headlamp MERCEDES-BENZ CLS COUPE 2010 User Guide
[x] Cancel search | Manufacturer: MERCEDES-BENZ, Model Year: 2010, Model line: CLS COUPE, Model: MERCEDES-BENZ CLS COUPE 2010Pages: 337, PDF Size: 7.36 MB
Page 104 of 337
.
X Turn the light switch to c.
X Press the combination switch beyond the
pressure point in the")
X
To activate: activate the Adaptive High-
beam Assist functio nusing the on-board
computer (Y page 208).
X Turn the light switch to c.
X Press the combination switch beyond the
pressure point in the direction of arrow :
(Y page 99).
The _ indicator lamp in the instrument
cluster lights up when the light sensor
switches the dipped-beam headlamps on
when it is dark.
If you are driving at speeds above
45 km/h:
the headlamp range is set automatically
depending on the distance between the
vehicle and other road users.
If you are driving at speeds above
55 km/h and no other road users are rec-
ognised:
the main-beam headlamps are switched on
automatically. The Kindicator lamp in
the instrument cluster also lights up.
If you are driving at speeds below
45 km/h or other road users are recog-
nised or the roads are adequately lit:
the main-beam headlamps are switched off
automatically. The Kindicator lamp in the instrument cluster goes out. The
_
indicator lamp in the instrument cluster
stays on.
X To deactivate: move the combination
switch back to its normal position.
The _ indicator lamp in the instrument
cluster goes out.
Headlamp flasher X
To switch on: turn the key in the ignition
lock to position 1or 2or start the engine.
X Pull the combination switch briefly in the
direction of arrow =. Hazard warning lamps
The hazard warning lamps automatically
switch on if:
R
an airbag is deployed.
R the vehicle decelerates rapidlyf rom a
speed of more than 70 km/h and comes to
a standstill.
X To switch on the hazard warnin glamps:
press button :.
All turn signals flash. If you now switch on
a turn signal using the combination switch,
only the turn signal lamp on the corre-
sponding side of the vehicle will flash.
X To switch off the hazard warning
lamps: press button :.
The hazard warning lamp switches off auto-
matically if the vehicle reaches a speed of Exterior lighting
101Lights and windscreen wipers Z
Page 105 of 337
over 10 km/h again after full brake applica-
tion.
i
The hazard warning lamps still operate if
the ignition is switched off. Headlam
pcleaning system
The headlamps are cleaned automatically if
the "Wipe with washer fluid" function is oper-
ated ten times while the lights are on and the
engine is running (Y page 106). When you
switch off the ignition, the automatic head-
lamp cleaning syste mis reset and counting is
resumed from 0. Intelligent Light System
Active light function The active light function is a system that
moves the headlamps according to the steer-
ing movements of the front wheels. In this
way, relevant areas remain illuminated while
driving. This allows you to recognise pedes-
trians, cyclists and animals.
Active:
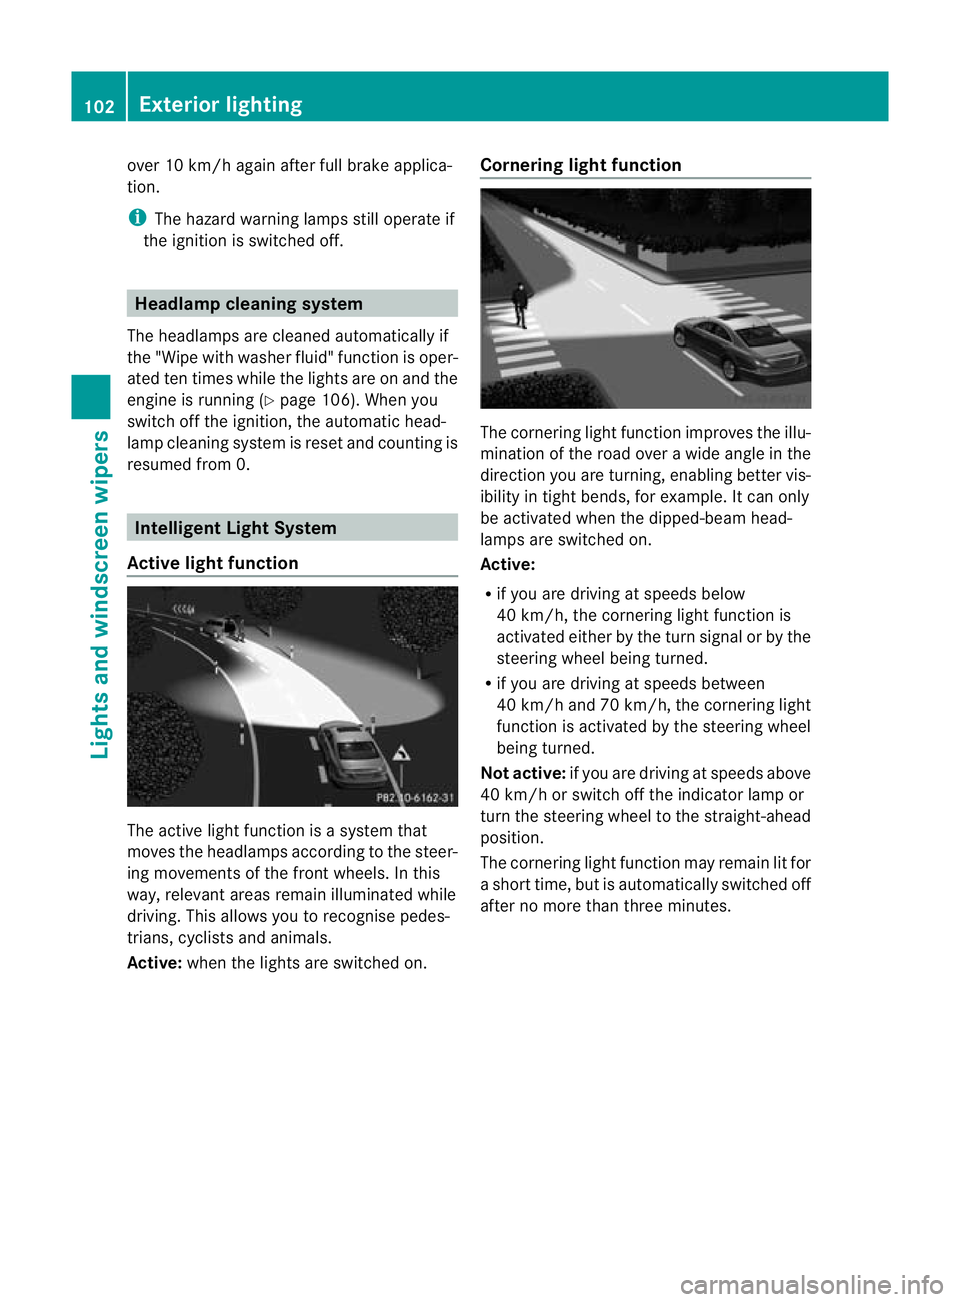
when the lights are switched on. Cornering light function The cornering light function improves the illu-
mination of the road over a wide angle in the
direction you are turning, enabling better vis-
ibility in tight bends, for example. It can only
be activated when the dipped-beam head-
lamps are switched on.
Active:
R
if you are driving at speeds below
40 km/h, the cornering light function is
activated either by the turn signal or by the
steering wheel being turned.
R if you are driving at speeds between
40 km/h and 70 km/h ,the cornering light
function is activated by the steering wheel
being turned.
Not active: if you are driving at speeds above
40 km/h or switch off the indicator lamp or
turn the steering wheel to the straight-ahead
position.
The cornering light function may remain lit for
a short time, but is automatically switched off
after no more than three minutes. 102
Exterior lightingLights and windscreen wipers
Page 106 of 337

Motorway mode
Motorway mode increases the range of the
beam.
Active:
R if you are driving at speeds above
110 km/h and do not make any large steer-
ing movements for 1000 m
R if you are driving at speeds above
130 km/h
Not active: if you are driving at speeds below
80 km/h following activation.
Extended range foglamps The extended range foglamps reduce the
glare experienced by the drive rand improve
the illuminatio nofthe edge of the carriage-
way.
Active: if you are driving at speeds below
70 km/h and you switch on the rear foglamp
Not active: if you are driving at speeds above
100 km/h or you switch off the rear foglamp
following activation Headlamps misted up inside
The headlamps may mist up on the inside if
there is high atmospheric humidity.
X Drive with the headlamps switched on.
Depending on the duration of the journey
and the weather conditions (humidity and
temperature), the headlamps may demist.
If they do not demist:
X Have the headlamps checked at a qualified
specialist workshop. Interior lighting
Overview of interior lighting
Front overhead control panel
:
u Switches the rear interior lighting
on/off
; | Switches the automatic interior
lighting control on/off
= p Switches the right-hand front read-
ing lamp on/off
? c Switches the front interior lighting
on/off
A p Switches the left-hand front reading
lamp on/off Interior lighting
103Lights and windscreen wipers Z
Page 108 of 337

that these function correctly at all times.
Have the headlamp setting checked regularly.
LED bulbs In additio
nto xenon bulbs, you also cannot
replace LED bulbs. Have LED bulbs replaced
at a qualified specialist workshop.
Mercedes-Benz recommends that you use a
Mercedes-Benz Service Centre for this pur-
pose. In particular, work relevant to safety or
on safety-related systems must be carried out
at a qualified specialist workshop.
Bulbs and lamps are an important aspect of
vehicle safety. You must therefore make sure
that these function correctly at all times.
Have the headlamp setting checked regularly.
Other bulbs G
Risk of injury
Bulbs and lights can become very hot. For this
reason, allow them to cool down before
changing them. Otherwise, you could burn
yourself when you touch them.
Keep bulbs out of the reach of children. Oth-
erwise, they could damage them, for example,
and injure themselves.
Never use a bulb which has been dropped.
Such a bulb may explode and injure you.
Halogen bulbs are pressurised and could
explode when you change them, especially if
they are very hot. You should therefore wear
eye protection and gloves when you are
changing them.
There are bulbs other than the xenon and LED
bulbs that you cannot replace. Replace only
the bulbs listed (Y page 105). Have the bulbs
that you cannot replace yourself changed at
a qualified specialist workshop.
Mercedes-Benz recommends that you use a
Mercedes-Benz Service Centre for this pur-
pose. In particular, work relevant to safety or
on safety-related systems must be carried out
at a qualified specialist workshop. If you require assistance changing bulbs, con-
sult a qualified specialist workshop.
Do not touch the glass tube of new bulbs with
your bare hands. Even minor contamination
can burn into the glass surface and reduce
the service life of the bulbs. Always use a lint-
free cloth or only touch the base of the bulb
when fitting.
Only use bulbs of the correc
ttype.
If the new bulb still does no tlight up, consult
a qualified specialist workshop.
Bulbs and lamps are an importan taspect of
vehicle safety. You must therefore make sure
that these function correctly at all times.
Have the headlamp setting checked regularly. Overview:c
hanging bulbs/bulb types
You can change the following bulbs. The bulb
type can be found in the legend. Tail lamp
:
Reversing lamp: W 16 W Changing bulbs
105Lights and windscreen wipers Z
Page 183 of 337
.
R you have travelled a certai nminimum dis-
tance without the traffic sign being repea-
ted or detected again.
X Display Speed Limit Assist using")
R
the road type changes (e.g. motorway,
country road).
R you have travelled a certai nminimum dis-
tance without the traffic sign being repea-
ted or detected again.
X Display Speed Limit Assist using the on-
board computer (Y page 203).
i You can also activate Speed Limit Assist
on COMAND APS .The maximum permissi-
ble speed is then displayed in COMAND
APS; see the COMAND APS operating
instructions. Night View Assist Plus
Important safety notes In addition to the illumination provided by the
normal headlamps, Night View Assist Plus
uses infrared light to illuminate the road. A
camera at the top of the windscreen picks up
the infrared light and displays a black and
white image in the COMAND APS display. The
image displayed in COMAND APS corre-
sponds to a road lit up by main-beam head-
lamps. This enables you to see the road's
course and any obstacles in good time. If
pedestrian recognition is activated, pedes-
trians recognised by the system are highligh-
ted in the Night View Assist Plus display.
G
Risk of accident
Night View Assist Plus is only an aid designed
to assist driving and does not relieve you of
the responsibility to pay attention. Continue
to look through the windscreen instead of
relying on the Night View Assist Plus display.
You are responsible for safety and must drive
in accordance with traffic conditions. You
could otherwise endanger yourself and oth-
ers. The system may be impaired or may not func-
tion if:
R
there is poor visibility, e.g. due to snow,
rain, fog or spray.
R the windscreen is dirty, misted up or cov-
ered, for instance by a sticker, in the vicinity
of the camera.
R on bends, on uphill gradients or downhill
gradients.
Light from the headlamps of oncoming vehi-
cles does not affect the Night View Assist Plus
display in the multifunction display. This is
also the case if you cannot switch on the
main-beam headlamps because of oncoming
traffic. G
Risk of accident
Night View Assist Plus does not detect
objects in the immediate vicinity of the vehi-
cle. Look through the windscreen when
manoeuvring. Make sure that there are no
people or animals in the area in which you are
manoeuvring.
i Infrared light is not visible to the human
eye and therefore does not dazzle. Night
View Assist Plus can therefore remain
switched on even if there is oncoming traf-
fic. :
Night View Assist Plus camera 180
Driving systemsDriving and parking
Page 184 of 337

Activating Night View Assis
tPlus You can only activate Night View Assist Plus
if:
R the key is in position 2in the ignition lock.
R it is dark.
R the light switch is in the corL posi-
tion.
R reverse gear has not been engaged.
X Make sure COMAN DAPS is switched on.
X Press button :.
The Night View Assist Plus display appears
in the COMAND APS display. :
Night View Assist Plus display
; Pedestrian recognised
= Framing
? Symbol for active pedestrian recognition
You can read about how to adjust the bright-
ness of the COMAND APS display in the
COMAND APS operating instructions.
i The infrared headlamps only switch on
when the vehicle is driving at speeds of at
least 10 km/h. This means that you do not have the full visual range while stationary
and cannot check whether Night View
Assist Plus is working.
Pedestrian recognition Night View Assist Plus recognises pedes-
trians using typical characteristics, e.g. a sil-
houette in the shape of a person.
Pedestrian recognition is then switched on
automatically if:
R
Night View Assist Plus is activated.
R you are driving faster than about 10 km/h.
R the surroundings are dark, e.g .when driv-
ing outside built-up areas without street
lighting.
If pedestrian recognition is active, sym-
bol ?appears. If a pedestrian is now recog-
nised, they are framed =and thereby high-
lighted. If the pedestrian recognition system
has brought a pedestrian to your attention,
look through the windscreen to evaluate the
situation. The actual distance to objects and
pedestrians cannot be gauged accurately by
looking at a screen.
It may be the case that objects are highlighted
as well as pedestrians. G
Risk of accident
Pedestrian recognition may be impaired or
inoperative, if:
R pedestrians are partially or completely
obscured by objects, e.g. by parked vehi-
cles.
R the silhouette in the Night View Assist Plus
display is incomplete or interrupted, e.g. by
powerful light reflections.
R pedestrians do not contrast with the sur-
roundings.
R pedestrians are not in an upright position,
e.g. sitting, squatting or lying.
i Animals are not recognised by pedestrian
recognition. Driving systems
181Driving and parking Z
Page 210 of 337

X
Press the :or9 button to select the
Brightness Display/switches: func-
tion.
You will see the selected setting.
X Press the abutton to confirm.
X Press the :or9 button to adjust the
brightness to any level from Level 1 to
Level 5 (bright).
X Press the aor% button to save the
setting.
Switching the daytime driving lights on/
off
If you have activated the Day lights func-
tion and the light switch is set to c, the
daytime driving lights are automatically
switched on during daylight hours when the
engine is running. When it is dark, the side
lamps and the dipped-beam headlamps are
switched on automatically.
The factory setting is on .
X Switch off the engine.
X Press the =or; button on the steer-
ing wheel to select the Settings menu.
X Press the :or9 button to select the
Light submenu.
X Press the abutton to confirm.
X Press the :or9 button to select the
Day lights function.
If the Day lights have been switched on,
the cone of light and the Wsymbol in
the multifunction display are shown in red.
X Press the abutton to save the setting.
Activating/deactivating the Intelligent
Light System
If you activate the Intell. Light Sys. function, you activate the following functions:
R motorway mode
R active light function
R cornering light function
R extended range foglamps X
Press the =or; button on the steer-
ing wheel to select the Settings menu.
X Press the :or9 button to select the
Light submenu.
X Press the abutton to confirm.
X Press :or9 to select the Intell. Light Sys. function.
If the Intell. Light Sys. function has
been switched on, the cone of light and the
L symbol in the multifunction display
are shown in red.
X Press the abutton to save the setting.
If you set the dipped-beam headlamps for
driving on the right/left (Y page 207), the
multifunction display shows the System inoperative display message under the
image of the vehicle for the Intell. Light
Sys. function in the
Light submenu.
Setting the dipped-beam headlamps for
driving on the right/left
This function is only available on vehicles with
the Intelligent Light System.
You can use this function to switch between
symmetrical beam and asymmetrical dipped
beam (Y page 98).
If you set the dipped-beam headlamps for
driving on the right/left, then motorway
mode and the extended range foglamps are
not available.
X Press the =or; button on the steer-
ing wheel to select the Settings menu.
X Press the :or9 button to select the
Light submenu.
X Press the abutton to confirm.
X Press :or9 to select the Dipped headl. Setting for: function.
You will see the selected setting: Right- side traffic or
Left-side traffic .
X Press the abutton to save the setting.
When you change the setting, conversion
does not take place until the next time the
vehicle is stationary. Menus and submenus
207On-board computer and displays Z
Page 211 of 337

Switching Adaptive Highbeam Assist on/
off
X
Press the =or; button on the steer-
ing wheel to select the Settings menu.
X Press the :or9 button to select the
Light submenu.
X Press the abutton to confirm.
X Press :or9 to select the Adapt. main beam function.
If the Adapt. main beam function has
been switched on, the cone of light and the
_ symbol in the multifunction display
are shown in red.
X Press the abutton to save the setting.
Setting the brightness of the ambient
lighting
X Press the =or; button on the steer-
ing wheel to select the Settings menu.
X Press the :or9 button to select the
Light submenu.
X Press the abutton to confirm.
X Press the :or9 button to select the
Amb. light +/- function.
X Press the abutton to confirm.
X Press the :or9 button to adjust the
brightness to any level from Off to
Level 5 (bright).
X Press the aor% button to save the
setting.
Setting the ambient lighting colour
X Press the =or; button on the steer-
ing wheel to select the Settings menu.
X Press the :or9 button to select the
Light submenu.
X Press the abutton to confirm.
X Press the :or9 button to select the
Amb. light col. function.
X Press the abutton to confirm. X
Press the :or9 button to set the
colour to SOLAR ,
NEUTRAL or
POLAR .
X Press the aor% button to save the
setting.
Activating/deactivating the surround
lighting and exterior lighting delayed
switch-off
The Surround lighting: function allows
you to set whether the exterior lighting should
come on when it is dark
R for 40 seconds after unlocking the vehicle
with the key
The exterior lighting switches off when you
open the driver’s door.
R for 15 seconds after switching off the
engine and closing the doors
If the engine is switched off and then none
of the doors are opened, or if an open door
is not closed, the exterior lighting goes out
after 60 seconds.
If you activate the Surround light‐ ing: function, the following light up:
R the side lamps
R the dipped-beam headlamps 31
R the daytime driving lamps 32
R the licence plate lighting
X Press the =or; button on the steer-
ing wheel to select the Settings menu.
X Press the :or9 button to select the
Light submenu.
X Press the abutton to confirm.
X Press the :or9 button to select the
Surround lighting function.
When the Surround lighting function is
activated, the light cone and the area
around the vehicle are displayed in red in
the multifunction display.
X Press the abutton to save the setting.
31 Only for vehicles without Intelligent Light System.
32 Only vehicles with Intelligent Light System. 208
Menus and submenusOn-board computer and displays
Page 224 of 337

Display messages Possible causes/consequences and
M Solutions
J
Check brake fluid
level G
Risk of accident
There is insufficien tbrake fluid in the brake fluid reservoir. In addi-
tion, the red Jwarning lamp in the instrument cluster lights
up and a warning tone sounds.
X Pull over and stop the vehicle safely as soon as possible, paying
attention to road and traffic conditions. Do not continue driving
under any circumstances.
X Apply the parking brake.
X Consult a qualified specialist workshop.
X Do not top up the brake fluid. This does not correct the error. #
Check brake wear The brake pads/linings have reached their wearl
imit.
X Visit a qualified specialist workshop. Lights
i Display messages about LEDs:
This display message will only appear if all LEDs have failed. Displa
ymessages Possible causes/consequences and
M Solutions
b
Left cornering
light
or
Right cornering
light The left or right-hand cornering light is faulty.
X
Visit a qualified specialist workshop. b
Left dipped beam
or
Right dipped beam The left or right-hand dipped-beam headlamp is faulty.
X
Visit a qualified specialist workshop. b
Rear
left indicator
or
Rear right indica‐
tor The rear left-hand or rear right-hand tur
nsignal is faulty.
X Visit a qualified specialist workshop. Display messages
221On-board computer and displays Z
Page 272 of 337
")
X
If necessary, top up with coolant that has
been tested and approved by Mercedes-
Benz.
X Replace cap :and turn it clockwise as far
as it will go.
For further information on coolant, see
(Y page 322).
Windscreen washer system and head-
lamp cleaning system The washer fluid reservoir is used for both the
windscree nwasher system and the headlamp
cleaning system.
i Vehicle components and their service
products must match .Mercedes-Benz rec-
ommends that you use products that have
been tested and approved by Mercedes-
Benz. These are listed under the relevant
section in this Mercedes-Benz Owner's
Manual.
You can recognise service products
approved by Mercedes-Benz by the follow-
ing inscription on the containers:
R MB-Freigabe (e.g. MB-Freigabe 229.51)
R MB Approval (e.g. MB Approval 229.51)
Other designations or recommendations
that relate to a level of quality or a specifi-
cation in accordance with an MB Sheet
number (such as MB 229.5) have not nec-
essarily been approved by Mercedes-Benz.
You can obtain further information from
any Mercedes-Benz Service Centre. G
Risk of fire
Windscreen washer fluid is highly flammable.
Fire, naked flames and smoking are prohibi-
ted when handling washer fluid concentrate.
! Only use washer fluid concentrate which
is suitable for plastic lamp lenses. Unsuit-
able washer fluid concentrat ecould dam-
age the plastic lamp lenses of the head-
lamps. !
Do not use distilled or de-ionised water in
the washer fluid reservoir. Otherwise, the
level sensor may be damaged.
i Add windscreen washer concentrate, e.g.
MB SummerFit, to the washer fluid all year
round. Example: washer fluid reservoir
X
Mix the windscreen washer fluid in a con-
tainer beforehand.
X At temperatures above freezing: fill the
washer fluid reservoir with amix of water
and windscreen washer concentrate (e.g.
MB SummerFit).
X At temperatures below freezing: fill the
washer fluid reservoir with amix of water
and windscreen washer concentrate (e.g.
MB WinterFit). Adapt the mixing ratio to the
outside temperatures.
X To open: pull cap:upwards by the tab.
X Top up with the premixed washer fluid.
X To close: press cap :onto the filler neck
until it engages. Maintenance
ASSYST PLUS service interval display
Service messages Information on the type of service and service
intervals (see separate Service Booklet).
You can obtain further information from a
Mercedes-Benz Service Centre. Maintenance
269Maintenance and care Z