interior lights MERCEDES-BENZ CLS COUPE 2011 Owners Manual
[x] Cancel search | Manufacturer: MERCEDES-BENZ, Model Year: 2011, Model line: CLS COUPE, Model: MERCEDES-BENZ CLS COUPE 2011Pages: 337, PDF Size: 7.37 MB
Page 10 of 337
Climate control
Activating/deactivating rear win-
dow heating ................................... 117
Activating/deactivating the auxil-
iary heating/ventilatio n................. 120
Convenience opening/closing (air
recirculation) ................................. 118
Demisting the windows .................. 117
Important safety information .........110
Indicator lamp ................................ 114
Problems with "cooling with air
dehumidification" ........................... 114
Problems with the rear window
heating .......................................... 117
Setting the climate mode (AIR
FLOW) ............................................ 114
Switching the ZONE function on/
off .................................................. 116
Clock( on-board computer) ...............206
Cockpit ................................................. 24
Collapsible spare wheel see Emergency spare wheel
Combination switch ............................99
Constant headlamp mode see Daytime driving lights
Consumption statistics (on-board
computer) .......................................... 198
Convenience box ............................... 252
Convenience closing feature ..............79
Convenience opening/closing Air-recirculation mode ...................118
Convenience opening feature ............79
Coolan t(engine)
Checkin gthe level ......................... 268
Display message ............................ 224
Notes ............................................. 322
Temperature (on-board computer) .212
Temperature gauge ........................ 194
Warning lamp ................................. 244
Cooling
see Climate control
Cornering light function (display
message) ............................................ 221
Crash-responsive emergency light-
ing ....................................................... 104Cruise control
Cruise control leve r....................... 152
Display message ............................ 231
Cup holder ......................................... 255
Centre console .............................. 255
Rea rcompartmen t......................... 255
Current fuel consumption (on-
board computer) ............................... 198 D
Dashboard see Cockpit
Data, technical .................................. 316
Date (on-board computer) ................206
Daytime driving lights Display message ............................ 223
Switching on/off (on-board com-
puter) ............................................. 207
Delaye dswitch-off
Exterio rlighting (on-board com-
puter )............................................. 208
Interior lighting (on-board com-
puter) ............................................. 209
Diesel particle filter ..........................149
Digital speedometer .........................198
Dipped-beam headlamps Display message ............................ 221
Setting for driving on the right/
left (on-board computer) ................207
DIREC TSELECT lever
see Automatic transmission
Display (cleaning instructions) ........274
Display messages ASSYST PLUS service interval dis-
play................................................ 269
Brakes ........................................... 219
Calling up (on-board computer) .....215
Clearing (on-board computer) ........215
Driving systems ............................. 226
Engine ............................................ 224
Key ................................................ 236
KEYLESS-GO .................................. 236
Lamp s............................................ 221
Safety systems .............................. 215
Tyres .............................................. 232
Vehicle .......................................... .234 Index
7
Page 14 of 337
Sea
tbelt ........................................ 239
SPORT handling mode ...................243
SRS ................................................ 243
Tyr ep ressure monitor ...................246
Instrument cluster
Displays. .......................................... 26
Overview .......................................... 26
Submenu (on-board computer) ......205
Warning and indicator lamps ...........28
Intelligen tLight System
Display message ............................ 223
Setting dipped-bea mheadlamps
for driving on the right/left (on-
board computer) ............................ 207
Switching on/off (on-board com-
puter) ............................................. 207
Interior lighting
Automatic control system ..............104
Delayed switch-off (on-board
computer) ...................................... 209
Emergency lighting ........................104
Manual control ............................... 104
Reading lamp ................................. 103
Setting brightness for display/
switches (on-board computer) .......206
Setting the ambient lighting
brightness (on-board computer) ....208
Setting the ambient lighting col-
our (on-board computer) ................ 208
Interior motion sensor ........................64
ISOFIX child seat securing system ....49 J
Jack Storage location ............................ 279
Using ............................................. 285
Jump-starting ..................................... 294
see Jump-starting K
Key Changing the battery .......................71
Checking the battery .......................70
Convenience closing feature ............79
Convenience opening feature ..........79
Display message ............................ 236Malfunction ...................................... 72
Modifying the programming
.............69
Starting the engine ........................130
KEYLESS-GO
Button ............................................ 129
Convenience closing ........................79
Display message ............................ 236
Locking ............................................ 69
Starting the engine ........................130
Unlocking ......................................... 69
Keyp ositions
Key ................................................ 129
KEYLESS GO .................................. 129
Kickdown ................................... 138, 141
Kneebag ............................................... 38 L
Lane-change assistant see Active Blind Spot Assist
see Blind Spot Assist
Lane Keeping Assist
Activating/deactivating (on-
board computer) ............................ 205
Display message ............................ 228
Function/informatio n.................... 185
Lane package ..................................... 183
Lashing eyelets ................................. 252
Lights Activating/deactivating the inte-
rior lighting delayed switch-off
(on-board computer) ......................209
Active light function .......................102
Automatic headlamp mode ..............99
Cornering light function .................102
Daytime driving lights ......................99
Dipped-bea mheadlamps ................. 99
Driving abroad ................................. 98
Foglamps (extended range) ...........103
Hazard warning lamps ...................101
Ligh tswitc h..................................... 98
Main-beam headlamps ................... 100
Motorway mode ............................. 103
Rea rfoglamp ................................... 99
Setting brightness for display/
switches (on-board computer) .......206
Setting the ambient lighting
brightness (on-board computer) ....208 Index
11
Page 38 of 337
Airbags and belt tensioners could fail to
deploy or be triggered in an accident despite
the deceleratio nforce being sufficient to trig-
ger the systems, or could be triggered unin-
tentionally. For this reason, never make any
modifications to the restraint systems.
Therefore, you must not tamper with elec-
tronic components or their software. SRS (Supplemental Restraint System)
Introduction SRS reduces the risk of occupants coming
into contact with the vehicle's interior in the
event of an accident. It can also reduce the
effect of the forces to which occupants are
subjected during an accident.
SRS consists of:
R the 6 SRS warning lamp
R airbags
R airbag control unit (with crash sensors)
R belt tensioners
R belt force limiters
SRS warning lamp SRS functions are checked regularly when
you switch on the ignition and when the
engine is running. Therefore, malfunctions
can be detected in good time.
The 6 SRS warning lamp in the instrument
cluster lights up when the ignition is switched
on. It goes out no later than a few seconds
after the engine is started. G
Risk of injury
If SRS is malfunctioning, individual systems
may be activated unintentionally or may not
be triggered in the event of an accident with
a high rate of vehicle deceleration. A malfunction has occurred if:
R
the 6 SRS warning lamp does not light
up when the ignition is switched on.
R the engine is running and the 6SRS
warning lamp does not go out after a few
seconds.
R the engine is running and the 6SRS
warning lamp lights up again.
In this case, have SRS checked immediately
at a qualified specialist workshop. Mercedes-
Benz recommends that you use a Mercedes-
Benz Service Centre for this purpose.
In particular, work relevant to safety or on
safety-related systems must be carried out at
a qualified specialist workshop.
Triggering of belt tensioners, belt force
limiters and airbags During the first stage of a collision, the airbag
control unit evaluates important physical
data relating to vehicle deceleration or accel-
eration, such as
R
duration
R direction
R magnitude
Based on the evaluation of this data, the air-
bag control unit pre-emptively triggers the
belt tensioners in the first stage.
i The front belt tensioners can only be trig-
gered if the seat belt tongues on the front
seats are correctly engaged in the seat belt
buckles.
If there is an even higher rate of vehicle decel-
eration or acceleration in a longitudinal direc-
tion, the front airbags are also deployed.
Your vehicle has adaptive, two-stage front air-
bags. The airbag control unit evaluates vehi-
cle deceleration or acceleration in the event
of a collision. When the first deployment
threshold is reached, the front airbag is filled
with enough propellant gas to reduce the risk
of injuries. The front airbag is fully deployed
if a second deployment threshold is exceeded
within a few milliseconds. Occupant safety
35Safety Z
Page 67 of 337
X
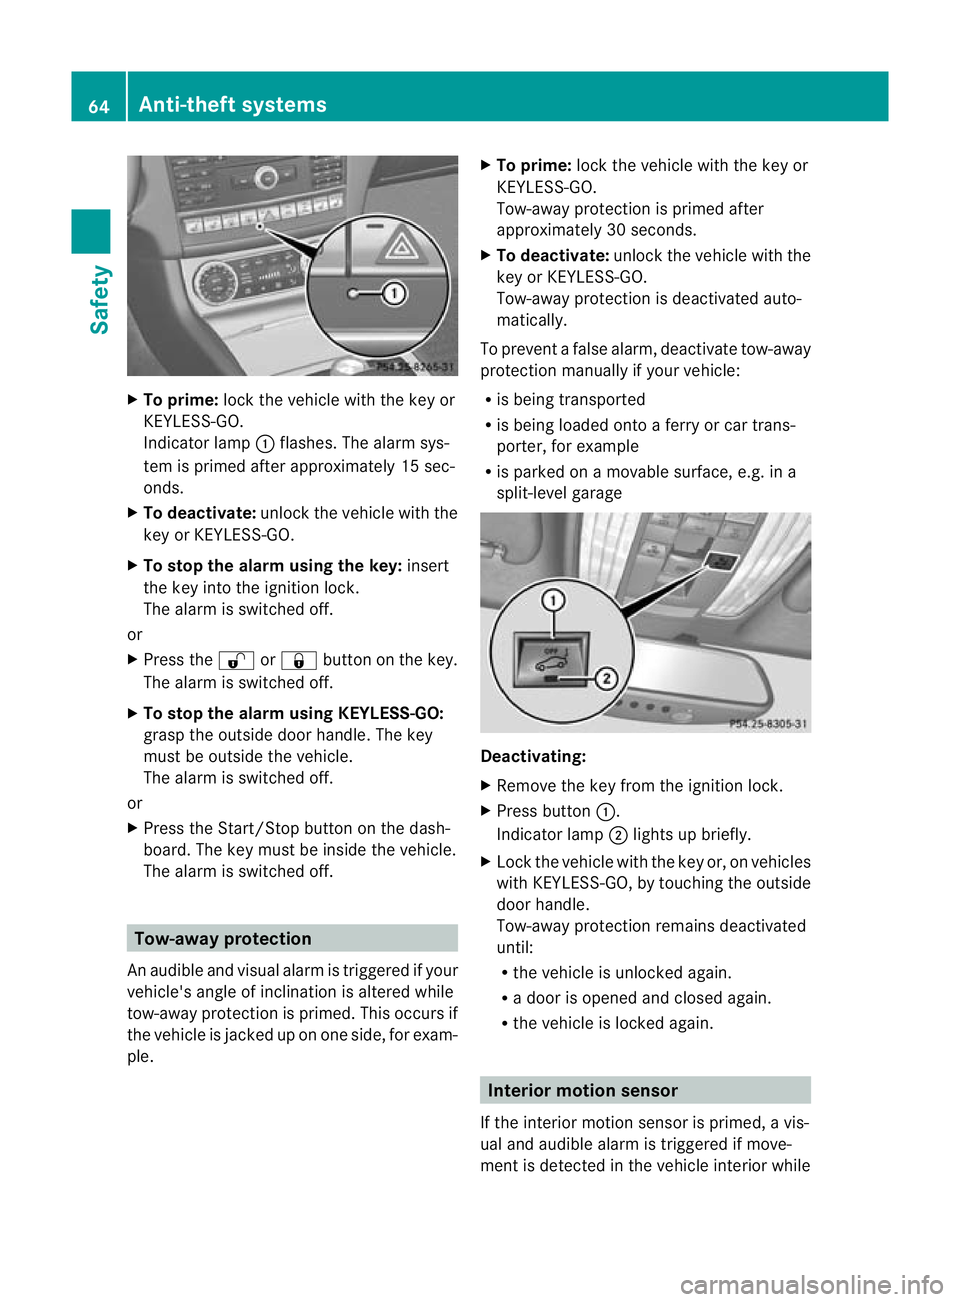
To prime: lock the vehicle with the key or
KEYLESS-GO.
Indicato rlamp :flashes. The alarm sys-
te mi s primed after approximately 15 sec-
onds.
X To deactivate: unlock the vehicle with the
key or KEYLESS-GO.
X To stop the alarm using the key: insert
the key into the ignition lock.
The alarm is switched off.
or
X Press the %or& button on the key.
The alarm is switched off.
X To stop the alarm using KEYLESS-GO:
grasp the outside door handle. The key
must be outside the vehicle.
The alarm is switched off.
or
X Press the Start/Stop button on the dash-
board. The key must be inside the vehicle.
The alarm is switched off. Tow-away protection
An audible and visual alarm is triggered if your
vehicle's angle of inclination is altered while
tow-away protection is primed. This occurs if
the vehicle is jacked up on one side, for exam-
ple. X
To prime: lock the vehicle with the key or
KEYLESS-GO.
Tow-away protection is primed after
approximately 30 seconds.
X To deactivate: unlock the vehicle with the
key or KEYLESS-GO.
Tow-away protection is deactivated auto-
matically.
To prevent a false alarm, deactivate tow-away
protection manually if your vehicle:
R is being transported
R is being loaded onto a ferry or car trans-
porter, for example
R is parked on a movable surface, e.g. in a
split-level garage Deactivating:
X
Remove the key from the ignition lock.
X Press button :.
Indicator lamp ;lights up briefly.
X Lock the vehicle with the key or, on vehicles
with KEYLESS-GO, by touching the outside
door handle.
Tow-away protection remains deactivated
until:
R the vehicle is unlocked again.
R a door is opened and closed again.
R the vehicle is locked again. Interior motion sensor
If the interior motion sensor is primed, a vis-
ual and audible alarm is triggered if move-
ment is detected in the vehicle interior while 64
Anti-theft systemsSafety
Page 100 of 337
Vehicle equipment
..............................98
Exterior lighting .................................. 98
Interior lighting ................................. 103
Changing bulbs ................................. 104
Windscreen wipers ...........................106 97Lights and windscreen wipers
Page 106 of 337
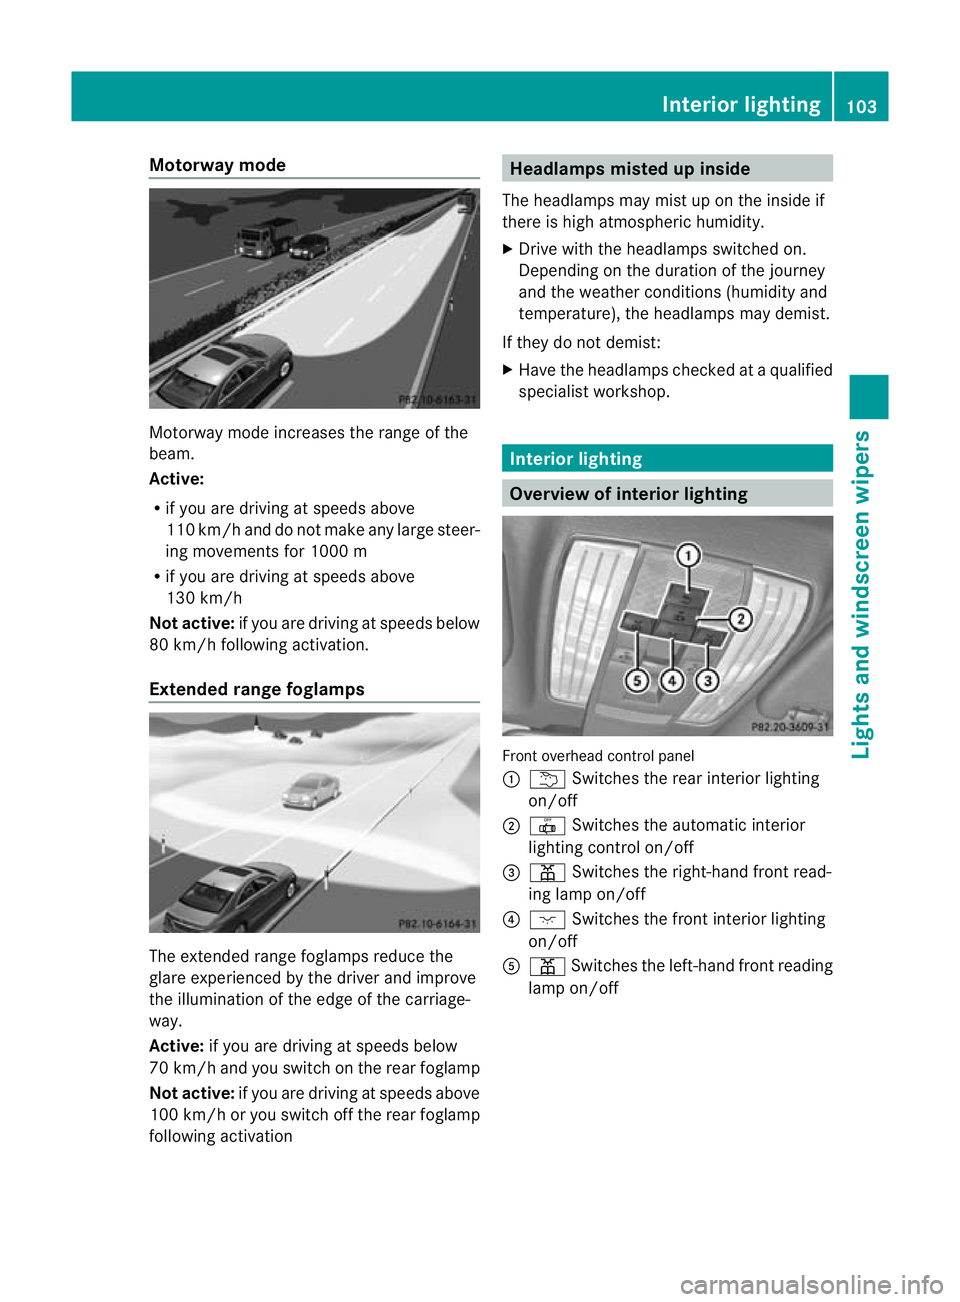
Motorway mode
Motorway mode increases the range of the
beam.
Active:
R if you are driving at speeds above
110 km/h and do not make any large steer-
ing movements for 1000 m
R if you are driving at speeds above
130 km/h
Not active: if you are driving at speeds below
80 km/h following activation.
Extended range foglamps The extended range foglamps reduce the
glare experienced by the drive rand improve
the illuminatio nofthe edge of the carriage-
way.
Active: if you are driving at speeds below
70 km/h and you switch on the rear foglamp
Not active: if you are driving at speeds above
100 km/h or you switch off the rear foglamp
following activation Headlamps misted up inside
The headlamps may mist up on the inside if
there is high atmospheric humidity.
X Drive with the headlamps switched on.
Depending on the duration of the journey
and the weather conditions (humidity and
temperature), the headlamps may demist.
If they do not demist:
X Have the headlamps checked at a qualified
specialist workshop. Interior lighting
Overview of interior lighting
Front overhead control panel
:
u Switches the rear interior lighting
on/off
; | Switches the automatic interior
lighting control on/off
= p Switches the right-hand front read-
ing lamp on/off
? c Switches the front interior lighting
on/off
A p Switches the left-hand front reading
lamp on/off Interior lighting
103Lights and windscreen wipers Z
Page 107 of 337
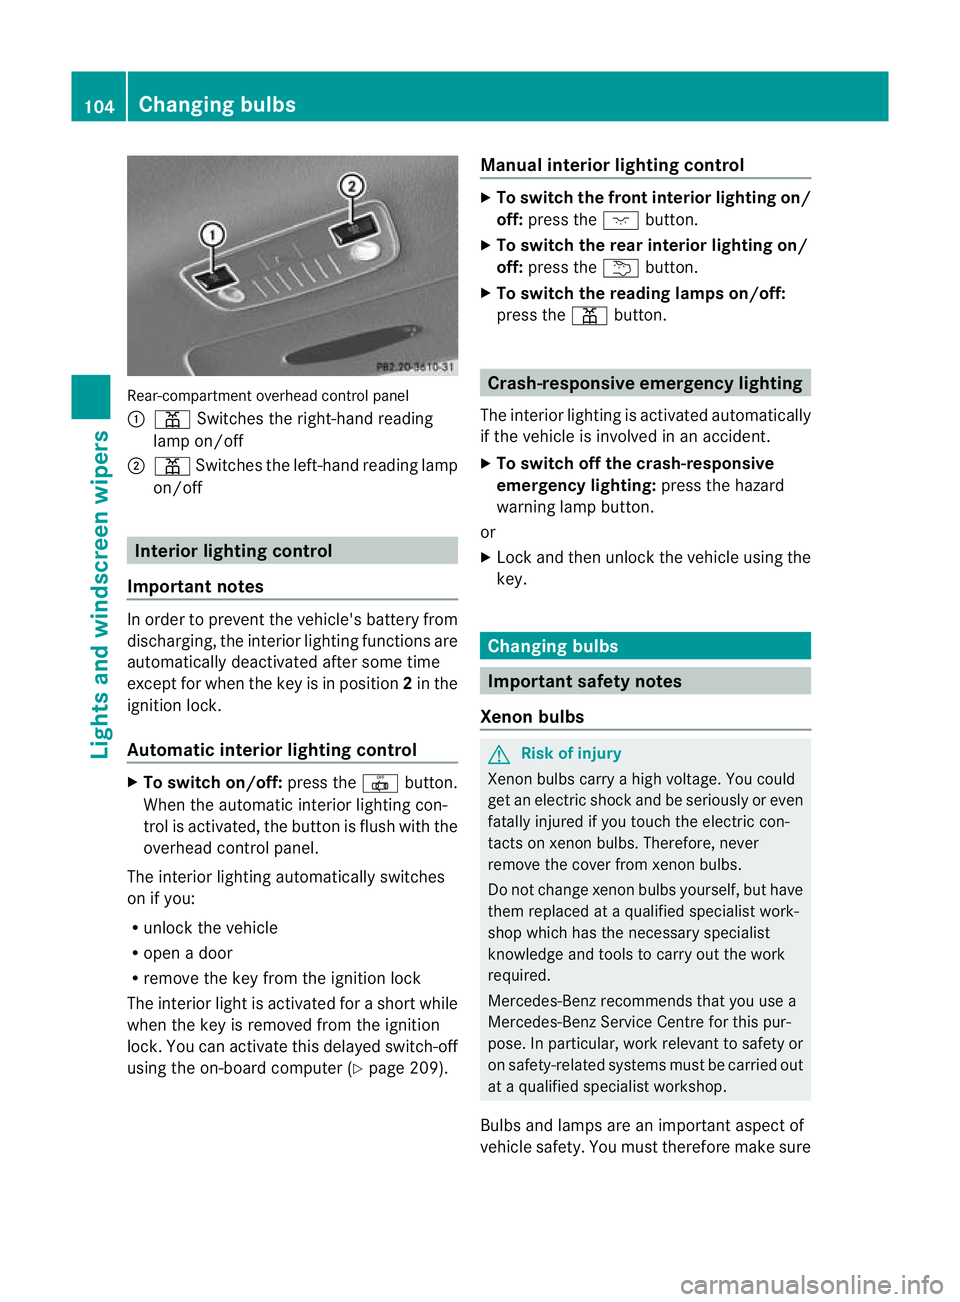
Rear-compartmen
toverhead control panel
: p Switches the right-hand reading
lamp on/off
; p Switches the left-hand reading lamp
on/off Interior lighting control
Important notes In order to prevent the vehicle's battery from
discharging, the interior lighting functions are
automatically deactivated after some time
except for when the key is in position
2in the
ignitio nlock.
Automatic interior lighting control X
To switch on/off: press the|button.
When the automatic interior lighting con-
trol is activated, the button is flush with the
overhead control panel.
The interior lighting automatically switches
on if you:
R unlock the vehicle
R open a door
R remove the key from the ignition lock
The interior light is activated for a short while
when the key is removed from the ignition
lock. You can activate this delayed switch-off
using the on-board computer (Y page 209).Manual interior lighting control X
To switch the front interior lighting on/
off: press the cbutton.
X To switch the rear interior lighting on/
off: press the ubutton.
X To switch the reading lamps on/off:
press the pbutton. Crash-responsive emergency lighting
The interior lighting is activated automatically
if the vehicle is involved in an accident.
X To switch off the crash-responsive
emergency lighting: press the hazard
warning lamp button.
or
X Lock and then unlock the vehicle using the
key. Changing bulbs
Important safety notes
Xenon bulbs G
Risk of injury
Xenon bulbs carry a high voltage. You could
get an electric shock and be seriously or even
fatally injured if you touch the electric con-
tacts on xenon bulbs. Therefore, never
remove the cover from xenon bulbs.
Do not change xenon bulbs yourself, but have
them replaced at a qualified specialist work-
shop which has the necessary specialist
knowledge and tools to carry out the work
required.
Mercedes-Benz recommends that you use a
Mercedes-Benz Service Centre for this pur-
pose. In particular, work relevant to safety or
on safety-related systems must be carried out
at a qualified specialist workshop.
Bulbs and lamps are an important aspect of
vehicle safety. You must therefore make sure 104
Changing bulbsLights and windscreen wipers
Page 120 of 337
X
Press the Ãbutton.
The indicator lamp in the ¬button goes
out. Airflow and air distribution are set to
automatic mode.
or
X Turn controls :orB clockwise or anti-
clockwise (Y page 111), (Y page 112).
or
X Press the KorI button. Demisting the windows
Windows misted up on the inside X
Activate the ¿cooling with air dehu-
midification function.
X Activate automatic mode Ã.
X If the windows continue to mist up, activate
the demisting function (Y page 116).
i You should only select this setting until
the windscreen is clear again.
Windows misted up on the outside X
Activate the windscreen wipers.
X Press the _button repeatedly until the
P orO symbol appears in the dis-
play.
i You should only select this setting until
the windscreen is clear again. Rear window heating
Activating/deactivating G
Risk of accident
Clear all windows of ice or snow before setting
off. Otherwise, impaired visibility could
endanger you and others.
The rear window heating has ahigh current
draw. You should therefore switch it off as
soon as the window is clear, as it only
switches off automatically after several
minutes. If the battery voltage is too low, the rear win-
dow heating may switch off.
X Turn the key to position 2in the ignition
lock.
X Press the ¤button.
The indicator lamp in the ¤button lights
up or goes out.
Problems with the rea rwindow heating The rear window heating has switched off
prematurely or cannot be activated.
X
Switch off any consumers that are not
required, e.g. reading lamps or interior
lighting.
When the battery is sufficiently charged,
the rear window heating is activated again
automatically. Activating/deactivating air-recircula-
tion mode
You can deactivate the flow of fresh air if
unpleasan todours are entering the vehicle
from outside. The air already inside the vehi-
cle will then be recirculated.
The operation of the air-recirculation mode is
the same for all contro lpanels. G
Ris
kofa ccident
Only switch ove rto air-recirculation mode
briefly at low outside temperatures. Other-
wise, the windows could mist up, thus impair-
ing visibility and endangering yourself and
others. This may prevent you from observing
the traffic conditions, thereby causing an
accident.
X Turn the key to position 2in the ignition
lock.
X To switch on: press thegbutton.
The indicator lamp in the gbutton lights
up. Operating the climate control system
117Climate control Z
Page 122 of 337
X
Turn the key to position 0in the ignition
lock or remove it.
X To switch on: press theÌbutton.
The indicator lamp in the Ìbutton lights
up.
X To deactivate: press theÌbutton.
The indicator lamp in the Ìbutton goes
out.
i Residual heat is deactivated automati-
cally:
R after about 30 minutes
R when the ignition is switched on
R if the battery voltage drops
R if the coolant temperature is too low Auxiliary heating
Important safety notes G
Risk of poisoning
Exhaust fumes are produced when the auxili-
ary heating is in operation. Inhaling these
exhaust fumes can be poisonous. You should
therefore switch off the auxiliary heating in
confined spaces without an extraction sys-
tem, e.g. a garage. G
Risk of fire
When operating the auxiliary heating, parts of
the vehicle may become very hot, and highly
inflammable material such as fuels could be
ignited. Operating the auxiliary heating is thus
prohibited at filling station sorwhen your vehi-
cle is being refuelled. You must therefore
switch off the auxiliary heating at filling sta-
tions.
! Operating the auxiliary heating/ventila-
tion draws on the vehicle battery. After you
have heated or ventilated the vehicle a
maximum of two times, drive for a longer
distance.
i Switch on the auxiliary heating regularly,
e.g. for about ten minutes every month. The auxiliary heating heats the air in the vehi-
cle interior to the set temperature without
using the heat of the running engine. The aux-
iliary heating is operated directly using the
vehicle's fuel. For this reason, the tank con-
tent must be at least at reserve fuel level to
ensure that the auxiliary heating functions.
The auxiliary heating/ventilation automati-
cally adjusts to changes in temperature and
weather conditions. For this reason, the aux-
iliary heating could switch from ventilation
mode to heating mode or from heating mode
to ventilation mode.
The auxiliary heating switches off automati-
cally after 50 minutes. This time limit can be
altered. To do this, visit a qualified specialist
workshop, e.g. a Mercedes-Ben
zService
Centre.
You cannot use the auxiliary ventilation to
cool the vehicle interior to a temperature
lower than the outside temperature.
Before switching on X
Turn the key to position 2in the ignition
lock.
X Set the temperature.
The auxiliary heating/ventilation can be acti-
vated even when the climate control is being
controlled manually. Optimum comfort can
be attained when the system is set to auto-
matic mode. Set the temperature to 22 †.
The auxiliary heating/ventilation can be acti-
vated or deactivated using the remote control
or the button on the centre console.
The on-board computer can be used to spec-
ify up to three departure times, one of which
may be preselected (Y page 210). Operating the climate control system
119Climate control Z
Page 136 of 337
Automatic engine start
The engine is started automatically if you:
R release the brake pedal when HOLD is not
activated and the transmission is in posi-
tion Dor N
R shif tthe transmission to position R
R depress the accelerator pedal
R switch off the ECO start/stop function by
pressing the ECO button (except for AMG
vehicles)
R change to drive program S,S+ orM(AMG
vehicles)
R unfasten your seat belt or open the driver's
door
The engine is also started automatically if:
R the vehicle starts to roll.
R the brake system requires this.
R the system detects moisture on the wind-
screen when the air-conditioning system is
switched on.
R the temperature in the vehicle interior devi-
ates from the set range.
R the battery's charge status is too low.
Switching the ECO start/stop function
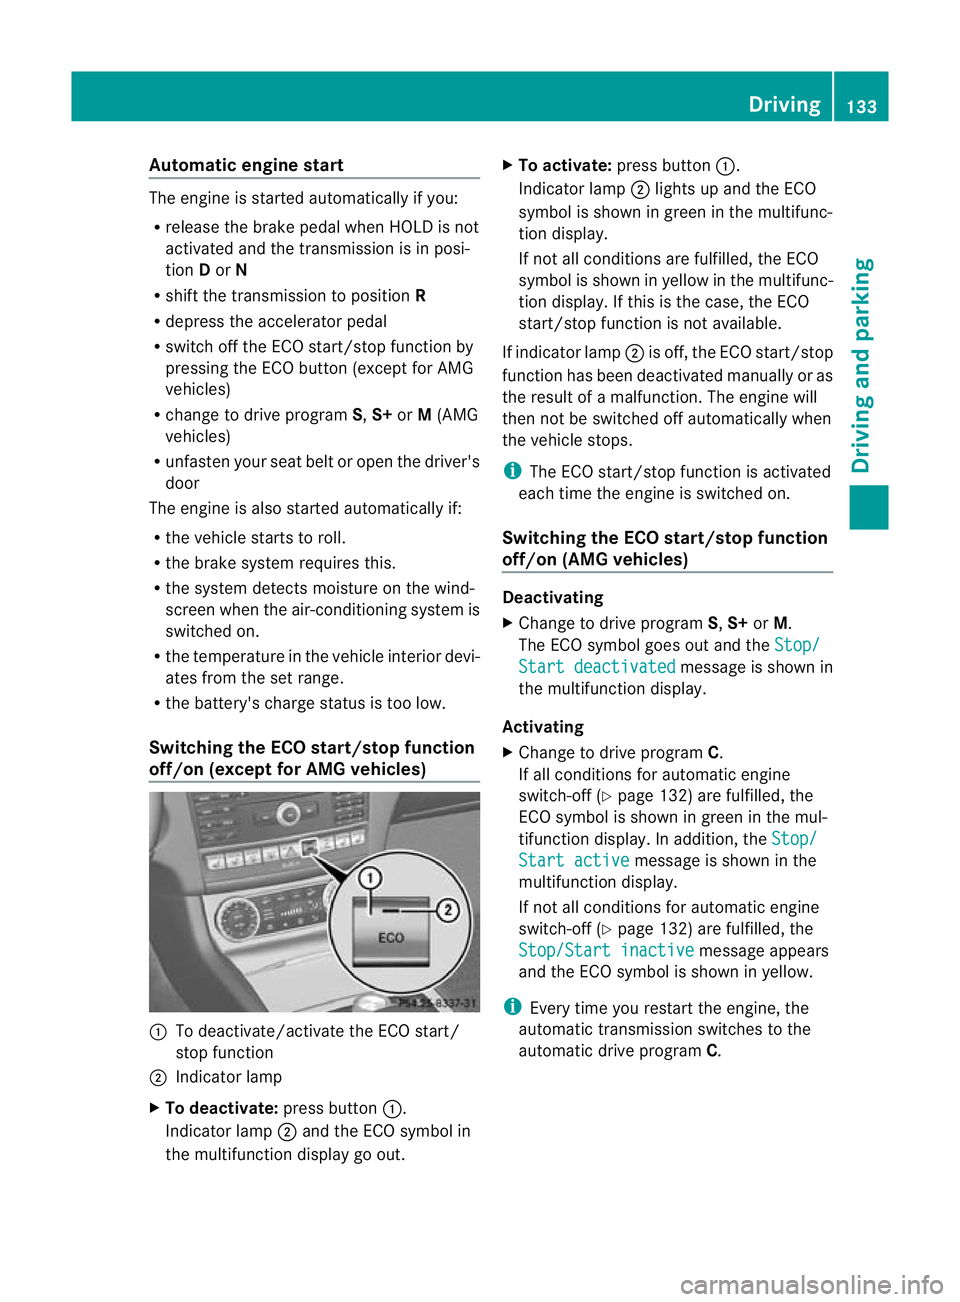
off/on (except for AMG vehicles) :
To deactivate/activate the ECO start/
stop function
; Indicator lamp
X To deactivate: press button:.
Indicator lamp ;and the ECO symbol in
the multifunction display go out. X
To activate: press button :.
Indicator lamp ;lights up and the ECO
symbol is shown in green in the multifunc-
tion display.
If not all conditions are fulfilled, the ECO
symbol is shown in yellow in the multifunc-
tion display. If this is the case, the ECO
start/stop function is not available.
If indicator lamp ;is off, the ECO start/stop
function has been deactivated manually or as
the result of a malfunction. The engine will
then not be switched off automatically when
the vehicle stops.
i The ECO start/stop function is activated
each time the engine is switched on.
Switching the ECO start/stop function
off/on (AMG vehicles) Deactivating
X
Change to drive program S,S+ orM.
The ECO symbol goes out and the Stop/ Start deactivated message is shown in
the multifunction display.
Activating
X Change to drive program C.
If all conditions for automatic engine
switch-off (Y page 132) are fulfilled, the
ECO symbol is shown in green in the mul-
tifunction display. In addition, the Stop/ Start active message is shown in the
multifunction display.
If not all conditions for automatic engine
switch-off (Y page 132) are fulfilled, the
Stop/Start inactive message appears
and the ECO symbol is shown in yellow.
i Every time you restart the engine, the
automatic transmission switches to the
automatic drive program C. Driving
133Driving and parking Z