winter tyres MERCEDES-BENZ CLS COUPE 2012 Owners Manual
[x] Cancel search | Manufacturer: MERCEDES-BENZ, Model Year: 2012, Model line: CLS COUPE, Model: MERCEDES-BENZ CLS COUPE 2012Pages: 373, PDF Size: 9.12 MB
Page 66 of 373
neither reduce the ris
kofaccident nor over-
rid ethe laws of physics .Driving safety sys-
tems are merel yaidsd esigned to assist driv-
ing. You are responsible for the distance to
the vehicl einfront, for vehicl espee dand for
braking in good time. Always adapt yourd riv-
ing style to suitt he prevailing road and
weather conditionsa nd maintainasafe dis-
tance from the vehicle in front.D rive care-
fully.
i The driving safety systems described only
work as effectively as possible when there
is adequate contact between the tyres and
the road surface. Please pay special atten-
tion to the notes on tyres, recommended
minimum tyre tread depths, etc.
(Y page 328).
In wintry driving conditions, always use
winter tyres (M+S tyres) and, if necessary,
snow chains. Only in this way will the driv-
ing safety systems described in this section
work as effectively as possible. ABS (Anti-lockB
raking System)
Important safety notes i
Observe the "Important safety notes" sec-
tio n(Ypage 62). G
WARNING
If ABS is faulty, the wheels could lock when
braking .The steerability and braking charac-
teristics may be severely impaired. Addition-
ally,f urther driving safety systems are deac-
tivated. There is an increased danger of skid-
ding and accidents.
Drive on carefully. Have ABS checked imme-
diately at aqualified specialist workshop.
When ABS is malfunctioning, other systems,
including driving safety systems, will also
become inoperative. Observe the information
on the ABS warning lamp (Y page 261) and
displaym essages which may be shown in the
instrumentc luster (Ypage 232). ABS regulates brake pressure in such
away
that the wheels do not lock when you brake.
This allowsy ou to continue steering the vehi-
cle when braking.
ABS works from aspeed of about 8km/h
upwards, regardless of road-surface condi-
tions. ABS works on slippery surfaces, even
when you only brake gently.
The yellow !ABS warning lamp in the
instrumentc lusterlight supw hen the ignition
is switched on. It goes out when the engine is
running.
Brakes X
If ABS intervenes: continue to depressthe
brak epedal with force until the braking sit-
uation is over.
X To make afull brake application:
depres sthe brak epedal with full force.
If AB Sintervene swhenb raking ,you will feel
ap ulsi ng in the brake pedal.
The pulsating brake peda lcan be an indica-
tio nofh azardous road condition sand func-
tions as areminder to tak eextra carew hile
driving. BAS (Brak
eAssist System)
i Observ ethe "Important safety notes" sec-
tio n(Ypage 62). G
WARNING
If BA Sism alfunctioning, the braking distance
in an emergency braking situation is
increased. There is arisk of accident.
In an emergency braking situation, depress
the brake pedal with full force. ABS prevents
the wheels from locking.
BAS operates in emergency braking situa-
tions. If you depress the brake pedal quickly,
BAS automaticallyb oosts the braking force,
thus shortening the stopping distance.
The brakes will function as usualo nce you
release the brake pedal.B AS is deactivated. Dr
ivin gsafety systems
63Safety Z
Page 167 of 373
The wear of individual componentsoft
he
brake system, such as the brake pads/linings
or brake discs, depends on the individual driv-
ing style and operating conditions.
For this reason, it is impossible to state a
mileage lifetime that will be valid under all
circumstances. An aggressive driving style
will lead to high wear. You can obtain further
information about this from your Mercedes-
Benz Servic eCentre.
New and replaced brake pads and discs only
reach their optimum braking effect after sev-
eral hundred kilometres of driving. Compen-
sate for this by applying greater force to the
brake pedal. Do not forget this, and adapt
your driving and braking accordingly during
this run-in period.
Excessively heavy braking results in corre-
spondingly high brake wear. Observe the
brake system warning lamp in the instrument
cluster and notea ny brake status messages
in the multifunction display .For high-per-
formanc edriving in particular, it is important
to maintain and have the brake system
checked regularly. Driving on wet roads
Aquaplaning If water has accumulated to
acertain depth
on the road surface, there is adanger of aqua-
planing occurring, even if:
R you are driving at low speeds.
R the tyres have adequate tread depth.
For this reason, do not drive in tyre ruts and
brake carefully.
Driving on flooded roads !
Bear in mind that vehicles travelling in
front or in the opposite direction create
waves. This may cause the maximum per-
missible water depth to be exceeded.
These notes must be observed under all
circumstances. You could otherwise dam- age the engine, the electronics or the trans-
mission.
If you have to drive on stretches of road on
which water has collected, please bear in
mind that:
R the maximum permissible still water depth
is 25 cm.
R you should drive no faster than at walking
pace. Winter driving
Important safety notes G
WARNING
If you shift down on aslippery road surface in
an attempt to increase the engine's braking
effect ,the drive wheels could lose their grip.
This increases the risk of skidding and having
an accident.
Do not shift down for additional engine brak-
ing on aslippery road surface. G
DANGER
If the exhaust pipe is blocked or adequate
ventilation is not possible, poisonous gases
such as carbon monoxide (CO) may enter the
vehicle. This is the case, e.g. if the vehicle
becomes trapped in snow. There is arisk of
fatal injury.
If you leave the engine or the auxiliary heating
running, make sure the exhaust pipe and area
around the vehicle are clear of snow. To
ensure an adequate supply of fresh air, open
aw indow on the side of the vehicle that is not
facing into the wind.
Have your vehicle winterproofed at aqualified
specialist workshop at the onset of winter.
Observe the notes in the "Winter operation"
section (Y page 330).
Driving with summer tyres Observe the notes in the "Winter operation"
section (Y
page 330). 164
Driving tipsDriving and parking
Page 171 of 373
control off message in the multifunction
displayf or approximately five seconds.
i The last speed stored is cleared when you
switch off the engine. SPEEDTRONIC
Important safety notes G
WARNING
Never depress the brake pedal continuously
while the vehicle is in motion, e.g. never cause
the brakes to rub by applying constant slight
pedal pressure. This causes the brake system
to overheat, increases the braking distance
and can lead to the brakes failing completely. G
WARNING
Do not change down for additional engine
braking on aslippery road surface. This could
cause the drive wheels to lose their grip and
the vehicle could skid. G
WARNING
SPEEDTRONIC is only an aid designed to
assist driving. You are responsible for the
vehicle's speed and for braking in good time.
SPEEDTRONIC brakes automaticallysot hat
you do not exceed the set speed. On long and
steep downhill gradients, especially if the
vehicle is laden, you must select shift range
1, 2or 3in good time. By doing so, you will
make use of the braking effect of the engine.
This relieves the load on the brake system and
prevents the brakes from overheating and
wearing too quickly. If you need additional
braking, depress the brake pedal repeatedly
rather than continuously.
You can set avariableorp ermanent limit
speed:
R variable for speed limits, e.g. in built-up
areas
R permanent for long-term speed restric-
tions, e.g. when driving with winter tyres
fitted (Y page 170) i
The speed indicated in the speedometer
may differ slightly from the limit speed
stored.
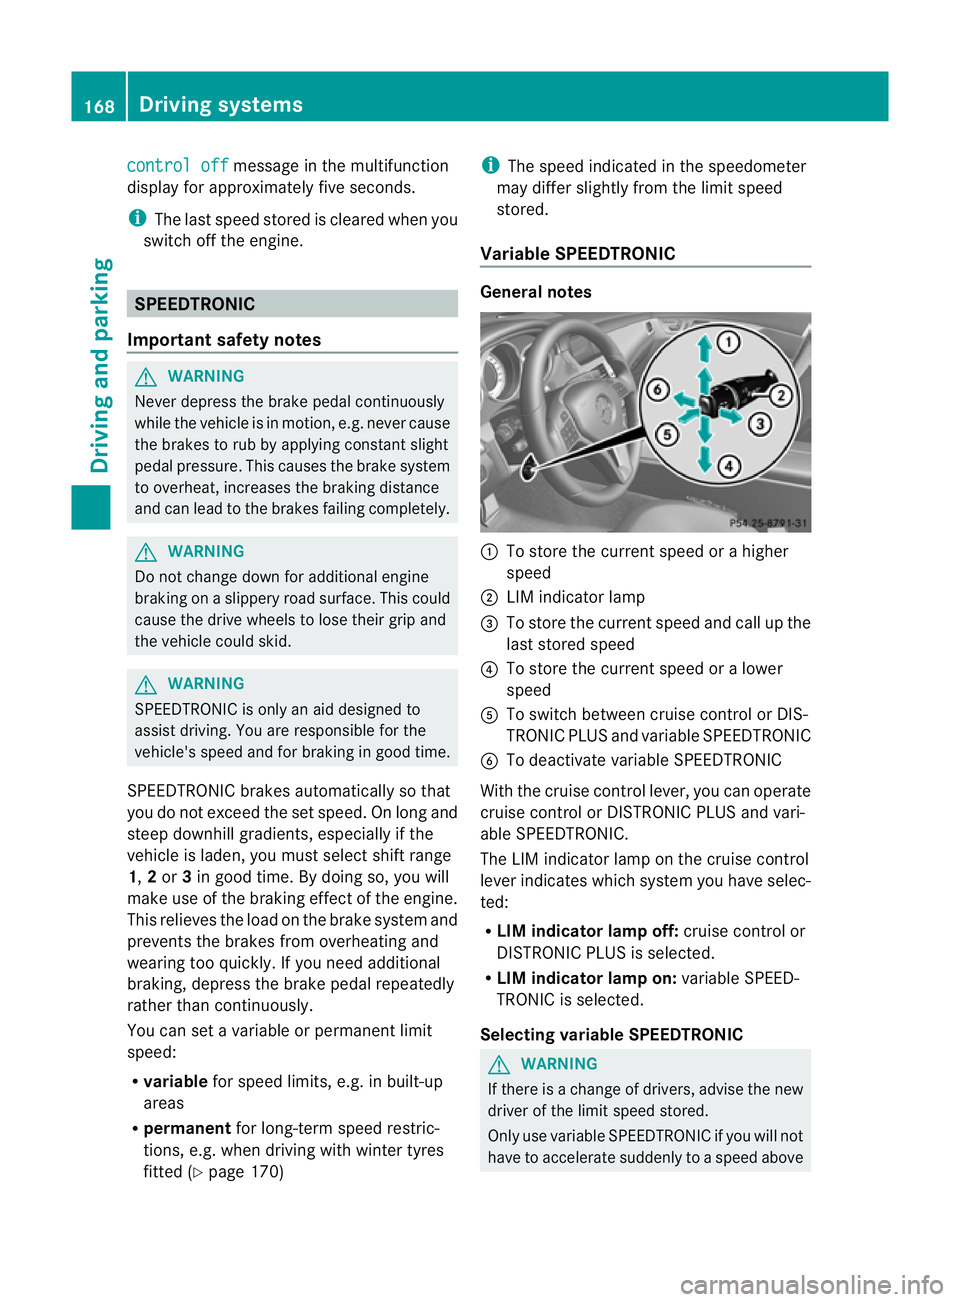
Variable SPEEDTRONIC General notes
:
To store the current speed or ahigher
speed
; LIM indicator lamp
= To store the current speed and call up the
last stored speed
? To store the current speed or alower
speed
A To switch between cruise control or DIS-
TRONIC PLUS and variableS PEEDTRONIC
B To deactivate variableS PEEDTRONIC
With the cruise control lever, you can operate
cruise control or DISTRONIC PLUS and vari-
able SPEEDTRONIC.
The LIM indicator lamp on the cruise control
lever indicates which system you have selec-
ted:
R LIM indicator lamp off: cruise control or
DISTRONIC PLUS is selected.
R LIM indicator lamp on: variableSPEED-
TRONIC is selected.
Selecting variable SPEEDTRONIC G
WARNING
If there is achange of drivers, advise the new
driver of the limit speed stored.
Only use variableS PEEDTRONIC if you will not
have to accelerate suddenly to aspeed above 168
Driving systemsDriving and parking
Page 173 of 373
ah
igher speed, or down ;for alower
speed.
or
X Keep th ecruise control leve rpressed
beyond the pressure point until the desired
spee diss et. Press the cruise control lever
up : for ahigher spee dordown;for a
lower speed.
X To adjust the set spee din1k m/h incre-
ments: briefly press the cruise control
lever up :to the pressure point for a
higher speed or down ;for alower speed.
or
X Keep the cruise control lever pressed to the
pressure point until the desired speed is
set. Press the cruise control lever up :for
ah igher speed or down ;for alower
speed.
Deactivating variable SPEEDTRONIC G
WARNING
It is not possible to deactivat evariable Speed-
tronic by braking.
There are several ways to deactivat evariable
SPEEDTRONIC:
X Briefly press the cruise control lever for-
wards :.
or
X Briefly press the cruise control lever in the
direction of arrow =.
LIM indicator lamp ;in the cruise control
lever goes out. Variable SPEEDTRONIC is
deactivated.
Cruise control or DISTRONIC PLUS is selec-
ted.
Variable SPEEDTRONIC is deactivated auto-
matically if you depress the accelerator pedal
beyond the pressure point (kickdown), but
only if your curren tspeed does not differ by
more than 20 km/ hfrom the stored speed.
You will hear awarning ton eifthis is the case.
i The last speed stored is cleared when you
switc hoff the engine. Permanent SPEEDTRONIC You can use the on-board computer to limit
the speed permanently to
avalue between
16 0k m/ h(e.g .for driving on winter tyres) and
th em aximum spee d(Ypage 224).
Shortly before th estoreds peed is reached, it
appears in the multifunction display.
Permanent SPEEDTRONIC remains active,
even if variable SPEEDTRONIC is deactivated.
You cannot exceed the stored limit speed,
even if you depress the accelerator pedal
beyond the pressure point (kickdown). DISTRONIC PLUS
Importan tsafet ynotes G
WARNING
Do not chang edown for additional engine
brakin gonas lippery road surface. This could
cause the drive wheels to lose their grip and
the vehicle could skid. G
WARNING
DISTRONIC PLUS is only an aid designed to
assist driving. The driver remains fully respon-
sible for the vehicle's distance from other
vehicles, the vehicle's speed and for braking
in good time.
DISTRONIC PLUS does not react in particular
to:
R pedestrians
R stationary obstacles on the road, e.g. stop-
ped or parked vehicles
R oncoming and crossing traffic
DISTRONIC PLUS may not detec tnarro wvehi-
cles driving in front, e.g. motorcycles, or vehi-
cles driving on adifferen tline. Therefore,
always pay attention to traffic condition seven
when DISTRONIC PLUS is activated. Other-
wise, you may fail to recognise danger sin
time, cause an accident and injure yourself
and others. 170
Driving systemsDriving and parking
Page 187 of 373
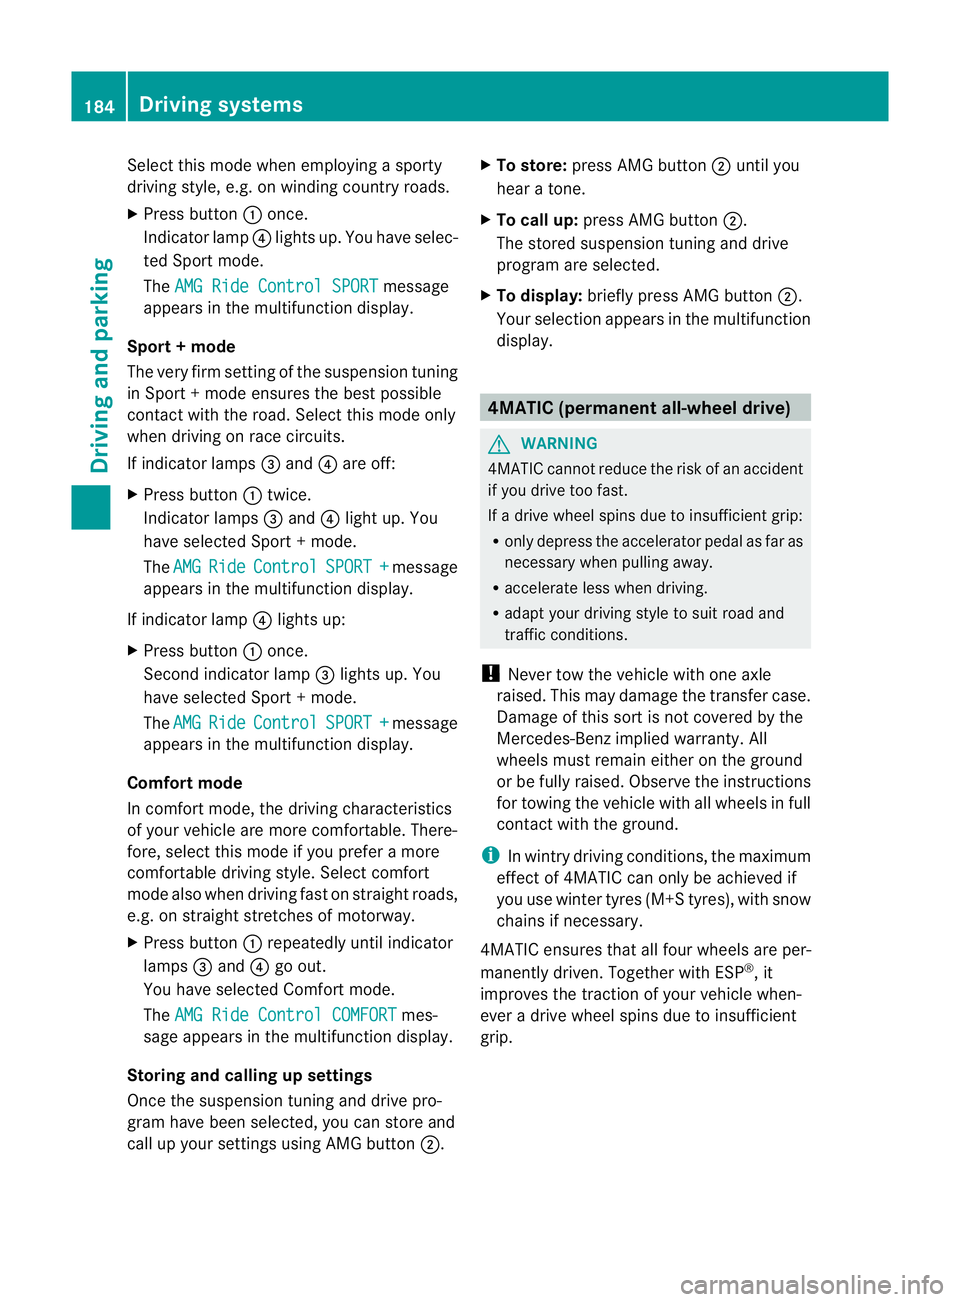
Select this mod
ewhene mploying asporty
driving style ,e.g. on winding country roads.
X Press button :once.
Indicato rlamp ?light sup. You have selec-
te dS port mode.
The AMG Rid eContro lSPORT message
appear sinthemultifunction display.
Sport +mode
The ver yfirms etting of the suspension tuning
in Sport +mode ensures the best possible
contact with the road. Select this mode only
when driving on race circuits.
If indicator lamps =and ?are off:
X Press button :twice.
Indicator lamps =and ?light up. You
have selected Sport +mode.
The AMG Ride Control SPORT + message
appears in the multifunction display.
If indicator lamp ?lights up:
X Press button :once.
Secondi ndicator lamp =lights up. You
have selected Sport +mode.
The AMG Ride Control SPORT + message
appears in the multifunction display.
Comfort mode
In comfor tmode, the driving characteristics
of your vehicle are more comfortable. There-
fore, select this mode if you prefer amore
comfortable driving style. Select comfort
mode also when driving fast on straight roads,
e.g. on straight stretches of motorway.
X Press button :repeatedly until indicator
lamps =and ?go out.
You have selected Comfort mode.
The AMG Ride Control COMFORT mes-
sage appears in the multifunction display.
Storing and calling up settings
Once the suspension tuning and drive pro-
gram have been selected, you can store and
call up your settings using AMG button ;.X
To store: press AMG button ;until you
hear atone.
X To call up: press AMG button ;.
The stored suspension tuninga nd drive
program are selected.
X To display: briefly press AMG button ;.
Your selection appears in the multifunction
display. 4MATIC (permanent all-wheel drive)
G
WARNING
4MATIC cannot reduce the risk of an accident
if you drive too fast.
If ad rive wheel spins due to insufficien tgrip:
R only depress the accelerator peda lasfar as
necessary when pulling away.
R accelerate less when driving.
R adapt yourd riving style to suitr oad and
traffic conditions.
! Never tow the vehicle with one axle
raised. This may damage the transfer case.
Damage of this sort is not covered by the
Mercedes-Benz implied warranty. All
wheels must remain either on the ground
or be fully raised. Observe the instructions
for towing the vehicle with all wheels in full
contact with the ground.
i In wintry driving conditions, the maximum
effect of 4MATIC can only be achieved if
you use winter tyres (M+ Styres), wit hsnow
chain sifnecessary.
4MATIC ensures that all four wheels are per-
manentl ydriven .Together wit hESP®
,it
improves th etraction of your vehicl ewhen-
eve rad rive wheel spins due to insufficient
grip. 184
Driving systemsDriving and parking
Page 227 of 373
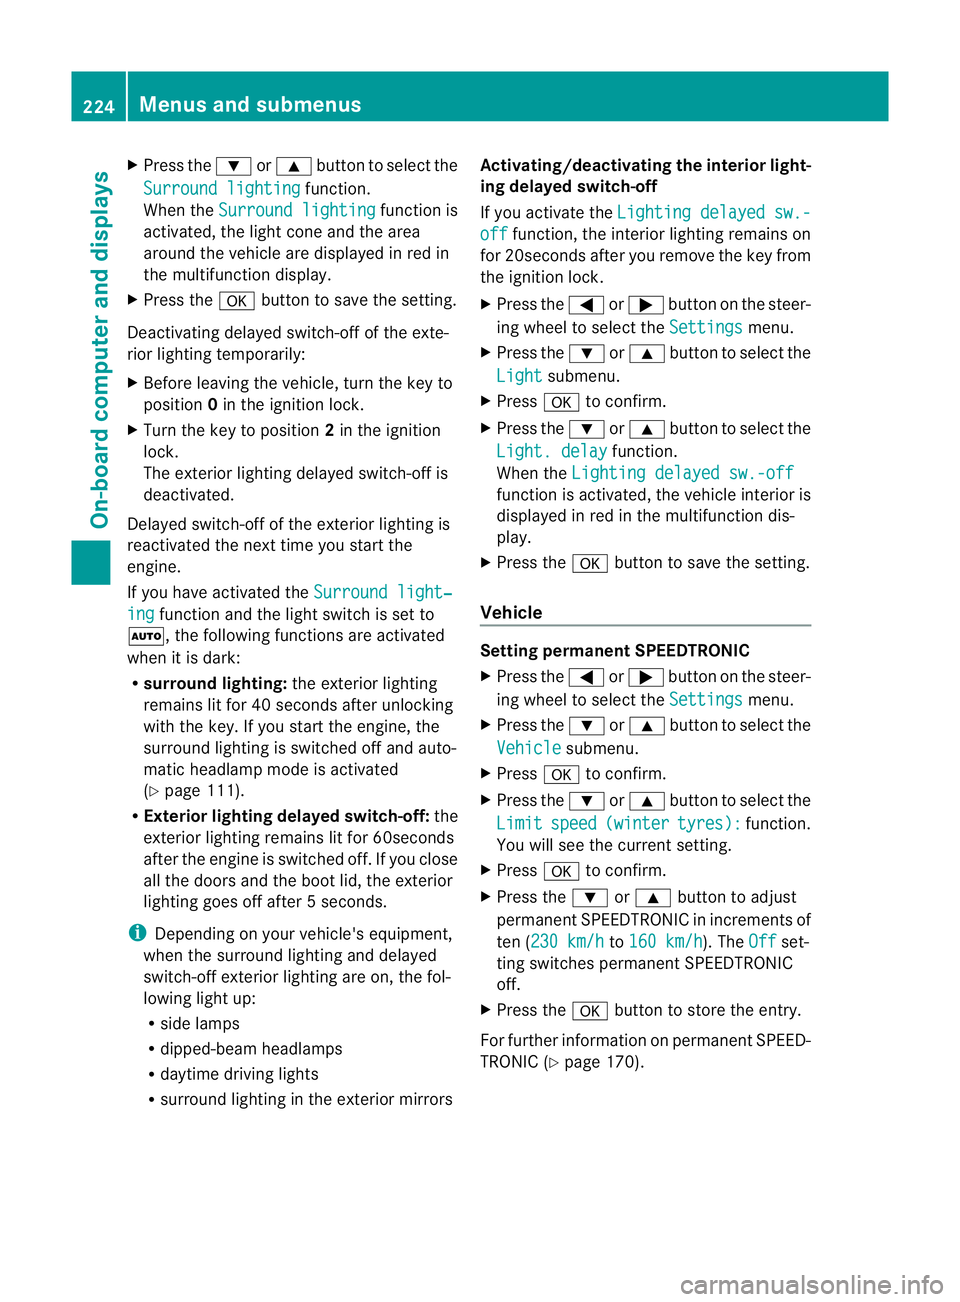
X
Press the :or9 button to select the
Surround lighting function.
When the Surround lighting function is
activated, the light cone and the area
around the vehicle are displaye dinred in
the multifunction display.
X Press the abutton to save the setting.
Deactivating delayed switch-off of the exte-
rior lighting temporarily:
X Before leaving the vehicle, turn the key to
position 0in the ignition lock.
X Turn the key to position 2in the ignition
lock.
The exterior lighting delayed switch-off is
deactivated.
Delayed switch-off of the exterior lighting is
reactivated the next time you start the
engine.
If you have activated the Surround light‐ing function and the light switch is set to
Ã,t he following functions are activated
when it is dark:
R surround lighting: the exterior lighting
remains lit for 40 seconds after unlocking
with the key. If you start the engine, the
surround lighting is switched off and auto-
matic headlamp mode is activated
(Y page 111).
R Exterior lighting delayed switch-off: the
exterior lighting remains lit for 60seconds
after the engine is switched off. If you close
all the doors and the boot lid, the exterior
lighting goes off after 5seconds.
i Depending on your vehicle's equipment,
when the surround lighting and delayed
switch-off exterior lighting are on, the fol-
lowing light up:
R side lamps
R dipped-beam headlamps
R daytime driving lights
R surround lighting in the exterior mirrors Activating/deactivating the interior light-
ing delayed switch-off
If you activat
ethe Lightin gdelayed sw.- off function
,the interior lighting remains on
for 20seconds after you remove the key from
the ignition lock.
X Press the =or; button on the steer-
ing wheel to select the Settings menu.
X Press the :or9 button to select the
Light submenu.
X Press ato confirm.
X Press the :or9 button to select the
Light. delay function.
When the Lightingdelayed sw.-off function is activated, the vehicle interior is
displayed in red in the multifunction dis-
play.
X Press the abutton to save the setting.
Vehicle Setting permanent SPEEDTRONIC
X
Press the =or; button on the steer-
ing wheel to select the Settings menu.
X Press the :or9 button to select the
Vehicle submenu.
X Press ato confirm.
X Press the :or9 button to select the
Limit speed (winter tyres): function.
You will see the curren tsetting.
X Press ato confirm.
X Press the :or9 button to adjust
permanen tSPEEDTRONIC in increment sof
ten ( 230 km/h to
160 km/h ). The
Off set-
ting switches permanent SPEEDTRONIC
off.
X Press the abutton to store the entry.
For furthe rinformation on permanent SPEED-
TRONI C(Ypage 170). 224
Menus and submenusOn-board computer and displays
Page 230 of 373
X
Press the :or9 button to select the
Easy Entry/Exit: function.
If the Easy Entry/Exit function is activa-
ted, the vehicle steerin gwheel is displayed
in red in the multifunction display.
X Press the abutton to save the setting.
Further information on the EASY-ENTRY/EXIT
feature (Y page 104).
Switching the belt adjustment on/off
X Press the =or; button on the steer-
ing wheel to select the Settings menu.
X Press the :or9 button to select the
Convenience submenu.
X Press ato confirm.
X Press the :or9 button to select the
Belt adjustment function.
When the Belt adjustment function is
activated, the vehicle seat belt is displayed
in red in the multifunction display.
X Press the abutton to save the setting.
For further information on belt adjustment,
see (Y page 50).
Switching the fold-in mirrors when lock-
ing function on/off
This function is only availabl eonvehicles with
Memory Function (Y page 107).
When you activat ethe Auto. fold in func-
tion, the exterior mirrors are folded in when
the vehicle is locked. When you unlock the
vehicle and then open adoor, the exterior
mirrors fold out again.
X Press the =or; button on the steer-
ing wheel to select the Settings menu.
X Press the :or9 button to select the
Convenience submenu.
X Press ato confirm.
X Press the :or9 button to select the
Auto. fold in function.
If the Auto. fold in function is activated,
the vehicle's exterior mirror is displaye din
red in the multifunction display.
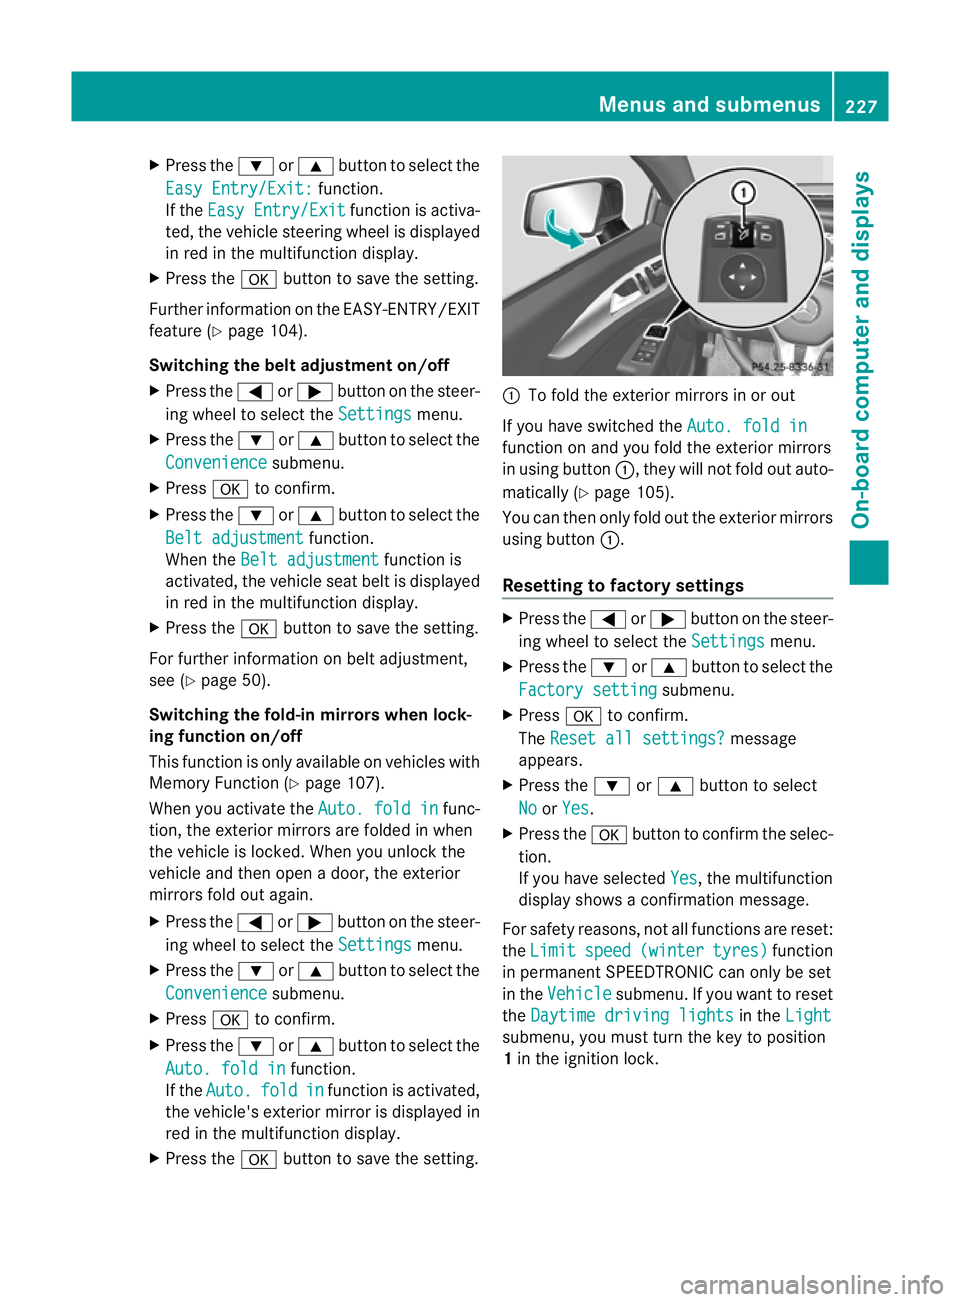
X Press the abutton to save the setting. :
To fold the exterior mirrors in or out
If you have switched the Auto. fold in function on and you fold the exterior mirrors
in using button
:,they will not fold out auto-
matically (Y page 105).
You can then only fold out the exterior mirrors
using button :.
Resetting to factor ysettings X
Pres sthe = or; button on th esteer-
ing wheel to selec tthe Settings menu.
X Press the :or9 button to select the
Factory setting submenu.
X Press ato confirm.
The Reset all settings? message
appears.
X Press the :or9 button to select
No or
Yes .
X Press the abutton to confirm the selec-
tion.
If you have selected Yes ,t
he multifunction
displays howsaconfirmation message.
For safety reasons, not all functions are reset:
the Limit speed (winter tyres) function
in permanent SPEEDTRONIC can only be set
in the Vehicle submenu. If you want to reset
the Daytime driving lights in the
Light submenu, you must turn the key to position
1
in the ignition lock. Menus and submenus
227On-board computer and displays Z
Page 305 of 373
R
Vehicles with akey:
do not remove the key from the ignition
lock. Do not open the driver's door or
front-passenger door when the engine is
switched off. Otherwise, the automatic
transmission selects park position P
automatically and locks the wheels. You
can prevent this by shifting the auto-
matic transmission to Nbeforehand.
R Vehicles with KEYLESS-GO:
do not open the driver's door or front-
passenger door when the engine is
switched off. Otherwise, the automatic
transmission selects park position P
automatically and locks the wheels.
Observe the following to make sure that the
automatic transmission stays in position N:
X Make sure the vehicle is stationary and the
ignition is switched off.
X Turn the key to position 2(Ypage 141) in
the ignition lock.
Use the key instead of the Start/Stop but-
ton on vehicles with KEYLESS-GO.
X Depress and hold the brake pedal.
X Shift the automatic transmission to posi-
tion N.
X Release the brake pedal.
X Release the electric parking brake.
X Switch off the ignition and leave the key in
the ignition lock.
You can wash the vehicle in an automatic car
wash from the very start.
Wash off excess dirt before cleaning the vehi-
cle in an automatic car wash.
After using an automatic car wash, wipe off
wax from the windscreen and the wiper
blades. This will prevent smears and reduce
wiping noises caused by residueont he wind-
screen.
Washing by hand In some countries, washing by hand is only
allowed at specially equipped washing bays. Observe the legal requirements for each indi-
vidual country.
X Do not use hot water and do not wash the
vehicle in direct sunlight.
X Use asoft sponge to clean.
X Use amild cleaning agent, such as acar
shampoo approved by Mercedes-Benz.
X Thoroughly hose down the vehicle with a
gentle jet of water.
X Do not point the water jet directly towards
the air inlet.
X Use plenty of water and rinse out the
sponge frequently.
X Rinse the vehicle with clean water and dry
thoroughly with achamois.
X Do not let the cleaning agent dry on the
paintwork.
When using the vehicle in winter, remove all
traces of road salt deposits carefully and as
soon as possible.
High-pressure cleaninge quipment G
WARNING
Do not use high-pressure cleaners with circu-
lar-jet nozzles (dirt grinders) to clean your
vehicle, in particular the tyres. You could oth-
erwise damage the tyres and cause an acci-
dent.
! Always maintain adistance of at least
30 cm between the vehicle and the high-
pressure cleaner nozzle. Information about
the correct distance is available from the
equipment manufacturer.
Move the high-pressure cleaner nozzle
around when cleaning your vehicle.
Do not aim directly at any of the following:
R tyres
R door gaps, roof gaps, jointse tc.
R electrical components
R battery
R connectors
R lights 302
CareMaintenance and care
Page 330 of 373
Useful information
............................328
Importan tsafet ynotes .................... 328
Operation ........................................... 328
Winter operation ............................... 330
Tyr epressure .................................... 331
Changing awheel ............................. 336
Wheel and tyr ecombinations ..........341
Emergency spar ewheel ................... 351 327Wheels and tyres
Page 333 of 373
Observe the notes on the emergency spare
wheel (Y
page 351). MOExtended tyres (tyres with run-flat
characteristics)
With MOExtended tyres (tyres with run-flat
characteristics), you can continue to drive
your vehicle even if there is atotal loss of
pressure in one or more tyres.
MOExtended tyres may only be used in con-
junction with an active tyre pressure loss
warning system or with an active tyre pres-
sure monitor and on wheels specificallyt es-
ted by Mercedes-Benz.
Notes on driving with MOExtended tyres with
af lat tyre (Y page 313).
i Vehicles with MOExtended tyres are not
equipped with aTIREFIT kit at the factory.
It is therefore recommended that you addi-
tionally equipy our vehicle with aTIREFIT kit
if you fit tyres that do not feature run-flat
characteristics, e.g. winter tyres. ATIREFIT
kit can be obtained from aqualified spe-
cialist workshop. Winter operation
General notes
Have your vehicle winterproofed at aqualified
specialist workshop at the onset of winter.
Observe the notes in the "Changing awheel"
section (Y page 336). Driving with summer tyres
At temperatures below +7 †, summer tyres
lose elasticity and therefore traction and
braking power. Change the tyres on your vehi-
cle to M+S tyres .Using summer tyres at very
cold temperatures could cause tears to form,
thereby damaging the tyres permanently.
Mercedes-Benz cannot accept responsibility
for this type of damage. M+S tyres
G
WARNING
M+S tyres with atyre tread depth of less than
4mma re not suitable for use in winter as they
do not provid esufficient traction. There is a
risk of accident.
M+S tyres with atread depth of less than
4mmm ust be replaced.
At temperatures below +7 †, use winter tyres
or all-seaso ntyres .Both types of tyre are
identified by the M+S marking.
Only winter tyres bearing the isnowflake
symbol in addition to the M+S marking pro-
vide the best possible grip in wintry road con-
ditions.
Only these tyres will allow driving safety sys-
tems such as ABS and ESP ®
to function opti-
mally in winter. These tyres have been devel-
oped specifically for driving in snow.
Use M+S tyres of the same make and tread
on all wheels to maintain safe handling char-
acteristics.
Always observe the maximum permissible
speed specified for the M+S tyres you have
fitted.
If you fit M+S tyres that have alower maxi-
mum permissible speed than that of the vehi-
cle, affix acorresponding warning label in the
driver's field of vision. This can be obtained
at aq ualified specialist workshop.
Under these circumstances, you should also
restrict the maximum speed of the vehicle
using permanent SPEEDTRONIC so that it
does not exceed the maximum permissible
speed for the M+S tyres (Y page 170).
When you have fitted the M+S tyres:
X Check the tyre pressures (Y page 331).
X Restart the tyre pressure loss warning sys-
tem (Y page 333).
X Restart the tyre pressure monitor
(Y page 335).
For more information on driving with an emer-
gency spare wheel, see (Y page 351).330
Winter operationWheels and tyres