engine MERCEDES-BENZ CLS COUPE 2020 Owners Manual
[x] Cancel search | Manufacturer: MERCEDES-BENZ, Model Year: 2020, Model line: CLS COUPE, Model: MERCEDES-BENZ CLS COUPE 2020Pages: 469, PDF Size: 8.47 MB
Page 6 of 469
Climate control
......................................... 137
Overview of climate contro l systems ..........1 37
Operating the climate control sy stem ......... 13 8 Driving and pa
rking ................................. 14 8
Driving ........................................................ 14 8
DY NA MIC SELECT switch ........................... 15 9
Au tomatic transmission .............................. 161
Fu nction of the 4MATIC .............................. 16 6
Re fuelling .................................................... 16 6
Pa rking ...................................................... .172
Driving and driving sa fety sy stems .............. 178
Tr ailer hit ch................................................ 234
Bicycle rack function .................................. 239
Ve hicle towing instructions ........................ .241 Instrument display and on-board
compu
ter.................................................. 243
No tes on the instrument display and on-
board computer .......................................... 24 3
Instrument display overview ...................... .244
Overview of the buttons on thesteering
wheel ..........................................................2 45
Operating the on-board computer .............. 24 5Overview of displa
yson the multifunc‐
tion display .................................................2 47
Head-up display .......................................... 247 MBUX multimedia sy
stem ...................... 250
Overview and operation .............................. 250
Sy stem settings .......................................... 258
Na vigation .................................................. 262
Te lephone .................................................. .268
Mercedes me and apps ............................... 271
Mercedes-Benz emer gency call sy stem ...... 280
Ra dio, media & TV...................................... 284
Sound settings ........................................... 290 Main
tenance and care ............................. 292
ASS YST PLUS service inter val display ........ 292
Engine compartment .................................. 293
Cleaning and care ...................................... .299 Breakdown assi
stance ............................ 306
Emergency ................................................. .306
Flat tyre ...................................................... 308
Battery (vehicle) .......................................... 314To
w- starting or towing away ....................... 319
Electrical fuses ........................................... 324 Wheels and tyres
..................................... 327
No tes on noise or unusual handling char‐
acteristics .................................................. .327
No tes on regular lyinspecting wheels and
tyres .......................................................... .327
No tes on snow chains ................................ 327
Ty re pressure .............................................. 328
Wheel change ............................................ .332
Emergency spa rewheel .............................. 342 Te
ch nical data .......................................... 343
No tes on tech nical da ta.............................. 343
On-board electronics .................................. 343
Ra dio operating permits forve hicle com‐
ponents ...................................................... 345
Ve hicle identification plate, VIN and
engine number overview ............................ 345
Operating fluids .......................................... 347
Ve hicle data ................................................ 356
Tr ailer hit ch................................................. 357 Contents
3
Page 14 of 469
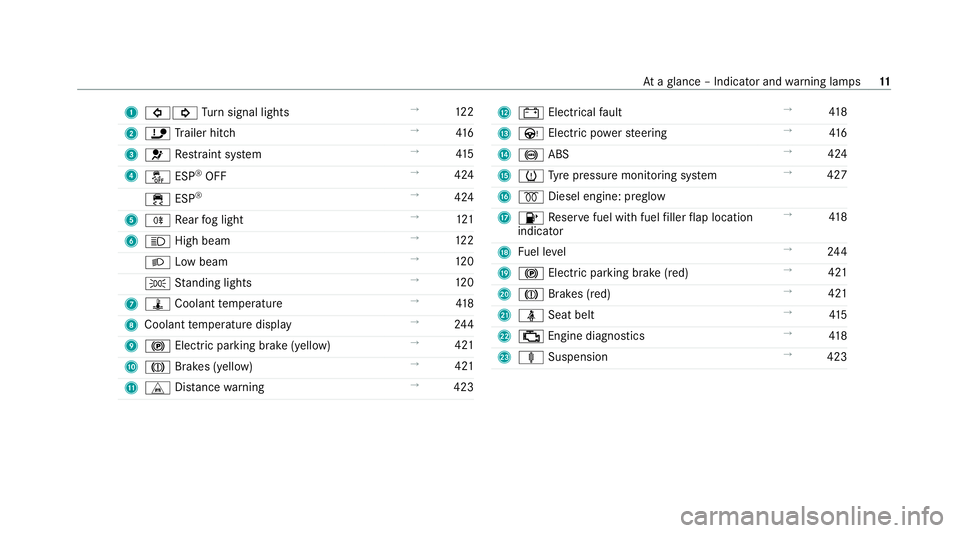
1
#! Turn signal lights →
12 2
2 ï Trailer hit ch →
416
3 6 Restra int sy stem →
41 5
4 å ESP®
OFF →
424
÷ ESP®
→
424
5 R Rear fog light →
121
6 K High beam →
12 2
L Low beam →
12 0
T Standing lights →
12 0
7 ÿ Coolant temp erature →
41 8
8 Coolant temp erature display →
24 4
9 ! Electric pa rking brake (yellow) →
421
A J Brakes (yellow) →
421
B L Distance warning →
423 C
# Electrical fault →
41 8
D Ù Electric po werst eering →
416
E ! ABS →
424
F h Tyre pressure monitoring sy stem →
427
G % Diesel engine: preglow
H 8 Reser vefuel with fuel filler flap location
indicator →
41 8
I Fuel le vel →
24 4
J ! Electric pa rking brake (red) →
421
K J Brakes (red) →
421
L ü Seat belt →
41 5
M ; Engine diagnostics →
41 8
N ä Suspension →
423 At
aglance – Indicator and warning lamps 11
Page 23 of 469
Pr
otection of the environment
+ ENVIRONMENTAL
NOTEEnvironmental
dama gedue tooperating conditions and
personal driving style The pollutant emission of
theve hicle is
directly related tothewa yyo u operate the
ve hicle.
Operate your vehicle in an environmentally
re sponsible manner tohelp pr otect the envi‐
ro nment. Please obser vethefo llowing rec‐
ommendations on ope rating conditions and
pe rsonal driving style.
Operating conditions: #
Make sure that the tyre pressure is cor‐
re ct. #
Do not car ryany unnecessary weight
(e.g. roof luggage rack s once you no
lon ger need them). #
Adhere tothe service inter vals.
A regularly serviced vehicle will contri b‐
ute toenvironmen tal pr otection. #
Alw ays ha vemaintenance workcar ried
out at a qualified specialist workshop.
Pe rsonal driving style: #
Do not depress the accelera tor pedal
when starting the engine. #
Do not warm upthe engine while the
ve hicle is stationar y. #
Drive carefully and maintain a suitable
di st ance from theve hicle in front. #
Avoid frequent, sudden acceleration
and braking. #
Change gear in good time and use each
ge ar on lyup toÔ of its maximum
engine speed. #
Switch off the engine in stationary traf‐
fi c, e.g. byusing the ECO start/ stop
function. #
Drive fuel-ef ficiently. Obser vethe ECO
display for a fuel-ef ficient driving style. Ta
ke -back of end-of-life vehicles
EU countries onl y:
Mercedes-Benz will take back your end-of-life
ve hicle for environment-friendly disposal in
accordance with the European Union(EU) End-
of-Life Vehicles Directive.
A network of vehicle take -ba ckpoints and dis‐
mantlers has been es tablished foryo uto return
yo ur vehicle. You can lea veit at any of these
points free of charge . This makes an impor tant
contribution toclosing there cycling circle and
conse rving resources.
Fo r fur ther information about there cycling and
disposal of end-of-li fevehicles, and theta ke-
back conditions, please visit the national
Mercedes-Benz website foryo ur count ry. 20
General no tes
Page 81 of 469
Locking/unlocking
the driver's door with the
emer gency key %
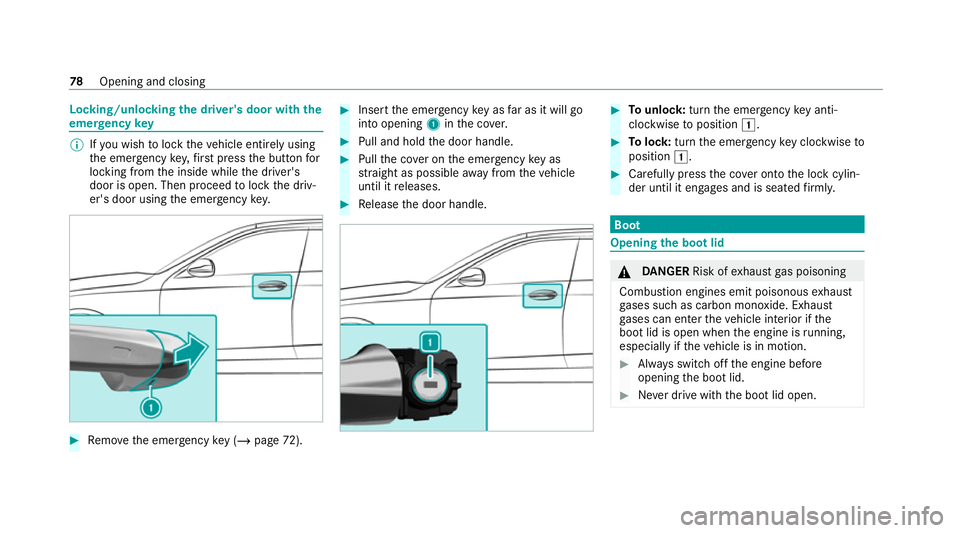
Ifyo u wish tolock theve hicle entirely using
th e emer gency key,firs t press the button for
locking from the inside while the driver's
door is open. Then proceed tolock the driv‐
er's door using the emer gency key. #
Remo vethe emer gency key ( / page 72). #
Insert the emer gency key as far as it will go
into opening 1inthe co ver. #
Pull and hold the door handle. #
Pull the co ver on the emer gency key as
st ra ight as possible away from theve hicle
until it releases. #
Release the door handle. #
Tounlo ck:turn the emer gency key anti-
clo ckwise toposition 1. #
Tolock: turnthe emer gency key clo ckwise to
position 1. #
Carefully press the co ver onto the lock cylin‐
der until it engages and is seated firm ly. Boot
Opening the bo
otlid &
DANG ER Risk of exhaust gas poisoning
Combustion engines emit poisonous exhaust
ga ses such as carbon monoxide. Exhaust
ga ses can enter theve hicle interior if the
boot lid is open when the engine is running,
especially if theve hicle is in motion. #
Alw ays switch off the engine before
opening the boot lid. #
Never drive with the boot lid open. 78
Opening and closing
Page 96 of 469
Note
s onthe cor rect driver's seat position &
WARNING Risk of accident due to
adjusting vehicle settings while theve hi‐
cle is in motion
Yo u could lose cont rol of theve hicle in the
fo llowing situations in particular:
R Ifyo u adjust the driver's seat, the head
re stra ints, thesteering wheel or the mir‐
ro r while theve hicle is in motion.
R Ifyo ufast enyour seat belt while theve hi‐
cle is in motion. #
Before starting the engine: adjust the
driver's seat, the head restra ints, the
st eering wheel and the mir ror and fas‐
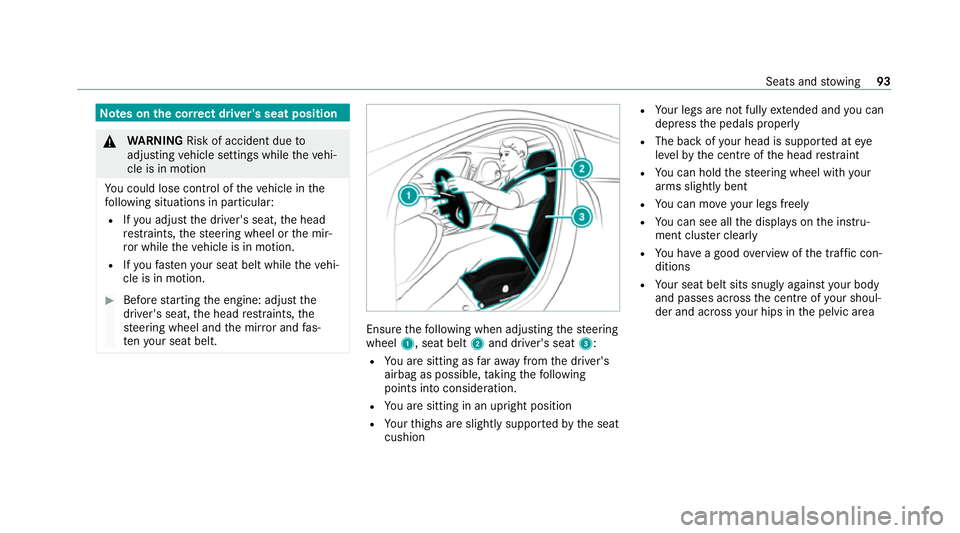
te nyo ur seat belt. Ensure
thefo llowing when adjusting thesteering
wheel 1, seat belt 2and driver's seat 3:
R You are sitting as faraw ay from the driver's
airbag as possible, taking thefo llowing
points into consideration.
R You are sitting in an upright position
R Your thighs are slight lysuppor tedby the seat
cushion R
Your legs are not fully extended and you can
depress the pedals properly
R The back of your head is suppo rted at eye
le ve lby the cent reofthe head restra int
R You can hold thesteering wheel with your
arms slightly bent
R You can mo veyour legs freely
R You can see all the displa yson the instru‐
ment clus ter clea rly
R You ha vea good overview of the tra ffic con‐
ditions
R Your seat belt sits snug lyagainst your body
and passes across the cent reofyour shoul‐
der and across your hips in the pelvic area Seats and
stowing 93
Page 99 of 469
#
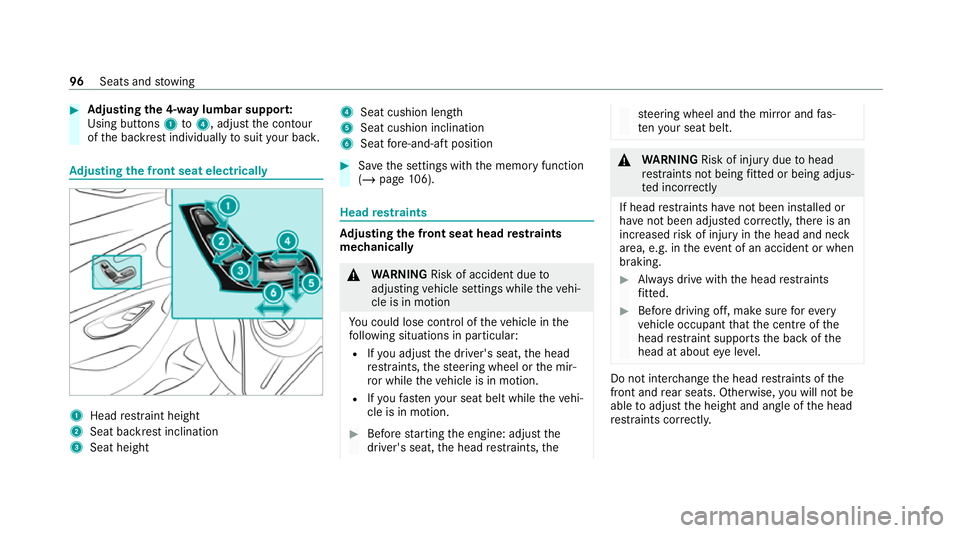
Adjusting the 4-w aylumbar suppor t:
Using buttons 1to4 , adjust the conto ur
of the backrest individually tosuit your bac k. Ad
justing the front seat electrically 1
Head restra int height
2 Seat backrest inclination
3 Seat height 4
Seat cushion length
5 Seat cushion inclination
6 Seat fore -and-aft position #
Save the settings with the memory function
(/ page 106). Head
restra ints Ad
justing the front seat head restra ints
mechanically &
WARNING Risk of accident due to
adjusting vehicle settings while theve hi‐
cle is in motion
Yo u could lose cont rol of theve hicle in the
fo llowing situations in particular:
R Ifyo u adjust the driver's seat, the head
re stra ints, thesteering wheel or the mir‐
ro r while theve hicle is in motion.
R Ifyo ufast enyour seat belt while theve hi‐
cle is in motion. #
Before starting the engine: adjust the
driver's seat, the head restra ints, the st
eering wheel and the mir ror and fas‐
te nyo ur seat belt. &
WARNING Risk of inju rydue tohead
re stra ints not being fitted or being adjus‐
te d incor rectly
If head restra ints ha venot been ins talled or
ha ve not been adjus ted cor rectly, there is an
increased risk of injury in the head and neck
area, e.g. in theev ent of an accident or when
braking. #
Alw ays drive with the head restra ints
fi tted. #
Before driving off, ma kesure forev ery
ve hicle occupant that the cent reofthe
head restra int supports the back of the
head at about eye le vel. Do not inter
change the head restra ints of the
front and rear seats. Otherwise, you will not be
able toadjust the height and angle of the head
re stra ints cor rectl y. 96
Seats and stowing
Page 105 of 469
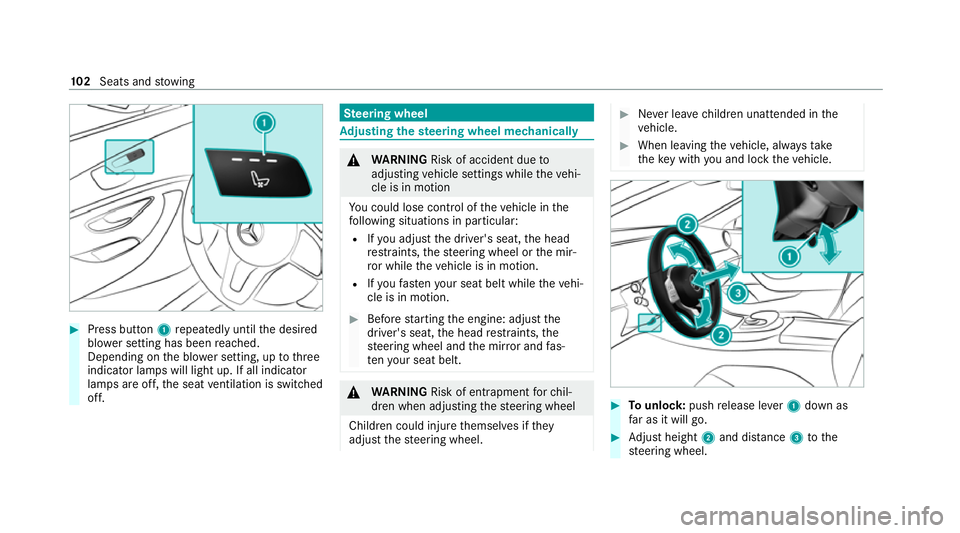
#
Press button 1repeatedly until the desired
blo wer setting has been reached.
Depending on the blo wer setting, up tothree
indicator lamps will light up. If all indicator
lamps are off, the seat ventilation is switched
off. Ste
ering wheel Ad
justing the steering wheel mechanically &
WARNING Risk of accident due to
adjusting vehicle settings while theve hi‐
cle is in motion
Yo u could lose cont rol of theve hicle in the
fo llowing situations in particular:
R Ifyo u adjust the driver's seat, the head
re stra ints, thesteering wheel or the mir‐
ro r while theve hicle is in motion.
R Ifyo ufast enyour seat belt while theve hi‐
cle is in motion. #
Before starting the engine: adjust the
driver's seat, the head restra ints, the
st eering wheel and the mir ror and fas‐
te nyo ur seat belt. &
WARNING Risk of entrapment forch il‐
dren when adjusting thesteering wheel
Children could injure themselves if they
adjust thesteering wheel. #
Never lea vechildren unat tended in the
ve hicle. #
When leaving theve hicle, alw aysta ke
th eke y with you and lock theve hicle. #
Tounlo ck:push release le ver1 down as
fa r as it will go. #
Adjust height 2and di stance 3tothe
st eering wheel. 102
Seats and stowing
Page 109 of 469
Yo
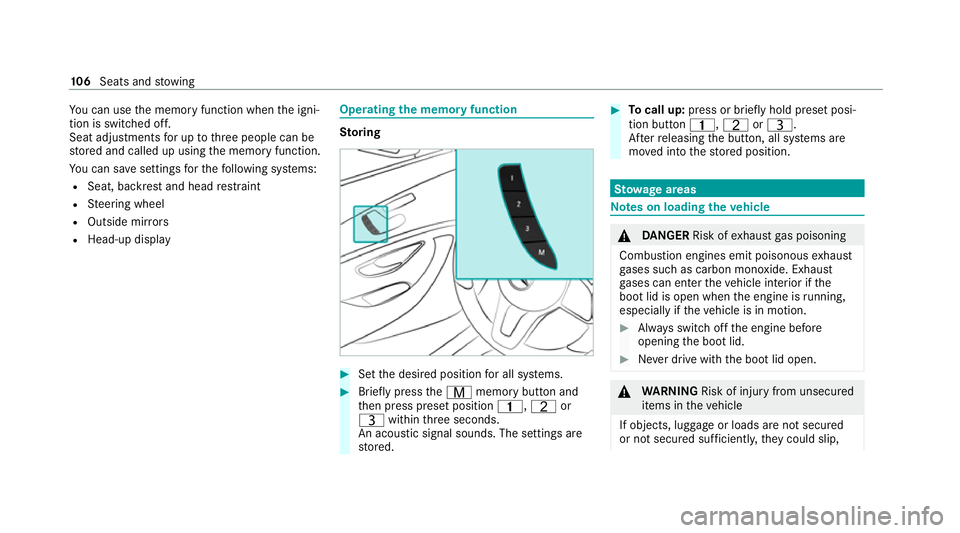
u can use the memory function when the igni‐
tion is switched off.
Seat adjustments for up tothre e people can be
st ored and called up using the memory function.
Yo u can sa vesettings forth efo llowing sy stems:
R Seat, backrest and head restra int
R Steering wheel
R Outside mir rors
R Head-up display Operating
the memory function St
oring #
Set the desired position for all sy stems. #
Brief lypress theV memory button and
th en press preset position 4,Tor
U within thre e seconds.
An acoustic signal sounds. The settings are
st ored. #
Tocall up: press or brief lyhold preset posi‐
tion button 4,TorU.
Af terre leasing the button, all sy stems are
mo ved into thestored position. St
ow age areas Note
s on loading theve hicle &
DANG ER Risk of exhaust gas poisoning
Combustion engines emit poisonous exhaust
ga ses such as carbon monoxide. Exhaust
ga ses can enter theve hicle interior if the
boot lid is open when the engine is running,
especially if theve hicle is in motion. #
Alw ays switch off the engine before
opening the boot lid. #
Never drive with the boot lid open. &
WARNING Risk of inju ryfrom unsecu red
items in theve hicle
If objects, luggage or loads are not secured
or not secured suf ficientl y,they could slip, 106
Seats and stowing
Page 124 of 469
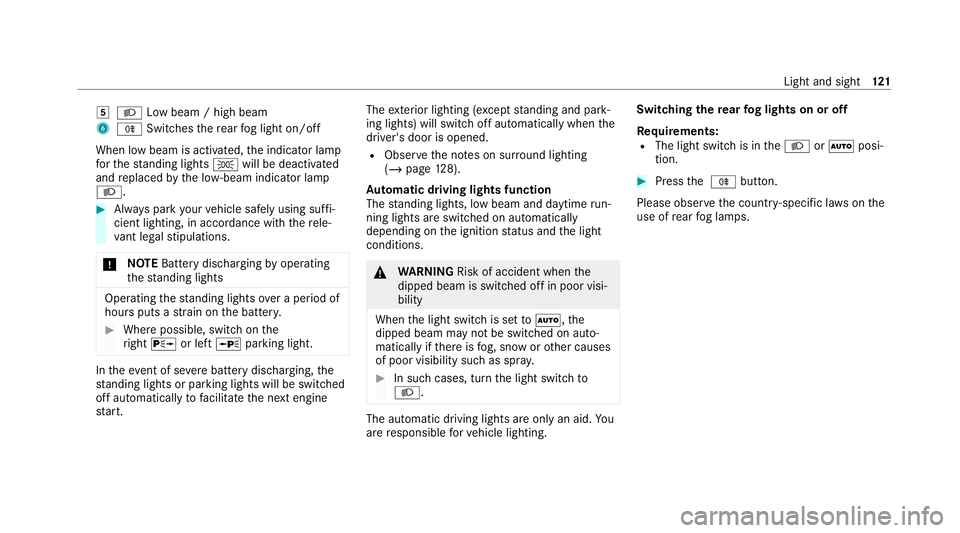
5
L Low beam / high beam
6 R Switches there ar fog light on/off
When low beam is activated, the indicator lamp
fo rth est anding lights Twill be deactivated
and replaced bythe lo w-beam indicator lamp
L. #
Alw ays park your vehicle safely using suf fi‐
cient lighting, in acco rdance with there le‐
va nt le galst ipulations.
* NO
TEBattery discharging byoperating
th est anding lights Operating
thest anding lights over a period of
hours puts a stra in on the batter y. #
Where possible, switch on the
ri ght X or left Wparking light. In
theeve nt of se vere battery discharging, the
st anding lights or parking lights will be swit ched
off automatically tofacilitate the next engine
st art. The
exterior lighting (e xcept standing and park‐
ing lights) will swit choff automatically when the
driver's door is opened.
R Obser vethe no tes on sur round lighting
(/ page 128).
Au tomatic driving lights function
The standing lights, low beam and daytime run‐
ning lights are switched on au tomatically
depending on the ignition status and the light
conditions. &
WARNING Risk of accident when the
dipped beam is switched off in poor visi‐
bility
When the light switch is set toà ,the
dipped beam may not be switched on auto‐
matically if there is fog, snow or other causes
of poor visibility such as spr ay. #
In such cases, turn the light switch to
L . The automatic driving lights are only an aid.
Yo u
are responsible forve hicle lighting. Switching
there ar fog lights on or off
Re quirements:
R The light switch is in theL orà posi‐
tion. #
Press the R button.
Please obser vethe count ry-specific la wsonthe
use of rear fog lamps. Light and sight
121
Page 131 of 469
R
If highly reflective signs are de tected, ULTRA
RANGE Highbeam will be switched off au to‐
matical ly.
At speeds greater than appr oximately 50 km/h:
R The headlamp range of the low beam is regu‐
lated automatically based on the dis tance to
ot her road users.
The sy stem's optical sensor is located behind
th e windscreen near theove rhead control panel.
Switching Adaptive Highbeam Assist Plus
on/off
Switching on #
Turn the light switch tothe à position. #
Switch on the high beam using the combina‐
tion switch.
When the high beam is switched on automat‐
ically in the dar k,the_ indicator lamp on
th e multifunction display will light up.
Switching off #
Switch off the high beam using the combina‐
tion switch. Setting
the low beam (vehicles with MULTI‐
BEAM LED headlamps only) Multimedia sy
stem:
4 © 5
Settings 5
Lights
5 Dipped-beams #
Select Right-side traffic, Left-side trafficor
Automatic. Setting
theex terior lighting switch-off delay
time Re
quirements:
R The light switch is in theà position.
Multimedia sy stem:
4 © 5
Settings 5
Lights
5 Ext. light. del. sw. off #
Set the switch-off delay time.
When theve hicle engine is switched off, the
ex terior lighting will be activated forth e set
time. Switching
the sur round lighting on/off Multimedia sy
stem:
4 © 5
Settings 5
Lights
5 Surround lighting
When Surround lighting is active,theex terior
lighting lights up for 40 seconds af terth eve hicle
is unloc ked. When youstart theve hicle, the sur‐
ro und lighting is deactivated and the automatic
driving lights are activated. #
Activate or deacti vate the function. 12 8
Light and sight