jump start MERCEDES-BENZ CLS COUPE 2020 Owners Manual
[x] Cancel search | Manufacturer: MERCEDES-BENZ, Model Year: 2020, Model line: CLS COUPE, Model: MERCEDES-BENZ CLS COUPE 2020Pages: 469, PDF Size: 8.47 MB
Page 319 of 469
Obser
vethis Owner's Manual.
Obser vethefo llowing if you do not intend touse
th eve hicle over an extended pe riod of time:
R Activate standby mode.
R Alternatively: connect the battery toa batâ
te ry charge r appro vedby Mercedes-Benz or
consult a qualified specialist workshop to
disconnect the batter y. Note
s onstarting assi stance and charging
th e12 V battery Ve
hicles with a lithium-ion battery
When charging the battery and during starting
assis tance, al ways use the jump-s tart connecâ
tion point in the engine compartment. *
NO
TEDama getothe battery from overâ
vo ltage When
charging using a bat tery charge r withâ
out a restriction of the maximum charging
vo ltage, the battery or the on-board electronâ
ics can be damaged. #
Only use battery charge rs with a maxiâ
mum charging voltage of 14.8 V. All
other vehicles
When charging the battery and during starting
assis tance, al ways use the jump-s tart connecâ
tion point in the engine compartment.
* NO
TEDama getothe battery from overâ
vo ltage When
charging using a bat tery charge r withâ
out a restriction of the maximum charging
vo ltage, the battery or the on-board electronâ
ics can be damaged. #
Only use battery charge rs with a maxiâ
mum charging voltage of 14.8 V. &
WARNING Risk ofexplosion from hydroâ
ge nga s igniting
There is a danger of hydrogen gas igniting
when charging the battery if there is a short
circuit or spar ksstart toform. #
Make sure that the positive term inal of
th e connected battery does not come
into conta ct withvehicle parts. #
Never place me tal objects or tools on a
batter y. #
The described order of the battery
clamps must be obser ved when conâ
necting and disconnecting the batter y. #
When giving starting assis tance, al ways
make sure that you on lyconnect batâ
te ry term inals with identical polarity. #
During starting assis tance, you must
obse rveth e described order for conâ
necting and disconnecting the jump
lead. #
Do not connect or disconnect the batâ
te ry cla mp s while the engine is running. 316
Breakdown assis tance
Page 320 of 469
&
WARNING Risk ofexplosion during
ch arging process and starting assis tance
During thech arging process and starting
assis tance, the battery may release an exploâ
sive gas mixture. #
Avoid fire , naked flames, creating
spar ksand smoking. #
Make sure there is suf ficient ventilaâ
tion. #
Do not lean over a batter y. &
WARNING Risk ofexplosion from a froâ
zen battery
A dischar ged battery may freeze at temp eraâ
tures slightly abo veor below freezing point.
During starting assis tance or battery chargâ
ing, bat tery gas can be released. #
Alw ays allow a battery tothaw before
ch arging it or per form ing starting assisâ
ta nce. If
th e indicator/warning lamps in the instrument
clus ter do not light up at low temp eratures, it is
ve ry likely that the dischar ged battery has froâ
zen. In this case you may neither jump-s tart the
ve hicle nor charge the batter y.
The service life of a battery that has been
th awe d may be dramatically shor tened. The
st arting characteristics may be impaired, espeâ
cially at low temp eratures.
It is recommended that you ha veathaw ed batâ
te ry checked at a qualified specialist workshop.
All vehicles
* NO
TEDama gecaused bynumerous or
ex tended attem ptsto start the engine Nume
rous or extended attem ptsto start the
engine may damage the catalytic con verter
due tonon-combu sted fuel. #
Avoid numerous and extended attem pts
to start the engine. Obser
vethefo llowing points during starting
assis tance and when charging the battery:
R Only use undamaged jump lead/charging
cables with a suf ficient cross-section and
insula tedte rm inal clamps.
R Non- insulated parts of thete rm inal clamps
must not come into con tact wi thother me tal
parts while the jump lead/charging cable is
connected tothe battery/jump-s tart connecâ
tion point.
R The jump lead/charging cable must not
come into contact wi thany parts which may
mo vewhen the engine is running.
R Alw ays make sure that nei ther you nor the
battery is elect rostatically charge d.
R Keep away from fire and naked flames.
R Do not lean overth e batter y.
Obser vethe additional following points when
ch arging the battery:
R Only use battery charge rs tested and
appr oved for Mercedes-Benz.
R Read the battery charge r's operating instrucâ
tions before charging the batter y. Breakdown assis
tance 317
Page 321 of 469
Obser
vethe additional following points during
st arting assistance:
R Starting assis tance may only be pr ovided
using vehicles, batteries or other jump start
devices with a nominal voltage of 12V.
R The vehicles must not touch.
R Vehicles with a petrol engine: jump-start
th eve hicle only when the engine and exhaust
sy stem are cold. St
arting assi stance and charging the12 V
battery Requ
irements:
R The vehicle is secured with the electric parkâ
ing brake.
R Vehicles with automatic transmission: the
transmission is in position j.
R The ignition and all electrical consumers are
switched off.
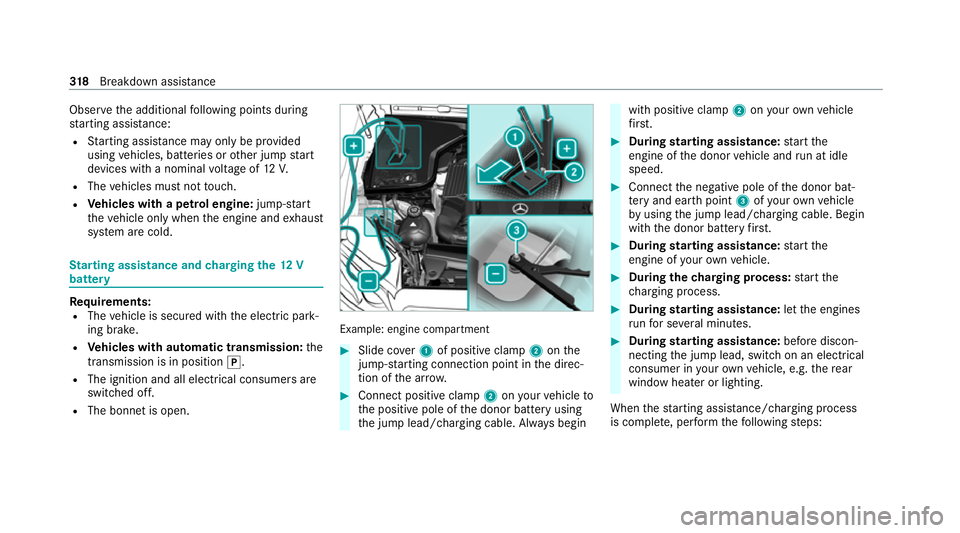
R The bonnet is open. Example: engine compartment
#
Slide co ver1 of positive clamp 2onthe
jump-s tarting connection point in the direcâ
tion of the ar row. #
Connect positive clamp 2onyour vehicle to
th e positive pole of the donor battery using
th e jump lead/charging cable. Alw ays begin with positive clamp
2onyour ow nve hicle
fi rs t. #
During starting assi stance: start the
engine of the donor vehicle and run at idle
speed. #
Connect the negative pole of the donor batâ
te ry and ear thpoint 3ofyour ow nve hicle
by using the jump lead/charging cable. Begin
with the donor battery firs t. #
During starting assi stance: start the
engine of your ow nve hicle. #
During thech arging process: start the
ch arging process. #
During starting assi stance: letthe engines
ru nfo r se veral minutes. #
During starting assi stance: before disconâ
necting the jump lead, switch on an electrical
consumer in your ow nve hicle, e.g. there ar
wind owheater or lighting.
When thest arting assis tance/charging process
is compl ete, per form thefo llowing steps: 318
Breakdown assis tance
Page 322 of 469
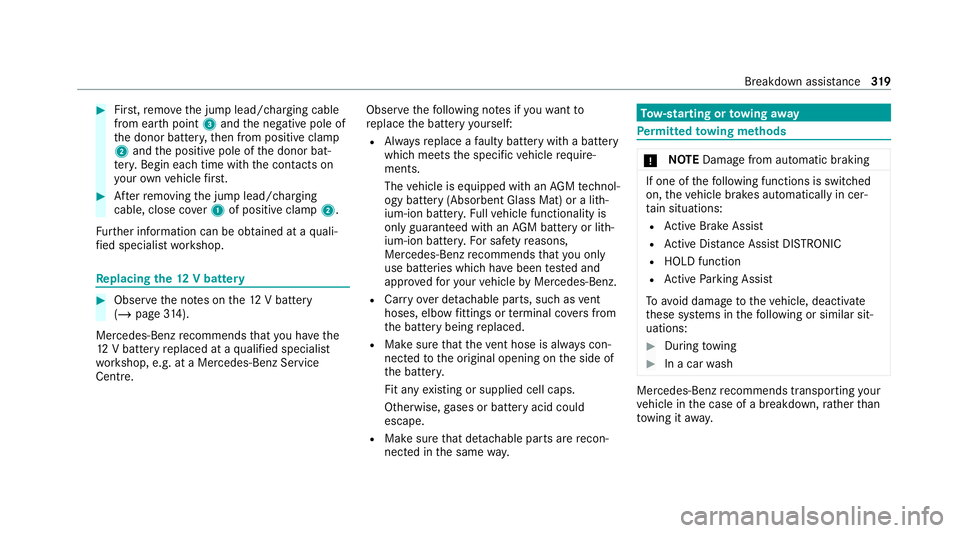
#
First,re mo vethe jump lead/charging cable
from ear thpoint 3and the negative pole of
th e donor batter y,then from positive clamp
2 and the positive pole of the donor batâ
te ry. Begin ea chtime wi th the conta cts on
yo ur ow nve hicle firs t. #
Afterre moving the jump lead/charging
cable, close co ver1 of positive clamp 2.
Fu rther information can be obtained at a qualiâ
fi ed specialist workshop. Re
placing the 12V battery #
Obser vethe no tes on the12 V battery
(/ page 314).
Me rcedes-Benz recommends that you ha vethe
12 V battery replaced at a qualified specialist
wo rkshop, e.g. at a Mercedes-Benz Service
Centre. Obser
vethefo llowing no tes if youwa ntto
re place the battery yourself:
R Alw aysre place a faulty bat tery with a battery
which meets the specific vehicle requireâ
ments.
The vehicle is equipped with an AGMtech nolâ
ogy battery (Absorbent Glass Mat) or a li thâ
ium-ion batter y.Fu llve hicle functionality is
only guaranteed with an AGM battery or lithâ
ium-ion batter y.Fo r saf etyre asons,
Mercedes-Benz recommends that you on ly
use bat teries which ha vebeen tested and
appr ovedfo ryo ur vehicle byMercedes-Benz.
R Carryove r de tach able parts, such as vent
hoses, elbow fittings or term inal co vers from
th e battery being replaced.
R Make sure that theve nt hose is al ways conâ
nected tothe original opening on the side of
th e batter y.
Fit any existing or supplied cell caps.
Otherwise, gases or battery acid could
escape.
R Make sure that de tach able parts are reconâ
nected in the same way. To
w- starting or towing away Pe
rm itted towing me thods *
NO
TEDama gefrom auto matic braking If one of
thefo llowing functions is switched
on, theve hicle brakes automatically in cerâ
ta in situations:
R Active Brake Assi st
R Active Dis tance Assi stDISTRONIC
R HOLD function
R Active Parking Assist
To avo id damage totheve hicle, deactivate
th ese sy stems in thefo llowing or similar sitâ
uations: #
During towing #
In a car wash Mercedes-Benz
recommends transporting your
ve hicle in the case of a breakdown, rath er than
to wing it away. Breakdown assis
tance 319
Page 406 of 469
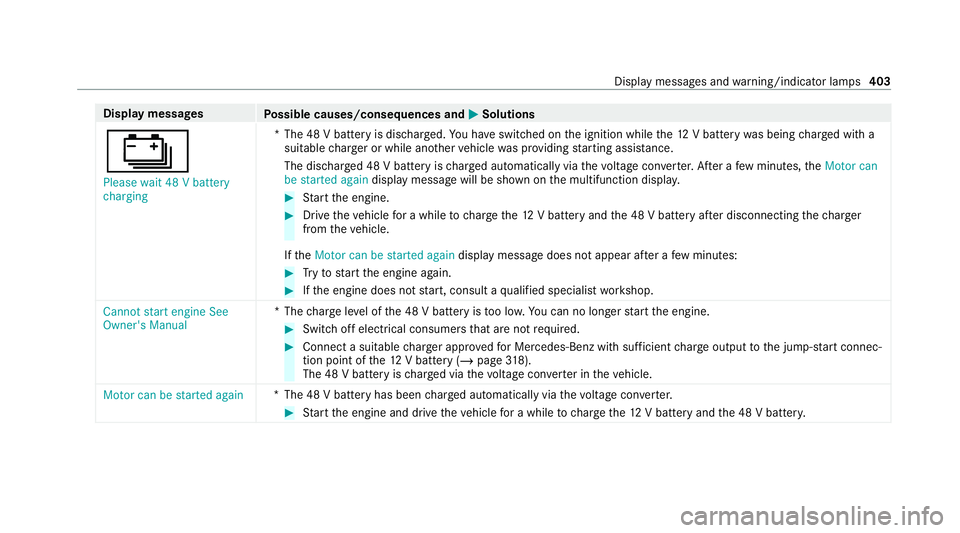
Display messages
Possible causes/consequences and M
MSolutions
Ă Please wait 48 V battery
charging *T
he 48 V battery is dischar ged. You ha veswitched on the ignition while the12 V battery was being charge d with a
suitable charge r or while ano ther vehicle was pr oviding starting assis tance.
The discha rged 48 V battery is charge d automatically via thevo ltage con verter. Af ter a few minutes, theMotor can
be started again display message will be shown on the multifunction displa y. #
Start the engine. #
Drive theve hicle for a while tocharge the12 V battery and the 48 V battery af ter disconnecting thech arger
from theve hicle.
If th eMotor can be started again display message does not appear af ter a few minutes: #
Tryto start the engine again. #
Ifth e engine does not start, consult a qualified specialist workshop.
Cannot start engine See
Owner's Manual *T
hecharge leve l of the 48 V battery is too lo w.You can no lon gerst art the engine. #
Switch off electrical consumers that are not required. #
Connect a suitable charge r appro vedfo r Mercedes-Benz with suf ficient charge output tothe jump-s tart connecâ
tion point of the12 V battery (/ page318).
The 48 V bat tery isch arge d via thevo ltage con verter in theve hicle.
Motor can be started again *T
he 48 V battery has been charge d automatically via thevo ltage con verter. #
Start the engine and drive theve hicle for a while tocharge the12 V battery and the 48 V batter y. Displ
aymessa ges and warning/indicator lamps 403
Page 449 of 469
Ionisation
Activating/deactivating (MBUX mulâ
timedia sy stem) ................................... 14 0
iPhone ÂŽ
see Smartphone integ ration
ISOFIX child seat securing sy stem
Fitting .................................................... 59
Seats suitable for attaching ................... 58 J
Jack Declaration of conformity ...................... 27
St orage location ..................................3 36
Jump-start connection ............................318
Gene ral no tes ...................................... 316K
Ke y.............................................................. 71
Ac oustic locking verification signal ........ 72
Battery ................................................... 73
Emergency key ...................................... 72
Energy consumption .............................. 72
Fe atures ................................................ 71
Ke yring attachment .............................. 72Overview ................................................
71
Problem .................................................74
Un locking setting .................................. .72
Ke y functions
Deactivating .......................................... 72
KEYLESS-GO Locking theve hicle ................................ 76
Problem .................................................76
Un locking setting .................................. .72
Un locking theve hicle ............................76
Kickd own.................................................1 65
Using ................................................... 16 5
Knee airbag ................................................ 42 L
Lamp see In terior lighting
Lamps (instrument display) see Warning/indicator lamps
Lane de tection (au tomatic)
see Active Lane Keeping Assist
Lane Keeping Assist
see Active Lane Keeping Assist Le
vel control sy stem
see AIR BODY CONT ROL
Light switch Overview ............................................ .120
Lighting see Interior lighting
see Lights
Lights ........................................................ 12 0
Ac tive headla mps ................................ 12 3
Ad aptive Highbeam Assist .................. .125
Ad aptive Highbeam Assist Plus .......... .126
Ad versewe ather light .......................... 12 5
Au tomatic driving lights ....................... 121
City lighting ........................................ .125
Combination switch ............................ .122
Cornering light ..................................... 12 3
Driving ab road (symm etrical low
beam) .................................................. 12 0
Fo g light (extended range) ................... 124
Haza rdwa rning lights .......................... 12 2
Headla mpflashing .............................. .122
High beam .......................................... .122
Intelligent Light Sy stem ....................... 12 3
Light switch ......................................... 12 0
Low beam ............................................1 20446
Index
Page 458 of 469
Closing ..................................................
87
Closing using theke y ............................ 85
Opening ................................................ .87
Opening with theke y ............................ .85
Problem .................................................89
Ra in-closing feature .............................. .88
Smartphone see Smartphone integration
see Telephone
Sma rtphone integ ration ......................... 279
Overview ............................................. 279
Snow chains ............................................ 327
Soc ket (12 V) ............................................ 11 5
Fr ont centre console ............................ 11 5
Soc ket (230 V) .......................................... 11 5
Re ar .................................................... .115
Software update System updates ................................... 259
Sound PRE-SAFE ÂŽ
Sound ................................. 49
Wheels and tyres ................................. 327
Sound menu Functions overview .............................. 290 Spare wheel
see Emer gency spa rewheel
Specific absor ption rate ........................... 24
Speed Limit Assist ..................................2 05
Fu nction/no tes ................................... 205
Setting .................................................2 06
Sy stem limitations ...............................2 05
Speed limit for winter tyres
Setting ................................................. 19 0
St andby mode
Ac tivating/deactivating ...................... .178
Fu nction ............................................... 178
St anding lights ........................................ 12 0
St art-off assi st
see Optimised acceleration
St art/s top button
Pa rking theve hicle .............................. 172
St arting theve hicle ............................. 14 9
Switching on the po wer supply or
ignition ................................................ 14 8
St art/s top function
see ECO start/ stop function St
arter battery
Charging (Remo teOnline) .................... 15 0
St arting assi stance
see Jump -sta rt connection
St arting the engine
see Vehicle
St arting-o ffaid
see Hill Start Assist
St ationary heater/ventilation
Displ ays (remo tecontrol) .................... 14 4
Problems (remo tecontrol) ................... 14 6
Re placing the battery (remo teconâ
trol) ...................................................... 14 5
Setting (MBUX multimedia sy stem) ..... 14 3
Setting (remo tecontrol) ...................... 14 3
Switching on/off (control panel) ......... 14 2
ST EER CONT ROL
Fu nction/no tes ................................... 183
Ste ering wheel ........................................ .245
Ad justing (electrically) ........................ .103
Ad justing (manually) ............................ 102
Buttons ................................................ 24 5
Care .................................................... 304
Operating the memory function ..........1 06 Index
455