oil reset MERCEDES-BENZ CLS SHOOTING BRAKE 2012 Owners Manual
[x] Cancel search | Manufacturer: MERCEDES-BENZ, Model Year: 2012, Model line: CLS SHOOTING BRAKE, Model: MERCEDES-BENZ CLS SHOOTING BRAKE 2012Pages: 405, PDF Size: 10.21 MB
Page 17 of 405
Luggage compartment enlarge-
ment
................................................... 294
Luggage compartment floor opening/closing ............................ 302
stowage well, unde r....................... 302
Luggage cover
Removing and fitting ......................298
Luggage holde r(EASY-PACK load-
securing kit) ...................................... .300
Lumbar support Adjusting ....................................... 104
Adjusting the 4-way lumba rsup-
por t................................................ 104
Luxu ry head restraint .......................101 M
M+S tyres ........................................... 356
Main-beam headlamps Display message ............................ 257
Switching Adaptive Highbeam
Assist on/off ................................. 121
Switching on/off ........................... 117
Massage function (PULSE) ...............103
Matt finish (cleaning instructions) ..327
Memory card (audio) .........................234
Memory function ............................... 111
Mercedes-Benz Service Centre see Qualified specialist workshop
Message memory (on-board com-
puter) ................................................. .249
Messages see Display messages
Mirror
see Vanity mirror (in sun visor)
Mirrors
see Exterior mirrors
see Rear-view mirror
Mobile phone
Frequencies ................................... 383
Installatio n..................................... 383
Menu (on-board computer) ............235
Notes/placing in the bracket ......... 309
Sliding adapter ............................... 311
Transmission output (maximum) .... 383
Modifying the programming (key) .....78
MOExtended tyres .............................337
Motorway mode ................................ 119MP3
Operating ...................................... .234
see Separate operating instructions
Multifunction display
Function/notes ............................. 229
Permanent displa y......................... 239
Multifunction steering wheel
Operating the on-board computer .228
Overview .......................................... 33 N
Navigation Menu (on-board computer) ............232
NECK-PRO head restraints
Operation ........................................ .46
Resetting after being triggered ........47
NECK-PRO luxury head restraints
Operation ........................................ .46
Resetting after being triggered ........48
Night View Assist Plus
Activating/deactivating .................206
Cleaning ......................................... 330
Function/notes ............................. 205
Problem (fault) ............................... 208
Notes on running in anew vehicle ..146 O
Occupant safety Childre ninthe vehicle ..................... 53
Important safety notes ....................40
Odometer
see Total distance recorder
see Trip meter
Oil
see Engine oil
On-board computer
AMG menu ..................................... 246
Assistance menu ........................... 236
Audi omenu ................................... 233
Convenience submenu ..................244
Displaying a service message ........324
Display messages ..........................249
DISTRONI CPLUS ........................... 183
Factory setting submenu ...............245
Heating submenu ........................... 243
Important safety notes ..................22614
Index
Page 20 of 405
Seats
Adjusting (electrically) ...................100
Adjusting lumba rsuppor t.............. 104
Adjusting the 4-way lumba rsup-
por t................................................ 104
Adjusting the head restraint ..........100
Cleaning the cover .........................331
Correct driver's seat position ........... 98
Important safety notes ....................99
Overview .......................................... 99
Seat heating problem ....................105
Seat ventilation problem ................105
Storing settings (memory func-
tion) ............................................... 111
Switching sea theating on/off .......104
Switching the sea tventilation on/
off .................................................. 105
Selector lever
Cleaning ......................................... 331
Sensors (cleaning instructions) .......328
Service see ASSYST PLUS
Service Centre
see Qualified specialist workshop
Service menu (on-board computer) .239
Service products Brake fluid ..................................... 392
Coolant (engine) ............................ 392
Engine oil ....................................... 391
Fuel ................................................ 386
Important safety notes ..................385
Washer fluid .................................. .393
Settings
Factory (on-board computer) .........245
On-board computer .......................239
Setting the air distribution ...............135
Setting the airflow ............................135
SETUP (on-board computer) .............246
Short journeys (diesel particle fil-
ter) ...................................................... 168
Sidebag ................................................ 45
Side lamps Switching on/off ........................... 116
Side windows
Convenience closing ........................90
Convenience opening ......................90
Important safety notes ....................89Opening/closing
.............................. 89
Problem (malfunction) .....................92
resetting .......................................... 91
Sliding sunroof
Important safety information ...........92
Opening/closing .............................. 93
Problem (malfunction) .....................95
Rain closing feature .........................93
Resetting ......................................... 93
Snow chains ...................................... 357
Socket Centre console .............................. 308
Luggage compartment ...................309
Rea rcompartmen t......................... 309
Under the armrest .........................308
Sockets
General notes ................................ 308
Spare wheel
Storing ........................................... 378
Specialist workshop ............................ 24
Spectacles compartment .................291
Speed, controlling see Cruise control
Spee dLimit Assist
Activating/deactivating the warn-
ing function .................................... 236
Displayin g...................................... 236
Display message ............................ 262
Display message in the multifunc-
tion displa y.................................... 204
Important safety notes ..................204
Speedometer
Digita l............................................ 231
In the Instrument cluster .........30, 227
Segments ...................................... 228
Selecting the unit of measure-
ment .............................................. 239
see Instrument cluster
SPEEDTRONIC
Deactivating variabl e..................... 176
Display message ............................ 267
Function/notes ............................. 174
Important safety notes ..................174
LIM indicator lamp .........................175
Permanent ..................................... 177
Selecting ........................................ 175
Storing the current spee d.............. 175
Variabl e......................................... 175 Index
17
Page 22 of 405
Temperature
Coolant .......................................... 228
Coolant (on-board computer) ......... 246
Engine oil (on-board computer) ...... 246
Outside temperature ..................... .228
Setting (climate control) ................134
TEMPOMAT
Function/notes ............................. 171
Theft-deterrent system
ATA (Anti-Theft Alarm system) .........72
Immobiliser ...................................... 72
Through-loading feature ...................293
Timing (RACETIMER) .........................246
Tiredness Assist see ATTENTION ASSIST
TIREFIT kit .......................................... 338
Top Tether ............................................ 57
Total distance recorder ....................230
Tow-away protection ..........................73
Towing Important safety notes ..................346
With the rear axle raised ................348
Towing atrailer
Activ eBlind Spot Assist .................215
Active Lane Keeping Assist ............217
Active Parking Assist .....................197
Axle load, permissible ....................398
Bulb failure indicator for LED
lamps ............................................. 223
ESP ®
(Electroni cStability Pro-
gram) ............................................... 69
Towing away
Fitting the towing eye. ...................347
Removing the towing eye. ..............348
With both axles on the ground .......348
Tow-starting
Emergency engine starting ............349
Important safety notes ..................346
Trailer
Display message ............................ 274
Trailer coupling
see Towing atrailer
Trailer towing
7-pin connector ............................. 223
Blind Spot Assist ............................ 210
Cleaning the trailer tow hitch ......... 329
Coupling up atrailer ...................... 221Decoupling
atrailer ....................... 221
Driving tips .................................... 219
Folding in the ball coupling ............221
Folding out the ball coupling ..........220
Important safety notes ..................217
Lights displa ymessage .................. 255
Mounting dimensions ....................396
Parktroni c...................................... 193
Power supply ................................. 222
Shift range ..................................... 157
Trailer loads ................................... 398
Transmission
see Automatic transmission
Transmission position display .........155
Transmission position display
(DIRECT SELECTl ever)...................... 155
Transporting the vehicle ..................349
Trim pieces (cleaning instructions) .331
Trip computer (on-board com-
puter) ................................................. .231
Trip meter Calling up ....................................... 230
Resetting (on-board computer) ......232
Turn signal
see Turn signals
Turn signals
Switching on/off ........................... 117
TV
Operating (on-board computer) .....234
see Separate operating instructions
Two-way radio
Frequencies ................................... 383
Installatio n..................................... 383
Transmission output (maximum) .... 383
Type identification plate
see Vehicle identification plate
Tyre pressure
Calling up (on-board computer) .....360
Display message ............................ 268
Not reached (TIREFIT) ....................339
Reached (TIREFIT) ..........................339
Recommended ............................... 357
Tyre pressure loss warning
Important safety notes ..................358
Restarting ...................................... 359 Index
19
Page 171 of 405
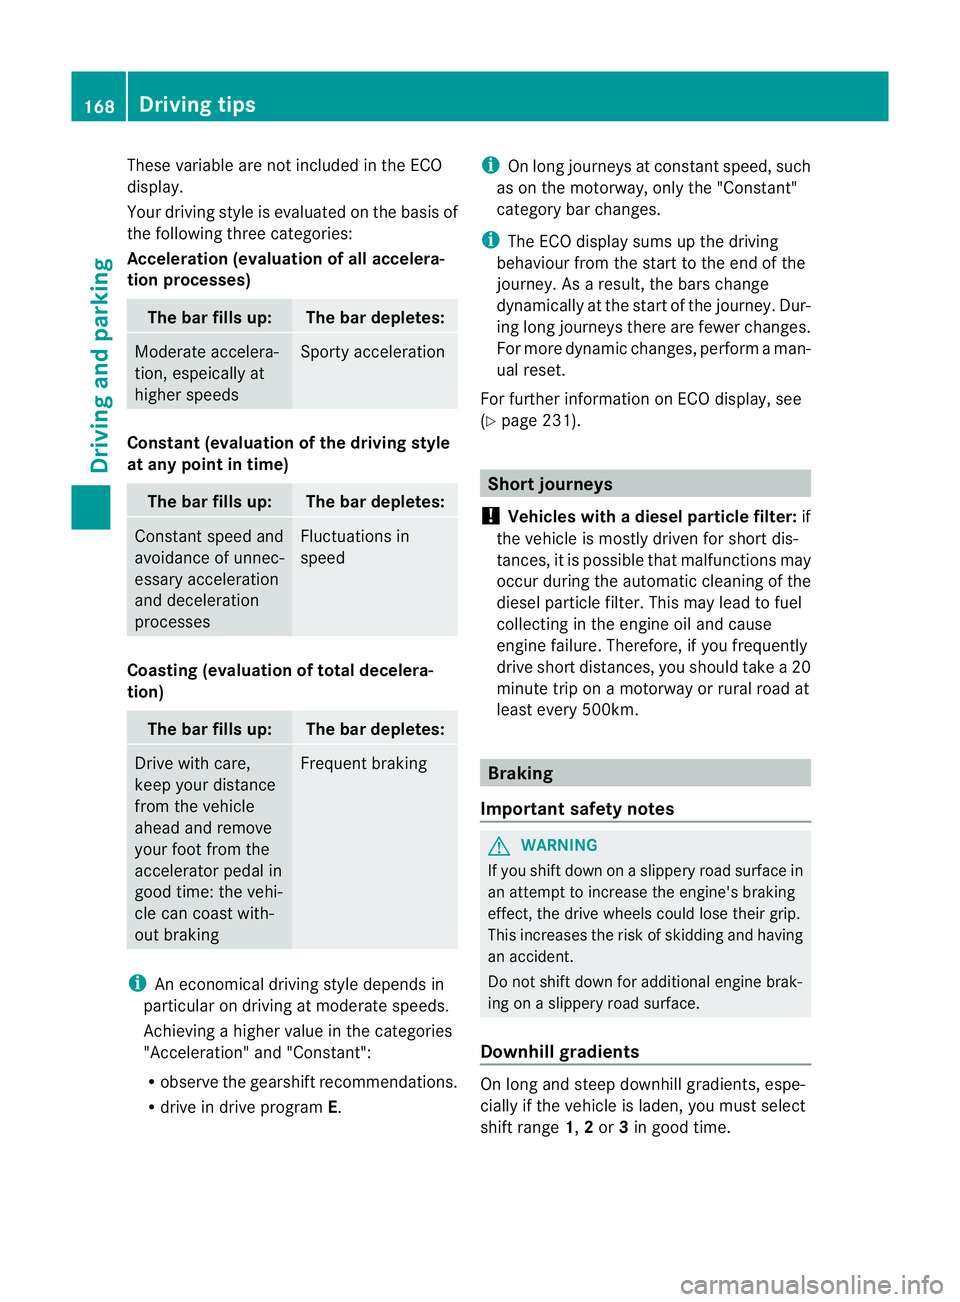
These variable are not included in the ECO
display.
Your driving style is evaluated on the basis of
the following three categories:
Acceleration (evaluation of all accelera-
tion processes) The bar fills up: The bar depletes:
Moderate accelera-
tion, espeically at
higher speeds Sporty acceleration
Constant (evaluation of the driving style
at any point in time)
The bar fills up: The bar depletes:
Constan
tspeed and
avoidance of unnec-
essary acceleration
and deceleration
processes Fluctuations in
speed
Coasting (evaluation of total decelera-
tion)
The bar fills up: The bar depletes:
Drive with care,
keep your distance
from the vehicle
ahead and remove
your foot from the
accelerator pedal in
good time: the vehi-
cle can coast with-
out braking Frequent braking
i
An economical driving style depends in
particular on driving at moderate speeds.
Achieving a higher value in the categories
"Acceleration" and "Constant":
R observe the gearshift recommendations.
R drive in drive program E.i
On long journeys at constan tspeed, such
as on the motorway, only the "Constant"
category bar changes.
i The ECO display sums up the driving
behaviour from the start to the end of the
journey. As a result, the bars change
dynamically at the start of the journey. Dur-
ing long journeys there are fewer changes.
For more dynamic changes, perfor maman-
ual reset.
For further informatio nonECO display, see
(Y page 231). Short journeys
! Vehicles with adiesel particle filter: if
the vehicle is mostly driven for short dis-
tances, it is possible that malfunctions may
occur during the automatic cleaning of the
diesel particle filter. This may lead to fuel
collecting in the engine oil and cause
engine failure. Therefore, if you frequently
drive short distances, you should take a 20
minute trip on a motorway or rural road at
least every 500km. Braking
Important safety notes G
WARNING
If you shift down on a slippery road surface in
an attempt to increase the engine's braking
effect, the drive wheels could lose their grip.
This increases the risk of skidding and having
an accident.
Do not shift down for additional engine brak-
ing on a slippery road surface.
Downhill gradients On long and steep downhill gradients, espe-
cially if the vehicle is laden, you must select
shift range 1,2or 3in good time. 168
Driving tipsDriving and parking
Page 327 of 405
The washer fluid reservoir is used for both the
windscreen washer system and the headlamp
cleaning system.
Further information on windscreen washer
fluid/antifreeze (Y
page 393).Service
ASSYST PLUS
Service messages The ASSYST PLUS service interval display
informs you of the next service due date.
Information on the type of service and service
intervals (see separate Service Booklet).
You can obtain further information from a
Mercedes-Benz Service Centre.
i
The ASSYST PLUS service interval display
does not show any information on the
engine oil level. Observe the notes on the
engine oil level (Y page 321).
The multifunction display shows a service
message for a few seconds, e.g.:
Next service A in .. days Service A due
Service A overdue by ... days
The letter indicates which service is due.
Astands for a minor service and
B for a major
service. A number or another letter may be
displayed after the letter .This figure indicates
any necessary additional maintenance work
to be performed.
If you notify a qualified specialist workshop of
this display, you will receive a statementon
the associated costs.
The ASSYST PLU Sservice interval display
does not take into accoun tany periods of
time during which the battery is disconnec-
ted. Maintaining the time-dependent service
schedule:
X
Note down the service due date displayed
in the multifunctio ndisplay before discon-
necting the battery.
or
X After reconnecting the battery, subtract
the battery disconnection periods fro mthe
service date shown on the display.
Hiding aservice message X
Press the %ora button on the steer-
ing wheel.
Displaying service messages X
Switch the ignitio non.
X Press the =or; button on the steer-
ing wheel to select the Serv. menu.
X Press the 9or: button to select the
ASSYST PLUS submenu and confirm with
a.
The service due date appears in the multi-
functio ndisplay.
Information about Service Resetting the ASSYST PLUS service inter-
val display
!
If the ASSYST PLUS service interval dis-
play has been inadvertently reset, this set-
ting can be corrected at a qualified special-
ist workshop.
Have service work carried out as described
in the Service Booklet. This may otherwise
lead to increased wear and damage to the
major assemblies or the vehicle.
Aq ualified specialist workshop, e.g. a
Mercedes-Ben zService Centre, will reset the
ASSYST PLUS service interval display after
the service work has been carried out. You
can also obtain further information on main-
tenance work, for example. 324
ServiceMaintenance and care