service indicator MERCEDES-BENZ CLS SHOOTING BRAKE 2012 Owners Manual
[x] Cancel search | Manufacturer: MERCEDES-BENZ, Model Year: 2012, Model line: CLS SHOOTING BRAKE, Model: MERCEDES-BENZ CLS SHOOTING BRAKE 2012Pages: 405, PDF Size: 10.21 MB
Page 20 of 405
Seats
Adjusting (electrically) ...................100
Adjusting lumba rsuppor t.............. 104
Adjusting the 4-way lumba rsup-
por t................................................ 104
Adjusting the head restraint ..........100
Cleaning the cover .........................331
Correct driver's seat position ........... 98
Important safety notes ....................99
Overview .......................................... 99
Seat heating problem ....................105
Seat ventilation problem ................105
Storing settings (memory func-
tion) ............................................... 111
Switching sea theating on/off .......104
Switching the sea tventilation on/
off .................................................. 105
Selector lever
Cleaning ......................................... 331
Sensors (cleaning instructions) .......328
Service see ASSYST PLUS
Service Centre
see Qualified specialist workshop
Service menu (on-board computer) .239
Service products Brake fluid ..................................... 392
Coolant (engine) ............................ 392
Engine oil ....................................... 391
Fuel ................................................ 386
Important safety notes ..................385
Washer fluid .................................. .393
Settings
Factory (on-board computer) .........245
On-board computer .......................239
Setting the air distribution ...............135
Setting the airflow ............................135
SETUP (on-board computer) .............246
Short journeys (diesel particle fil-
ter) ...................................................... 168
Sidebag ................................................ 45
Side lamps Switching on/off ........................... 116
Side windows
Convenience closing ........................90
Convenience opening ......................90
Important safety notes ....................89Opening/closing
.............................. 89
Problem (malfunction) .....................92
resetting .......................................... 91
Sliding sunroof
Important safety information ...........92
Opening/closing .............................. 93
Problem (malfunction) .....................95
Rain closing feature .........................93
Resetting ......................................... 93
Snow chains ...................................... 357
Socket Centre console .............................. 308
Luggage compartment ...................309
Rea rcompartmen t......................... 309
Under the armrest .........................308
Sockets
General notes ................................ 308
Spare wheel
Storing ........................................... 378
Specialist workshop ............................ 24
Spectacles compartment .................291
Speed, controlling see Cruise control
Spee dLimit Assist
Activating/deactivating the warn-
ing function .................................... 236
Displayin g...................................... 236
Display message ............................ 262
Display message in the multifunc-
tion displa y.................................... 204
Important safety notes ..................204
Speedometer
Digita l............................................ 231
In the Instrument cluster .........30, 227
Segments ...................................... 228
Selecting the unit of measure-
ment .............................................. 239
see Instrument cluster
SPEEDTRONIC
Deactivating variabl e..................... 176
Display message ............................ 267
Function/notes ............................. 174
Important safety notes ..................174
LIM indicator lamp .........................175
Permanent ..................................... 177
Selecting ........................................ 175
Storing the current spee d.............. 175
Variabl e......................................... 175 Index
17
Page 23 of 405
Tyre pressure monitor
Checking the tyre pressure elec-
tronically ........................................ 360
Function/notes ............................. 360
Restarting ...................................... 361
Warning lamp ................................. 288
Warning message .......................... 361
Tyres
Changing awheel .......................... 362
Checking ........................................ 355
Direction of rotatio n...................... 362
Display message ............................ 268
Important safety notes ..................354
MOExtended tyres .........................356
Replacing ....................................... 362
Service life ..................................... 355
Storing ........................................... 363
Tyr esize (data) .............................. 367
Tyr etread ...................................... 355
see Flat tyre U
Unladen weight ................................. 394
Unlocking Emergency unlocking .......................84
From inside the vehicle (central
unlocking button) ............................. 83V
Vanity mirror (in sun visor) ..............305
Variable SPEEDTRONIC see SPEEDTRONIC
Vehicle
Correct use ...................................... 25
Data acquisition ............................... 25
Display message ............................ 272
Electronics ..................................... 383
Equipment ....................................... 23
Implied warranty .............................. 25
Individua lsettings .......................... 239
Leaving parked up .........................167
Locking (in an emergency) ...............84
Locking (key )................................... 77
Lowering ........................................ 366
Pulling away ................................... 149
Raising ........................................... 364
Registration ..................................... 24Securing from rolling away
............363
Towing away .................................. 346
Transporting .................................. 349
Unlocking (in an emergency) ...........84
Unlocking (key )................................ 77
Vehicle data ................................... 394
Vehicle data ....................................... 394
Vehicle dimensions ...........................394
Vehicle emergency locking ................84
Vehicle identification number see VIN
Vehicle identification plate ..............384
Vehicle level AIRMATIC ...................................... 188
AMG RIDE CONTROL sports sus-
pension .......................................... 190
Vehicle level (display message) .......261
Vehicle tool kit .................................. 335
Vehicle weights ................................. 394
Video Operating the DVD ......................... 234
VIN ...................................................... 384 W
Warning and indicator lamps ABS ................................................ 279
Brakes ........................................... 278
Distance warning signa l................. 287
ESP ®
.............................................. 281
ESP ®
OFF ....................................... 282
Fuel tank ........................................ 285
LIM (cruise control) ........................ 172
LIM (DISTRONIC PLUS) ..................178
LIM (variable SPEEDTRONIC) .........175
Overview .................................. 32, 276
PASSENGER AIRBAG OFF ................55
Reserve fuel ................................... 285
Seat bel t........................................ 277
SRS ................................................ 284
Tyr ep ressure monitor ...................288
Warning triangle ................................ 334
Washer fluid Display message ............................ 275
Wheel bol ttightening torque ...........366
Wheel chock ...................................... 36320
Index
Page 55 of 405
Rear seat belt status indicator
Rear sea
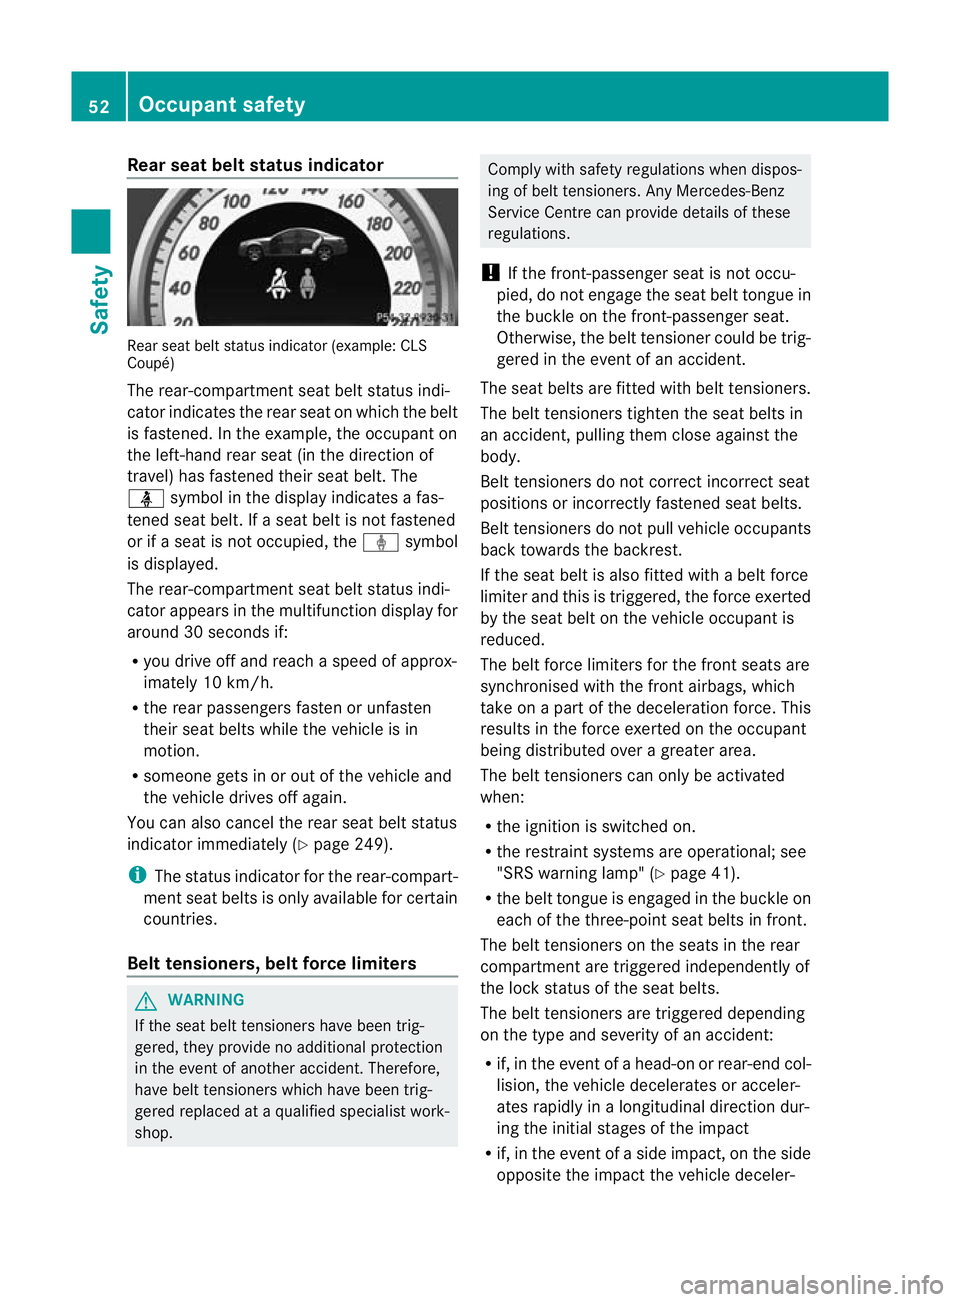
tbelt status indicato r(example: CLS
Coupé)
The rear-compartment seat belt status indi-
cator indicates the rear seat on which the belt
is fastened. In the example, the occupant on
the left-hand rear seat (in the direction of
travel) has fastened their seat belt. The
ü symbol in the display indicates a fas-
tened seat belt. If a seat belt is not fastened
or if a seat is not occupied, the ýsymbol
is displayed.
The rear-compartment seat belt status indi-
cator appears in the multifunction display for
around 30 seconds if:
R you drive off and reach a speed of approx-
imately 10 km/h.
R the rear passengers fasten or unfasten
their seat belts while the vehicle is in
motion.
R someone gets in or out of the vehicle and
the vehicle drives off again.
You can also cancel the rear seat belt status
indicato rimmediately (Y page 249).
i The status indicator for the rear-compart-
ment seat belts is only available for certain
countries.
Belt tensioners, beltf orce limitersG
WARNING
If the seat belt tensioners have been trig-
gered, they provide no additional protection
in the event of another accident. Therefore,
have belt tensioners which have been trig-
gered replaced at a qualified specialist work-
shop. Comply with safety regulations when dispos-
ing of belt tensioners. Any Mercedes-Benz
Service Centre can provide details of these
regulations.
! If the front-passenger seat is not occu-
pied, do no tengage the sea tbelt tongue in
the buckle on the front-passenger seat.
Otherwise, the belt tensioner could be trig-
gered in the event of an accident.
The seat belts are fitted with belt tensioners.
The belt tensioners tighten the seat belts in
an accident, pulling them close against the
body.
Belt tensioners do not correct incorrect seat
positions or incorrectly fastened seat belts.
Belt tensioners do not pull vehicle occupants
back towards the backrest.
If the seat belt is also fitted with a belt force
limiter and this is triggered, the force exerted
by the seat belt on the vehicle occupan tis
reduced.
The belt force limiters for the front seats are
synchronised with the front airbags, which
take on a part of the deceleration force. This
results in the force exerted on the occupant
being distributed over a greater area.
The beltt ensioners can only be activated
when:
R the ignition is switched on.
R the restraint systems are operational; see
"SRS warning lamp" (Y page 41).
R the belt tongue is engaged in the buckle on
each of the three-point seat belts in front.
The belt tensioners on the seats in the rear
compartment are triggered independently of
the lock status of the seat belts.
The belt tensioners are triggered depending
on the type and severity of an accident:
R if, in the event of a head-on or rear-end col-
lision, the vehicle decelerates or acceler-
ates rapidly in a longitudinal direction dur-
ing the initial stages of the impact
R if, in the event of a side impact, on the side
opposite the impact the vehicle deceler- 52
Occupant safetySafety
Page 57 of 405
Observe the general notes on the HOLD func-
tion, which can be found under the same key-
word. G
WARNING
Unsecured or incorrectly positioned loads
increase the risk of injury for children and all
other occupants in the event of:
R an accident
R sudden braking
R a sudden change of direction
Do not transport heavy or hard objects in the
vehicle interior unless they are secured. You
will find further information under "Loading
guidelines" in the index.
If a child is travelling in your vehicle, secure
the child using a child restraint system which
is recommended for Mercedes-Benz vehicles.
The child restraint system must be appropri-
ate to the age, weight and size of the child.
Ideally the child restraint system should be
installed on a suitable rear seat. Make sure
that the child is secured for the trip.
Mercedes-Benz recommends that you use
the listed child restraint systems
(Y page 61). You can obtain further infor-
mation aboutt he correct child restraint sys-
tem from any Mercedes-Benz Service Centre.
i It is advisable to use Mercedes-Ben zcare
products to clean child restraint systems.
You can obtain informatio nabout this at
any Mercedes-Benz Service Centre.
Child restraint system on the front-
passenger seat G
WARNING
If the front-passenger airbag is not disabled:
R a child secured in a child restraint system
on the front-passenger seat could be seri-
ously and even fatally injured by the front-
passenger airbag deploying. This is espe-
cially a risk if the child is in the immediate vicinity of the front-passenger airbag when
it deploys.
R never secure a child on the front-passenger
seat in a rearward-facing child restraint sys-
tem. Only secure a rearward-facing child
restraint system on a suitable rear seat.
R always move the front-passenger seat to
the rearmos tposition if you secure a child
in a forward-facing child restraint system
on the front-passenger seat.
The front-passenger airbag is not disabled:
R on vehicles without automatic child seat
recognition on the front-passenger seat
R in vehicles with automatic child seat rec-
ognition in the front-passenger seat, if no
special child restraint system with trans-
ponders for automatic child seat recogni-
tion in the front-passenger seat has been
fitted
R on vehicles with automatic child seat rec-
ognition on the front-passenger seat, if the
PASSENGER AIRBAG OFF indicator lamp
4 is not lit.
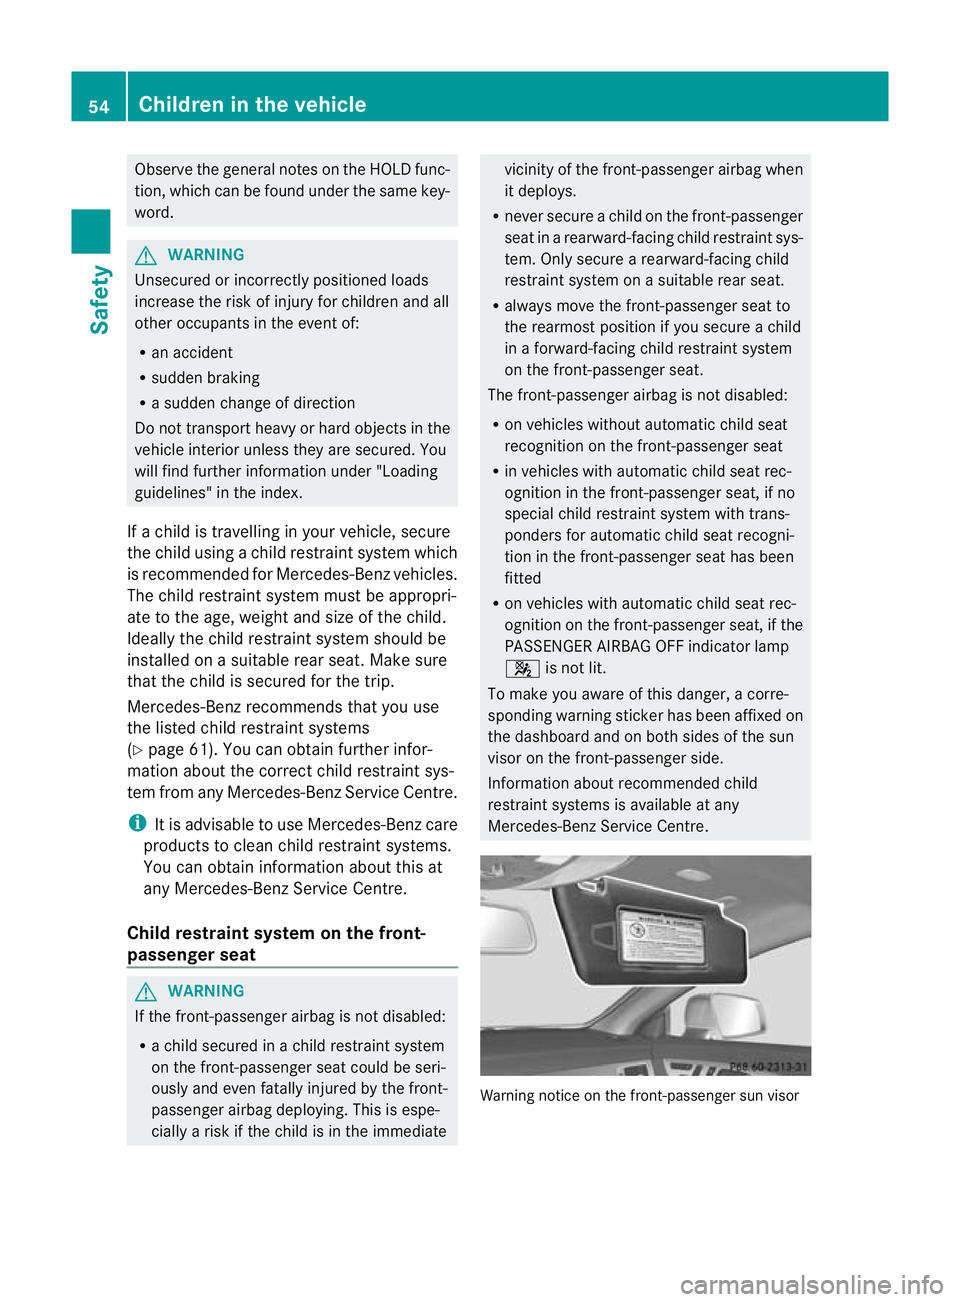
To make you aware of this danger, a corre-
sponding warning sticker has been affixed on
the dashboard and on both sides of the sun
visor on the front-passenger side.
Information about recommended child
restraint systems is available at any
Mercedes-Benz Service Centre. Warning notice on the front-passenger sun visor54
Children in the vehicleSafety
Page 169 of 405
Switching off the engine
Vehicles with automatic transmission X
Firmly depress the parking brake.
X All vehicles (except AMG vehicles): shift
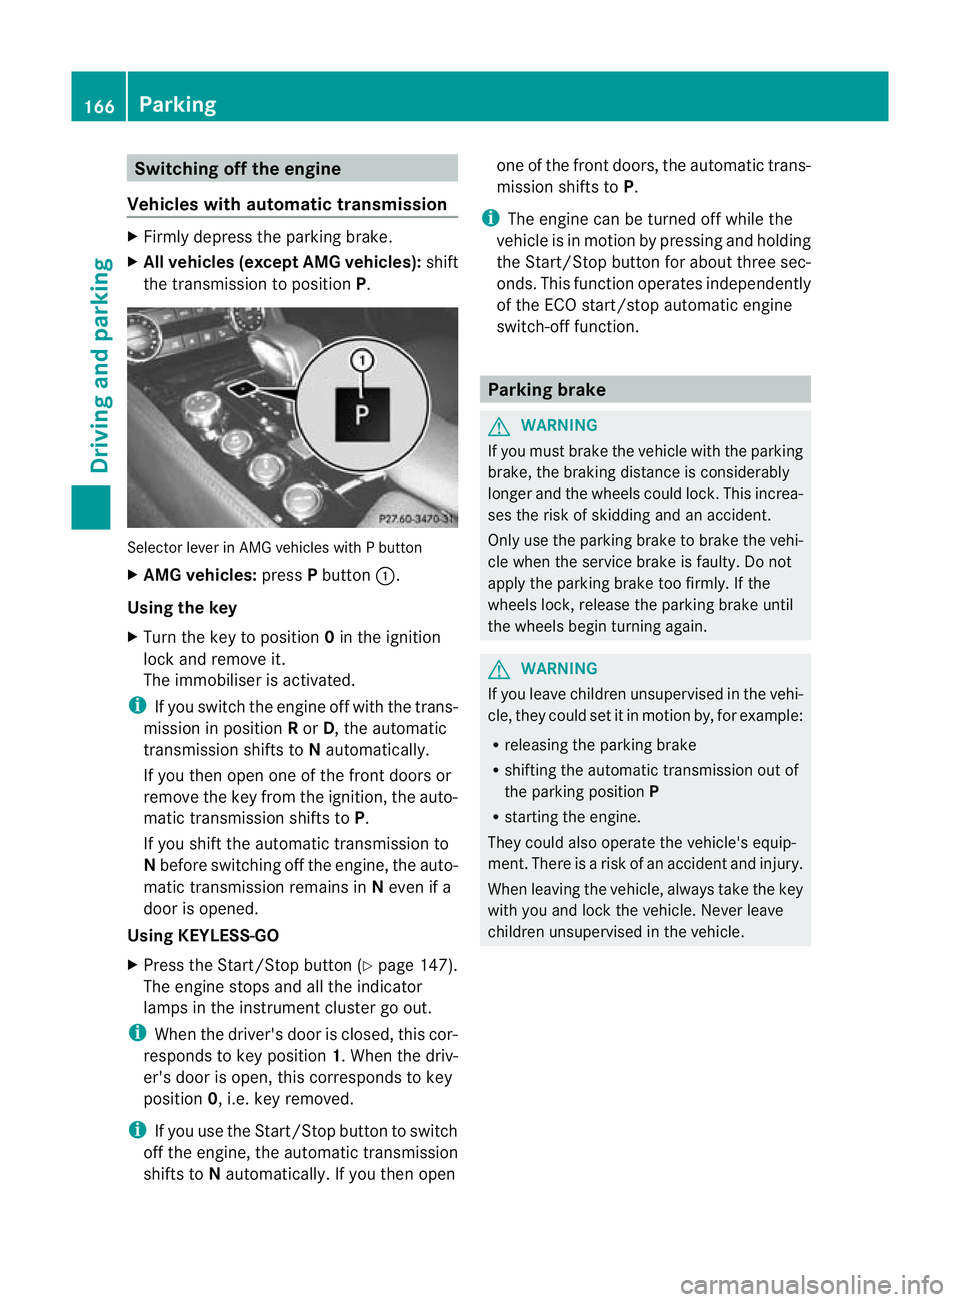
the transmission to position P.Selector lever in AMG vehicles with P button
X AMG vehicles: pressPbutton :.
Using the key
X Turn the key to position 0in the ignition
lock and remove it.
The immobiliser is activated.
i If you switch the engine off with the trans-
mission in position Ror D, the automatic
transmission shifts to Nautomatically.
If you then open one of the front doors or
remove the key from the ignition, the auto-
matic transmission shifts to P.
If you shift the automatic transmission to
N before switching off the engine, the auto-
matic transmission remains in Neven if a
door is opened.
Using KEYLESS-GO
X Press the Start/Stop button (Y page 147).
The engine stops and all the indicator
lamps in the instrumen tcluster go out.
i When the driver's door is closed, this cor-
responds to key position 1. When the driv-
er's door is open, this corresponds to key
position 0, i.e. key removed.
i If you use the Start/Stop button to switch
off the engine, the automatic transmission
shifts to Nautomatically. If you the nopen one of the fron
tdoors, the automatic trans-
mission shifts to P.
i The engine can be turned off while the
vehicle is in motion by pressing and holding
the Start/Stop button for about three sec-
onds. This function operates independently
of the ECO start/stop automatic engine
switch-off function. Parking brake
G
WARNING
If you must brake the vehicle with the parking
brake, the braking distance is considerably
longer and the wheels could lock. This increa-
ses the risk of skidding and an accident.
Only use the parking brake to brake the vehi-
cle when the service brake is faulty. Do not
apply the parking brake too firmly. If the
wheels lock, release the parking brake until
the wheels begin turning again. G
WARNING
If you leave children unsupervised in the vehi-
cle, they could set it in motion by, for example:
R releasing the parking brake
R shifting the automatic transmission out of
the parking position P
R starting the engine.
They could also operate the vehicle's equip-
ment.T here is a risk of an accident and injury.
When leaving the vehicle, always take the key
with you and lock the vehicle. Never leave
children unsupervised in the vehicle. 166
ParkingDriving and parking
Page 345 of 405
Observe the service intervals in the Service
Booklet or contact a qualified specialist
workshop for more information.
! You should have all work involving the
battery carried out at aqualified specialist
workshop. In the exceptional case that it is
necessary for you to disconnect the battery
yourself, make sure that:
R you switch off the engine and remove the
key. On vehicles with KEYLESS-GO,
ensure that the ignition is switched off.
Chec kthat all the indicator lamps in the
instrument cluster are off. Otherwise,
electronic components, such as the
alternator, may be damaged.
R you first remove the negative terminal
clamp and then the positive terminal
clamp. Never swap the terminal clamps.
Otherwise, the vehicle's electronic sys-
tem may be damaged.
R in vehicles with automatic transmission,
the transmission is locked in position P
after disconnecting the battery. The vehi-
cle is secured against rolling away.Y ou
can then no longer move the vehicle.
The battery and the cover of the positive
terminal clamp must be fitted securely dur-
ing operation.
Comply with safety precautions and take pro-
tective measures when handling batteries. WARNING
Fire, naked flames and smoking
are prohibited when handling the
battery. Avoid creating sparks.
Battery acid is caustic. Avoid con-
tact with the skin, eyes or clothing.
Wear suitable protective clothing,
in particular gloves, an apron and
a face mask.
Immediately rinse acid splashes
off with clean water. Consult a doc-
tor if necessary. Wear eye protection.
Keep children away.
Observe this Owner's Manual.
For safety reasons, Mercedes-Benz recom-
mends that you only use batteries which have
been tested and approved for your vehicle by
Mercedes-Benz. These batteries provide
increased impact protection to prevent vehi-
cle occupants from suffering acid burns
should the battery be damaged in the event
of an accident.
In order for the battery to achieve the maxi-
mum possible service life, it must always be
sufficiently charged.
The vehicle battery, like other batteries, can
discharge over time if you do not use the
vehicle. In such cases, have the battery dis-
connected at a qualified specialist workshop.
You can also charge the battery with a
charger recommended by Mercedes-Benz.
For more information, please contact a quali-
fied specialist workshop.
Have the battery charge checked more fre-
quently if you use the vehicle mainly for short
trips or if you leave it standing idle for a
lengthy period. Consult a qualified specialist
workshop if you wish to leave your vehicle
parked up for a long period of time.
i When you park the vehicle, remove the
key if you do not require any electrical con-
sumers. The vehicle will then use very little
energy, thus conserving battery power.
i If the power supply has been interrupted,
e.g. if the battery was discharged, you will
have to:
R set the clock. Information on setting the
clock can be found in the separate oper-
ating instructions. 342
Battery (vehicle)Breakdown assistance
Page 346 of 405
On vehicles with COMAND Online and a
navigation system, the clock is set auto-
matically.
R reset the function for folding the exterior
mirrors in/out automatically, by folding
the mirrors out once (Y page 109).Charging the battery
G
WARNING
During charging and jump-starting, explosive
gases can escape from the battery. There is a
risk of an explosion.
Particularly avoid fire, naked flames, creating
sparks and smoking. Ensure there is sufficient
ventilation while charging and jump-starting.
Do not lean over a battery. G
WARNING
Battery acid is caustic. There is a risk of injury.
Avoid contact with the skin, eyes or clothing.
Do not inhale any battery gases. Do not lean
over the battery. Keep children away from
batteries. Wash battery acid immediately with
water and seek medical attention. G
WARNING
A discharged battery can freeze at tempera-
tures below freezing point. When jump-start-
ing the vehicle or charging the battery, gases
can escape from the battery. There is a risk of
an explosion.
Allow the frozen battery to thaw out before
charging it or jump-starting.
! Only use battery chargers with a maxi-
mum charging voltage of 14.8 V.
! Only charge the battery using the jump-
start connection point.
The jump-starting connection point is in the
engine compartment (Y page 344).
If, at low temperatures, the indicator lamps/
warning lamps in the instrument cluster do
not light up, it is highly likely that the dis-
charged battery has frozen. In this case, you may neither charge the battery nor jump-start
the vehicle. The service life of a thawed-out
battery may be shorter. Starting characteris-
tics are particularly impaired at low tempera-
tures. Have the thawed-out battery checked
at a qualified specialist workshop.
Never charge a battery which is still fitted in
the vehicle unless a Mercedes-Benz approved
battery charger is being used.
Abattery
charge runit specially adapted for Mercedes-
Benz vehicles and tested and approved by
Mercedes-Benz is available as an accessory.
It permits the charging of the battery in its
installed position. Contact a Mercedes-Benz
Service Centre for informatio nand availabil-
ity .R ead the battery charger's operating
instructions before chargin gthe battery.
X Open the bonnet (Y page 320).
X Connect the battery charger to the positive
terminal and earth point in the same order
as when connecting the donor battery in
the jump-starting procedure
(Y page 344). Battery (vehicle)
343Breakdown assistance Z
Page 353 of 405
Electrical fuses
Important safety notes
G
WARNING
Only use fuses that have been approved for
Mercedes-Ben zvehicles and which have the
correct fuse rating for the systems con-
cerned. Do not attempt to repair or bridge
faulty fuses. Using fuses which have not been
approved or attempting to repair or bridge
faulty fuses could cause the fuse to be over-
loaded and result in a fire. Have the cause
traced and rectified at a qualified specialist
workshop.
! Only use fuses that have been approved
for Mercedes-Benz vehicles and which
have the correct fuse rating for the system
concerned. Otherwise, components or sys-
tems could be damaged.
The fuses in your vehicle serve to close down
faulty circuits. If afuse blows, all the compo-
nents on the circuit and their functions stop
operating.
Blown fuses must be replace dwith fuses of
the same rating, which you can recognise by
the colour and fuse rating. The fuse ratings
are listed in the fuse allocation chart.
If the newly inserted fuse also blows, have the
cause traced and rectified at a qualified spe-
cialist workshop, e.g. a Mercedes-Benz
Service Centre. Before replacing a fuse
X Secure the vehicle against rolling away
(Y page 165).
X Switch off all electrical consumers.
X Turn the key to position 0in the ignition
lock and remove it (Y page 147).
or
X On vehicles with KEYLESS-GO, make sure
the ignition is switched off (Y page 147).
All indicator lamps in the instrumen tcluster
must be off. The fuses are located in various fuse boxes:
R
fuse box in the engine compartmen tonthe
left-hand side of the vehicle, when viewed
in the direction of travel
R CLS Coupé: fuse box in the boot on the
right-hand side of the vehicle, when viewed
in the direction of travel
R CLS Shooting Brake: fuse box in the lug-
gage compartmentont he right-hand side
of the vehicle, when viewed in the direction
of travel
CLS Coupé: the fuse allocation chart is loca-
ted in the vehicle tool kit in the stowage com-
partment under the boot floor (Y page 335).
CLS Shooting Brake: the fuse allocation
chart is located in the vehicle tool kit in the
stowage compartmentu nderthe luggage
compartment floor (Y page 335). Fuse box in the engine compartment
G
WARNING
Make sure that the windscreen wipers are
turned off and the key is pulled out of the igni-
tion lock before you open the cover of the fuse
box. Otherwise, the windscreen wipers and
the wiper rods above the cover could be set
in motion. This could lead to you or others
being injured by the wiper rods.
! Make sure that no moisture can enter the
fuse box when the cover is open.
! When closing the cover, make sure that it
is lying correctly on the fuse box. Moisture
seeping in or dirt could otherwise impair
the operation of the fuses.
X Make sure that the windscreen wipers are
switched off.
X Open the bonnet. 350
Electrical fusesBreakdown assistance