ECU MERCEDES-BENZ E-Class 2016 W213 Comand Manual
[x] Cancel search | Manufacturer: MERCEDES-BENZ, Model Year: 2016, Model line: E-Class, Model: MERCEDES-BENZ E-Class 2016 W213Pages: 246, PDF Size: 6.7 MB
Page 168 of 246
Your COMANDequipment
These operatin ginstruction sdescribe all
standar dan doptional equipmen tavailable
fo ryour COMAN Dsyste mat th etime of pur -
chase. Country-specifi cdifference sare pos -
sible. Please note that your COMAN Dsyste m
may no tbe equipped wit hall th efeature s
described .Thi salso applies to safety-relevan t
systems an dfunctions. Therefore, th eequip -
men ton your COMAN Dsyste mmay diffe r
from that in th edescription san dillustrations.
Should you hav ean yquestion sconcernin g
equipmen tan doperation ,pleas econsult an
authorized Mercedes-Ben zCenter.
Switchin gon th eradi o
XPress th e$ button.
The radio display appears .You will hear th e
last station playe don th elast waveban d
selected.
Switching HD Radi oon/of f
XIn radio mode: slid e6 thecontroller .
XSelectOption s.
XBy selecting Oorª befor eHDRadi o,you
determin ewhether HD radio is switched on
or off.
If HD radio is switched off, th esyste mdoe s
no tswitch to digita lradio an dit is no tpossible
to selec tan ysub-channels.
iHD Radio ™Technology Manufactured
Under License From iBiquit yDigital Corp.
U.S. an dForeign Patents .The HD an dHD
Radio logos are proprietary trademark sof
iBiquit yDigital Corp.
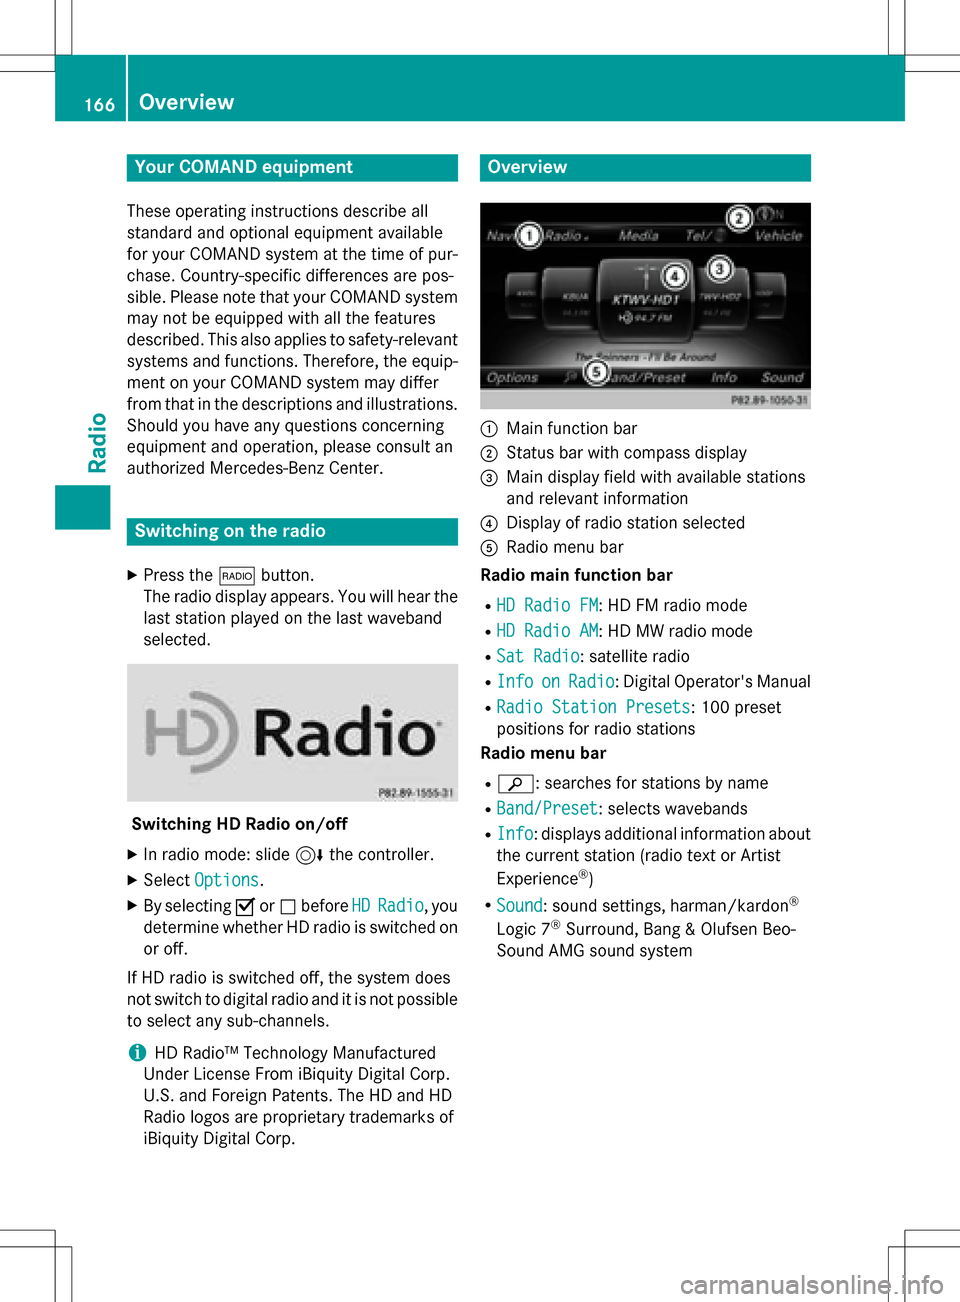
Overview
:Main function bar
;Status bar wit hcompass display
=Main display field wit havailable station s
an drelevant information
?Display of radio station selecte d
ARadio menubar
Radi omain function ba r
RHD RadioFM:HD FM radio mode
RHD Radi oAM:HD MW radio mode
RSa tRadi o:satellite radio
RInfoonRadi o:Digital Operator's Manual
RRadio Statio nPreset s:10 0preset
position sfo rradio station s
Radi omenu ba r
Rè:searches fo rstation sby name
RBand/Prese t:selects wavebands
RInfo:displays additional information about
th ecurren tstation (radio text or Artist
Experience
®)
RSoun d:soun dsettings, harman/kardon®
Logic 7®Surround ,Ban g & Olufsen Beo-
Sound AM Gsoun dsyste m
166Overview
Radio
Page 184 of 246
CRemaining playingtime of th ecurren t
track
DElapse dplaybac ktime for th ecurren t
track
EGraphic time display
FAlbum cover (if available)
Inserting and removing adis c fr om
th esingle CD/DVD dr ive
XTo insert:press theþ buttonon th e
single drive.
If there is adisc already inserted, it will be
ejected.
XInser t adisc into th edisc slot wit hth eprin-
te dside facin gupwards.
The drive closes and th edisc is played .
If th eCD/DV Dis operate din Medi amode,
th ecorrespondin gbasic men uwill be
shown. If th eCD/DV Dis started usin g
another application (e.g. navigation), th e
display will no tchange.
iThe drive may no tbe able to play disc s
wit hcopy protection .
XTo remove:press theþ button.
The drive ejects th edisc .
XRemove th eejecte ddisc from th eslot .
If you do no ttak eth edisc out of th eslot ,it
is draw nin again automatically after ashort
while .
Inserting discs int oth eDVD changer
The DV Dchanger has amagazine wit hsix
trays.
XTo inser tth eCD/DVD int oth emaga-
zin etray :press th eV button.
The magazine men uappears.
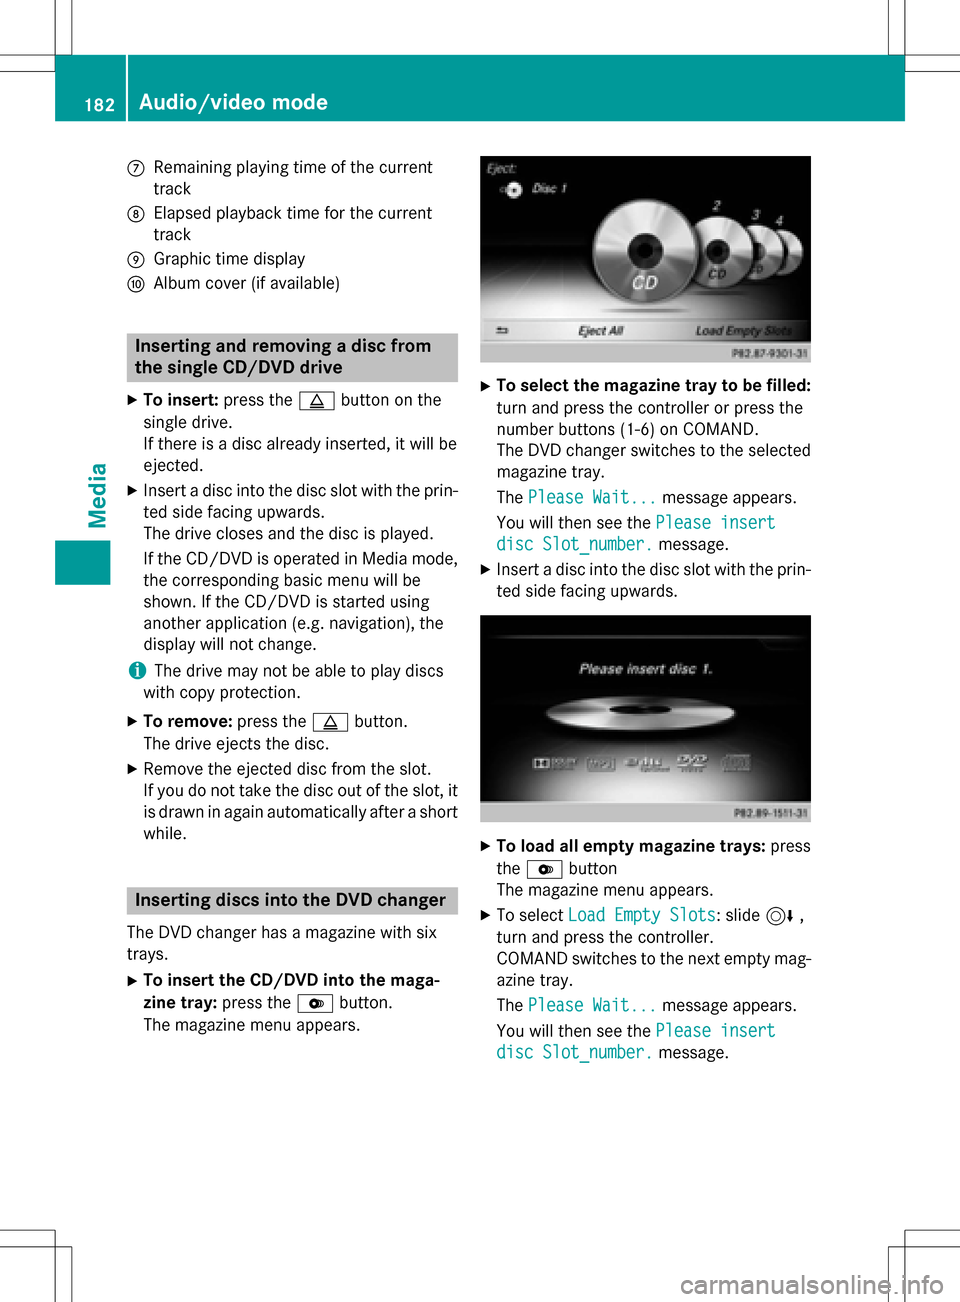
XTo select th emagazine tray to be filled:
tur nand press th econtroller or press th e
number buttons (1-6) on COMAND .
The DV Dchanger switches to th eselected
magazine tray.
The Please Wait.. .
message appears.
You will then see th ePlease insert
dis cSlot_number.message .
XInsert adisc into th edisc slot wit hth eprin-
te dside facin gupwards.
XTo load all empt ymagazine trays: press
th eV button
The magazine men uappears.
XTo select LoadEmpty Slots:slid e6 ,
tur nand press th econtroller .
COMAND switches to th enext empty mag -
azine tray.
The Please Wait.. .
message appears.
You will then see th ePlease insert
dis cSlot_number.message .
182Audio/video mode
Media
Page 185 of 246
XInsert a disc into the disc slot with the prin-
ted side facing upwards.
Once the disc is loaded, the DVD changer
switches to the next empty tray.
XRepeat these steps until all magazine trays
are filled.
The DVD changer plays the last inserted
disc.
XTo exit the DVD changer menu:press the
V button.
Ejecting discs from the DVD changer
i
If you remove one disc while playing
another disc, the DVD changer interrupts
playback. Playback continues once the disc has been ejected.
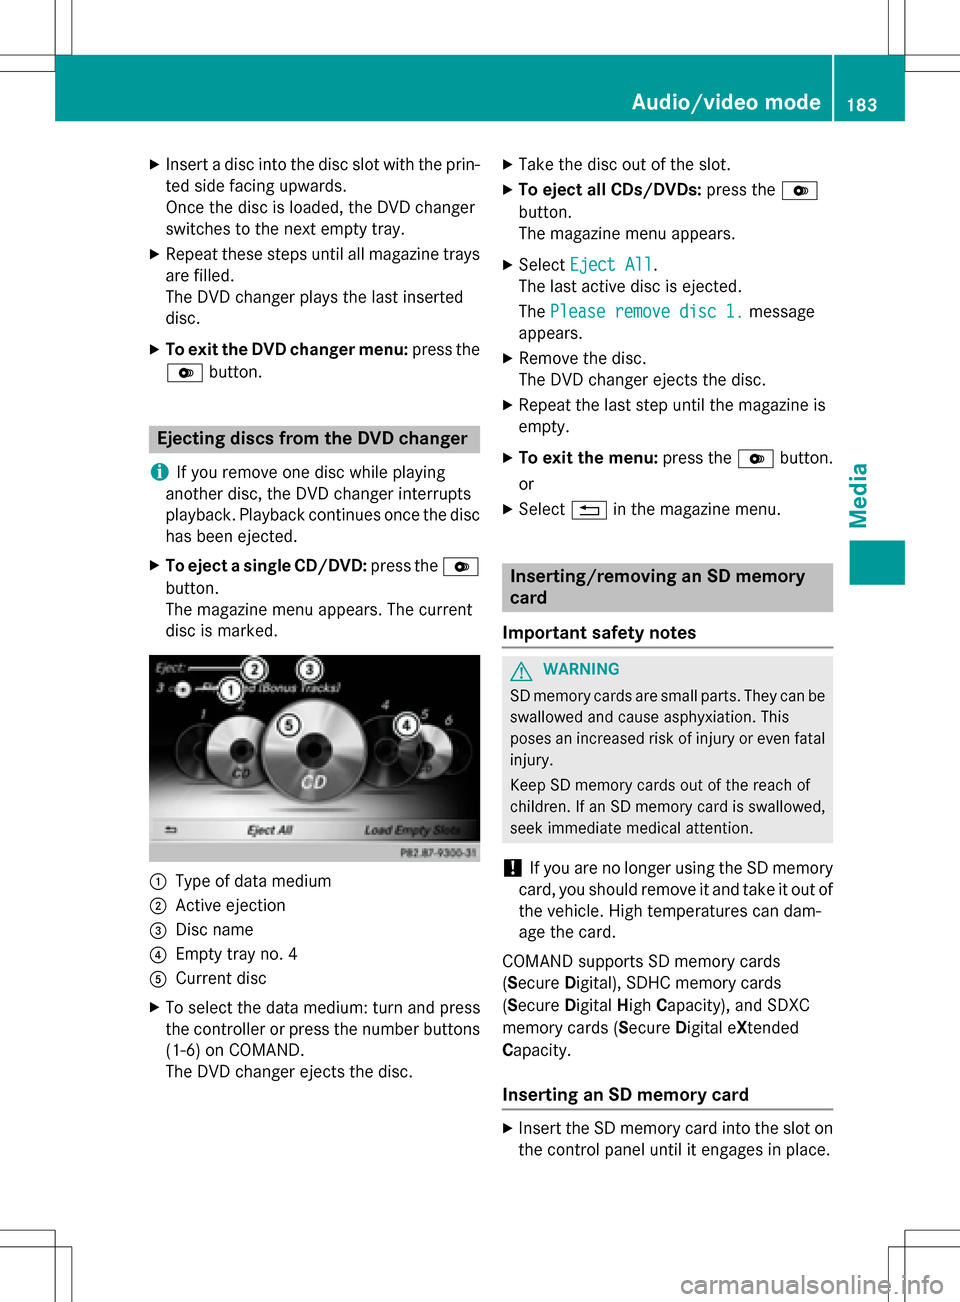
XTo eject a single CD/DVD: press theV
button.
The magazine menu appears. The current
disc is marked.
:Type of data medium
;Active ejection
=Disc name
?Empty tray no. 4
ACurrent disc
XTo select the data medium: turn and press
the controller or press the number buttons
(1-6) on COMAND.
The DVD changer ejects the disc.
XTake the disc out of the slot.
XTo eject all CDs/DVDs: press theV
button.
The magazine menu appears.
XSelect Eject All.
The last active disc is ejected.
The Please remove disc 1.
message
appears.
XRemove the disc.
The DVD changer ejects the disc.
XRepeat the last step until the magazine is
empty.
XTo exit the menu: press theVbutton.
or
XSelect %in the magazine menu.
Inserting/removing an SD memory
card
Important safety notes
GWARNING
SD memory cards are small parts. They can be
swallowed and cause asphyxiation. This
poses an increased risk of injury or even fatal injury.
Keep SD memory cards out of the reach of
children. If an SD memory card is swallowed,
seek immediate medical attention.
!If you are no longer using the SD memory
card, you should remove it and take it out of
the vehicle. High temperatures can dam-
age the card.
COMAND supports SD memory cards
(Secure Digital), SDHC memory cards
(Secure Digital HighCapacity), and SDXC
memory cards (Secure Digital eXtended
Capacity.
Inserting an SD memory card
XInsert the SD memory card into the slot on
the control panel until it engages in place.
Audio/video mode183
Media
Z
Page 194 of 246
Option 1: entering the passkey
XYou can find information on this in the
"Authorizing (connecting) a mobile phone"
section (
Ypage 116).
After successful authorization, the Blue-
tooth
®audio device is connected and
starts playing.
Option 2: Secure Simple Pairing
iThe Bluetooth®audio device must sup-
port Bluetooth®version 2.1 for connection
via Secure Simple Pairing. COMAND cre-
ates a six-digit code, which is displayed on
both devices that are to be connected
For some Bluetooth
®audio devices, the
pairing must be confirmed within 10 sec-
onds.
XIf the number code displayed on COMAND
and on the Bluetooth®audio device is the
same, select Yes
: press the controller.
If you select Yes
, authorization continues
and the Bluetooth®audio device is connec-
ted. Playback starts.
If you select No
, authorization is canceled.
External authorization
If COMAND does not find your Bluetooth®
audio device, this may be due to particular
security settings on your Bluetooth®audio
device. In this case, check whether your Blue-
tooth
®audio device can locate COMAND.
The Bluetooth
®device name for COMAND is
MB Bluetooth
.
XSwitch on Bluetooth®audio mode
(
Ypage 194).
XTo select Options: slide6and press the
controller.
XTo select Bluetooth Audio Devices:
press the controller.
XTo select Connect via Audio Device:
turn and press the controller.
A message appears. Authorizing
XStart the authorization on your Bluetooth®
audio device (see the manufacturer's oper-
ating instructions).
After successful authorization, the Blue-
tooth
®audio device is connected and
starts playing.
With some Bluetooth
®audio devices, play-
back must first be started on the device itself
so that COMAND can play the audio files.
Reconnecting a Bluetooth®audio
device
The Bluetooth®audio profiles are connected
automatically under the following circum-
stances:
Rone of the last two mobile phones to have
been connected has also been used as a
Bluetooth
®audio player (if this function is
supported by the mobile phone).
Rthe mobile phone is automatically connec-
ted. The Bluetooth®audio player is then
connected.
iFor an automatic connection with
COMAND, the telephone must be within
range.
For most Bluetooth
®audio devices, the
"automatic connection" must be activated
by checking a box. Depending on the
device used, this prompt often takes place
when authorizing (see the manufacturer's
operating instructions).
If the No Bluetooth Audio Device Con‐
nectedmessage appears, you have two
options to reconnect the Bluetooth®audio
device.
Option 1:
XTo select Connect Last Used Playerin
the basic display: press the controller.
If COMAND can locate the Bluetooth
®
audio device, it will be connected and will
start playing.
192Bluetooth®audio mode
Media
Page 226 of 246
Your COMANDequipment
These operatin ginstruction sdescribe all
standar dan doptional equipmen tavailable
fo ryour COMAN Dsyste mat th etime of pur -
chase. Country-specifi cdifference sare pos -
sible. Please note that your COMAN Dsyste m
may no tbe equipped wit hall th efeature s
described .Thi salso applies to safety-relevan t
systems an dfunctions. Therefore, th eequip -
men ton your COMAN Dsyste mmay diffe r
from that in th edescription san dillustrations.
Should you hav ean yquestion sconcernin g
equipmen tan doperation ,pleas econsult an
authorized Mercedes-Ben zCenter.
Overview
Important safet ynotes
GWARNING
The CD/DVD drive is aclass 1lase rproduct.
If you ope nth ehousin gof th eCD/DVD drive,
there is aris kof exposure to invisible lase r
radiation .Thi slase rradiation could damage
your retina. There is aris kof injury.
Never ope nth ehousing. Always hav emain -
tenanc ean drepair wor kcarrie dout at aquali -
fie dspecialis tworkshop .
GWARNING
If objects suc has headphones/headset sor
external audio/video sources are no tsecure d
in th epassenger compartment, they can be
flun garound an dhit vehicle occupants .There
is aris kof injury, fo rexample in th eevent of
sudden braking or asudden change in direc -
tion .
Always stow these items or similar objects
carefully so that they canno tbe flun garound ,
fo rexample in alockable vehicle stowag e
compartment.
Equipment
Observ ethat arange of Rear Seat Entertain -
men tSystems are available fo rMercedes -
Benz vehicles .In this Operator's Manual, th e
Rear Seat Entertainmen tSyste mCode 86 4is
used fo rillustration purposes. If you hav e a
differen tRear Seat Entertainmen tSyste min
your vehicle, pleas erefer to th emanufactur-
er' soperatin ginstructions.
Component s
The Rear Seat Entertainmen tSyste m
includes :
Rtwoscreens fo rth erea rbehin dth efront-
seat head restraints
Rtw oremot econtrols
RaCD/DVD drive
RAU Xjack son bot hrea rscreens (AUX dis -
play) an don th eCD/DVD drive (AUX drive)
Rheadphone sfo reac hrea rscree n
Rtwoset sof cordless headphone s
224Overview
Rear Seat Entertainment System
Page 241 of 246
XTo show the menu:press the9button on
the remote control.
XSelect DVD-Videoand press the 9button
on the remote control to confirm.
XSelect DVD Functionsand press the 9
button to confirm.
XSelect SubtitlesorCamera Angleand
press the 9button to confirm.
In both cases, a menu appears after a few
seconds. The #dot indicates the current
setting.
XSelect a setting using the 9:but-
tons and press the 9button to confirm.
XTo exit the menu: press the=or;
button.
Interactive content
DVDs can also contain interactive content
(e.g. a video game). In a video game, you may
be able to influence events, for example, by
selecting and triggering actions. The type and
number of actions depend on the DVD.
XSelect an action using the
9;:= buttons on the
remote control and press the 9button to
execute it.
A menu appears and the first entry, Select
,
is highlighted.
XPress the 9button.
Active COMAND media source mode
Overview
You can transfer a media source selected in
COMAND to the Rear Seat Entertainment
System. If you switch the media source in
COMAND, this will not be transferred to the
Rear Seat Entertainment System.
You can transfer these media sources to the
Rear Seat Entertainment System:
RRadio
RCD/MP3 mode (CD, SD card, USB)
RMedia Interface
RVideo DVD mode
Observe the sequence described below when
playing a COMAND media source on the Rear
Seat Entertainment System.
1. Activating the function in COMAND
XSwitch on the radio (Ypage 166).
XActivate CD/MP3 mode (CD, SD card, USB)
(
Ypage 178)
XSwitch on the media interface
(
Ypage 196).
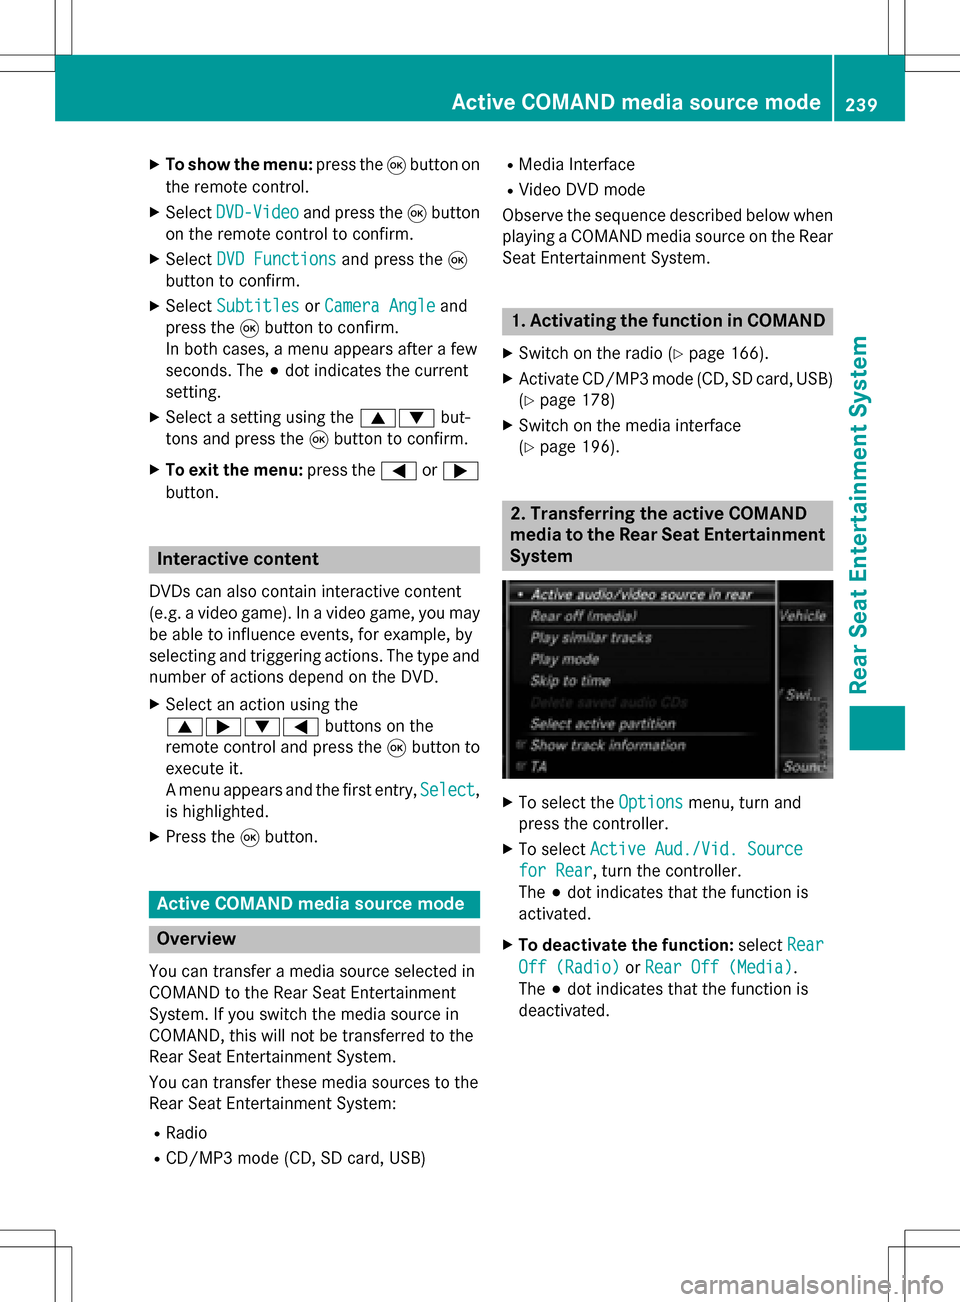
2. Transferring the active COMAND
media to the Rear Seat Entertainment
System
XTo select the Optionsmenu, turn and
press the controller.
XTo select Active Aud./Vid. Source
for Rear, turn the controller.
The #dot indicates that the function is
activated.
XTo deactivate the function: selectRear
Off (Radio)orRear Off (Media).
The #dot indicates that the function is
deactivated.
Active COMAND media source mode239
Rear Seat Entertainment System
Z
Page 244 of 246
REAR" (left-handscreen) or "R REAR" (right -
han dscreen) is highlighte din th ewindow.
XSelec tAuxin th emen uusin gth e
9=; buttons on theremot e
control and press th e9 butto nto confirm .
XSelectSourcefrom th eAU Xmen uand
press th e9 butto nto confirm .
XSelectDispla yAuxand press th e9 but-
to nto confirm .
Playbac kstarts. If an external video source
does no tprovid e avideo picture, an audio
men uappears.
Adjusting treble and bas s
XSelectTrebleor Bas sin th eAU Xmen u
and press th e9 butto non th eremot e
control to confirm .
A scale appears.
XSelec t asetting usin gth e9 or:
butto nand press th e9 butto nto confirm .
Adjusting th ebrightness, contrast or
color
XSelec tDispla yAuxorDis cDriveAuxin
th eAU Xmen uand press th e9 butto nto
confirm .
XSelectBrightnes s,Contrastor Color
and press th e9 butto nto confirm .
A scale appears.
XSelec t asetting usin gth e9 or:
butto nand press th e9 butto nto confirm .
Changingth epicture forma t
XSelec tDispla yAuxorDis cDriveAuxin
th eAU Xmen uand press th e9 butto nto
confirm .
XSelectAutomatic,16: 9Optimized,4:3
or Widescree nusingth e9: but-
tons and confirm wit h9 button.
The dot in fron tof th emen uitem indicate s
th ecurrentl yselected pictur eformat .
242AUX mode
Rear Seat Entertainment System