ECO mode MERCEDES-BENZ E-Class 2016 W213 Comand Manual
[x] Cancel search | Manufacturer: MERCEDES-BENZ, Model Year: 2016, Model line: E-Class, Model: MERCEDES-BENZ E-Class 2016 W213Pages: 246, PDF Size: 6.7 MB
Page 114 of 246
Your COMANDequipment
These operatin ginstruction sdescribe all
standar dan doptional equipmen tavailable
fo ryour COMAN Dsyste mat th etime of pur -
chase. Country-specifi cdifference sare pos -
sible. Please note that your COMAN Dsyste m
may no tbe equipped wit hall th efeature s
described .Thi salso applies to safety-relevan t
systems an dfunctions. Therefore, th eequip -
men ton your COMAN Dsyste mmay diffe r
from that in th edescription san dillustrations.
Should you hav ean yquestion sconcernin g
equipmen tan doperation ,pleas econsult an
authorized Mercedes-Ben zCenter.
Important safet ynotes
GWARNING
If you operat emobile communication equip-
men twhil edriving, you will be distracted from
traffic conditions. You could also los econtro l
of th evehicle. There is aris kof an accident.
Only operat ethis equipment when th evehicle
is stationary.
If you mak e acallon your mobile phone whil e
driving, always use hands-free mode. Only
use th emobile phone when road, weather
an dtraffic condition spermit .Some jurisdic -
tion sprohibi tth edriver from usin g amobile
phone whil edrivin g avehicle.
Bear in min dthat at aspeed of 30 mph
(approximately 50 km/h), th evehicle cover s
a distanc eof 44 feet (approximately 14 m)
per second.
Excessive levels of electromagnetic radiation
may cause damage to your health an dth e
health of others.
There is scientific discussio nsurroundin gth e
possible health risks posed by electromag-
neti cfields .You can reduce this ris kby usin g
an exterio rantenna. Therefore, connec
tyour mobile communica-
tion sequipmen tto th evehicle' sexterio r
antenn awhereve rpossible.
General notes
Telephon y
The Bluetoot h®interface on COMAN Dis
available fo rtelephony.
If your mobile phone supports th eBluetoot h
®
profilePBAP (Phone Book Access Profile),th e
contact sare automatically displaye din
COMAND.
You can use th etext messag ean de-mail
function sif your mobile phone supports th e
MA PBluetoot h
®profile (Messag eAccess
Profile) .Observ eth eother requirements fo r
th ee-mail an dtext messag efunction s
(
Ypage 138).
Wit h a suitable mobile phone ,you can use th e
hands-free syste man dreceiv evCards via th e
Bluetoot h
®interface .
You can obtain more information about suit -
able mobile phone son th eInternet at
www.mercedes-benz-mobile.com .
You can also obtain more information by call-
ing.
In th eUSA, you can get in touch wit hth e
Mercedes-Ben zCustomer Assistanc eCente r
on 1-800-FOR-MERCede s(1-800-367-6372).
In Canada, you can get in touch with the Cus- tomer Relations Center on 1-800-387-0100.
Call disconnection while the vehicle is
in motion
A call may be disconnected if:
Rthere is insufficient network coverage in
certain areas.
Ryou move from one transmitter/receiver
area (cell) into another and no channels are
free.
Ryou use a SIM card that is not compatible
with the network available.
112General notes
Telephone
Page 158 of 246
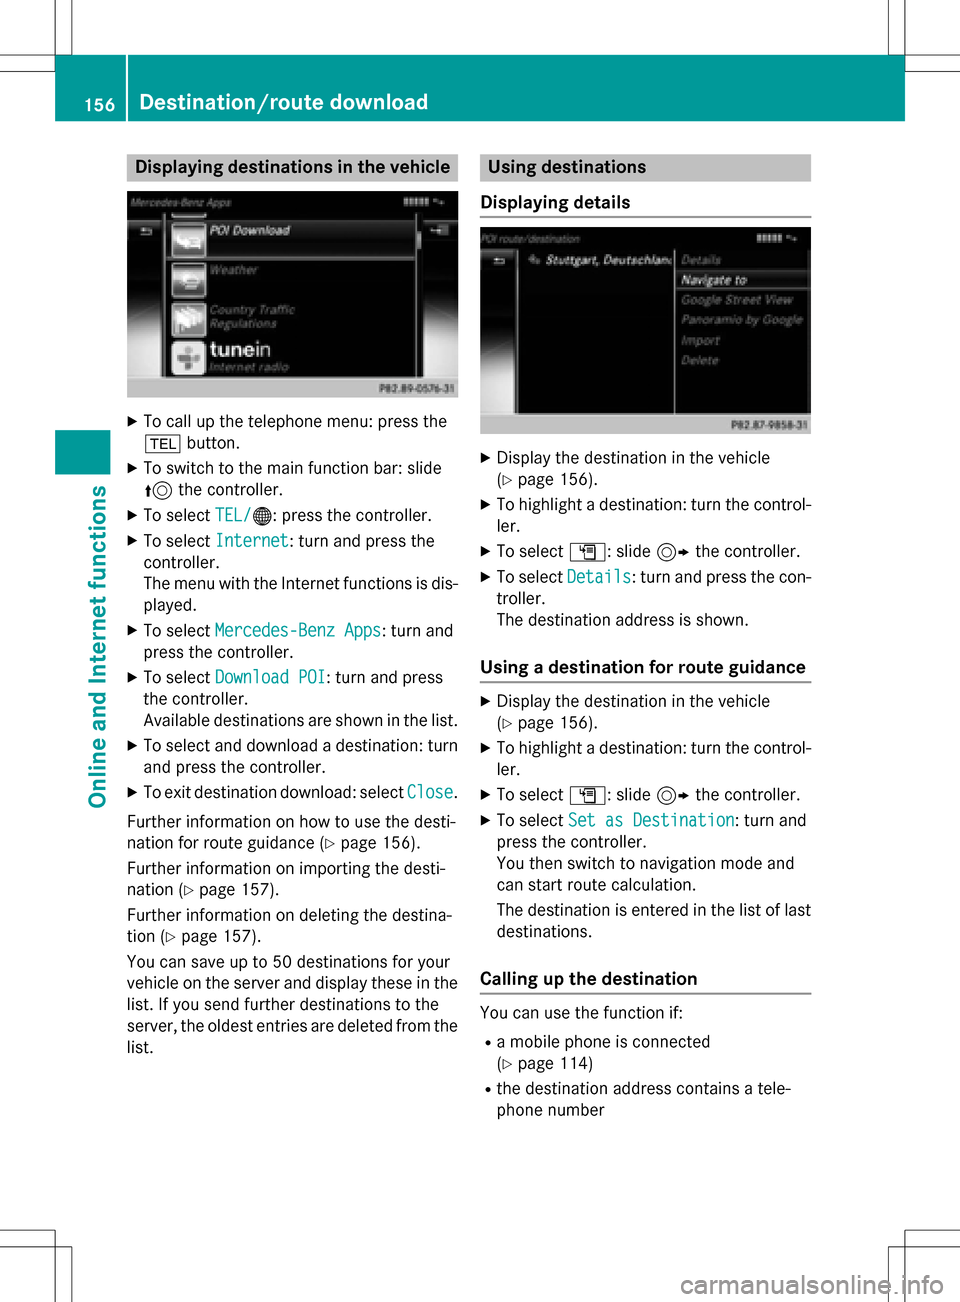
Displaying destinations in thevehicle
XTo cal lup th etelephon emenu: press th e
% button.
XTo switch to th emain function bar :slid e
5 thecontroller .
XTo selectTEL /®: press th econtroller .
XTo selectInternet:turn and press th e
controller .
The men uwit hth eInternet function sis dis -
played .
XTo selec tMercedes-Ben zApp s:turn and
press th econtroller .
XTo selectDownload POI:turn and press
th econtroller .
Availabl edestination sare shown in th elist .
XTo selec tand download adestination :turn
and press th econtroller .
XTo exit destination download :selec tClose.
Further information on how to use th edesti -
nation fo rrout eguidanc e (
Ypage 156).
Further information on importing th edesti -
nation (
Ypage 157).
Further information on deleting th edestina-
tion (
Ypage 157).
You can sav eup to 50 destination sfo ryour
vehicle on th eserver and display these in th e
list .If you sen dfurther destination sto th e
server ,th eoldest entries are delete dfrom th e
list .
Usin gdestinations
Displaying detail s
XDisplay thedestination in th evehicle
(
Ypage 156).
XTo highlight adestination :turn th econtrol-
ler .
XTo selec tG: slide9 thecontroller .
XTo selectDetail s:turn and press th econ-
troller.
The destination address is shown .
Using adestination for rout eguidance
XDisplay th edestination in th evehicle
(
Ypage 156).
XTo highlight adestination :turn th econtrol-
ler .
XTo selec tG: slide9 thecontroller .
XTo selectSet as Destination:turn and
press th econtroller .
You then switch to navigation mode and
can start rout ecalculation .
The destination is entered in th elist of last
destinations.
Calling up th edestination
You can use th efunction if:
Ramobile phone is connecte d
(
Ypage 114)
Rth edestination address contain s atele-
phone number
156Destination/route download
Online and Internet functions
Page 168 of 246
Your COMANDequipment
These operatin ginstruction sdescribe all
standar dan doptional equipmen tavailable
fo ryour COMAN Dsyste mat th etime of pur -
chase. Country-specifi cdifference sare pos -
sible. Please note that your COMAN Dsyste m
may no tbe equipped wit hall th efeature s
described .Thi salso applies to safety-relevan t
systems an dfunctions. Therefore, th eequip -
men ton your COMAN Dsyste mmay diffe r
from that in th edescription san dillustrations.
Should you hav ean yquestion sconcernin g
equipmen tan doperation ,pleas econsult an
authorized Mercedes-Ben zCenter.
Switchin gon th eradi o
XPress th e$ button.
The radio display appears .You will hear th e
last station playe don th elast waveban d
selected.
Switching HD Radi oon/of f
XIn radio mode: slid e6 thecontroller .
XSelectOption s.
XBy selecting Oorª befor eHDRadi o,you
determin ewhether HD radio is switched on
or off.
If HD radio is switched off, th esyste mdoe s
no tswitch to digita lradio an dit is no tpossible
to selec tan ysub-channels.
iHD Radio ™Technology Manufactured
Under License From iBiquit yDigital Corp.
U.S. an dForeign Patents .The HD an dHD
Radio logos are proprietary trademark sof
iBiquit yDigital Corp.
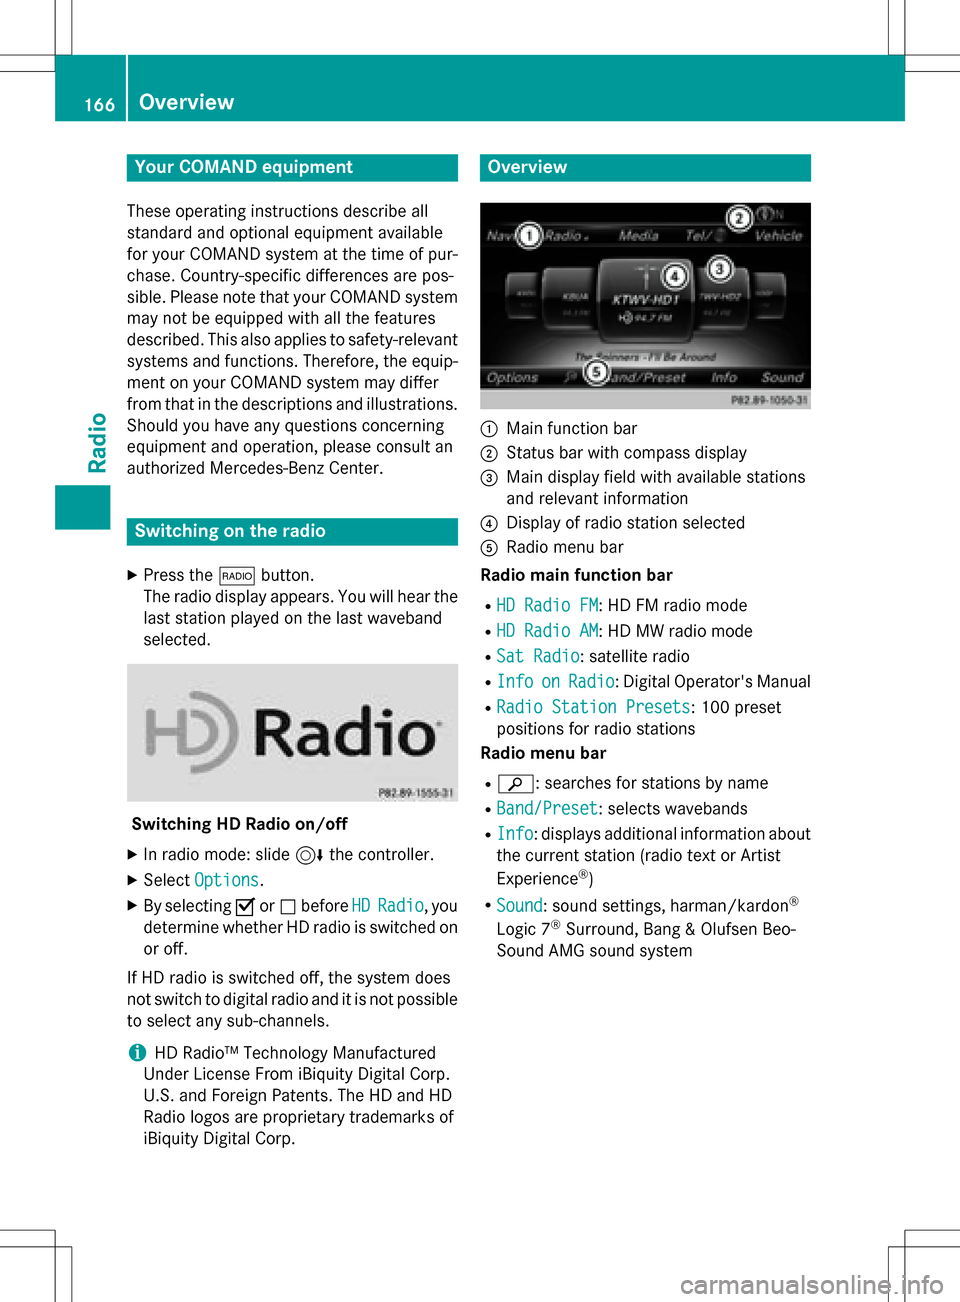
Overview
:Main function bar
;Status bar wit hcompass display
=Main display field wit havailable station s
an drelevant information
?Display of radio station selecte d
ARadio menubar
Radi omain function ba r
RHD RadioFM:HD FM radio mode
RHD Radi oAM:HD MW radio mode
RSa tRadi o:satellite radio
RInfoonRadi o:Digital Operator's Manual
RRadio Statio nPreset s:10 0preset
position sfo rradio station s
Radi omenu ba r
Rè:searches fo rstation sby name
RBand/Prese t:selects wavebands
RInfo:displays additional information about
th ecurren tstation (radio text or Artist
Experience
®)
RSoun d:soun dsettings, harman/kardon®
Logic 7®Surround ,Ban g & Olufsen Beo-
Sound AM Gsoun dsyste m
166Overview
Radio
Page 170 of 246
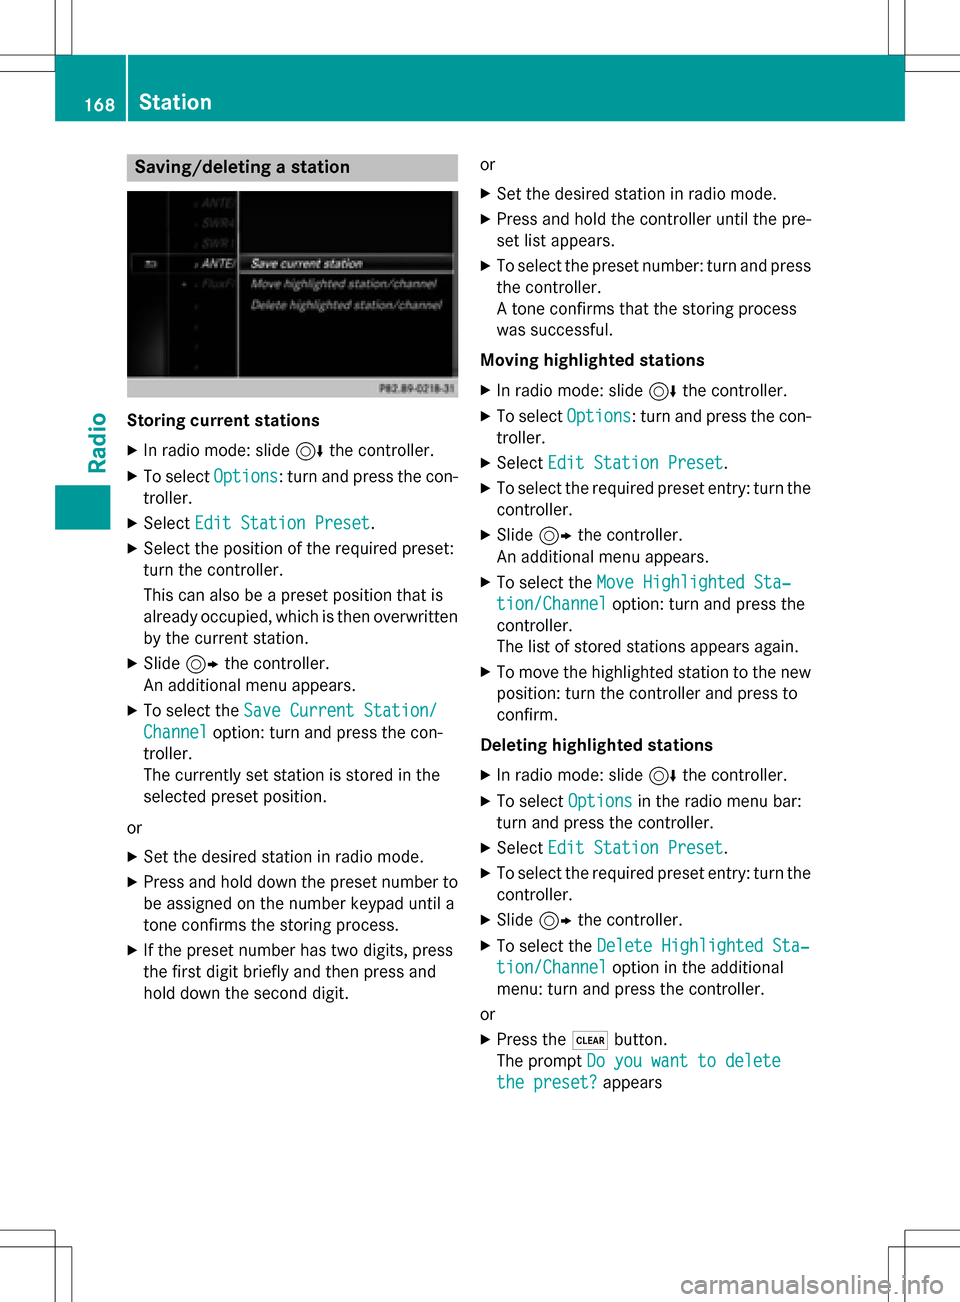
Saving/deleting a station
Storing current stations
XIn radio mode: slide6the controller.
XTo select Options: turn and press the con-
troller.
XSelect Edit Station Preset.
XSelect the position of the required preset:
turn the controller.
This can also be a preset position that is
already occupied, which is then overwritten
by the current station.
XSlide9the controller.
An additional menu appears.
XTo select the Save Current Station/
Channeloption: turn and press the con-
troller.
The currently set station is stored in the
selected preset position.
or
XSet the desired station in radio mode.
XPress and hold down the preset number to
be assigned on the number keypad until a
tone confirms the storing process.
XIf the preset number has two digits, press
the first digit briefly and then press and
hold down the second digit. or
XSet the desired station in radio mode.
XPress and hold the controller until the pre-
set list appears.
XTo select the preset number: turn and press
the controller.
A tone confirms that the storing process
was successful.
Moving highlighted stations
XIn radio mode: slide 6the controller.
XTo select Options: turn and press the con-
troller.
XSelect Edit Station Preset.
XTo select the required preset entry: turn the
controller.
XSlide9the controller.
An additional menu appears.
XTo select the Move Highlighted Sta‐
tion/Channeloption: turn and press the
controller.
The list of stored stations appears again.
XTo move the highlighted station to the new position: turn the controller and press to
confirm.
Deleting highlighted stations
XIn radio mode: slide 6the controller.
XTo select Optionsin the radio menu bar:
turn and press the controller.
XSelect Edit Station Preset.
XTo select the required preset entry: turn the
controller.
XSlide9the controller.
XTo select the Delete Highlighted Sta‐
tion/Channeloption in the additional
menu: turn and press the controller.
or
XPress the $button.
The prompt Do you want to delete
the preset?appears
168Station
Radio
Page 174 of 246
XFor the channel number, press the corre-
sponding number keys on the control panel
one after the other.
XPress thezkey on the number keypad.
COMAND sets the selected channel.
iYou can only select currently permitted
digits.
Selecting a channel via the satellite
radio station list
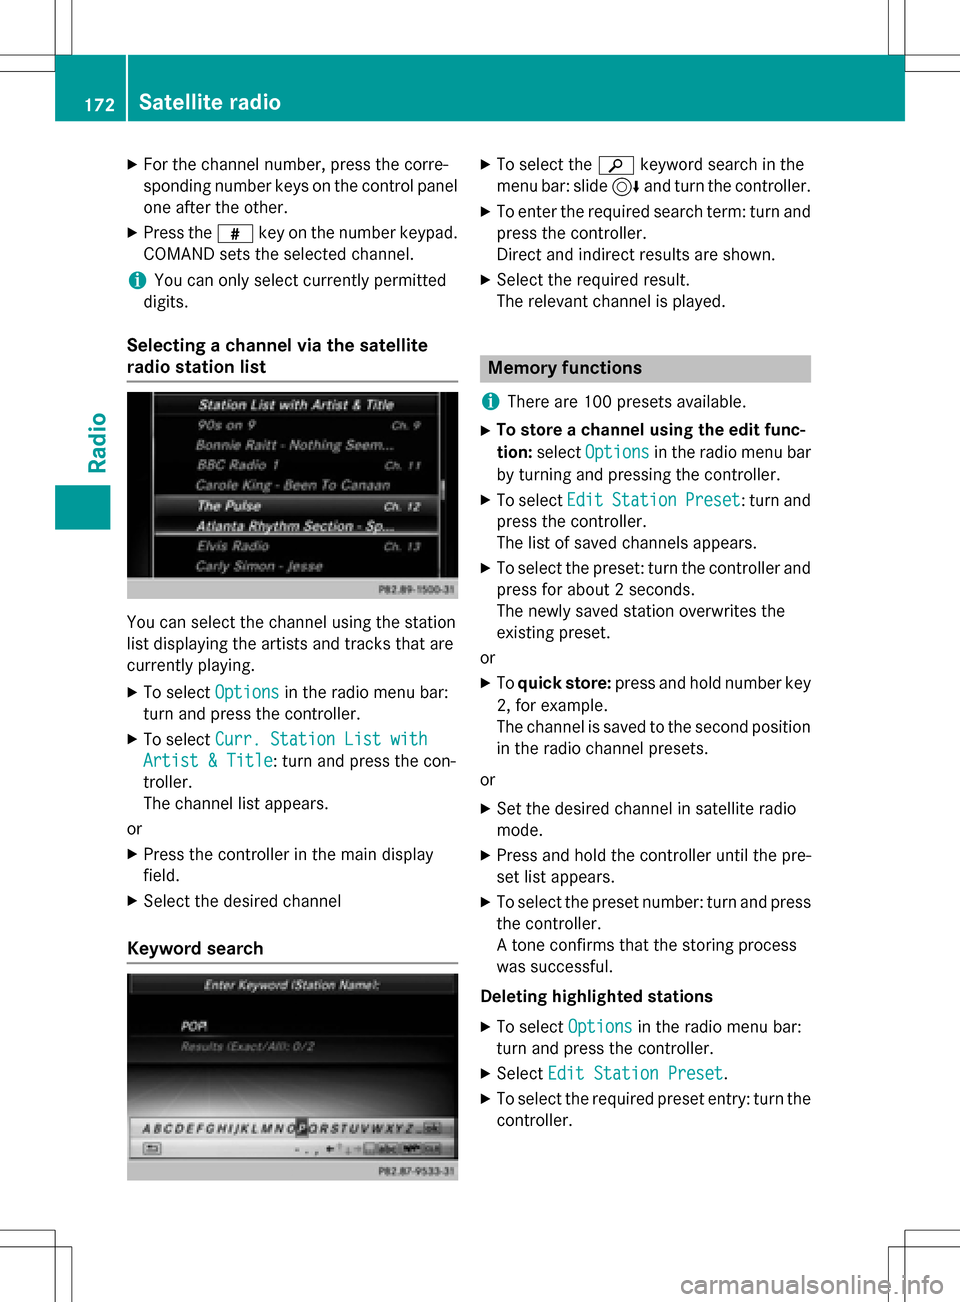
You can select the channel using the station
list displaying the artists and tracks that are
currently playing.
XTo select Optionsin the radio menu bar:
turn and press the controller.
XTo select Curr. Station List with
Artist & Title: turn and press the con-
troller.
The channel list appears.
or
XPress the controller in the main display
field.
XSelect the desired channel
Keyword search
XTo select the èkeyword search in the
menu bar: slide 6and turn the controller.
XTo enter the required search term: turn and
press the controller.
Direct and indirect results are shown.
XSelect the required result.
The relevant channel is played.
Memory functions
i
There are 100 presets available.
XTo store a channel using the edit func-
tion: select Options
in the radio menu bar
by turning and pressing the controller.
XTo select EditStationPreset: turn and
press the controller.
The list of saved channels appears.
XTo select the preset: turn the controller and
press for about 2 seconds.
The newly saved station overwrites the
existing preset.
or
XTo quick store: press and hold number key
2, for example.
The channel is saved to the second position
in the radio channel presets.
or
XSet the desired channel in satellite radio
mode.
XPress and hold the controller until the pre-
set list appears.
XTo select the preset number: turn and press
the controller.
A tone confirms that the storing process
was successful.
Deleting highlighted stations
XTo select Optionsin the radio menu bar:
turn and press the controller.
XSelect Edit Station Preset.
XTo select the required preset entry: turn the
controller.
172Satellite radio
Radio
Page 180 of 246
Your COMANDequipment
These operatin ginstruction sdescribe all
standar dan doptional equipmen tavailable
fo ryour COMAN Dsyste mat th etime of pur -
chase. Country-specifi cdifference sare pos -
sible. Please note that your COMAN Dsyste m
may no tbe equipped wit hall th efeature s
described .Thi salso applies to safety-relevan t
systems an dfunctions. Therefore, th eequip -
men ton your COMAN Dsyste mmay diffe r
from that in th edescription san dillustrations.
Should you hav ean yquestion sconcernin g
equipmen tan doperation ,pleas econsult an
authorized Mercedes-Ben zCenter.
Activating medi amode
General notes
There are severa lways to activat emedia
source susin gCOMAND.
The relevant section sof th eOperator's Man -
ual describe th esimples tway to activat e a
media source .
Thi ssection describes all option sfo ractivat -
in g media sources.
Button activation
XTo cal lup th emedia menu: press th eÕ
button.
The last media source you hav eset is dis -
played.
XPress th eÕ buttonagain .
The men uappears wit hth eavailable media
sources.
XTo selec tmedia sources: turn th econtroller
until th edesire dmedia source is in th ecen-
ter. Press th econtroller .
The media source sare available in th efol-
lowing order :
RCD/DVD
RMemorycar d
RMedia Interface 1an dMedia Interface 2
RBT audio
If playable music files are found ,they will be
playe dby COMAND.
Switching on automatically
Whe nan external media source is connected,
CD an dSD memor ycar dfunction sare auto-
matically switched on by COMAND. Whe n
usin gUS Bdevices, switch to th eappropriat e
Media Interface 1or Media Interface 2basi c
display.
External media sources:
RApple®devices (e.g. iPhon e®)
RUSBdevices (e.g. US Bstick, MP3 player)
RCD
RDV D
RSD cards
Rvia devices connecte dby Bluetoot h®
If playable music files are found ,they will be
playe dby COMAND.
iIfamedia function is already switched on
in COMAND, this will be interrupted an dth e
basi cdisplay of th enewly connecte d
devic ewill appear (except when usin gwit h
USB/iPo d
®).
If another function ,suc has navigation ,is
operating, th ebasi cdisplay will no tchange.
Only th emusic from th enewly connecte d
media source will play (except when usin g
wit hUSB/iPo d
®).
178Activating media mode
Media
Page 184 of 246
CRemaining playingtime of th ecurren t
track
DElapse dplaybac ktime for th ecurren t
track
EGraphic time display
FAlbum cover (if available)
Inserting and removing adis c fr om
th esingle CD/DVD dr ive
XTo insert:press theþ buttonon th e
single drive.
If there is adisc already inserted, it will be
ejected.
XInser t adisc into th edisc slot wit hth eprin-
te dside facin gupwards.
The drive closes and th edisc is played .
If th eCD/DV Dis operate din Medi amode,
th ecorrespondin gbasic men uwill be
shown. If th eCD/DV Dis started usin g
another application (e.g. navigation), th e
display will no tchange.
iThe drive may no tbe able to play disc s
wit hcopy protection .
XTo remove:press theþ button.
The drive ejects th edisc .
XRemove th eejecte ddisc from th eslot .
If you do no ttak eth edisc out of th eslot ,it
is draw nin again automatically after ashort
while .
Inserting discs int oth eDVD changer
The DV Dchanger has amagazine wit hsix
trays.
XTo inser tth eCD/DVD int oth emaga-
zin etray :press th eV button.
The magazine men uappears.
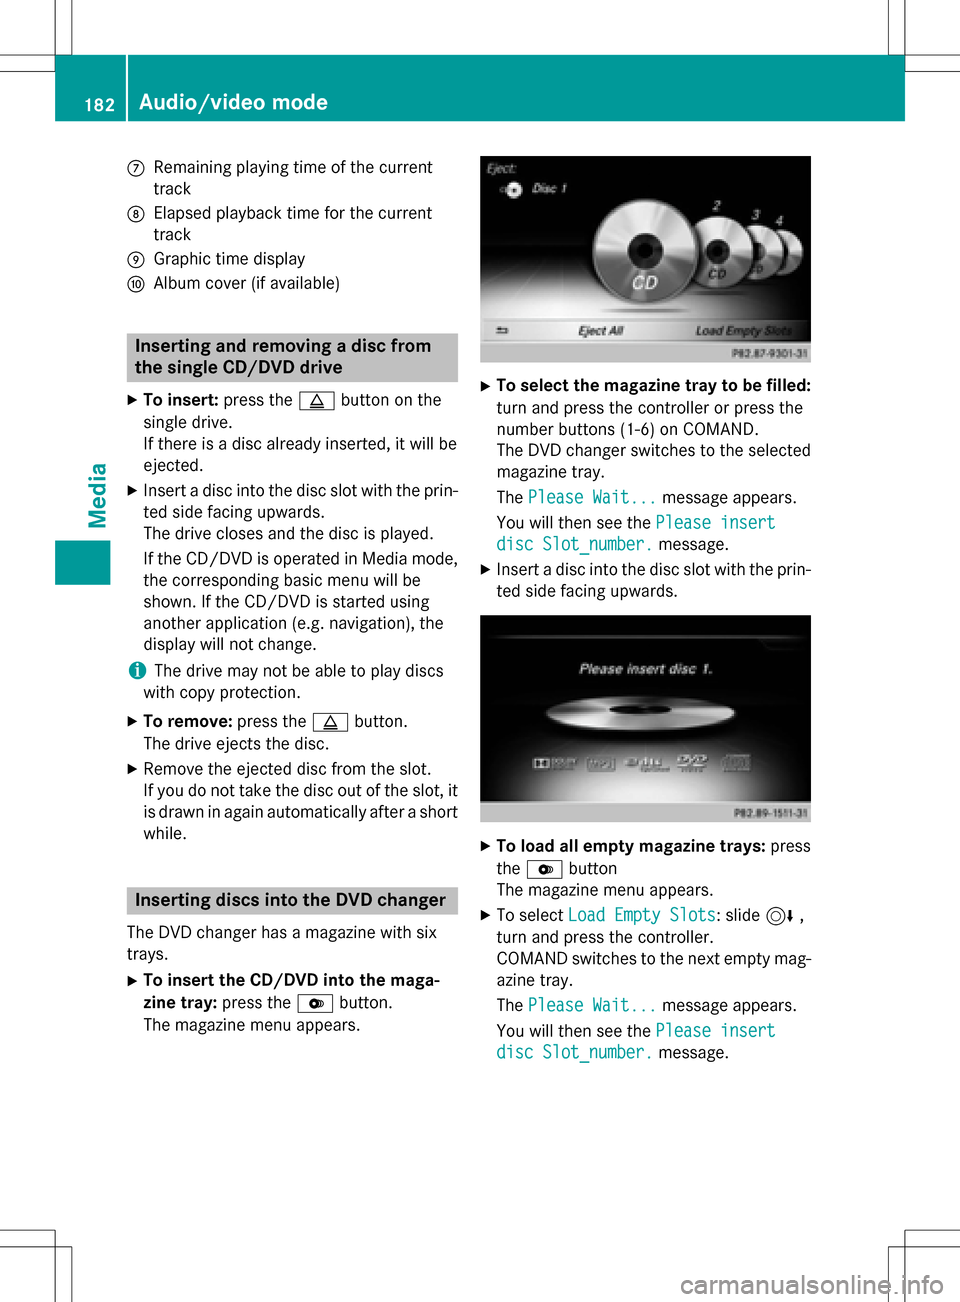
XTo select th emagazine tray to be filled:
tur nand press th econtroller or press th e
number buttons (1-6) on COMAND .
The DV Dchanger switches to th eselected
magazine tray.
The Please Wait.. .
message appears.
You will then see th ePlease insert
dis cSlot_number.message .
XInsert adisc into th edisc slot wit hth eprin-
te dside facin gupwards.
XTo load all empt ymagazine trays: press
th eV button
The magazine men uappears.
XTo select LoadEmpty Slots:slid e6 ,
tur nand press th econtroller .
COMAND switches to th enext empty mag -
azine tray.
The Please Wait.. .
message appears.
You will then see th ePlease insert
dis cSlot_number.message .
182Audio/video mode
Media
Page 190 of 246
Category list
XIn Media mode, slide6the controller.
The media menu bar is shown.
XTo select Search: turn and press the con-
troller.
The category list is shown.
Depending on the connected media sources
and files, the following categories are listed:
RCurrent Track List
RFolder
RSelect By Cover
RKeyword Search
RPlaylists
RArtists
RAlbums
RTracks
RGenres
RYear
RComposers
RStored Audio CDsComposers
RVideos
RPhotos
iThe categories are available as soon as
the entire media content has been read and
analyzed.
If the same device is reconnected with
unchanged media content, these catego-
ries are available more quickly.
When connecting Apple
®devices, the cat-
egories “Folder”, “Year” and “Photos” are
not available.
Searching by current track list
XTo select CurrentTrackListin the cat-
egory list: turn and press the controller.
The selection list appears.
XSelect the required track.
Searching by folder
Playable files can be searched for in the active
data medium's directories.
XTo select Folderin the category list: turn
and press the controller.
The folder list appears.
XSelect the required folder.
Either the desired track list appears or con-
tinue searching in the folder directory until
the desired track list has been found.
XSelect the required track.
Select By Cover
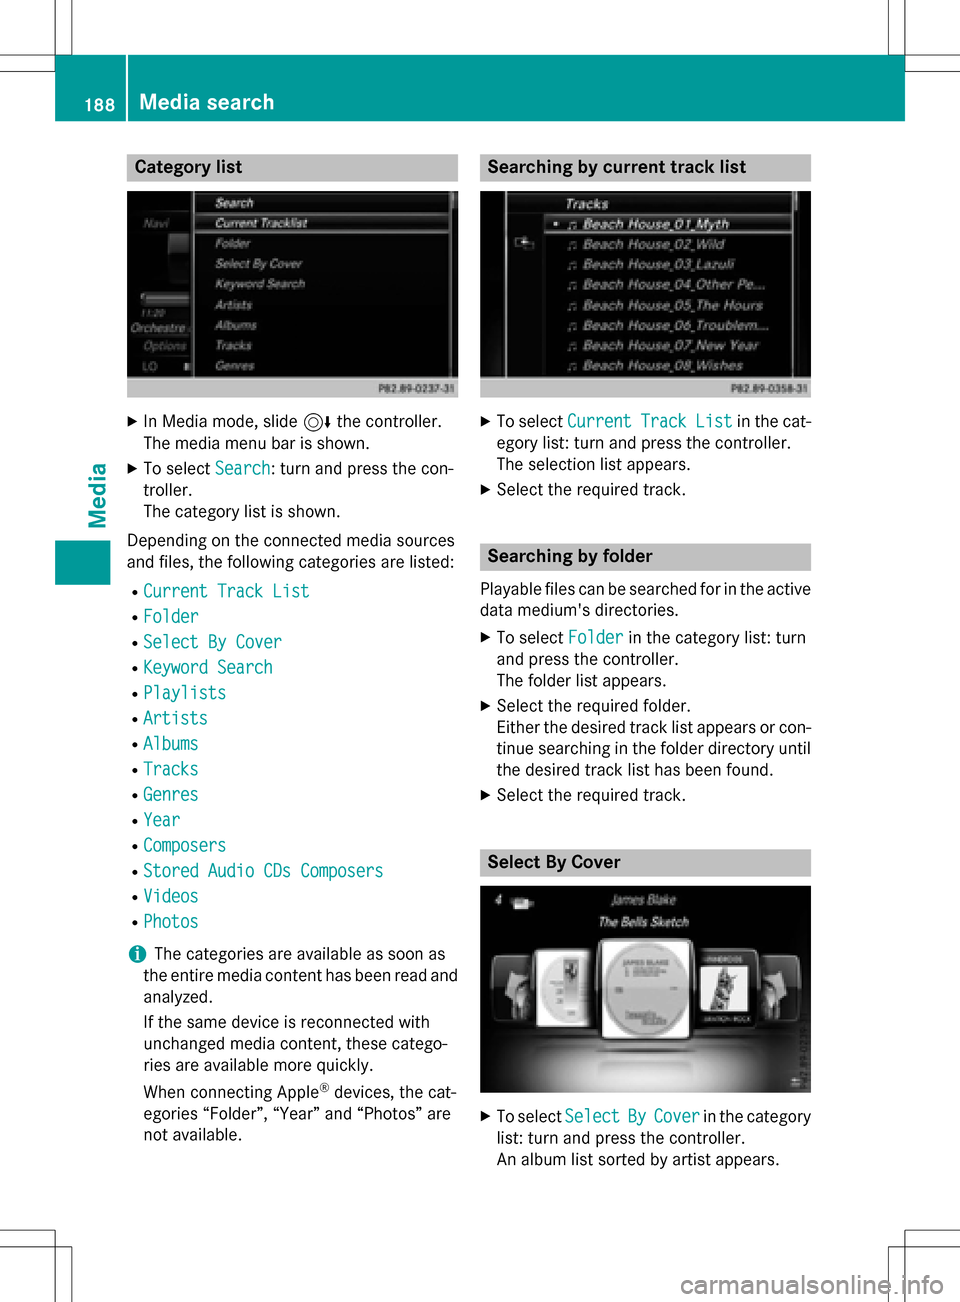
XTo select SelectByCoverin the category
list: turn and press the controller.
An album list sorted by artist appears.
188Media search
Media
Page 192 of 246
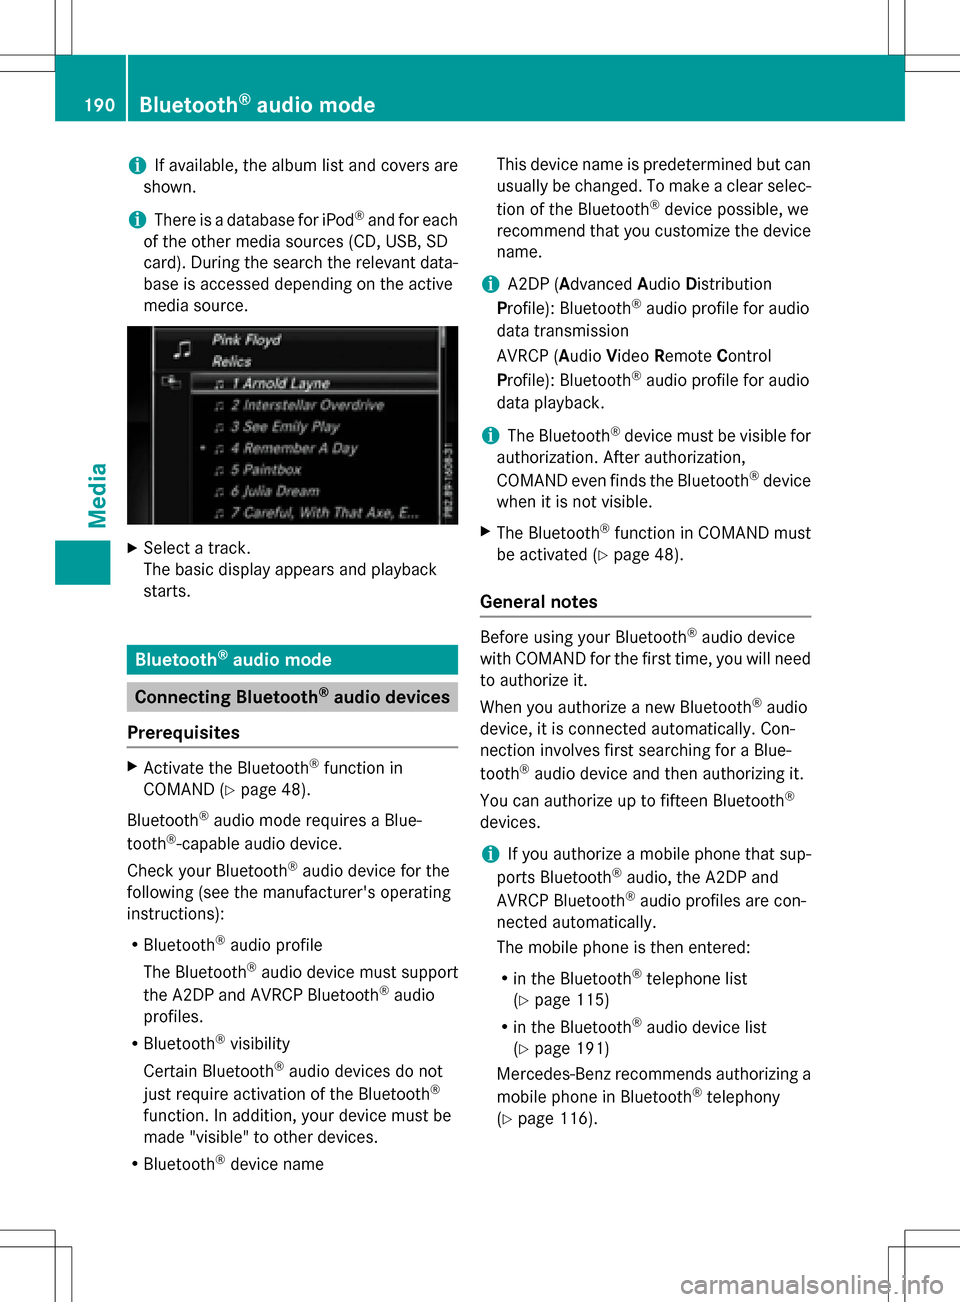
iIf available, the album list and covers are
shown.
iThere is a database for iPod®and for each
of the other media sources (CD, USB, SD
card). During the search the relevant data-
base is accessed depending on the active
media source.
XSelect a track.
The basic display appears and playback
starts.
Bluetooth®audio mode
Connecting Bluetooth®audio devices
Prerequisites
XActivate the Bluetooth®function in
COMAND (
Ypage 48).
Bluetooth
®audio mode requires a Blue-
tooth®-capable audio device.
Check your Bluetooth
®audio device for the
following (see the manufacturer's operating
instructions):
RBluetooth®audio profile
The Bluetooth
®audio device must support
the A2DP and AVRCP Bluetooth®audio
profiles.
RBluetooth®visibility
Certain Bluetooth
®audio devices do not
just require activation of the Bluetooth®
function. In addition, your device must be
made "visible" to other devices.
RBluetooth®device name This device name is predetermined but can
usually be changed. To make a clear selec-
tion of the Bluetooth
®device possible, we
recommend that you customize the device
name.
iA2DP (A dvanced Audio Distribution
Profile): Bluetooth®audio profile for audio
data transmission
AVRCP (A udioVideo Remote Control
Profile): Bluetooth
®audio profile for audio
data playback.
iThe Bluetooth®device must be visible for
authorization. After authorization,
COMAND even finds the Bluetooth
®device
when it is not visible.
XThe Bluetooth®function in COMAND must
be activated (
Ypage 48).
General notes
Before using your Bluetooth®audio device
with COMAND for the first time, you will need
to authorize it.
When you authorize a new Bluetooth
®audio
device, it is connected automatically. Con-
nection involves first searching for a Blue-
tooth
®audio device and then authorizing it.
You can authorize up to fifteen Bluetooth
®
devices.
iIf you authorize a mobile phone that sup-
ports Bluetooth®audio, the A2DP and
AVRCP Bluetooth®audio profiles are con-
nected automatically.
The mobile phone is then entered:
Rin the Bluetooth®telephone list
(
Ypage 115)
Rin the Bluetooth®audio device list
(
Ypage 191)
Mercedes-Benz recommends authorizing a
mobile phone in Bluetooth
®telephony
(
Ypage 116).
190Bluetooth®audio mode
Media
Page 194 of 246
Option 1: entering the passkey
XYou can find information on this in the
"Authorizing (connecting) a mobile phone"
section (
Ypage 116).
After successful authorization, the Blue-
tooth
®audio device is connected and
starts playing.
Option 2: Secure Simple Pairing
iThe Bluetooth®audio device must sup-
port Bluetooth®version 2.1 for connection
via Secure Simple Pairing. COMAND cre-
ates a six-digit code, which is displayed on
both devices that are to be connected
For some Bluetooth
®audio devices, the
pairing must be confirmed within 10 sec-
onds.
XIf the number code displayed on COMAND
and on the Bluetooth®audio device is the
same, select Yes
: press the controller.
If you select Yes
, authorization continues
and the Bluetooth®audio device is connec-
ted. Playback starts.
If you select No
, authorization is canceled.
External authorization
If COMAND does not find your Bluetooth®
audio device, this may be due to particular
security settings on your Bluetooth®audio
device. In this case, check whether your Blue-
tooth
®audio device can locate COMAND.
The Bluetooth
®device name for COMAND is
MB Bluetooth
.
XSwitch on Bluetooth®audio mode
(
Ypage 194).
XTo select Options: slide6and press the
controller.
XTo select Bluetooth Audio Devices:
press the controller.
XTo select Connect via Audio Device:
turn and press the controller.
A message appears. Authorizing
XStart the authorization on your Bluetooth®
audio device (see the manufacturer's oper-
ating instructions).
After successful authorization, the Blue-
tooth
®audio device is connected and
starts playing.
With some Bluetooth
®audio devices, play-
back must first be started on the device itself
so that COMAND can play the audio files.
Reconnecting a Bluetooth®audio
device
The Bluetooth®audio profiles are connected
automatically under the following circum-
stances:
Rone of the last two mobile phones to have
been connected has also been used as a
Bluetooth
®audio player (if this function is
supported by the mobile phone).
Rthe mobile phone is automatically connec-
ted. The Bluetooth®audio player is then
connected.
iFor an automatic connection with
COMAND, the telephone must be within
range.
For most Bluetooth
®audio devices, the
"automatic connection" must be activated
by checking a box. Depending on the
device used, this prompt often takes place
when authorizing (see the manufacturer's
operating instructions).
If the No Bluetooth Audio Device Con‐
nectedmessage appears, you have two
options to reconnect the Bluetooth®audio
device.
Option 1:
XTo select Connect Last Used Playerin
the basic display: press the controller.
If COMAND can locate the Bluetooth
®
audio device, it will be connected and will
start playing.
192Bluetooth®audio mode
Media