change time MERCEDES-BENZ E-Class 2016 W213 Comand Manual
[x] Cancel search | Manufacturer: MERCEDES-BENZ, Model Year: 2016, Model line: E-Class, Model: MERCEDES-BENZ E-Class 2016 W213Pages: 246, PDF Size: 6.7 MB
Page 7 of 246
Starting playback if the Blue-
tooth®audio device has been
stopped ......................................... 194
Telephony ...................................... 114
Telephony notes ............................ 112
Buttons and controller ........................ 24
C
Call lists
Displaying details ........................... 135
Opening and selecting an entry ..... 135
Saving an entry in the address
book .............................................. 136
Camera
360° camera (COMAND) ................. 58
Rear view camera ............................ 59
Car pool lanes ...................................... 68
Category list (music search) ............ 188
CD
Fast forward/fast rewind ............... 185
Inserting ........................................ 182
Inserting/loading (DVD changer) ... 182
Inserting/loading (Rear Seat
Entertainment System) .................. 232
Notes on discs ............................... 181
Removing/ejecting (Rear Seat
Entertainment System) .................. 232
Selecting a track ............................ 185
Sound settings (balance, bass,
fader, treble) .................................. 206
CD mode
Playback options ........................... 184
Character entry
Phone book ...................................... 32
Characters
Entering (navigation) ........................ 33
Clear button ......................................... 25
Climate control
Ionization (COMAND) ....................... 56
COMAND
Active multicontour seat .................. 56
Basic functions ................................ 30
Components .................................... 20
Control panel ................................... 23
Controller ......................................... 24
Display ............................................. 21
Functions ......................................... 20 Multicontour seat ............................ 56
Seat functions .................................. 56
Switching on/off .............................. 30
COMAND display
Cleaning instructions ....................... 22
Setting ............................................. 40
Contacts
Deleting ......................................... 133
Importing ....................................... 133
Controller ............................................. 24
Cordless headphones
Changing batteries ........................ 229
Indicator lamp ................................ 227
Rear Seat Entertainment System ... 227
Selecting the screen ...................... 228
D
Date format, setting ............................ 43
Day design, setting ............................. 40
Delayed switch-off
Interior lighting ................................ 55
Delayed switch-off time
Setting (COMAND) ........................... 55
Destination
Saving to SD memory card .............. 99
Storing in the address book ............. 98
Destination (navigation)
Entering a destination using the
map ................................................. 78
Entering a point of interest .............. 74
Entering using geo-coordinates ....... 82
Entering using Mercedes-Benz
Apps ................................................ 82
Keyword search ............................... 72
Saving .............................................. 98
Selecting an address book con-
tact as a destination ........................ 74
Selecting from the list of last des-
tinations ........................................... 74
Destination/route download
Deleting a destination from the
server ............................................ 157
Displaying destinations in the
vehicle ........................................... 156
Displaying the vehicle identifica-
tion number (VIN) .......................... 157
Importing destinations ................... 157
Index5
Page 35 of 246
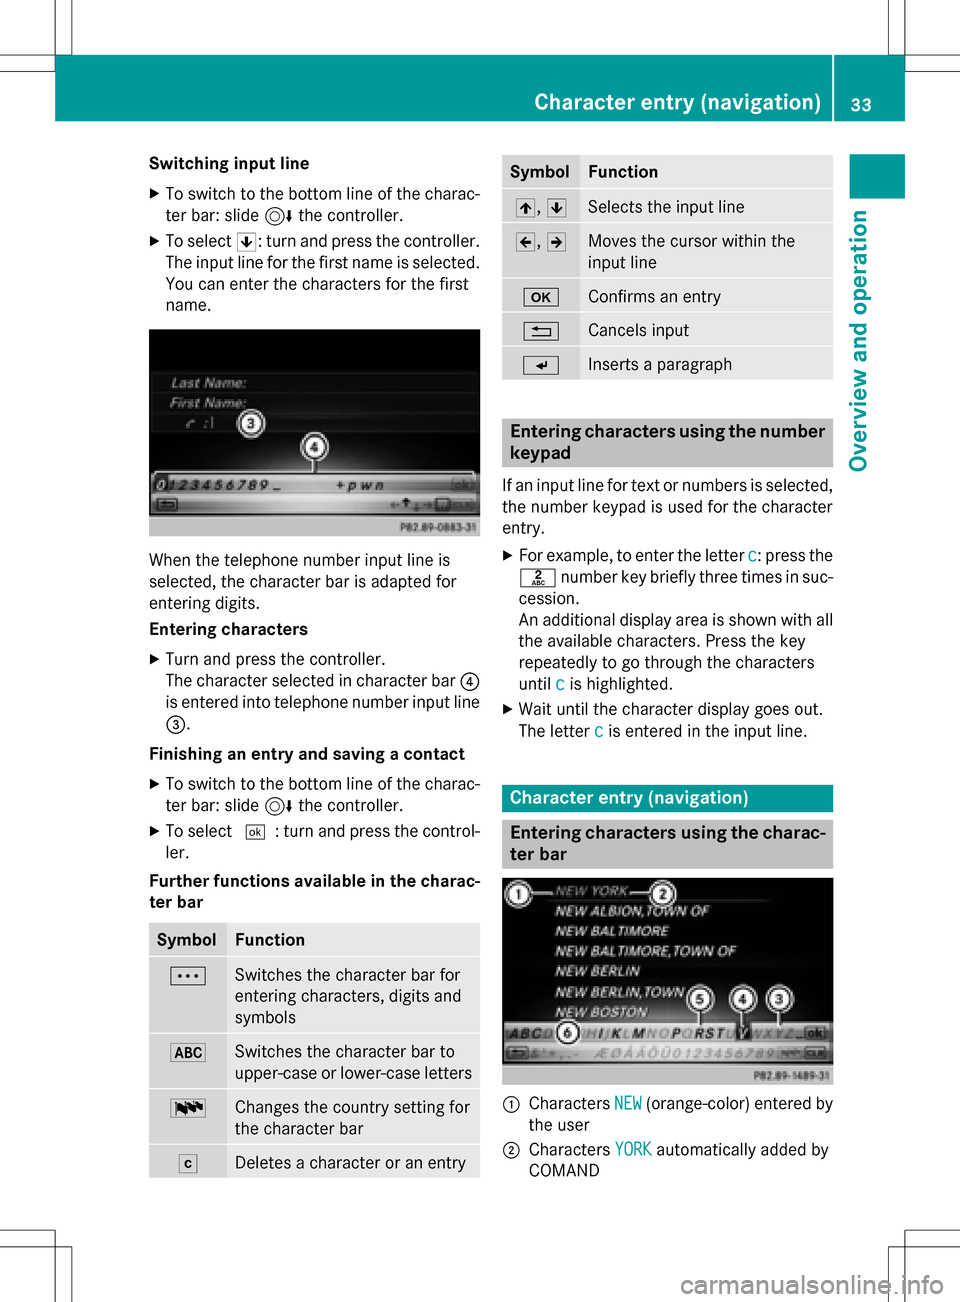
Switching input line
XTo switch to the bottom line of the charac-
ter bar: slide6the controller.
XTo select 5: turn and press the controller.
The input line for the first name is selected.
You can enter the characters for the first
name.
When the telephone number input line is
selected, the character bar is adapted for
entering digits.
Entering characters
XTurn and press the controller.
The character selected in character bar ?
is entered into telephone number input line
=.
Finishing an entry and saving a contact
XTo switch to the bottom line of the charac-
ter bar: slide 6the controller.
XTo select ¬: turn and press the control-
ler.
Further functions available in the charac-
ter bar
SymbolFunction
ÄSwitches the character bar for
entering characters, digits and
symbols
*Switches the character bar to
upper-case or lower-case letters
BChanges the country setting for
the character bar
FDeletes a character or an entry
SymbolFunction
4, 5Selects the input line
2,3Moves the cursor within the
input line
bConfirms an entry
%Cancels input
SInserts a paragraph
Entering characters using the number
keypad
If an input line for text or numbers is selected,
the number keypad is used for the character
entry.
XFor example, to enter the letter c: press the
l number key briefly three times in suc-
cession.
An additional display area is shown with all
the available characters. Press the key
repeatedly to go through the characters
until c
is highlighted.
XWait until the character display goes out.
The letter c
is entered in the input line.
Character entry (navigation)
Entering characters using the charac-
ter bar
:Characters NEW(orange-color) entered by
the user
;Characters YORKautomatically added by
COMAND
Character entry (navigation)33
Overview and operation
Page 44 of 246
XSelect the country you are currently in by
turning and pressing the controller.
The country is accepted.
A time zone list may also be displayed,
depending on the country selected.
XTo select the desired time zone:turn and
press the controller.
The time zone is accepted.
A list of available options for setting sum-
mer time appears (
Ypage 42).
Setting summer and standard time
The Daylight Saving Timemenu is not
available in all countries.
You can use the Daylight Saving Time
menu to set automatic summer time change-
over or switch the summer time setting on or
off. The changeover to summer time advan-
ces the time by one hour.
XPress theØbutton on the COMAND
control panel.
or
XPress Vehiclein the main function bar.
The vehicle menu is displayed.
XTo select Time: slide6, turn and press
the controller to confirm.
A menu appears.
XTo select Daylight Saving Time: turn
and press the controller.
A list with options appears.
XTo select Automatic,Onor Off: turn and
press the controller.
SettingFunction
AutomaticThe summer and
standard time are
automatically
changed over.
OnThe clock is
advanced one hour
ahead of standard
time.
OffThe standard time
for the chosen time
zone is selected.
Manual time setting
iUsing the manual time settings, you can
set the time forwards or backwards by up to
several hours.
XPress the Øbutton on the COMAND
control panel.
or
XPress Vehiclein the main function bar.
The vehicle menu is displayed.
XTo select Time: slide6, turn and press
the controller to confirm.
A menu appears.
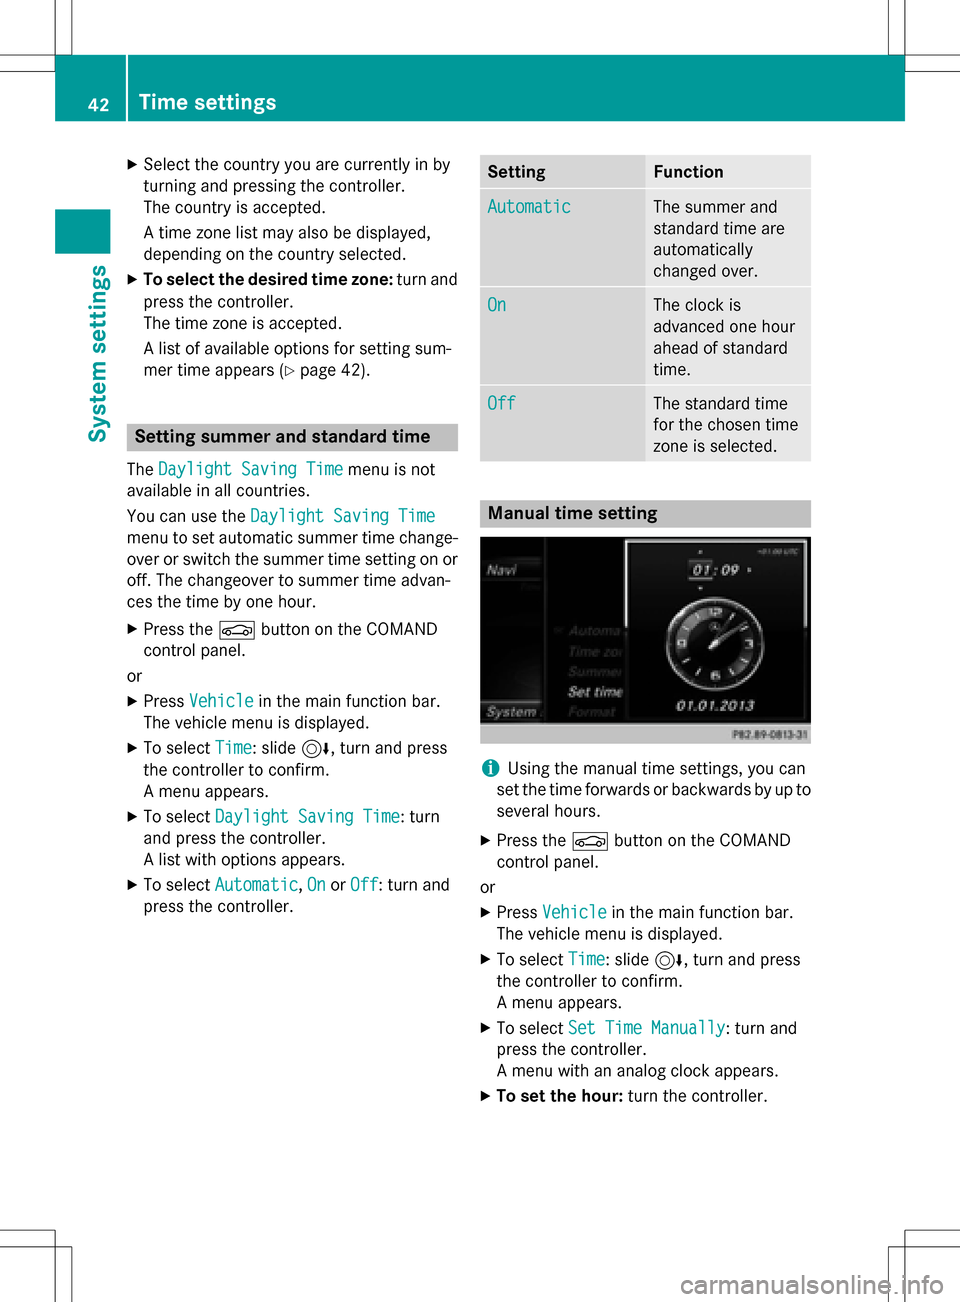
XTo select Set Time Manually: turn and
press the controller.
A menu with an analog clock appears.
XTo set the hour: turn the controller.
42Time settings
System settings
Page 45 of 246
XTo highlight the minutes:slide9 the
controller.
XTo set the minutes: turn and press the
controller.
The time is accepted.
The Automatic Time Settings
function
is deactivated ª.
If Automatic
is set for the summer time
changeover, a prompt will appear asking
whether the automatic changeover should
be maintained between summer and winter
time.
iIf Automatic Time Settingsis reacti-
vated, the previous settings for time zone
and summer time changeover are restored.
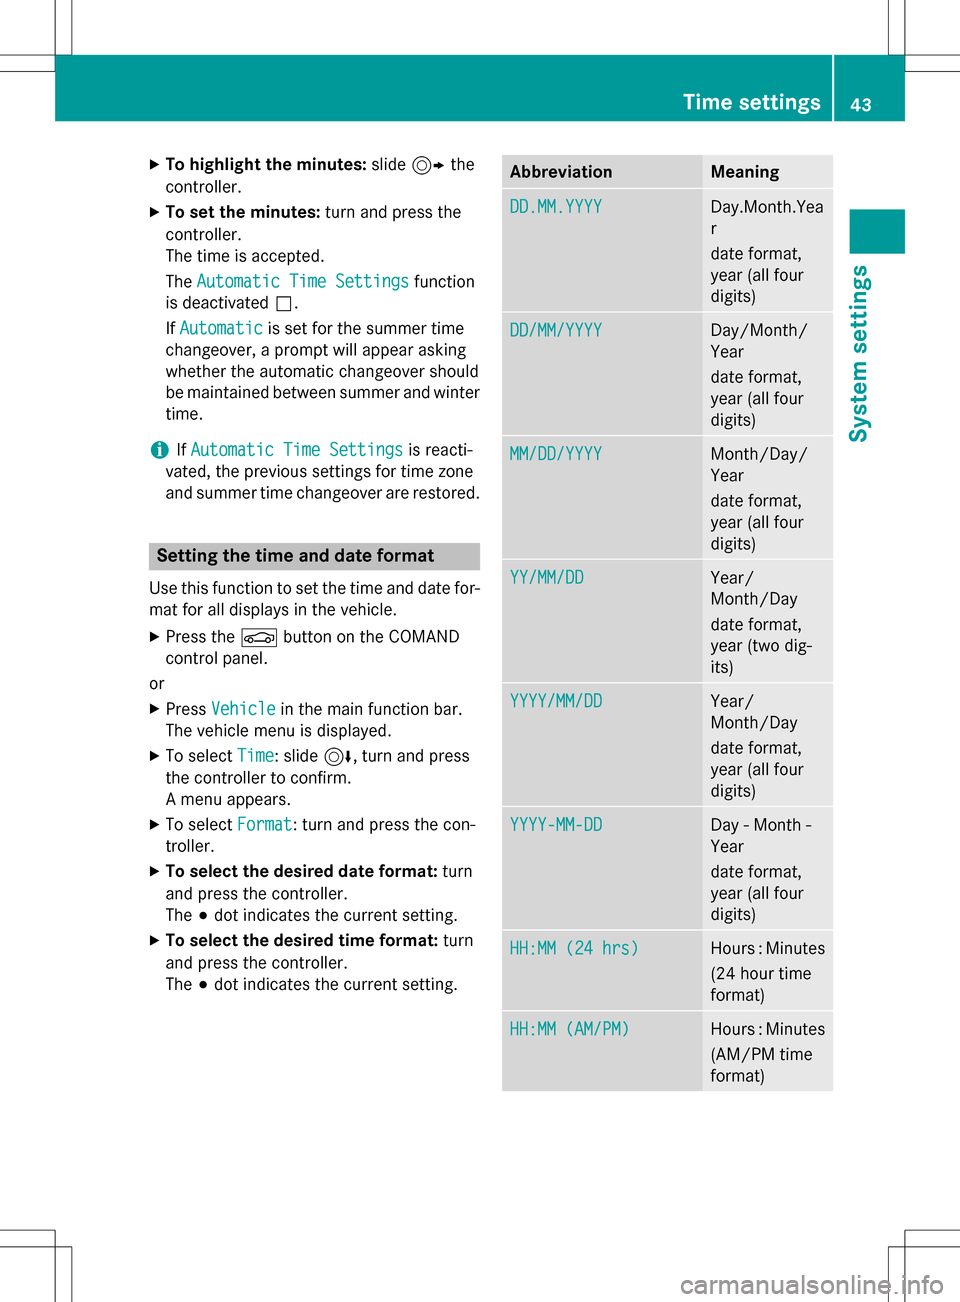
Setting the time and date format
Use this function to set the time and date for-
mat for all displays in the vehicle.
XPress the Øbutton on the COMAND
control panel.
or
XPress Vehiclein the main function bar.
The vehicle menu is displayed.
XTo select Time: slide6, turn and press
the controller to confirm.
A menu appears.
XTo select Format: turn and press the con-
troller.
XTo select the desired date format: turn
and press the controller.
The #dot indicates the current setting.
XTo select the desired time format: turn
and press the controller.
The #dot indicates the current setting.
AbbreviationMeaning
DD.MM.YYYYDay.Month.Yea
r
date format,
year (all four
digits)
DD/MM/YYYYDay/Month/
Year
date format,
year (all four
digits)
MM/DD/YYYYMonth/Day/
Year
date format,
year (all four
digits)
YY/MM/DDYear/
Month/Day
date format,
year (two dig-
its)
YYYY/MM/DDYear/
Month/Day
date format,
year (all four
digits)
YYYY-MM-DDDay - Month -
Year
date format,
year (all four
digits)
HH:MM (24 hrs)Hours : Minutes
(24 hour time
format)
HH:MM (AM/PM)Hours : Minutes
(AM/PM time
format)
Time settings43
System settings
Z
Page 56 of 246
Your COMANDequipment
These operatin ginstruction sdescribe all
standar dan doptional equipmen tavailable
fo ryour COMAN Dsyste mat th etime of pur -
chase. Country-specifi cdifference sare pos -
sible. Please note that your COMAN Dsyste m
may no tbe equipped wit hall th efeature s
described .Thi salso applies to safety-relevan t
systems an dfunctions. Therefore, th eequip -
men ton your COMAN Dsyste mmay diffe r
from that in th edescription san dillustrations.
Should you hav ean yquestion sconcernin g
equipmen tan doperation ,pleas econsult an
authorized Mercedes-Ben zCenter.
Important safet ynotes
GWARNING
If you operat emobile communication equip-
men twhil edriving, you will be distracted from
traffic conditions. You could also los econtro l
of th evehicle. There is aris kof an accident.
Only operat ethis equipment when th evehicle
is stationary.
You mus tobserv eth elega lrequirements fo r
th ecountry in whic hyou are currentl ydrivin g
when operatin gmobile communication s
equipmen tin th evehicle.
Vehicl esettings
Calling up vehicle settings
XPress th eØ buttonon th eCOMAN D
contro lpanel.
or
XPress Vehicl ein themain function bar .
The vehicle men uis displayed.
XTo selec tVehicl eSettings:turn an d
press th econtroller .
XTo selectth edesired vehicle setting:
turn an dpress th econtroller .
The main are awit hth esetting elemen tis
active .
Selecting adifferent vehicle setting:
XTo activat eth emen ufo rselecting th evehi-
cl e setting :slid e5 thecontroller .
Exitin gth evehicle settings:
XTo selec t&: slide6 andpress th econ-
troller.
Ambien tlighting
General notes
You can set th efollowin gfo rth eambien t
lighting :
RInteriorwelcom eligh t
Ambien tlighting is activated fo r ashort
time when th edriver's doo ris opened.
RBrightness
Thi ssetting makes an additional change to
th ebrightness of th eambien tlighting .
RColor
Thi ssetting changes th ecolor of th eambi-
en tlighting .
Setting th ebrightness
XCall up VehicleSettings(Ypage 54).
XTo selec tAmbien tLigh tBrightness:
turn an dpress th econtroller .
The setting elemen tis active .
XPress thecontroller .
XTo change th ebrightness value: turn an d
press th econtroller .
You can fin dfurther information on th einte -
rio rlighting in th evehicle Operator's Manual.
54Vehicle settings
Vehicle functions
Page 57 of 246
Setting the color
XCall upVehicle Settings(Ypage 54).
XTo select AmbientLightColor: turn and
press the controller.
The setting element is active.
XTo select a color: turn the controller.
You can find further information on the inte-
rior lighting in the vehicle Operator's Manual.
Setting the interior welcome light
XCall up Vehicle Settings(Ypage 54).
XTo select Interior welcome light: turn
and press the controller.
XPress the controller.
The function is switched on or off, depend-
ing on the previous status.
You can find further information on the inte-
rior lighting in the vehicle Operator's Manual.
Switching locator lighting on/off
If you switch on the LocatorLightingfunc-
tion, the exterior lighting is switched on for a
short time when it is dark. The light switch
must be set to Ã.
The exterior lighting remains on for
40 seconds after the vehicle is unlocked.
When you start the engine, the locator light-
ing is switched off and automatic headlamp
mode is activated.
You can find further information on the auto-
matic headlamp mode in the vehicle Opera-
tor's Manual.
XCall up Vehicle Settings(Ypage 54).
XTo select Locator Lighting: turn and
press the controller.
XPress the controller.
The function is switched on or off, depend-
ing on the previous status.
You can find further information on the lock-
ing feature in the vehicle Operator's Manual.
iThere may be fewer settings or none
depending on your vehicle's equipment.
Setting the delayed switch-off time
Interior lighting delayed switch-off
The interior lighting is activated for the dura-
tion of the delayed switch-off time when the
SmartKey is removed from the ignition lock.
XCall up Vehicle Settings(Ypage 54).
XTo select Interior Lighting Delayed
Switch-off: turn and press the controller.
The setting element is active.
XTo change the delayed switch-off time: turn the controller.
You can find further information on the inte-
rior lighting in the vehicle Operator's Manual.
Exterior lighting delayed switch-off
If you switch on the Exterior Lighting
Delayed Switch-offfunction, the exterior
lighting is switched on for a short time after
the engine is switched off. The light switch
must be set to Ã.
The exterior lighting remains on for
60 seconds after the engine is switched off. If
you close all the doors and the tailgate, the
exterior lighting switches off after the set
time.
XCall up Vehicle Settings(Ypage 54).
XTo select Exterior Lighting Delayed
Switch-off: turn and press the controller.
The setting element is active.
XTo change the delayed switch-off time: turn the controller.
Displaying energy consumption and
generated electrical energy
A bar graph displays the energy consumption
and the generated electrical energy.
XCall up Vehicle Settings(Ypage 54).
XTo select Consumption: turn and press the
controller.
The energy consumption and the generated
electrical energy for the last 15 minutes of
the journey is shown.
Vehicle settings55
Vehicle functions
Z
Page 59 of 246
XTo change the setting: slide4or1
the controller.
The change will be visible in the setting ele-
ment.
XTo exit the menu: press the%button.
Adjusting the seat cushion
XCall up the seat functions (Ypage 56).
XTo select Seat Surface: turn and press
the controller.
XTo select a seat: slide 1the controller.
XTo change the setting: turn the controller.
You will see the changes you have made in
the settings display.
XTo exit the menu: press the%button.
Adjusting the driving dynamics
XCall up the seat functions (Ypage 56).
XTo select a seat: slide 1the controller.
XTo select Dynamic Multicontour Seat:
turn and press the controller.
You can select:
R0: Off
R1: Level 1 (weak)
R2: Level 2 (strong)
XTo select the setting: turn the controller.
XTo exit the menu: press the%button.
Massage programs
Overview
You can select the following massage pro-
grams:
RRelaxing Massage
Massage the entire back, rising waves,
soothing downward movements
RActivating Massage
Mobilizing massage and rising and
descending dynamic waves
RClassic Massage
Single and twin waves moving upwards
across the entire back
RMobilizing Massage
Mobilization via stronger single and twin
waves moving upwards across the entire
back
Selecting a massage program
XCall up the seat functions (Ypage 56).
XTo select Massage: turn and press the con-
troller.
XTo select a seat: slide 1the controller.
XTo select massage programs: turn and
press the controller.
The massage program runs for approx-
imately 15 to 25 minutes, depending on the
setting.
XTo exit the menu: press the%button.
Seat heating balance
The balance function controls the distribution
of heat on the seat backrest and cushion.
The balance function influences the currently
set heating level of the seat heating (see the
vehicle Operator's Manual).
XCall up the seat functions (Ypage 56).
XTo select Seat Heating Balance: turn
and press the controller.
XTo select a seat: slide 1the controller.
XTo change the setting: turn the controller.
You will see the changes you have made in
the settings display.
The settings represent the following:
R0— the backrest and seat cushion are
evenly heated according to the setting
selected with the seat heating button.
R1to 3— the heat output to the seat cushion
is reduced one level at a time.
R-1to -3— the heat output to the backrest is
reduced one level at a time.
XTo exit the menu: press the%button.
Seats57
Vehicle functions
Z
Page 66 of 246
Your COMANDequipment
These operatin ginstruction sdescribe all
standar dan doptional equipmen tavailable
fo ryour COMAN Dsyste mat th etime of pur -
chase. Country-specifi cdifference sare pos -
sible. Please note that your COMAN Dsyste m
may no tbe equipped wit hall th efeature s
described .Thi salso applies to safety-relevan t
systems an dfunctions. Therefore, th eequip -
men ton your COMAN Dsyste mmay diffe r
from that in th edescription san dillustrations.
Should you hav ean yquestion sconcernin g
equipmen tan doperation ,pleas econsult an
authorized Mercedes-Ben zCenter.
Introduction
Important safet ynotes
GWARNING
If you operat einformation systems an dcom-
munication equipment integrated in th evehi-
cl e whil edriving, you will be distracted from
traffic conditions. You could also los econtro l
of th evehicle. There is aris kof an accident.
Only operat eth eequipment when th etraffic
situation permits. If you are no tsur ethat this
is possible, par kth evehicle payin gattention
to traffic condition san doperat eth eequip-
men twhen th evehicle is stationary.
You mus tobserv eth elega lrequirements fo r
th ecountry in whic hyou are currentl ydrivin g
when operatin gCOMAND.
COMAN Dcalculates th erout eto th edestina -
tion without taking accoun tof th efollowing,
fo rexample:
Rtraffic lights
Rstop an dyield signs
Rmergin glanes
Rparking or stoppin gin ano parking/n o
stoppin gzone
Rother road an dtraffic rule san dregulation s
Rnarrow bridge s COMAN
Dcan giv eincorrec tnavigation com-
mands if th eactual street/traffic situation
doe sno tcorrespon dwit hth edigita lmap's
data. Digital map sdo no tcover all areas no r
all routes in an area. Fo rexamp le,
arou
t emay
hav ebee ndiverted or th edirection of aone-
way stree tmay hav echanged .
Fo rthis reason ,you mus talways observ e
road an dtraffic rule san dregulation sdurin g
your journey. Road an dtraffic rule san dreg -
ulation salways hav epriorit yover th esys -
tem' sdrivin grecommendations.
Navigation announcement sare intended to
direc tyou whil edrivin gwithout divertin gyour
attention from th eroad an ddriving.
Please always use this feature instead of con-
sultin gth emap display fo rdirections. Look -
in g at th eicon sor map display can distract
you from traffic condition san ddriving, an d
increase th eris kof an accident.
General notes
Operationa lreadines sof th enavigation
syste m
The navigation syste mmus tdetermin eth e
position of th evehicle befor efirst use or
wheneve roperational status is restored .
Therefore, you may hav eto drive fo r awhil e
befor eprecise rout eguidance is possible.
GP Sreception
Amon gother things, correc tfunctionin gof
th enavigation syste mdepend son GPS recep-
tion .In certain situations, GPS reception may
be impaired, there may be interferenc eor
there may be no reception at all, e.g. in tun-
nels or parking garages .
iUsing roof carriers may impair th ecorrec t
functionin gof aroof antenn a(phone, sat -
ellite radio, GPS).
64Introduction
Navigation
Page 70 of 246
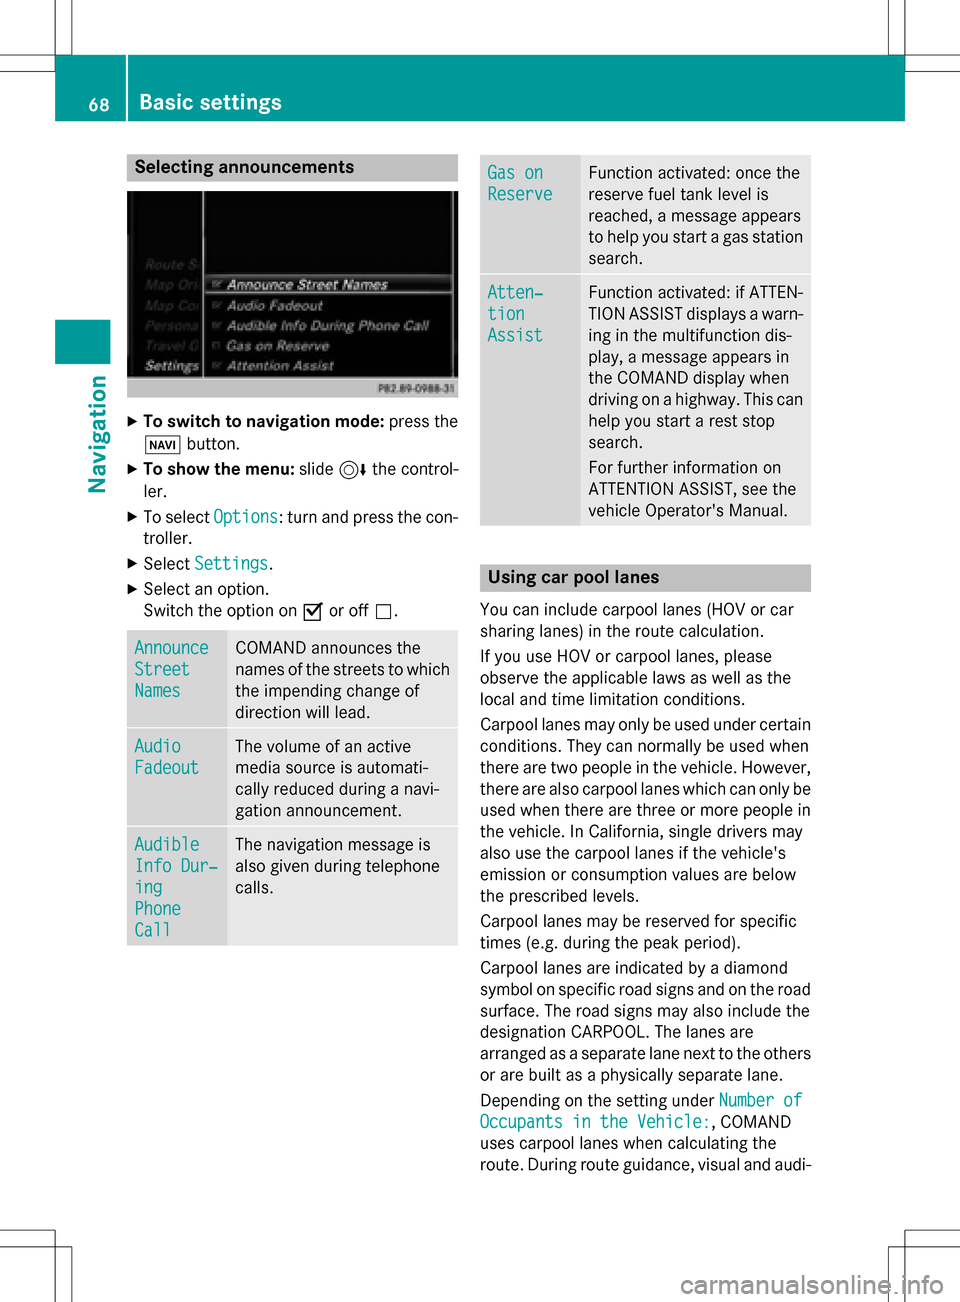
Selecting announcements
XTo switch to navigation mode:press the
Ø button.
XTo show the menu: slide6the control-
ler.
XTo select Options: turn and press the con-
troller.
XSelect Settings.
XSelect an option.
Switch the option on Oor off ª.
Announce
Street
Names
COMAND announces the
names of the streets to which
the impending change of
direction will lead.
Audio
Fadeout
The volume of an active
media source is automati-
cally reduced during a navi-
gation announcement.
Audible
Info Dur‐
ing
Phone
Call
The navigation message is
also given during telephone
calls.
Gas on
Reserve
Function activated: once the
reserve fuel tank level is
reached, a message appears
to help you start a gas station
search.
Atten‐
tion
Assist
Function activated: if ATTEN-
TION ASSIST displays a warn-
ing in the multifunction dis-
play, a message appears in
the COMAND display when
driving on a highway. This can
help you start a rest stop
search.
For further information on
ATTENTION ASSIST, see the
vehicle Operator's Manual.
Using car pool lanes
You can include carpool lanes (HOV or car
sharing lanes) in the route calculation.
If you use HOV or carpool lanes, please
observe the applicable laws as well as the
local and time limitation conditions.
Carpool lanes may only be used under certain
conditions. They can normally be used when
there are two people in the vehicle. However,
there are also carpool lanes which can only be
used when there are three or more people in
the vehicle. In California, single drivers may
also use the carpool lanes if the vehicle's
emission or consumption values are below
the prescribed levels.
Carpool lanes may be reserved for specific
times (e.g. during the peak period).
Carpool lanes are indicated by a diamond
symbol on specific road signs and on the road
surface. The road signs may also include the
designation CARPOOL. The lanes are
arranged as a separate lane next to the others
or are built as a physically separate lane.
Depending on the setting under Number of
Occupants in the Vehicle:, COMAND
uses carpool lanes when calculating the
route. During route guidance, visual and audi-
68Basic settings
Navigation
Page 81 of 246

XTo select a destination:press the con-
troller.
The list contains the Menu
menu item. If
several destinations are available in the
area around the crosshair, these are also
displayed.
XTo show the menu: press the controller.
XTo select a destination from the selection
list: turn and press the controller.
If the digital map provides navigable
address data, you will see the destination
address in the address entry menu.
XTo start route calculation: selectStart.
Entering intermediate destinations
Introduction
You can also map the route to the destination yourself by entering up to four intermediate
destinations. The sequence of the intermedi-
ate destinations can be changed at any time.
COMAND provides a selection of predefined
POIs in eight categories, e.g. Restaurants
for a quick selection. You can also use the
destination entry options to enter intermedi-
ate destinations.
Creating intermediate destinations
XTo switch to navigation mode: press the
Ø button.
XTo show the menu: slide6the control-
ler.
XTo select Destination: turn and press the
controller.
XSelect Intermediate Destinations.
The destination is entered in the intermedi-
ate destinations menu.
XTo select Add New:: press the controller.
XTo select a POI category or Other: turn and
press the controller.
After selecting one of the eight POI cate-
gories, available POIs are displayed:
Ralong the route
Rin the vicinity
COMAND first searches for destinations on
the route. The search for destinations is
then initiated in the area around the current
vehicle position.
XAfter selecting Other, select one of the
destination entry options.
Destination entry79
Navigation
Z