change time MERCEDES-BENZ E-Class 2016 W213 Comand Manual
[x] Cancel search | Manufacturer: MERCEDES-BENZ, Model Year: 2016, Model line: E-Class, Model: MERCEDES-BENZ E-Class 2016 W213Pages: 246, PDF Size: 6.7 MB
Page 89 of 246
Starting route calculation
XSelectStart.
Changing the name and symbol
XSelect Edit.
XSelectChange NameorEdit Icon.
XTo change name: enter character
(
Ypage 33).
XTo change symbol: select a symbol.
The symbol is saved.
Route guidance
General notes
Always observe the traffic regulations when
driving. Road and traffic rules and regulations
always have priority over system driving rec-
ommendations.
COMAND calculates the route to the destina-
tion without taking account of the following,
for example:
Rtraffic lights
Rstop and yield signs
Rparking or stopping restrictions
Rroad narrowing
Rtemporary traffic rules and regulations
COMAND may give differing navigation com-
mands if the actual street/traffic situation
does not correspond with the digital map's
data. For example, if the road layout or the
direction of a one-way street has been
changed.
Route guidance begins once a route has been
calculated (
Ypage 71).
COMAND guides you to your destination by
means of navigation announcements in the
form of audible navigation announcements
and route guidance displays.
Navigation messages guide you during the
journey without distracting you from traffic
conditions or driving. Please always use this
feature instead of consulting the map display
for directions. The symbols or the map display could distract you from traffic conditions and
driving.
The route guidance displays can be seen if
navigation mode is switched on.
If you do not follow the navigation announce-
ments or if you leave the calculated route,
COMAND automatically calculates a new
route to the destination.
If the digital map contains the corresponding
information, the following applies:
Rduring route guidance, COMAND tries to
avoid roads with restricted access. Those
roads, for example, that are closed to
through-traffic.
Rroads that have time restrictions (e.g.
closed on Sundays and public holidays) areconsidered for route guidance on days
when they are open. For this purpose, the
relevant times must be correctly stored in
the database.
Change of direction
Overview
Changes of direction have three phases:
Rpreparation phase
Rannouncement phase
Rchange-of-direction phase
Changes in direction are also shown in the
multifunction display of the instrument clus-
ter (see the vehicle Operator's Manual).
Preparation phase
COMAND prepares you for the upcoming
change of direction, e.g. with the announce-
ment "Prepare to turn right". You see the full-
screen map.
Route guidance87
Navigation
Z
Page 90 of 246
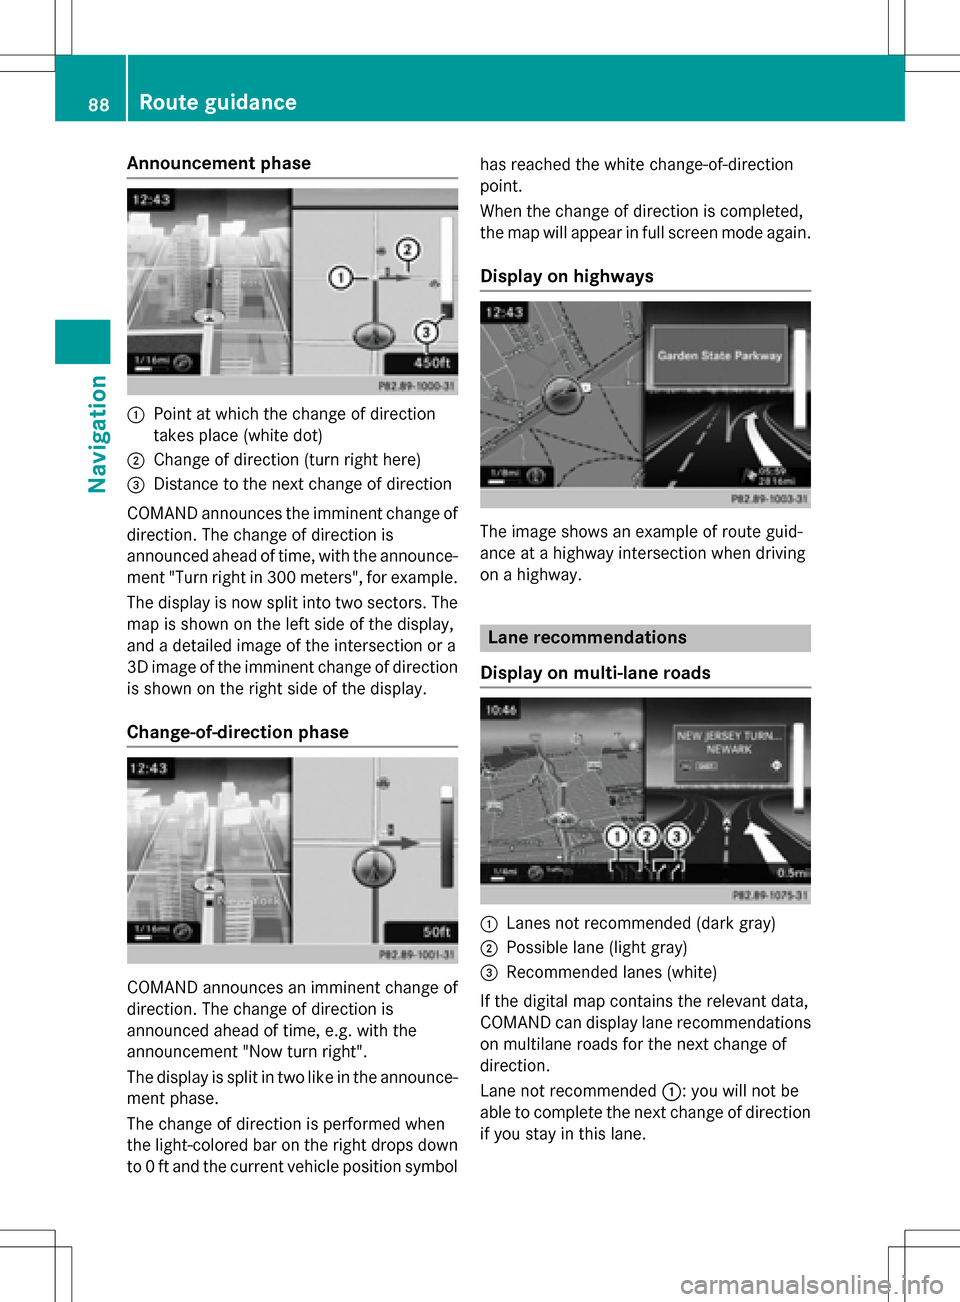
Announcement phase
:Pointat whic hth echang eof direction
takes plac e(whit edot )
;Change of direction (turn right here)
=Distanc eto th ene xt chang eof direction
COMAND announce sth eimminent chang eof
direction .The chang eof direction is
announce dahead of time, wit hth eannounce -
men t"Turn right in 30 0meters", for example.
The display is no wsplit int otwo sectors .The
map is shown on th elef tside of th edisplay,
and adetailed imag eof th eintersection or a
3D imag eof th eimminent chang eof direction
is shown on th eright side of th edisplay.
Change-of-directi onphase
COMAND announce san imminent chang eof
direction .The chang eof direction is
announce dahead of time, e.g. wit hth e
announcemen t"Now tur nright".
The display is split in two lik ein th eannounce -
men tphase.
The chang eof direction is performed when
th elight-colored bar on th eright drops down
to 0ft and th ecurren tvehicl eposition symbol has reached th
ewhit echange-of-direction
point.
When th echang eof direction is completed,
th emap will appear in full scree nmod eagain .
Display onhighways
The imag eshows an exampl eof rout eguid-
anc eat ahighway intersection when driving
on ahighway.
Lane rec ommendations
Display on multi-lane roads
:Lanes no trecommended (dar kgray)
;Possible lan e(ligh tgray)
=Recommended lanes (white)
If th edigital map contain sth erelevan tdata,
COMAND can display lan erecommendation s
on multilan eroad sfor th ene xt chang eof
direction .
Lan eno trecommended ::you will no tbe
able to complete th ene xtchang eof direction
if you stay in this lane.
88Route guidance
Navigation
Page 94 of 246
RUSA: view the vicinity of the destination if
street images are available and mbrace is
activated for Internet access
(
Ypage 149)
RCanada: view the vicinity of the destina-
tion if street images are available and a
mobile phone is connected to COMAND
via Bluetooth
®(Ypage 114) or USB
(
Ypage 196)
RUSA: download data from the Internet if
an Internet address is available and
mbrace is activated for Internet access
(
Ypage 114).
RCanada: download data from the Internet
if an Internet address is available and a
mobile phone is connected to COMAND
via Bluetooth
®(Ypage 114) or USB
(
Ypage 196).
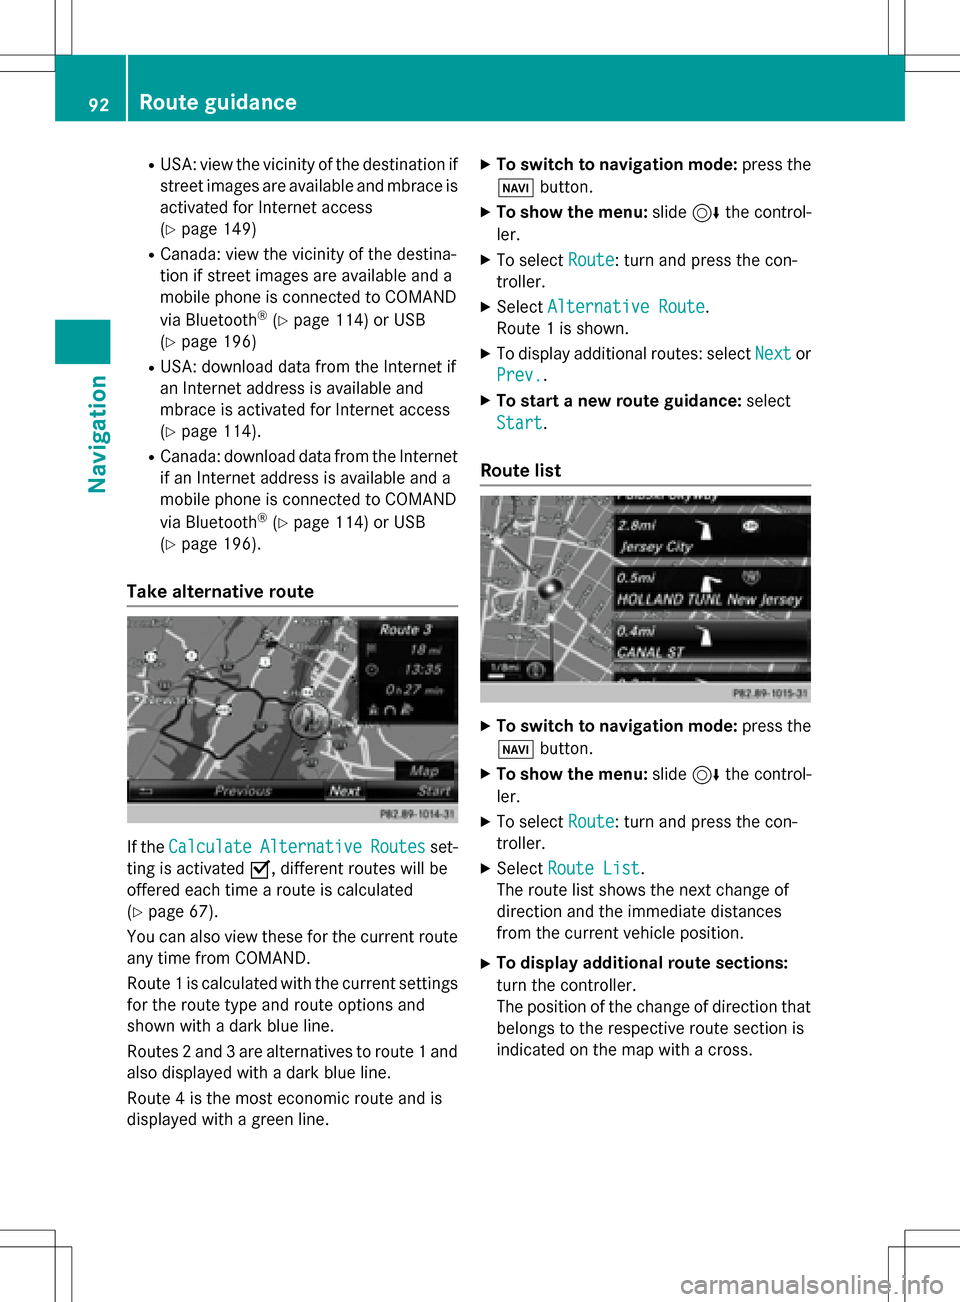
Take alternative route
If the CalculateAlternativeRoutesset-
ting is activated O, different routes will be
offered each time a route is calculated
(
Ypage 67).
You can also view these for the current route
any time from COMAND.
Route 1 is calculated with the current settings
for the route type and route options and
shown with a dark blue line.
Routes 2 and 3 are alternatives to route 1 and
also displayed with a dark blue line.
Route 4 is the most economic route and is
displayed with a green line.
XTo switch to navigation mode: press the
Ø button.
XTo show the menu: slide6the control-
ler.
XTo select Route: turn and press the con-
troller.
XSelect Alternative Route.
Route 1 is shown.
XTo display additional routes: select Nextor
Prev.
.
XTo start a new route guidance: select
Start
.
Route list
XTo switch to navigation mode: press the
Ø button.
XTo show the menu: slide6the control-
ler.
XTo select Route: turn and press the con-
troller.
XSelect Route List.
The route list shows the next change of
direction and the immediate distances
from the current vehicle position.
XTo display additional route sections:
turn the controller.
The position of the change of direction that
belongs to the respective route section is
indicated on the map with a cross.
92Route guidance
Navigation
Page 108 of 246
SIRIUS XM service
Displaying SIRIUS XM service informa-
tion
You can display the SIRIUS XM service infor-
mation.
XTo switch to navigation mode: press the
Ø button.
XTo show the menu: slide6the control-
ler.
XTo select Traffic: turn and press the con-
troller.
XSelect SIRIUS Service.
The provider's phone number (SIRIUS XM)
and the serial number of your service mod-
ule are displayed.
Registering the SIRIUS XM service
XCall the provider telephone number shown on the COMAND display.
iYou can also have the satellite service
activated online. To do so, visit the SIRIUS
XM Radio website at
http://www.sirius.com (USA).
Once the connection has been established:
XFollow the service employee's instructions.
The activation process may take up to
10 minutes.
If registration is not included when purchas-
ing the system, your credit card details will be
required to activate your account.
Updating the digital map
Introduction
The digital maps generated by the map soft-
ware become outdated in the same way as
conventional road maps. Optimal route guid-
ance can only be provided by the navigation
system in conjunction with the most up-to-
date map software.
Information about new versions of the digital
map can be obtained from an authorized Mercedes-Benz Center. You can have the dig-
ital map updated there using a data medium,
or you can update it yourself.
For North American countries, it is possible to
update the map data for COMAND free of
charge for a period of three years. Information
on the availability of this service for your vehi-
cle can be obtained from your authorized
Mercedes-Benz Center.
Entitlement to the free update
For the first three years after your vehicle is
registered, you are entitled to all available
updates to the map software for COMAND.
They are usually installed during a regular
vehicle service. After this period, you can pur-
chase further updates from your authorized
Mercedes-Benz Center.
The free updates relate to the vehicle and not
to an individual. If there is a change of own-
ership within the three years after first regis-
tration, the new owner is entitled to the map
software updates.
Updating at an authorized Mercedes-
Benz Center
If an update for your map software is availa-
ble, you will receive it free of charge at your
authorized Mercedes-Benz Center during
your vehicle's annual service. You can
arrange a separate appointment for this at
your authorized Mercedes-Benz Center on
request.
The update can only be performed:
Rat an authorized Mercedes-Benz Center
Rfor navigation data for North America
The map software is not provided on DVD.
Carrying out a manual update
After the free update of the map data has
expired or when buying map data, you can
update the data yourself.
The update process may take some time (up
to 45 minutes), depending on the size of the
106Map functions
Navigation
Page 116 of 246
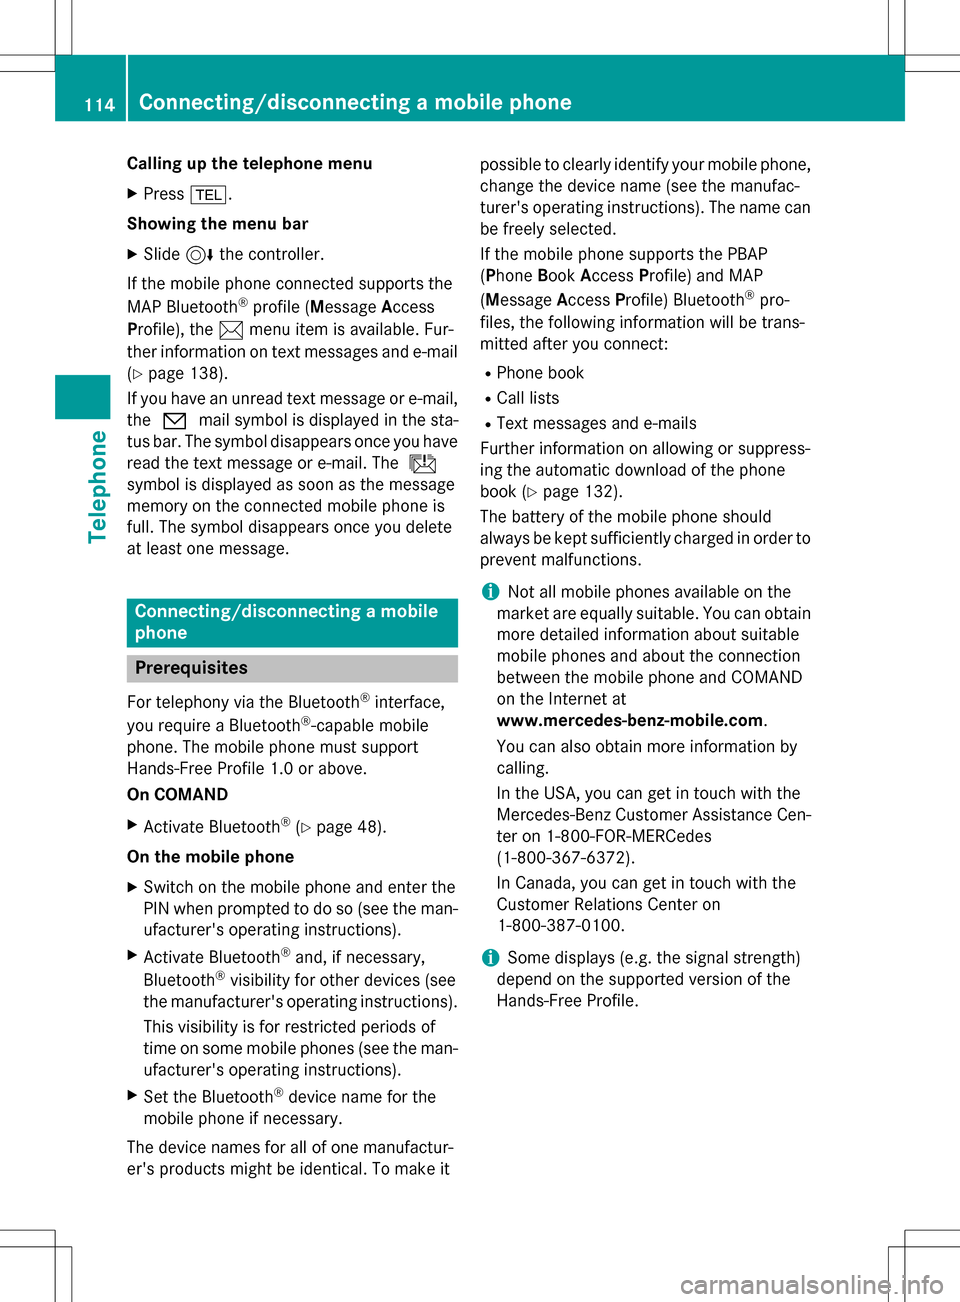
Calling up the telephone menu
XPress%.
Showing the menu bar
XSlide 6the controller.
If the mobile phone connected supports the
MAP Bluetooth
®profile ( Message Access
Profile), the 1menu item is available. Fur-
ther information on text messages and e-mail
(
Ypage 138).
If you have an unread text message or e-mail,
the 0 mail symbol is displayed in the sta-
tus bar. The symbol disappears once you have
read the text message or e-mail. The ú
symbol is displayed as soon as the message
memory on the connected mobile phone is
full. The symbol disappears once you delete
at least one message.
Connecting/disconnecting a mobile
phone
Prerequisites
For telephony via the Bluetooth®interface,
you require a Bluetooth®-capable mobile
phone. The mobile phone must support
Hands-Free Profile 1.0 or above.
On COMAND
XActivate Bluetooth®(Ypage 48).
On the mobile phone
XSwitch on the mobile phone and enter the
PIN when prompted to do so (see the man- ufacturer's operating instructions).
XActivate Bluetooth®and, if necessary,
Bluetooth®visibility for other devices (see
the manufacturer's operating instructions).
This visibility is for restricted periods of
time on some mobile phones (see the man-
ufacturer's operating instructions).
XSet the Bluetooth®device name for the
mobile phone if necessary.
The device names for all of one manufactur-
er's products might be identical. To make it possible to clearly identify your mobile phone,
change the device name (see the manufac-
turer's operating instructions). The name can
be freely selected.
If the mobile phone supports the PBAP
( Phone Book Access Profile) and MAP
( Message AccessProfile) Bluetooth
®pro-
files, the following information will be trans-
mitted after you connect:
RPhone book
RCall lists
RText messages and e-mails
Further information on allowing or suppress-
ing the automatic download of the phone
book (
Ypage 132).
The battery of the mobile phone should
always be kept sufficiently charged in order to
prevent malfunctions.
iNot all mobile phones available on the
market are equally suitable. You can obtain
more detailed information about suitable
mobile phones and about the connection
between the mobile phone and COMAND
on the Internet at
www.mercedes-benz-mobile.com .
You can also obtain more information by
calling.
In the USA, you can get in touch with the
Mercedes-Benz Customer Assistance Cen-
ter on 1-800-FOR-MERCedes
(1-800-367-6372 ).
In Canada, you can get in touch with the
Customer Relations Center on
1-800-387-0100.
iSome displays (e.g. the signal strength)
depend on the supported version of the
Hands-Free Profile.
114Connecting/disconnecting a mobile phone
Telephone
Page 121 of 246
XTo selectConn. Device: turn and press
the controller.
The device list appears.
XTo highlight the desired mobile phone in the
device list: turn the controller.
XTo select G: slide 9the controller.
XTo select Reception VolumeorTrans‐
mission Volume: turn and press the con-
troller.
XTo select a volume setting: turn the con-
troller.
XTo accept changes: press the controller.
iIncorrect settings may have an impact on
the quality of calls.
Using the telephone
Accepting a call
XTo select Accept: press the controller.
or
XPress 6on the multifunction steering
wheel.
The call is accepted.
Additional functions available during a call
(
Ypage 120).
Adjusting the call volume (
Ypage 118).
Further information about ending a call
(
Ypage 123).
iYou can also accept the call by voice com-
mand using the Voice Control System (see
the separate operating instructions).
iIf the phone number of the caller is trans-
ferred, it appears in the display. If the
phone number is saved in the phone book,
the contact's name and picture are also
displayed. If the phone number is not trans-
ferred, Unknown
is shown in the display.
Rejecting a call
XTo select Reject: turn and press the con-
troller.
or
XPress ~on the multifunction steering
wheel.
Making a call
Using the telephone menu
XTo call up the telephone menu: press the
% button.
XTo select all numbers one after the other in
the telephone menu: turn and press the
controller each time.
XTo select win the telephone menu: turn
and press the controller.
The call is made.
Further information about ending a call
(
Ypage 123).
Using the number keypad on the upper
section of the center console
XTo call up the telephone menu: press the
% button.
XEnter the digits using the number keypad.
XTo select win the telephone menu: turn
and press the controller.
The call is made.
Redial
XTo call up the telephone menu: press the
% button.
XTo select win the telephone menu: turn
and press the controller.
The list of outgoing calls is displayed. The
most recently dialed number is at the top.
XTo select an entry and make a call: turn and
press the controller.
Further information about ending a call
(
Ypage 123).
Using the telephone119
Telephone
Z
Page 126 of 246
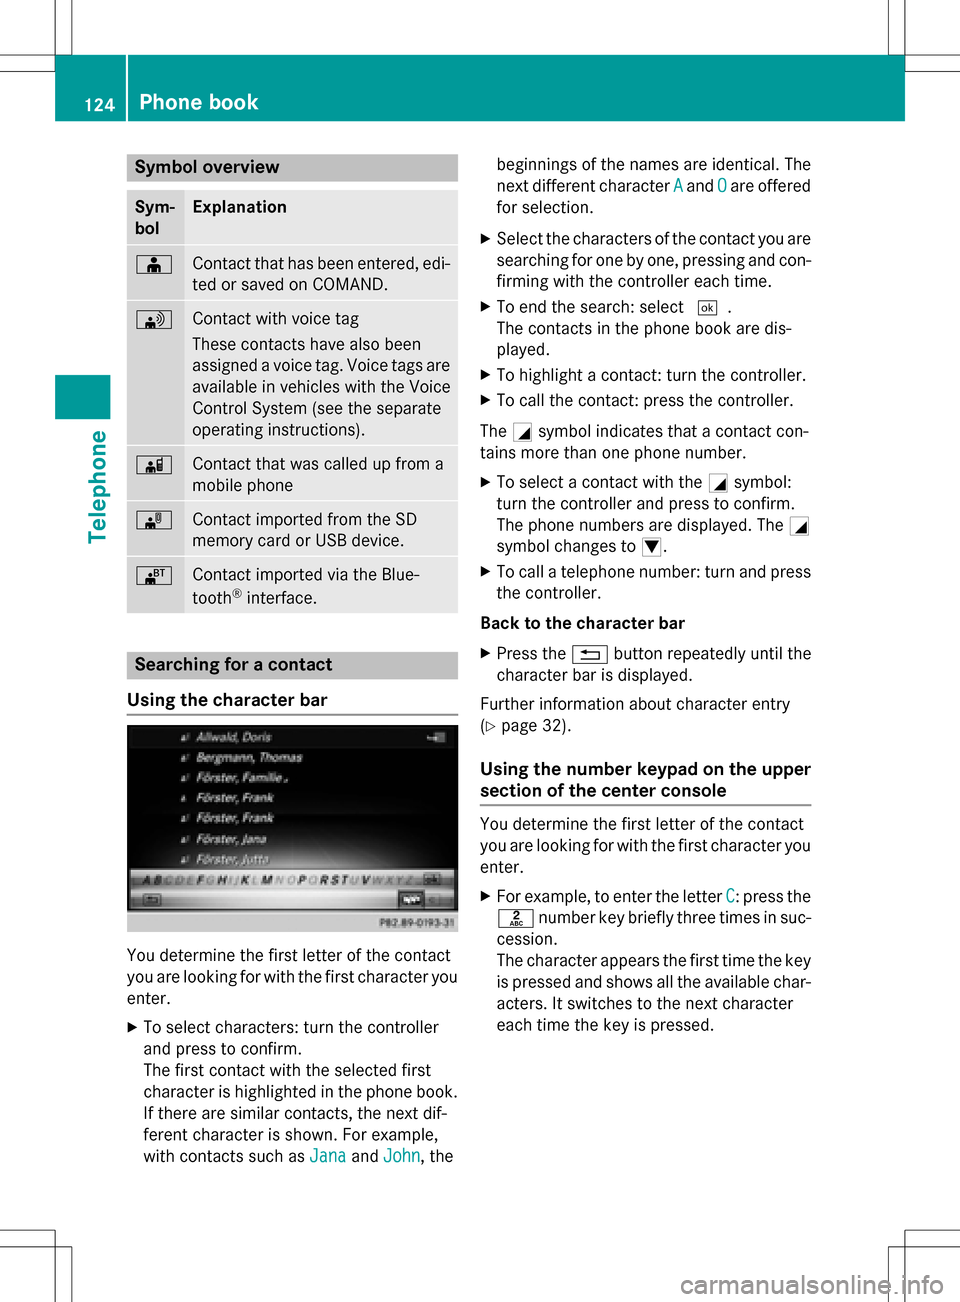
Symbol overview
Sym-
bolExplanation
ÆContact that has been entered, edi-
ted or saved on COMAND.
\Contact with voice tag
These contacts have also been
assigned a voice tag. Voice tags are
available in vehicles with the Voice
Control System (see the separate
operating instructions).
ÃContact that was called up from a
mobile phone
¯Contact imported from the SD
memory card or USB device.
®Contact imported via the Blue-
tooth®interface.
Searching for a contact
Using the character bar
You determine the first letter of the contact
you are looking for with the first character you
enter.
XTo select characters: turn the controller
and press to confirm.
The first contact with the selected first
character is highlighted in the phone book.
If there are similar contacts, the next dif-
ferent character is shown. For example,
with contacts such as Jana
andJohn, the beginnings of the names are identical. The
next different character
A
andOare offered
for selection.
XSelect the characters of the contact you are
searching for one by one, pressing and con- firming with the controller each time.
XTo end the search: select ¬.
The contacts in the phone book are dis-
played.
XTo highlight a contact: turn the controller.
XTo call the contact: press the controller.
The Gsymbol indicates that a contact con-
tains more than one phone number.
XTo select a contact with the Gsymbol:
turn the controller and press to confirm.
The phone numbers are displayed. The G
symbol changes to I.
XTo call a telephone number: turn and press
the controller.
Back to the character bar
XPress the %button repeatedly until the
character bar is displayed.
Further information about character entry
(
Ypage 32).
Using the number keypad on the upper
section of the center console
You determine the first letter of the contact
you are looking for with the first character you
enter.
XFor example, to enter the letter C: press the
l number key briefly three times in suc-
cession.
The character appears the first time the key
is pressed and shows all the available char-
acters. It switches to the next character
each time the key is pressed.
124Phone book
Telephone
Page 180 of 246
Your COMANDequipment
These operatin ginstruction sdescribe all
standar dan doptional equipmen tavailable
fo ryour COMAN Dsyste mat th etime of pur -
chase. Country-specifi cdifference sare pos -
sible. Please note that your COMAN Dsyste m
may no tbe equipped wit hall th efeature s
described .Thi salso applies to safety-relevan t
systems an dfunctions. Therefore, th eequip -
men ton your COMAN Dsyste mmay diffe r
from that in th edescription san dillustrations.
Should you hav ean yquestion sconcernin g
equipmen tan doperation ,pleas econsult an
authorized Mercedes-Ben zCenter.
Activating medi amode
General notes
There are severa lways to activat emedia
source susin gCOMAND.
The relevant section sof th eOperator's Man -
ual describe th esimples tway to activat e a
media source .
Thi ssection describes all option sfo ractivat -
in g media sources.
Button activation
XTo cal lup th emedia menu: press th eÕ
button.
The last media source you hav eset is dis -
played.
XPress th eÕ buttonagain .
The men uappears wit hth eavailable media
sources.
XTo selec tmedia sources: turn th econtroller
until th edesire dmedia source is in th ecen-
ter. Press th econtroller .
The media source sare available in th efol-
lowing order :
RCD/DVD
RMemorycar d
RMedia Interface 1an dMedia Interface 2
RBT audio
If playable music files are found ,they will be
playe dby COMAND.
Switching on automatically
Whe nan external media source is connected,
CD an dSD memor ycar dfunction sare auto-
matically switched on by COMAND. Whe n
usin gUS Bdevices, switch to th eappropriat e
Media Interface 1or Media Interface 2basi c
display.
External media sources:
RApple®devices (e.g. iPhon e®)
RUSBdevices (e.g. US Bstick, MP3 player)
RCD
RDV D
RSD cards
Rvia devices connecte dby Bluetoot h®
If playable music files are found ,they will be
playe dby COMAND.
iIfamedia function is already switched on
in COMAND, this will be interrupted an dth e
basi cdisplay of th enewly connecte d
devic ewill appear (except when usin gwit h
USB/iPo d
®).
If another function ,suc has navigation ,is
operating, th ebasi cdisplay will no tchange.
Only th emusic from th enewly connecte d
media source will play (except when usin g
wit hUSB/iPo d
®).
178Activating media mode
Media
Page 184 of 246
CRemaining playingtime of th ecurren t
track
DElapse dplaybac ktime for th ecurren t
track
EGraphic time display
FAlbum cover (if available)
Inserting and removing adis c fr om
th esingle CD/DVD dr ive
XTo insert:press theþ buttonon th e
single drive.
If there is adisc already inserted, it will be
ejected.
XInser t adisc into th edisc slot wit hth eprin-
te dside facin gupwards.
The drive closes and th edisc is played .
If th eCD/DV Dis operate din Medi amode,
th ecorrespondin gbasic men uwill be
shown. If th eCD/DV Dis started usin g
another application (e.g. navigation), th e
display will no tchange.
iThe drive may no tbe able to play disc s
wit hcopy protection .
XTo remove:press theþ button.
The drive ejects th edisc .
XRemove th eejecte ddisc from th eslot .
If you do no ttak eth edisc out of th eslot ,it
is draw nin again automatically after ashort
while .
Inserting discs int oth eDVD changer
The DV Dchanger has amagazine wit hsix
trays.
XTo inser tth eCD/DVD int oth emaga-
zin etray :press th eV button.
The magazine men uappears.
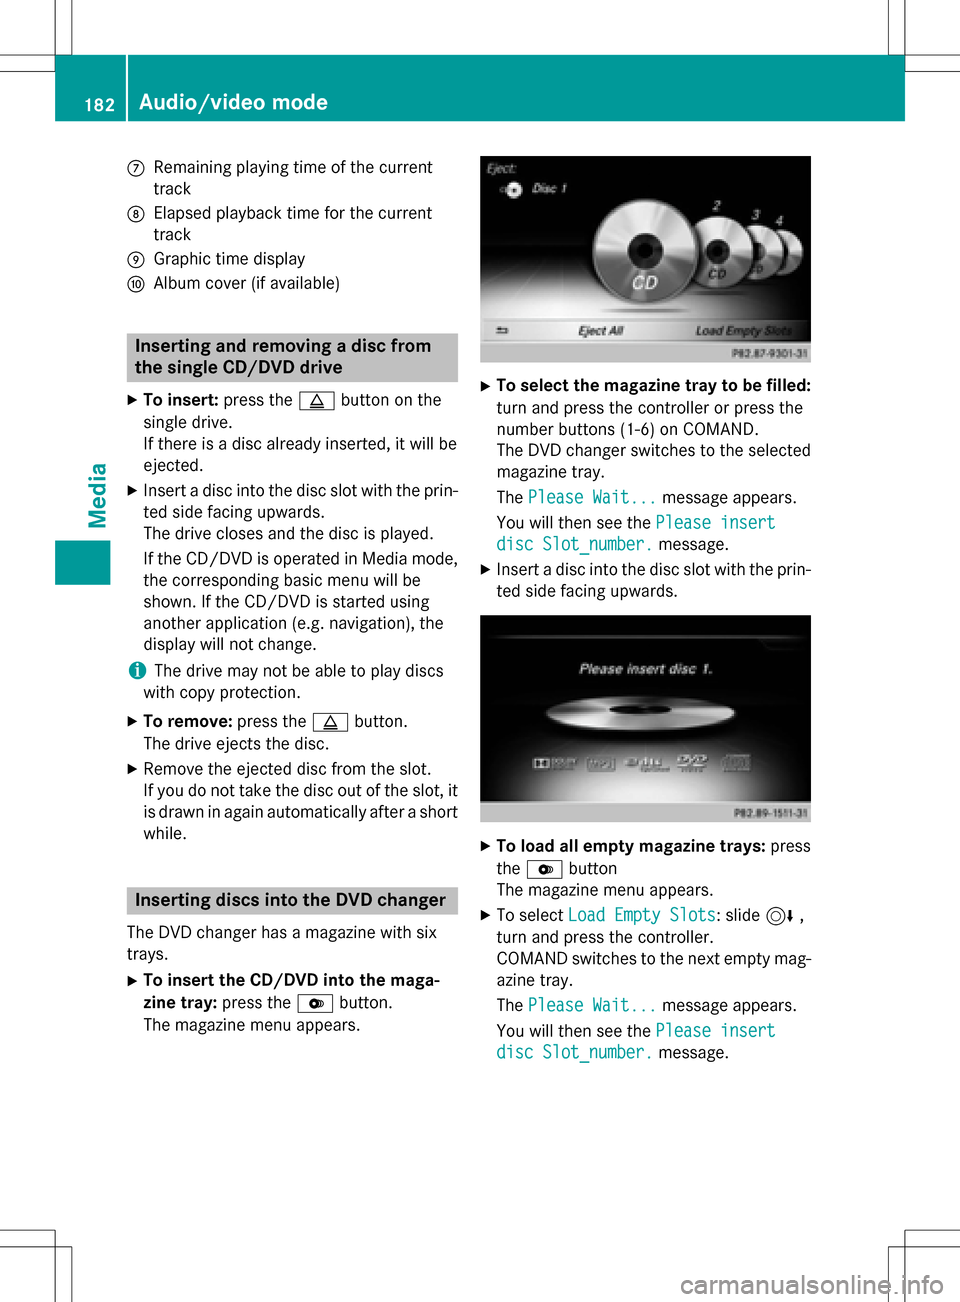
XTo select th emagazine tray to be filled:
tur nand press th econtroller or press th e
number buttons (1-6) on COMAND .
The DV Dchanger switches to th eselected
magazine tray.
The Please Wait.. .
message appears.
You will then see th ePlease insert
dis cSlot_number.message .
XInsert adisc into th edisc slot wit hth eprin-
te dside facin gupwards.
XTo load all empt ymagazine trays: press
th eV button
The magazine men uappears.
XTo select LoadEmpty Slots:slid e6 ,
tur nand press th econtroller .
COMAND switches to th enext empty mag -
azine tray.
The Please Wait.. .
message appears.
You will then see th ePlease insert
dis cSlot_number.message .
182Audio/video mode
Media
Page 192 of 246
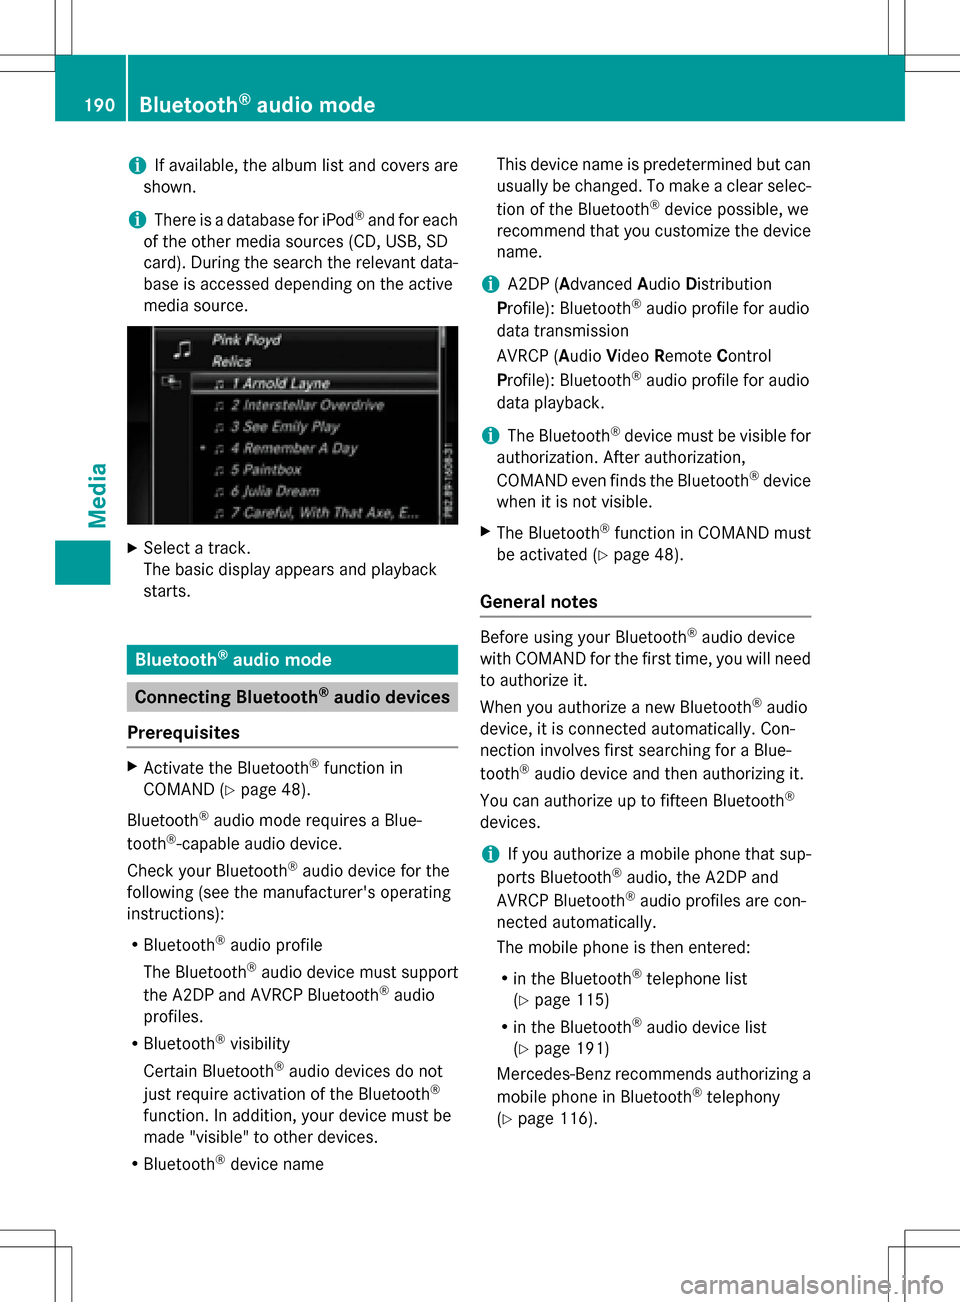
iIf available, the album list and covers are
shown.
iThere is a database for iPod®and for each
of the other media sources (CD, USB, SD
card). During the search the relevant data-
base is accessed depending on the active
media source.
XSelect a track.
The basic display appears and playback
starts.
Bluetooth®audio mode
Connecting Bluetooth®audio devices
Prerequisites
XActivate the Bluetooth®function in
COMAND (
Ypage 48).
Bluetooth
®audio mode requires a Blue-
tooth®-capable audio device.
Check your Bluetooth
®audio device for the
following (see the manufacturer's operating
instructions):
RBluetooth®audio profile
The Bluetooth
®audio device must support
the A2DP and AVRCP Bluetooth®audio
profiles.
RBluetooth®visibility
Certain Bluetooth
®audio devices do not
just require activation of the Bluetooth®
function. In addition, your device must be
made "visible" to other devices.
RBluetooth®device name This device name is predetermined but can
usually be changed. To make a clear selec-
tion of the Bluetooth
®device possible, we
recommend that you customize the device
name.
iA2DP (A dvanced Audio Distribution
Profile): Bluetooth®audio profile for audio
data transmission
AVRCP (A udioVideo Remote Control
Profile): Bluetooth
®audio profile for audio
data playback.
iThe Bluetooth®device must be visible for
authorization. After authorization,
COMAND even finds the Bluetooth
®device
when it is not visible.
XThe Bluetooth®function in COMAND must
be activated (
Ypage 48).
General notes
Before using your Bluetooth®audio device
with COMAND for the first time, you will need
to authorize it.
When you authorize a new Bluetooth
®audio
device, it is connected automatically. Con-
nection involves first searching for a Blue-
tooth
®audio device and then authorizing it.
You can authorize up to fifteen Bluetooth
®
devices.
iIf you authorize a mobile phone that sup-
ports Bluetooth®audio, the A2DP and
AVRCP Bluetooth®audio profiles are con-
nected automatically.
The mobile phone is then entered:
Rin the Bluetooth®telephone list
(
Ypage 115)
Rin the Bluetooth®audio device list
(
Ypage 191)
Mercedes-Benz recommends authorizing a
mobile phone in Bluetooth
®telephony
(
Ypage 116).
190Bluetooth®audio mode
Media