lug MERCEDES-BENZ E-Class 2016 W213 Comand Manual
[x] Cancel search | Manufacturer: MERCEDES-BENZ, Model Year: 2016, Model line: E-Class, Model: MERCEDES-BENZ E-Class 2016 W213Pages: 246, PDF Size: 6.7 MB
Page 230 of 246
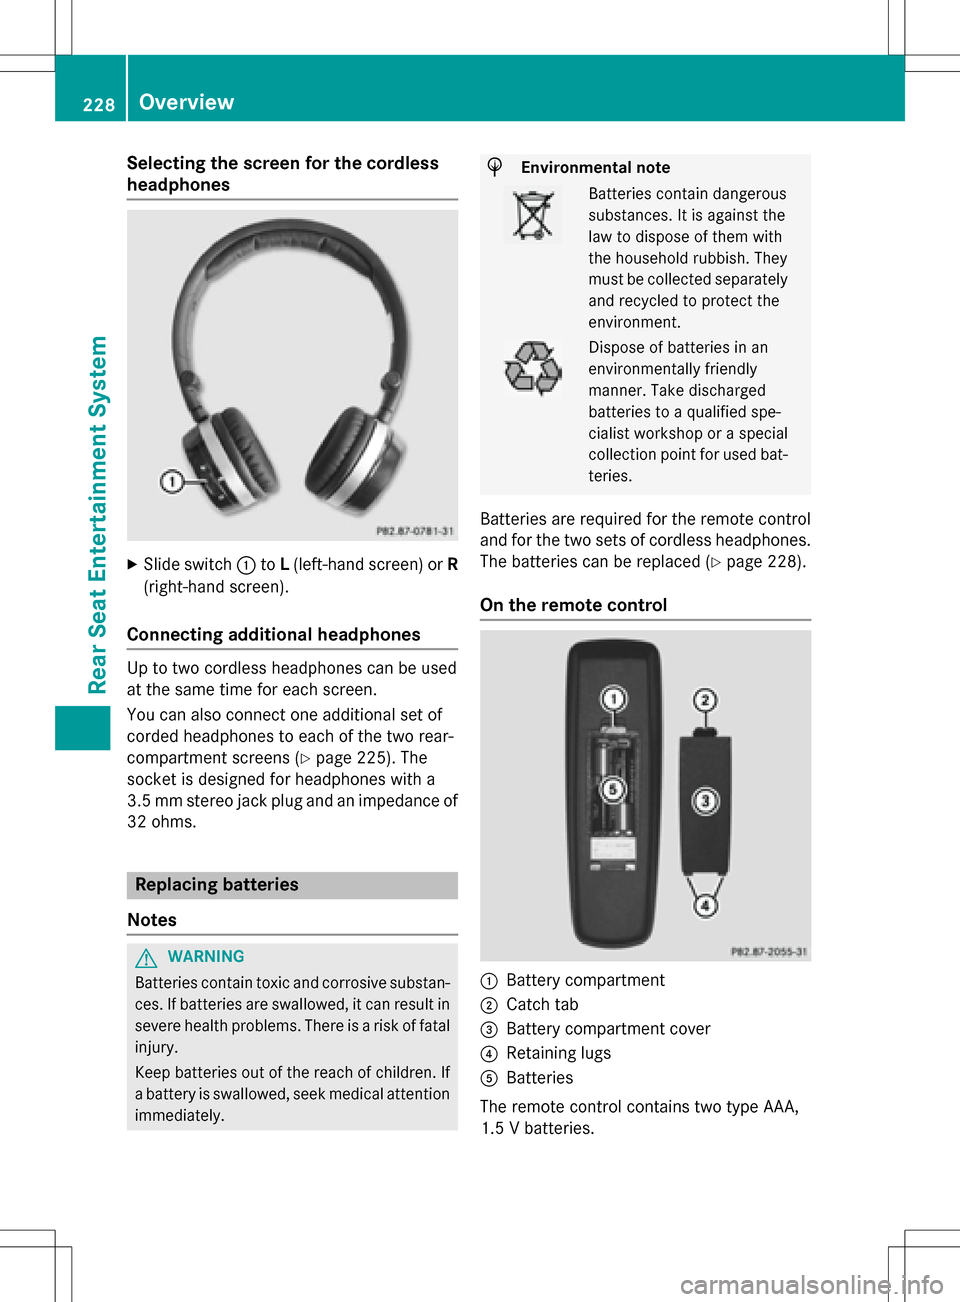
Selecting the screen for the cordless
headphones
XSlide switch:toL(left-hand screen) or R
(right-hand screen).
Connecting additional headphones
Up to two cordless headphones can be used
at the same time for each screen.
You can also connect one additional set of
corded headphones to each of the two rear-
compartment screens (
Ypage 225). The
socket is designed for headphones with a
3.5 mm stereo jack plug and an impedance of 32 ohms.
Replacing batteries
Notes
GWARNING
Batteries contain toxic and corrosive substan- ces. If batteries are swallowed, it can result in
severe health problems. There is a risk of fatalinjury.
Keep batteries out of the reach of children. If
a battery is swallowed, seek medical attention immediately.
HEnvironmental note
Batteries contain dangerous
substances. It is against the
law to dispose of them with
the household rubbish. They
must be collected separatelyand recycled to protect the
environment.
Dispose of batteries in an
environmentally friendly
manner. Take discharged
batteries to a qualified spe-
cialist workshop or a special
collection point for used bat-
teries.
Batteries are required for the remote control
and for the two sets of cordless headphones.
The batteries can be replaced (
Ypage 228).
On the remote control
:Battery compartment
;Catch tab
=Battery compartment cover
?Retaining lugs
ABatteries
The remote control contains two type AAA,
1.5 V batteries.
228Overview
Rear Seat Entertainment System
Page 231 of 246
XTo open the battery compartment:
remove battery compartment cover=on
the back of the remote control.
XTo do so, press down retaining lug ;and
take off battery compartment cover =.
XRemove discharged batteriesAfrom the
tray.
XInsert the new batteries. Observe the polar-
ity markings on the batteries and battery
compartment when doing so.
Left-hand battery: the positive pole (+)
must face upwards.
Right-hand battery: the positive pole (+)
must face downwards.
XTo close the battery compartment:
insert battery compartment cover =start-
ing with retaining lugs ?into the battery
compartment and allow catch tab ;to
engage in place.
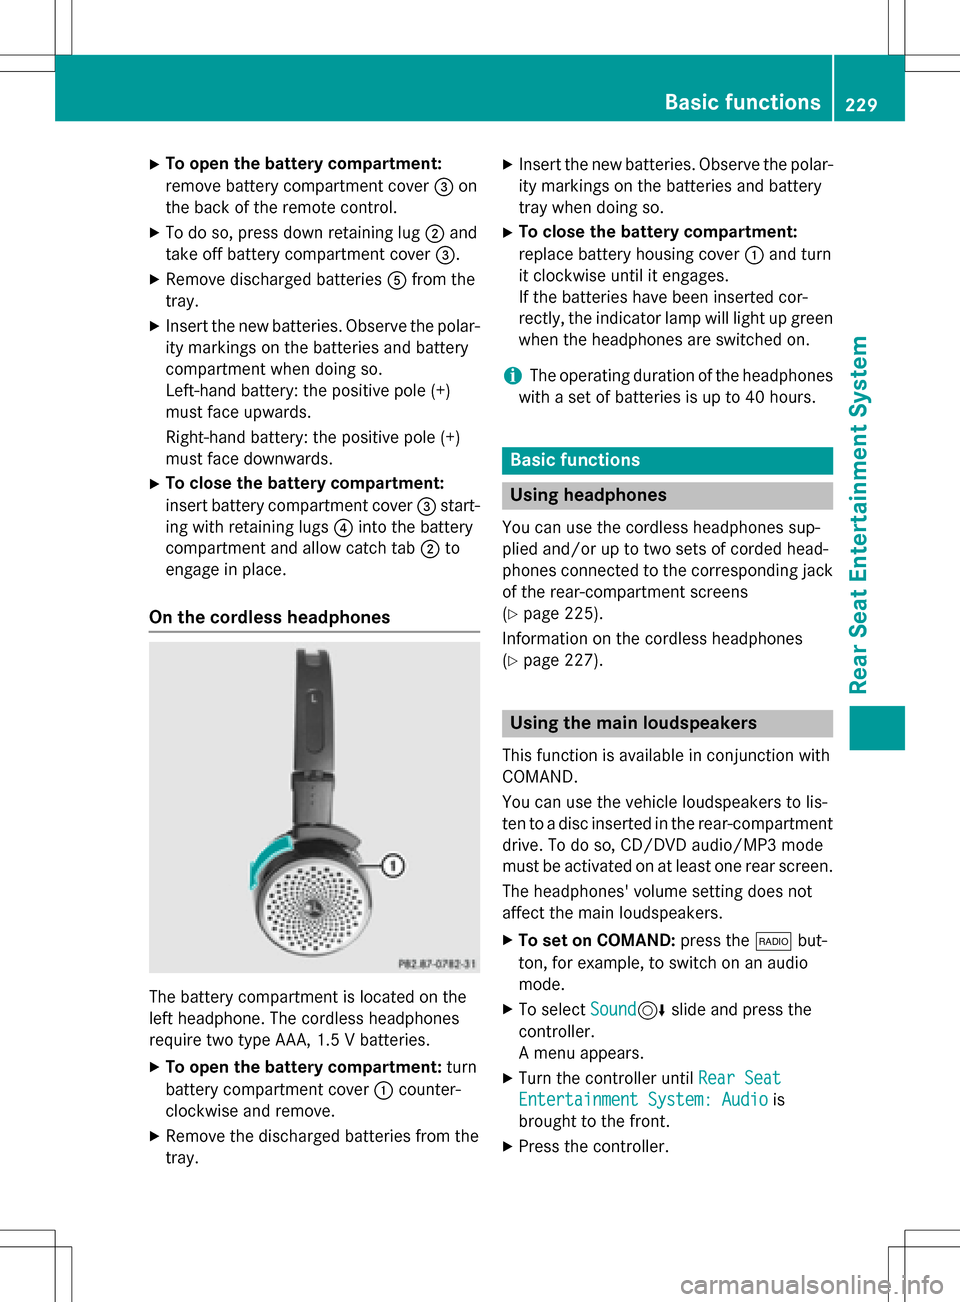
On the cordless headphones
The battery compartment is located on the
left headphone. The cordless headphones
require two type AAA, 1.5 V batteries.
XTo open the battery compartment: turn
battery compartment cover :counter-
clockwise and remove.
XRemove the discharged batteries from the
tray.
XInsert the new batteries. Observe the polar-
ity markings on the batteries and battery
tray when doing so.
XTo close the battery compartment:
replace battery housing cover :and turn
it clockwise until it engages.
If the batteries have been inserted cor-
rectly, the indicator lamp will light up green
when the headphones are switched on.
iThe operating duration of the headphones
with a set of batteries is up to 40 hours.
Basic functions
Using headphones
You can use the cordless headphones sup-
plied and/or up to two sets of corded head-
phones connected to the corresponding jack
of the rear-compartment screens
(
Ypage 225).
Information on the cordless headphones
(
Ypage 227).
Using the main loudspeakers
This function is available in conjunction with
COMAND.
You can use the vehicle loudspeakers to lis-
ten to a disc inserted in the rear-compartment
drive. To do so, CD/DVD audio/MP3 mode
must be activated on at least one rear screen.
The headphones' volume setting does not
affect the main loudspeakers.
XTo set on COMAND: press the$but-
ton, for example, to switch on an audio
mode.
XTo select Sound6slide and press the
controller.
A menu appears.
XTurn the controller until Rear Seat
Entertainment System: Audiois
brought to the front.
XPress the controller.
Basic functions229
Rear Seat Entertainment System
Z
Page 243 of 246
XTo select a folder:press the:button
on the remote control.
XHighlight one of the two folder symbols
with the =or; button and press 9
to confirm.
Depending on your selection, the previous
or next folder is selected and the first track
is played.
Additional setting option:
RAdjusting the sound settings (Ypage 230)
Functions in DVD video mode
XTo hide a menu: confirmMenuwith the 9
button.
The video image is played in full screen
mode.
Additional setting options:
RAdjusting the brightness, contrast and
color (
Ypage 230)
RChanging the picture format (Ypage 231)
RAdjusting the sound settings (Ypage 230)
AUX mode
Introduction
You can connect external video sources with
a sound and video signal to the Rear Seat
Entertainment System:
Rone external video source to each of the
rear screens (AUX display)
Rone external video source to the rear-com- partment disc drive (AUX drive)
Operating the external video source; see the
manufacturer's operating instructions.
For further details about external video sour-
ces, please consult an authorized Mercedes-
Benz Center.
Connecting AUX equipment
AUX drive jacks
The AUX drive jacks are located on the rear-
compartment drive to the right of the þ
(
Ypage 226) button.
AUX display jacks
The AUX display jacks are on the side of the
two rear screens (
Ypage 225).
Connecting audio and video cables
XInsert the audio plugs for the left and right
signals into the corresponding Land R
jacks.
XInsert the video plug into the Vjack.
Activating AUX mode
AUX drive
Requirements: the external video source is
connected to the rear-compartment drive and
playback is selected.
XSelect Auxin the menu using the
9=; buttons on the remote
control and press the 9button to confirm.
The AUX menu appears.
XSelect Sourcefrom the AUX menu and
press the 9button to confirm.
XSelect Disc Drive Auxand press the 9
button to confirm.
Playback starts. If an external video source
does not provide a video picture, an audio
menu appears.
Displaying AUX
Requirements: the external video source is
connected to the rear-compartment screen
and playback is selected.
XSelect a screen using the thumbwheel on
the remote control (
Ypage 225) until " L
AUX mode241
Rear Seat Entertainment System
Z