height MERCEDES-BENZ E-Class CABRIOLET 2014 C207 Owner's Manual
[x] Cancel search | Manufacturer: MERCEDES-BENZ, Model Year: 2014, Model line: E-Class CABRIOLET, Model: MERCEDES-BENZ E-Class CABRIOLET 2014 C207Pages: 394, PDF Size: 5.28 MB
Page 66 of 394
loose in the even
tofanaccident, heavy
braking or a sudde nchange in direction. The
child restraint system could be thrown about,
striking vehicle occupants. There is an
increased risk of injury, possibly even fatal.
Always install child restraint systems
properly, even if they are not being used.
Make sure that you observe the child restraint
system manufacturer's installation
instructions. G
WARNING
Child restraint systems or their securing
systems which have been damaged or
subjected to a load in an accident can no
longer protect as intended. The child cannot
then be restrained in the event of an accident,
heavy braking or sudden changes of direction.
There is an increased risk of injury, possibly
even fatal.
Replace child restraint systems which have
been damaged or subjected to a load in an
accident as soon as possible. Have the
securing systems on the child restraint
system checked at a qualified specialist
workshop, before you install a child restraint
system again. G
WARNING
Infants and small children should never share
a seat belt with another occupant. In the event
of an accident, they could be crushed
between the occupant and seat belt.
Ac hild's risk of serious or fatal injuries is
significantly increased if the child restraints
are not properly secured in the vehicle and/
or the child is not properly secured in the child
restraint.
Children that are too large for a child restraint
must travel in seats using normal seat belts.
Position the shoulder belt across the chest
and shoulder, not the face or neck.Ab ooster
seat may be necessary to achieve proper seat
belt positioning for children over 41 lbs
(18 kg) until they reach a height where alap/ shoulder belt fits properly without a booster
seat.
When the child restraint is no
tinuse, remove
it from the vehicle or secure it with the seat
belt to prevent the child restraint from
becoming a projectile in the event of an
accident. G
WARNING
If children are left unsupervised in the vehicle,
they could:
R open the doors, thus endangering other
people or road users.
R get out and disrupt traffic.
R operate the vehicle's equipment.
Additionally, children could set the vehicle in
motion if, for example, they:
R release the parking brake.
R shifting the automatic transmission out of
park position P
R Start the engine.
There is a risk of an accident and injury.
When leaving the vehicle, always take the
SmartKey with you and lock the vehicle. Never
leave children or animals unattended in the
vehicle. Always keep the SmartKey out of
reach of children. G
WARNING
If persons, particularly children are subjected
to prolonged exposure to extreme heat or
cold, there is a risk of injury, possibly even
fatal. Never leave children unattended in the
vehicle. G
WARNING
If the child restraint system is subjected to
direct sunlight, parts may get very hot.
Children may burn themselves on these parts,
particularly on the metal parts of the child
restraint system. There is a risk of injury.
If you leave the vehicle, taking the child with
you, always ensure that the child restraint
system is not exposed to direct sunlight. 64
Children in the vehicleSafety
Page 102 of 394
i
Vehicle height when opening/closing the
soft top (Y page 390).
i Make sure that the soft top is dry and
clean before closing it. Otherwise, water or
dirt could enter the vehicle interior or trunk.
You can open or close the soft top:
R when the vehicle is stationary or
R when you do not exceed aspeed of
25 mph (40 km/h).
If there is a strong head wind, it may not be
possible to close the soft top fully. In this
case, reduce speed or stop in order to close
the soft top fully.
For safety reasons, Mercedes-Benz
recommends that you only open or close the
soft top when the vehicle is stationary.
If the soft top does not open or close fully, the
soft-top hydraulics are depressurized and the
soft top is lowered:
R after approximately 7minutes when the
ignition is switched on
R immediately if the ignition is switched off Opening and closing with the soft top
switch
Important safety notes G
WARNING
When opening or closing the soft top, there is
a risk that parts of the body could become
trapped by moving parts such as the roof
mechanism, the trunk lid, or the side
windows .There is a risk of injury.
When opening or closing the roof, make sure
that no parts of the body are in the vicinity of
moving parts. Release the switch if somebody
becomes trapped. G
WARNING
If the vehicle speed exceeds 25 mph
(40 km/h) the soft top stops during the
opening or closing procedure. This impairs your view to the rear. There is a risk of an
accident.
Reduce your speed to below 25 mph
(40 km/h) or stop the vehicle in accordance
with the traffic conditions.P
ress or pull the
soft-top switch again in order to open or close
the soft top fully.
Opening and closing X
Make sure that the trunk partition is closed
(Y page 106).
X Close the trunk lid.
X Turn the SmartKey to position 2in the
ignitio nlock.
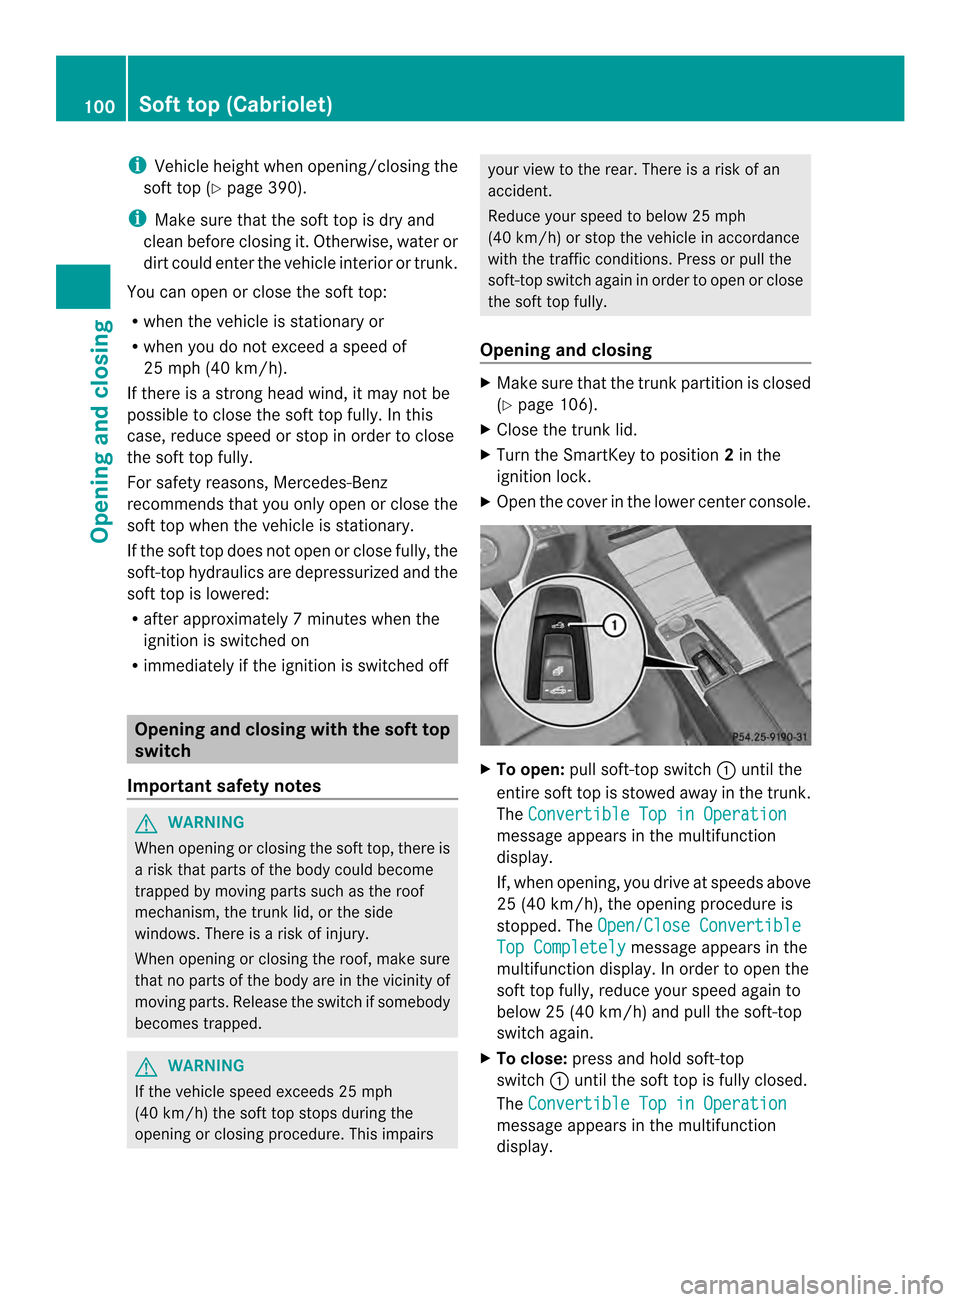
X Open the cover in the lower center console. X
To open: pull soft-top switch 0002until the
entire soft top is stowed away in the trunk.
The Convertible Top in Operation message appears in the multifunction
display.
If, when opening, you drive at speeds above
25 (40 km/h), the opening procedure is
stopped. The
Open/Close Convertible Top Completely message appears in the
multifunction display .Inorder to open the
soft top fully, reduce yours peed again to
below 25 (40 km/h) and pull the soft-top
switch again.
X To close: press and hold soft-top
switch 0002until the soft top is fully closed.
The Convertible Top in Operation message appears in the multifunction
display.100
Soft top (Cabriolet)Opening and closing
Page 111 of 394

X
Pull the AIRCAP wind screen out of the
guide rails in the direction of the arrow.
Make sure that you pull the AIRCAP wind
screen forwards slightly when doing so.
Installing X
Keeping the AIRCAP wind screen
horizontal, guide it into the slot between
the head restraints in the direction of the
arrow with both racks straight down.
X Push the AIRCAP wind screen down until
the bolts are at the same height as the
brackets on the head restraints.
X Insert the bolts into the brackets on both
sides.
X Tighten the bolts with the 4mmAllen key
until they engage.
The markings on the bolts are vertical. Soft top (Cabriolet)
109Opening and closing Z
Page 119 of 394
The seat belt should:
R
fit snugly across your body
R be routed across the middle of your
shoulder
R be routed in your pelvic area across the hip
joints
X Before starting off, adjust the rear-view
mirror and the exterior mirrors in such a
way that you have a good view of road and
traffic conditions (Y page 127).
X Vehicles with a memory function: save
the seat, steering wheel and exterior mirror
settings with the memory function
(Y page 130). Seats
Important safety notes
G
WARNING
Children could become trapped if they adjust
the seats, particularly when unattended.
There is a risk of injury.
When leaving the vehicle, always take the
SmartKey with you and lock the vehicle. Never
leave children unsupervised in the vehicle. G
WARNING
You could lose control of your vehicle if you
do the following while driving:
R adjust the driver's seat, head restraint,
steering wheel or mirrors
R fasten the seat belt
There is a risk of an accident.
Adjust the driver's seat, head restraint,
steering wheel and mirror and fasten your
seat belt before starting the engine. G
WARNING
If you adjust the seat height carelessly, you or
other vehicle occupants could be trapped and
thereby injured. Children in particular could
accidentally press the electrical seat adjustmen
tbuttons and become trapped.
There is a ris kofinjury.
While moving the seats, make sure tha tyour
hands or other body parts do not get under
the lever assembly of the seat adjustment
system. G
WARNING
When you adjust a seat, you or other vehicle
occupants could become trapped, e.g. on the
seat guide rail. There is arisk of injury.
Make sure when adjusting aseat that no one
has any body parts in the sweep of the seat. G
WARNING
If head restraints are not installed and
adjusted correctly, they cannot provide
protection as intended. There is an increased
risk of injury in the head and neck area, e.g.
in the event of an accident or when braking.
Always drive with the head restraints
installed. Before driving off, make sure for
every vehicle occupant that the center of the
head restraint supports the back of the head
at about eye level. G
WARNING
The seat belt does not offer the intended level
of protection if you have not moved the
backrest to an almost vertical position .When
braking or in the event of an accident, you
could slide underneath the seat belt and
sustain abdomen or neck injuries, for
example. This poses an increased risk of
injury or even fatal injury.
Adjust the seat properly before beginning
your journey. Always ensure that the backrest
is in an almost vertical position and that the
shoulder section of your seat belt is routed
across the center of your shoulder. Seats
117Seats, steering wheel and mirrors Z
Page 120 of 394

!
To avoid damage to the seats and the seat
heating, observe the following information:
R keep liquids from spilling on the seats. If
liquid is spilled on the seats, dry them as
soon as possible.
R if the seat covers are damp or wet, do not
switch on the seat heating. The seat
heating should also not be used to dry
the seats.
R clean the seat covers as recommended;
see "Interior care".
R do not transport heavy loads on the
seats. Do not place sharp objects on the
seat cushions, e.g. knives, nails or tools.
The seats should only be occupied by
passengers, if possible.
R when the seat heating is in operation, do
not cover the seats with insulating
materials, e.g. blankets, coats, bags,
seat covers, child seats or booster seats.
! Make sure that there are no objects in the
footwell or behind the seats when resetting
the seats. There is a risk that the seats
and/or the objects could be damaged.
i The head restraints in the front seats are
installed with the NECK-PRO system
(Y page 55). For this reason, it is not
possible to remove the head restraints
from the front seats.
For more information, contact a qualified
specialist workshop. Adjusting the seats
0002
Head restraint height
0003 Seat cushion angle
0023 Seat height
0022 Seat fore-and-aft adjustment
0020 Backrest angle
i If PRE-SAFE ®
is triggered, the front-
passenger seat will be moved to a better
position if it was previouslyinan
unfavorable position.
i You can store the seat settings using the
memory function (Y page 130).
i Vehicles with the through-loading
feature: if you fold down a rear seat
backrest, the respective front seat is
moved forwards slightly if necessary. This
prevents the seats from colliding. Adjusting the head restraints
Important safety notes G
WARNING
You could lose control of your vehicle if you
do the following while driving:
R adjust the driver's seat ,head restraint,
steering wheel or mirrors
R fasten the seat belt
There is a risk of an accident.
Adjust the driver's seat, head restraint,
steering wheel and mirror and fasten your
seat belt before starting the engine. 118
SeatsSeats, steering wheel and mirrors
Page 121 of 394

G
WARNING
If head restraints are not installed and
adjusted correctly, they cannot provide
protection as intended. There is an increased
risk of injury in the head and neck area, e.g.
in the event of an accident or when braking.
Always drive with the head restraints
installed. Before driving off, make sure for
every vehicle occupant that the center of the
head restraint supports the back of the head
at about eye level.
General notes Observe the important safety notes regarding
the seats (Y page 117).
Do not rotate the head restraints of the front
and rear seats. Otherwise, you cannot adjust
the height and angle of the head restraints to
the correct position.
Adjusting the height of the head
restraints electrically X
To adjust the head restraint height: slide
switch for head restraint adjustment 0002up
or down in the direction of the arrow. Rear seat head restraints Lowering and extending the rear seat
head restraints from the front (Cabriolet)
X
Turn the SmartKey to position 2in the
ignitio nlock (Y page 165).
X To lower: press button 0002.
The head restraints move to the lowest
position.
If AIRCAP is activated, the right-hand
indicator lamp on the AIRCAP button goes
out.
X To extend: press button 0002again.
The head restraints only move into the
central position if AIRCAP is activated and
no rear seat belt has been fastened.
If AIRCAP is activated, the right-hand
indicator lamp on the AIRCAP button
comes on.
i Please see further information on AIRCAP
(Y page 107). Lowering the head restraints in the
rear compartment manually
(Cabriolet)
If the head restraints in the rear compartment
are in the upper position, the soft top cannot
be closed fully. Seats
119Seats, steering wheel and mirrors Z
Page 126 of 394
Problems with the seat ventilation
Problem Possible causes/consequences and
0001 Solutions
The seat ventilation has
switched off
prematurely or cannot
be switched on. The on-board voltage is too low because too many electrical
consumers are switched on.
X
Switch off electrical consumers that you do not need, such as
the rear window defroster or interior lighting.
Once the battery is sufficiently charged, the seat ventilation will
switch back on automatically. AIRSCARF (Cabriolet)
G
WARNING
When AIRSCARF is switched on, very hot air
can flow from the vents in the head restraints.
This could result in burns in the immediate
vicinity of the air vents. There is a risk of injury.
Reduce the heater output before it becomes
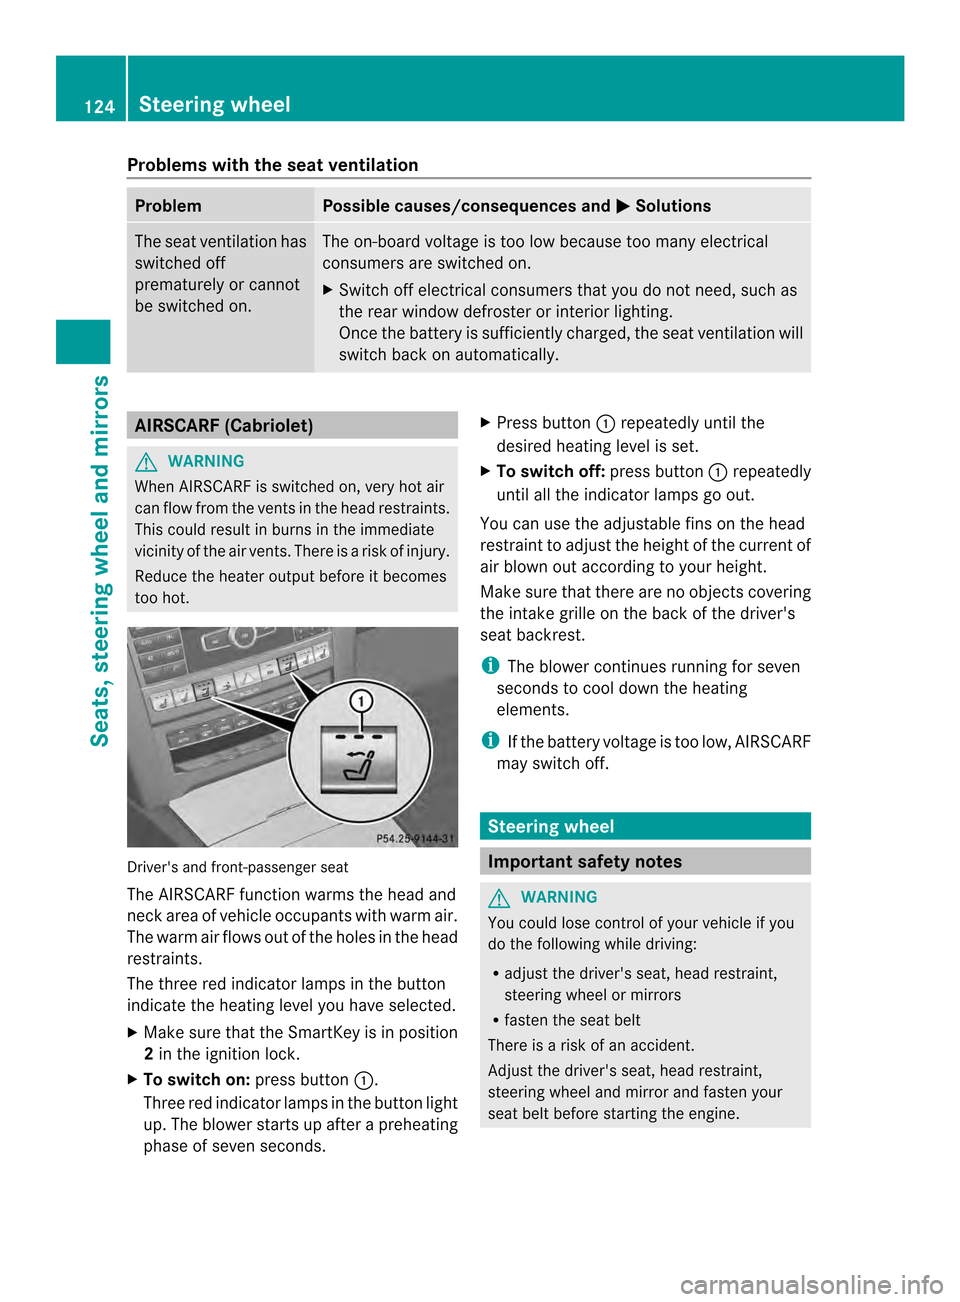
too hot. Driver's and front-passenger seat
The AIRSCARF function warms the head and
neck area of vehicle occupants with warm air.
The warm air flows out of the holes in the head
restraints.
The three red indicator lamps in the button
indicate the heating level you have selected.
X
Make sure that the SmartKey is in position
2in the ignition lock.
X To switch on: press button0002.
Three red indicator lamps in the button light
up. The blower starts up after a preheating
phase of seven seconds. X
Press button 0002repeatedly until the
desired heating level is set.
X To switch off: press button0002repeatedly
until all the indicator lamps go out.
You can use the adjustable fins on the head
restraint to adjust the height of the current of
air blown out according to your height.
Make sure that there are no objects covering
the intake grille on the back of the driver's
seat backrest.
i The blower continues running for seven
seconds to cool down the heating
elements.
i If the battery voltage is too low, AIRSCARF
may switch off. Steering wheel
Important safety notes
G
WARNING
You could lose control of your vehicle if you
do the following while driving:
R adjust the driver's seat, head restraint,
steering wheel or mirrors
R fasten the seat belt
There is a risk of an accident.
Adjust the driver's seat, head restraint,
steering wheel and mirror and fasten your
seat belt before starting the engine. 124
Steering wheelSeats, steering wheel and mirrors
Page 127 of 394

G
WARNING
Childre ncould injure themselves if they
adjust the steering wheel. There is a risk of
injury.
When leaving the vehicle, always take the
SmartKey with you and lock the vehicle. Never
leave children unsupervised in the vehicle. Adjusting the steering wheel
0002
To adjust the steering wheel height
0003 To adjust the steering wheel position
(fore-and-aft adjustment)
i Further related subjects:
R EASY-ENTRY/EXIT feature
(Y page 126)
R Storing settings (Y page 130) Steering wheel heating
Activating/deactivating X
Turn the SmartKey to position 2in the
ignition lock (Y page 165).
X To switch on/off: turn the lever in the
direction of arrow 0002or0003.
Indicator lamp 0023lights up or goes out.
Vehicles without KEYLESS-GO: when you
remove the SmartKey from the ignition lock,
the steering wheel heating is deactivated.
Vehicles with KEYLESS-GO: when you switch
off the ignition and open the driver's door, the
steering wheel heating is deactivated.
i The steering wheel heating may switch off
temporarily if:
R the temperature in the vehicle interior is
above 86 ‡ (30 †).
R the temperature of the steering wheel is
above 95 ‡ (35 †).
Indicator lamp 0023remains on. Steering wheel
125Seats, steering wheel and mirrors Z
Page 210 of 394
Parking tips:
R
On narrow roads, drive as close to the
parking space as possible.
R Parking spaces that are littered or
overgrown might be identified or measured
incorrectly.
R Parking spaces that are partially occupied
by trailer drawbars might not be identified
as such or be measured incorrectly.
R Snowfall or heavy rain may lead to a parking
space being measured inaccurately.
R Pay attention to the PARKTRONIC
(Y page 205) warning messages during the
parking procedure.
R You can intervene in the steering procedure
to correct it at any time. Active Parking
Assist will then be canceled.
R When transporting a load which protrudes
from your vehicle, you should not use
Active Parking Assist.
R Never use Active Parking Assist when snow
chains are installed.
R Make sure that the tire pressures are
always correct. This has adirec tinfluence
on the parking characteristics of the
vehicle.
Use Active Parking Assist for parking spaces:
R tha tare parallel or at right-angles to the
direction of travel
R that are on straight roads, not bends
R that are on the same level as the road, e.g.
not on the pavement
Detecting parking spaces Objects located above the height range of
Active Parking Assist will not be detected
when the parking space is measured. These
are not taken into account when the parking
procedure is calculated, e.g. overhanging
loads, tail sections or loading ramps of goods
vehicles. G
WARNING
If there are objects above the detection range:
R Active Park Assist may steer too early
R the vehicle may not stop in front of these
objects.
You may cause a collision as a result. There is
a risk of an accident.
If there are objects above the detection range,
stop and deactivate Active Parking Assist.
For further information on the detection
range (Y page 204).
Active Parking Assist does not support you
with parking spaces at right-angles to the
direction of travel if:
R two parking spaces are located directly
next to one another
R the parking space is directly next to a low
obstacle such as a low curb
R you park forwards
Active Parking Assist does not support you
with parking spaces that are parallel or at
right-angles to the direction of travel if:
R the parking space is on acurb
R the system reads the parking space as
being blocked, for example by foliage or
grass paving blocks
R the area is too small for the vehicle to
maneuver into
R the parking space is bordered by an
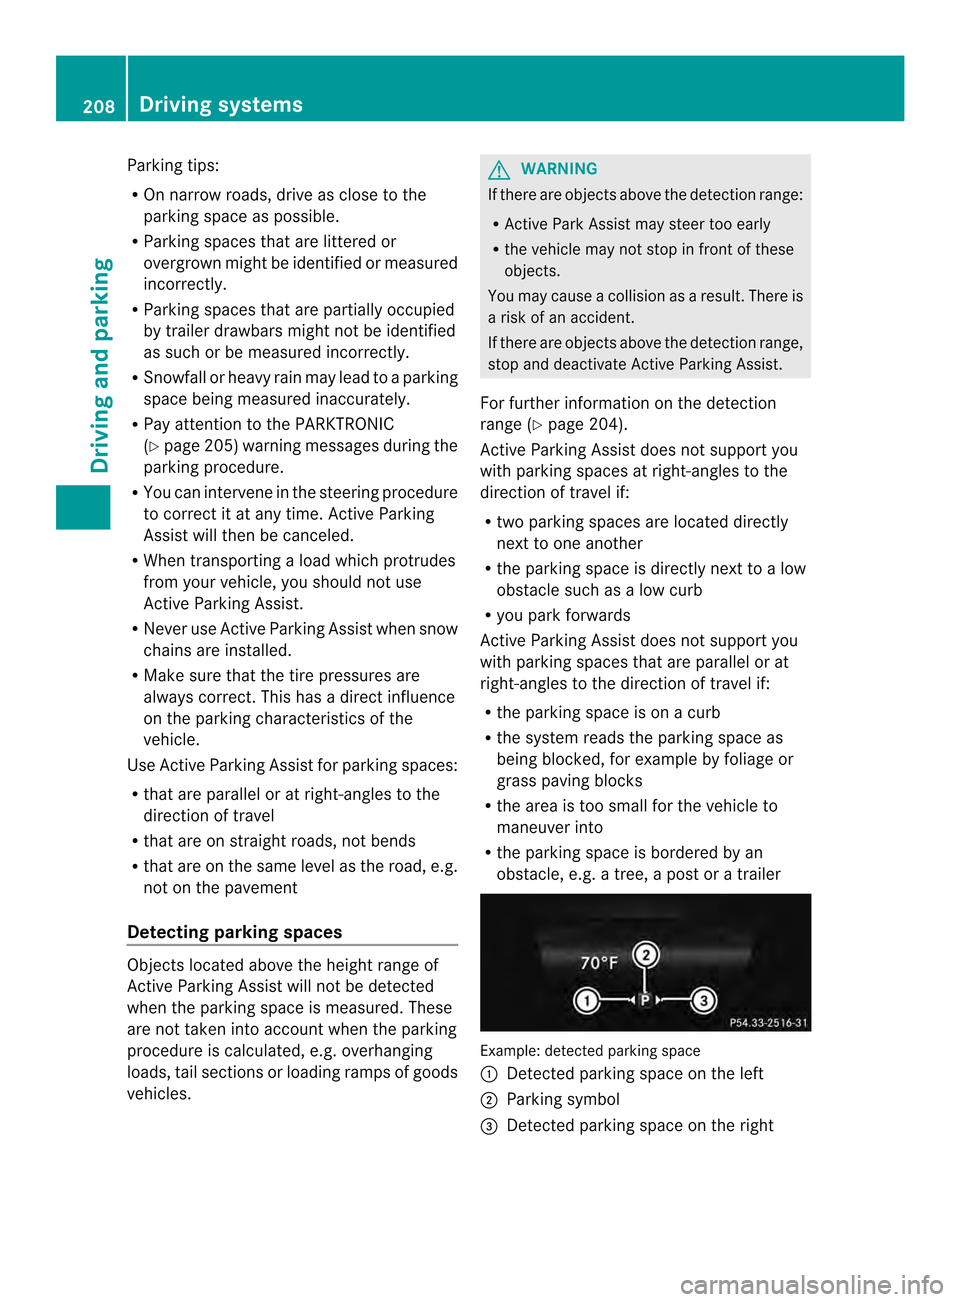
obstacle, e.g. a tree, a post or a trailer Example: detected parking space
0002 Detected parking space on the left
0003 Parking symbol
0023 Detected parking space on the right 208
Driving systemsDriving and pa
rking
Page 315 of 394

could otherwise damage the windshield
wipers or the hood. X
Make sure that the windshield wipers are
turned off.
X Pull release lever 0002on the hood.
The hood is released. X
Reach into the gap, pull hoo dcatch
handle 0003up and lift the hood.
If you lift the hood by approximately 15 in
(40 cm), the hood is opened and held open
automatically by the gas-filled strut.
Closing the hood X
Lowe rthe hood and let it fall from a height
of approximately 8inche s(20 cm).
X Check that the hood has engaged properly.
If the hood can be raised slightly, it is not
properly engaged. Open it again and close
it with a little more force. Engine oil
General notes Depending on the driving style, the vehicle
consumes up to 0.9 US qt (0.8 liters) of oil
over
adistanc eof600 miles (1,000 km). The
oil consumption may be higher than this when
the vehicle is new or if you frequently drive at
high engine speeds.
Depending on the engine, the oil dipstic kmay
be in a different location.
When checking the oil level:
R park the vehicle on a level surface.
R the engine should be switched off for
approximately five minutes if the engine is
at normal operating temperature.
R if the engine is not at normal operating
temperature, e.g .ifthe engine was only
started briefly, wait about 30 minutes
before carrying out the measurement.
Checking the oil level using the oil
dipstick G
WARNING
Certain components in the engine
compartment, such as the engine, radiator
and parts of the exhaust system, can become
very hot. Working in the engine compartment
poses a risk of injury.
Where possible, let the engine cool down and
touch only the components described in the
following. Engine compartment
313Maintenance and care Z