tailgate MERCEDES-BENZ E-CLASS COUPE 2017 Owners Manual
[x] Cancel search | Manufacturer: MERCEDES-BENZ, Model Year: 2017, Model line: E-CLASS COUPE, Model: MERCEDES-BENZ E-CLASS COUPE 2017Pages: 541, PDF Size: 10.71 MB
Page 204 of 541

Ad
justing the warning tones of Parking
Assist PARKTRONIC
Multimedia sy stem:
, Vehicle .
k Assistance .
Cam. &
Parking Pilot .
Set warning tone
Ad justing the volume of thewa rning tones #
Select Warning tone volume. #
Adjust theva lue.
Specifying thest arting point for the warning
to nes
Yo u can specify whe ther thePa rking Assist
PA RKTRONIC warning tones should commence
when theve hicle is fur ther aw ay from an obs ta‐
cle. #
Select Warn early. #
Activate Oor deacti vate ª the function.
Ac tivating/deactivating audio fadeout
Yo u can specify whe ther thevo lume of a media
source in the multimedia sy stem is tobe
re duced when Parking Assist PARKTRONIC gives
an audible warning. #
Select Audio fadeout during warning tones . #
Activate Oor deacti vate ª the function. Re
versing camera Fu
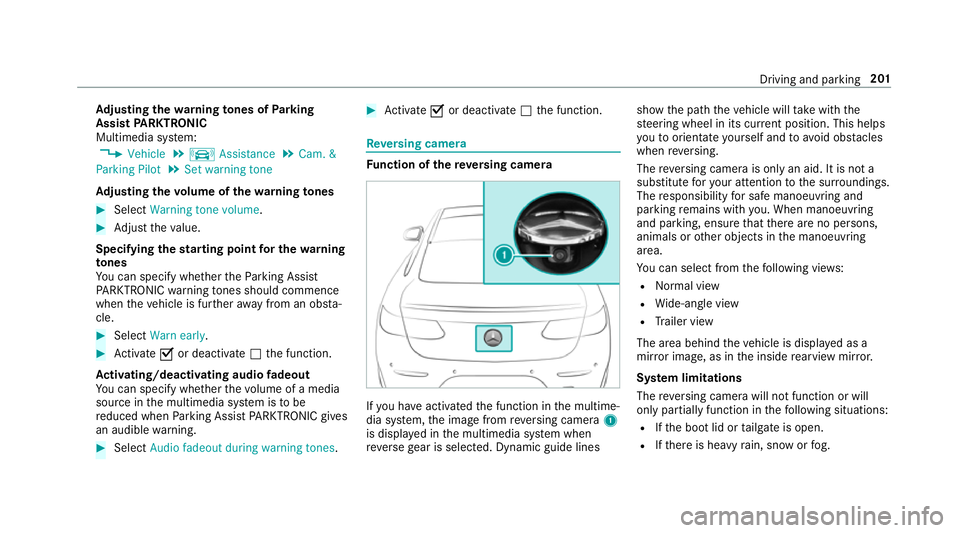
nction of there ve rsing camera If
yo u ha veactivated the function in the multime‐
dia sy stem, the image from reve rsing camera 1
is displa yed in the multimedia sy stem when
re ve rsege ar is selec ted. Dynamic guide lines show
the path theve hicle will take with the
st eering wheel in its cur rent position. This helps
yo uto orientate yourself and toavo id obs tacles
when reve rsing.
The reve rsing camera is only an aid. It is not a
substitute foryo ur attention tothe sur roundings.
The responsibility for safe manoeuvring and
parking remains with you. When manoeuv ring
and pa rking, ensure that there are no persons,
animals or other objects in the manoeuvring
area.
Yo u can select from thefo llowing vie ws:
R Normal view
R Wide-angle view
R Trailer view
The area behind theve hicle is displa yed as a
mir ror image, as in the inside rearview mir ror.
Sy stem limitations
The reve rsing camera will not function or will
only partially function in thefo llowing situations:
R Ifth e boot lid or tailgate is open.
R Ifth ere is heavy rain, snow or fog. Driving and parking
201
Page 209 of 541

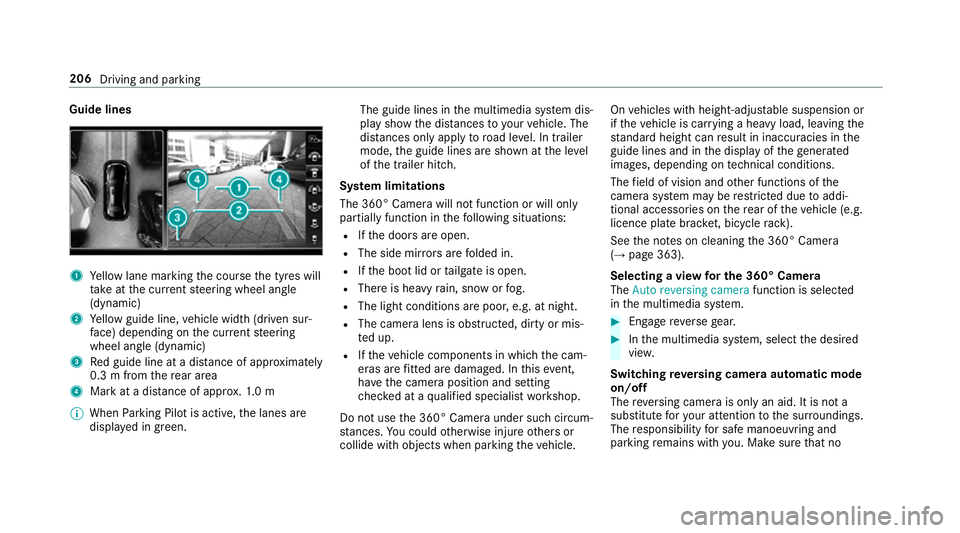
Guide lines
1
Yellow lane marking the course the tyres will
ta ke atthe cur rent steering wheel angle
(dynamic)
2 Yellow guide line, vehicle width (driven sur‐
fa ce) depending on the cur rent steering
wheel angle (dynamic)
3 Red guide line at a dis tance of appr oximately
0.3 m from there ar area
4 Mark at a distance of appr ox.1. 0 m
% When Parking Pilot is active, the lanes are
displa yed in green. The guide lines in
the multimedia sy stem dis‐
play show the dis tances toyour vehicle. The
dis tances only apply toroad le vel. In trailer
mode, the guide lines are shown at the le vel
of the trailer hitch.
Sy stem limitations
The 360° Camera will not function or will only
partially function in thefo llowing situations:
R Ifth e doors are open.
R The side mir rors are folded in.
R Ifth e boot lid or tailgate is open.
R There is heavy rain, snow or fog.
R The light conditions are poor, e.g. at night.
R The camera lens is obstructed, dirty or mis‐
ted up.
R Ifth eve hicle components in which the cam‐
eras are fitted are dama ged. In this event,
ha ve the camera position and setting
ch ecked at a qualified specialist workshop.
Do not use the 360° Camera under such circum‐
st ances. You could otherwise injure others or
collide with objects when parking theve hicle. On
vehicles with height-adjus table suspension or
if th eve hicle is car rying a heavy load, leaving the
st andard height can result in inaccuracies in the
guide lines and in the display of thege nerated
ima ges, depending on tech nical conditions.
The field of vision and other functions of the
came rasystem may be restricted due toaddi‐
tional accesso ries on there ar of theve hicle (e.g.
licence plate brac ket, bicycle rack ).
See the no tes on cleaning the 360° Camera
(→ page 363).
Selecting a view for the 360° Camera
The Auto reversing camera function is selected
in the multimedia sy stem. #
Enga gereve rsege ar. #
Inthe multimedia sy stem, select the desired
vie w.
Switching reve rsing camera automatic mode
on/off
The reve rsing camera is only an aid. It is not a
substitute foryo ur attention tothe sur roundings.
The responsibility for safe manoeuvring and
parking remains with you. Make sure that no 206
Driving and parking
Page 232 of 541

#
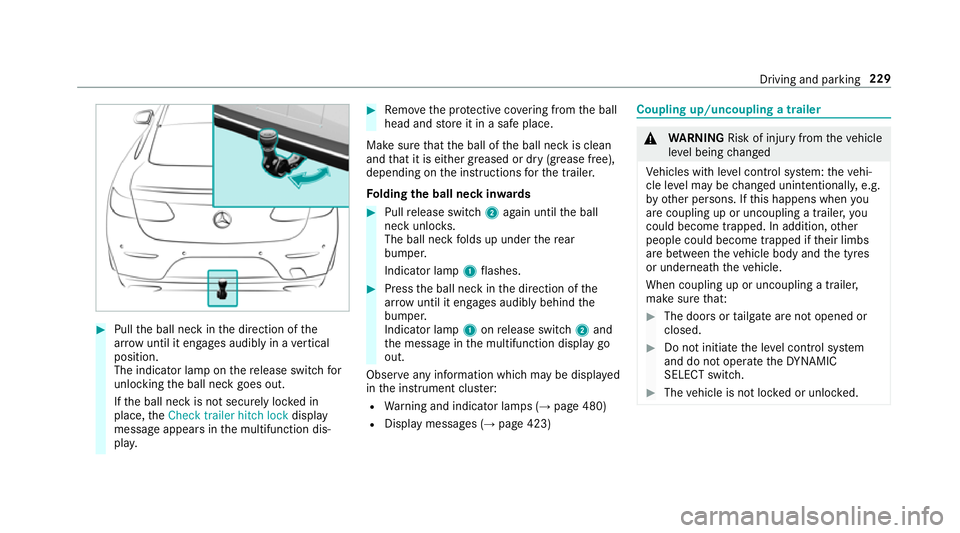
Pull the ball neck in the direction of the
ar row until it en gage s audibly in a vertical
position.
The indicator lamp on there lease switch for
unlo cking the ball neck goes out.
If th e ball neck is not securely loc ked in
place, theCheck trailer hitch lock display
message appears in the multifunction dis‐
pla y. #
Remo vethe pr otective co vering from the ball
head and store it in a safe place.
Make sure that the ball of the ball neck is clean
and that it is either greased or dry (grease free),
depending on the instructions forth e trailer.
Fo lding the ball neck in wards #
Pull release switch 2again until the ball
neck unloc ks.
The ball neck folds up under there ar
bumper.
Indicator lamp 1flashes. #
Press the ball neck in the direction of the
ar row until it en gage s audibly behind the
bumper.
Indicator lamp 1onrelease switch 2and
th e message in the multifunction display go
out.
Obser veany information which may be displa yed
in the instrument clus ter:
R Warning and indicator lamps (→ page 480)
R Display messages (→ page 423) Coupling up/uncoupling a trailer
&
WARNING Risk of inju ryfrom theve hicle
le ve l being changed
Ve hicles with le vel control sy stem: theve hi‐
cle le vel may be changed unin tentional ly, e.g.
by ot her persons. If this happens when you
are coupling up or uncoupling a trailer, you
could become trapped. In addition, other
people could become trapped if their limbs
are between theve hicle body and the tyres
or underneath theve hicle.
When coupling up or uncoupling a trailer,
make sure that: #
The doors or tailgate are not opened or
closed. #
Do not initiate the le vel control sy stem
and do not operate theDY NA MIC
SELECT switch. #
The vehicle is not loc ked or unloc ked. Driving and parking
229