tire pressure MERCEDES-BENZ E-CLASS ESTATE 2012 Owners Manual
[x] Cancel search | Manufacturer: MERCEDES-BENZ, Model Year: 2012, Model line: E-CLASS ESTATE, Model: MERCEDES-BENZ E-CLASS ESTATE 2012Pages: 457, PDF Size: 11.62 MB
Page 23 of 457
Outside temperature ......................2
47
Setting (climate control) ................147
TEMPOMAT
Function/notes ............................. 189
Theft-deterrent system
ATA (Anti-Theft Alarm system) .........78
Immobiliser ...................................... 78
Through-loading ................................ 315
Through-loading feature ...................315
Time see Separate Owner' smanual
Timing (RACETIMER) .........................265
Tiredness Assist see ATTENTION ASSIST
TIREFIT kit .......................................... 364
Top Tether ............................................ 59
Total distance recorder ....................249
Tow-away protection ..........................79
Towing Important safety notes ..................372
With the rear axle raised ................373
Towing atrailer
Activ eBlind Spot Assist .................232
Active Lane Keeping Assist ............234
Axle load, permissible ....................450
Bulb failure indicator for LED
lamps ............................................. 241
ESP ®
(Electroni cStability Pro-
gram) ............................................... 75
Towing away
Fitting the towing eye. ...................373
Removing the towing eye. ..............373
With both axles on the ground .......374
Tow-starting
Emergency engine starting ............375
Important safety notes ..................372
Removing the towing eye. ..............373
Trailer
Display message ............................ 295
Trailer coupling
see Towing atrailer
Trailer towing
7-pin connector ............................. 241
Blind Spot Assist ............................ 227
Cleaning the trailer tow hitch ......... 355
Coupling up atrailer ...................... 238
Decoupling atrailer ....................... 239Driving tips
.................................... 236
Folding in the ball coupling ............239
Folding out the ball coupling ..........237
Important safety notes ..................234
Lights displa ymessage .................. 275
Mounting dimensions ....................447
Parking Guidance ........................... 218
Parktroni c...................................... 214
Power supply ................................. 240
Shift range ..................................... 174
Trailer loads ................................... 448
Transmission
see Automatic transmission
see Manual transmission
Transmission position display .........172
Transmission position display
(DIRECT SELECTl ever)...................... 172
Transporting the vehicle ..................374
Trim pieces (cleaning instructions) .356
Trip computer (on-board com-
puter) ................................................. .249
Trip meter Calling up ....................................... 249
Resetting (on-board computer) ......251
Turn signal
see Turn signals
Turn signals
Changing bulbs (front) ...................137
Switching on/off ........................... 128
TV
Operating (on-board computer) .....253
see Separate operating instructions
Two-way radio
Frequencies ................................... 433
Installatio n..................................... 433
Transmission output (maximum) .... 433
Type identification plate
see Vehicle identification plate
Tyre pressure
Calling up (on-board computer) .....386
Display message ............................ 289
Not reached (TIREFIT) ....................366
Reached (TIREFIT) ..........................366
Recommended ............................... 383
Tyre pressure loss warning
Important safety notes ..................385
Restarting ...................................... 38520
Index
Page 328 of 457
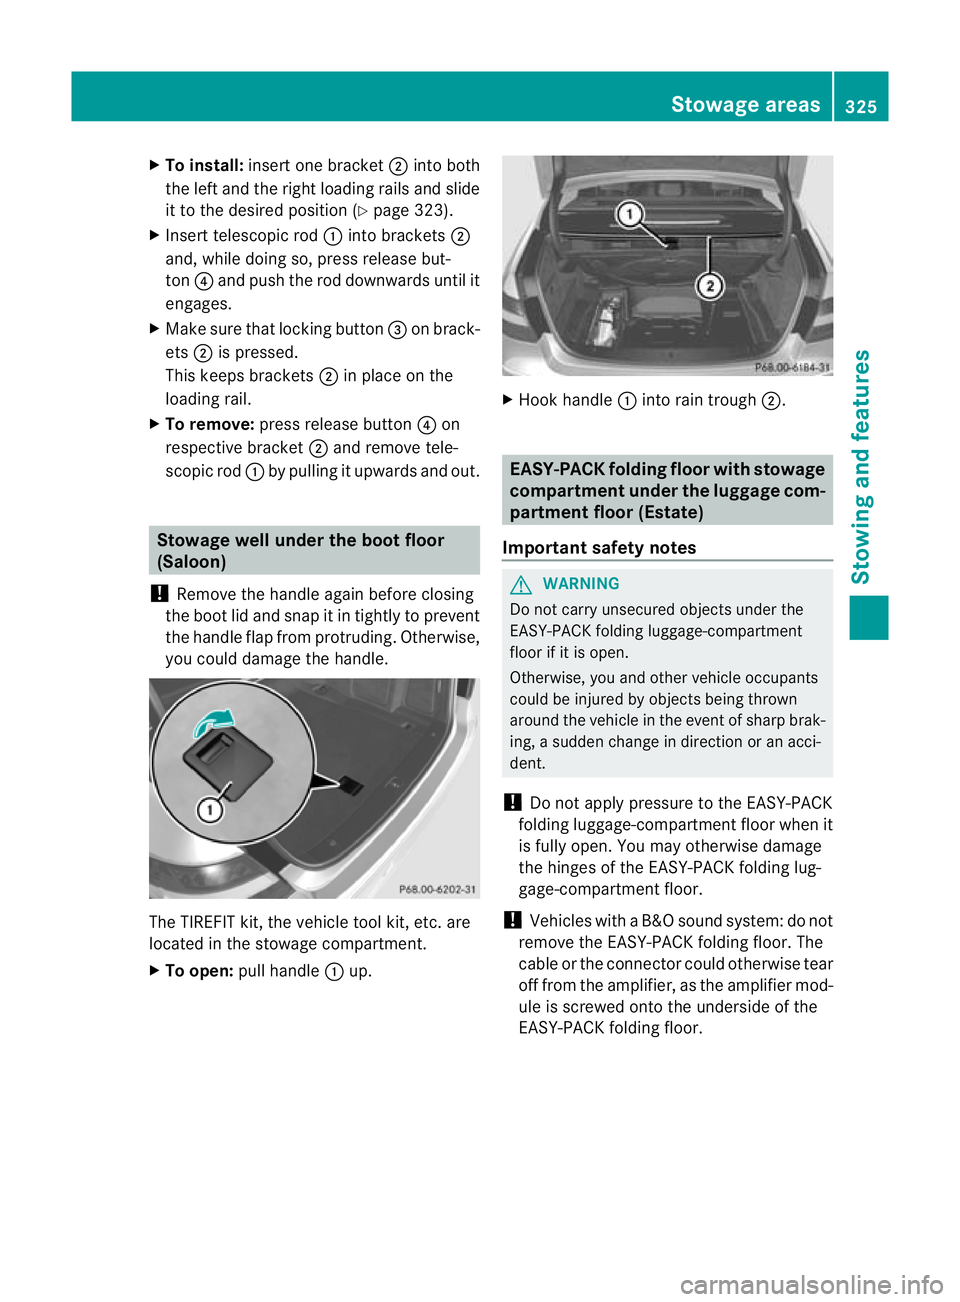
X
To install: insert one bracket ;into both
the left and the right loading rails and slide
it to the desired positio n(Ypage 323).
X Insert telescopic rod :into brackets ;
and, while doing so, press release but-
ton ?and push the rod downwards until it
engages.
X Make sure that locking button =on brack-
ets ;is pressed.
This keeps brackets ;in place on the
loading rail.
X To remove: press release button ?on
respective bracket ;and remove tele-
scopic rod :by pulling it upwards and out. Stowage well under the boot floor
(Saloon)
! Remove the handle again before closing
the boot lid and snap it in tightly to prevent
the handle flap from protruding. Otherwise,
you could damage the handle. The TIREFIT kit, the vehicle tool kit
,etc. are
located in the stowage compartment.
X To open: pull handle :up. X
Hoo khandle :into rain trough ;. EASY-PACK folding floor with stowage
compartment under th
eluggag ecom-
partment floor (Estate)
Important safety notes G
WARNING
Do not carry unsecured objects under the
EASY-PACK folding luggage-compartment
floo rifiti s open.
Otherwise, you and other vehicle occupants
could be injured by objects being thrown
around the vehicle in the event of sharp brak-
ing, a sudden change in direction or an acci-
dent.
! Do not apply pressure to the EASY-PACK
folding luggage-compartmentf loor when it
is fully open .You may otherwise damage
the hinges of the EASY-PACK folding lug-
gage-compartment floor.
! Vehicles with a B&O sound system: do not
remove the EASY-PACK folding floor. The
cable or the connector could otherwise tear
off from the amplifier, as the amplifier mod-
ule is screwed onto the underside of the
EASY-PACK folding floor. Stowage areas
325Stowing and features Z
Page 367 of 457
Do not exceed the stated maximum speed.
Avoid abrupt steering and driving manoeu-
vres, and driving ove
robstacles (kerbs, pot-
holes, off-road). This applies in particular to a
laden vehicle.
Stop driving in emergency mode if:
R you hear banging noises.
R the vehicle starts to shake.
R you see smoke and smell rubber.
R ESP ®
is intervening constantly.
R there are tears in the sidewalls of the tyre.
After driving in emergency mode, have the
wheel rims checked at a qualified specialist
workshop with regard to their further use. The
faulty tyre must be replaced.
With MOExtended tyres (tyres with run-flat
characteristics), you can continue to drive
your vehicle even if there is a total loss of
pressure in one or more tyres.
MOExtended tyres may only be used in con-
junction with an active tyre pressure loss
warning system or with an active tyre pres-
sure monitor.
The maximum driving distance is approx-
imately 80 km when the vehicle is partially
laden, and approximately 30 km when the
vehicle is fully laden.
In addition to the vehicle load, the driving dis-
tance possible depends upon:
R speed
R road condition
R outside temperature
The driving distance possible in run-flat mode
may be reduced by extreme driving condi-
tions/manoeuvres, or it can be increased
through a moderate style of driving.
The maximum permissible distance which
can be driven in run-flat mode is counted from
the momen tthe tyre pressure loss warning
appears in the multifunction display.
You must not exceed a maximum speed of
80 km/h. i
When replacing one or all tyres, make
sure that you only use tyres marked
"MOExtended". Make sure that you only
use the size of tyre specified for the vehicle. TIREFIT kit
Using the TIREFIT kit TIREFIT is a tyre sealant.
You can use TIREFIT to seal punctures of up
to 4 mm, particularly those in the tyre tread.
You can use TIREFIT at outside temperatures
down to Ò20 †. G
WARNING
In the following situations, the tyre sealant is
unable to provide sufficient breakdown assis-
tance, as it is unable to seal the tyre properly:
R there are cuts or punctures in the tyre
larger than those mentioned above.
R the wheel rim is damaged.
R you have driven at very low tyre pressures
or on a flat tyre.
There is a risk of accident.
Do not drive any further. Contact a qualified
specialist workshop. G
WARNING
The tyre sealant is harmful and causes irrita-
tion. It must not come into contact with your
skin, eyes or clothing or be swallowed. Do not
inhale TIREFIT fumes. Keep tyre sealant away
from children. There is a risk of injury.
If you come into contact with the tyre sealant,
observe the following:
R Rinse off the tyre sealant from your skin
immediately with water.
R If the tyre sealant comes into contact with
your eyes, immediately rinse them thor-
oughly with clean water.
R If tyre sealant is swallowed, immediately
rinse your mouth out thoroughly and drink
plenty of water. Do not induce vomiting,
and seek medical attention immediately. 364
Flat tyreBreakdown assistance
Page 368 of 457
R
Immediately change out of clothing which
has come into contact with tyre sealant.
R If an allergic reaction occurs, seek medical
attention immediately.
! Do not operate the tyre inflation com-
pressor for longer than eight minutes at a
time withou tabreak. It may otherwise
overheat.
The tyre inflation compressor can be oper-
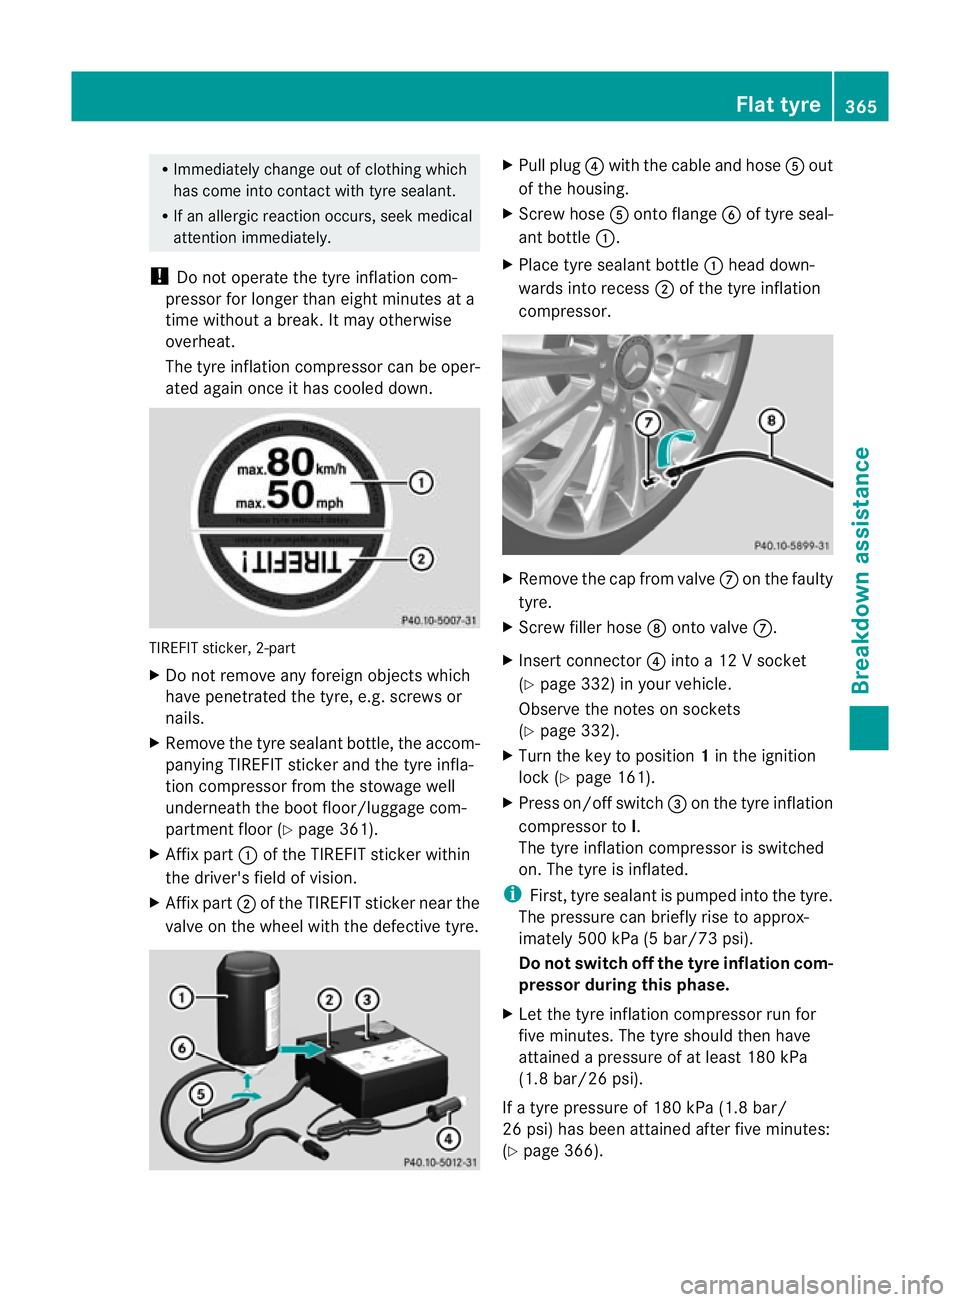
ated again once it has cooled down. TIREFIT sticker, 2-part
X
Do not remove any foreign objects which
have penetrated the tyre, e.g. screws or
nails.
X Remove the tyre sealant bottle, the accom-
panying TIREFIT sticker and the tyre infla-
tion compressor from the stowage well
underneath the boot floor/luggage com-
partment floor (Y page 361).
X Affix part :of the TIREFIT sticker within
the driver's field of vision.
X Affix part ;of the TIREFIT sticker near the
valve on the wheel with the defective tyre. X
Pull plug ?with the cable and hose Aout
of the housing.
X Screw hose Aonto flange Bof tyre seal-
ant bottle :.
X Place tyre sealant bottle :head down-
wards into recess ;of the tyre inflation
compressor. X
Remove the cap from valve Con the faulty
tyre.
X Screw filler hose Donto valve C.
X Insert connector ?into a 12 V socket
(Y page 332) in your vehicle.
Observe the notes on sockets
(Y page 332).
X Turn the key to position 1in the ignition
lock (Y page 161).
X Press on/off switch =on the tyre inflation
compressor to I.
The tyre inflation compressor is switched
on. The tyre is inflated.
i First, tyre sealant is pumped into the tyre.
The pressure can briefly rise to approx-
imately 500 kPa (5 bar/73 psi).
Do not switch off the tyre inflation com-
pressor during this phase.
X Let the tyre inflation compressor run for
five minutes. The tyre should then have
attained a pressure of at least 180 kPa
(1.8 bar/26 psi).
If a tyre pressure of 180 kPa (1.8 bar/
26 psi) has been attained after five minutes:
(Y page 366). Flat tyre
365Breakdown assistance Z
Page 369 of 457
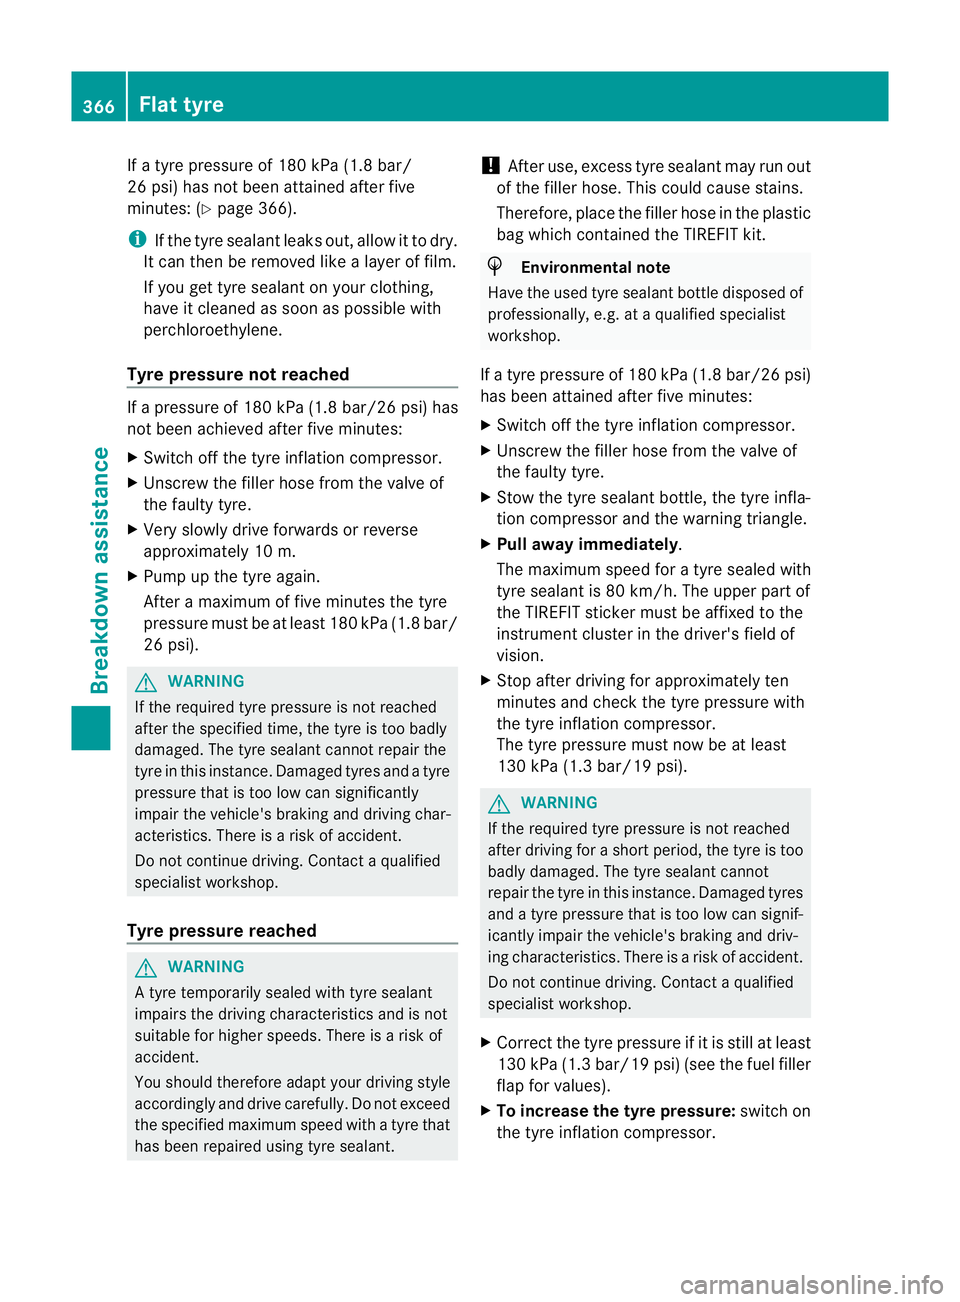
If a tyre pressure of 180 kPa (1.8 bar/
26 psi) has not been attained after five
minutes: (Y
page 366).
i If the tyre sealant leaks out, allow it to dry.
It can then be removed like a layer of film.
If you get tyre sealant on yourc lothing,
have it cleaned as soon as possible with
perchloroethylene.
Tyre pressure not reached If
ap ressure of 180 kPa (1.8 ba r/26 psi) has
not bee nachieved afte rfive minutes:
X Switch off the tyre inflation compressor.
X Unscrew the filler hose fro mthe valve of
the faulty tyre.
X Very slowly drive forwards or reverse
approximately 10 m.
X Pump up the tyre again.
After a maximum of five minutes the tyre
pressure must be at least 180 kPa (1.8 bar/
26 psi). G
WARNING
If the required tyre pressure is not reached
after the specified time, the tyre is too badly
damaged. The tyre sealant cannot repair the
tyre in this instance. Damaged tyres and a tyre
pressure that is too low can significantly
impair the vehicle's braking and driving char-
acteristics. There is a risk of accident.
Do not continue driving. Contact a qualified
specialist workshop.
Tyre pressure reached G
WARNING
At yre temporarily sealed with tyre sealant
impairs the driving characteristics and is not
suitable for higher speeds .There is a risk of
accident.
You should therefore adapt your driving style
accordingly and drive carefully. Do not exceed
the specified maximum speed with a tyre that
has been repaired using tyre sealant. !
After use, excess tyre sealant may run out
of the filler hose. This could cause stains.
Therefore, place the filler hose in the plastic
bag which contained the TIREFIT kit. H
Environmental note
Have the used tyre sealant bottle disposed of
professionally, e.g. at aqualified specialist
workshop.
If a tyre pressure of 18 0kPa (1.8 bar/26 psi)
has been attained after five minutes:
X Switch off the tyre inflation compressor.
X Unscrew the filler hose from the valve of
the faulty tyre.
X Stow the tyre sealant bottle, the tyre infla-
tion compressor and the warning triangle.
X Pull away immediately.
The maximum speed for a tyre sealed with
tyre sealant is 80 km/h. The upper part of
the TIREFIT sticker must be affixed to the
instrument cluster in the driver's field of
vision.
X Stop after driving for approximately ten
minutes and check the tyre pressure with
the tyre inflation compressor.
The tyre pressure must now be at least
130 kPa (1.3 bar/19 psi). G
WARNING
If the required tyre pressure is not reached
after driving for a short period, the tyre is too
badly damaged. The tyre sealant cannot
repair the tyre in this instance. Damaged tyres
and a tyre pressure that is too low can signif-
icantly impair the vehicle's braking and driv-
ing characteristics .There is a risk of accident.
Do not continue driving. Contact a qualified
specialist workshop.
X Correct the tyre pressure if it is still at least
130 kPa (1.3 bar/19 psi) (see the fuel filler
flap for values).
X To increase the tyre pressure: switch on
the tyre inflation compressor. 366
Flat tyreBreakdown assistance
Page 384 of 457
other obstacles. If it is necessary to drive over
kerbs, speed humps or similar elevations, try
to do so slowly and at an obtuse angle. Oth-
erwise, the tyres, particularly the sidewalls,
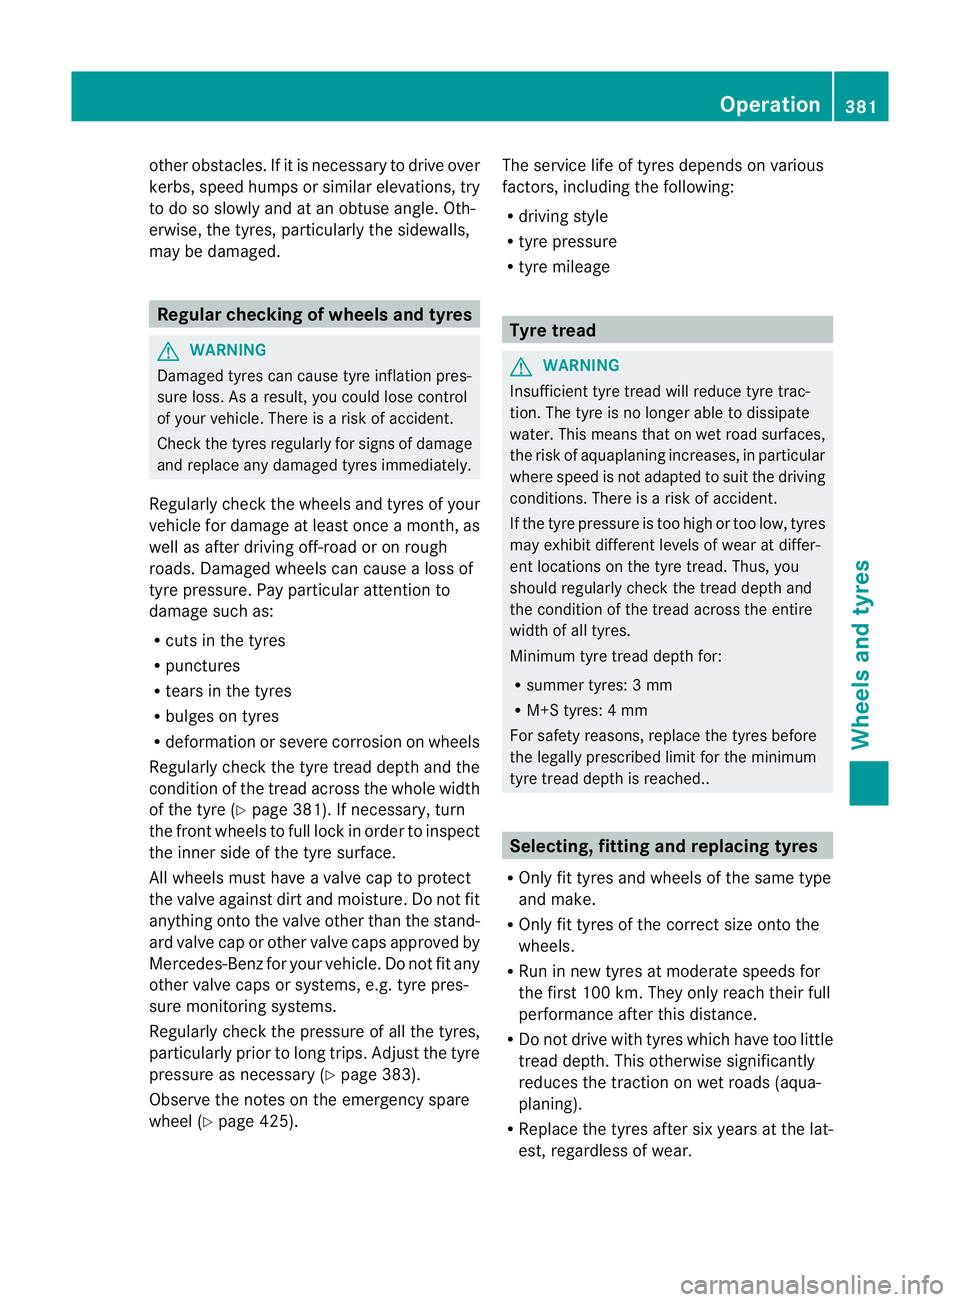
may be damaged. Regular checking of wheels and tyres
G
WARNING
Damaged tyres can cause tyre inflation pres-
sure loss. As a result, you could lose control
of your vehicle. There is a risk of accident.
Check the tyres regularly for signs of damage
and replace any damaged tyres immediately.
Regularly check the wheels and tyres of your
vehicle for damage at least once a month, as
well as after driving off-road or on rough
roads. Damaged wheels can cause a loss of
tyre pressure. Pay particular attention to
damage such as:
R cuts in the tyres
R punctures
R tears in the tyres
R bulges on tyres
R deformation or severe corrosion on wheels
Regularly check the tyre tread depth and the
condition of the tread across the whole width
of the tyre (Y page 381). If necessary, turn
the front wheels to full lock in order to inspect
the inner side of the tyre surface.
All wheels must have a valve cap to protect
the valve against dirt and moisture. Do not fit
anything onto the valve other than the stand-
ard valve cap or other valve caps approved by
Mercedes-Benz for your vehicle. Do not fit any
other valve caps or systems, e.g. tyre pres-
sure monitoring systems.
Regularly check the pressure of all the tyres,
particularly prior to long trips. Adjust the tyre
pressure as necessary (Y page 383).
Observe the notes on the emergency spare
wheel (Y page 425). The service life of tyres depends on various
factors, including the following:
R
driving style
R tyre pressure
R tyre mileage Tyre tread
G
WARNING
Insufficient tyre tread will reduce tyre trac-
tion. The tyre is no longer able to dissipate
water. This means that on wet road surfaces,
the risk of aquaplaning increases, in particular
where speed is not adapted to suit the driving
conditions. There is a risk of accident.
If the tyre pressure is too high or too low, tyres
may exhibit different levels of wear at differ-
ent locations on the tyre tread. Thus, you
should regularly check the tread depth and
the condition of the tread across the entire
width of all tyres.
Minimum tyre tread depth for:
R summer tyres: 3 mm
R M+S tyres: 4 mm
For safety reasons, replace the tyres before
the legally prescribed limit for the minimum
tyre tread depth is reached.. Selecting, fitting and replacing tyres
R Only fit tyres and wheels of the same type
and make.
R Only fit tyres of the correct size onto the
wheels.
R Run in new tyres at moderate speeds for
the first 100 km. They only reach their full
performance after this distance.
R Do not drive with tyres which have too little
tread depth. This otherwise significantly
reduces the traction on wet roads (aqua-
planing).
R Replace the tyres after six years at the lat-
est, regardless of wear. Operation
381Wheels and tyres Z
Page 385 of 457
Observe the notes on the emergency spare
wheel (Y
page 425). MOExtended tyres (tyres with run-flat
characteristics)
With MOExtended tyres (tyres with run-flat
characteristics), you can continue to drive
your vehicle even if there is a total loss of
pressure in one or more tyres.
MOExtended tyres may only be used in con-
junction with an active tyre pressure loss
warning system or with an active tyre pres-
sure monitor and on wheels specifically tes-
ted by Mercedes-Benz.
Notes on driving with MOExtended tyres with
a flat tyre (Y page 363).
i Vehicles with MOExtended tyres are not
equipped with a TIREFIT kit at the factory.
It is therefore recommended that you addi-
tionally equip your vehicle with a TIREFIT kit
if you fit tyres that do not feature run-flat
characteristics, e.g. winter tyres. A TIREFIT
kit can be obtained from a qualified spe-
cialist workshop. Winter operation
General notes
Have your vehicle winterproofed at a qualified
specialist workshop at the onset of winter.
Observe the notes in the "Changing a wheel"
section (Y page 388). Driving with summer tyres
At temperatures below +7 †, summer tyres
lose elasticity and therefore traction and
braking power. Change the tyres on your vehi-
cle to M+S tyres. Using summer tyres at very
cold temperatures could cause tears to form,
thereby damaging the tyres permanently.
Mercedes-Benz cannot accept responsibility
for this type of damage. M+S tyres
G
WARNING
M+S tyres with a tyre tread depth of less than
4mma re not suitable for use in winter as they
do not provide sufficient traction. There is a
risk of accident.
M+S tyres with a tread depth of less than
4 mm must be replaced.
At temperatures below +7 †, use winter tyres
or all-seaso ntyres .Both types of tyre are
identified by the M+S marking.
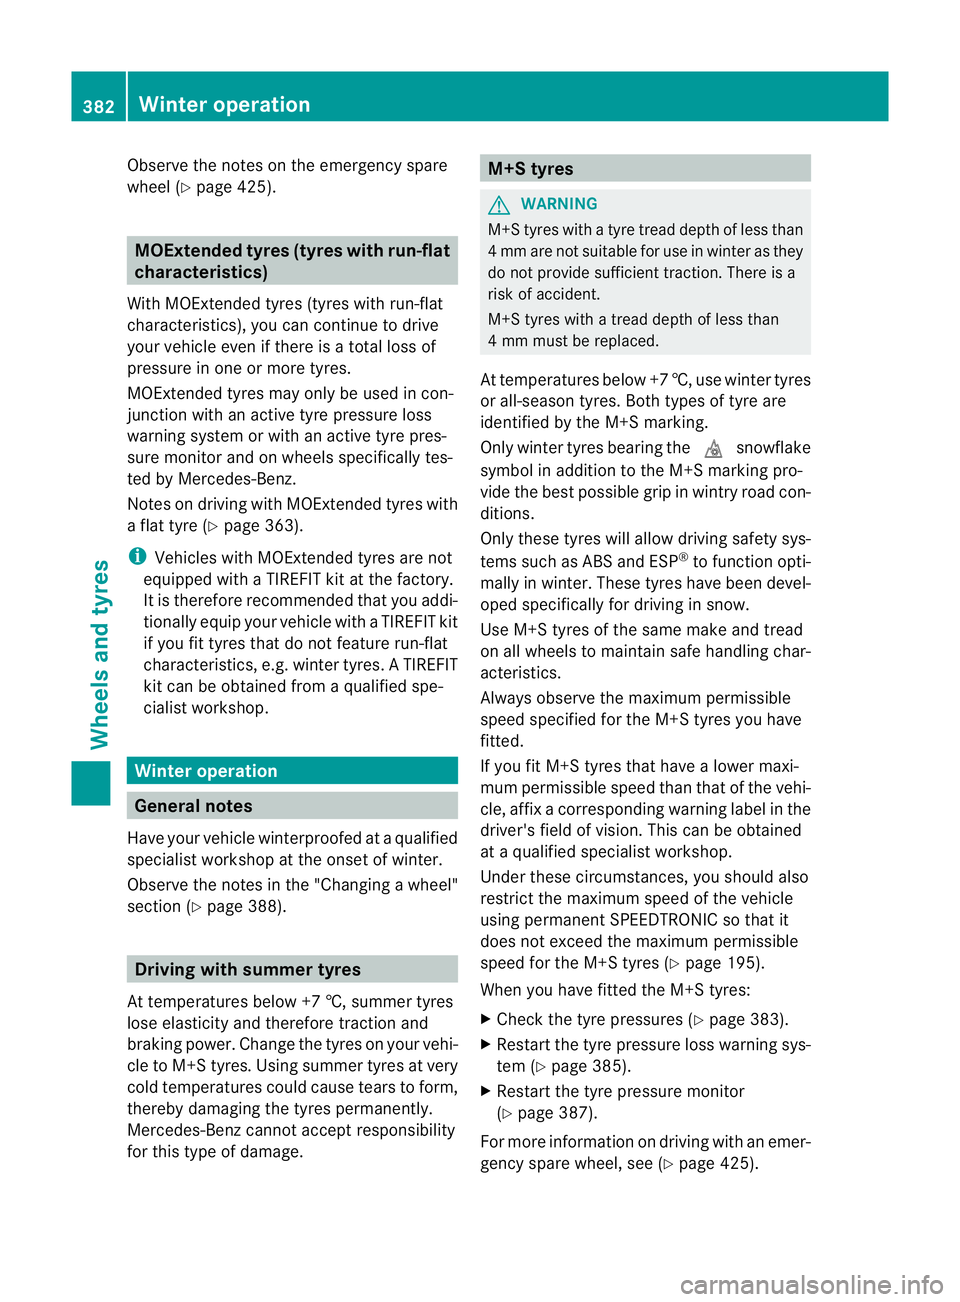
Only winter tyres bearing the isnowflake
symbol in addition to the M+S marking pro-
vide the best possible grip in wintry road con-
ditions.
Only these tyres will allow driving safety sys-
tems such as ABS and ESP ®
to function opti-
mally in winter. These tyres have been devel-
oped specifically for driving in snow.
Use M+S tyres of the same make and tread
on all wheels to maintain safe handling char-
acteristics.
Always observe the maximum permissible
speed specified for the M+S tyres you have
fitted.
If you fit M+S tyres that have a lower maxi-
mum permissible speed than that of the vehi-
cle, affix a corresponding warning label in the
driver's field of vision. This can be obtained
at a qualified specialist workshop.
Under these circumstances, you should also
restrict the maximum speed of the vehicle
using permanent SPEEDTRONIC so that it
does not exceed the maximum permissible
speed for the M+S tyres (Y page 195).
When you have fitted the M+S tyres:
X Check the tyre pressures (Y page 383).
X Restart the tyre pressure loss warning sys-
tem (Y page 385).
X Restart the tyre pressure monitor
(Y page 387).
For more information on driving with an emer-
gency spare wheel, see (Y page 425).382
Winter operationWheels and tyres
Page 396 of 457
X
Tighten the wheel bolts until they are fin-
ger-tight.
X Unscrew the centring pin.
X Tighten the last wheel bolt until it is finger-
tight.
X Vehicles with acollapsible emergency
spare wheel: inflate the collapsible emer-
gency spare wheel (Y page 427).
Only then lower the vehicle.
Lowering the vehicle G
WARNING
The wheels could work loose if the wheel nuts
and bolts are not tightene dto the specified
tightening torque. There is a risk of accident.
Have the tightening torque immediately
checked at a qualified specialist workshop
after a wheel is changed.
! Vehicles with acollapsible emergency
spare wheel: Inflate the collapsible emer-
gency spare wheel using the tyre inflation
compressor before lowering th evehicle.
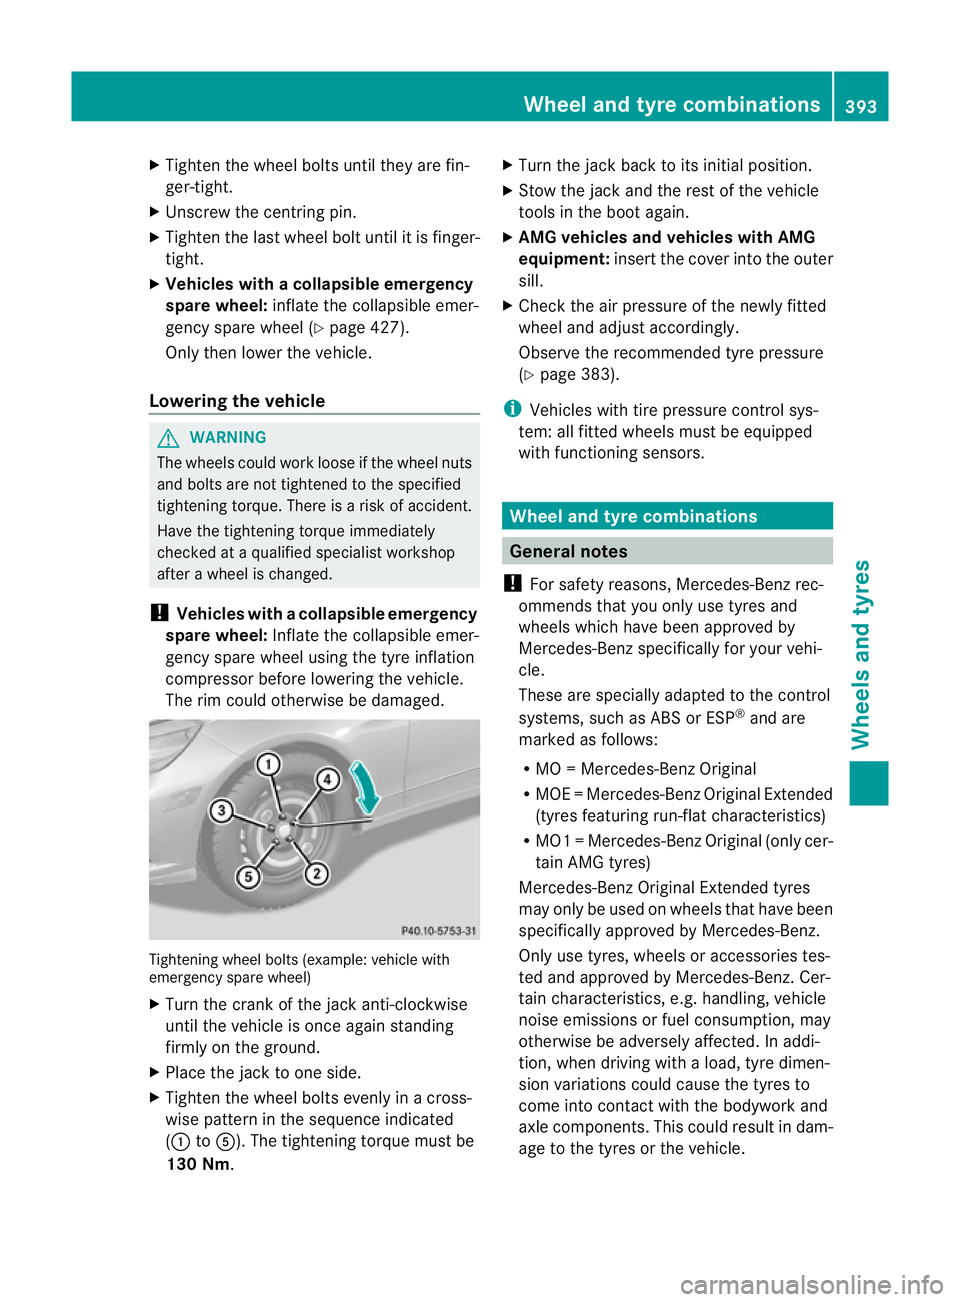
The rim could otherwise be damaged. Tightening wheel bolts (example: vehicle with
emergency spare wheel)
X Turn the crank of the jack anti-clockwise
until the vehicle is once again standing
firmly on the ground.
X Place the jack to one side.
X Tighten the wheel bolts evenly in a cross-
wise patter ninthe sequence indicated
(: toA). The tightening torque must be
130 Nm. X
Turn the jack back to its initial position.
X Stow the jack and the rest of the vehicle
tools in the boot again.
X AMG vehicles and vehicles with AMG
equipment: insert the cover into the outer
sill.
X Check the air pressure of the newly fitted
wheel and adjust accordingly.
Observe the recommended tyre pressure
(Y page 383).
i Vehicles with tire pressure control sys-
tem: all fitted wheels must be equipped
with functioning sensors. Wheel and tyre combinations
General notes
! For safety reasons, Mercedes-Ben zrec-
ommends that you only use tyres and
wheels which have been approved by
Mercedes-Benzs pecifically for your vehi-
cle.
These are specially adapted to the control
systems, such as ABS or ESP ®
and are
marked as follows:
R MO =Mercedes-BenzO riginal
R MOE =Mercedes-BenzO riginal Extended
(tyres featuring run-flat characteristics)
R MO1 =Mercedes-BenzO riginal (only cer-
tain AMG tyres)
Mercedes-Benz Original Extended tyres
may only be used on wheels that have been
specifically approved by Mercedes-Benz.
Only use tyres, wheels or accessories tes-
ted and approved by Mercedes-Benz. Cer-
tain characteristics, e.g. handling, vehicle
noise emissions or fuel consumption, may
otherwise be adversely affected. In addi-
tion, when driving with aload, tyre dimen-
sion variations could cause the tyres to
come into contact with the bodywork and
axle components.T his could result in dam-
age to the tyres or the vehicle. Wheel and tyre combinations
393Wheels and tyres Z
Page 397 of 457
Mercedes-Ben
zaccepts no liability for
damage resulting from the use of tyres,
wheels or accessories othe rthan those tes-
ted and approved.
Further information about wheels, tyres
and approved combinations can be
obtained from any qualified specialist
workshop.
! Retreaded tyres are neither tested nor
recommended by Mercedes-Benz, since
previous damage cannot always be detec-
ted on retreaded tyres. As a result,
Mercedes-Ben zcannot guarantee vehicle
safety if retreaded tyres are fitted. Do not
fit used tyres if you have no information
about their previous usage.
! Large wheels :the lower the section width
for a certain wheel size, the lower the ride
comfort is on poor road surfaces. Roll com-
fort and suspension comfort are reduced
and the risk of damage to the wheels and
tyres as a result of driving over obstacles
increases.
Overview of abbreviations used in the follow-
ing tyre tables:
R BA: both axles
R FA: front axle
R RA: rear axle
You will find a table with recommended tyre
pressures for various operating conditions on
the inside of your vehicle's fuel filler flap. For
further information on tyre pressure, see
(Y page 383). Check tyre pressures regularly
and only when the tyres are cold.
Notes on the vehicle equipment –always fit
the vehicle:
R with tyres of the same size on a given axle
(left/right)
R with the same type of tyres at a given time
(summer tyres, winter tyres, MOExtended
tyres)
Vehicles with MOExtended tyres are not
equipped with a TIREFIT kit at the factory. It
is therefore recommended that you addition- ally equip your vehicle with a TIREFIT kit if you
fit tyres that do not feature run-flat charac-
teristics, e.g. winter tyres. A TIREFIT kit can
be obtained fro
maqualified specialist work-
shop.
i Not all wheel/tyre combinations can be
mounted at the factory in all countries. 394
Wheel and tyre combinationsWheels and tyres