ignition MERCEDES-BENZ E-CLASS ESTATE 2015 Service Manual
[x] Cancel search | Manufacturer: MERCEDES-BENZ, Model Year: 2015, Model line: E-CLASS ESTATE, Model: MERCEDES-BENZ E-CLASS ESTATE 2015Pages: 497, PDF Size: 16.23 MB
Page 147 of 497
X
Press the Rbutton.
The yellow Rindicator lamp in the
instrument cluster lights up.
X To switch off the rear foglamp: press the
R button.
The yellow Rindicator lamp in the
instrument cluster goes out.
Side lamps ! If the batter
yhas been excessively dis-
charged, the side lamps or parking lamps
are automatically switched off to enable
the next engine start .Always park your
vehicle safely and sufficiently lit according
to legal standards. Avoid the continuous
use of the Tside lamps for several
hours. If possible, switch on the Xright
or the Wleft parking lamp.
X To switch on: turn the light switch to T.
The green Tindicator lamp in the instru-
ment cluster lights up.
Parking lamps
Switching on the parking lamps ensures that
the corresponding side of the vehicle is illu-
minated.
X To switch on the parking lamps: the key
is not in the ignition lock or it is in posi-
tion 0.
X Turn the light switch to W(left-hand side
of the vehicle) or X(right-hand side of
the vehicle). Combination switch
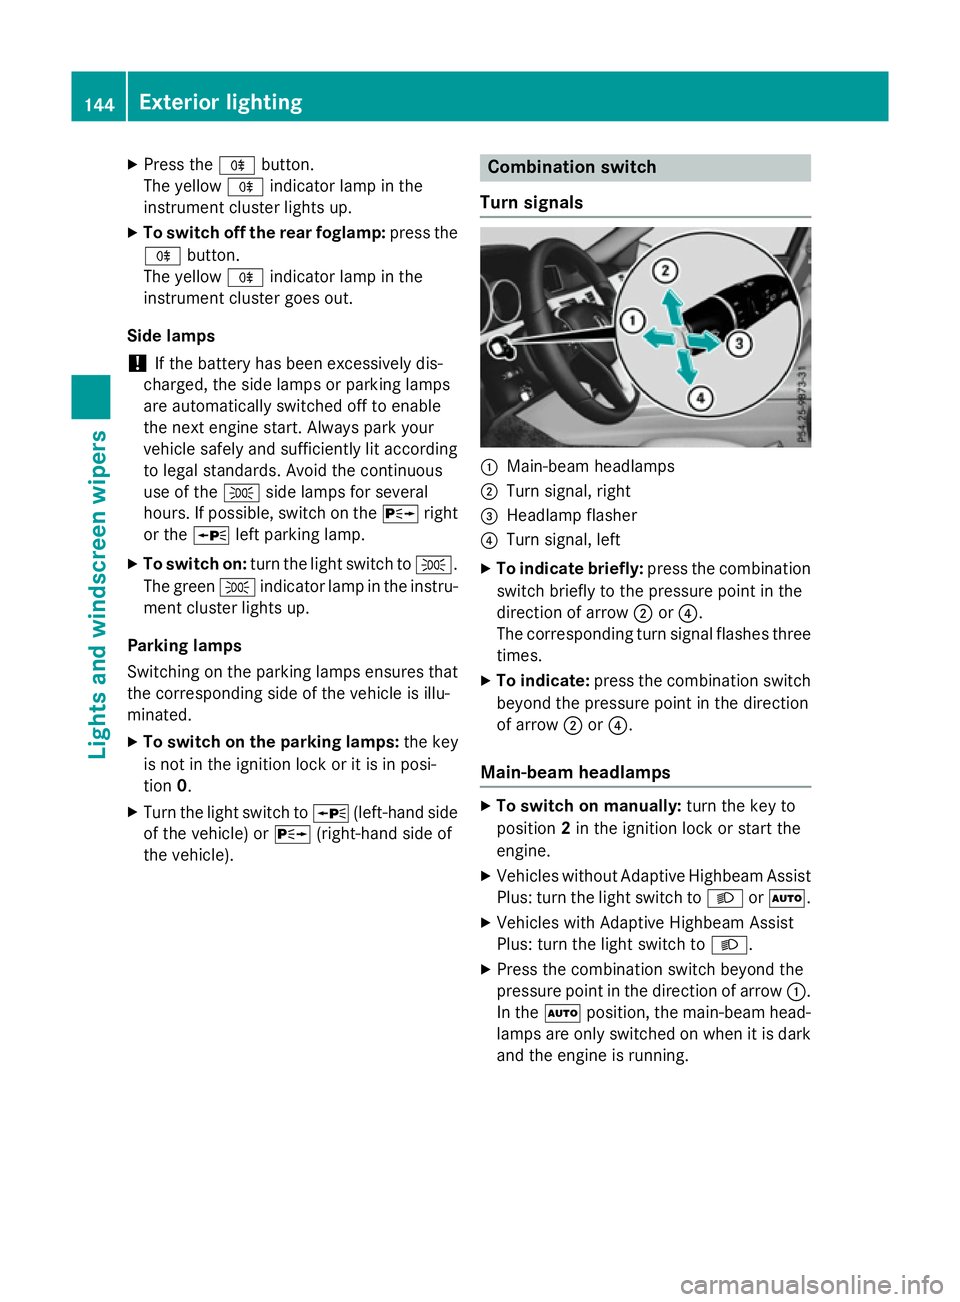
Turns ignals :
Main-beam headlamps
; Turn signal, right
= Headlamp flasher
? Turn signal, left
X To indicate briefly: press the combination
switch briefly to the pressure point in the
direction of arrow ;or?.
The corresponding turn signal flashes three
times.
X To indicate: press the combination switch
beyond the pressure point in the direction
of arrow ;or?.
Main-beam headlamps X
To switch on manually: turn the key to
position 2in the ignition lock or start the
engine.
X Vehicles without Adaptive Highbeam Assist
Plus: turn the light switch to LorÃ.
X Vehicles with Adaptive Highbeam Assist
Plus: turn the light switch to L.
X Press the combination switch beyond the
pressure point in the direction of arrow :.
In the Ãposition, the main-beam head-
lamps are only switched on when it is dark
and the engine is running. 144
Exterior lightingLights and windscreen wipers
Page 148 of 497
The blue
Kindicator lamp in the instru-
ment cluster lights up when the main-beam headlamps are switched on.
X To deactivate: move the combination
switch back to its normal position.
The blue Kindicator lamp in the instru-
ment cluster goes out.
Vehicles with Adaptive Highbeam Assist
Plus: when Adaptive Highbeam Assist Plus is
activated, it automatically controls activation
and deactivation of the main-beam head-
lamps (Y page 147).
Headlam pflasher X
To switch on: turn the key in the ignition
lock to position 1or 2,ors tart the engine.
X Pull the combination switch in the direction
of arrow =. Hazard warning lamps
X
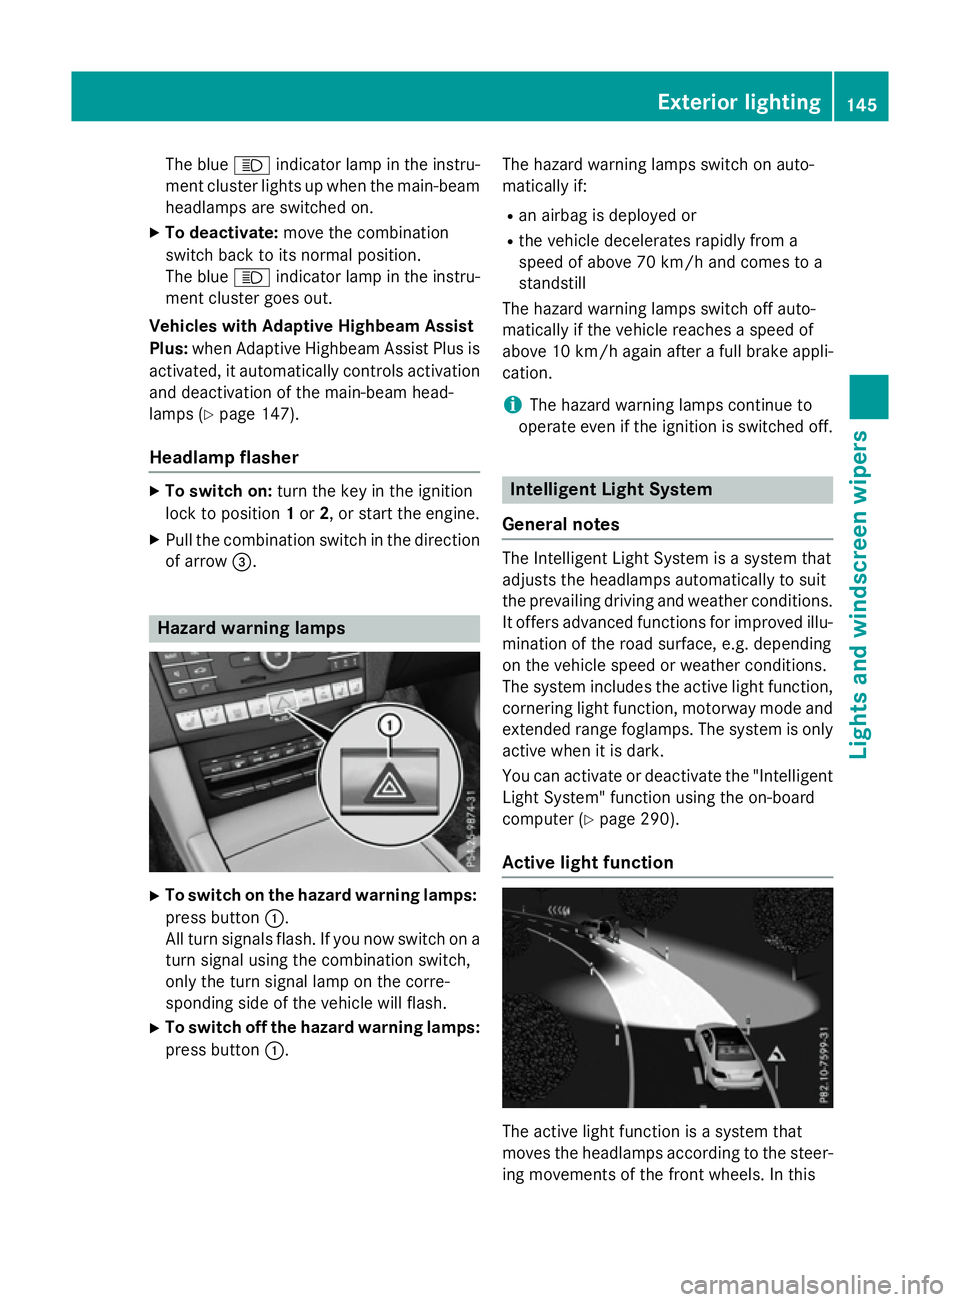
To switch on the hazard warning lamps:
press button :.
All turn signals flash. If you now switch on a turn signal using the combination switch,
only the turn signal lamp on the corre-
sponding side of the vehicle will flash.
X To switch off the hazard warning lamps:
press button :. The hazard warning lamps switch on auto-
matically if:
R an airbag is deployed or
R the vehicle decelerates rapidly from a
speed of above 70 km/ha nd comes to a
standstill
The hazard warning lamps switch off auto-
matically if the vehicle reaches aspeed of
above 10 km/ha gain afterafull brake appli-
cation.
i The hazard warning lamps continue to
operate even if the ignition is switched off. Intelligent Light System
General notes The Intelligent Light System is
asystem that
adjusts the headlamps automatically to suit
the prevailing driving and weather conditions.
It offers advanced functions for improved illu-
mination of the road surface, e.g. depending
on the vehicle speed or weather conditions.
The system includes the active light function, cornering light function, motorway mode and
extended range foglamps. The system is only active when it is dark.
You can activate or deactivate the "IntelligentLight System" function using the on-board
computer (Y page 290).
Active light function The active light function is
asystem that
moves the headlamps according to the steer-
ing movements of the front wheels. In this Exterior lighting
145Lights and windscreen wipers Z
Page 152 of 497
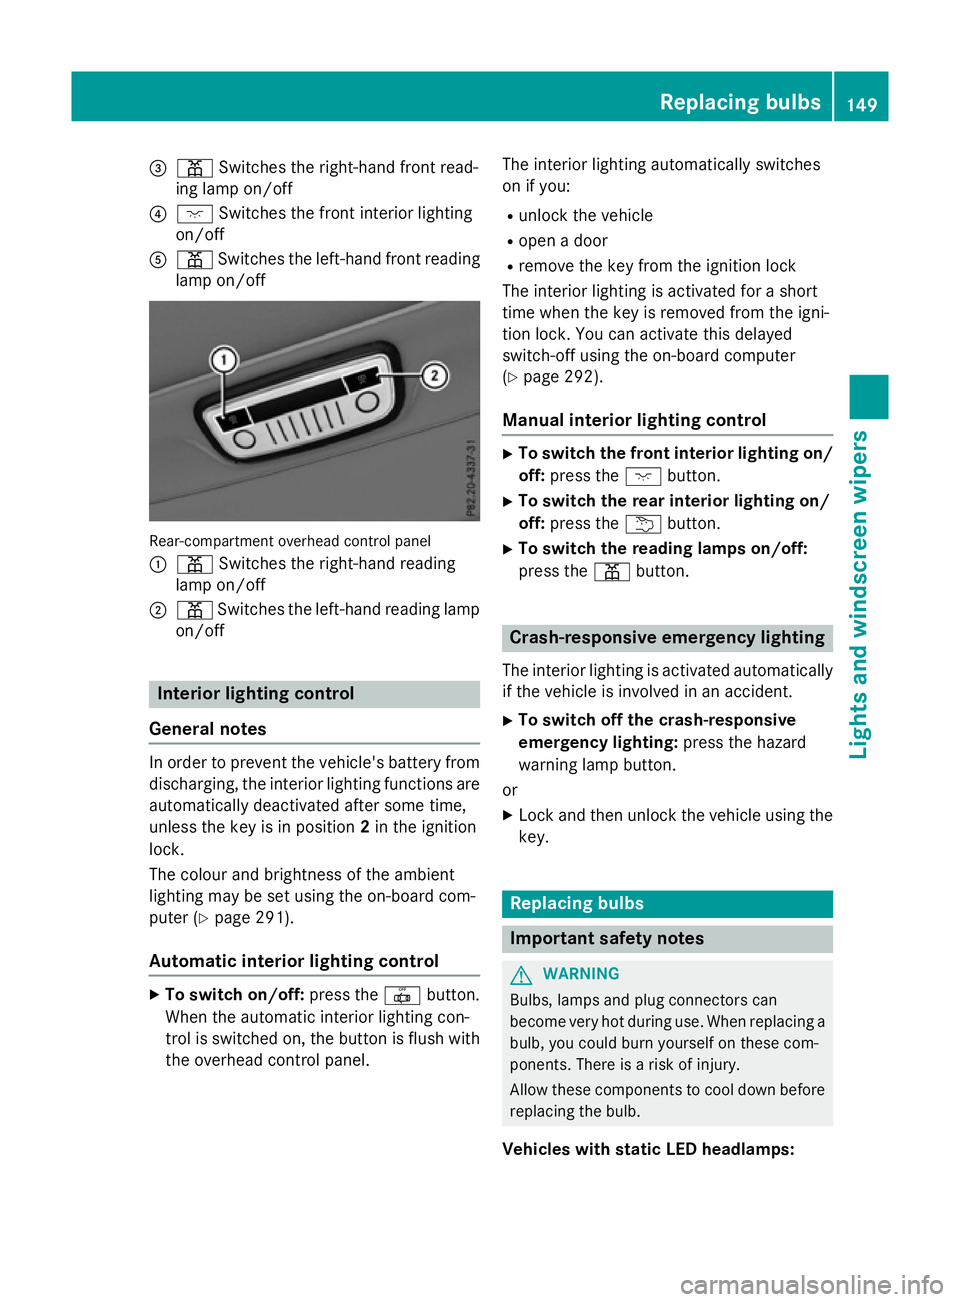
=
p Switches the right-hand front read-
ing lamp on/off
? c Switches the front interio rlighting
on/off
A p Switches the left-hand front reading
lamp on/off Rear-compartment overhead contro
lpan el
: p Switches the right-hand reading
lamp on/off
; p Switches the left-hand reading lamp
on/off Interior lighting control
General notes In order to prevent the vehicle's battery from
discharging, the interio rlighting functions are
automaticall ydeactivate daftersom etime,
unless the key is in position 2in the ignition
lock.
The colou rand brightness of the ambient
lighting may be set using the on-board com-
puter (Y page 291).
Automatic interior lighting control X
To switc hon/off: press the |button.
Whe nthe automatic interio rlighting con-
trol is switche don, the button is flush with
the overhead control panel. The interio
rlighting automaticall yswitches
on if you:
R unlock the vehicle
R ope nad oor
R remove the key from the ignition lock
The interio rlighting is activate dfor as hort
time when the key is removed from the igni-
tion lock. Yo ucan activate this delayed
switch-off using the on-board computer
(Y page 292).
Manua lint erior lighting control X
To switc hthe fron tint erior lighting on/
off: press the cbutton.
X To switc hthe rear interior lighting on/
off: press the ubutton.
X To switc hthe reading lamps on/off:
press the pbutton. Crash-responsive emergenc
ylighting
The interio rlighting is activate dautomatically
if the vehicl eisinvolve dinana ccident.
X To switc hoff the crash-responsive
emergenc ylighting: press the hazard
warning lamp button.
or X Lock and then unlock the vehicl eusing the
key. Replacing bulbs
Important safety notes
G
WARNING
Bulbs, lamps and plug connectors can
become very hot during use. Whe nreplacing a
bulb ,you could burn yoursel fonthesecom-
ponents. There is ariskofi njury.
Allow thes ecomponents to cool dow nbefore
replacing the bulb.
Vehicles with stati cLED headlamps: Replacing bulbs
149Lights and windscree nwipers Z
Page 154 of 497
X
Insert bulbh older;into the lamp and turn
it clockwise.
X Align housing cover :and turn it clock-
wise until it engages.
Turn signal lamps (static LED head-
lamps) X
Switch off the lights.
X Open the bonnet.
X Turn housing cover :anti-clockwise and
pullito ut.
X Turn bulbh older;anti-clockwise and pull
it out.
X Take the bulbo ut of bulbholder;.
X Insert the new bulbi nto bulbholder;.
X Insert bulbh older;into the lamp and turn
it clockwise.
X Align housing cover :and turn it clock-
wise until it engages. Windscreen wipers
Switching the windscreen wipers on/
off
! Do not operate the windscree
nwipers
when the windscree nisdry, as this could
damage the wiper blades. Moreover, dust
that has collected on the windscree ncan
scratch the glass if wiping takes place when the windscree nisdry.
If it is necessary to switch on the wind-
screen wipers in dry weather conditions,
alwayso perate them using washer fluid. !
If the windscree
nwipers leave smears on
the windscree nafter the vehicle has been
washed in an automatic car wash, this may
be due to wax or other residue. Clean the
windscree nwith washer fluida fter an auto-
matic car wash.
! Intermittent wiping with rain sensor: due
to optical influences and the windscreen
becoming dirty in dry weather conditions,
the windscree nwipers may be activated
inadvertently .This could damage the wind-
screen wiper blades or scratch the wind-
screen.
For this reason, you shoulda lwaysswitch
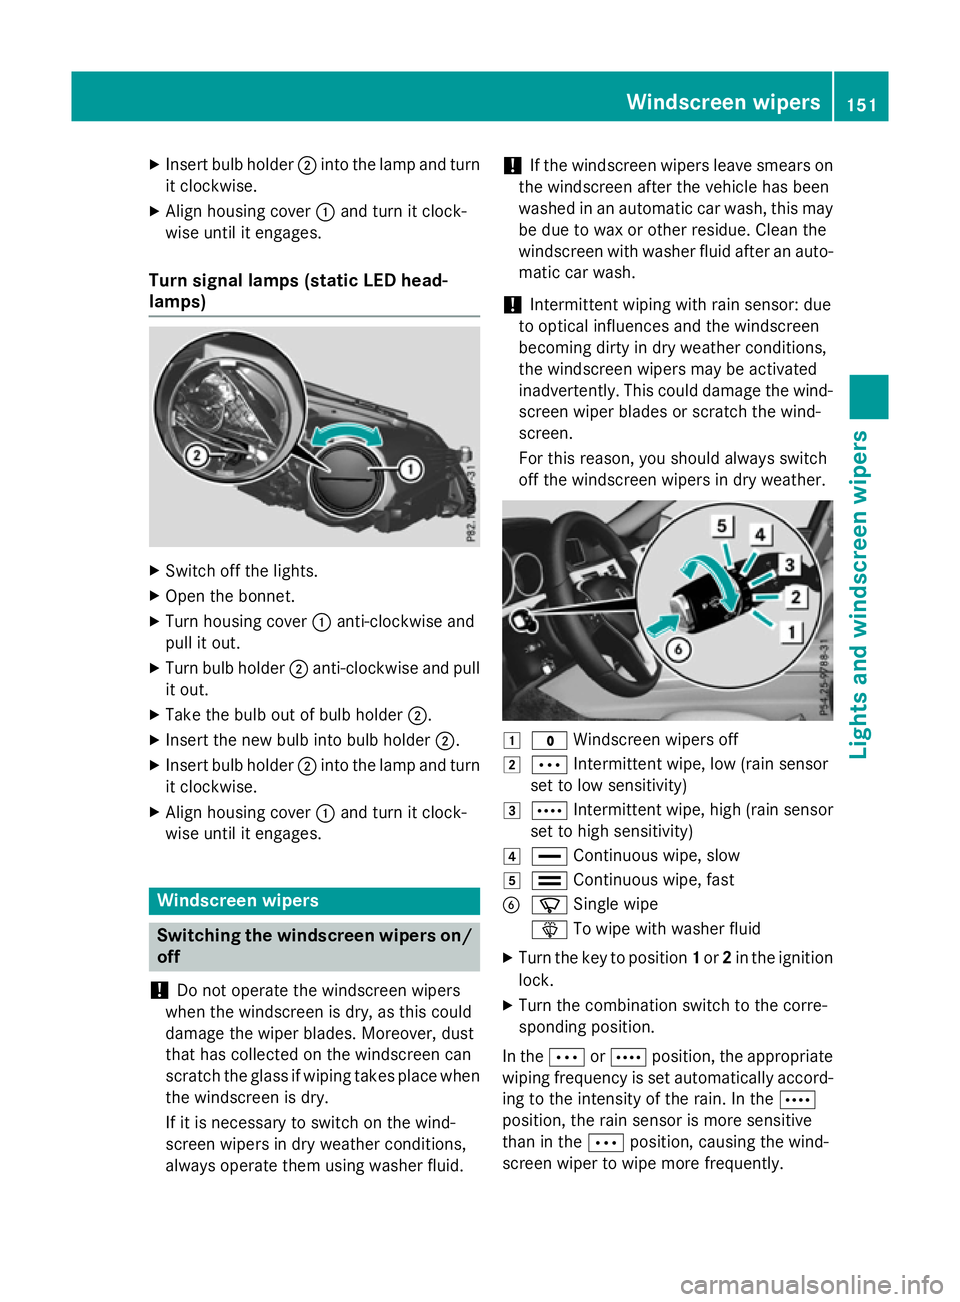
off the windscree nwipers in dry weather. 1
$ Windscreen wipers off
2 Ä Intermittent wipe, low (rains ensor
set to low sensitivity)
3 Å Intermittent wipe, high (rains ensor
set to high sensitivity)
4 ° Continuou swipe, slow
5 ¯ Continuou swipe, fast
B í Single wipe
î To wipew ith washer fluid
X Turn the key to position 1or 2in the ignition
lock.
X Turn the combination switch to the corre-
sponding position.
In the ÄorÅ position, the appropriate
wiping frequency is set automaticall yaccord-
ing to the intensity of the rain. In the Å
position, the rain sensor is more sensitive
than in the Äposition, causing the wind-
screen wiper to wipem ore frequently. Windscreen wipers
151Lights and windscreenw ipers Z
Page 155 of 497
If the wiper blades are worn, the windscreen
willnol onger be wiped properly. This could
prevent you from observing the traffic condi-
tions. Switching the rear window wipero
n/
off :
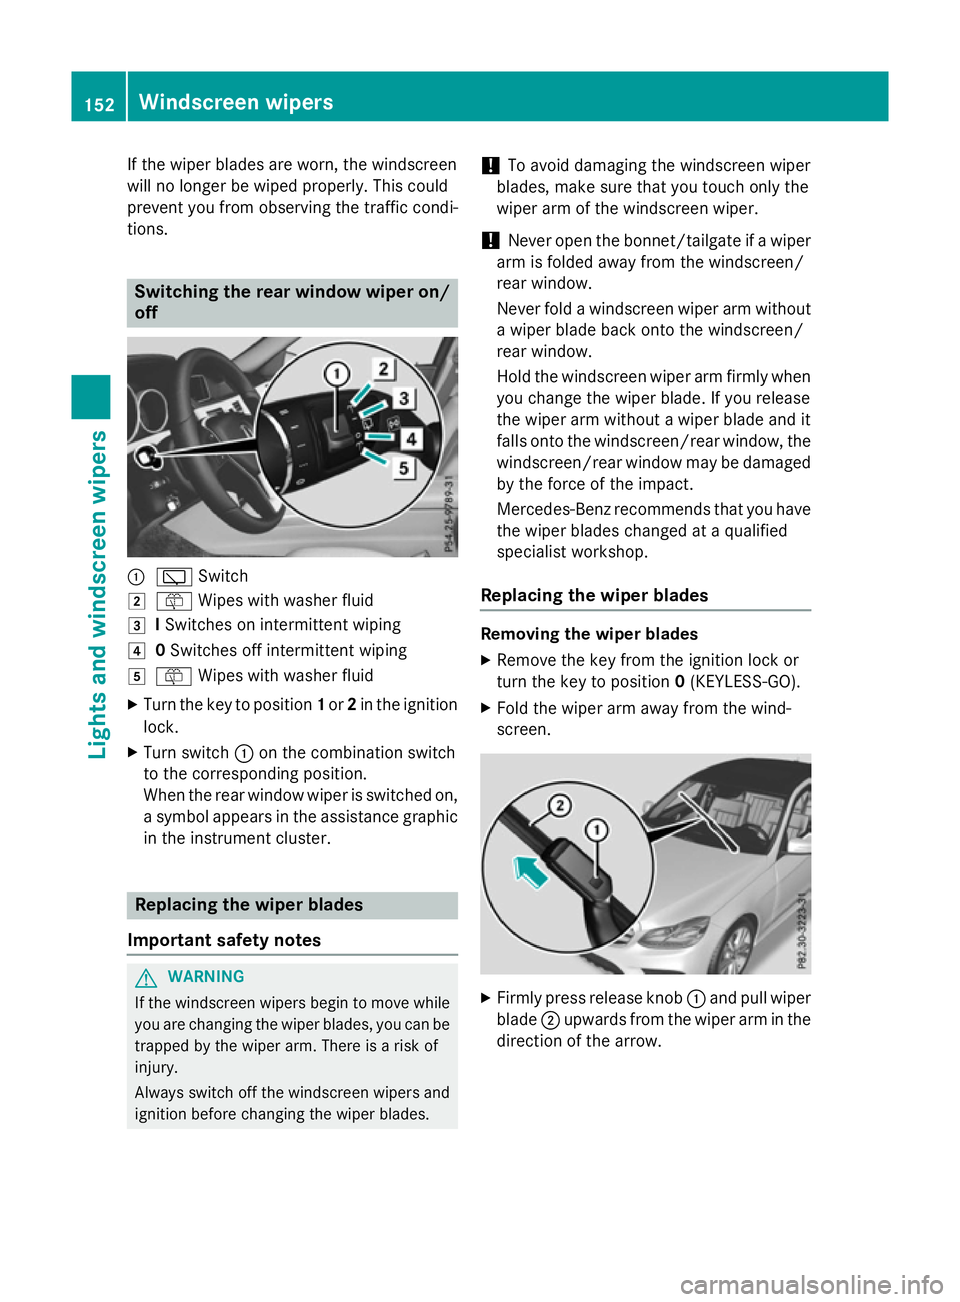
è Switch
2 ô Wipesw ith washer fluid
3 ISwitches on intermittent wiping
4 0Switches off intermittent wiping
5 ô Wipesw ith washer fluid
X Turn the key to position 1or 2in the ignition
lock.
X Turn switch :on the combination switch
to the corresponding position.
When the rear window wiper is switched on,
as ymbola ppears in the assistance graphic
in the instrument cluster. Replacing the wiperb
lades
Important safety notes G
WARNING
If the windscree nwipers begintom ove while
you are changing the wiper blades, you can be trapped by the wiper arm. There is arisk of
injury.
Alwayss witch off the windscree nwipers and
ignition before changing the wiper blades. !
To avoid damaging the windscree
nwiper
blades, make sure that you touch only the
wiper arm of the windscree nwiper.
! Never open the bonnet/tailgate if
awiper
arm is folded awayf rom the windscreen/
rear window.
Never fold awindscree nwiper arm without
aw iper blade back onto the windscreen/
rear window.
Hold the windscree nwiper arm firmly when
you change the wiper blade. If you release
the wiper arm withou tawiper blade and it
fallso nto the windscreen/rear window ,the
windscreen/rear window may be damaged
by the force of the impact.
Mercedes-Benz recommends that you have
the wiper blades changed at aqualified
specialist workshop.
Replacing the wiperb lades Removing the wiperb
lades
X Remove the key from the ignition lock or
turn the key to position 0(KEYLESS-GO).
X Fold the wiper arm awayf rom the wind-
screen. X
Firmly press release knob :and pullw iper
blade ;upwards from the wiper arm in the
direction of the arrow. 152
Windscreen wipersLights and windscreenw
ipers
Page 156 of 497
Fitting th
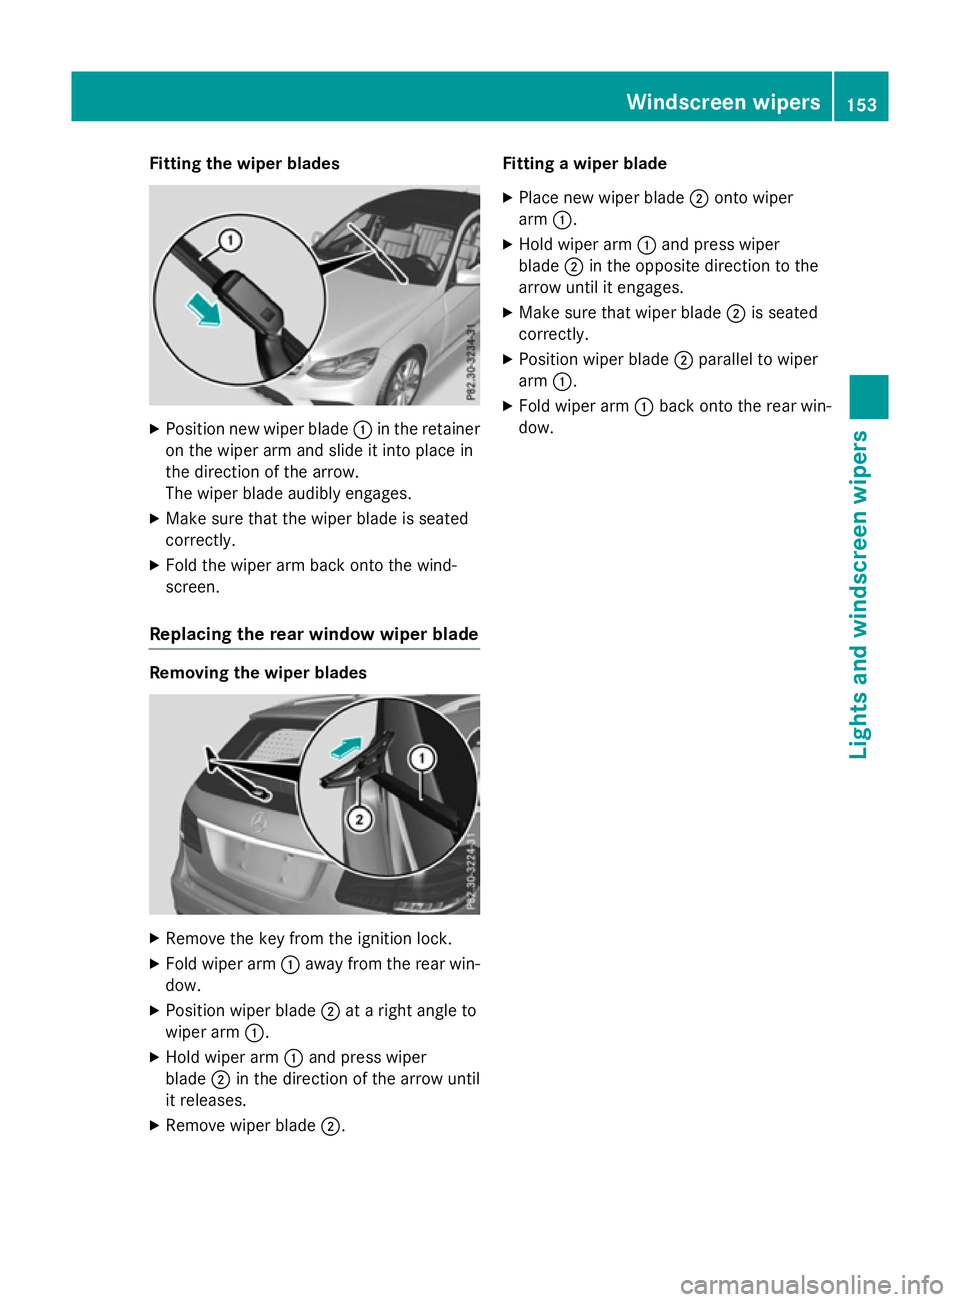
ewiper blades X
Positio nnew wiper blade :in th eretainer
on th ewiper arm and slide it int oplacein
th ed irection of th earrow.
The wiper blade audibly engages.
X Mak esure that th ewiper blade is seated
correctly.
X Fold th ewiper arm back onto th ewind-
screen.
Replacin gthe rea rwindow wiper blade Removing th
ewiper blades X
Remove th ekeyfrom th eignition lock.
X Fold wiper arm :away from th erear win-
dow.
X Positio nwiper blade ;atar igh tangle to
wiper arm :.
X Hol dw iper arm :and press wiper
blade ;in th edirection of th earrow until
it releases.
X Remove wiper blade ;. Fitting
awiper blade
X Plac enew wiper blade ;onto wiper
arm :.
X Hol dw iper arm :and press wiper
blade ;in th eopposit edirection to the
arrow until it engages.
X Mak esure that wiper blade ;is seated
correctly.
X Positio nwiper blade ;parallel to wiper
arm :.
X Fold wiper arm :back onto th erear win-
dow. Windscreen wipers
153Lightsand windscreen wipers Z
Page 157 of 497
Problems with the windscreen wipers
Problem
Possible causes/consequences and
M
MSolutions The windscreen wipers
are jammed. Leaves or snow, for example, may be obstructing the windscreen
wiper movement.T he wiper motor has been deactivated.
X For safety reasons, you should remove the key from the ignition
lock.
or
X Switch off the engine using the Start/Stop button and open the
driver's door.
X Remove the cause of the obstruction.
X Switch the windscreen wipers back on. The windscreen wipers
fail completely. The windscreen wiper drive is malfunctioning.
X Select another wiper speed on the combination switch.
X Have the windscreen wipers checked at aqualified specialist
workshop. 154
Windscreen wipersLights and windscreen wipers
Page 159 of 497
Useful information
i This Owner's Manual describes all mod-
els, series and optional equipment for your
vehicle that were available at the time of
going to press. National variation sare pos-
sible. Not ethat your vehicle may not be
equipped with all of the function sdescri-
bed. This is also the case for system sand
function srelevan ttosafety.
i Read the information on qualified special-
ist workshops: (Y page 27). Overview of climat
econtrol systems Genera
lnotes
Observ ethe settings recommende donthe
following pages. The windows could other-
wise mist up.
To preven tthe windows from misting up:
R switc hoff climat econtro lonly briefly
R switc hona ir-recirculation mode only
briefly
R switc hont he coolin gwith air dehumidifi-
cation function
R switc hont he windscreen demisting func-
tion briefly, if required
Climate contro lregulates the temperature
and the humidity in the vehicle interior and
filter sundesirable substances out of the air.
Climate contro lisonly operational when the
engin eisrunning. Optimum operation is only
achieved when the side windows and the roof
are closed.
The residual heat function can only be acti-
vated or deactivated with the ignition
switched off (Y page 167).
i Ventilate the vehicle for
abrief period
during warm weather, e.g. using the con-
venience openin gfeature (Y page 111).
This will speed up the coolin gprocess and
the desired interior temperature will be
reached more quickly. i
The integrated filter filter
sout most par-
ticles of dust and soot and completely fil-
ter sout pollen. It also reduces gaseous pol-
lutant sand odours. Aclogged filter reduces
the amount of air supplied to the vehicle
interior. For this reason ,you should always
observ ethe interval for replacin gthe filter,
which is specified in the Service Booklet. As this depends on environmental conditions,
e.g. heavy air pollution, the interval may be shorter than stated in the Service Booklet.
i It is possible that the residual heat func-
tion may be activated automatically an hour
after the key has been removed. The vehi-
cle is then ventilated for 30 minutes to dry the automatic climat econtrol. 156
Overview of climat
econtrol systemsClimat econtrol
Page 163 of 497
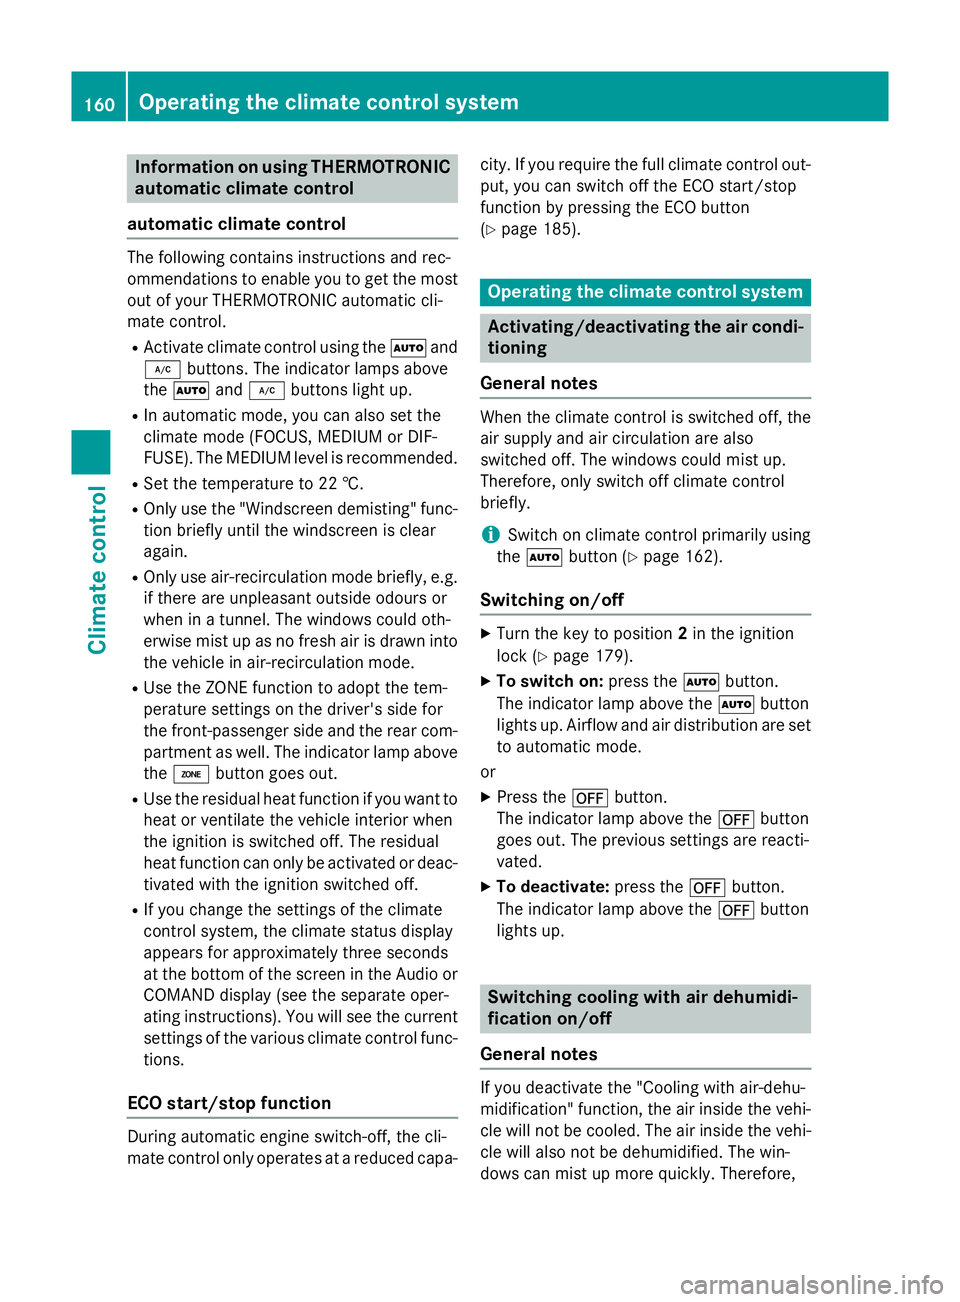
Information on using THERMOTRONIC
automatic climat econtrol
automatic climat econtrol The followin
gcontai ns instruction sand rec-
ommendation stoenable you to get th emost
out of your THERMOTRONI Cautomatic cli-
mat econtrol.
R Activat eclimat econtro lusin gthe à and
¿ buttons .The indicator lamps above
the à and¿ buttons ligh tup.
R In automatic mode, you can also set the
climat emode( FOCUS ,MEDIU MorD IF-
FUSE). The MEDIUM leve lisrecommended.
R Se tthe temperature to 22 †.
R Only use th e"Windscree ndemisting "func-
tion briefly until th ewindscree nisclear
again.
R Only use air-recirculation mod ebriefly, e.g.
if there are unpleasan toutside odour sor
when in atunnel. The windows could oth-
erwise mis tupasnof resh air is drawn into
th ev ehicl eina ir-recirculation mode.
R Use th eZON Efunction to adopt th etem-
peratur esetting sonthedriver' sside for
th ef ront-pa ssenger side and th erear com-
partmen taswell. The indicator lamp above
the á buttongoes out.
R Use th eresidual heat function if you want to
heat or ventilat ethe vehicl einterio rwhen
th ei gnition is switched off .The residual
heat function can only be activated or deac- tivated wit hthe ignition switched off.
R If you chang ethe setting softheclimate
control system, th eclimat estatus display
appear sfor approximately three seconds
at th ebotto moft hescree nintheAudio or
COMAND display (see th eseparate oper-
ating instructions). You will see th ecurrent
setting softhevarious climat econtro lfunc-
tions.
ECO start/stop function During automatic engin
eswitch-off ,the cli-
mat econtro lonlyo perate satareducedcapa- city. If you require th
efull climat econtro lout-
put ,you can switch off th eECO start/stop
function by pressin gthe ECO button
(Y page 185). Operating th
eclimat econtrol system Activating/deactivating th
eair condi-
tioning
General notes When th
eclimat econtro lisswitched off ,the
air suppl yand air circulation are also
switched off .The windows could mis tup.
Therefore, only switch off climat econtrol
briefly.
i Switc
honc limatecontro lprimarily using
the à button(Ypage 162).
Switchin gon/off X
Turn th ekeyto position 2in th eignition
loc k(Ypage 179).
X To switch on: press theÃbutton.
The indicator lamp abov ethe à button
lights up. Airflo wand air distribution are set
to automatic mode.
or
X Press the ^button.
The indicator lamp abov ethe ^ button
goes out .The previous setting sare reacti-
vated.
X To deactivate: press the^button.
The indicator lamp abov ethe ^ button
lights up. Switchin
gcooling with air dehumidi-
fication on/off
General notes If you deactivat
ethe "Coolin gwitha ir-dehu-
midification "function ,the air inside th evehi-
cle will no tbecooled. The air inside th evehi-
cle will also no tbedehumidified. The win-
dows can mis tupmoreq uickly. Therefore, 160
Operating th
eclimat econtrol systemClimat econt rol
Page 165 of 497
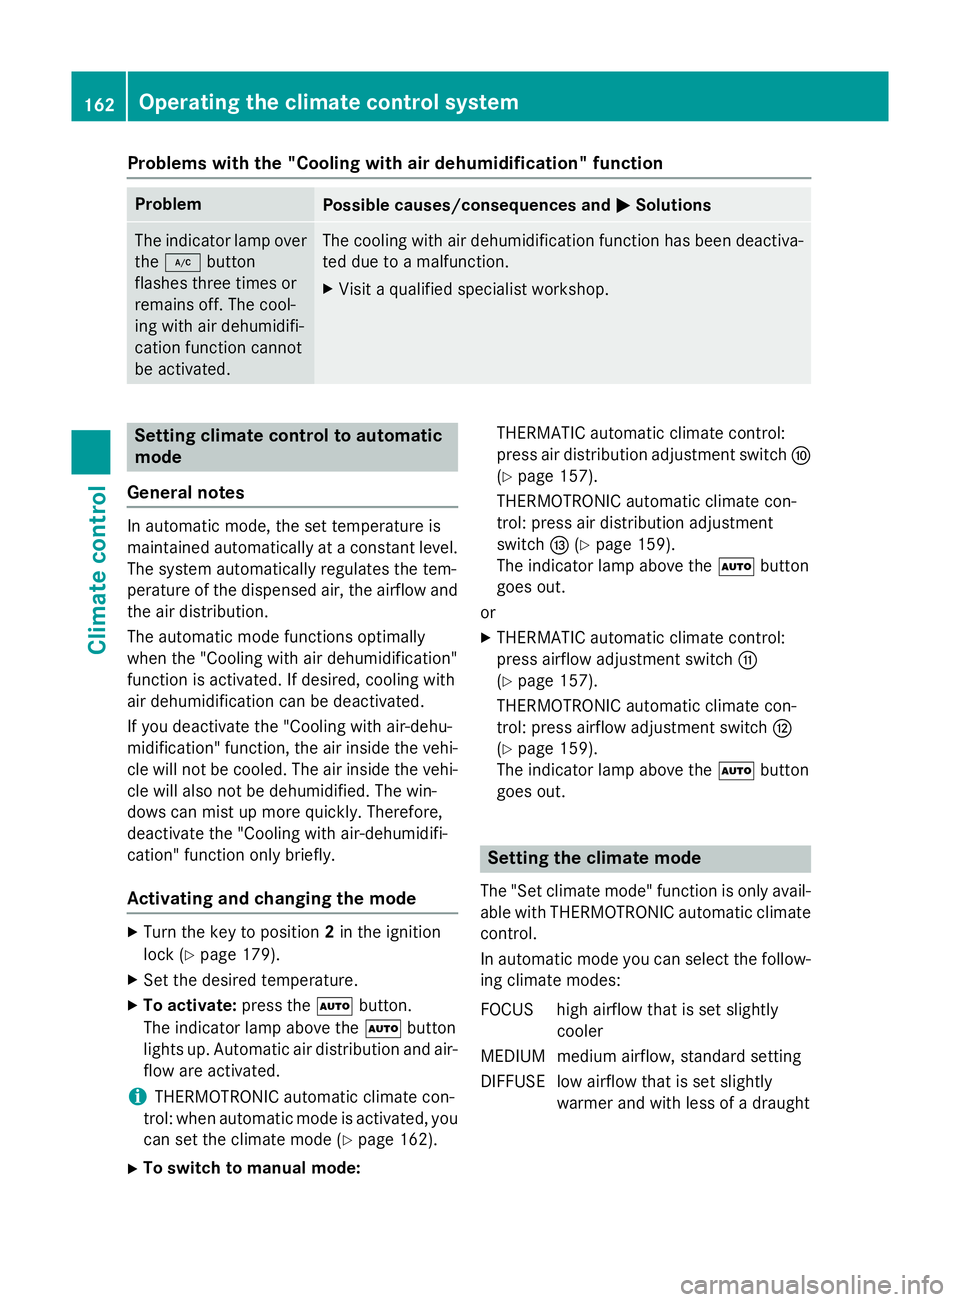
Problems with the "Cooling with air dehumidification" function
Problem
Possible causes/consequences and
M
MSolutions The indicator lamp over
the ¿ button
flashes three times or
remains off. The cool-
ing with air dehumidifi-
cation function cannot
be activated. The cooling with air dehumidification function has been deactiva-
ted due to amalfunction.
X Visit aqualified specialist workshop. Setting climate control to automatic
mode
General notes In automatic mode, the set temperature is
maintained automatically at
aconstant level.
The system automatically regulates the tem-
perature of the dispensed air, the airflow and
the air distribution.
The automatic mode functions optimally
when the "Cooling with air dehumidification"
function is activated. If desired, cooling with
air dehumidification can be deactivated.
If you deactivate the "Cooling with air-dehu-
midification" function, the air inside the vehi-
cle will not be cooled. The air inside the vehi- cle will also not be dehumidified. The win-
dows can mist up more quickly. Therefore,
deactivate the "Cooling with air-dehumidifi-
cation" function only briefly.
Activating and changing the mode X
Turn the key to position 2in the ignition
lock (Y page 179).
X Set the desired temperature.
X To activate: press theÃbutton.
The indicator lamp above the Ãbutton
lights up. Automatic air distribution and air-
flow are activated.
i THERMOTRONIC automatic climate con-
trol: when automatic mode is activated, you can set the climate mode (Y page 162).
X To switch to manualm ode:THERMATIC automatic climate control:
press air distribution adjustment switch
F
(Y page 157).
THERMOTRONIC automatic climate con-
trol: press air distribution adjustment
switch I(Ypage 159).
The indicator lamp above the Ãbutton
goes out.
or
X THERMATIC automatic climate control:
press airflow adjustment switch G
(Y page 157).
THERMOTRONIC automatic climate con-
trol: press airflow adjustment switch H
(Y page 159).
The indicator lamp above the Ãbutton
goes out. Setting the climate mode
The "Set climate mode" function is only avail-
able with THERMOTRONIC automatic climate control.
In automatic mode you can select the follow-
ing climate modes:
FOCUS high airflow that is set slightly cooler
MEDIUM medium airflow, standard setting
DIFFUSE low airflow that is set slightly warmer and with less of adraught 162
Operating the climate control systemClimatec
ontrol