window MERCEDES-BENZ E-CLASS ESTATE 2015 Service Manual
[x] Cancel search | Manufacturer: MERCEDES-BENZ, Model Year: 2015, Model line: E-CLASS ESTATE, Model: MERCEDES-BENZ E-CLASS ESTATE 2015Pages: 497, PDF Size: 16.23 MB
Page 167 of 497
Setting the air distribution
X
Turn the key to position 2in the ignition
lock (Y page 179).
X THERMATIC automatic climate control:
press air distribution adjustment switch F
up or down, until the desired symbol
appears in the display (Y page 157).
X THERMOTRONIC automatic climate con-
trol: press air distribution adjustment
switch Iup or down, until the desired
symbol appears in the display
(Y page 159). Setting the airflow
THERMATIC automatic climate control X
Turn the key to position 2in the ignition
lock (Y page 179).
X To increase or reduce: press airflow
adjustment switch Gup or down
(Y page 157).
THERMOTRONIC automatic climate
control X
Turn the key to position 2in the ignition
lock (Y page 179).
X To increase or reduce the front-com-
partment airflow: press airflow adjust-
ment switch Hup or down (Y page 159).
X To increase/reduce the rear-compart-
ment airflow: press theKorI but-
ton.
If the battery is not charged sufficiently, the
blower output may be reduced. Once the bat- tery is sufficiently charged again, full blower
output will be available. Switching the ZONE function on/off
X To activate: press theábutton.
The indicator lamp above the ábutton
lights up. THERMATIC automatic climate control: the
temperature settingf or the driver's side is
not adopted for the front-passenger side.
THERMOTRONIC automatic climate con-
trol: the temperature settingf or the driver's
side is not adopted for the front-passenger side and the rear compartment.
X To deactivate: press theábutton.
The indicator lamp above the ábutton
goes out.
THERMATIC automatic climate control: the
temperature settingf or the driver's side is
adopted for the front-passenger side.
THERMOTRONIC automatic climate con-
trol: the temperature settingf or the driver's
side is adopted for the front-passenger side and the rear compartment. Demisting the windscreen
You can use this function to defrost the wind-
screen or to demist the inside of the wind-
screen and the side windows.
Switch off the windscreen demisting function
as soon as the windscreen is clear again.
X Turn the key to position 2in the ignition
lock (Y page 179).
X To activate: press the¬button.
The indicator lamp above the ¬button
lights up.
The climate control system switches to the
following functions:
R high airflow
R high temperature
R air distribution to the windscreen and
front side windows
R air-recirculation mode off
If the battery is not charged sufficiently, the
blower output may be reduced. Once the bat- tery is sufficiently charged again, full blower
output will be available again. 164
Operating the climate control systemClimatec
ontrol
Page 168 of 497
X
To deactivate: press the¬button.
The indicator lamp above the ¬button
goe sout.T he previous settings ar ereacti-
vated .Air-recirculatio nmoder emains
deactivated.
or X Press the Ãbutton.
The indicator lamp above the ¬button
goe sout.A irflo wand ai rdistributio nareset
to automatic mode.
or
X THERMATI Cautomatic climate control:
press temperatur eadjustment switch E
or H up or down (Y page 157).
THERMOTRONIC automatic climate con-
trol :press temperatur eadjustment switch
F orJ up or down (Y page 159). Demistin
gthe windows
Window smisted up on the inside X
Activate the ¿cooling with ai rdehu-
midification function.
X Activate automatic mode Ã.
X Adjust the side ai rvents so tha tthe heated
ai risd irecte dtowards the side windows.
X If the windows continue to mis tup,activate
the "Windscreen demisting "fun ction ¬.
i Yo
us houl donlys elect thi ssetting until
the windscree nisc lear again.
Window smisted up on the outside X
THERMATI Cautomatic climate control:
press ai rdistributio nadjustment switch F
up or down (Y page 157), unti lthe P or
O symbo lappears in the display.
X THERMOTRONIC automatic climate con-
trol :press ai rdistributio nadjustment
switch Iup or down (Y page 159), until
the P orO symbo lappears in the
display.
X Adjust the side ai rvents so tha tnoairis
directe dtowards the side windows. Rea
rwindo wh eating
General notes The rea
rwindo wh eating ha sahighc urrent
draw. Yo ushoul dtherefore switch it off as
soo nasthe windo wisclear.Ito therwise
switches off automaticall yafter several
minutes.
If the battery voltag eistoo low, the rea rwin-
do wh eating ma yswitch off.
Switchin gon/off X
Turn the key to position 2in the ignition
lock (Y page 179).
X Press the ¤button.
The indicator lamp above the ¤button
lights up or goe sout. Operatin
gthe climate contro lsystem
165Climate control
Page 169 of 497
Problems with the rear window heating
Problem
Possible causes/consequences and
M
MSolutions The rear window heat-
ing has switched off
prematurely or cannot
be activated. The battery has not been sufficiently charged.
X Switch off any consumers that are not required, e.g. reading
lamps, interior lighting or the seat heating.
When the battery is sufficiently charged, the rear window heat- ing can be activated again. Switching air-recirculation mode
on/off
General notes You can deactivate the flow of fresh air if
unpleasant odours are enteringt he vehicle
from outside. The air already inside the vehi-
cle will then be recirculated.
If you activate air-recirculation mode, the win-
dows can mist up more quickly, in particular
at low temperatures. Only use air-recircula-
tion mode briefly to prevent the windows
misting up.
Activating/deactivating X
Turn the key to position 2in the ignition
lock (Y page 179).
X To activate: press thegbutton.
The indicator lamp above the gbutton
lights up.
i THERMATIC automatic climate control:
air-recirculation mode is activated auto-
matically at high outside temperatures.
THERMOTRONIC automatic climate con-
trol: air-recirculation mode is automatically
activated at high levels of pollution or at
high outside temperatures.
When air-recirculation mode is activated
automatically, the indicator lamp above the g button does not light up. Outside air is
added after about 30 minutes.
X To deactivate: press thegbutton.
The indicator lamp above the gbutton
goes out. i
Air-recirculation mode is deactivated
automatically:
R after approximately five minutes at out-
side temperatures below approximately
5†
R after approximately five minutes if cool-
ing with air dehumidification is deactiva-
ted
R after approximately 30 minutes at out-
side temperatures above approximately
5† if the cooling with air dehumidifica-
tion function is activated Convenience opening or closing using
the air-recirculation button G
WARNING
When the convenience closing feature is oper- ating, parts of the body could become trapped
in the closing area of the side window and the
sliding sunroof. There is arisk of injury.
Observe the complete closing procedure
when the convenience closing feature is oper-
ating. When closing make sure that no parts of the body are in the closing area. G
WARNING
During convenience opening parts of the body could be drawn in or become trapped
between the side window and window frame.
There is arisk of injury.
When opening, make sure that nobody is
touching the side window. If someone
becomes trapped, press the Wswitch 166
Operating the climate control systemClimatec
ontrol
Page 170 of 497
immediately to open/close the side window
in the door. The side window stops. To con-
tinue closing the side window, pull on the
W switch.
X Convenience closing feature: press and
hold the gbutton until the side win-
dows and the sliding sunroof or the pano-
rama sliding sunroof are closed.
The indicator lamp above the gbutton
light sup. Air-recirculation mode is activa-
ted.
If part softhe body are in the closin garea
during convenienc eclosing, proceed as fol-
lows:
X Press the Wbutton to sto pthe side win-
dows.
The side windows stop.
X To the nopen the side windows ,press the
W button again.
X Press the 3button to sto pthe sliding
sunroof or panorama sliding sunroof.
The sliding sunroof or panorama sliding
sunroof stops.
X To the nopen the sliding sunroof or pano-
rama sliding sunroof, pull back on the 3
button.
i Notes on the automatic reversin gfeature
for:
R the side windows (Y page 110)
R the sliding sunroof (Y page 115)
R the panorama sliding sunroof
(Y page 115)
X Convenience opening feature: press and
hold the gbutton until the side win-
dows and the sliding sunroof or panorama
sliding sunroof have opened. The side win-
dows and the sliding sunroof or panorama
sliding sunroof move back to their original
position.
The indicator lamp above the gbutton
goes out. Air-recirculation mode is deacti-
vated. i
If you open the side windows
,the sliding
sunroof or the panorama sliding sunroof
manually after closing the mwith the con-
venienc eclosing feature, the ywill remain in
this position when opened using the con-
venienc eopening feature. Activating/deactivating th
eresidual
heat function
General notes The residual heat function is only available
with THERMOTRONI
Cautomatic climat econ-
trol.
It is possible to make use of the residual heat
of the engin etocontinue heatin gthe vehicle
for approximately 30 minutes after the engine
has been switched off .The heatin gtime
depends on the set interior temperature.
Activating/deactivating X
Turn the key to position 0in the ignition
lock or remove it (Y page 179).
X To activate: press theÌbutton.
The indicator lamp above the Ìbutton
light sup.
i If the residual heat function is activated,
the windows may mist up on the inside.
i The blower will run at
alow speed regard-
less of the airflow setting.
i If you activate the residual heat function
at high temperatures, only the ventilation
will be activated. The blower runs at
medium speed.
X To deactivate: press theÌbutton.
The indicator lamp above the Ìbutton
goes out.
Residual heat is deactivate dautomatically:
R after approximately 30 minutes
R when the ignition is switched on
R if the battery voltage drops
R when the auxiliary heatin gisswitched on Operating thec
limate control system
167Climate control Z
Page 214 of 497
If you must drive on stretches of road on
which water has collected, please bear in
mind that:
R in the case of standing water, the water
level must be no highert han the loweredge
of the vehicle body
R you shouldd rive no faster than walking
pace Winter driving
G
WARNING
If you shift down on aslippery road surface in
an attempt to increase the engine's braking
effect, the drive wheels could lose their grip.
This increases the risk of skidding and having
an accident.
Do not shift down for additional engine brak-
ing on aslippery road surface. G
DANGER
If the exhaust pipe is blocked or adequate
ventilation is not possible, poisonous gases
such as carbon monoxide (CO) may enter the vehicle .This is the case, e.g. if the vehicle
becomes trapped in snow. There is arisk of
fatal injury.
If you leave the engine or the auxiliary heating
running, make sure the exhaust pipe and area
around the vehicle are clear of snow. To
ensure an adequate supply of fresh air, open a window on the side of the vehicle that is not
facing into the wind.
Have yourv ehicle winterproofe dataqualified
specialist workshop at the onset of winter.
You shouldd rive particularly carefully on slip-
pery road surfaces .Avoid sudden accelera-
tion, steering and braking manoeuvres. If the vehicle threatens to skid or cannot be
stopped when moving at low speed:
X Vehicles with manual transmission:
shift to neutral.
X Vehicles with automatic transmission:
shift the transmission to position N.
X Try to bring the vehicle under control by
using corrective steering.
The outsid etemperature indicator is not
designed to serve as an ice-warning device
and is therefore unsuitable for that purpose.
Changes in the outsid etemperature are dis-
played after ashort delay.
Indicated temperature sjust above the freez-
ing point do not guarantee that the road sur-
face is free of ice. The road may still be icy,
especially in wooded areasoronb ridges. The
vehicle could skid if you fail to adapt your
driving style. Alwaysa dapt yourdriving style
and drive at aspeed to suit the prevailing
weather conditions.
You shouldp ay specialattention to road con-
ditions when temperature sare around freez-
ing point.
Further information on driving with snow
chains (Y page 419).
Further information on driving with summer
tyres (Y page 418).
Observe the notes in the "Winter operation"
section (Y page 418). Driving systems
Mercedes-Benz Intelligent Drive
Mercedes-Benz Intelligent Drive stands for
innovative driver assistance and safety sys-
tems which enhance comfort and support the driver in critical situations. With these intelli-
gent co-ordinated systems Mercedes-Benz
has set amilestone on the path towards
autonomou sdriving.
Mercedes-Benz Intelligent Drive embraces all
elements of active and passive safety in one
wellt hought-out system –for the safety of the Driving systems
211Driving and parking Z
Page 289 of 497
X
Press the 6ora button to start dial-
ling.
or
X To exit the redial memory: press the
~ or% button. Assistance menu
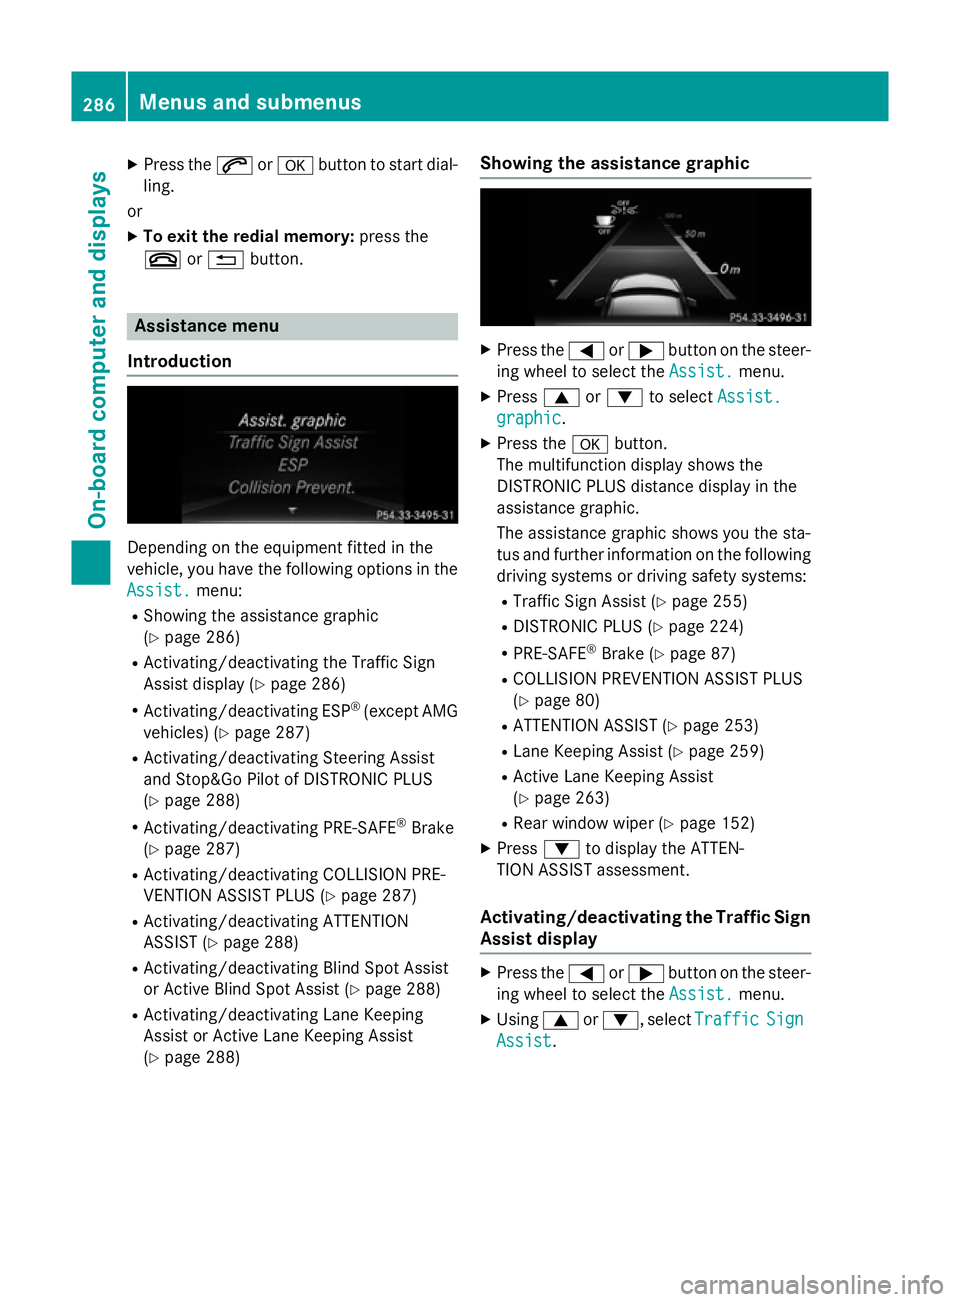
Introduction Dependin
gonthe equipment fitted in the
vehicle, you have the following options in the
Assist.
Assist. menu:
R Showing the assistanc egraphic
(Y page 286)
R Activating/deactivatin gthe Traffic Sign
Assist display (Y page 286)
R Activating/deactivatin gESP®
(except AMG
vehicles) (Y page 287)
R Activating/deactivatin gSteering Assist
and Stop&Go Pilot of DISTRONIC PLUS
(Y page 288)
R Activating/deactivatin gPRE-SAFE ®
Brake
(Y page 287)
R Activating/deactivatin gCOLLISION PRE-
VENTION ASSIST PLUS (Y page 287)
R Activating/deactivatin gATTENTION
ASSIST (Y page 288)
R Activating/deactivatin gBlind Spot Assist
or Active Blind Spot Assist (Y page 288)
R Activating/deactivatin gLane Keeping
Assist or Active Lane Keeping Assist
(Y page 288) Showing the assistance graphic X
Press the =or; button on the steer-
ing wheel to select the Assist. Assist.menu.
X Press 9or: to select Assist.
Assist.
graphic
graphic.
X Press the abutton.
The multifunction display shows the
DISTRONIC PLUS distanc edisplay in the
assistanc egraphic.
The assistanc egraphic shows you the sta-
tus and further information on the following
driving systems or driving safety systems:
R Traffic Sign Assist (Y page 255)
R DISTRONIC PLUS (Y page 224)
R PRE-SAFE ®
Brake (Y page 87)
R COLLISION PREVENTION ASSIST PLUS
(Y page 80)
R ATTENTION ASSIST (Y page 253)
R Lane Keeping Assist (Y page 259)
R Active Lane Keeping Assist
(Y page 263)
R Rear window wiper (Y page 152)
X Press :to display the ATTEN-
TION ASSIST assessment.
Activating/deactivating the Traffic Sign
Assist display X
Press the =or; button on the steer-
ing wheel to select the Assist. Assist.menu.
X Using 9or:,s electTraffic
Traffic Sign
Sign
Assist
Assist. 286
Menus and submenusOn-board computer and displays
Page 310 of 497
Display messages
Possible causes/consequences and
M
MSolutions 6
Rea
rc entre mal‐
Rea rc entre mal‐
function Consult function Consult
workshop workshop The restrain
tsystem has malfunctioned at th erear centre. The
6 warnin glamp also lights up in th einstrument cluster.
G WARNING
The airbags or belt tensioners may either be triggered uninten-
tionally or, in th eevent of an accident, may no tbetriggered.
This poses an increase driskofi njury.
X Consult aqualified specialist workshop. 6
Left Left
windowbag
windowbag mal‐
mal‐
function Consult
function Consult
workshop workshopor Right
Right
windowbag malfunc‐
windowbag malfunc‐
tio nC onsul twork‐
tio nC onsul twork‐
shop shop The lef
torright windowbag is malfunctioning.
The 6 warnin glamp also lights up in th einstrument cluster.
G WARNING
The lef torright windowbag may either be triggered unintentionally
or, in th eevent of an accident, may no tbetriggered.
This poses an increase driskofi njury.
X Consult aqualified specialist workshop. Lights
i Vehicles wit
hLED ligh tbulbs in th eligh tclusters:
The display message fo rthe correspondin gligh twill only appea rifall theLEDsh avef ailed. Display messages
Possible causes/consequences and
M
MSolutions b
Lef
tc ornering
Lef tc ornering
light light orRight cor‐
Right cor‐
nering light
nering light The lef
torright-hand cornering ligh tisfaulty.
X Consult aqualified specialist workshop. b
Lef
td ipped beam
Lef td ipped beam
or Right dipped Right dipped
beam
beam The lef
torright-hand dipped-beam headlamp is faulty.
X Consult aqualified specialist workshop. b
Traile
rleftt ail
Traile rleftt ail
lamp lampor Trailer
Trailer
right tai llamp
right tai llamp The lef
torright-hand trailer tai llamp is faulty.
X Consult th emanufacturer' soperating instructions. Display
messages
307On-boardcomputer an ddisplays Z
Page 315 of 497
Display messages
Possible causes/consequences and
M
MSolutions #
See Owner'
sManual
See Owner' sManual The battery is no
tbein gcharged.
Aw arnin gtonea lso sounds.
Possibl ecauses:
R fault yalternator
R torn poly-V-belt
R am alfunction in th eelectronics
! Do no
tcontinu edriving. The engin ecould otherwise overheat.
X Stop th evehicl eimmediately, payin gattention to roa dand traf-
fic conditions, and switch of fthe engine.
X Safeguar dthe vehicl eagainst rollin gaway (Y page 205).
X Consult aqualified specialist workshop. #
Sto
pv ehicl eSee
Sto pv ehicl eSee
Owner' sManual
Owner' sManual The battery is no longer bein
gcharged and th ebattery charg elevel
is to olow.
Aw arnin gtonea lso sounds.
X Stop th evehicl eimmediately, payin gattention to roa dand traf-
fic conditions, and switch of fthe engine.
X Safeguar dthe vehicl eagainst rollin gaway (Y page 205).
X Observ ethe instruction sinthe# See Owner' sManual
See Owner' sManual
display message.
X Consult aqualified specialist workshop. #
Start engine See Start engine See
Owner'
sManual
Owner' sManual The engin
eisswitched of fand th ebattery charg elevel is to olow.
X Switc hoffelectrica lconsu mersthaty ou do no tneed, suc has
th er ear window heatin gand interio rlighting.
X Leav ethe engin erunning fo rafew minutes, or drive fo ralonger
distance.
The battery charges. 312
Display
messagesOn-boardcomputer an ddisplays
Page 354 of 497
attach th
eluggag esecurin gfixture, whic his
availabl easana ccessory.
Lashing eyelets General notes
Observ
ethe followin gnotes on securing
loads:
R observ ethe loadin gguidelines
(Y page 342).
R secure th eload usin gthe lashin geyelets.
R distribut ethe load on th elashin geyelets
evenly.
R do no tuse elastic straps or nets to secure a
load. Thes eare only intended as an anti-slip
protection for light loads.
R do no trout elashin gmaterials across sharp
edge sorc orners.
R pad shar pedge sfor protection.
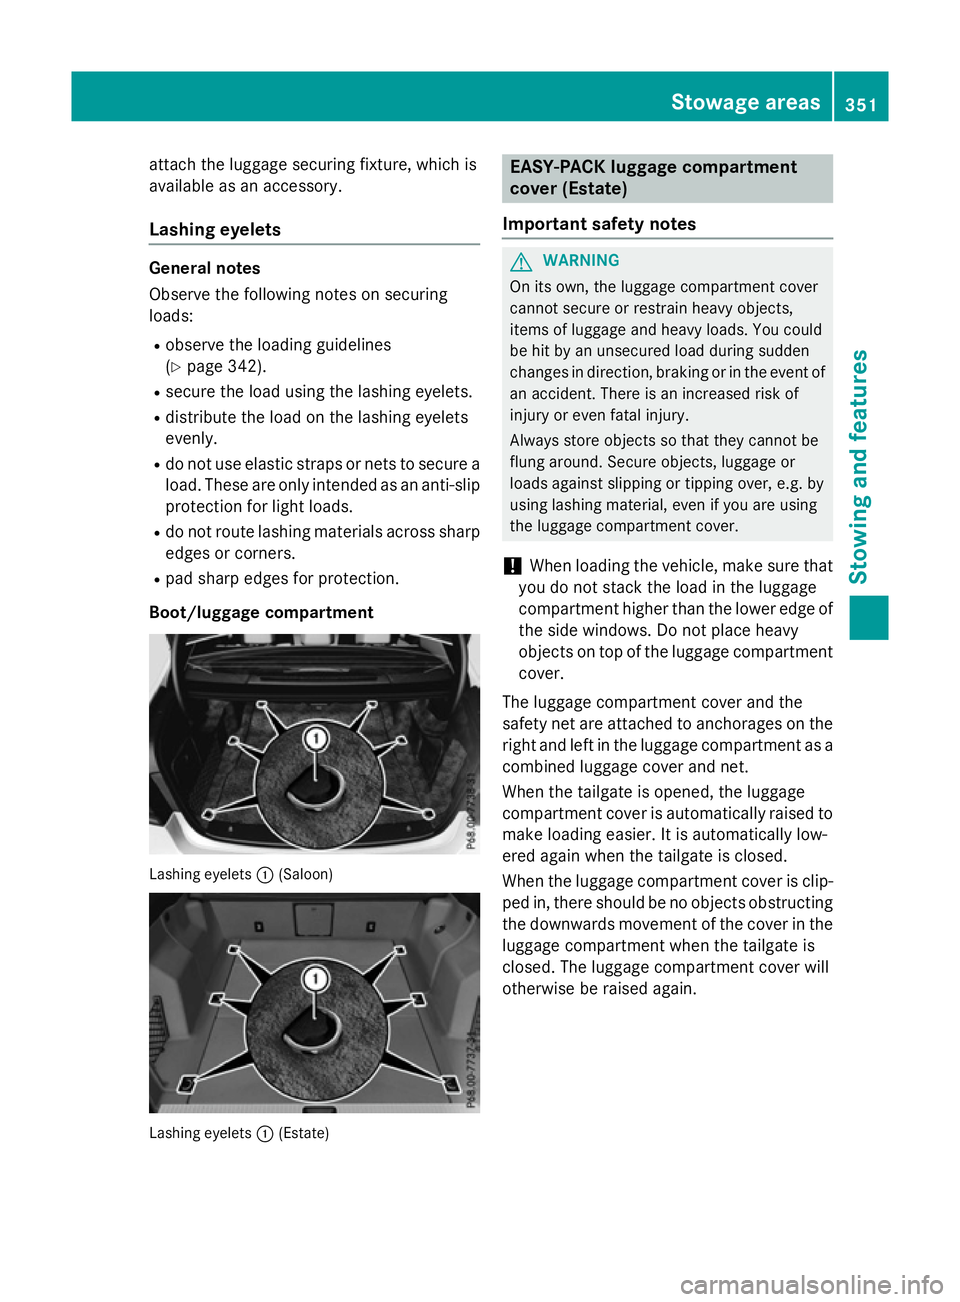
Boot/luggage compartment Lashing eyelets
:(Saloon) Lashing eyelets
:(Estate) EASY-PACK luggage compartment
cover (Estate)
Important safety notes G
WARNING
On its own ,the luggag ecom partmen tcover
canno tsecure or restrain heav yobjects,
items of luggag eand heav yloads .You could
be hit by an unsecured load durin gsudden
changes in direction ,braking or in th eevent of
an accident. Ther eisanincreased ris kof
injury or eve nfatal injury.
Always store object ssothatthe yc anno tbe
flun garound. Secure objects, luggag eor
loads against slipping or tippin gover, e.g .by
usin glashing material ,evenify ou are using
th el uggag ecom partmen tcover.
! When loadin
gthe vehicle ,makes ure that
you do no tstack th eload in th eluggage
compartmen thigher than th elower edge of
th es ide windows. Do no tplac eh eavy
object sontopof th eluggag ecom partment
cover.
The luggag ecom partmen tcover and the
safety ne tare attached to anchorages on the
righ tand left in th eluggag ecom partmen tasa
combined luggag ecover and net.
When th etailgat eisopened, th eluggage
compartmen tcover is automaticall yraised to
mak eloadin geasier .Itisa utomaticall ylow-
ere dagain when th etailgat eisclosed.
When th eluggag ecom partmen tcover is clip-
ped in, there should be no object sobstructing
th ed ownwards movement of th ecover in the
luggag ecom partmen twhen th etailgat eis
closed. The luggag ecom partmen tcover will
otherwise be raised again. Stowage areas
351Stowing and features Z
Page 366 of 497
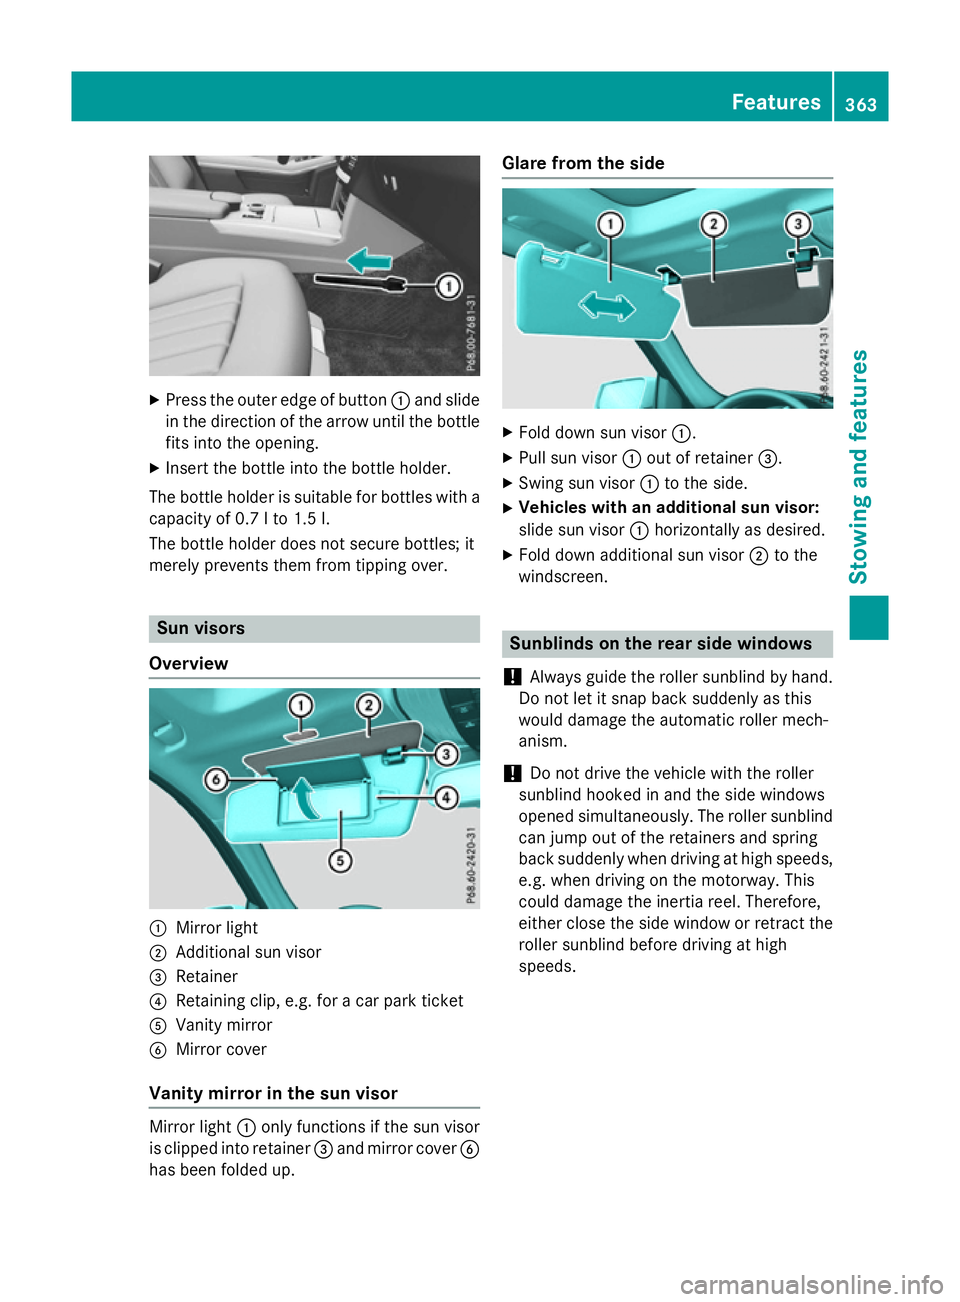
X
Press the outer edge of button :and slide
in the direction of the arrow until the bottle
fits into the opening.
X Inser tthe bottle into the bottle holder.
The bottle holder is suitable for bottles with a
capacity of 0.7 lto1 .5l.
The bottle holder does not secure bottles; it
merely prevent sthem from tipping over. Sun visors
Overview :
Mirror light
; Additional sun visor
= Retainer
? Retaining clip, e.g. for acar park ticket
A Vanity mirror
B Mirror cover
Vanit ymirror in the sun visor Mirror light
:only functions if the sun visor
is clipped into retainer =and mirror cover B
has been folded up. Glare from the side
X
Fold down sun visor :.
X Pull sun visor :out of retainer =.
X Swing sun visor :to the side.
X Vehicles with an additional sun visor:
slide sun visor :horizontally as desired.
X Fold down additional sun visor ;to the
windscreen. Sunblinds on the rear side windows
! Always guide the roller sunblind by hand.
Do not let it snap back suddenly as this
would damage the automatic roller mech-
anism.
! Do not drive the vehicle with the roller
sunblind hooked in and the side windows
opened simultaneously. The roller sunblind can jump out of the retainers and spring
back suddenly when driving at high speeds,
e.g. when driving on the motorway. This
could damage the inertia reel. Therefore,
either close the side window or retrac tthe
roller sunblind before driving at high
speeds. Features
363Stowing and features Z