oil MERCEDES-BENZ E-CLASS ESTATE 2016 Owners Manual
[x] Cancel search | Manufacturer: MERCEDES-BENZ, Model Year: 2016, Model line: E-CLASS ESTATE, Model: MERCEDES-BENZ E-CLASS ESTATE 2016Pages: 565, PDF Size: 11.34 MB
Page 179 of 565
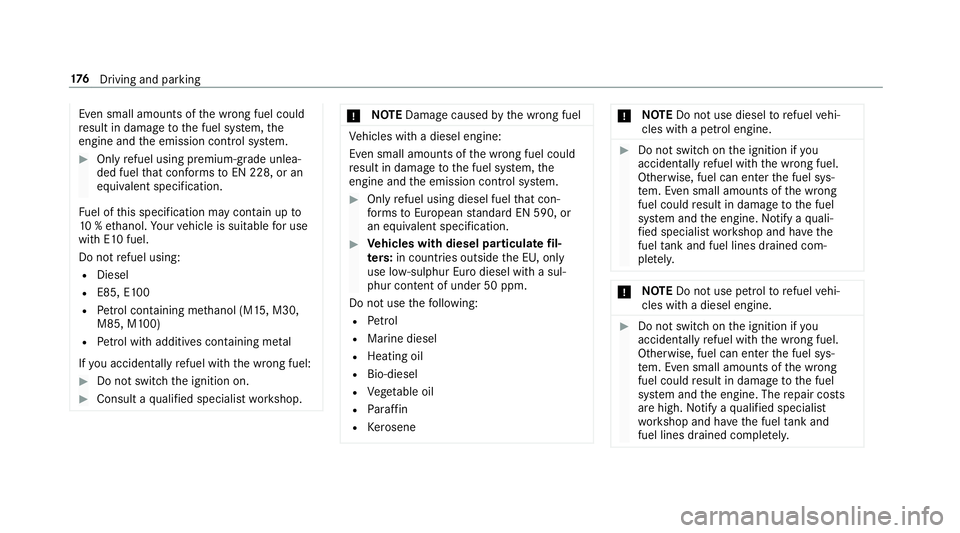
Even small amounts of
the wrong fuel could
re sult in damage tothe fuel sy stem, the
engine and the emission control sy stem. #
Only refuel using premium-grade unlea‐
ded fuel that con form sto EN 228, or an
equi valent specification.
Fu el of this specification may con tain up to
10 %ethanol. Your vehicle is suitable for use
with E10 fuel.
Do not refuel using:
R Diesel
R E85, E100
R Petrol containing me thanol (M15, M30,
M85, M100)
R Petrol wi thadditives con taining me tal
If yo u accidentally refuel with the wrong fuel: #
Do not switch the ignition on. #
Consult a qualified specialist workshop. *
NO
TEDama gecaused bythe wrong fuel Ve
hicles with a diesel engine:
Even small amounts of the wrong fuel could
re sult in damage tothe fuel sy stem, the
engine and the emission control sy stem. #
Only refuel using diesel fuel that con‐
fo rm sto European standard EN 590, or
an equivalent specification. #
Vehicles with diesel particulate fil‐
ters: in countries outside the EU, only
use lo w-sulphur Euro diesel with a sul‐
phur content of under 50 ppm.
Do not use thefo llowing:
R Petrol
R Marine diesel
R Heating oil
R Bio-diesel
R Vegetable oil
R Paraffin
R Kerosene *
NO
TEDo not use diesel torefuel vehi‐
cles with a petrol engine. #
Do not switch on the ignition if you
acciden tally refuel with the wrong fuel.
Otherwise, fuel can enter the fuel sys‐
te m. Even small amounts of the wrong
fuel could result in damage tothe fuel
sy stem and the engine. Notify a quali‐
fi ed specialist workshop and ha vethe
fuel tank and fuel lines drained com‐
pl et ely. *
NO
TEDo not use petrol torefuel vehi‐
cles with a diesel engine. #
Do not switch on the ignition if you
acciden tally refuel with the wrong fuel.
Otherwise, fuel can enter the fuel sys‐
te m. Even small amounts of the wrong
fuel could result in damage tothe fuel
sy stem and the engine. The repair costs
are high. Notifyaqu alified specialist
wo rkshop and ha vethe fuel tank and
fuel lines drained compl etely. 176
Driving and pa rking
Page 261 of 565
Ad
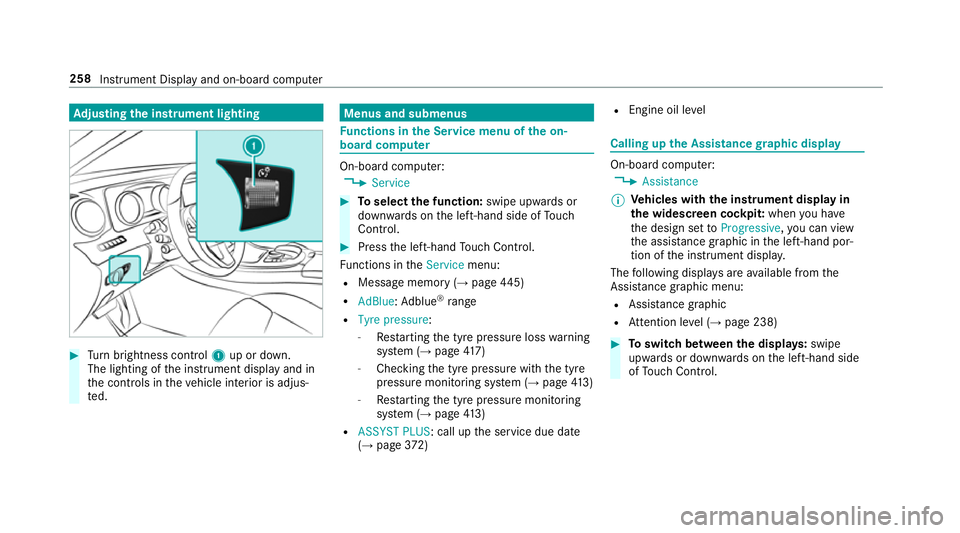
justing the in stru ment lighting #
Turn brightness control 1up or down.
The lighting of the instrument display and in
th e controls in theve hicle interior is adjus‐
te d. Menus and submenus
Fu
nctions in the Service menu of the on-
board compu ter On-board computer:
, Service #
Toselect the function: swipe upwards or
down wards on the left-hand side of Touch
Control. #
Press the left-hand Touch Control.
Fu nctions in theService menu:
R Message memory (→ page445)
R AdBlue: Adblue ®
ra nge
R Tyre pressure:
-Restarting the tyre pressure loss warning
sy stem (→ page417)
- Che cking the tyre pressure with the tyre
pressure monitoring sy stem (→ page413)
- Restarting the tyre pressure monitoring
sy stem (→ page413)
R ASSYST PLUS: call up the service due date
(→ page 372) R
Engine oil le vel Calling up
the Assistance graphic display On-board computer:
, Assistance
% Ve
hicles with the instrument display in
th e widescreen cockpit: whenyou ha ve
th e design set toProgressive ,yo u can view
th e assis tance graphic in the left-hand por‐
tion of the instrument displa y.
The following displa ysare available from the
Assi stance graphic menu:
R Assis tance graphic
R Attention le vel (→ page 238) #
Toswitch between the displa ys:swipe
up wa rds or down wards on the left-hand side
of Touch Control. 258
Instru ment Display and on-board computer
Page 275 of 565
Command
Function
Enter country
Enter town
Enter district
Enter street
Enter junction
Enter house number
Enter postcode To
enter a count ry/t ow n/di strict/street/junction/house number/postcode
Nearest restaurant
Nearest car park
Nearest rest area with toilets
Nearest filling station To
sear chfor nearby restaurants, parking spaces and filling stations
Last destinations To
select a destination from the list of last entered destinations
Alternative routes To
switch route guidance toano ther route
Start route guidance To
start route guidance af ter entering a valid destination
Cancel route guidance To
cancel route guidance 272
LINGU ATRO NIC
Page 375 of 565
ASS
YST PLUS se rvice inter val display Fu
nction of the ASS YST PLUS se rvice inter val
displ ay The ASS
YST PLUS service inter val display in the
instrument display pr ovides information on the
re maining time or dis tance be fore the next
service due date.
Yo u can hide this service message using the
back button on the left-hand side of thesteering
wheel.
Yo u can obtain fur ther information concerning
th e servicing of your vehicle from a qualified
specialist workshop, e.g. a Mercedes-Benz
Service Centre. Displaying
the service due da teOn-board computer:
, Service .
ASSYST PLUS
The next service due date is displa yed. #
Toexitth e displa y:press the back button
on the left-hand side of thesteering wheel. Make sure
toobser vethefo llowing fur ther rela‐
te d subjec t:
R Operating the on-board computer
(→ page 256). Car
rying out service workatregular inter‐
va ls *
NO
TEPremature wearthro ugh failure to
obser veservice due dates Service
workwhich is not car ried out at the
ri ght time or incomple tely can lead to
inc reased wear and damage totheve hicle. #
Alw ays obser vethe prescribed service
inter vals. #
Alw ays ha vethe prescribed service
wo rkcar ried out at a qualified specialist
wo rkshop. Special service
requ irements The prescribed service inter
val is based on nor‐
mal operation of theve hicle. Service workwill need
tobe per form ed more of ten if theve hicle
is operated under arduous conditions or
increased loads, forex ample:
R regular city driving with frequent intermedi‐
ate stops.
R ifth eve hicle is primarily used totrave l short
dis tances.
R for frequent operation in mountainous terrain
or on poor road sur faces.
R ifth e engine is of ten le ftidling for long peri‐
ods.
R in particula rly dusty conditions and/or if air-
re circulation mode is frequently used.
In these or similar operating conditions, ha ve,for
ex ample, the interior air filter, engine air filter,
engine oil and oil filter changed more frequent ly.
The tyres must be checked more frequently if
th eve hicle is operated under increased loads.
Fu rther information can be obtained at a quali‐
fi ed specialist workshop. 372
Maintenance and care
Page 379 of 565

Engine oil
Checking
the engine oil le vel using the oil
dip stick &
WARNING Danger of bu rns from hot
component parts in the engine compart‐
ment
Cer tain component parts in the engine com‐
partment may be very hot, e.g. the engine,
th era diator and parts of theex haust sy stem. #
Let the engine cool down and only
to uch the component parts described
below: Depending on
the engine, the oil dipstick may be
ins talled in the engine compartment in dif fere nt
locations.
Wa iting time before checking the oil le vel:
R Engine at normal operating temp erature: five
minutes. R
Engine not at normal operating temp erature
(e.g. the engine was only star ted brief ly): 30
minutes. #
Park theve hicle on a flat sur face. #
Remo veoil dipstick 1and wipe off. #
Slowly slide oil dipstick 1into the guide
tube tothestop, and take it out again af ter
appr oximately thre e seconds.
R Oil le vel is cor rect: oil le vel is between 2
and 3.
R Oil le velto o low: oil le vel is at 3or
belo w.
R Oil le velto o high: oil le vel is abo ve2 . #
Ifth e oil le vel is too lo w,top up with 1 l of
engine oil. #
Ifth e oil le vel is too high, drain off excess
engine oil. Consult a qualified specialist
wo rkshop.
Checking the engine oil le vel using the on-
board compu ter (E 220 d)
The engine oil le vel is de term ined during driving.
The oil le vel display is only available af ter a driv‐
ing time of up to30 minutes and if the ignition is
switched on, depending on the driving profile.
It is not possible tocor rectly measu rethe oil
le ve l if:
R The vehicle is not le vel during the measuring
process. 376
Maintenance and care
Page 380 of 565
R
The bonnet was pr eviously opened.
The engine must be restar ted and the engine oil
le ve l will be de term ined again during driving.
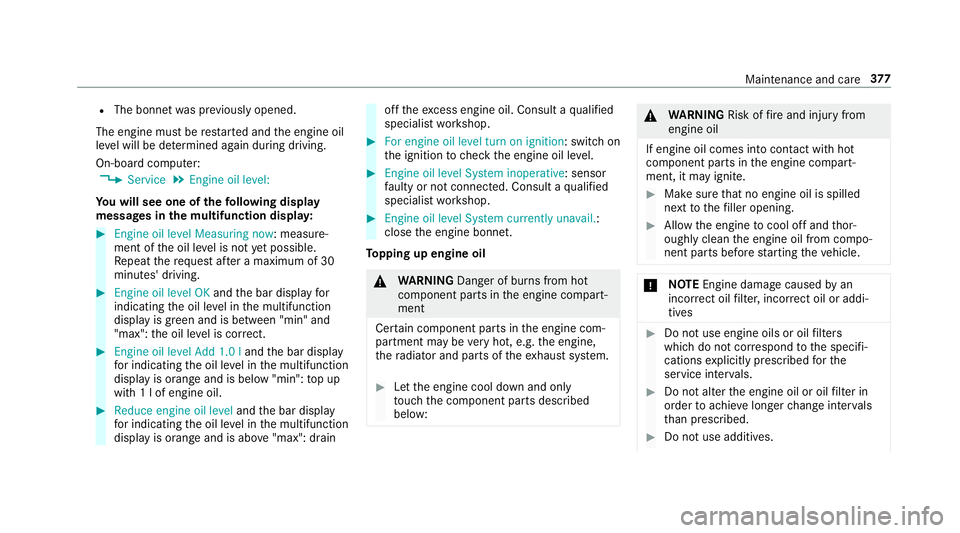
On-board computer: , Service .
Engine oil level:
Yo u will see one of thefo llowing display
messa ges in the multifunction displa y:#
Engine oil level Measuring now: measu re‐
ment of the oil le vel is not yet possible.
Re peat there qu est af ter a maximum of 30
minutes' driving. #
Engine oil level OK andthe bar display for
indicating the oil le vel in the multifunction
display is green and is between "min" and
"max": the oil le vel is cor rect. #
Engine oil level Add 1.0 l andthe bar display
fo r indicating the oil le vel in the multifunction
display is orange and is below "min": top up
with 1 l of engine oil. #
Reduce engine oil level andthe bar display
fo r indicating the oil le vel in the multifunction
display is orange and is abo ve"max": drain off
theexc ess engine oil. Consult a qualified
specialist workshop. #
For engine oil level turn on ignition: switch on
th e ignition tocheck the engine oil le vel. #
Engine oil level System inoperative : sensor
fa ulty or not connected. Consult a qualified
specialist workshop. #
Engine oil level System currently unavail. :
close the engine bonn et.
To pping up engine oil &
WARNING Danger of bu rns from hot
component parts in the engine compart‐
ment
Cer tain component parts in the engine com‐
partment may be very hot, e.g. the engine,
th era diator and parts of theex haust sy stem. #
Let the engine cool down and only
to uch the component parts described
below: &
WARNING Risk offire and injury from
engine oil
If engine oil comes into con tact wi thhot
component parts in the engine compart‐
ment, it may ignite. #
Make sure that no engine oil is spilled
next tothefiller opening. #
Allow the engine tocool off and thor‐
oughly clean the engine oil from compo‐
nent parts before starting theve hicle. *
NO
TEEngine dama gecaused byan
incor rect oil filter, incor rect oil or addi‐
tives #
Do not use engine oils or oil filters
which do not cor respond tothe specifi‐
cations explicitly prescribed forthe
service inter vals. #
Do not alter the engine oil or oil filter in
order toachie velonger change inter vals
th an presc ribed. #
Do not use additives. Maintenance and care
377
Page 381 of 565
#
Follow the instructions in the service
inter val display rega rding the oil
ch ange. *
NO
TEDama gecaused bytopping up too
much engine oil To
pping up too much engine oil can cause
damage tothe engine or the catalytic con‐
ve rter. #
Have excess engine oil siphoned off at
a qu alified specialist workshop. #
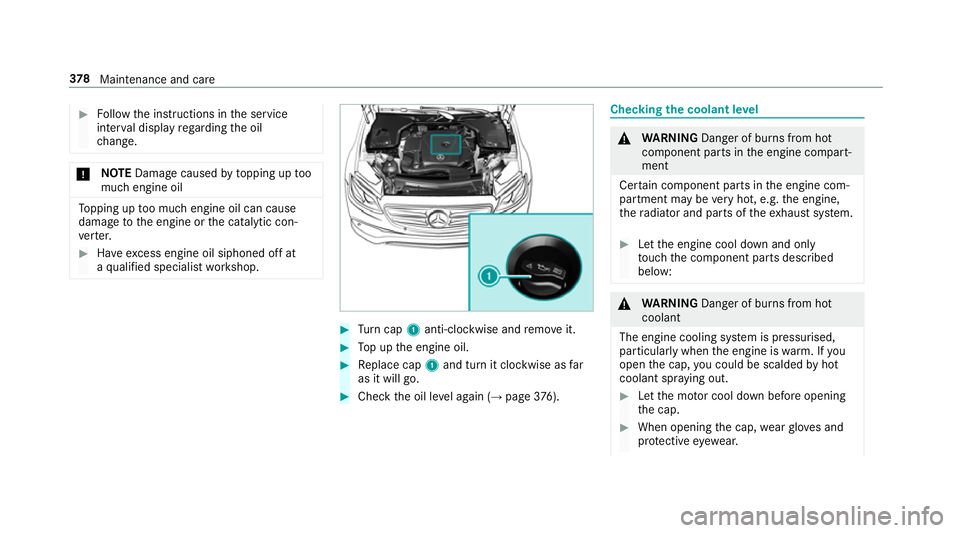
Turn cap 1anti-clockwise and remo veit. #
Top up the engine oil. #
Replace cap 1and turn it clockwise as far
as it will go. #
Check the oil le vel again (→ page376). Checking
the coolant le vel &
WARNING Danger of bu rns from hot
component parts in the engine compart‐
ment
Cer tain component parts in the engine com‐
partment may be very hot, e.g. the engine,
th era diator and parts of theex haust sy stem. #
Let the engine cool down and only
to uch the component parts described
below: &
WARNING Danger of bu rns from hot
coolant
The engine cooling sy stem is pressurised,
particularly when the engine is warm. If you
open the cap, you could be scalded byhot
coolant spr aying out. #
Let the mo tor cool down before opening
th e cap. #
When opening the cap, wearglove s and
pr otective eyew ear. 378
Maintenance and care
Page 384 of 565
#
Do not use high-pressure cleane rswith
circular jet nozzles toclean theve hicle. #
Have damaged tyres or chassis parts
re placed immediatel y. To
avo id damage to yourvehicle, obser vethefo l‐
lowing when using a high-pressure cleaner:
R Keep theke y at least 3 m away from the
ve hicle. Otherwise theta ilgate could open
unin tentional ly.
R Maintain a dis tance of at least 30 cm tothe
ve hicle.
R Vehicles with deco rative foil: parts of your
ve hicle are co vered with a decorative foil. Maintain a dis
tance of at least 70 cm
between thefo il-c ove red parts of theve hicle
and the nozzle of the high pressure cleaner.
Mo vethe high-pressure cleaner nozzle
around whilst cleaning.
R Obser vethe information on the cor rect dis‐
ta nce in the equipment manufacturer's oper‐
ating instructions.
R Do not point the nozzle of the high-pressure
cleaner directly at sensitive parts such as
tyres, slits, electrical component parts, bat‐
te ries, light sources and ventilation sl ots. Wa
shing theve hicle byhand Obser
vethe legal requ irements, e.g. in some
countries, washing byhand is only allo wed at
specially equipped washing ba ys. #
Use a mild cleaning agent, such as a car
shampoo. #
Washtheve hicle with luk ewarmwate r using
a soft car sponge. When doing so, do not
ex pose theve hicle todirect sunlight. #
Carefully hose theve hicle off with water and
dry using a chamois. Take care not topoint
th ewate r jet directly towa rdsth e air inlet
grille. Maintenance and care
381
Page 385 of 565
Note
s on paint work/matt finish paint workcare Obser
vethefo llowing information: Information on cleaning and car
eAvoiding damage tothe paintwork
Pa int R
Insect remains: soak with insect remo ver and rinse off the
trea ted areas af terw ards.
R Bird droppings: soak with water and rinse off af terw ards.
R Coolant, brake fluid, tree resins, oils, fuel and greases:
ge ntly rub with a clo thsoaked in petroleum ether or
lighter fluid.
R Tarst ains: use tarre mo ver.
R Wax: use silicone remo ver. R
Do not apply sticke rs,fi lms etc.
R Remo vedirt immediately, where possible.
Matt finish R
The vehicle should preferably be washed byhand using a
soft sponge, car shampoo and plenty of water.
R Only use care products recommended byMercedes-Benz. R
Do not polish theve hicle and light-alloy wheels.
R Do not ha veyour vehicle cleaned at an automatic car
wa sh too frequently and do not use wash programs which
fi nish wi tha hot waxve hicle treatment.
R Do not use paint cleaner, buf fing or polishing products
su ch as a gloss preser ver,e.g. wax.
R Alw ays ha vepaintwork repairs car ried out at a qualified
specialist workshop. 382
Maintenance and care
Page 388 of 565
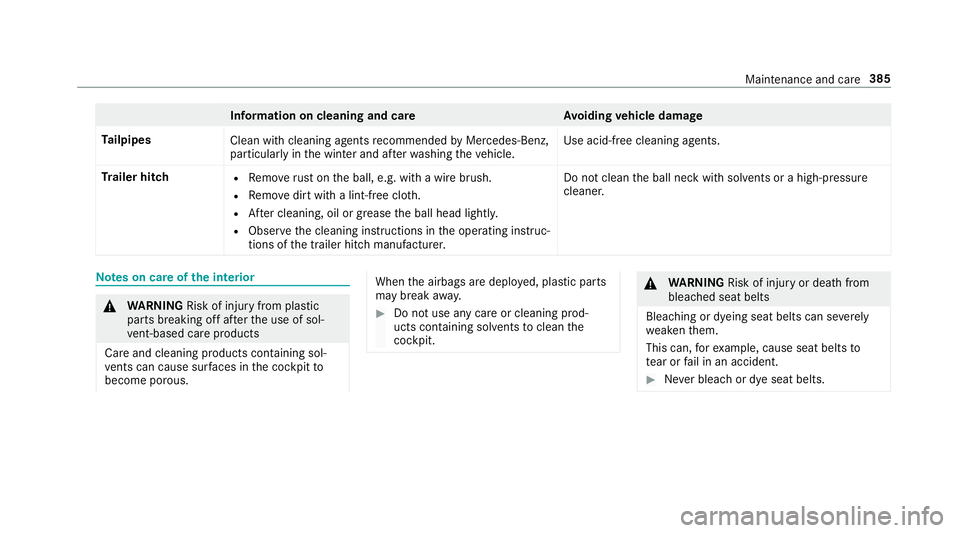
Information on cleaning and car
eAvoiding vehicle damage
Ta ilpipes
Clean with cleaning agents recommended byMercedes-Benz,
particular lyin the winter and af terwa shing theve hicle. Use acid-free cleaning agents.
Tr ailer hitch R
Remo verust on the ball, e.g. with a wire brush.
R Remo vedirt with a lint-free clo th.
R After cleaning, oil or grease the ball head lightl y.
R Obser vethe cleaning instructions in the operating instruc‐
tions of the trailer hitch manufacturer. Do not clean
the ball neck with solvents or a high-pressure
cleaner. Note
s on care of the interior &
WARNING Risk of inju ryfrom pla stic
parts breaking off af terth e use of sol‐
ve nt-based care products
Ca reand cleaning products con taining sol‐
ve nts can cause su rfaces in the cockpit to
become porous. When
the airbags are deplo yed, plastic parts
may break away. #
Do not use any care or cleaning prod‐
ucts containing sol vents toclean the
cockpit. &
WARNING Risk of inju ryor death from
bleached seat belts
Bleaching or dyeing seat belts can se verely
we aken them.
This can, forex ample, cause seat belts to
te ar or fail in an accident. #
Never blea chor dye seat belts. Maintenance and care
385