wheel MERCEDES-BENZ E350 4MATIC 2011 W212 Workshop Manual
[x] Cancel search | Manufacturer: MERCEDES-BENZ, Model Year: 2011, Model line: E350 4MATIC, Model: MERCEDES-BENZ E350 4MATIC 2011 W212Pages: 400, PDF Size: 16.3 MB
Page 117 of 400
set the exterior mirror such that the
rear wheel and curb are visible.
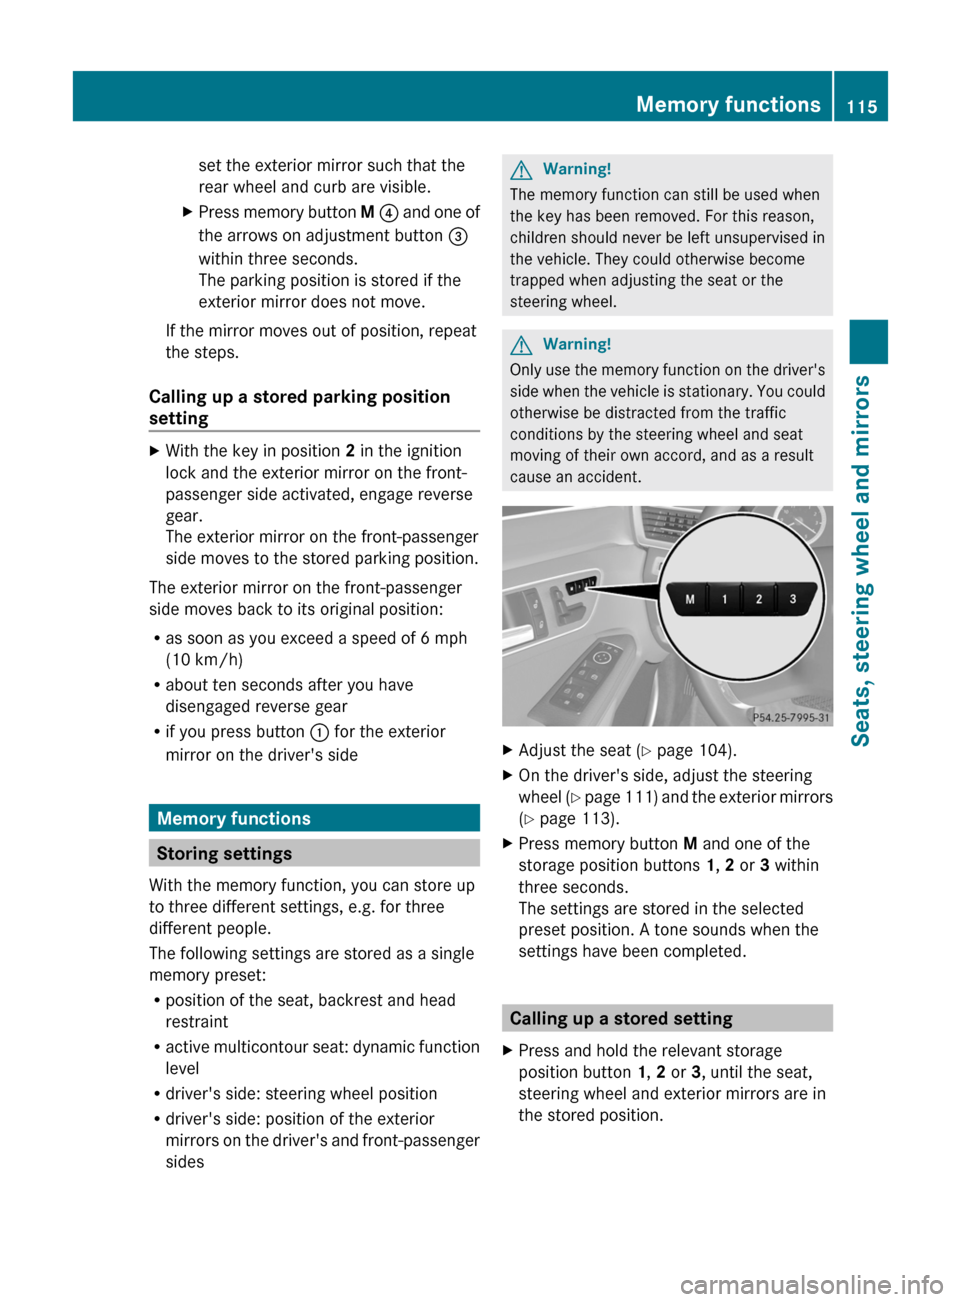
XPress memory button M ? and one of
the arrows on adjustment button =
within three seconds.
The parking position is stored if the
exterior mirror does not move.
If the mirror moves out of position, repeat
the steps.
Calling up a stored parking position
setting
XWith the key in position 2 in the ignition
lock and the exterior mirror on the front-
passenger side activated, engage reverse
gear.
The exterior mirror on the front-passenger
side moves to the stored parking position.
The exterior mirror on the front-passenger
side moves back to its original position:
Ras soon as you exceed a speed of 6 mph
(10 km/h)
Rabout ten seconds after you have
disengaged reverse gear
Rif you press button : for the exterior
mirror on the driver's side
Memory functions
Storing settings
With the memory function, you can store up
to three different settings, e.g. for three
different people.
The following settings are stored as a single
memory preset:
Rposition of the seat, backrest and head
restraint
Ractive multicontour seat: dynamic function
level
Rdriver's side: steering wheel position
Rdriver's side: position of the exterior
mirrors on the driver's and front-passenger
sides
GWarning!
The memory function can still be used when
the key has been removed. For this reason,
children should never be left unsupervised in
the vehicle. They could otherwise become
trapped when adjusting the seat or the
steering wheel.
GWarning!
Only use the memory function on the driver's
side when the vehicle is stationary. You could
otherwise be distracted from the traffic
conditions by the steering wheel and seat
moving of their own accord, and as a result
cause an accident.
XAdjust the seat (Y page 104).XOn the driver's side, adjust the steering
wheel (Y page 111) and the exterior mirrors
(Y page 113).
XPress memory button M and one of the
storage position buttons 1, 2 or 3 within
three seconds.
The settings are stored in the selected
preset position. A tone sounds when the
settings have been completed.
Calling up a stored setting
XPress and hold the relevant storage
position button 1, 2 or 3, until the seat,
steering wheel and exterior mirrors are in
the stored position.
Memory functions115Seats, steering wheel and mirrorsBA 212 USA, CA Edition B 2011; 1; 5, en-USdimargiVersion: 3.0.3.62010-05-20T13:33:46+02:00 - Seite 115Z
Page 118 of 400
iThe setting procedure is interrupted as
soon as you release the storage position
button.116Memory functionsSeats, steering wheel and mirrors
BA 212 USA, CA Edition B 2011; 1; 5, en-USdimargiVersion: 3.0.3.62010-05-20T13:33:46+02:00 - Seite 116
Page 125 of 400

The cornering light function improves the
illumination of the road over a wide angle in
the direction you are turning, enabling better
visibility in tight bends, for example. It can
only be activated when the low-beam
headlamps are switched on.
Active: if you are driving at speeds below
25 mph (40 km/h) and switch on the turn
signals or turn the steering wheel.
Not active: if you are driving at speeds above
25 mph (40 km/h) or switch off the turn
signal or turn the steering wheel to the
straight-ahead position.
The cornering light function may remain lit for
a short time, but is automatically switched off
after no more than three minutes.
Headlamps fogged up on the inside
The headlamps may fog up on the inside if
there is high atmospheric humidity.
XDrive with the headlamps switched on.
The headlamps clear up after a short
distance.
If the moisture does not disappear, the
headlamp casing is not sealed correctly and
moisture has been able to enter.
XHave the headlamps checked at a qualified
specialist workshop.Interior lighting
Overview of interior lighting
Front overhead control panel
:u To switch the rear interior lighting
on/off
;| To switch the automatic interior
lighting control on/off
=p To switch the right-hand front
reading lamp on/off
?c To switch the front interior lighting
on/off
Ap To switch the left-hand front reading
lamp on/off
Rear-compartment overhead control panel
:p To switch the right-hand reading
lamp on/off
;p To switch the left-hand reading lamp
on/off
Interior lighting123Lights and windshield wipersBA 212 USA, CA Edition B 2011; 1; 5, en-USdimargiVersion: 3.0.3.62010-05-20T13:33:46+02:00 - Seite 123Z
Page 146 of 400

iResidual heat is deactivated
automatically:
Rafter about 30 minutes
Rwhen the ignition is switched on
Rif the battery voltage drops
Rif the coolant temperature is too low
Setting the air vents
Important safety notes
GWarning
When operating the climate control, the air
that enters the passenger compartment
through the air vents can be very hot or very
cold (depending on the set temperature). This
could cause burns or frostbite to unprotected
skin in the immediate area of the air vents.
Always keep sufficient distance between
unprotected parts of the body and the air
vents. If necessary, use the air distribution
adjustment to direct the air to air vents in the
vehicle interior that are not in the immediate
area of unprotected skin.
In order to ensure the direct flow of fresh air
through the air vents into the vehicle interior,
please observe the following notes:
Rkeep the air inlet between the windshield
and the hood free of blockages, such as ice,
snow or leaves
Rnever cover the vents or air inlet and outlet
grilles in the vehicle interior.
iFor virtually draft-free ventilation, adjust
the sliders of the air vents to the center
position.
Setting the center air vents:Center air vent, left;Center air vent, right=Center vent thumbwheel, right?Center vent thumbwheel, leftXTo open/close: turn thumbwheels =
and ? up or down.
Setting the side air vents
XTo open/close: turn thumbwheel = up or
down.
iSide window defroster vent : is never
completely shut, even if side air vent ; is
shut.
Setting the air vent in the glove box
When automatic climate control is activated,
the glove box can be ventilated, for instance
to cool its contents. The level of airflow
144Setting the air ventsClimate control
BA 212 USA, CA Edition B 2011; 1; 5, en-USdimargiVersion: 3.0.3.62010-05-20T13:33:46+02:00 - Seite 144
Page 147 of 400

depends on the airflow and air distribution
settings.
! Close the air vent when heating the
vehicle.
At high outside temperatures, open the air
vent and activate the "cooling with air
dehumidification" function. Otherwise,
temperature-sensitive items stored in the
glove box could be damaged.
:Air vent thumbwheel;Air ventXTo open/close: turn thumbwheel :
clockwise or counter-clockwise.
Setting the rear-compartment air
vents
Setting the center vents in the rear
compartment
:Rear-compartment air vent thumbwheel;Rear-compartment air vent, right=Rear control panel for 3-zone automatic
climate control18?Rear-compartment air vent, leftXTo open/close: turn thumbwheel : up or
down.
Setting the rear-compartment side air
vents
:B-pillar air vent;Thumbwheel for B-pillar air ventXTo open/close: turn thumbwheel ; to the
left or right.18For Canada only.Setting the air vents145Climate controlBA 212 USA, CA Edition B 2011; 1; 5, en-USdimargiVersion: 3.0.3.62010-05-20T13:33:46+02:00 - Seite 145Z
Page 150 of 400

Vehicle equipment
i This manual describes all the standard
and optional equipment of your vehicle
which was available at the time of
purchase. Country-specific differences are
possible. Bear in mind that your vehicle
may not feature all functions described
here. This also refers to safety-related
systems and functions.
Notes on breaking-in a new vehicle
The first 1000 miles (1500 km)
The more you look after the engine when it is
new, the happier you will be with its
performance in the future.
R Drive at varying vehicle speeds and engine
speeds for the first 1000 miles (1500 km)
for this reason.
R Avoid overstraining the vehicle during this
period, e.g. driving at full throttle.
R Change gear in good time, at the latest
when the tachometer needle is 2
/ 3 of the
way to the red area in the tachometer
display.
R If possible, do not depress the accelerator
pedal past the point of resistance
(kickdown).
R Only select shift ranges 3, 2 or 1 when
driving slowly, e.g. in mountainous terrain.
After 1000 miles (1500 km) you may
gradually bring the vehicle up to full road and
engine speeds.
Additional breaking-in notes for AMG
vehicles:
R For the first 1000 miles (1500 km), do not
exceed a speed of 85 mph (140 km/h).
R Only allow the engine to briefly reach a
maximum engine speed of 4500 rpm.
R Shift gears in good time.
i Also observe these breaking-in notes
when the vehicle's engine or axle gear have
been replaced.
i Always observe the respective limit
speeds.
AMG vehicles with rear axle locking
differential
Your vehicle is equipped with a self-locking
differential on the rear axle. Change the oil
after a breaking-in period of
2000 miles(3000 km) to improve protection
of the rear axle differential. This oil change
extends the service life of the differential.
Have the oil change carried out at a qualified
specialist workshop. Mercedes-Benz
recommends that you use an authorized
Mercedes-Benz Center for this purpose.
Driving
Important safety notes
GWarning
Make sure absolutely no objects are
obstructing the pedals' range of movement.
Keep the driver's footwell clear of all
obstacles. If there are any floormats or
carpets in the footwell, make sure the pedals
still have sufficient clearance.
During sudden driving or braking maneuvers
the objects could get caught between the
pedals. You could then no longer brake or
accelerate. This could lead to accidents and
injury.
GWarning
On slippery road surfaces, never downshift in
order to obtain braking action. This could
result in drive wheel slip and reduced vehicle
control. Your vehicle's ABS will not prevent
this type of loss of control.
148DrivingDriving and parking
BA 212 USA, CA Edition B 2011; 1; 5, en-USdimargiVersion: 3.0.3.62010-05-20T13:33:46+02:00 - Seite 148
Page 151 of 400
GWarning
It is dangerous to shift the automatic
transmission out of parking position P or
neutral position N if the engine speed is
higher than idle speed. If your foot is not firmly
on the brake pedal, the vehicle could
accelerate quickly forward or in reverse. You
could lose control of the vehicle and hit
someone or something. Only shift into gear
when the engine is idling normally and when
your right foot is firmly on the brake pedal.
! Warm up the engine quickly. Do not use
the engine's full performance until it has
reached operating temperature.
Only shift the automatic transmission to
the desired drive position when the vehicle
is stationary.
Where possible, avoid spinning the drive
wheels when pulling away on slippery
roads. You could otherwise damage the
drive train.
! AMG vehicles: at low engine oil
temperatures (below 68 ‡ (+20 †), the
maximum engine speed is restricted in
order to protect the engine. To protect the
engine and maintain smooth engine
operation, avoid driving at full throttle when
the engine is cold.
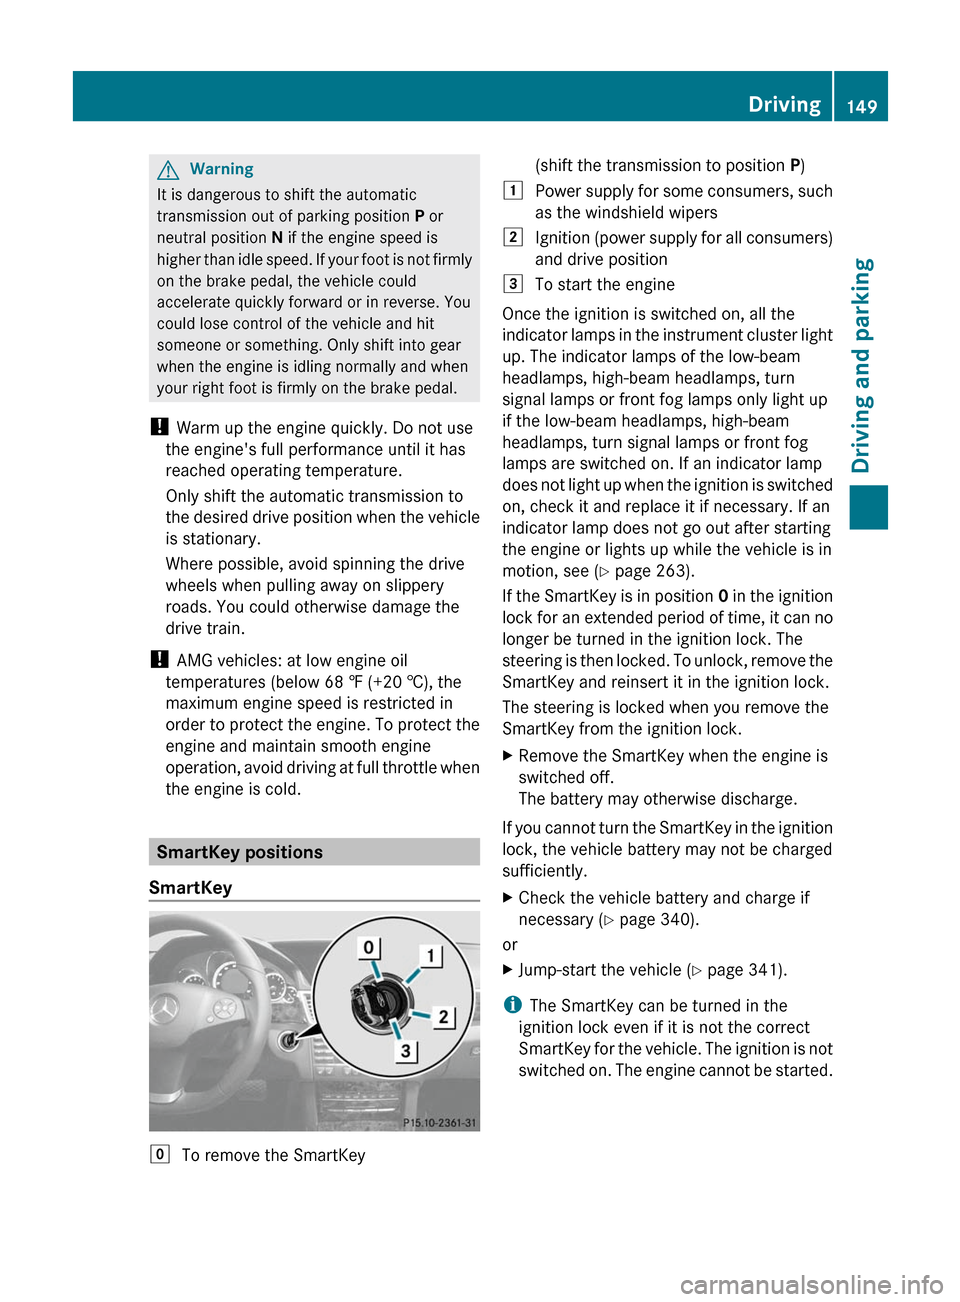
SmartKey positions
SmartKey
gTo remove the SmartKey(shift the transmission to position P)1Power supply for some consumers, such
as the windshield wipers2Ignition (power supply for all consumers)
and drive position3To start the engine
Once the ignition is switched on, all the
indicator lamps in the instrument cluster light
up. The indicator lamps of the low-beam
headlamps, high-beam headlamps, turn
signal lamps or front fog lamps only light up
if the low-beam headlamps, high-beam
headlamps, turn signal lamps or front fog
lamps are switched on. If an indicator lamp
does not light up when the ignition is switched
on, check it and replace it if necessary. If an
indicator lamp does not go out after starting
the engine or lights up while the vehicle is in
motion, see ( Y page 263).
If the SmartKey is in position 0 in the ignition
lock for an extended period of time, it can no
longer be turned in the ignition lock. The
steering is then locked. To unlock, remove the
SmartKey and reinsert it in the ignition lock.
The steering is locked when you remove the
SmartKey from the ignition lock.
XRemove the SmartKey when the engine is
switched off.
The battery may otherwise discharge.
If you cannot turn the SmartKey in the ignition
lock, the vehicle battery may not be charged
sufficiently.
XCheck the vehicle battery and charge if
necessary ( Y page 340).
or
XJump-start the vehicle ( Y page 341).
i
The SmartKey can be turned in the
ignition lock even if it is not the correct
SmartKey for the vehicle. The ignition is not
switched on. The engine cannot be started.
Driving149Driving and parkingBA 212 USA, CA Edition B 2011; 1; 5, en-USdimargiVersion: 3.0.3.62010-05-20T13:33:46+02:00 - Seite 149Z
Page 159 of 400
Rdepress the brake pedal and keep it
depressed.
R shift to neutral N.
R release the brake pedal.
R if applied, release the parking brake.
R switch off the ignition and leave the
SmartKey in the ignition lock.
Shifting to transmission position DXWhen the vehicle is stationary, depress the
brake pedal.XPush the DIRECT SELECT lever down past
the first point of resistance.
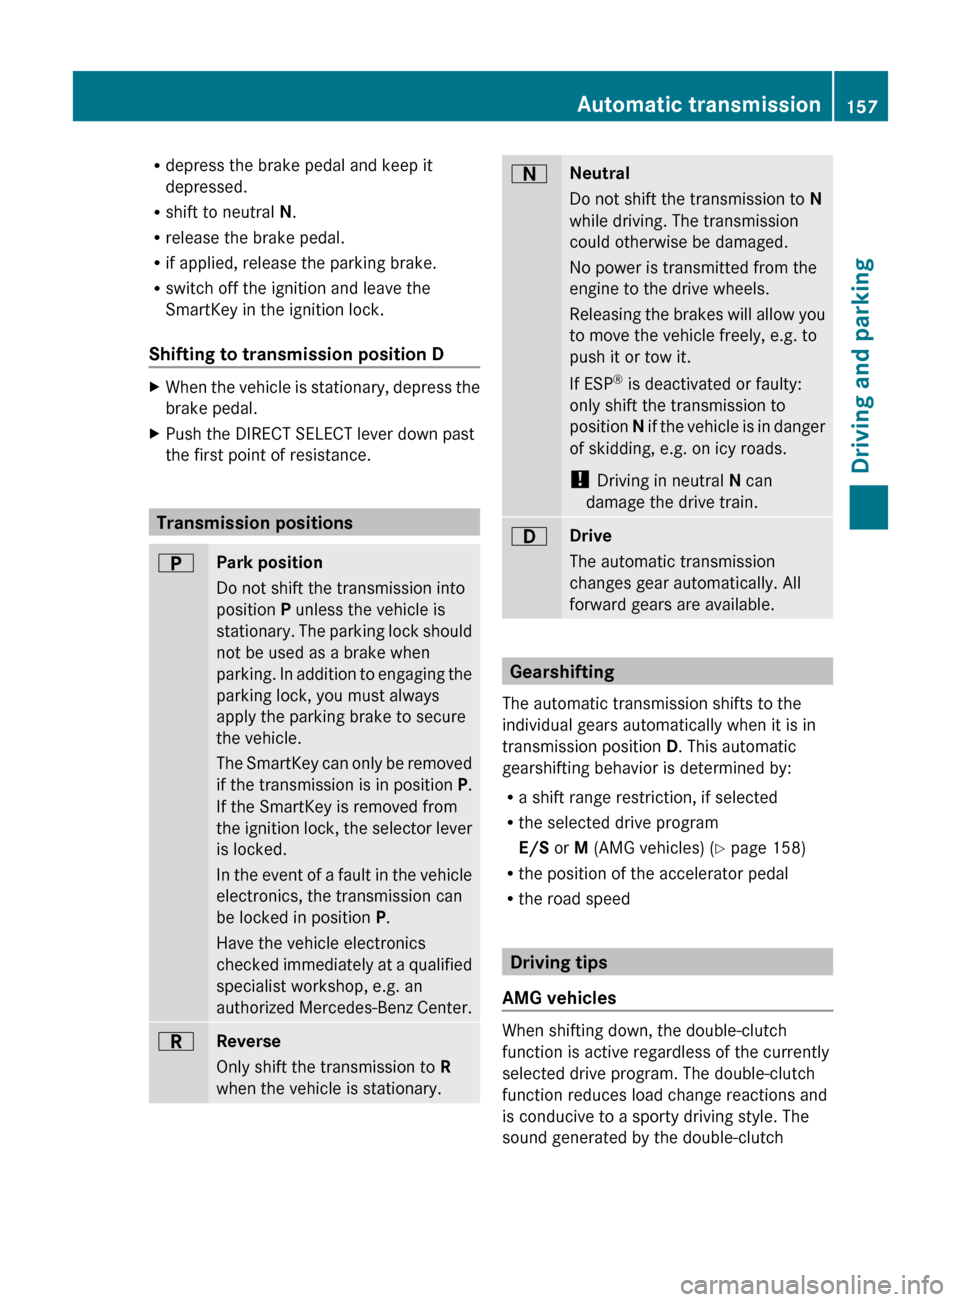
Transmission positions
BPark position
Do not shift the transmission into
position P unless the vehicle is
stationary. The parking lock should
not be used as a brake when
parking. In addition to engaging the
parking lock, you must always
apply the parking brake to secure
the vehicle.
The SmartKey can only be removed
if the transmission is in position P.
If the SmartKey is removed from
the ignition lock, the selector lever
is locked.
In the event of a fault in the vehicle
electronics, the transmission can
be locked in position P.
Have the vehicle electronics
checked immediately at a qualified
specialist workshop, e.g. an
authorized Mercedes-Benz Center.CReverse
Only shift the transmission to R
when the vehicle is stationary.ANeutral
Do not shift the transmission to N
while driving. The transmission
could otherwise be damaged.
No power is transmitted from the
engine to the drive wheels.
Releasing the brakes will allow you
to move the vehicle freely, e.g. to
push it or tow it.
If ESP ®
is deactivated or faulty:
only shift the transmission to
position N if the vehicle is in danger
of skidding, e.g. on icy roads.
! Driving in neutral N can
damage the drive train.7Drive
The automatic transmission
changes gear automatically. All
forward gears are available.
Gearshifting
The automatic transmission shifts to the
individual gears automatically when it is in
transmission position D. This automatic
gearshifting behavior is determined by:
R a shift range restriction, if selected
R the selected drive program
E/S or M (AMG vehicles) ( Y page 158)
R the position of the accelerator pedal
R the road speed
Driving tips
AMG vehicles
When shifting down, the double-clutch
function is active regardless of the currently
selected drive program. The double-clutch
function reduces load change reactions and
is conducive to a sporty driving style. The
sound generated by the double-clutch
Automatic transmission157Driving and parkingBA 212 USA, CA Edition B 2011; 1; 5, en-USdimargiVersion: 3.0.3.62010-05-20T13:33:46+02:00 - Seite 157Z
Page 161 of 400

C ComfortComfortable, economical
driving
S SportSporty driving styleS+ SportPlusExtremely sporty driving
style
M ManualManual gearshiftingRS RACE
START
Optimal vehicle
acceleration from a
standstill
iFor further information on "Drive
program" (Y page 159).
Only change from automatic drive program C,
S or S+ to manual drive program M when the
vehicle is stationary.
XTurn program selector : until the desired
drive program appears in the multifunction
display in the speedometer.
The drive program indicator on program
selector : lights up in red.
iThe automatic transmission switches to
automatic drive program C each time the
engine is started.
iRS cannot be selected during normal
driving. For further information on RACE
START (Y page 190).
Steering wheel paddle shifters
:Left-hand steering wheel paddle shifter;Right-hand steering wheel paddle shifterYou can restrict or derestrict the shift range
by using the steering wheel paddle shifters.
You can change gear yourself by using the
steering wheel paddle shifters in the manual
drive program.
In the automatic drive program, you can
restrict or derestrict the shift range by using
the steering wheel paddle shifters
(Y page 159).
iYou can only change gear with the
steering wheel paddle shifters when the
transmission is in position D.
Automatic drive program
Drive program E (drive program C on AMG
vehicles) is characterized by the following:
Rthe vehicle pulling away more gently in
forward and reverse gears, unless the
accelerator pedal is depressed fully
Rincreased sensitivity, which improves
driving stability on slippery road surfaces,
for example
Rthe automatic transmission shifting up
sooner, which results in the vehicle being
driven at lower engine speeds and the
wheels being less likely to spin
In drive program S, the automatic
transmission shifts up later.
Shift ranges
Introduction
When the automatic transmission is in
position D, it is possible to restrict or
derestrict the shift range (Y page 159).
The shift range selected is shown in the
multifunction display. The automatic
transmission shifts only as far as the selected
gear.
Driving situations=You can use the engine's braking
effect.
Automatic transmission159Driving and parkingBA 212 USA, CA Edition B 2011; 1; 5, en-USdimargiVersion: 3.0.3.62010-05-20T13:33:46+02:00 - Seite 159Z
Page 162 of 400

5To use the braking effect of the
engine on downhill gradients and
for driving:
R on steep mountain roads
R in mountainous terrain
R in arduous conditions4To use the braking effect of the
engine on extremely steep downhill
gradients and on long downhill
stretches
Restricting the shift range
XPull the left-hand steering wheel paddle
shifter.
The shift range is restricted.
i In order to prevent the engine from
overrevving, the automatic transmission
does not shift down when the engine speed
is too high.
i If the maximum engine speed for the shift
range is reached and you continue to
accelerate, the automatic transmission
shifts up in order to prevent the engine
from overrevving, even if the shift range is
restricted.
Derestricting the shift range
XPull the right-hand steering wheel paddle
shifter.
The shift range is derestricted.
Clearing the shift range restriction
XPull and hold the right-hand steering wheel
paddle shifter until D is shown again in the
multifunction display.
The automatic transmission shifts from the
current shift range directly to D.Selecting the ideal shift rangeXPull the left-hand steering wheel paddle
shifter and hold it in position.
The automatic transmission shifts to the
gear which allows ideal acceleration and
deceleration. To do this, the automatic
transmission shifts down one or more
gears.
Manual drive program
Switching on the manual drive program
The manual drive program is only available for
AMG vehicles.
Manual drive program M is different from
drive programs S and S+ with regard to
spontaneity, responsiveness and
smoothness of gear changes.
Manual drive program M can be selected
using the program selector button. You can
change gear using the steering wheel paddle
shifters in manual drive program M if the
transmission is in position D. The gear
currently selected and engaged is shown in
the multifunction display.
XAMG vehicles: turn the program selector
( Y page 158) until M appears in the
multifunction display.
The indicator M on the program selector
lights up in red.
Upshifting
! In manual drive program M, the automatic
transmission does not shift up
automatically even when the engine
limiting speed for the current gear is
reached. When the engine limiting speed is
reached, the fuel supply is cut to prevent
the engine from overrevving. Always make
sure that the engine speed does not reach
the red area of the tachometer. There is
otherwise a risk of engine damage.
160Automatic transmissionDriving and parking
BA 212 USA, CA Edition B 2011; 1; 5, en-USdimargiVersion: 3.0.3.62010-05-20T13:33:46+02:00 - Seite 160