MERCEDES-BENZ G-Class 2009 W463 Owner's Manual
G-Class 2009 W463
MERCEDES-BENZ
MERCEDES-BENZ
https://www.carmanualsonline.info/img/4/3511/w960_3511-0.png
MERCEDES-BENZ G-Class 2009 W463 Owner's Manual
Trending: check engine light, fuses, lights, oil pressure, garage door opener, remote control, reset
Page 191 of 264
Page 192 of 264
a chrome cleaner. If in doubt whether an
ornamental molding is chrome-plated,
contact an authorized Mercedes-Benz
Center.
Headlamps, brake lamps, tail lamps,
side markers, turn signal lenses
XUse a mild vehicle wash detergent, such as
Mercedes-Benz approved Car Shampoo,
with plenty of water.
! Only use window cleaning solutions that
are suitable for plastic lamp lenses.
Window cleaning solutions which are not
suitable may damage the plastic lamp
lenses of the headlamps. Therefore, do not
use abrasives, solvents or cleaners that
contain solvents.
Cleaning the Rear Parking Assist
system sensors
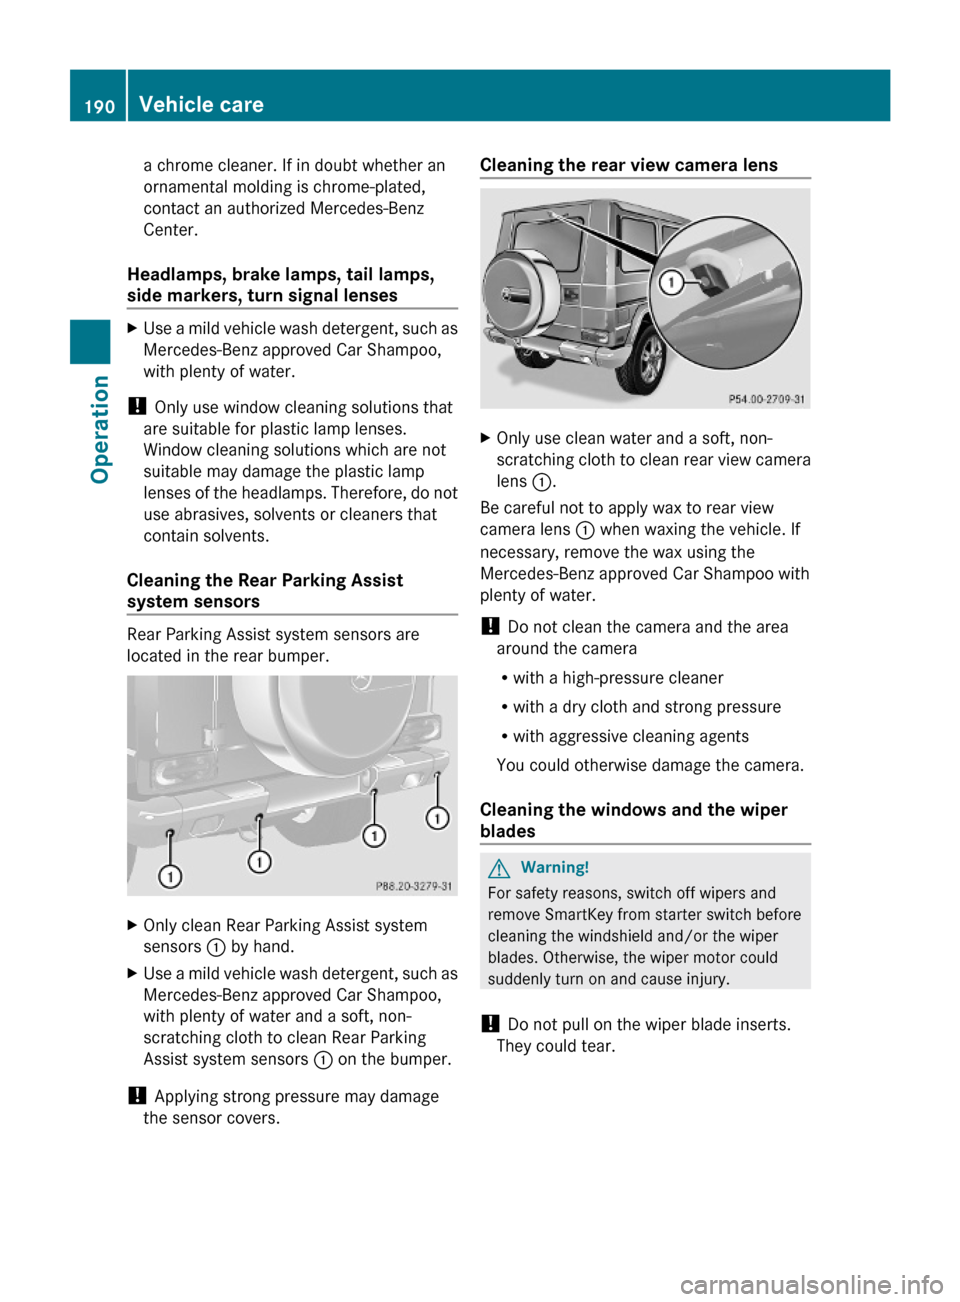
Rear Parking Assist system sensors are
located in the rear bumper.
XOnly clean Rear Parking Assist system
sensors : by hand.
XUse a mild vehicle wash detergent, such as
Mercedes-Benz approved Car Shampoo,
with plenty of water and a soft, non-
scratching cloth to clean Rear Parking
Assist system sensors : on the bumper.
! Applying strong pressure may damage
the sensor covers.
Cleaning the rear view camera lensXOnly use clean water and a soft, non-
scratching cloth to clean rear view camera
lens :.
Be careful not to apply wax to rear view
camera lens : when waxing the vehicle. If
necessary, remove the wax using the
Mercedes-Benz approved Car Shampoo with
plenty of water.
! Do not clean the camera and the area
around the camera
Rwith a high-pressure cleaner
Rwith a dry cloth and strong pressure
Rwith aggressive cleaning agents
You could otherwise damage the camera.
Cleaning the windows and the wiper
blades
GWarning!
For safety reasons, switch off wipers and
remove SmartKey from starter switch before
cleaning the windshield and/or the wiper
blades. Otherwise, the wiper motor could
suddenly turn on and cause injury.
! Do not pull on the wiper blade inserts.
They could tear.
190Vehicle careOperation
463_AKB; 2; 52, en-USd2ureepe,Version: 2.11.7.12008-12-02T10:52:11+01:00 - Seite 190
Page 193 of 264
Page 194 of 264
Page 195 of 264
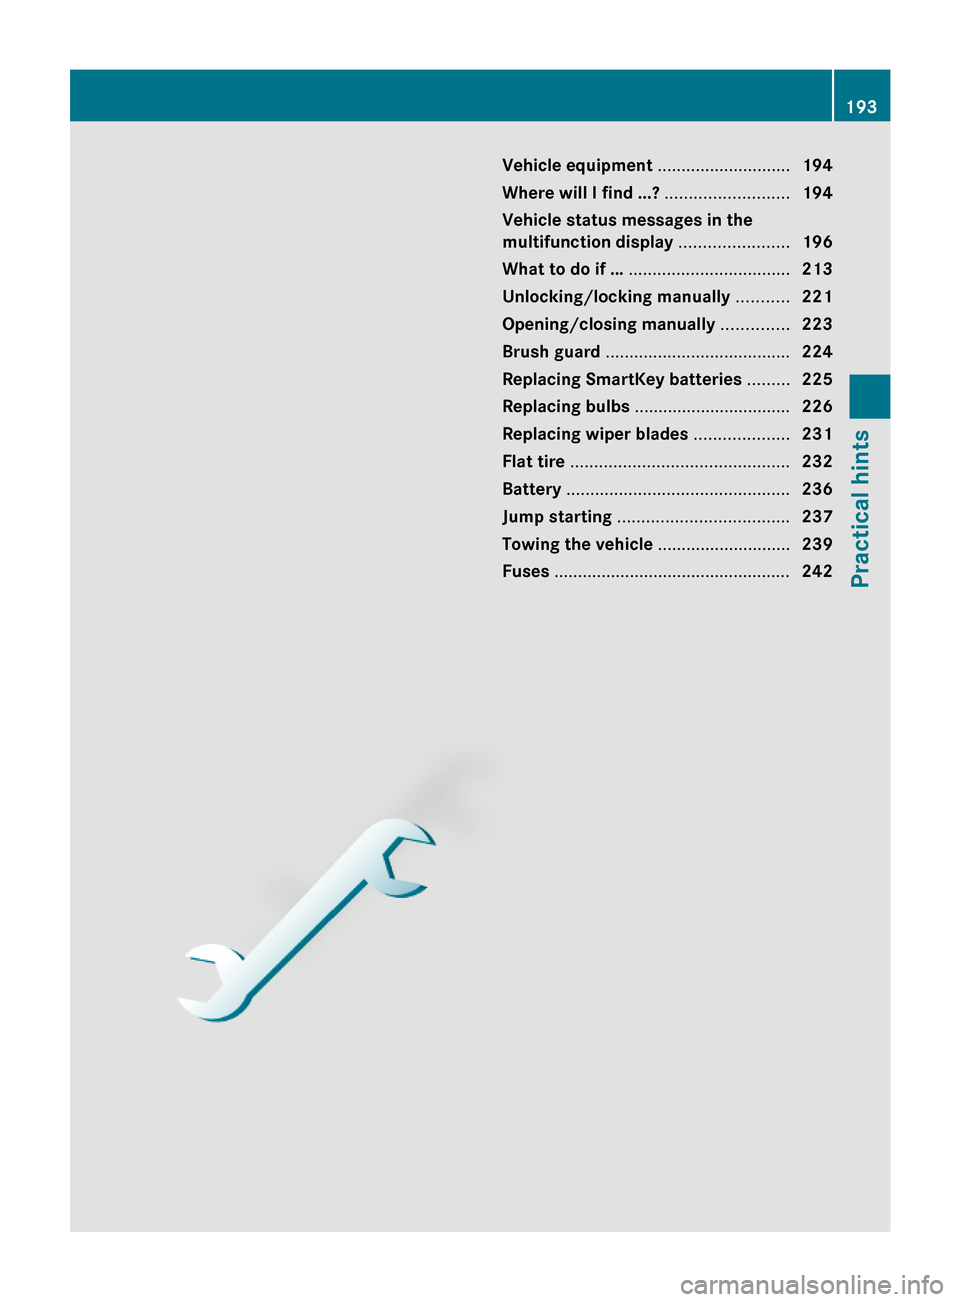
Vehicle equipment ............................194
Where will I find ...? ..........................194
Vehicle status messages in the
multifunction display .......................196
What to do if … ..................................213
Unlocking/locking manually ...........221
Opening/closing manually ..............223
Brush guard .......................................224
Replacing SmartKey batteries .........225
Replacing bulbs .................................226
Replacing wiper blades ....................231
Flat tire ..............................................232
Battery ...............................................236
Jump starting ....................................237
Towing the vehicle ............................239
Fuses ..................................................242
193Practical hints463_AKB; 2; 52, en-USd2ureepe,Version: 2.11.7.12008-12-02T10:52:11+01:00 - Seite 193
Page 196 of 264
Vehicle equipment
iThis Operator’s Manual describes all
features, standard or optional, potentially
available for your vehicle at the time of
purchase. Please be aware that your
vehicle might not be equipped with all
features described in this manual.
Where will I find ...?
First aid kit
iCheck expiration dates and contents for
completeness at least once a year and
replace missing/expired items.
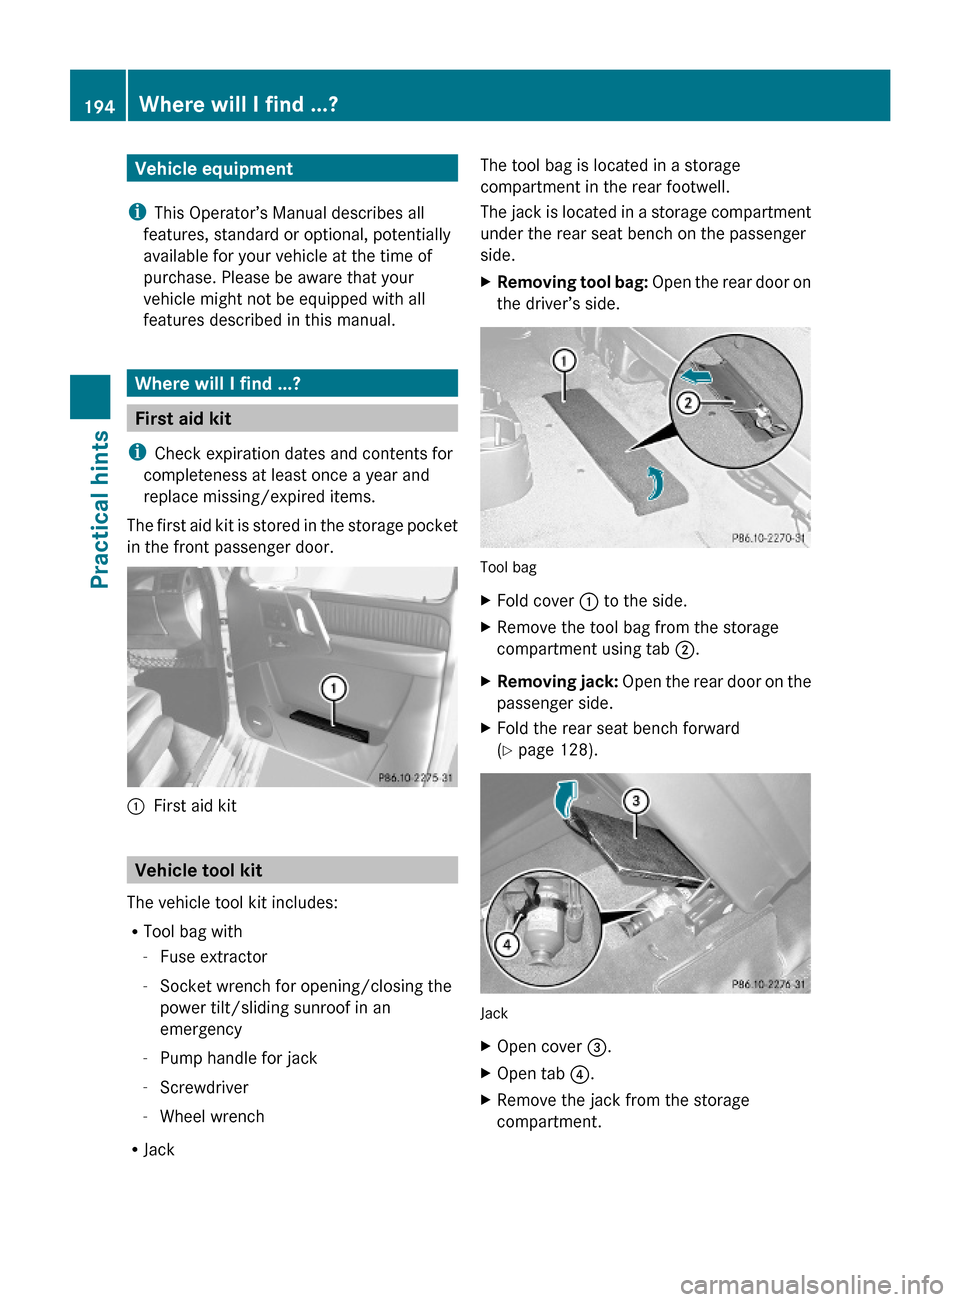
The first aid kit is stored in the storage pocket
in the front passenger door.
:First aid kit
Vehicle tool kit
The vehicle tool kit includes:
RTool bag with
-Fuse extractor
-Socket wrench for opening/closing the
power tilt/sliding sunroof in an
emergency
-Pump handle for jack
-Screwdriver
-Wheel wrench
RJack
The tool bag is located in a storage
compartment in the rear footwell.
The jack is located in a storage compartment
under the rear seat bench on the passenger
side.
XRemoving tool bag: Open the rear door on
the driver’s side.
Tool bag
XFold cover : to the side.XRemove the tool bag from the storage
compartment using tab ;.
XRemoving jack: Open the rear door on the
passenger side.
XFold the rear seat bench forward
(Y page 128).
Jack
XOpen cover =.XOpen tab ?.XRemove the jack from the storage
compartment.
194Where will I find ...?Practical hints
463_AKB; 2; 52, en-USd2ureepe,Version: 2.11.7.12008-12-02T10:52:11+01:00 - Seite 194
Page 197 of 264

Jack GWarning!
Only use the jack supplied with your vehicle
to lift the vehicle briefly for wheel changes. If
you use the jack for any other purpose, you or
others could be injured, as the jack is
designed only for the purpose of changing a
wheel.
When using the jack, observe the safety notes
in the “Mounting the spare wheel” section and
the notes on the jack.
XTake the pump handle (three pieces) and
jack from the vehicle tool kit
(Y page 194).
Pump handle
XAssemble the pump handle.
Jack
XSet indent : of the pump handle onto
release bolt ; of the jack.
XUsing the pump handle, turn release
bolt ; clockwise until its stop.
Release bolt ; is closed.
XRemove the pump handle from release
bolt ;.
XSet the pump handle into the pump lever
as indicated by the arrow.
Before placing the pump handle and the jack
back into the vehicle tool kit:
XPress the jack piston in again and close the
release bolt by using the pump handle.
XDisassemble the pump handle.
Spare wheel
GObserve Safety notes, see page 232.
The spare wheel is located under a cover on
the outside of the vehicle’s tailgate.
XRemoving: Take the screwdriver from the
vehicle tool kit (Y page 194).
XOpen lock : using the screwdriver.
iYou can also use a coin to open the lock.
XFold tab ; downwards.Where will I find ...?195Practical hints463_AKB; 2; 52, en-USd2ureepe,Version: 2.11.7.12008-12-02T10:52:11+01:00 - Seite 195Z
Page 198 of 264
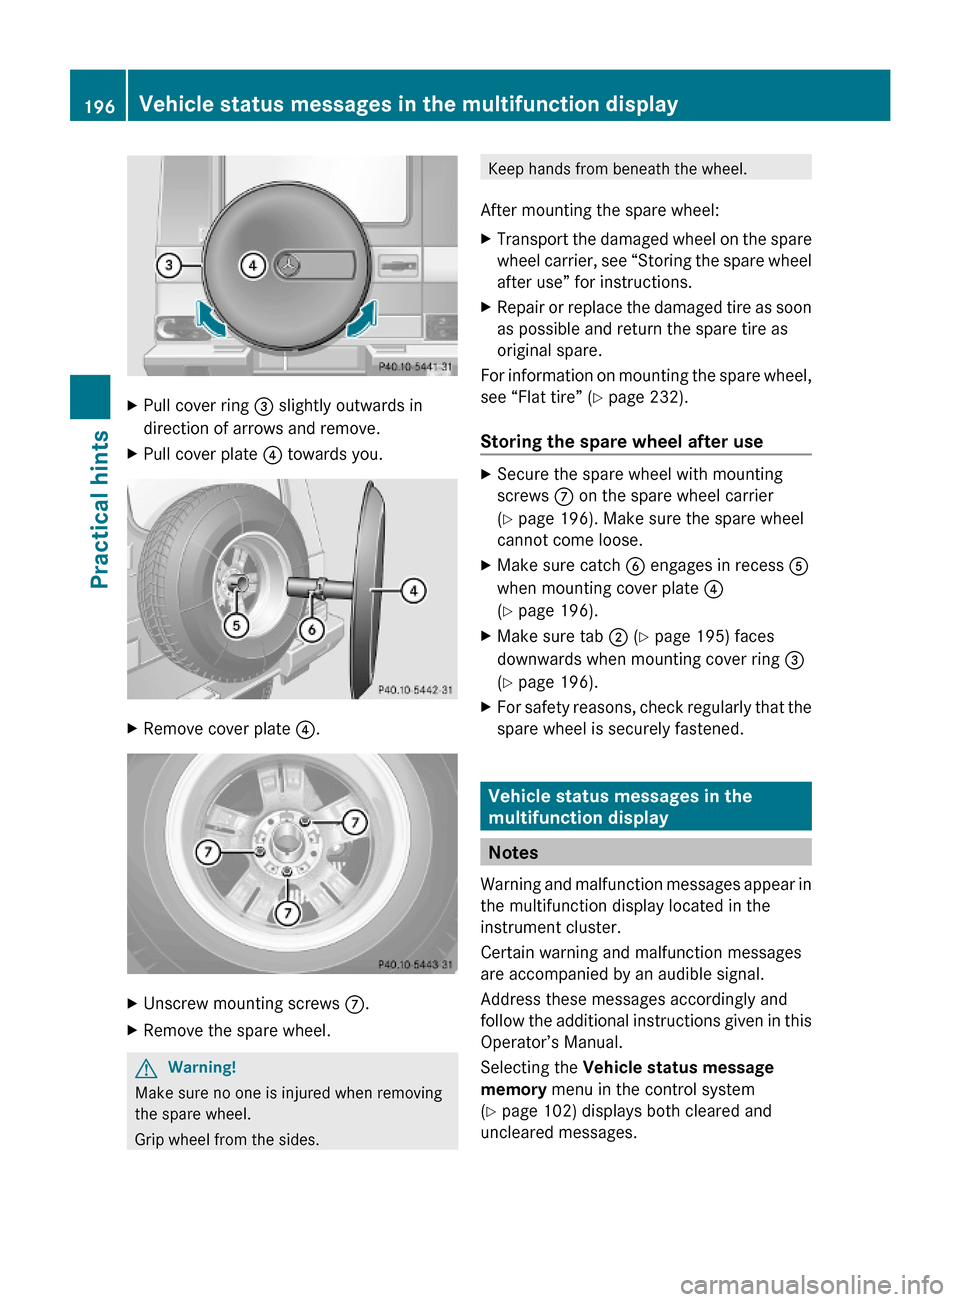
XPull cover ring = slightly outwards in
direction of arrows and remove.
XPull cover plate ? towards you.XRemove cover plate ?.XUnscrew mounting screws C.XRemove the spare wheel.GWarning!
Make sure no one is injured when removing
the spare wheel.
Grip wheel from the sides.
Keep hands from beneath the wheel.
After mounting the spare wheel:
XTransport the damaged wheel on the spare
wheel carrier, see “Storing the spare wheel
after use” for instructions.
XRepair or replace the damaged tire as soon
as possible and return the spare tire as
original spare.
For information on mounting the spare wheel,
see “Flat tire” (Y page 232).
Storing the spare wheel after use
XSecure the spare wheel with mounting
screws C on the spare wheel carrier
(Y page 196). Make sure the spare wheel
cannot come loose.
XMake sure catch B engages in recess A
when mounting cover plate 4
(Y page 196).
XMake sure tab ; (Y page 195) faces
downwards when mounting cover ring =
(Y page 196).
XFor safety reasons, check regularly that the
spare wheel is securely fastened.
Vehicle status messages in the
multifunction display
Notes
Warning and malfunction messages appear in
the multifunction display located in the
instrument cluster.
Certain warning and malfunction messages
are accompanied by an audible signal.
Address these messages accordingly and
follow the additional instructions given in this
Operator’s Manual.
Selecting the Vehicle status message
memory menu in the control system
(Y page 102) displays both cleared and
uncleared messages.
196Vehicle status messages in the multifunction displayPractical hints
463_AKB; 2; 52, en-USd2ureepe,Version: 2.11.7.12008-12-02T10:52:11+01:00 - Seite 196
Page 199 of 264
Page 200 of 264
Trending: cruise control, battery location, height adjustment, fuel, seat memory, open hood, traction control
