ECU MERCEDES-BENZ G-Class 2015 W463 Repair Manual
[x] Cancel search | Manufacturer: MERCEDES-BENZ, Model Year: 2015, Model line: G-Class, Model: MERCEDES-BENZ G-Class 2015 W463Pages: 350, PDF Size: 6.44 MB
Page 330 of 350

every 3,000 to 6,000 miles
(5,000 to 10,000 km), or earlier if tire wear
requires. Do not change the direction of
wheel rotation.
Clean the contact surfaces of the wheel and
the brake disc thoroughly every time a wheel
is rotated. Check the tire pressure and reac-
tivate the tire pressure monitor (Y page 313)
if necessary. Direction of rotation
Tires with a specified direction of rotation
have additional benefits, e.g. if there is a risk
of hydroplaning. You will only gain these ben-
efits if the correct direction of rotation is
observed.
An arrow on the sidewall of the tire indicates
its correct direction of rotation.
You may mount the spare wheel against the
direction of rotation. Adhere to the time
restriction on use as well as the speed limi-
tation specified on the spare wheel. Storing wheels
Store tires that are not being used in a cool,
dry and preferably dark place. Protect the
tires from oil, grease, gasoline and diesel. Mounting a wheel
Preparing the vehicle G
WARNING
When you remove the spare wheel from the
spare wheel bracket, the vehicle’s weight dis- tribution changes. If the vehicle is already
raised, the jack could tip over. There is a risk
of injury.
Remove the spare wheel from the spare wheel
bracket before lifting the vehicle.
X Prepare the vehicle as described
(Y page 292). X
Remove the vehicle tool kit and the jack
(Y page 290).
X Secure the vehicle to prevent it from rolling
away.
X Remove the spare wheel from the spare
wheel bracket (Y page 291).
i Vehicles without a spare wheel or emer-
gency spare wheel are not equipped with a tire-change tool kit at the factory. For more
information on which tools are required to
perform a wheel change on your vehicle
e.g. lug wrench or jack, consult an author-
ized Mercedes-Benz Center.
Securing the vehicle to prevent it from
rolling away X
On level ground: place chocks or other
suitable items under the front and rear of
the wheel that is diagonally opposite the
wheel you wish to change.
X On downhill gradients: place chocks or
other suitable items in front of the wheels
of the front and rear axle.
Raising the vehicle G
WARNING
If you do not position the jack correctly at the appropriate jacking point of the vehicle, the
jack could tip over with the vehicle raised.
There is a risk of injury.
Only position the jack at the appropriate jack-
ing point of the vehicle. The base of the jack
must be positioned vertically, directly under
the jacking point of the vehicle.
! The jack is designed exclusively for jack-
ing up the vehicle at the jacking points.
Otherwise, your vehicle could be damaged.
The following must be observed when raising
the vehicle:
R To raise the vehicle, only use the vehicle-
specific jack that has been tested and
approved by Mercedes-Benz. If used incor- 328
Changing a wheelWheels and tires
Page 331 of 350

rectly, the jack could tip over with the vehi-
cle raised.
R The jack is designed only to raise and hold
the vehicle for a short time while a wheel
is being changed. It is not suited for per-
forming maintenance work under the vehi- cle.
R Avoid changing the wheel on uphill and
downhill slopes.
R Before raising the vehicle, secure it from
rolling away by applying the parking brake
and inserting wheel chocks. Never disen-
gage the parking brake while the vehicle is raised.
R The jack must be placed on a firm, flat and
non-slip surface. On a loose surface, a
large, load-bearing underlay must be used.
On a slippery surface, a non-slip underlay
must be used, e.g. rubber mats.
R Do not use wooden blocks or similar
objects as a jack underlay. Otherwise, the
jack will not be able to achieve its load-
bearing capacity due to the restricted
height.
R Make sure that the distance between the
underside of the tires and the ground does
not exceed 1.2 in (3 cm).
R Never place your hands and feet under the
raised vehicle.
R Never lie under the raised vehicle.
R Never start the engine when the vehicle is
raised.
R Never open or close a door or the tailgate
when the vehicle is raised.
R Make sure that no persons are present in
the vehicle when the vehicle is raised. X
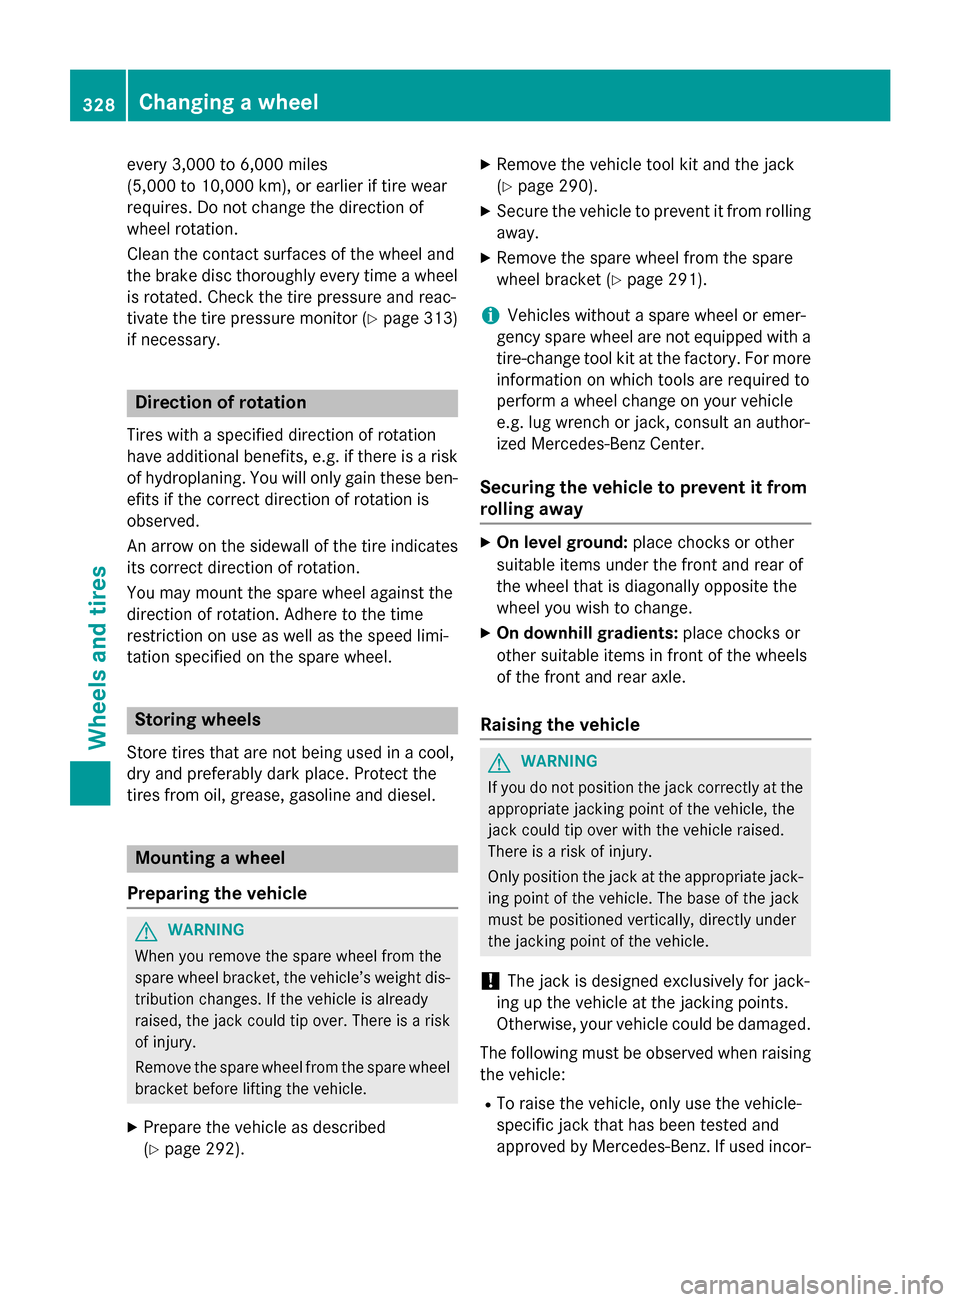
Using lug wrench :, loosen the bolts on
the wheel you wish to change by about one full turn. Do not unscrew the wheel bolts
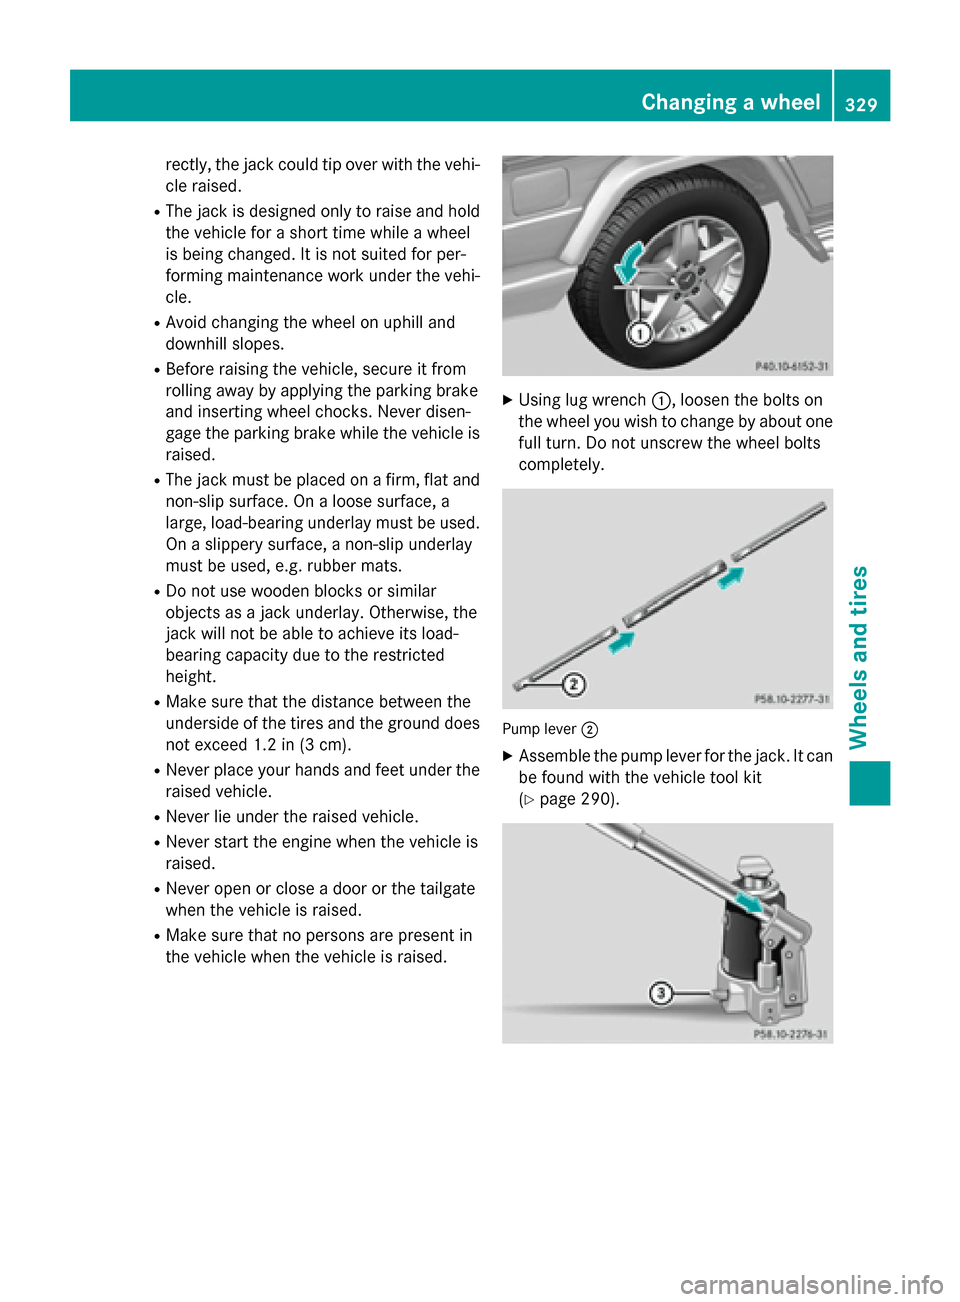
completely. Pump lever
;
X Assemble the pump lever for the jack. It can
be found with the vehicle tool kit
(Y page 290). Changing a wheel
329Wheels and tires Z
Page 332 of 350

X
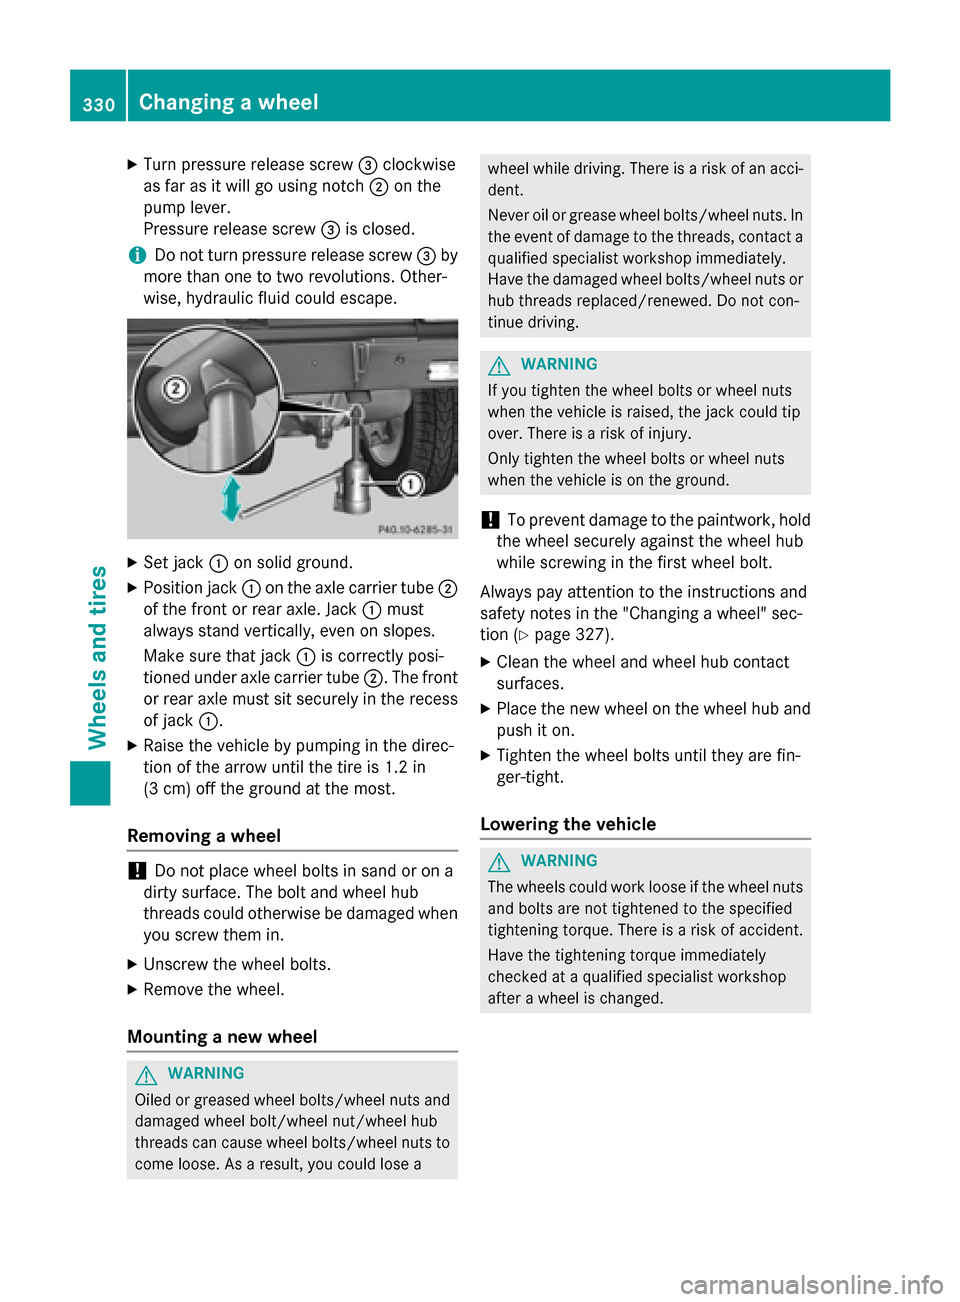
Turn pressure release screw =clockwise
as far as it will go using notch ;on the
pump lever.
Pressure release screw =is closed.
i Do not turn pressure release screw
=by
more than one to two revolutions. Other-
wise, hydraulic fluid could escape. X
Set jack :on solid ground.
X Position jack :on the axle carrier tube ;
of the front or rear axle. Jack :must
always stand vertically, even on slopes.
Make sure that jack :is correctly posi-
tioned under axle carrier tube ;. The front
or rear axle must sit securely in the recess of jack :.
X Raise the vehicle by pumping in the direc-
tion of the arrow until the tire is 1.2 in
(3 cm) off the ground at the most.
Removing a wheel !
Do not place wheel bolts in sand or on a
dirty surface. The bolt and wheel hub
threads could otherwise be damaged when you screw them in.
X Unscrew the wheel bolts.
X Remove the wheel.
Mounting a new wheel G
WARNING
Oiled or greased wheel bolts/wheel nuts and damaged wheel bolt/wheel nut/wheel hub
threads can cause wheel bolts/wheel nuts to come loose. As a result, you could lose a wheel while driving. There is a risk of an acci-
dent.
Never oil or grease wheel bolts/wheel nuts. In the event of damage to the threads, contact a
qualified specialist workshop immediately.
Have the damaged wheel bolts/wheel nuts or hub threads replaced/renewed. Do not con-
tinue driving. G
WARNING
If you tighten the wheel bolts or wheel nuts
when the vehicle is raised, the jack could tip
over. There is a risk of injury.
Only tighten the wheel bolts or wheel nuts
when the vehicle is on the ground.
! To prevent damage to the paintwork, hold
the wheel securely against the wheel hub
while screwing in the first wheel bolt.
Always pay attention to the instructions and
safety notes in the "Changing a wheel" sec-
tion (Y page 327).
X Clean the wheel and wheel hub contact
surfaces.
X Place the new wheel on the wheel hub and
push it on.
X Tighten the wheel bolts until they are fin-
ger-tight.
Lowering the vehicle G
WARNING
The wheels could work loose if the wheel nuts and bolts are not tightened to the specified
tightening torque. There is a risk of accident.
Have the tightening torque immediately
checked at a qualified specialist workshop
after a wheel is changed. 330
Changing a wheelWheels and tires
Page 333 of 350

X
Open the pressure release screw on the
jack using the pump lever (Y page 328) by
approximately one turn.
X Lower the vehicle until it is once again
standing firmly on the ground.
X Place the jack to one side.
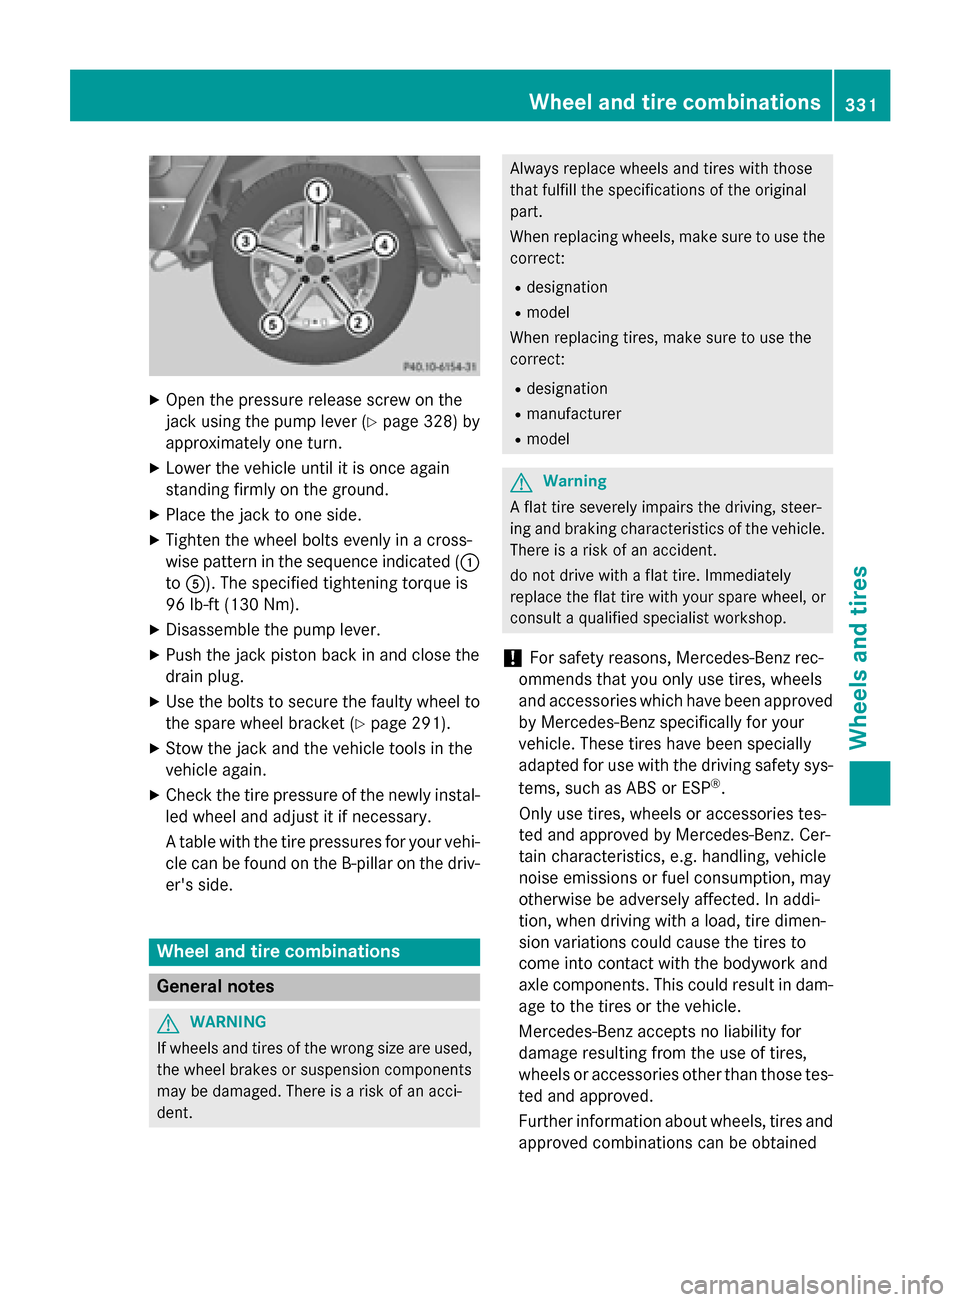
X Tighten the wheel bolts evenly in a cross-
wise pattern in the sequence indicated ( :
to A). The specified tightening torque is
96 lb-ft (130 Nm).
X Disassemble the pump lever.
X Push the jack piston back in and close the
drain plug.
X Use the bolts to secure the faulty wheel to
the spare wheel bracket (Y page 291).
X Stow the jack and the vehicle tools in the
vehicle again.
X Check the tire pressure of the newly instal-
led wheel and adjust it if necessary.
A table with the tire pressures for your vehi-cle can be found on the B-pillar on the driv-
er's side. Wheel and tire combinations
General notes
G
WARNING
If wheels and tires of the wrong size are used, the wheel brakes or suspension components
may be damaged. There is a risk of an acci-
dent. Always replace wheels and tires with those
that fulfill the specifications of the original
part.
When replacing wheels, make sure to use the
correct:
R designation
R model
When replacing tires, make sure to use the
correct:
R designation
R manufacturer
R model G
Warning
A flat tire severely impairs the driving, steer-
ing and braking characteristics of the vehicle.
There is a risk of an accident.
do not drive with a flat tire. Immediately
replace the flat tire with your spare wheel, or
consult a qualified specialist workshop.
! For safety reasons, Mercedes-Benz rec-
ommends that you only use tires, wheels
and accessories which have been approved by Mercedes-Benz specifically for your
vehicle. These tires have been specially
adapted for use with the driving safety sys-
tems, such as ABS or ESP ®
.
Only use tires, wheels or accessories tes-
ted and approved by Mercedes-Benz. Cer-
tain characteristics, e.g. handling, vehicle
noise emissions or fuel consumption, may
otherwise be adversely affected. In addi-
tion, when driving with a load, tire dimen-
sion variations could cause the tires to
come into contact with the bodywork and
axle components. This could result in dam-
age to the tires or the vehicle.
Mercedes-Benz accepts no liability for
damage resulting from the use of tires,
wheels or accessories other than those tes- ted and approved.
Further information about wheels, tires and
approved combinations can be obtained Wheel and tire combinations
331Wheels and tires Z