overheating MERCEDES-BENZ G-Class 2015 W463 Owner's Manual
[x] Cancel search | Manufacturer: MERCEDES-BENZ, Model Year: 2015, Model line: G-Class, Model: MERCEDES-BENZ G-Class 2015 W463Pages: 350, PDF Size: 6.44 MB
Page 156 of 350
helps avoid overheating and excessive
wear of the brakes.
When you take advantage of the engine
braking effect, a drive wheel may not turn
for some time, e.g. on a slippery road sur-
face. This could cause damage to the drive train. This type of damage is not covered bythe Mercedes-Benz warranty.
Heavy and light loads G
WARNING
If you rest your foot on the brake pedal while
driving, the braking system can overheat. This increases the stopping distance and can even
cause the braking system to fail. There is a
risk of an accident.
Never use the brake pedal as a footrest. Never
depress the brake pedal and the accelerator
pedal at the same time.
! Depressing the brake pedal constantly
results in excessive and premature wear to
the brake pads.
If the brakes have been subjected to a heavy load, do not stop the vehicle immediately, but
drive on for a short while. This allows the air- flow to cool the brakes more quickly.
Wet roads If driving in heavy rain for a prolonged period
of time without braking, there may be a
delayed reaction from the brakes when brak-
ing for the first time. This may also occur after
the vehicle has been washed.
You have to depress the brake pedal more
firmly. Maintain a greater distance from the
vehicle in front.
After driving on a wet road or having the vehi-
cle washed, brake firmly while paying atten-
tion to the traffic conditions. This will warm up
the brake discs, thereby drying them more
quickly and protecting them against corro-
sion. Limited braking performance on salt-
treated roads If you drive on salted roads, a layer of salt
residue may form on the brake discs and
brake pads. This can result in a significantly
longer braking distance.
R Brake occasionally to remove any possible
salt residue. Make sure that you do not
endanger other road users when doing so.
R Carefully depress the brake pedal and the
beginning and end of a journey.
R Maintain a greater distance to the vehicle
ahead.
Servicing the brakes !
If the brake warning lamp lights up in the
instrument cluster and you hear a warning
tone even though the parking brake has
been released, the brake fluid level may be too low. Observe additional warning mes-
sages in the multifunction display.
The brake fluid level may be too low due tobrake pad wear or leaking brake lines.
Have the brake system checked immedi-
ately. This work should be carried out at a
qualified specialist workshop.
! A function or performance test should
only be carried out on a 2-axle dynamom-
eter. If you are planning to have the vehicle
tested on such a dynamometer, contact an
authorized Mercedes-Benz Center to
obtain further information first. Otherwise,
you could damage the drive train or the
brake system.
! As the ESP ®
system operates automati-
cally, the engine and the ignition must be
switched off (the SmartKey must be in posi-
tion 0or 1in the ignition lock) if the parking
brake is tested on a brake dynamometer
(for a maximum of ten seconds).
Braking applications triggered automati-
cally by ESP ®
may otherwise seriously dam-
age the brake system. 154
Driving tipsDriving and parking
Page 165 of 350
braking effect of the engine. This relieves the
load on the brake system and prevents the
brakes from overheating and wearing too
quickly.
Use cruise control only if road and traffic con-
ditions make it appropriate to maintain a
steady speed for a prolonged period. You can store any road speed above 20 mph
(30 km/h).
i Cruise control should not be activated
when driving off-road.
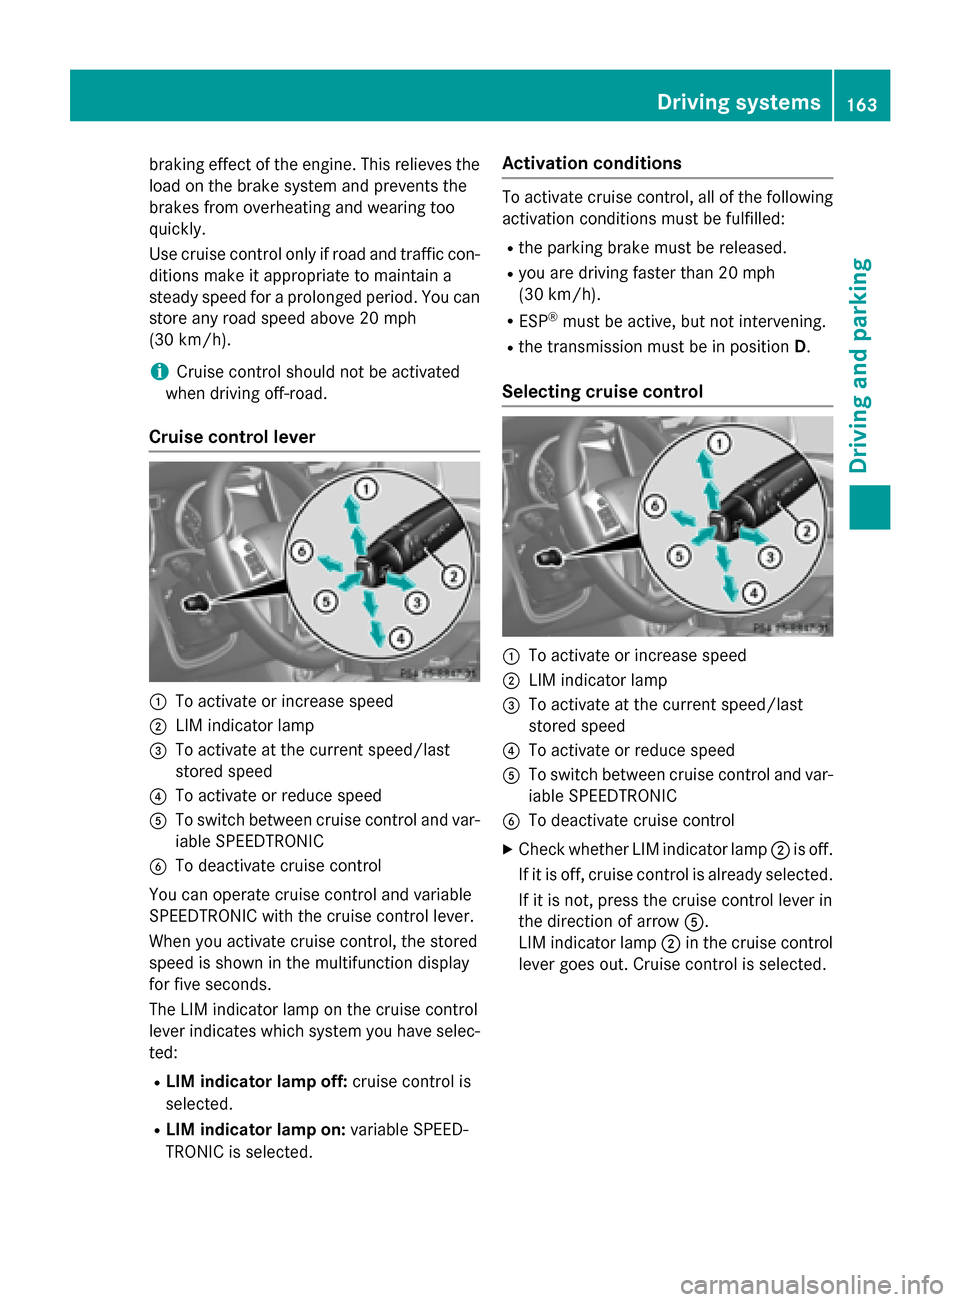
Cruise control lever :
To activate or increase speed
; LIM indicator lamp
= To activate at the current speed/last
stored speed
? To activate or reduce speed
A To switch between cruise control and var-
iable SPEEDTRONIC
B To deactivate cruise control
You can operate cruise control and variable
SPEEDTRONIC with the cruise control lever.
When you activate cruise control, the stored
speed is shown in the multifunction display
for five seconds.
The LIM indicator lamp on the cruise control
lever indicates which system you have selec-
ted:
R LIM indicator lamp off: cruise control is
selected.
R LIM indicator lamp on: variable SPEED-
TRONIC is selected. Activation conditions To activate cruise control, all of the following
activation conditions must be fulfilled:
R the parking brake must be released.
R you are driving faster than 20 mph
(30 km/h).
R ESP ®
must be active, but not intervening.
R the transmission must be in position D.
Selecting cruise control :
To activate or increase speed
; LIM indicator lamp
= To activate at the current speed/last
stored speed
? To activate or reduce speed
A To switch between cruise control and var-
iable SPEEDTRONIC
B To deactivate cruise control
X Check whether LIM indicator lamp ;is off.
If it is off, cruise control is already selected.
If it is not, press the cruise control lever in
the direction of arrow A.
LIM indicator lamp ;in the cruise control
lever goes out. Cruise control is selected. Driving systems
163Driving and parking Z
Page 169 of 350
General notes
SPEEDTRONIC brakes automatically so that
you do not exceed the set speed. On long and steep downhill gradients, especially if the
vehicle is laden or towing a trailer, you must
select shift range 1,2or 3in good time. By
doing so, you will make use of the braking
effect of the engine, which relieves the load
on the brake system and prevents the brakes from overheating and wearing too quickly. If
you need additional braking, depress the
brake pedal repeatedly rather than continu-
ously.
i The speed indicated in the speedometer
may differ slightly from the limit speed
stored.
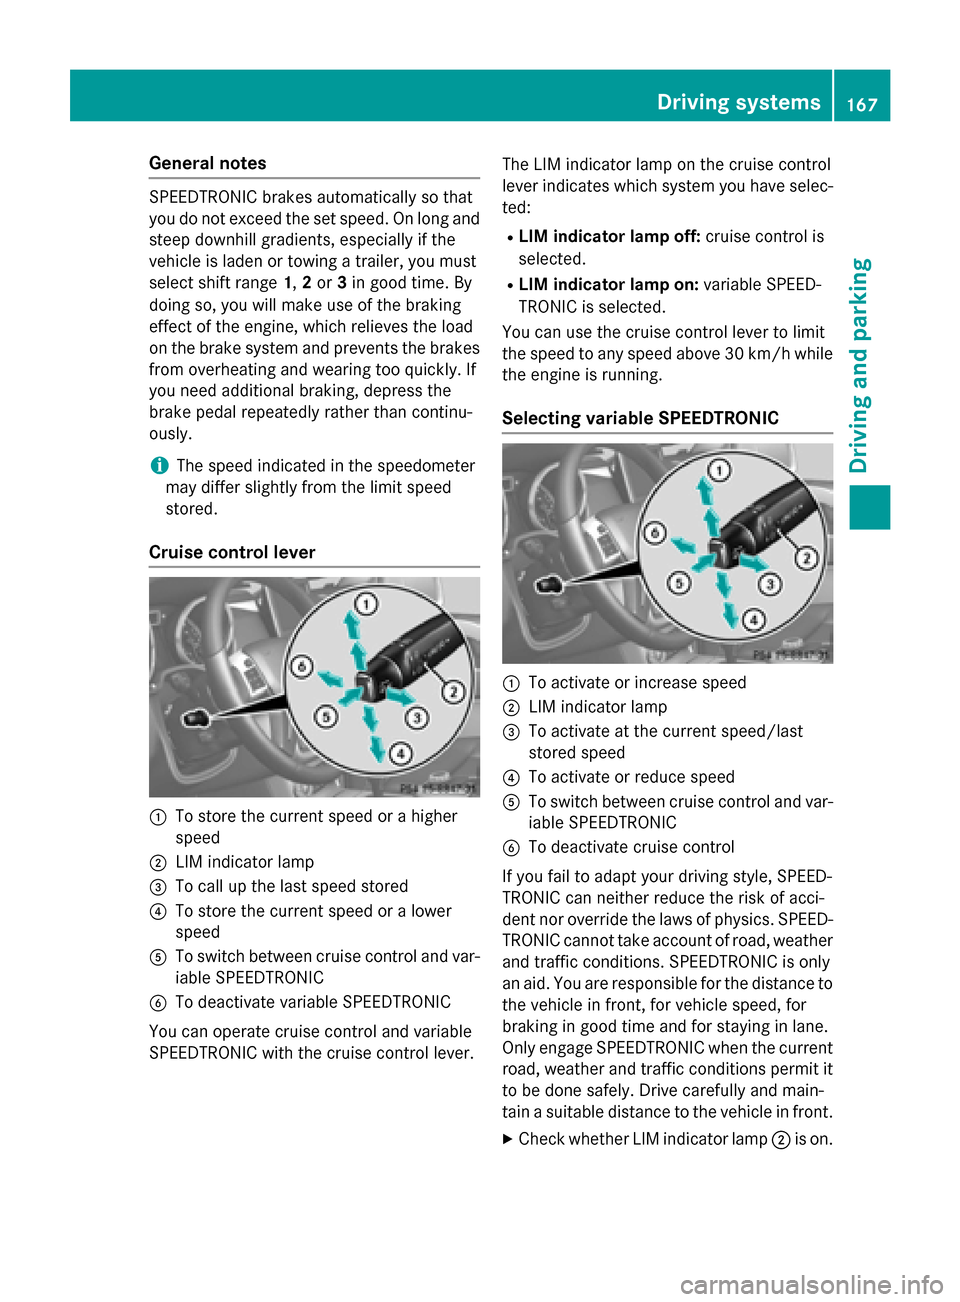
Cruise control lever :
To store the current speed or a higher
speed
; LIM indicator lamp
= To call up the last speed stored
? To store the current speed or a lower
speed
A To switch between cruise control and var-
iable SPEEDTRONIC
B To deactivate variable SPEEDTRONIC
You can operate cruise control and variable
SPEEDTRONIC with the cruise control lever. The LIM indicator lamp on the cruise control
lever indicates which system you have selec-
ted:
R LIM indicator lamp off: cruise control is
selected.
R LIM indicator lamp on: variable SPEED-
TRONIC is selected.
You can use the cruise control lever to limit
the speed to any speed above 30 km/h while
the engine is running.
Selecting variable SPEEDTRONIC :
To activate or increase speed
; LIM indicator lamp
= To activate at the current speed/last
stored speed
? To activate or reduce speed
A To switch between cruise control and var-
iable SPEEDTRONIC
B To deactivate cruise control
If you fail to adapt your driving style, SPEED-
TRONIC can neither reduce the risk of acci-
dent nor override the laws of physics. SPEED-
TRONIC cannot take account of road, weather
and traffic conditions. SPEEDTRONIC is only
an aid. You are responsible for the distance to the vehicle in front, for vehicle speed, for
braking in good time and for staying in lane.
Only engage SPEEDTRONIC when the current
road, weather and traffic conditions permit it to be done safely. Drive carefully and main-
tain a suitable distance to the vehicle in front.
X Check whether LIM indicator lamp ;is on. Driving systems
167Driving and parking Z
Page 172 of 350
time and for staying in your lane. Only engage
DISTRONIC PLUS when the current road,
weather and traffic conditions permit it to be done safely, and adapt your driving style
accordingly. Drive carefully and maintain a
suitable distance to the vehicle in front.
When DISTRONIC PLUS detects a risk of col-
lision with the vehicle in front but is unable to
sufficiently decelerate the vehicle in order to
maintain the set distance from the vehicle in
front, you will be warned visually and acous-
tically. DISTRONIC PLUS cannot prevent a
collision without your intervention. An inter-
mittent warning tone will then sound and the distance warning lamp will light up in the
instrument cluster. Brake immediately in
order to increase the distance from the vehi-
cle in front, or take evasive action, provided it
is safe to do so.
DISTRONIC PLUS may not detect narrow
vehicles driving in front, e.g. motorcycles, or
vehicles driving on a different line. Therefore,
always pay attention to traffic conditions
even when DISTRONIC PLUS is activated.
Otherwise, you may fail to recognize dangers
in time, cause an accident and injure yourself and others.
In particular, the detection of obstacles can
be impaired if:
R the sensor is dirty or covered
R there is snow or heavy rain
R there is interference by other radar sources
R there is the possibility of strong radar
reflections, for example, in parking
garages.
If DISTRONIC PLUS is activated, the vehicle
brakes automatically in certain situations.
This can happen unexpectedly, especially
when towing or in a car wash. There is a risk of an accident. In these or similar situations,
deactivate DISTRONIC PLUS.
If you want DISTRONIC PLUS to assist you,
the following activation conditions must be
fulfilled (Y page 171) and the radar sensor
system must be operational. General notes DISTRONIC PLUS regulates the speed and
automatically helps you maintain the dis-
tance to the vehicle detected in front.
DISTRONIC PLUS brakes automatically so
that the set speed is not exceeded.
On long and steep downhill gradients, espe-
cially if the vehicle is laden or towing a trailer,
you must select shift range 1,2or 3in good
time. By doing so, you will make use of the
braking effect of the engine. This relieves the load on the brake system and prevents the
brakes from overheating and wearing too
quickly.
If DISTRONIC PLUS detects a slower-moving
vehicle in front, your vehicle is braked in order
to maintain the preset distance to the vehicle in front.
If there is no vehicle in front, DISTRONIC
PLUS operates in the same way as cruise
control in the speed range between 20 mph
(Canada: 30 km/h) and 120 mph (Canada:
200 km/h). If a vehicle is driving in front of
you, it operates in the speed range between
0 mph (0 km/h) and 120 mph (Canada:
200 km/h).
Do not use DISTRONIC PLUS while driving on roads with steep gradients.
As DISTRONIC PLUS transmits radar waves, it
can resemble the radar detectors of the
responsible authorities. You can refer to the
relevant chapter in the Operator's Manual if
questions are asked about this.
i USA only:
This device has been approved by the FCC as a "Vehicular Radar System". The radar
sensor is intended for use in an automotive
radar system only. Removing, tampering
with, or altering the device will void any
warranties, and is not permitted by the
FCC. Do not tamper with, alter, or use in
any non-approved way.
Any unauthorized modification to this
device could void the user’s authority to
operate the equipment. 170
Driving systemsDriving an
d parking
Page 194 of 350
R
the permissible rear axle load of the towing
vehicle
R the maximum permissible gross vehicle
weight of both the towing vehicle and the
trailer
When towing a trailer, your vehicle's handling
characteristics will be different in comparison with when driving without a trailer.
The vehicle/trailer combination:
R is heavier
R is restricted in its acceleration and gradi-
ent-climbing capability
R has an increased braking distance
R is affected more by strong crosswinds
R demands more sensitive steering
R has a larger turning radius
This could impair the handling characteris-
tics.
When towing a trailer, always adjust your
speed to the current road and weather con-
ditions. Do not exceed the maximum permis-
sible speed for your vehicle/trailer combina-
tion.
General notes R
Do not exceed the legally prescribed max-
imum speed for vehicle/trailer combina-
tions in the relevant country.
This lowers the risk of an accident.
R Only install an approved trailer coupling on
your vehicle.
Further information on availability and on
installation is available from any authorized Mercedes-Benz Center.
R The bumpers of your vehicle are not suita-
ble for installing detachable trailer cou-
plings.
R Do not install hired trailer couplings or
other detachable trailer couplings on the
bumpers of your vehicle.
R If you do not need the ball coupling, remove
the ball coupling from the ball coupling
recess. This reduces the risk of damage to the ball coupling. i
When towing a trailer, set the tire pres-
sure on the rear axle of the towing vehicle
for a maximum load; see the tire pressure
table in the fuel filler flap (Y page 310).
You will find installation dimensions and loads
under "Technical data" (Y page 346).
The maximum noseweight of the trailer draw- bar on the ball coupling for up to 3 people is
562 lbs (255 kg). The maximum noseweight
of the trailer drawbar for more than 3 people and the maximum load for the trunk can be
found in the noseweight table (Y page 347).
However, the actual noseweight must not
exceed the value given on the trailer tow hitch or trailer identification plates. The lowest
weight applies.
Please note that when towing a trailer,
PARKTRONIC (Y page 182) and Blind Spot
Assist (Y page 178) are only available with
limitations, or not at all.
i On vehicles without level control, the
height of the ball coupling will alter accord- ing to the load placed on the vehicle. If nec-
essary, use a trailer with a height-adjusta-
ble drawbar.
Driving tips X
On long and steep downhill gradients,
select shift range 1,2or 3(Y page 145) in
good time.
i This also applies if you have activated
cruise control or SPEEDTRONIC.
X If necessary, shift the transfer case to LOW
RANGE (Ypage 186).
This will use the braking effect of the
engine, so that less braking will be required
to maintain the speed. This relieves the
load on the brake system and prevents the
brakes from overheating and wearing too
quickly. If you need additional braking,
depress the brake pedal repeatedly rather
than continuously.
The maximum permissible speed for vehicle/
trailer combinations depends on the type of
trailer. Before beginning the journey, check 192
Towing a trailerDriving an
d parking
Page 195 of 350
the trailer's documents to see what the max-
imum permissible speed is. Observe the
legally prescribed maximum speed in the rel-evant country.
For certain Mercedes-Benz vehicles, the max-
imum permissible rear axle load is increased
when towing a trailer. Refer to the "Technical
data" section to find out whether this applies
to your vehicle. If you utilize any of the added maximum rear axle load when towing a trailer,the vehicle/trailer combination may not
exceed a maximum speed of 60 mph
(100 km/h) for reasons concerning the oper-ating permit. This also applies in countries in
which the permissible maximum speed for
vehicle/trailer combinations is above 60 mph
(100 km/h).
When towing a trailer, your vehicle's handling
characteristics will be different in comparison to when driving without a trailer and it will
consume more fuel.
On long and steep downhill gradients, you
must select shift range 1,2or 3in good time.
i This also applies if you have activated
cruise control or DISTRONIC PLUS.
This will use the braking effect of the engine,
so that less braking will be required to main-
tain the speed. This relieves the load on the
brake system and prevents the brakes from
overheating and wearing too quickly. If you
need additional braking, depress the brake
pedal repeatedly rather than continuously.
Driving tips If the trailer swings from side to side:
X Do not accelerate.
X Do not counter-steer.
X Brake if necessary. R
Maintain a greater distance from the vehi-
cle in front than when driving without a
trailer.
R Avoid braking abruptly. If possible, brake
gently at first to allow the trailer to run on.
Then, increase the braking force rapidly.
R The values given for gradient-climbing
capabilities from a standstill refer to sea
level. When driving in mountainous areas,
note that the power output of the engine,
and consequently the vehicle's gradient-
climbing capability, decrease with increas-
ing altitude. Trailer power supply
! You can connect accessories with a max-
imum power consumption of 180 W to the
permanent power supply.
You must not charge a trailer battery using the power supply.
The trailer socket of your vehicle is equipped at the factory with a permanent power supply.
The permanent power supply is supplied via
trailer socket pin 9.
A qualified specialist workshop can provide
more information about installing the trailer
electrics. Trailer with 7-pin connector
General notes You can make a connection to the 13-pin
socket on the ball coupling using an adapter
or, if necessary, an adapter cable. Both can be obtained in a qualified specialist workshop.
Installing the adapter !
Make sure that there is enough slack in
the cable for cornering so that the cable
cannot become detached. Towing a trailer
193Driving and parking Z
Page 344 of 350
Warning symbol
:advises you about:
R possible dangers
R having service work carried out at a quali-
fied specialist workshop
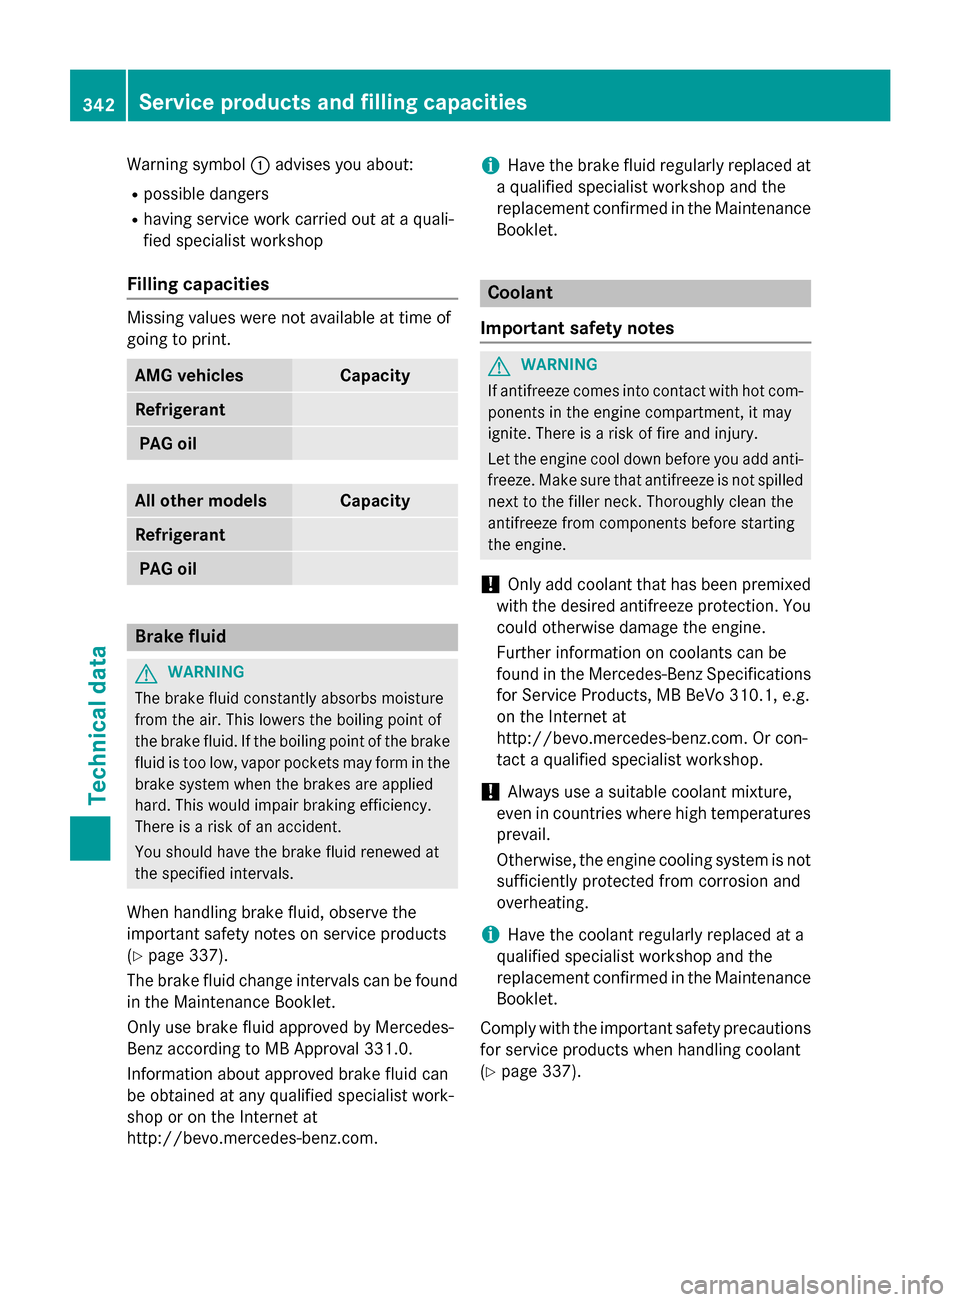
Filling capacities Missing values were not available at time of
going to print. AMG vehicles Capacity
Refrigerant
PAG oil
All other models Capacity
Refrigerant
PAG oil
Brake fluid
G
WARNING
The brake fluid constantly absorbs moisture
from the air. This lowers the boiling point of
the brake fluid. If the boiling point of the brake fluid is too low, vapor pockets may form in the brake system when the brakes are applied
hard. This would impair braking efficiency.
There is a risk of an accident.
You should have the brake fluid renewed at
the specified intervals.
When handling brake fluid, observe the
important safety notes on service products
(Y page 337).
The brake fluid change intervals can be found
in the Maintenance Booklet.
Only use brake fluid approved by Mercedes-
Benz according to MB Approval 331.0.
Information about approved brake fluid can
be obtained at any qualified specialist work-
shop or on the Internet at
http://bevo.mercedes-benz.com. i
Have the brake fluid regularly replaced at
a qualified specialist workshop and the
replacement confirmed in the Maintenance Booklet. Coolant
Important safety notes G
WARNING
If antifreeze comes into contact with hot com- ponents in the engine compartment, it may
ignite. There is a risk of fire and injury.
Let the engine cool down before you add anti-
freeze. Make sure that antifreeze is not spilled
next to the filler neck. Thoroughly clean the
antifreeze from components before starting
the engine.
! Only add coolant that has been premixed
with the desired antifreeze protection. You
could otherwise damage the engine.
Further information on coolants can be
found in the Mercedes-Benz Specifications for Service Products, MB BeVo 310.1, e.g.
on the Internet at
http://bevo.mercedes-benz.com. Or con-
tact a qualified specialist workshop.
! Always use a suitable coolant mixture,
even in countries where high temperatures prevail.
Otherwise, the engine cooling system is not
sufficiently protected from corrosion and
overheating.
i Have the coolant regularly replaced at a
qualified specialist workshop and the
replacement confirmed in the Maintenance Booklet.
Comply with the important safety precautions for service products when handling coolant
(Y page 337). 342
Service products and filling capacitiesTechnical data
Page 345 of 350
The coolant is a mixture of water and anti-
freeze/corrosion inhibitor. It performs the
following tasks:
R corrosion protection
R antifreeze protection
R raising the boiling point
If the coolant has antifreeze protection down to -35 ‡(-37 †), the boiling point of the cool-
ant in the pressurized system is approx-
imately 266 ‡ (130 †).
The antifreeze/corrosion inhibitor concentra- tion in the engine cooling system should:
R be at least 50%. This will protect the engine
cooling system against freezing down to
approximately -35 ‡ (-37 †).
R no t exceed 55% (antifreeze protection
down to -49 ‡ [-45 †]). Otherwise, heat
will no t be dissipated as effectively.
Mercedes-Benz recommends an antifreeze/
corrosion inhibitor in accordance with MB
Specifications for Service Products 310.1.
i When the vehicle is first delivered, it is fil-
led with a coolant mixture that ensures
adequate antifreeze and corrosion protec-
tion.
i The coolant is checked with every main-
tenance interval at a qualified specialist
workshop.
The engine cooling system is filled with cool-
ant at the factory which contains antifreeze/
corrosion inhibitor that ensures protection
down to approximately -35 ‡ (-37 †).
Your vehicle has a range of aluminum com-
ponen ts. Aluminum components in the
engine make it necessary to use antifreeze/
corrosion inhibitor that has been specifically
formulated to protect the aluminum parts.
Failure to use such anticorrosion/antifreeze
coolant will result in a significantly shortened
service life.
The coolant must be used throughout the year
in order to maintain the necessary corrosion
protection and to provide protection from
overheating. In the Maintenance Booklet, you can find information on the intervals for
renewal.
The renewal interval is determined by the
coolant type and the engine cooling system
design. The renewal interval in the Mainte-
nance Booklet is only valid if the coolant is
renewed or added to with Mercedes-Benz
approved products. Therefore, only use MB
326.0 antifreeze/corrosion inhibitor or
another Mercedes-Benz approved product of the same specification.
Information on other products with the same
specifications that are approved by
Mercedes-Benz can be obtained at an author- ized Mercedes-Benz Center or on the Internet at http://bevo.mercedes-benz.com.
If the coolant level is too low, MB 325.0 anti-
freeze/corrosion inhibitor should be added.
Have the engine cooling system checked for
possible leaks.
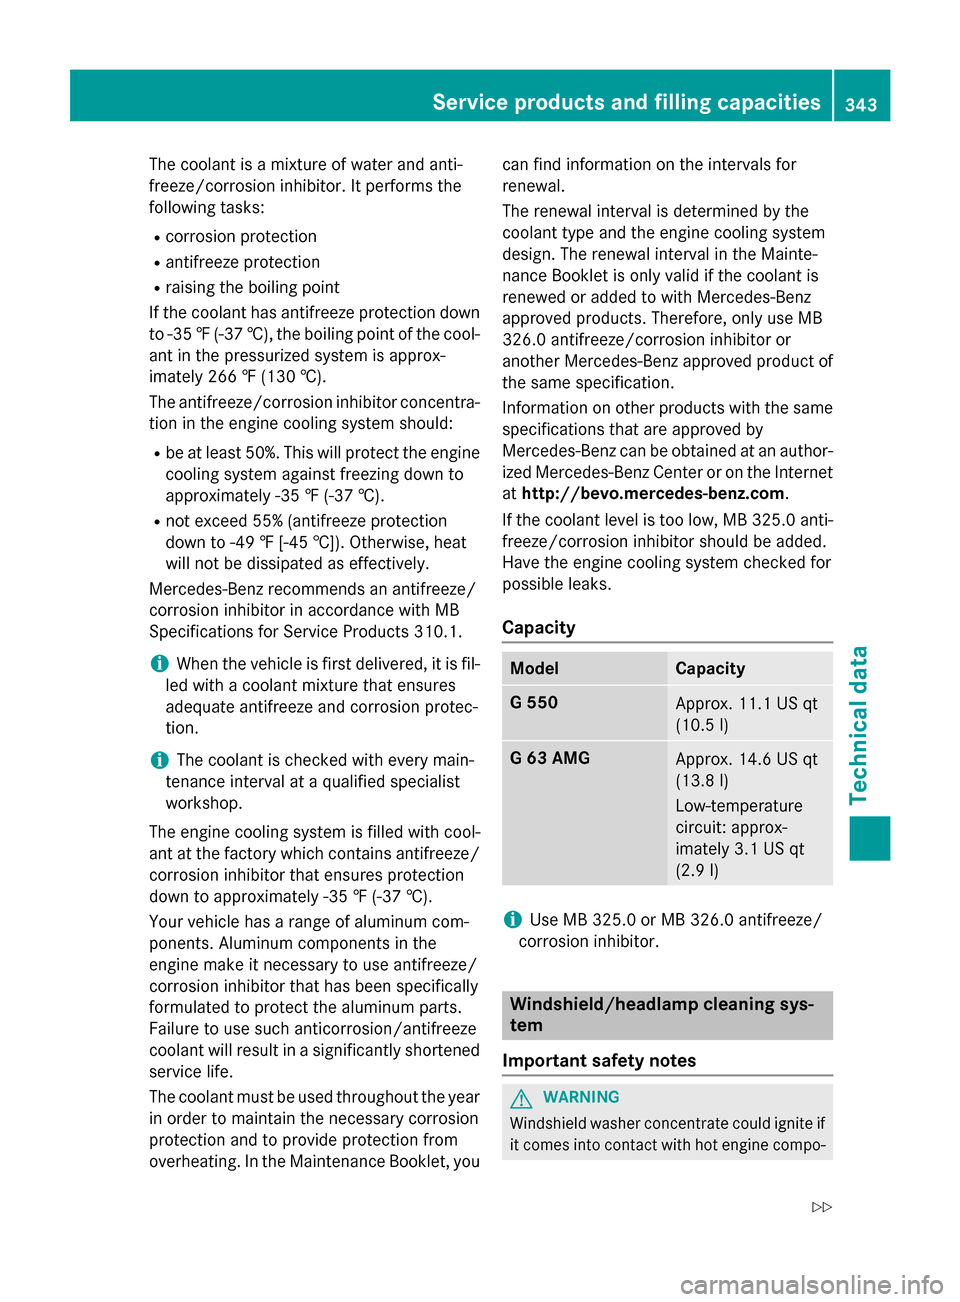
Capacity Model Capacity
G 550
Approx. 11.1 US qt
(10.5 l)
G 63 AMG
Approx. 14.6 US qt
(13.8 l)
Low-temperature
circuit: approx-
imately 3.1 US qt
(2.9 l)
i
Use MB 325.0 or MB 326.0 antifreeze/
corrosion inhibitor. Windshield/headlamp cleaning sys-
tem
Important safety notes G
WARNING
Windshield washer concentrate could ignite if it comes into contact with hot engine compo- Service products and filling capacities
343Technical data
Z