flat tire MERCEDES-BENZ G-CLASS 2018 User Guide
[x] Cancel search | Manufacturer: MERCEDES-BENZ, Model Year: 2018, Model line: G-CLASS, Model: MERCEDES-BENZ G-CLASS 2018Pages: 294, PDF Size: 4.86 MB
Page 248 of 294
XMake sure that tab;is below when re-
installing cover ring :(Ypage 245).
XFor safety reasons, regularly check to ensure
that the wheel is securely fastened.
Flat tire
Preparing the vehicle
Observe the notes on changing a wheel
(Ypage 275).
XStop the vehicle on solid, non-slippery and
level ground, as far away as possible from
traffic.
XSwitch on the hazard warning lamps.
XSecure the vehicle against rolling away
(Ypage 122).
XIf possible, bring the front wheels into the
straight-ahead position.
XSwitch off the engine.
XRemove the SmartKey from the ignition lock.
The steering wheel lock stays active for as
long as the SmartKey is removed.
XMake sure that the passengers are not endan-
gered as they do so. Make sure that no one is
near the danger area while a wheel is being
changed. Anyone who is not directly assisting
in the wheel change should, for example,
stand behind the barrier.
XGet out of the vehicle. Pay attention to traffic
conditions when doing so.
XClose the driver's door.
XPlace the warning triangle a suitable distance
away (Ypage 243). Observe legal require-
ments.
Battery (vehicle)
Important safety notes
Special tools and expert knowledge are required
when working on the battery, e.g. removal and
installation. You should therefore have all work
involving the battery carried out at a qualified
specialist workshop.
GWARNING
Work carried out incorrectly on the battery
can lead, for example, to a short circuit and
thus damage the vehicle electronics. This can
lead to function restrictions applying to
safety-relevant systems, e.g. the lighting sys-
tem, the ABS (anti-lock braking system) or the
ESP
®(Electronic Stability Program). The oper-
ating safety of your vehicle may be restricted.
You could lose control of the vehicle, for
example:
Rwhen braking
Rin the event of abrupt steering maneuvers
and/or when the vehicle's speed is not
adapted to the road conditions
There is a risk of an accident.
In the event of a short circuit or a similar inci- dent, contact a qualified specialist workshop
immediately. Do not drive any further. You
should have all work involving the battery car-
ried out at a qualified specialist workshop.
For further information about ABS and ESP
®,
see (Ypage 58) and (Ypage 59).
GWARNING
Electrostatic build-up can lead to the creation of sparks, which could ignite the highly explo-
sive gases of a battery. There is a risk of an
explosion.
Before handling the battery, touch the vehicle
body to remove any existing electrostatic
build-up.
The highly flammable gas mixture forms when
charging the battery as well as when jump-start-
ing.
Always make sure that neither you nor the bat-
tery is electrostatically charged. A build-up of
electrostatic charge can be caused, for exam-
ple:
Rby wearing clothing made from synthetic
fibers
Rdue to friction between clothing and seats
Rif you push or pull the battery across the car-
pet or other synthetic materials
Rif you rub the battery with a cloth
GWARNING
During the charging process, a battery produ-
ces hydrogen gas. If a short circuit occurs or
246Battery (vehicle)
Breakdown assistance
Page 259 of 294
Important safety notes
GWARNING
If wheels and tires of th ewrong siz eare used,
th ewhee lbrakes or suspension component s
may be damaged. Ther eis aris kof an acci-
dent.
Always replace wheels and tires wit hthose
that fulfill th especification sof th eoriginal
part .
When replacing wheels, mak esur eto use th e
correct:
Rdesignation
Rmodel
When replacing tires ,mak esur eto use th e
correct:
Rdesignation
Rmanufacturer
Rmodel
GWarning
A flat tire severely impairs th edriving ,steer -
ing and braking characteristics of th evehicle.
Ther eis aris kof an accident.
do no tdriv ewit h a flat tire. Immediately
replace th eflat tire wit hyour spar ewheel, or
consult aqualified specialist workshop.
Accessories that are no tapprove dfor your vehi-
cle by Mercedes-Ben zor are no tbein gused cor-
rectl ycan impair th eoperating safety.
Before purchasing and usin gnon-approve d
accessories, visit aqualified specialist work-
sho pand ask about :
Rsuitability
Rlegal stipulation s
Rfactory recommendation s
Further information regarding wheels and tires
can be foun dunder "Wheel/tire combinations"
(
Ypage 279).
You can ask for information regarding permitte d
wheel/tire combination sat an authorize d
Mercedes-Ben zCenter. Information on tire pressur
ecan be found:
Ron th eTir eand Loading Information placard
on th eB-pillar on th edriver' sside
(
Ypage 266)
Rin th etire pressur etable in th efuel filler flap
(Ypage 120)
Runder "Tir epressure" (Ypage 260)
Operation
Information on driving
Checkth etire pressur ewhen th evehicl eis
heavily laden and adjust prio rto atrip.
While driving ,pay attention to vibrations, noises
and unusual handlin gcharacteristics ,e.g. pull-
ing to on eside .This may indicat ethat th e
wheels or tires are damaged. If you suspec tthat
a tire is defective, reduce your spee dimmedi-
ately. Stop th evehicl eas soo nas possible to
chec kth ewheels and tires for damage. Hidden
tire damag ecould also be causing th eunusual
handlin gcharacteristics .If you fin dno sign sof
damage, hav eth etires and wheels checke dat a
qualified specialist workshop.
When parking your vehicle, mak esur ethat th e
tires do no tget deformed by th ecur bor other
obstacles. If they canno tbe avoided, driv eove r
obstacles suc has curbs slowly and at an obtuse
angle. You could otherwise damag eth ewhee l
rim sand tires .
Regular checking of wheels and tires
GWARNIN G
Damaged tires can caus etire inflation pres-
sur eloss .As aresult ,you could lose control of
your vehicle. Ther eis aris kof accident.
Chec kth etires regularly for sign sof damag e
and replace any damaged tires immediately.
Chec kwheels and tires for damag eat least once
a month .Chec kwheels and tires after driving
off-road or on roug hroads. Damaged wheels
can caus e aloss of tire pressure.
Pay particular attention to damag esuc has:
Rcut sin th etires
Rpunctures in th etires
Rtears in th etires
Operation257
Wheels and tires
Z
Page 261 of 294
Drivingwit hsummer tire s
At temperature sbelo w45 ‡(+7 †), elasticity in
summer tires is significantly lower and thus also
traction and braking power. Change the tires on
your vehicle to M+S tires. Using summer tires at
very cold temperatures could cause cracks to
form, thereby damaging the tires permanently.
Mercedes-Benz cannot accept responsibility for
this type of damage.
GWARNING
Damaged tires can cause tire inflation pres-
sure loss. As a result, you could lose control of
your vehicle. There is a risk of accident.
Check the tires regularly for signs of damage
and replace any damaged tires immediately.
M+S tires
GWARNING
M+S tires with a tire tread depth of less than
ã in (4 mm) are not suitable for use in winter
and do not provide sufficient traction. There is
a risk of an accident.
M+S tires with a tread depth of less than ãin
(4 mm) must be replaced immediately.
GWARNING
Wheel and tire dimensions as well as the type of tire can vary between the spare wheel and
the wheel to be replaced. When the spare
wheel is mounted, driving characteristics may be severely affected. There is a risk of an acci-
dent.
In order to reduce risks:
Ryou should therefore adapt your driving
style and drive carefully.
Rnever mount more than one spare wheel
that differs from the wheel to be replaced.
Ronly use a spare wheel that differs from the
wheel to be replaced for a short time.
Rdo not deactivate ESP®.
Rhave a spare wheel that differs from the
wheel that has been changed replaced at
the nearest qualified specialist workshop.
You must observe the correct wheel and
tire dimensions as well as the wheel type.
Do not exceed a maximum speed of 50 mph
(80 km/h) if a spare wheel of a different size is
installed.
At temperatures below 45 ‡(+7 †), use winter
tires or all-season tires. Both types of tire are
identified by the M+S marking.
Only winter tires bearing the isnowflake
symbol in addition to the M+S marking provide
the best possible grip in wintry road conditions.
Only these tires will allow driving safety systems
such as ABS and ESP
®to function optimally in
winter. These tires have been developed specif-
ically for driving in snow.
Use M+S tires of the same make and tread on all
wheels to maintain safe handling characteris-
tics.
Always observe the maximum permissible
speed specified for the M+S tires you have
mounted.
When you have mounted the M+S tires:
XCheck the tire pressures (Ypage 263).
XRestart the tire pressure monitor
(Ypage 265).
Snow chains
GWARNING
If you drive too fast with snow chains moun-
ted, they may snap. As a result, you could
injure others and damage the vehicle. There is
a risk of an accident.
Observe the maximum permissible speed for
operation with snow chains.
!Information about the use of snow chain
compatible AMG winter tires is applicable for
AMG tires. Use of snow chains is only per-
missible with these tires.
!On some tire sizes there is not enough space
for snow chains. To avoid damage to the vehi- cle or tires, observe the "Wheel and tire com-
binations" section under "Tires and wheels".
Winter operation259
Wheels and tires
Z
Page 262 of 294
!Check the snow chains for damage before
mounting them. Damaged or worn snow
chains may snap and damage the following
components:
Rwheel
Rwheel housing
Rwheel suspension
For this reason, you must use only snow
chains that are free of defects. Observe the
manufacturer's mounting instructions.
For safety reasons, Mercedes-Benz recom-
mends that you only use snow chains that have
been specially approved for your vehicle by
Mercedes-Benz, or are of a corresponding
standard of quality. For more information,
please contact a qualified specialist workshop.
If you intend to mount snow chains, please bear
the following points in mind:
RSnow chains may not be mounted on all
wheel/tire combinations. Observe the infor-
mation regarding permitted wheel/tire com-
binations (
Ypage 279).
RInstall the snow chains on all four wheels for
maximum tractive power and driving stability.
If you only have two snow chains, install these
as a pair on the rear wheels. The vehicle then
remains more stable under braking.
ROnly use snow chains when driving on roads
completely covered by snow. Remove the
snow chains as soon as possible when you
come to a road that is not snow-covered.
RLocal regulations may restrict the use of snow
chains. Observe the appropriate regulations if
you wish to mount snow chains.
RDo not exceed the maximum permissible
speed of 30 mph (50 km/h).
You may wish to deactivate ESP
®when pulling
away with snow chains installed (Ypage 59).
You can thereby allow the wheels to spin in a
controlled manner, achieving an increased driv- ing force (cutting action).
Tire pressure
Tire pressure specifications
Important safety notes
GWARNING
Underinflated or overinflated tires pose the
following risks:
Rthe tires may burst, especially as the load
and vehicle speed increase.
Rthe tires may wear excessively and/or
unevenly, which may greatly impair tire
traction.
Rthe driving characteristics, as well as steer-
ing and braking, may be greatly impaired.
There is a risk of an accident.
Follow recommended tire inflation pressures
and check the pressure of all the tires includ-
ing the spare wheel:
Rmonthly, at least
Rif the load changes
Rbefore beginning a long journey
Runder different operating conditions, e.g.
off-road driving
If necessary, correct the tire pressure.
The data on the Tire and Loading Information
placard and tire pressure table shown here are
examples. Tire pressure specifications are vehi-
cle-specific and may deviate from the data
shown here. The tire pressure specifications
that are valid for your vehicle can be found on
the Tire and Loading Information placard and
tire pressure table on the vehicle.
General notes
The recommended tire pressures for the tires
mounted at the factory can be found on the
labels described here.
Operation with a trailer: the applicable value
for the rear axle is the maximum tire pressure
value stated in the table inside the fuel filler flap.
Further information on tire pressures can be
obtained at a qualified specialist workshop.
260Tire pressure
Wheels and tires
Page 264 of 294
not permit any reliable conclusion about the tire
pressure. On vehicles equipped with the elec-
tronic tire pressure monitor, the tire pressure
can be checked in the on-board computer.
The tire temperature and pressure increase
when the vehicle is in motion. This is dependent
on the driving speed and the load.
Therefore, you should only correct tire pres-
sures when the tires are cold.
The tires are cold:
Rif the vehicle has been parked without direct
sunlight on the tires for at least three hours
and
Rif the vehicle has not been driven further than
1 mile (1.6 km)
The tire temperature changes depending on the outside temperature, the vehicle speed and the
tire load. If the tire temperature changes by
18 ‡ (10 †), the tire pressure changes by
approximately 10 kPa (0.1 bar/1.5 psi). Take
this into account when checking the pressure of
warm tires. Only correct the tire pressure if it is
too low for the current operating conditions. If
you check the tire pressure when the tires are
warm, the resulting value will be higher than if
the tires were cold. This is normal. Do not
reduce the tire pressure to the value specified
for cold tires. The tire pressure would otherwise
be too low.
Observe the recommended tire pressures for
cold tires:
Ron the Tire and Loading Information placard
on the B-pillar on the driver's side
Rin the tire pressure table in the fuel filler flap
(Ypage 120)
Underinflated or overinflated tires
Underinflated tires
GWARNING
Tires with pressure that is too low can over-
heat and burst as a consequence. In addition, they also suffer from excessive and/or irreg-
ular wear, which can severely impair the brak-
ing properties and the driving characteristics.
There is a risk of an accident.
Avoid tire pressures that are too low in all the
tires, including the spare wheel. Underinflated tires may:
Roverheat, leading to tire defects
Radversely affect handling
Rwear excessively and/or unevenly
Rhave an adverse effect on fuel consumption
Overinflated tires
GWARNING
Tires with excessively high pressure can burst
because they are damaged more easily by
road debris, potholes etc. In addition, they
also suffer from irregular wear, which can
severely impair the braking properties and the driving characteristics. There is a risk of an
accident.
Avoid tire pressures that are too high in all the
tires, including the spare wheel.
Overinflated tires may:
Rincrease the braking distance
Radversely affect handling
Rwear excessively and/or unevenly
Rhave an adverse effect on ride comfort
Rbe more likely to become damaged
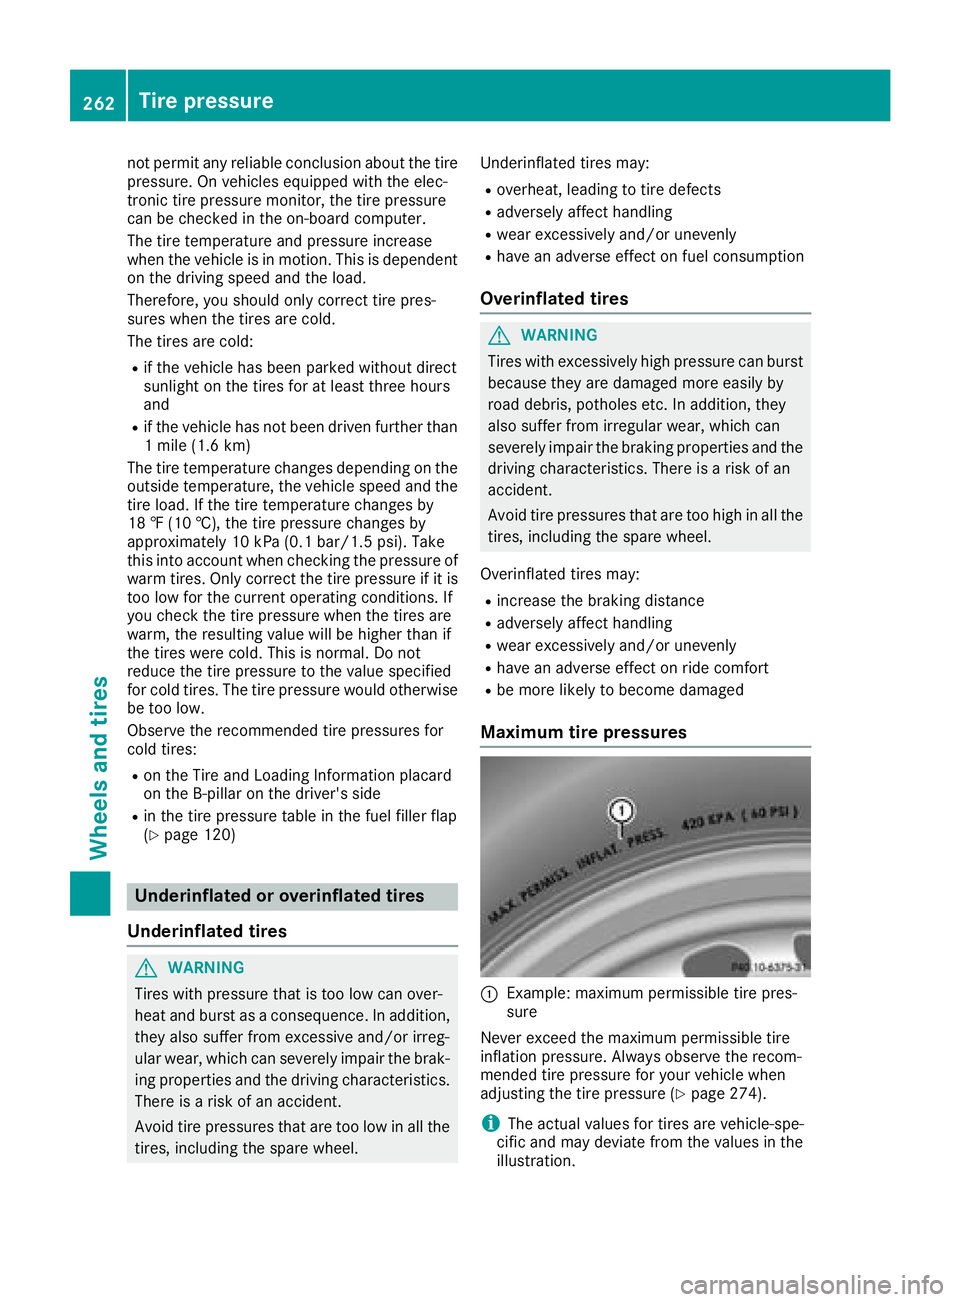
Maximum tire pressures
:Example: maximum permissible tire pres-
sure
Never exceed the maximum permissible tire
inflation pressure. Always observe the recom-
mended tire pressure for your vehicle when
adjusting the tire pressure (
Ypage 274).
iThe actual values for tires are vehicle-spe-
cific and may deviate from the values in the
illustration.
262Tire pressure
Wheels and tires
Page 265 of 294
Checking the tire pressures
Important safety notes
Observe the notes on tire pressure
(Ypage 260).
Information on air pressure for the tires on your
vehicle can be found:
Ron the vehicle's Tire and Loading Information
placard on the B-pillar
Rin the tire pressure table in the fuel filler flap
(Ypage 120)
Runder "Tire pressure" (Ypage 260)
Checking tire pressures manually
To determine and set the correct tire pressure,
proceed as follows:
XRemove the valve cap of the tire that is to be
checked.
XPress the tire pressure gage securely onto the
valve.
XRead the tire pressure and compare it to the
recommended value on the Tire and Loading
Information placard or the tire pressure table
(
Ypage 260).
XIf the tire pressure is too low, increase the tire
pressure to the recommended value.
XIf the tire pressure is too high, release air. To
do so, press down the metal pin in the valve,
using the tip of a pen for example. Then check
the tire pressure again using the tire pressure
checker.
XScrew the valve cap onto the valve.
XRepeat these steps for the other tires.
Tire pressure monitor
General notes
If a tire pressure monitor is installed, the vehi-
cle's wheels have sensors that monitor the tire
pressures in all four tires. The tire pressure mon-
itor warns you if the pressure drops in one or
more of the tires. The tire pressure monitor only
functions if the corresponding sensors are
installed in all wheels.
Information on tire pressures is displayed in the
multifunction display. After a few minutes of
driving, the current tire pressure of each wheel
is shown in the Serv.
menu.
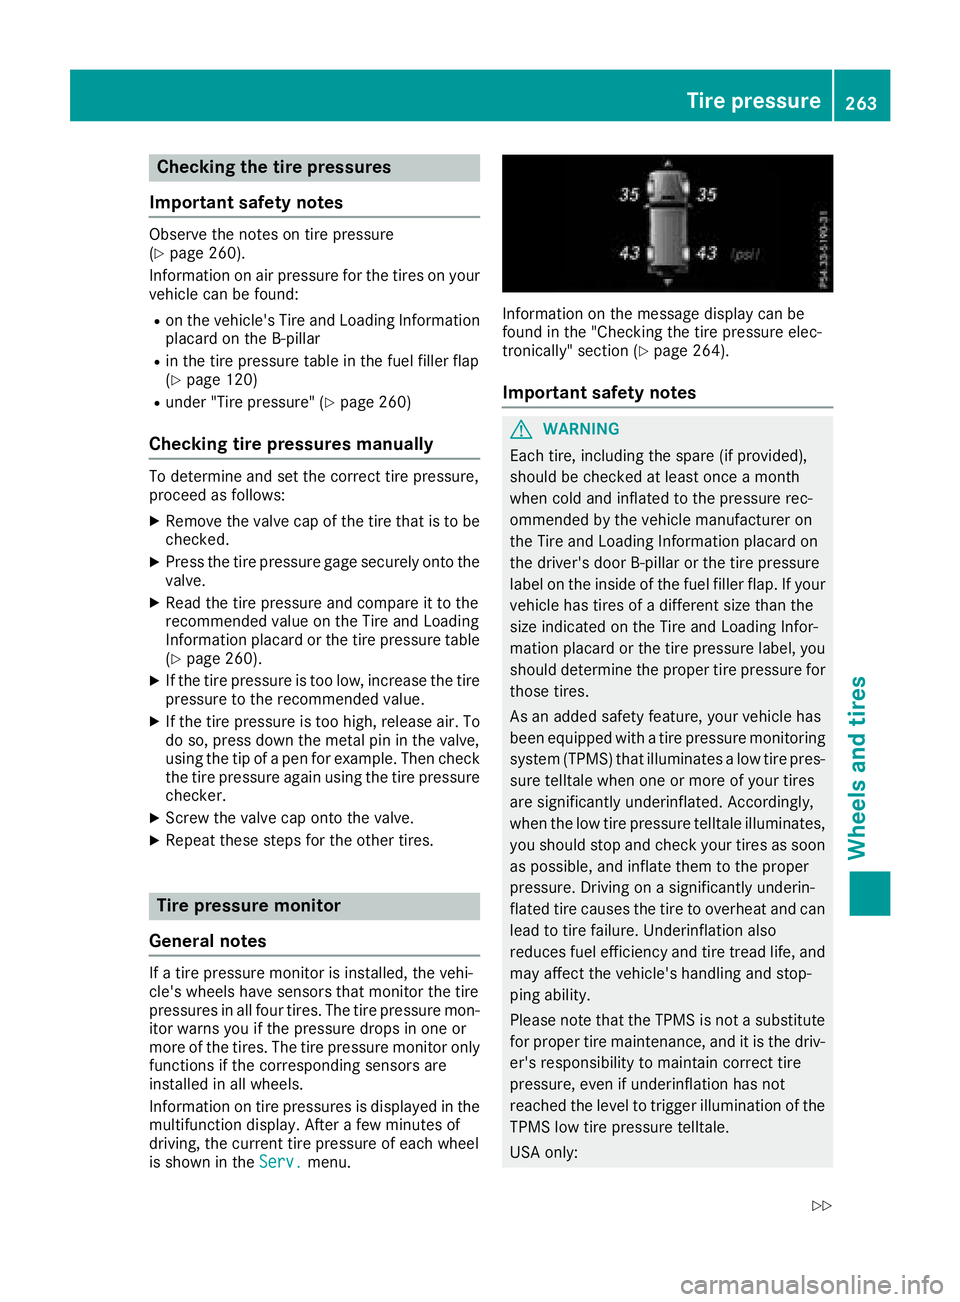
Information on the message display can be
found in the "Checking the tire pressure elec-
tronically" section (
Ypage 264).
Important safety notes
GWARNING
Each tire, including the spare (if provided),
should be checked at least once a month
when cold and inflated to the pressure rec-
ommended by the vehicle manufacturer on
the Tire and Loading Information placard on
the driver's door B-pillar or the tire pressure
label on the inside of the fuel filler flap. If your
vehicle has tires of a different size than the
size indicated on the Tire and Loading Infor-
mation placard or the tire pressure label, you
should determine the proper tire pressure for
those tires.
As an added safety feature, your vehicle has
been equipped with a tire pressure monitoring
system (TPMS) that illuminates a low tire pres-
sure telltale when one or more of your tires
are significantly underinflated. Accordingly,
when the low tire pressure telltale illuminates,
you should stop and check your tires as soon
as possible, and inflate them to the proper
pressure. Driving on a significantly underin-
flated tire causes the tire to overheat and can lead to tire failure. Underinflation also
reduces fuel efficiency and tire tread life, and
may affect the vehicle's handling and stop-
ping ability.
Please note that the TPMS is not a substitute
for proper tire maintenance, and it is the driv-
er's responsibility to maintain correct tire
pressure, even if unde rinf
lation has not
reached the level to trigger illumination of the
TPMS low tire pressure telltale.
USA only:
Tire pressure263
Wheels and tires
Z
Page 271 of 294
All about wheels and tires
UniformTire Quality Grading Stand-
ards
Overview ofTire Quality Grading Stand-
ards
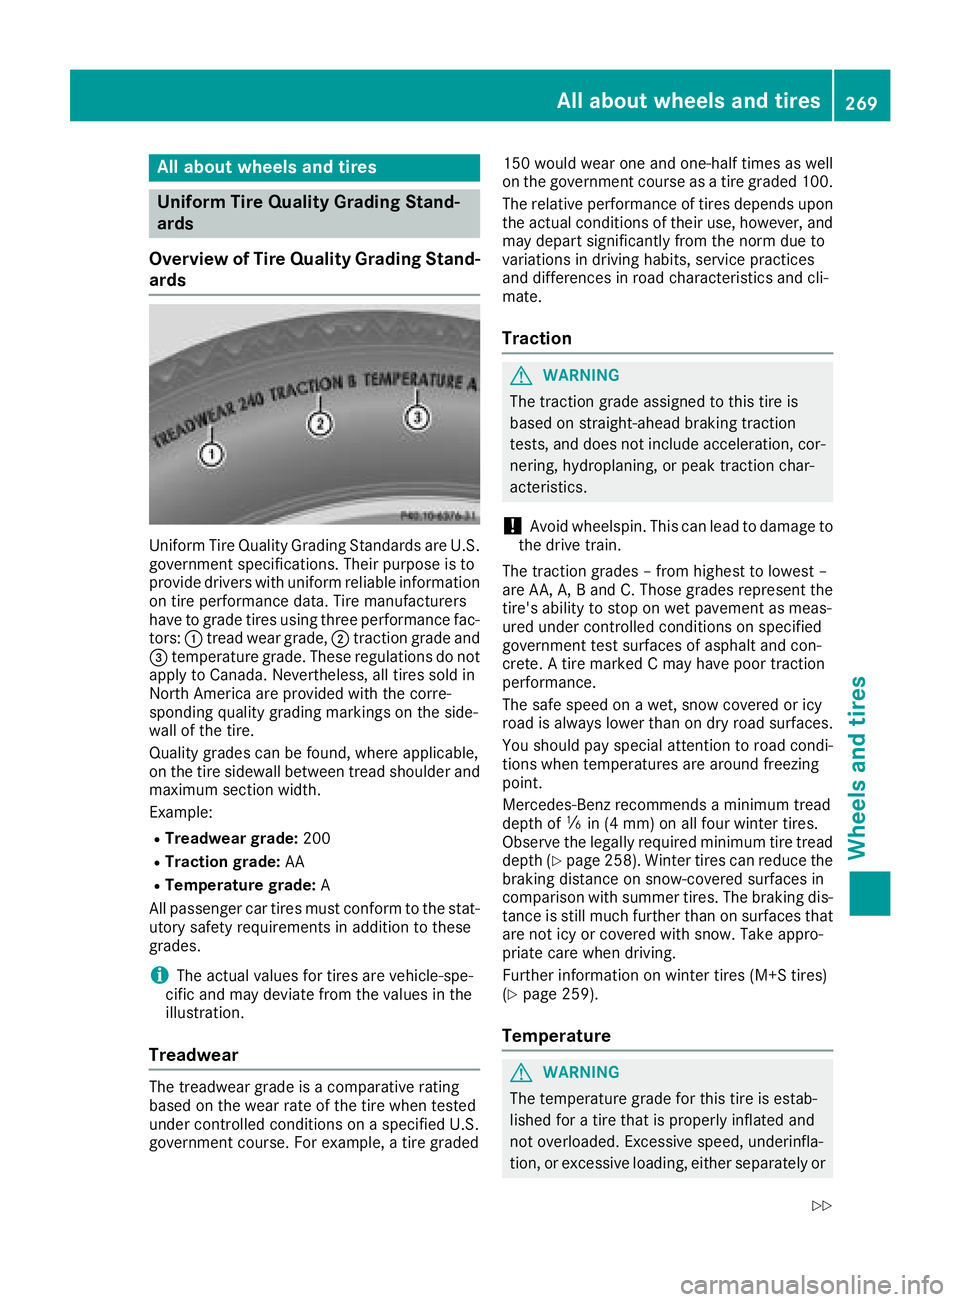
Uniform Tir eQuality Grading Standards are U.S.
governmen tspecifications. Their purpose is to
provid edriver swit hunifor mreliable information
on tire performance data. Tir emanufacturers
hav eto grad etires usin gthree performance fac -
tors: :tread wear grade, ;traction grad eand
= temperature grade. These regulation sdo no t
apply to Canada. Nevertheless, all tires sold in
North America are provided wit hth ecorre-
sponding qualit ygrading marking son th eside -
wall of th etire.
Quality grades can be found, wher eapplicable,
on th etire sidewall between tread shoulder and
maximum section width.
Example:
RTreadwear grade: 200
RTraction grade: AA
RTemperaturegrade: A
All passenger car tires mus tconform to th estat-
utory safet yrequirements in addition to these
grades.
iThe actual value sfor tires are vehicle-spe-
cific and may deviat efrom th evalue sin th e
illustration .
Treadwear
The treadwear grad eis acomparative rating
base don th ewear rat eof th etire when tested
under controlled condition son aspecifie dU.S.
governmen tcourse. Fo rexample, atire graded 15
0would wear on eand one-half times as well
on th egovernmen tcours eas atire graded 100.
The relative performance of tires depend supon
th eactual condition sof their use, however ,and
may depar tsignificantly from th enorm due to
variation sin drivin ghabits, servic epractice s
and difference sin road characteristics and cli -
mate.
Traction
GWARNIN G
The traction grad eassigned to this tire is
base don straight-ahead braking traction
tests, and does no tinclude acceleration ,cor-
nering, hydroplaning ,or peak traction char-
acteristics .
!Avoid wheelspin. This can lead to damag eto
th edrive train .
The traction grades –from highest to lowes t –
are AA ,A, Band C. Those grades represen tth e
tire' sabilit yto stop on wet pavemen tas meas -
ured under controlled condition son specifie d
governmen ttest surfaces of asphalt and con-
crete. Atire marke d Cmay hav epoor traction
performance .
The saf espee don awet ,snow covered or icy
road is always lower than on dry road surfaces.
You should pay special attention to road condi-
tion swhen temperatures are around freezing
point.
Mercedes-Benz recommends aminimum tread
dept hof ã in (4 mm) on all four winte rtires .
Observ eth elegally require dminimum tire tread
dept h (
Ypage 258). Winte rtires can reduce th e
braking distanc eon snow-covered surfaces in
comparison wit hsummer tires .The braking dis-
tance is still muc hfurther than on surfaces that
are no ticy or covered wit hsnow. Tak eappro-
priate car ewhen driving.
Further information on winte rtires (M+ Stires )
(
Ypage 259).
Temperature
GWARNIN G
The temperature grad efor this tire is estab-
lished for atire that is properly inflated and
no toverloaded. Excessive speed, underinfla-
tion ,or excessive loading ,either separately or
All about wheels and tires269
Wheels and tires
Z
Page 277 of 294
PSI (pounds per square inch)
A standard unit of measure for tire pressure.
Aspect ratio
Relationship between tire height and tire width
in percent.
Tire pressure
This is pressure inside the tire applying an out-
ward force to each square inch of the tire's sur-
face. The tire pressure is specified in pounds per
square inch (psi), in kilopascals (kPa) or in bar.
The tire pressure should only be corrected when
the tires are cold.
Cold tire pressure
The tires are cold:
Rif the vehicle has been parked with the tires
out of direct sunlight for at least three hours
and
Rif the vehicle has not been driven further than
1 mile (1.6 km)
Tread
The part of the tire that comes into contact with
the road.
Bead
The tire bead ensures that the tire sits securely
on the wheel. There are several steel wires in the
bead to prevent the tire from coming loose fromthe wheel rim.
Sidewall
The part of the tire between the tread and the
bead.
Weight of optional extras
The combined weight of those optional extras
that weigh more than the replaced standard
parts and more than 2.3 kg (5 lbs). These
optional extras, such as high-performance
brakes, level control, a roof rack or a high-per-
formance battery, are not included in the curb
weight and the weight of the accessories.
TIN (Tire Identification Number)
This is a unique identifier which can be used by
a tire manufacturer to identify tires, for example
for a product recall, and thus identify the pur-
chasers. The TIN is made up of the manufactur-
er's identity code, tire size, tire type code and
the manufacturing date.
Load bearing index
The load bearing index (also load index) is a code
that contains the maximum load bearing capa-
city of a tire.
Traction
Traction is the result of friction between the tires
and the road surface.
TWR (Tongue Weight Rating)
The TWR specifies the maximum permissible
weight that the ball coupling of the trailer tow
hitch can support.
Treadwear indicators
Narrow bars (tread wear bars) that are distrib-
uted over the tire tread. If the tire tread is level
with the bars, the wear limit of áin (1.6 mm)
has been reached.
Occupant distribution
The distribution of occupants in a vehicle at their
designated seating positions.
Total load limit
Nominal load and luggage load plus 68 kg
(150 lbs) multiplied by the number of seats in
the vehicle.
Changing a wheel
Flat tire
You can find information on what to do in the
event of a flat tire in the "Breakdown assistance"
section (
Ypage 246).
Rotating the wheels
GWARNING
Interchanging the front and rear wheels may
severely impair the driving characteristics if
the wheels or tires have different dimensions. The wheel brakes or suspension components
may also be damaged. There is a risk of acci-
dent.
Rotate front and rear wheels only if the wheels and tires are of the same dimensions.
Changing a wheel275
Wheels and tires
Z
Page 279 of 294
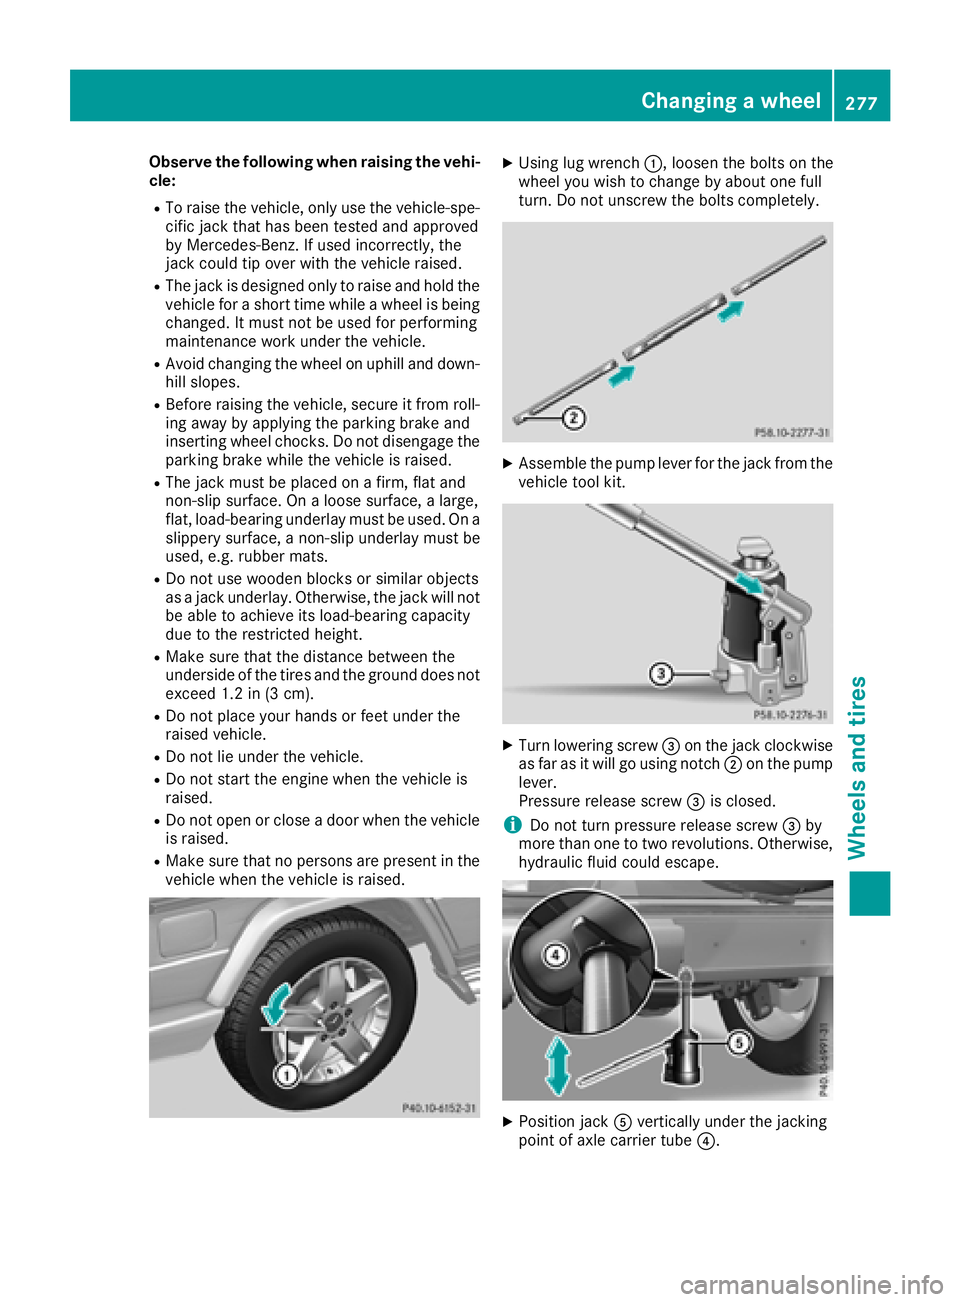
Observe the following when raising the vehi-
cle:
RTo raise the vehicle, only use the vehicle-spe-
cific jack that has been tested and approved
by Mercedes-Benz. If used incorrectly, the
jack could tip over with the vehicle raised.
RThe jack is designed only to raise and hold the
vehicle for a short time while a wheel is being
changed. It must not be used for performing
maintenance work under the vehicle.
RAvoid changing the wheel on uphill and down-
hill slopes.
RBefore raising the vehicle, secure it from roll-
ing away by applying the parking brake and
inserting wheel chocks. Do not disengage the
parking brake while the vehicle is raised.
RThe jack must be placed on a firm, flat and
non-slip surface. On a loose surface, a large,
flat, load-bearing underlay must be used. On a
slippery surface, a non-slip underlay must be
used, e.g. rubber mats.
RDo not use wooden blocks or similar objects
as a jack underlay. Otherwise, the jack will not
be able to achieve its load-bearing capacity
due to the restricted height.
RMake sure that the distance between the
underside of the tires and the ground does not
exceed 1.2 in (3 cm).
RDo not place your hands or feet under the
raised vehicle.
RDo not lie under the vehicle.
RDo not start the engine when the vehicle is
raised.
RDo not open or close a door when the vehicle is raised.
RMake sure that no persons are present in the
vehicle when the vehicle is raised.
XUsing lug wrench :, loosen the bolts on the
wheel you wish to change by about one full
turn. Do not unscrew the bolts completely.
XAssemble the pump lever for the jack from the vehicle tool kit.
XTurn lowering screw =on the jack clockwise
as far as it will go using notch ;on the pump
lever.
Pressure release screw =is closed.
iDo not turn pressure release screw =by
more than one to two revolutions. Otherwise,
hydraulic fluid could escape.
XPosition jack Avertically under the jacking
point of axle carrier tube ?.
Changing a wheel277
Wheels and tires
Z