remote start MERCEDES-BENZ G-CLASS 2018 Owner's Manual
[x] Cancel search | Manufacturer: MERCEDES-BENZ, Model Year: 2018, Model line: G-CLASS, Model: MERCEDES-BENZ G-CLASS 2018Pages: 294, PDF Size: 4.86 MB
Page 17 of 294
R
RACE TIMER (on-board computer,
Mercedes-AMG vehicles).................. 172
RACETIMER
Deleting all laps .............................1 72
Displaying and starting .................. 172
Displaying the intermediate time ... 172
Resetting the current lap ...............1 72
Starting a new lap .......................... 172
Stopping ........................................ 172
Radiator cover ................................... 231
Radio
Selecting a station ......................... 165
Radio mode
see also Digital Operator's Man-
ual ..................................................2 03
Radio-wave reception/transmis-
sion in the vehicle
Declaration of conformity ................ 26
Rear bench seat
Folding forward .............................. 213
Rear compartment
Setting the air vents ......................1 03
Rear door
Display message ............................ 190
Important safety notes .................... 68
Rear fog lamp
Display message ............................ 180
Replacing bulbs ............................... 92
Switching on/off .............................. 87
Rear seat bench
Folding into an upright position ..... 213
Rear view camera
Cleaning instructions ..................... 240
Coupling up a trailer function ........1 48
Display in the multimedia system .. 147
Function/notes .............................1 46
General notes ................................ 146
Switching on/off ........................... 147
Rear window defroster
Problem (malfunction) ................... 101
Switching on/off ........................... 101
Rear window wiper
Replacing the wiper blade ................ 94
Switching on/off .............................. 94
Rear-view mirror
Dipping (automatic) ......................... 83 Reflective safety jacket
.................... 243
Refrigerant (air-conditioning sys-
tem)
Important safety notes .................. 287
Refueling
Fuel gauge ....................................... 32
Important safety notes .................. 120
R
efueling process .......................... 120
see Fuel
Remote control
Programming (garage door
opener) .......................................... 227
Replacing bulbs
Backup lamp .................................... 92
Brake lamp ...................................... 92
Important safety notes .................... 89
Overview of bulb types .................... 90
Rear fog lamp .................................. 92
Tail lamp .......................................... 92
Turn signal (rear) .............................. 92
Turn signals (front) ........................... 91
Reporting safety defects .................... 27
Rescue card ......................................... 28
Reserve (fuel tank)
see Fuel
Reserve fuel
Display message ............................ 183
Warning lamp ................................. 199
Residual heat
Switching on/off ........................... 102
Restraint system
Display message ............................ 177
Introduction ..................................... 38
Warning lamp ................................. 198
Warning lamp (function) ................... 38
Reversing lamps (display mes-
sage) ................................................... 180
Roadside Assistance (breakdown) .... 25
Roof lining and carpets (cleaning
guidelines) ......................................... 242
Route (navigation)
see Route guidance (navigation)
Route guidance
see also Digital Operator's Man-
ual .................................................. 203
Route guidance (navigation) ............ 164
Route guidance active ...................... 164
Index15
Page 65 of 294
SmartKey
Important safety notes
GWARNING
If children are left unsupervised in the vehicle,
they could:
Ropen the doors, thus endangering other
people or road users.
Rget out and disrupt traffic.
Roperate the vehicle's equipment.
Additionally, children could set the vehicle in
motion if, for example, they:
Rrelease the parking brake.
Rshifting the automatic transmission out of
park position P
RStart the engine.
There is a risk of an accident and injury.
When leaving the vehicle, always take the
SmartKey with you and lock the vehicle. Never
leave children or animals unattended in the
vehicle. Always keep the SmartKey out of
reach of children.
GWARNING
If you attach heavy or large objects to the
SmartKey, the SmartKey could be uninten-
tionally turned in the ignition lock. This could
cause the engine to be switched off. There is a risk of an accident.
Do not attach any heavy or large objects to the
SmartKey. Remove any bulky key rings before
inserting the SmartKey into the ignition lock.
!Keep the SmartKey away from strong mag-
netic fields. Otherwise, the remote control
function could be affected.
Strong magnetic fields can occur in the vicin-
ity of powerful electrical installations.
Do not keep the SmartKey:
Rwith electronic devices, e.g. a mobile phone
or another SmartKey.
Rwith metallic objects, e.g. coins or metal foil.
Rinside metallic objects, e.g. a metal case.
This can affect the functionality of the Smart- Key. A check which periodically establishes a radio
connection between the vehicle and the Smart-
Key determines whether a valid SmartKey is in
the vehicle. This occurs, for example:
Rwhen starting the engine
Rwhile driving
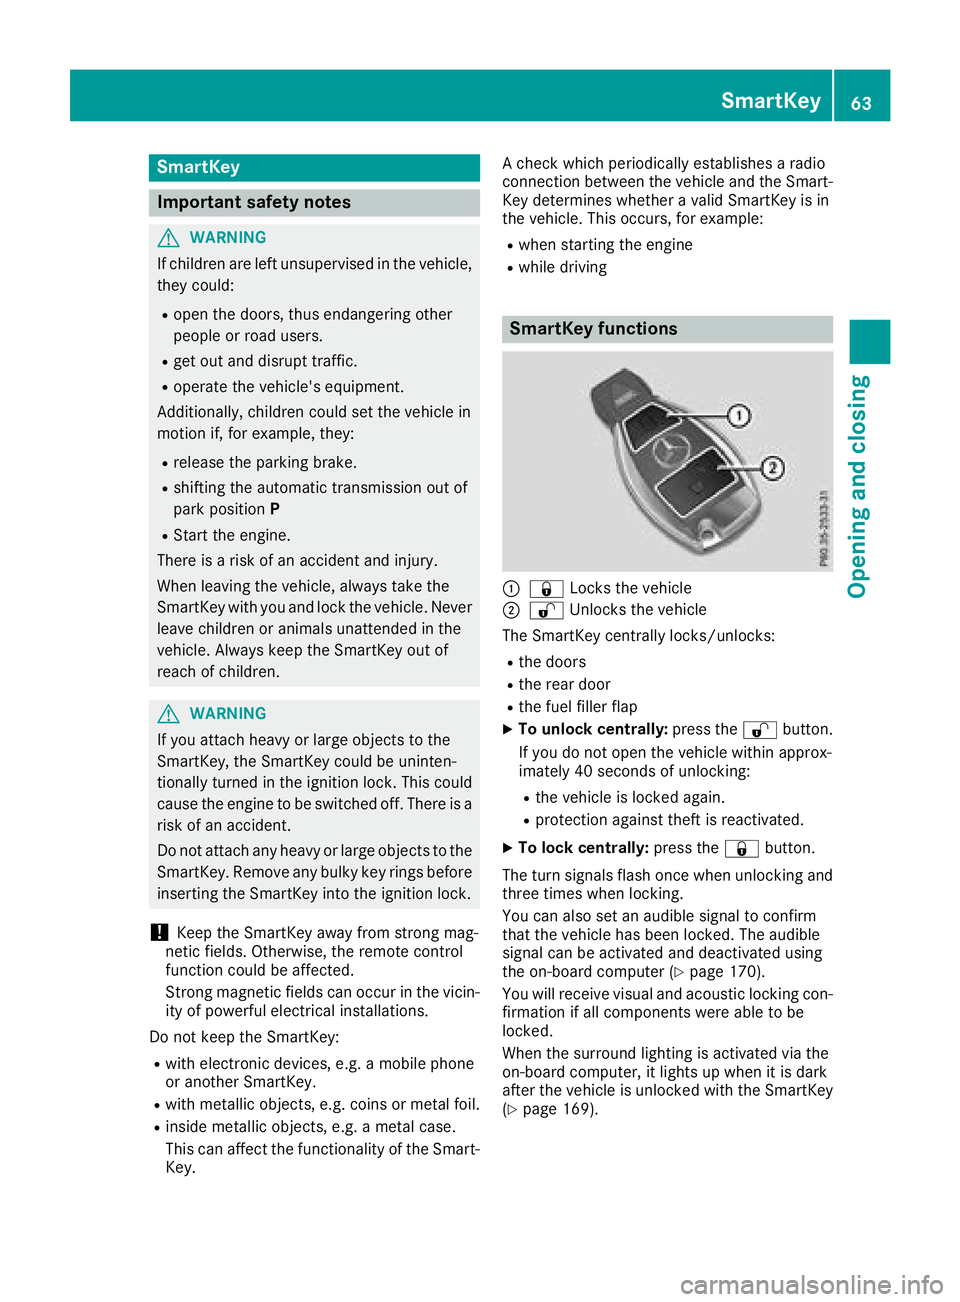
SmartKey functions
:&
Locks the vehicle
;%Unlocks the vehicle
The SmartKey centrally locks/unlocks:
Rthe doors
Rthe rear door
Rthe fuel filler flap
XTo unlock centrally: press the%button.
If you do not open the vehicle within approx-
imately 40 seconds of unlocking:
Rthe vehicle is locked again.
Rprotection against theft is reactivated.
XTo lock centrally: press the&button.
The turn signals flash once when unlocking and
three times when locking.
You can also set an audible signal to confirm
that the vehicle has been locked. The audible
signal can be activated and deactivated using
the on-board computer (
Ypage 170).
You will receive visual and acoustic locking con-
firmation if all components were able to be
locked.
When the surround lighting is activated via the
on-board computer, it lights up when it is dark
after the vehicle is unlocked with the SmartKey (
Ypage 169).
SmartKey63
Opening and closing
Z
Page 226 of 294
Specifying and sending the destination
address
XGo to the website http://maps.google.com
and enter a destination address into the entry
field.
XTo send the destination address to the e-
mail address of your mbrace account:
click on the corresponding button on the web-
site.
Example:
If you select 'Send to vehicle' and then
'Mercedes-Benz', the destination address will
be sent to your vehicle.
XWhen the "Send" dialog window appears:
Enter the e-mail address you specified when
setting up your mbrace account into the cor-
responding field.
XClick "Send".
Information on specific commands such as
"Address entry" or "Send" can be found on the
website.
Calling up a transmitted destination
address
XTurn the SmartKey to position 2in the ignition
lock (Ypage 105).
The transmitted destination address is loaded
into the vehicle's navigation system.
A display message appears, asking whether
navigation should be started.
XSelect Yesby turning 3or sliding 1
the controller and confirm with 7.
The system calculates the route and subse-
quently starts the route guidance with the
address entered.
If you select No
the address can be stored in
the address book.
If you have sent more than one destination
address, each individual destination must be
confirmed separately.
Destination addresses are loaded in the same
order as the order in which they were sent.
If you own multiple Mercedes-Benz vehicles with
mbrace and activated mbrace accounts:
If multiple vehicles are registered under the
same e-mail address, the destination will be
sent to all the vehicles.
Vehicle remote opening
You can use the vehicle remote opening if you
have unintentionally locked your vehicle and a
replacement SmartKey is not available.
The vehicle can be opened by the Mercedes-
Benz Customer Assistance Center.
The vehicle can be immediately opened
remotely within four days of the ignition being
turned off. After this time, the remote unlocking
may be delayed by 15 to 60 minutes. After
30 days, the vehicle can no longer be opened
remotely.
The vehicle remote unlocking feature is availa-
ble if the relevant mobile phone network is avail-
able and a data connection is possible.
XContact the following service hotlines:
Mercedes-Benz Customer Assistance Center
at 1-800-FOR-MERCedes (1-800-367-6372)
or 1-866-990-9007
You will be asked for your password.
XReturn to your vehicle at the time agreed upon
with the Mercedes-Benz Customer Assis-
tance Center.
Alternatively, the vehicle can be opened via:
Rthe Internet, under the "Owners Online" sec-
tion
Rtelephone applications (e.g. for iPhone®,
Android™)
To do this, you will need your identification num-
ber and password.
Vehicle remote closing
The vehicle remote closing feature can be used
when you have forgotten to lock the vehicle and you are no longer nearby.
The vehicle can then be locked by the Mercedes-
Benz Customer Assistance Center.
The vehicle can be immediately remotely locked
within four days of the ignition being turned off.
After this time, remote closing may be delayed
by 15 to 60 minutes. After 30 days the vehicle
can no longer be locked remotely.
The vehicle remote closing feature is available if
the relevant mobile phone network is available
and a data connection is possible.
XContact the following service hotlines:
224Features
Stowage and features
Page 227 of 294
Mercedes-Benz Customer Assistance Center
at 1-800-FOR-MERCedes (1-800-367-6372)
or 1-866-990-9007
You will be asked for your password.
The next time you are inside the vehicle and you
switch on the ignition, the Doors Locked
Remotelymessage appears in the multifunction
display.
Alternatively, the vehicle can be locked via:
Rthe Internet, under the "Owners Online" sec-
tion
Rtelephone applications (e.g. for iPhone®,
Android™)
To do this, you will need your identification num-
ber and password.
Stolen vehicle recovery service
If your vehicle has been stolen:
XNotify the police.
The police will issue a numbered incident
report.
XThis number will be forwarded to the
Mercedes-Benz Customer Assistance Center
together with your PIN.
The Mercedes-Benz Customer Assistance
Center then tries to locate the system. The
Mercedes-Benz Customer Assistance Center
contacts you and the local law enforcement
agency if the vehicle is located.
However, only the law enforcement agency is
informed of the location of the vehicle.
If the anti-theft alarm system is activated for
longer than 30 seconds, the Mercedes-Benz
Customer Assistance Center is automatically
notified.
Vehicle Health Check
With the Vehicle Health Check, the Customer
Assistance Center can provide improved sup-
port for problems with your vehicle. During an
existing call, vehicle data is transferred to the
Customer Assistance Center.
The customer service representative can use
the received data to decide what kind of assis-
tance is required. You are then, for example,
guided to the nearest Mercedes-Benz Service
Center or a recovery vehicle is called.
If vehicle data need to be transferred during an
Info call or a Roadside Assistance call, this is
initiated by the Customer Assistance Center. You will see the
Roadside Assistance Con‐
nectedmessage in the display. If the Vehicle
Health Check can be started, the RequestforVehicle Diagnostics Received Startvehicle diagnostics?message appears in
the display.
XPress the Yesbutton to confirm the message.
XIf theVehicle Diagnostics PleaseStart Ignitionmessage appears: turn the
SmartKey to position 2in the ignition lock
(
Ypage 105).
XIf the Please follow the instructionsreceivedbyphoneandmoveyourvehi‐cle to a safe position.message
appears: please follow the instructions
received by phone and move your vehicle to a
safe position.
The message in the display disappears.
The vehicle operating state check begins. You
will see the Vehicle Diagnostics Active
message.
If you select Cancel
, the Vehicle Health
Check is canceled completely.
When the check is complete, the Sending
vehicle diagnostics data. (Voice con‐nection may be interrupted duringdatatransfer)message appears. The vehicle
data can now be sent.
XPress the OKbutton to confirm the message.
The voice connection with the Customer
Assistance Center is terminated.
You will see the Vehicle Diagnostics:
Transferring Data...message.
The vehicle data is sent to the Customer
Assistance Center.
Depending on what the customer service rep-
resentative agreed with you, the voice connec-
tion is re-established after the transfer is com-
plete. If necessary, you will be contacted at a
later time by another means, e.g. by e-mail or
phone.
Another function of the Vehicle Health Check is
the transfer of service data to the Customer
Assistance Center. If a service is due, the display
shows a message to this effect together with
information about any special offers at your
workshop.
This information can also be called up under
"Owners Online" at http://www.mbusa.com.
Information on the data stored in the vehicle
(
Ypage 28).
Features225
Stowage and features
Z
Page 230 of 294
XTo start programming mode:press and
hold one of buttons ;to? on the integrated
garage door opener.
The garage door opener is now in program-
ming mode. After a short time, indicator
lamp :will start flashing. It flashes approx-
imately once per second.
Indicator lamp :flashes immediately the
first time that the transmitter button is pro-
grammed. If this transmitter button has
already been programmed, indicator lamp :
will only start flashing at a rate of once a sec-
ond after 20 seconds have elapsed.
XContinue to hold the transmitter button.
XTo program the remote control: point
transmitter button Bof remote control A
towards the transmitter buttons on the rear-
view mirror at a distance of 2 to 12 in (5 to
30 cm).
XKeep transmitter button Bon remote control
A pressed until indicator lamp :starts to
flash rapidly.
When indicator lamp :flashes rapidly: pro-
gramming is finished.
XRelease transmitter buttons ;,=or? on
the integrated remote control and transmitter
button Bon remote control A.
If indicator lamp :does not flash rapidly and
goes out after approximately 20 second s:
repeat the programming process for the cor-
responding button on the rear-view mirror.
When doing so, vary the distance between
remote control Aand the rear-view mi
rror.
The required distance between remote con-
trol Aand the integrated garage door opener
depends on the garage door drive system.
Several attempts might be necessary. You
should test every position for at least
20 seconds before trying another position.
If the garage door system works with a rolling
code, you must synchronize the remote control
integrated in the rear-view mirror with the
garage door system receiver after program-
ming.
You can find further information on this in the
operating instructions of the garage door sys-
tem.
Synchronizing the rolling code
Pay attention to the "Important safety notes"
(Ypage 227).
If the garage door system uses a rolling code,
you will also have to synchronize the garage door system with the integrated garage door
opener in the rear-view mirror. To do this you will
need to use the programming button on the door
drive control panel. The programming button
may be located in different places depending on
the manufacturer. It is usually located on the
door drive unit on the garage ceiling.
Familiarize yourself with the garage door drive
operating instructions, e.g. under "Program-
ming additional remote controls", before carry-
ing out the following steps.
Your vehicle must be within reach of the garage
door or gate opener drive. Make sure that nei-
ther your vehicle nor any persons/objects are
present within the sweep of the door or gate.
Observe the safety notes when performing the
rolling code synchronization (
Ypage 227).
XTurn the SmartKey to position
2in the igni-
tion lock (Ypage 105).
XGet out of the vehicle.
XPress the programming button on the door
drive unit.
You now have 30 seconds to initiate the next
step.
XGet into the vehicle.
XPress previously programmed button ;,=
or ? on the integrated garage door opener
repeatedly until the door closes.
The rolling code synchronization i
s then com-
plete.
Notes on programming the remote con-
trol
Canadian radio frequency laws require a "break"
(or interruption) of the transmission signals
after broadcasting for a few seconds. Therefore,
these signals may not last long enough for the
integrated remote control to recognize the sig-
nal during programming. Comparable with
Canadian law, American garage door openers
also have a built-in "interruption".
Proceed as follows:
Rif you live in Canada.
Rif you have difficulties programming the
garage door opener (regardless of where you
live) when following the programming steps.
XPress and hold one of buttons ;to? on the
integrated garage door opener until the inte-
grated remote control is successfully set up.
XSimultaneously press transmitter button B
on remote control Aand hold for two sec-
228Features
Stowage and features