wheel bolt torque MERCEDES-BENZ G-CLASS 2018 Owner's Manual
[x] Cancel search | Manufacturer: MERCEDES-BENZ, Model Year: 2018, Model line: G-CLASS, Model: MERCEDES-BENZ G-CLASS 2018Pages: 294, PDF Size: 4.86 MB
Page 23 of 294

Distance warning ........................... 201
DISTRONIC PLUS ........................... 201
ESP
®.............................................. 196
ESP®OFF ....................................... 197
Fuel tank ........................................ 199
General notes ................................ 191
Overview .......................................... 32
Parking brake ................................ 194
PASSENGER AIR BAG OFF ............... 39
Reserve fuel ................................... 199
Restraint system ............................ 198
Seat belt ........................................ 192
Tire pressure monitor .................... 202
Warning triangle ................................ 243
Warranty .............................................. 24
Washer fluid
Display message ............................ 191
Weather display (COMAND)
see also Digital Operator's Man-
ual .................................................. 203
Wheel and tire combinations
Tires ............................................... 279
Wheel bolt tightening torque ........... 278
Wheels
Changing a wheel .......................... 275
Checking ........................................ 257
Cleaning ......................................... 238
Important safety notes .................. 257
Information on driving .................... 257
Interchanging/changing ................ 275
Mounting a new wheel ................... 278
Mounting a wheel .......................... 276
Removing a wheel .......................... 278
Snow chains .................................. 259
Storing ........................................... 276
Tightening torque ........................... 278
Wheel size/tire size ....................... 279
Window curtain air bag
Display message ............................ 178
Operation ......................................... 46
Windows
see Side windows
Windshield
Defrosting ...................................... 100
Windshield heating ........................... 101
Windshield washer fluid
see Windshield washer system Windshield washer system
Adding washer fluid ....................... 234
Notes ............................................. 287
Windshield wipers
Problem (malfunction) ..................... 95
Rear window wiper .......................... 94
Replaci ng the w
iper blades .............. 94
Switching on/off .............................. 93
Winter driving
Important safety notes .................. 258
Slippery road surfaces ................... 128
Snow chains .................................. 259
Winter operation
Overview ........................................ 258
Radiator cover ............................... 231
Summer tires ................................. 259
Winter tires
M+S tires ....................................... 259
Wiper blades
Cleaning ......................................... 239
Important safety notes .................... 94
Replacing ......................................... 94
Wooden trim (cleaning instruc-
tions) .................................................. 241
Index21
Page 280 of 294

Make sure that jackAis at the correct posi-
tion under axle carrier tube ?. The front or
rear axle must sit securely in the recess of
jack A.
XKeep pumping until axle carrier tube ?sits
securely in the recess of jack Aand the base
of the jack lies evenly on the ground.
Ensure that the jack is located vertically under
the jacking point.
XRaise the vehicle by pumping until the tire is
no more than 1.2 in (3 cm) off the ground.
Removing a wheel
!Do not place wheel bolts in sand or on a dirty
surface. The bolt and wheel hub threads could
otherwise be damaged when you screw them
in.
When mounting/removing wheels, and for as
long as the wheels are removed, avoid applying
any external force on the brake disks. This could impair the level of comfort when braking.
XUnscrew the wheel bolts.
XRemove the wheel.
Mounting a new wheel
GWARNING
Oiled or greased wheel bolts/wheel nuts and
damaged wheel bolt/wheel nut/wheel hub
threads can cause wheel bolts/wheel nuts to
come loose. As a result, you could lose a
wheel while driving. There is a risk of an acci-
dent.
Never oil or grease wheel bolts/wheel nuts. In
the event of damage to the threads, contact a
qualified specialist workshop immediately.
Have the damaged wheel bolts/wheel nuts or
hub threads replaced/renewed. Do not con-
tinue driving.
GWARNING
If you tighten the wheel bolts or wheel nuts
when the vehicle is raised, the jack could tip
over. There is a risk of injury.
Only tighten the wheel bolts or wheel nuts
when the vehicle is on the ground.
!To prevent damage to the paintwork, hold
the wheel securely against the wheel hub
while screwing in the first wheel bolt.
Always pay attention to the instructions and
safety notes in the "Changing a wheel" section
(
Ypage 275).
Only use wheel bolts that have been designed
for the wheel and the vehicle. For safety rea-
sons, Mercedes-Benz recommends that you
only use wheel bolts which have been approved
for Mercedes-Benz vehicles and the respective
wheel.
XClean the wheel and wheel hub contact sur-
faces.
XPlace the new wheel on the wheel hub and
push it on.
XTighten the wheel bolts until they are finger-
tight.
Lowering the vehicle
GWARNING
The wheels could work loose if the wheel nuts and bolts are not tightened to the specified
tightening torque. There is a risk of accident.
Have the tightening torque immediately
checked at a qualified specialist workshop
after a wheel is changed.
XSlowly open the pressure release screw on
the jack using the pump lever by approx-
imately one full turn and carefully lower the
vehicle (
Ypage 276).
XYou can put the jack aside.
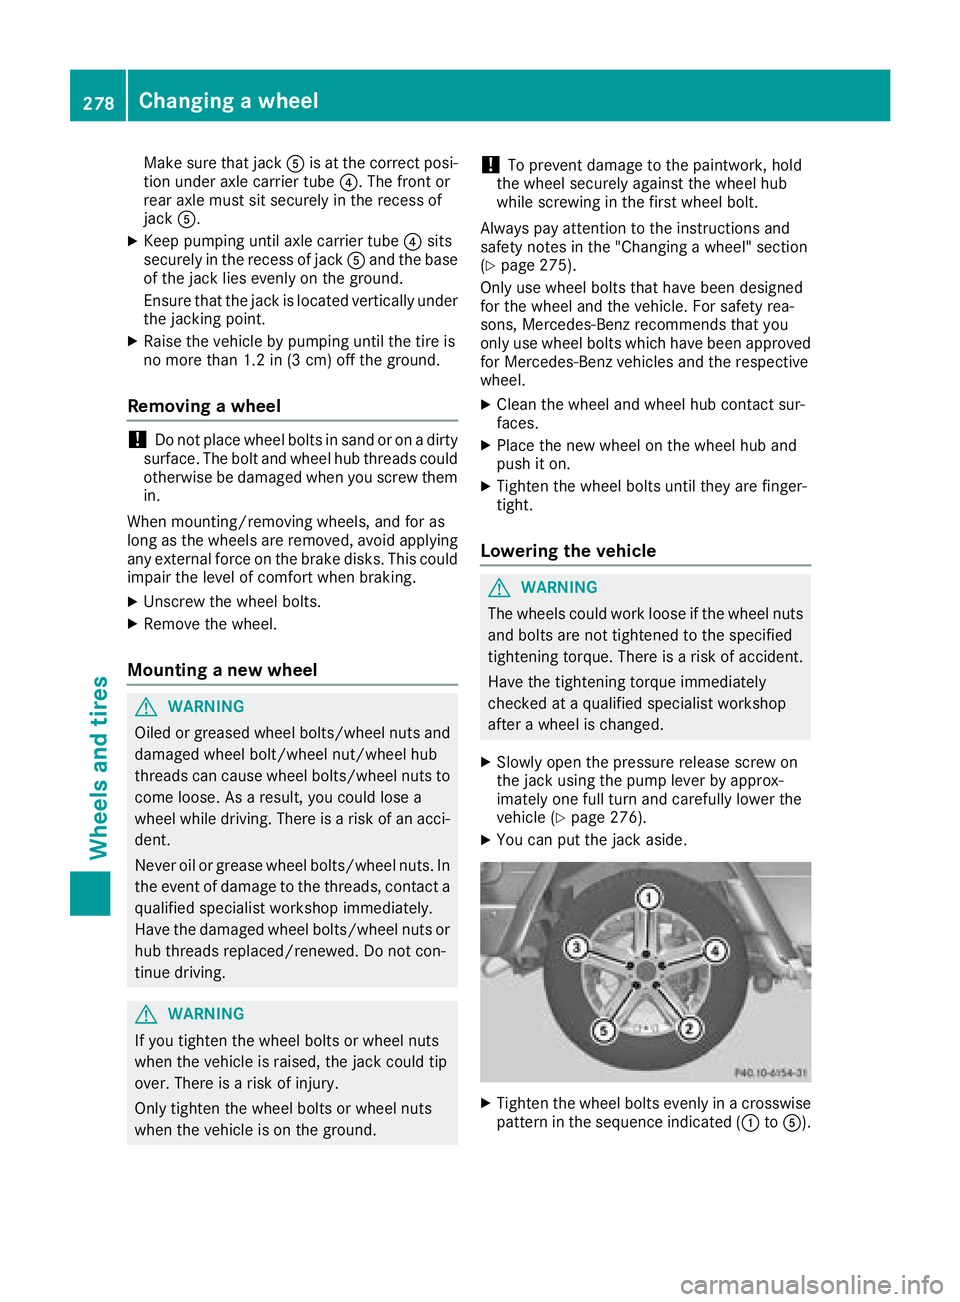
XTighten the wheel bolts evenly in a crosswisepattern in the sequence indicated (: toA).
278Changing a wheel
Wheels and tires