bulb MERCEDES-BENZ G-CLASS SUV 2008 Owners Manual
[x] Cancel search | Manufacturer: MERCEDES-BENZ, Model Year: 2008, Model line: G-CLASS SUV, Model: MERCEDES-BENZ G-CLASS SUV 2008Pages: 293, PDF Size: 4.49 MB
Page 7 of 293
4
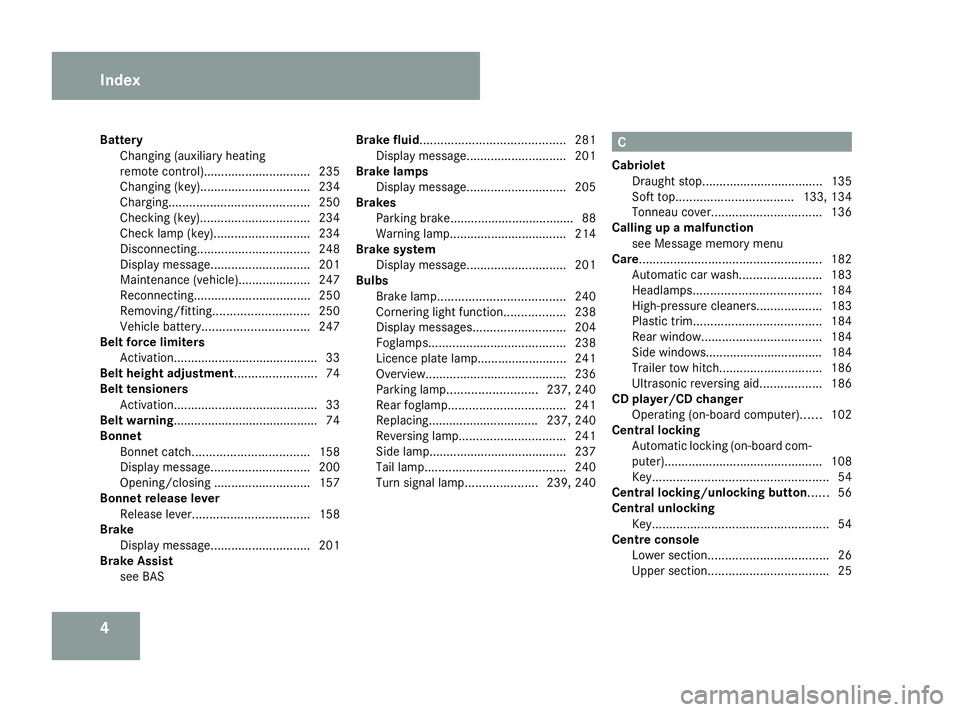
Battery
Changing (auxiliary heating
remote control) ............................... 235
Changing (key).. .............................. 234
Charging. ........................................ 250
Checking (key). ............................... 234
Check lamp (key). ........................... 234
Disconnecting ................................. 248
Display message ............................. 201
Maintenance (vehicle)..................... 247
Reconnecting.................................. 250
Removing/fitting. ........................... 250
Vehicle battery. .............................. 247
Belt force limiters
Activation.......................................... 33
Belt height adjustment........................ 74
Belt tensioners Activation.......................................... 33
Belt warning.......................................... 74
Bonnet Bonnet catch .................................. 158
Display message ............................. 200
Opening/closing ............................ 157
Bonnet release lever
Release leve r.................................. 158
Brake
Display message ............................. 201
Brake Assist
see BAS Brake fluid..........................................
281
Display message ............................. 201
Brake lamps
Display message ............................. 205
Brakes
Parking brake................................... .88
Warning lamp..................................2 14
Brake system
Display message ............................. 201
Bulbs
Brake lamp. .................................... 240
Cornering light function ..................238
Display messages ........................... 204
Foglamps. ....................................... 238
Licence plate lamp.......................... 241
Overview. ........................................ 236
Parking lamp. ......................... 237, 240
Rear foglamp. ................................. 241
Replacing............................... .237, 240
Reversing lamp. .............................. 241
Side lamp........................................ 237
Tail lamp ......................................... 240
Turn signal lamp. ....................239, 240 C
Cabriolet Draught stop................................... 135
Soft top .................................. 133, 134
Tonneau cover. ............................... 136
Calling up a malfunction
see Message memory menu
Care..................................................... 182
Automatic car wash. .......................183
Headlamps. .................................... 184
High-pressure cleaners. ..................183
Plastic trim. .................................... 184
Rear window. .................................. 184
Side windows.................................. 184
Trailer tow hitch. ............................. 186
Ultrasonic reversing aid. .................186
CD player/CD changer
Operating (on-board computer). .....102
Central locking
Automatic locking (on-board com-
puter). ............................................. 108
Key. .................................................. 54
Central locking/unlocking button...... 56
Central unlocking Key. .................................................. 54
Centre console
Lower section. .................................. 26
Upper section. .................................. 25Index
463_AKB; 1; 8, en-GB
wobuchh,
Version: 2.10.6 2008-07-17T15:19:41+02:00 - Seite 4Dateiname: 6515_4091_02_buchblock.pdf; preflight
Page 11 of 293
8 I
Immobiliser.......................................... .51
Indicator and warning lamp Brakes (red). ................................... 214
Engine diagnostic ........................... 215
PASSENGER AIRBAG OFF .........40, 211
Reserve fuel. ................................... 216
Seat belt. ........................................ 216
SRS........................................... 33, 214
Indicator and warning lamps............ 212
Indicator lamps see Warning and indicator lamps
Instrument cluster............................... 95
Overview. .......................................... 22
Selecting the language (on-board
computer). ...................................... 106
Instrument lighting.............................. 96
Interior lighting.................................... 79
Automatic control ............................. 80
Delayed switch-off (on-board
computer). ...................................... 108
Luggage compartment lighting. ........80
Manual control.................................. 80
Reading lamp .................................... 80
Rear interior lighting. ........................81
Interior motion sensor......................... 52
Intermittent wipe Windscreen wipers. ..........................83
ISOFIX child seat securing system..... 44 J
Jack Cabriolet. ........................................ 191
Long-wheelbase station wagon....... 189
Operation........................................ 244
Short-wheelbase station wagon. .....190
Jump-starting ...................................... 251
Jump leads ...................................... 251 K
Key......................................................... 54 Changing the battery ......................234
Checking the battery ......................234
Display message ............................. 208
Factory setting............................ 54, 55
Loss. ............................................... 225
Malfunction..................................... 225
Modifying the programming. .............54
Key positions
Key. .................................................. 59
Kickdown.............................................. 91 L
Lamps see Warning and indicator lamps
Lashing eyelets.................................. 140
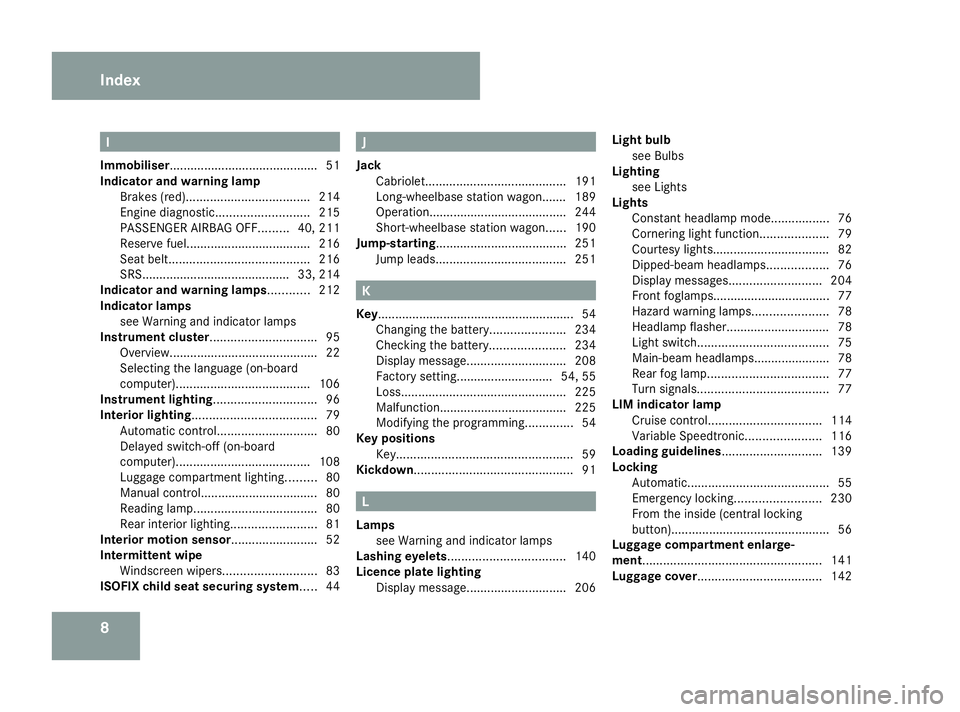
Licence plate lighting Display message ............................. 206Light bulb
see Bulbs
Lighting
see Lights
Lights
Constant headlamp mode. ................76
Cornering light function ....................79
Courtesy lights.................................. 82
Dipped-beam headlamps ..................76
Display messages ........................... 204
Front foglamps.................................. 77
Hazard warning lamps. .....................78
Headlamp flasher.............................. 78
Light switch. ..................................... 75
Main-beam headlamps..................... .78
Rear fog lamp ................................... 77
Turn signals. ..................................... 77
LIM indicator lamp
Cruise control. ................................ 114
Variable Speedtronic. .....................116
Loading guidelines............................. 139
Locking Automatic. ........................................ 55
Emergency locking .........................230
From the inside (central locking
button) .............................................. 56
Luggage compartment enlarge-
ment.................................................... 141
Luggage cover.................................... 142Index
463_AKB; 1; 8, en-GB
wobuchh,
Version: 2.10.6 2008-07-17T15:19:41+02:00 - Seite 8Dateiname: 6515_4091_02_buchblock.pdf; preflight
Page 180 of 293
Driving ab
road 177
R
Clean an y mud from the tyre tread after
crossing a ford.
R Apply the brakes to dry them after crossing
a ford. Driving on sand
Observe the following rules when driving on
sand:
R shift the transfer case to
LOW (Ypage 92).
R avoid high engine speeds.
R select a shift range appropriate to the ter-
rain.
R drive quickly to overcome the rolling resist-
ance. Otherwise, the vehicle could dig itself
into the sand.
R drive in the tracks of other vehicles, if pos-
sible. Make sure that the ruts are not too
deep, that the sand is firm enough and that
your vehicle has sufficient ground clear-
ance. Ruts
Observe the following rules when driving
along ruts in off-road terrain or on roads with
loose gravel:
! Check that the ruts are not too deep and
that your vehicle has sufficient clearance.
Otherwise, your vehicle could be damaged
or bottom out and get stuck.
R shift the transfer case to
LOW (Ypage 92).
R avoid high engine speeds.
R select shift range 1.
R drive slowly.
R where ruts are too deep, drive with the
wheels on one side on the middle section
of the road if possible. Driving abroad
Points to remember
An extensive Mercedes-Benz Service network
is also available in other countries. You can
obtain the relevant workshop directories
from any Mercedes-Benz Service Centre.
Only low-octane fuel is available in certain
countries.
You can find further information about fuel
grades on (Y page 154). Symmetrical dipped beam
If your journey takes you to countries where
vehicles are driven on the opposite side of the
road to the country in which the vehicle is
registered, your headlamps must be switched
to symmetrical dipped beam. Oncoming traf-
fic will be dazzled less. G
Risk of injury
Xenon bulbs are under high voltage. You
could get an electric shock and be seriously
or even fatally injured if you touch the elec-
tric contacts on xenon bulbs. Therefore, do
not, remove the cover on xenon bulbs.
Do not change xenon headlamps yourself,
but have them replaced at a qualified spe- Operation
463_AKB; 1; 8, en-GB
wobuchh,
Version: 2.10.6 2008-07-17T15:19:41+02:00 - Seite 177 ZDateiname: 6515_4091_02_buchblock.pdf; preflight
Page 207 of 293
Display
messages 204 Display messages Possible cause/consequence Possible solution
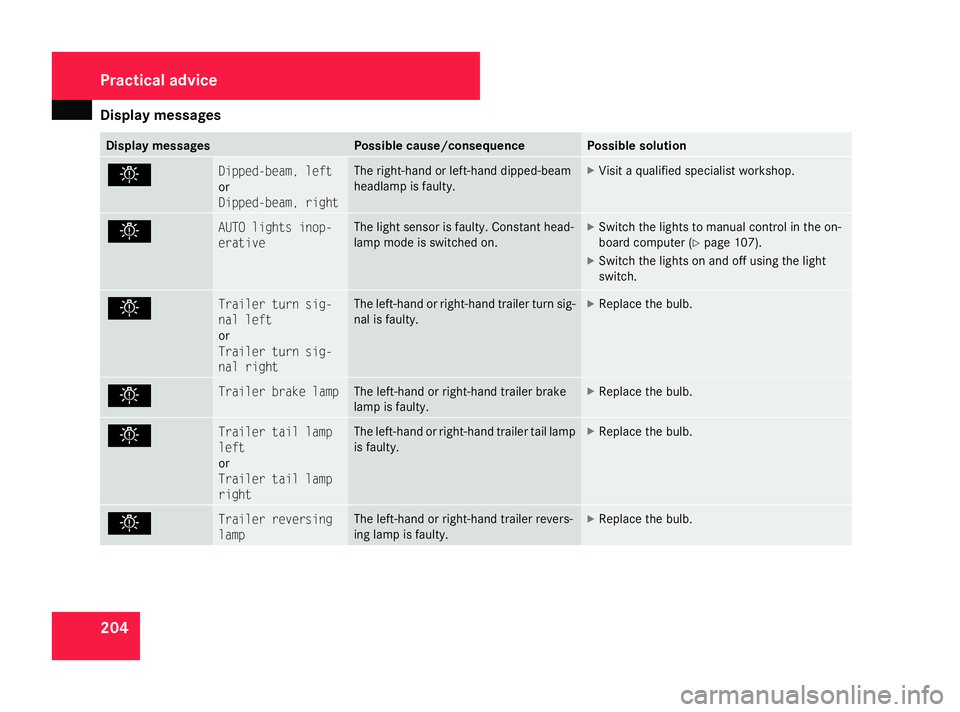
. Dipped-beam, left
or
Dipped-beam, right The right-hand or left-hand dipped-beam
headlamp is fa
ulty. X
Visit a qualified specialist workshop. . AUTO lights inop-
erative The light sensor is faulty. Constant head-
lamp mode is switched on. X
Switch the lights to manual control in the on-
board computer (Y page 107).
X Switch the lights on and off using the light
switch. . Trailer turn sig-
nal left
or
Trailer turn sig-
nal right The left-hand or right-hand trailer turn sig-
nal is faulty. X
Replace the bulb. . Trailer brake lamp The left-hand or right-hand trailer brake
lamp is faulty. X
Replace the bulb. . Trailer tail lamp
left
or
Trailer tail lamp
right The left-hand or right-hand trailer tail lamp
is faulty. X
Replace the bulb. . Trailer reversing
lamp The left-hand or right-hand trailer revers-
ing lamp is faulty. X
Replace the bulb. Practical advice
463_AKB; 1; 8, en-GB
wobuchh,
Version: 2.10.6 2008-07-17T15:19:41+02:00 - Seite 204Dateiname: 6515_4091_02_buchblock.pdf; preflight
Page 208 of 293
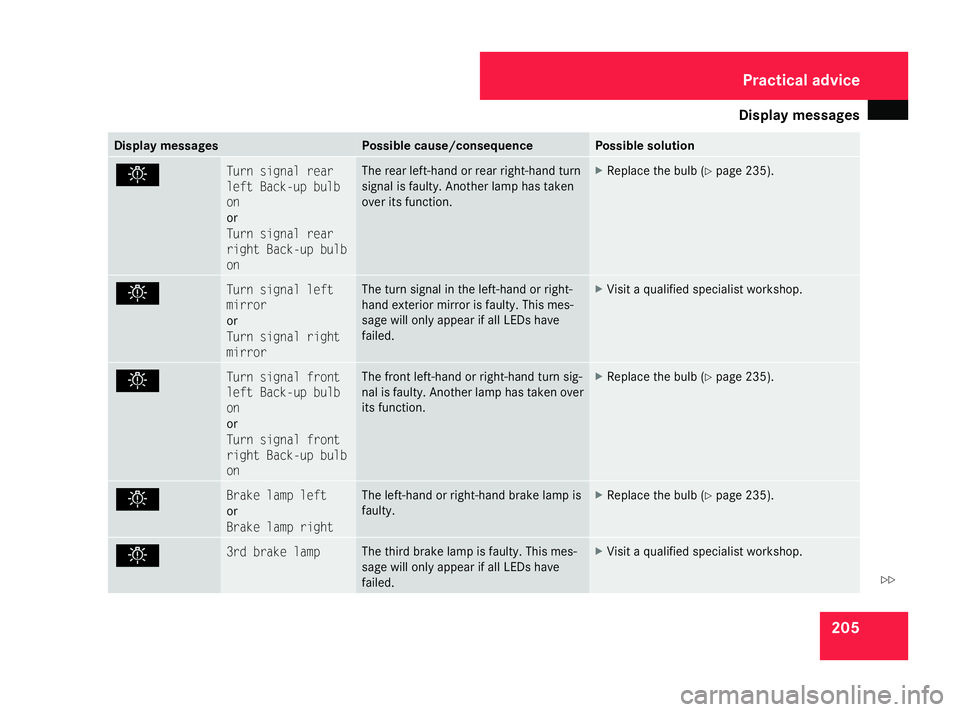
Display
messages 205Display messages Possible cause/consequence Possible solution
. Turn signal rear
left Back-up bulb
on
or
Turn signal rear
right Back-up bulb
on The rear left-hand or rear right-hand turn
signal is fa
ulty. Another lamp has taken
over its function. X
Replace the bulb (Y page 235). . Turn signal left
mirror
or
Turn signal right
mirror The turn signal in the left-hand or right-
hand exterior mirror is faulty. This mes-
sage will only appear if all LEDs have
failed. X
Visit a qualified specialist workshop. . Turn signal front
left Back-up bulb
on
or
Turn signal front
right Back-up bulb
on The front left-hand or right-hand turn sig-
nal is faulty. Another lamp has taken over
its function. X
Replace the bulb (Y page 235). . Brake lamp left
or
Brake lamp right The left-hand or right-hand brake lamp is
faulty. X
Replace the bulb (Y page 235). . 3rd brake lamp The third brake lamp is faulty. This mes-
sage will only appear if all LEDs have
failed. X
Visit a qualified specialist workshop. Practical advice
463_AKB; 1; 8, en-GB
wobuchh,
Version: 2.10.6 2008-07-17T15:19:41+02:00 - Seite 205 ZDateiname: 6515_4091_02_buchblock.pdf; preflight
Page 209 of 293
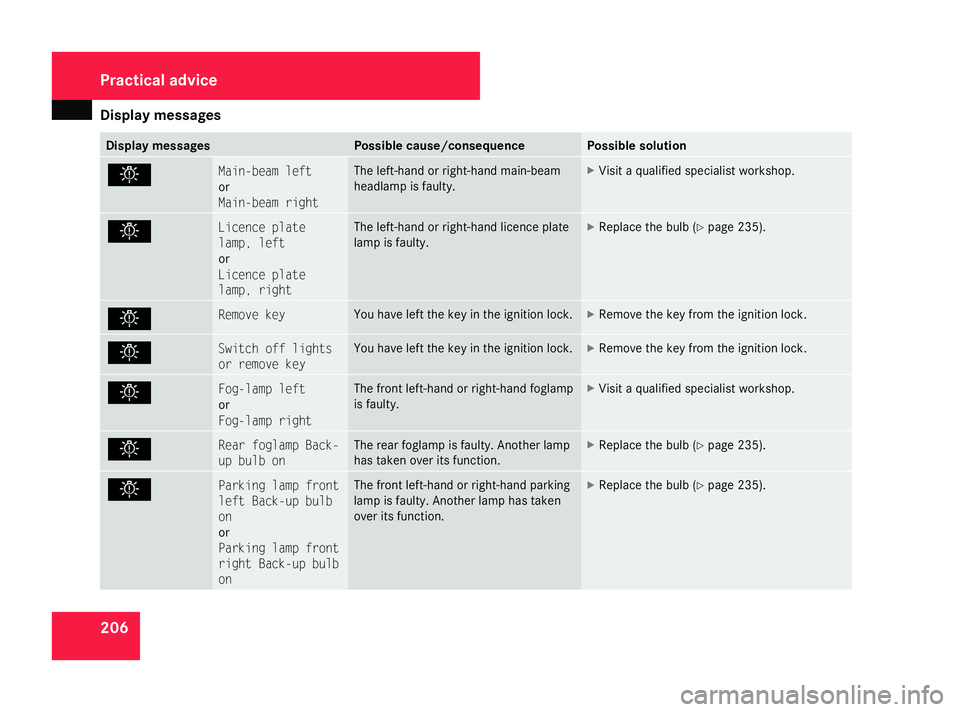
Display
messages 206 Display messages Possible cause/consequence Possible solution
. Main-beam left
or
Main-beam right The left-hand or right-hand main-beam
headlamp is fa
ulty. X
Visit a qualified specialist workshop. . Licence plate
lamp, left
or
Licence plate
lamp, right The left-hand or right-hand licence plate
lamp is faulty. X
Replace the bulb (Y page 235).. Remove key You have left the key in the ignition lock. X
Remove the key from the ignition lock. . Switch off lights
or remove key You have left the key in the ignition lock. X
Remove the key from the ignition lock. . Fog-lamp left
or
Fog-lamp right The front left-hand or right-hand foglamp
is faulty. X
Visit a qualified specialist workshop. . Rear foglamp Back-
up bulb on The rear foglamp is faulty. Another lamp
has taken over its function. X
Replace the bulb (Y page 235).. Parking lamp front
left Back-up bulb
on
or
Parking lamp front
right Back-up bulb
on The front left-hand or right-hand parking
lamp is faulty. Another lamp has taken
over its function. X
Replace the bulb (Y page 235).Practical advice
463_AKB; 1; 8, en-GB
wobuchh,
Version: 2.10.6 2008-07-17T15:19:41+02:00 - Seite 206Dateiname: 6515_4091_02_buchblock.pdf; preflight
Page 210 of 293
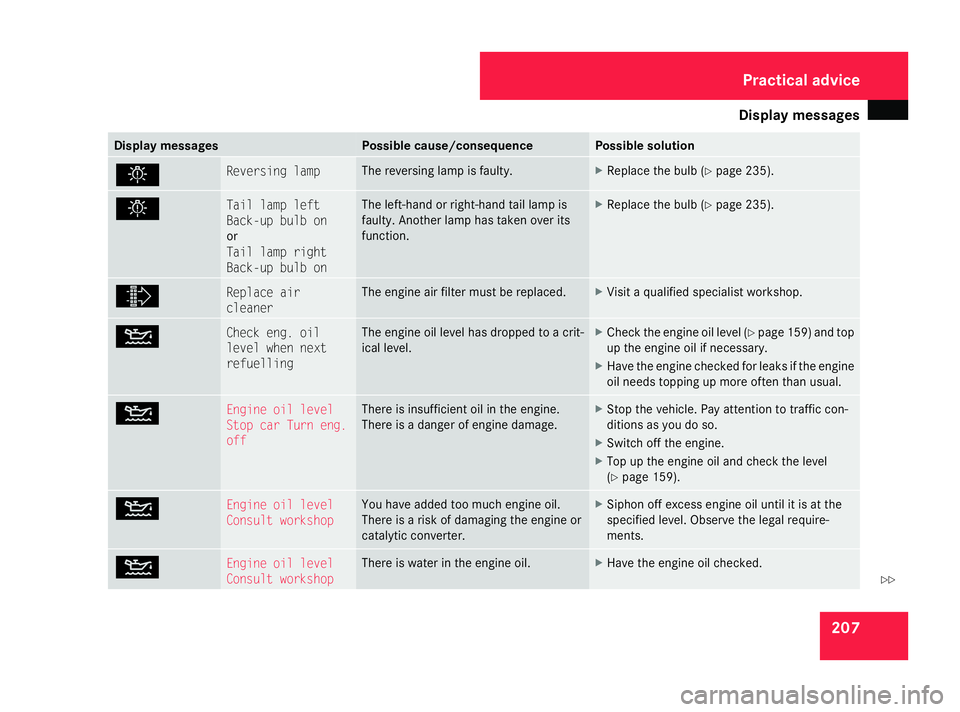
Display
messages 207Display messages Possible cause/consequence Possible solution
. Reversing lamp The reversing lamp is fa
ulty. X
Replace the bulb (Y page 235). . Tail lamp left
Back-up bulb on
or
Tail lamp right
Back-up bulb on The left-hand or right-hand tail lamp is
faulty. Another lamp has taken over its
function. X
Replace the bulb (Y page 235). ò Replace air
cleaner The engine air filter must be replaced. X
Visit a qualified specialist workshop. N Check eng. oil
level when next
refuelling The engine oil level has dropped to a crit-
ical level. X
Check the engine oil level (Y page 159) and top
up the engine oil if necessary.
X Have the engine checked for leaks if the engine
oil needs topping up more often than usual. N Engine oil level
Stop car Turn eng.
off There is insufficient oil in the engine.
There is a danger of engine damage. X
Stop the vehicle. Pay attention to traffic con-
ditions as you do so.
X Switch off the engine.
X Top up the engine oil and check the level
(Y page 159). N Engine oil level
Consult workshop You have added too much engine oil.
There is a risk of damaging the engine or
catalytic converter. X
Siphon off excess engine oil until it is at the
specified level. Observe the legal require-
ments. N Engine oil level
Consult workshop There is water in the engine oil. X
Have the engine oil checked. Practical advice
463_AKB; 1; 8, en-GB
wobuchh,
Version: 2.10.6 2008-07-17T15:19:41+02:00 - Seite 207 ZDateiname: 6515_4091_02_buchblock.pdf; preflight
Page 238 of 293
Changing the bulbs
235
X
Push the battery tray back into the key
housing until the battery tray engages.
X Check the function of all key buttons on the
vehicle. Auxiliary heating* remote control
Checking the batteries X
Press the ONorOFF button.
The battery charge check lamp lights up
when you press the button:
R ON green
R OFF red
and then briefly orange.
If the batteries are discharged, the battery
check lamp only lights up in orange when
the buttons are pressed.
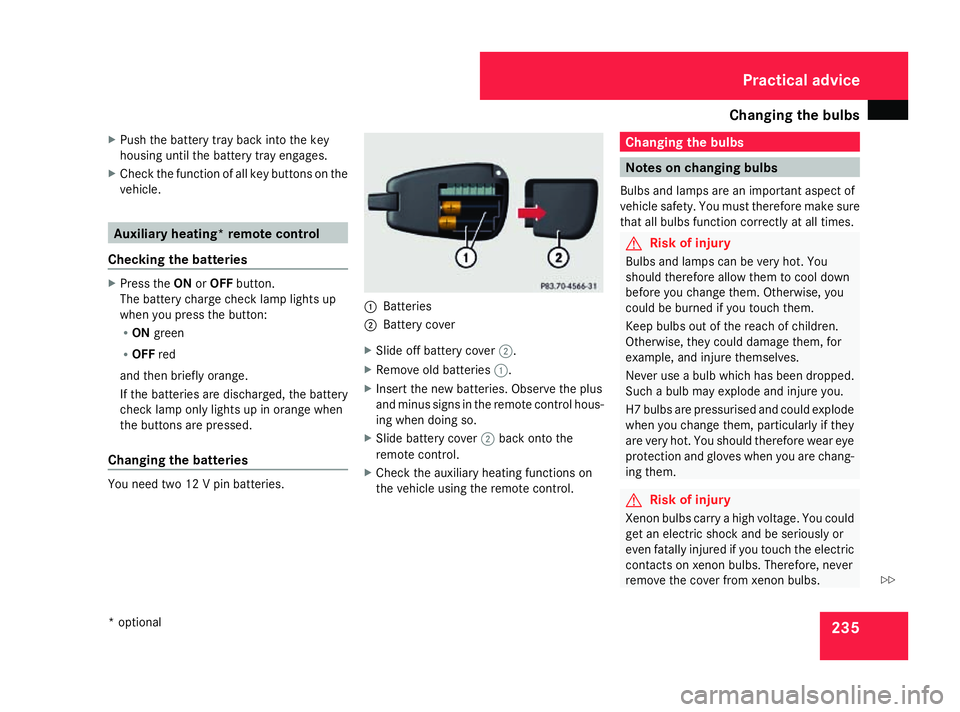
Changing the batteries You need two 12 V pin batteries. 1
Batteries
2 Battery cover
X Slide off battery cover 2.
X Remove old batteries 1.
X Insert the new batteries. Observe the plus
and minus signs in the remote control hous-
ing when doing so.
X Slide battery cover 2back onto the
remote control.
X Check the auxiliary heating functions on
the vehicle using the remote control. Changing the bulbs
Notes on changing bulbs
Bulbs and lamps are an important aspect of
vehicle safety. You must therefore make sure
that all bulbs function correctly at all times. G
Risk of injury
Bulbs and lamps can be very hot. You
should therefore allow them to cool down
before you change them. Otherwise, you
could be burned if you touch them.
Keep bulbs out of the reach of children.
Otherwise, they could damage them, for
example, and injure themselves.
Never use a bulb which has been dropped.
Such a bulb may explode and injure you.
H7 bulbs are pressurised and could explode
when you change them, particularly if they
are very hot. You should therefore wear eye
protection and gloves when you are chang-
ing them. G
Risk of injury
Xenon bulbs carry a high voltage. You could
get an electric shock and be seriously or
even fatally injured if you touch the electric
contacts on xenon bulbs. Therefore, never
remove the cover from xenon bulbs. Practical advice
* optional
463_AKB; 1; 8, en-GB
wobuchh, Version: 2.10.6 2008-07-17T15:19:41+02:00 - Seite 235 ZDateiname: 6515_4091_02_buchblock.pdf; preflight
Page 239 of 293
Changing the bulbs
236 Do not change xenon bulbs yourself, but
have them replaced at a qualified specialist
workshop which has the necessary special-
ist knowledge and tools to carry out the
work required.
Mercedes-Benz recommends that you use
a Mercedes-Benz Service Centre for this
purpose. In particular, work relevant to
safety or on safety-related systems must be
carried out at a qualified specialist work-
shop.
! Do not change the LEDs yourself. You
could otherwise damage the LEDs or parts
of the vehicle. Overview
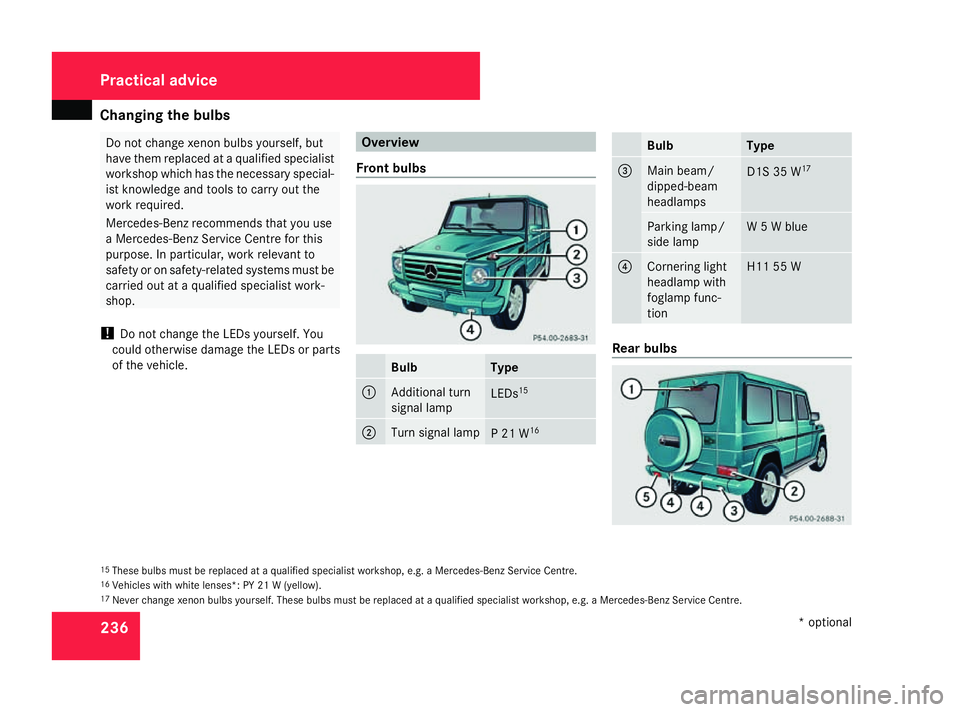
Front bulbs Bulb Type
1
Additional turn
signal lamp
LEDs
15 2
Turn signal lamp
P 21 W
16 Bulb Type
3
Main beam/
dipped-beam
headlamps
D1S 35 W
17 Parking lamp/
side lamp W 5 W blue
4
Cornering light
headlamp with
foglamp func-
tion H11 55 W
Rear bulbs
15
These bulbs must be replaced at a qualified specialist workshop, e.g. a Mercedes-Benz Service Centre.
16 Vehicles with white lenses*: PY 21 W (yellow).
17 Never change xenon bulbs yourself. These bulbs must be replaced at a qualified specialist workshop, e.g. a Mercedes-Benz Service Centre. Practical advice
* optional
463_AKB; 1; 8, en-GB
wobuchh,
Version: 2.10.6 2008-07-17T15:19:41+02:00 - Seite 236Dateiname: 6515_4091_02_buchblock.pdf; preflight
Page 240 of 293
Changing the bulbs
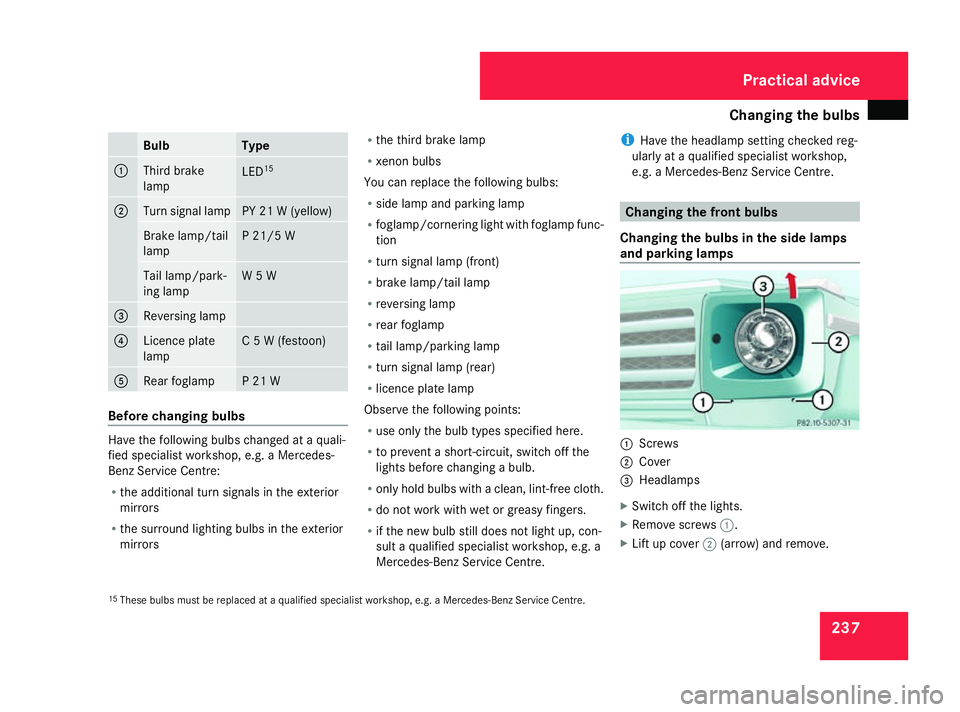
237Bulb Type
1
Third brake
lamp
LED
15 2
Turn signal lamp PY 21 W (yellow)
Brake lamp/tail
lamp P 21/5 W
Tail lamp/park-
ing lamp W 5 W
3
Reversing lamp
4
Licence plate
lamp C 5 W (festoon)
5
Rear foglamp P 21 W
Before changing bulbs
Have the following bulbs changed at a quali-
fied specialist workshop, e.g. a Mercedes-
Benz Service Centre:
R
the additional turn signals in the exterior
mirrors
R the surround lighting bulbs in the exterior
mirrors R
the third brake lamp
R xenon bulbs
You can replace the following bulbs:
R side lamp and parking lamp
R foglamp/cornering light with foglamp func-
tion
R turn signal lamp (front)
R brake lamp/tail lamp
R reversing lamp
R rear foglamp
R tail lamp/parking lamp
R turn signal lamp (rear)
R licence plate lamp
Observe the following points:
R use only the bulb types specified here.
R to prevent a short-circuit, switch off the
lights before changing a bulb.
R only hold bulbs with a clean, lint-free cloth.
R do not work with wet or greasy fingers.
R if the new bulb still does not light up, con-
sult a qualified specialist workshop, e.g. a
Mercedes-Benz Service Centre. i
Have the headlamp setting checked reg-
ularly at a qualified specialist workshop,
e.g. a Mercedes-Benz Service Centre. Changing the front bulbs
Changing the bulbs in the side lamps
and parking lamps 1
Screws
2 Cover
3 Headlamps
X Switch off the lights.
X Remove screws 1.
X Lift up cover 2(arrow) and remove.
15 These bulbs must be replaced at a qualified specialist workshop, e.g. a Mercedes-Benz Service Centre. Practical advice
463_AKB; 1; 8, en-GB
wobuchh,
Version: 2.10.6 2008-07-17T15:19:41+02:00 - Seite 237 ZDateiname: 6515_4091_02_buchblock.pdf; preflight