wheel bolt torque MERCEDES-BENZ G-CLASS SUV 2008 Owners Manual
[x] Cancel search | Manufacturer: MERCEDES-BENZ, Model Year: 2008, Model line: G-CLASS SUV, Model: MERCEDES-BENZ G-CLASS SUV 2008Pages: 293, PDF Size: 4.49 MB
Page 16 of 293

13
Trailer towing
Driving tips. .................................... 178
Mounting dimensions. ....................274
Ultrasonic reversing aid. .................119
Transfer case
Display message ............................. 202
Shift range ........................................ 92
Transmission
Display message ............................. 198
Transmission output (maximum)
Telephone/two-way radio ...............260
Transport (vehicle)............................. 254
Travelling uphill .................................. 174
Trip computer Menu (on-board computer). ............110
Trip meter........................................... 100
Resetting. ......................................... 96
Turn signal lamps
Display message ............................. 205
Two-way radio
Installation. ..................................... 260
Tyre grip.............................................. 171
Tyre pressure ..................................... 164
Calling up (on-board computer) .....165
Display message ............................. 198
see Tyre pressure
Tyres
Direction of rotatio n....................... 164
General notes. ................................ 162
Technical data. ............................... 267Tyre tread............................................ 164 U
Ultrasonic reversing aid.................... 118
Malfunction..................................... 222
Range of the sensors. .....................118
Trailer towing. ................................. 119
Warning displa y.............................. 119
Unladen weight.......................... 271, 272
Unlocking Emergency unlocking...................... 229
From the inside (central unlocking
button) .............................................. 56 V
Variable Speedtronic .........................115
Vehicle Emergency unlocking .............229, 230
Individual settings (on-board com-
puter). ............................................. 104
Leaving parked up. .........................228
Towing. ........................................... 254
Transporting ................................... 254
Vehicle battery................................... 247
Vehicle dimensions............................ 269
Vehicle electronics............................ 260
Vehicle identification number
(VIN)............................................ 261, 262
Vehicle identification plates............. 261Vehicle tool kit
Cabriolet. ........................................ 191
Long-wheelbase station wagon....... 189
Short-wheelbase station wagon. .....190
Vehicle weights.................................. 271 W
Warning and indicator lamp ABS (yellow).................................... 212
LIM (cruise control)......................... 114
LIM (variable Speedtronic). .............116
Warning and indicator lamps
ESP ®
......................................... 48, 213
Warning signal
Audible. .......................................... 217
Warning triangle
Cabriolet. ........................................ 191
Long-wheelbase station wagon
............................................... 188, 190
Washer fluid
Display message ............................. 209
Wearing seat belts............................... 71
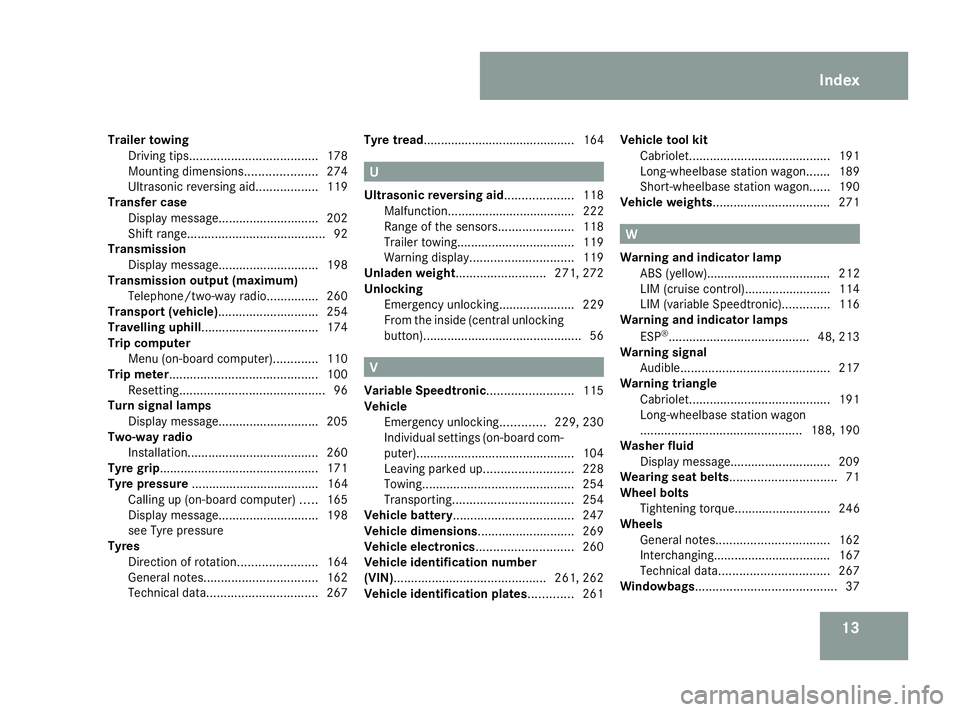
Wheel bolts Tightening torque............................ 246
Wheels
General notes. ................................ 162
Interchanging.................................. 167
Technical data. ............................... 267
Windowbags......................................... 37 Index
463_AKB; 1; 8, en-GB
wobuchh,
Version: 2.10.6 2008-07-17T15:19:41+02:00 - Seite 13Dateiname: 6515_4091_02_buchblock.pdf; preflight
Page 170 of 293

Tyres and wheels
167
R
changed the tyre pressure
R changed the wheels or tyres
R fitted new wheels or tyres
If you wish to define the new reference values
manually:
X Use the table on the inside of the fuel filler
flap to ensure that the tyre pressure is set
correctly in all four tyres for the current
operating conditions.
Also observe the notes in the section on
tyre pressures (Y page 164).
X Make sure that the key is in position 2in
the ignition lock.
The standard display appears in the multi-
function display (Y page 101).
X Press the jork button to select the
Tyre pressure function on the multi-func-
tion steering wheel or wait until the follow-
ing message appears:
Tyre pressure displayed only after
driving a few mins.
X Press the reset button on the left of the
instrument cluster (Y page 96).
The following message appears in the
multi-function display:
Tyre pressure monitor
reactivate?
Yes No
X Press the æbutton on the multi-func-
tion steering wheel.
The following message appears in the
multi-function display:
Tyre pressure monitor restarted
The tyre pressure monitor has stored the
pressure of the tyres as a new reference
value.
If you wish to cancel the restart:
X Press the çbutton on the multi-func-
tion steering wheel.
The tyre pressure values stored at the last
restart will continue to be monitored. Interchanging the wheels
G
Risk of accident
Interchange the front and rear wheels only
if they have the same dimensions: for exam-
ple size, offset, etc.
After every wheel interchange/change,
have the tightening torque checked at a
qualified specialist workshop that has the
necessary specialist knowledge and tools
to carry out the work required. Mercedes-
Benz recommends that you use a Mercedes-Benz Service Centre for this pur-
pose. In particular, work relevant to safety
or on safety-related systems must be car-
ried out at a qualified specialist workshop.
The wheels could work loose if they are not
tightened to a torque of 130 Nm.
For safety reasons, Mercedes-Benz recom-
mends that you only use wheel bolts of the
correct size which have been approved for
Mercedes-Benz vehicles.
The wear patterns on the front and rear tyres
differ depending on the operating conditions.
Interchange the wheels before a clear wear
pattern has formed on the tyres. Front tyres
typically wear more on the shoulders and the
rear tyres in the centre.
Interchange the wheels every 5,000 km to
10,000 km depending on the degree of tyre
wear, provided that the vehicle has the same
size front and rear tyres. Do not reverse the
direction of tyre rotation.
Clean the contact surfaces of the wheel and
the brake disc thoroughly every time a wheel
is interchanged. Check the tyre pressure and
reactivate the tyre pressure monitor* if nec-
essary. Operation
* optional
463_AKB; 1; 8, en-GB
wobuchh
,V ersion: 2.10.6
2008-07-17T15:19:41+02:00 - Seite 167 ZDateiname: 6515_4091_02_buchblock.pdf; preflight
Page 249 of 293

Flat tyre
246
!
Do not place wheel bolts in sand or on a
dirty surface. This could cause damage to
the bolt and wheel hub threads.
X Remove the wheel.
Fit ting a new wheel G
Risk of accident
Replace damaged or corroded wheel bolts.
Never oil or grease wheel bolts. G
Risk of accident
If a wheel hub thread is damaged, you must
not drive the vehicle any further. Consult a
qualified specialist workshop which has the
necessary specialist knowledge and tools
to carry out the work required. Mercedes-
Benz recommends that you use a
Mercedes-Benz Service Centre or Service
24h for this purpose. In particular, work rel-
evant to safety or on safety-related systems
must be carried out at a qualified specialist
workshop. G
Risk of accident
Only use wheel bolts that have been
designed for the wheel and the vehicle. For
safety reasons, Mercedes-Benz recom- mends that you only use wheel bolts which
have been approved for Mercedes-Benz
vehicles. Other bolts could work loose.
Do not tighten the wheel bolts completely
while the vehicle is still jacked up. The vehi-
cle could topple off the jack.
X Clean the wheel and wheel hub contact
surfaces.
X Place the wheel on the wheel hub and push
it on.
X Tighten the wheel bolts until they are fin-
ger-tight.
Lowering the vehicle X
Open the pressure release screw on the
jack using the pump lever (Y page 244) by
approximatel y one turn.
X Place the jack to one side. 1
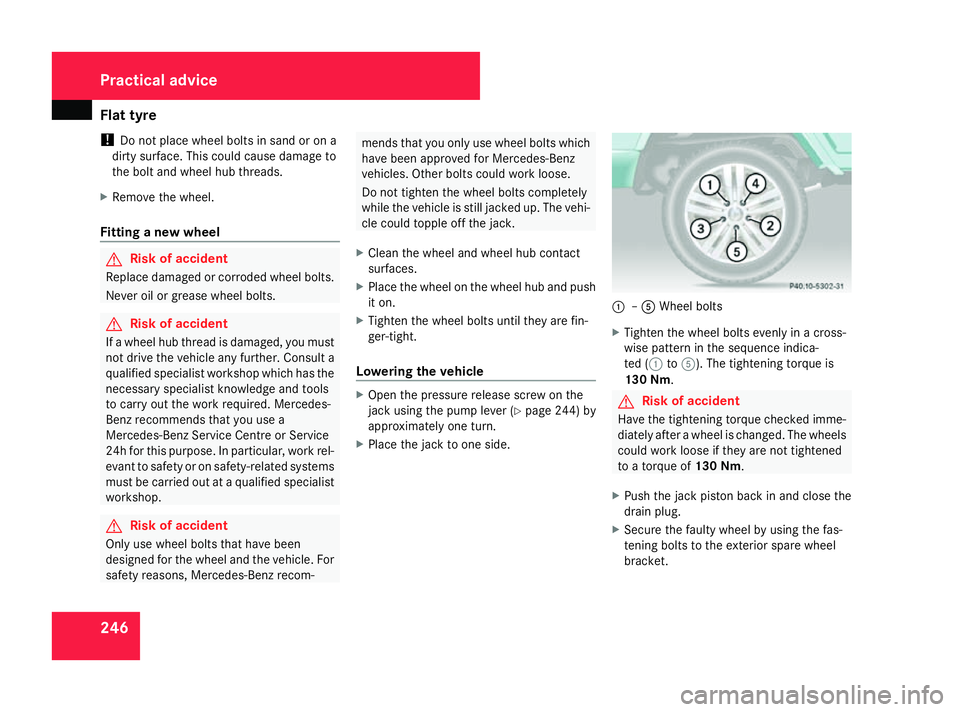
–5 Wheel bolts
X Tighten the wheel bolts evenly in a cross-
wise pattern in the sequence indica-
ted (1 to5). The tightening torque is
130 Nm . G
Risk of accident
Have the tightening torque checked imme-
diately after a wheel is changed. The wheels
could work loose if they are not tightened
to a torque of 130 Nm.
X Push the jack piston back in and close the
drain plug.
X Secure the faulty wheel by using the fas-
tening bolts to the exterior spare wheel
bracket. Practical advice
463_AKB; 1; 8, en-GB
wobuchh,
Version: 2.10.6 2008-07-17T15:19:41+02:00 - Seite 246Dateiname: 6515_4091_02_buchblock.pdf; preflight