battery MERCEDES-BENZ G-CLASS SUV 2012 User Guide
[x] Cancel search | Manufacturer: MERCEDES-BENZ, Model Year: 2012, Model line: G-CLASS SUV, Model: MERCEDES-BENZ G-CLASS SUV 2012Pages: 357, PDF Size: 8.86 MB
Page 98 of 357
The following adjustments are made:
R
the seat cushion and head restraint move
down.
R the seat moves forwards or backwards,
depending on the starting position.
R backrest :tilts forwards.
R on the driver's side, the steering wheel
moves upwards and towards the dash-
board.
X Fold backrest :forwards in the direction
of the arrow.
Folding the seat back X
Push backrest :back until the seat
engages.
The seat cushion, head restraint, backrest
and steering wheel (driver's side) move
back to their original positions.
For safety reasons, the seat only moves to
its original position if this is in frontoft he
EASY-ENTRY position.
i Store the seat position using the memory
function (Y page 102).
i If your seat position is behind the EASY-
ENTRY position, you can return to this posi-
tion by pressing one of the memory but-
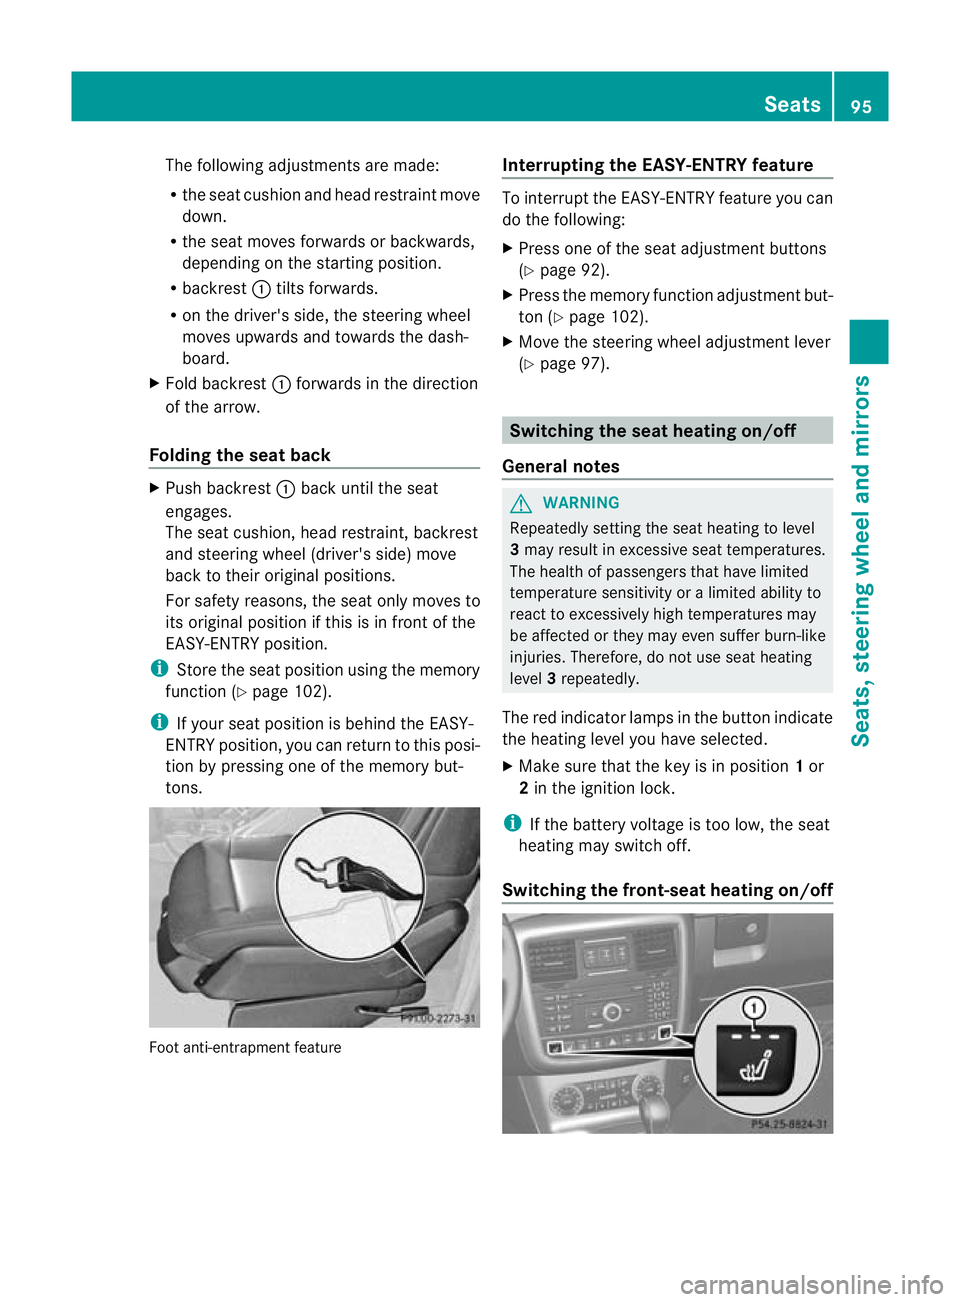
tons. Foot anti-entrapment feature Interrupting the EASY-ENTRY feature To interrupt the EASY-ENTRY feature you can
do the following:
X
Press one of the seat adjustment buttons
(Y page 92).
X Press the memory function adjustment but-
ton (Y page 102).
X Move the steering wheel adjustment lever
(Y page 97). Switching the seat heating on/off
General notes G
WARNING
Repeatedly setting the seat heating to level
3 may result in excessive seat temperatures.
The health of passengers that have limited
temperature sensitivity or a limited ability to
react to excessively high temperatures may
be affected or they may even suffer burn-like
injuries. Therefore, do not use seat heating
level 3repeatedly.
The red indicator lamps in the button indicate
the heating level you have selected.
X Make sure that the key is in position 1or
2 in the ignition lock.
i If the battery voltage is too low, the seat
heating may switch off.
Switching the front-seat heating on/off Seats
95Seats, steering wheel and mirrors Z
Page 100 of 357
i
If the battery voltage is too low, the seat
ventilation may switch off.
Problems with the seat ventilation If one or all of the indicator lamps in the seat
ventilation button are flashing, the seat ven-
tilatio nhas switched off automatically. The
vehicle's electrical system voltage is too low
because too many electrical consumers are
switched on.
X Switch off electrical consumers that you do
no tn eed, such as the rear window heating
or interior lighting.
Once the battery is sufficiently charged, the
seat ventilation will switch back on auto-
matically. Steering wheel
Important safety notes
G
WARNING
Do not adjust the steering wheel while driving.
Adjusting the steering wheel while driving
could cause the driver to lose control of the
vehicle.
The electrical steering wheel adjustment can
be operated at any time. Therefore, do not
leave children unattended in the vehicle or
with access to an unlocked vehicle. Children
having unsupervised access to a vehicle could
result in an acciden tand/o rserious personal
injury. Adjusting the steering wheel
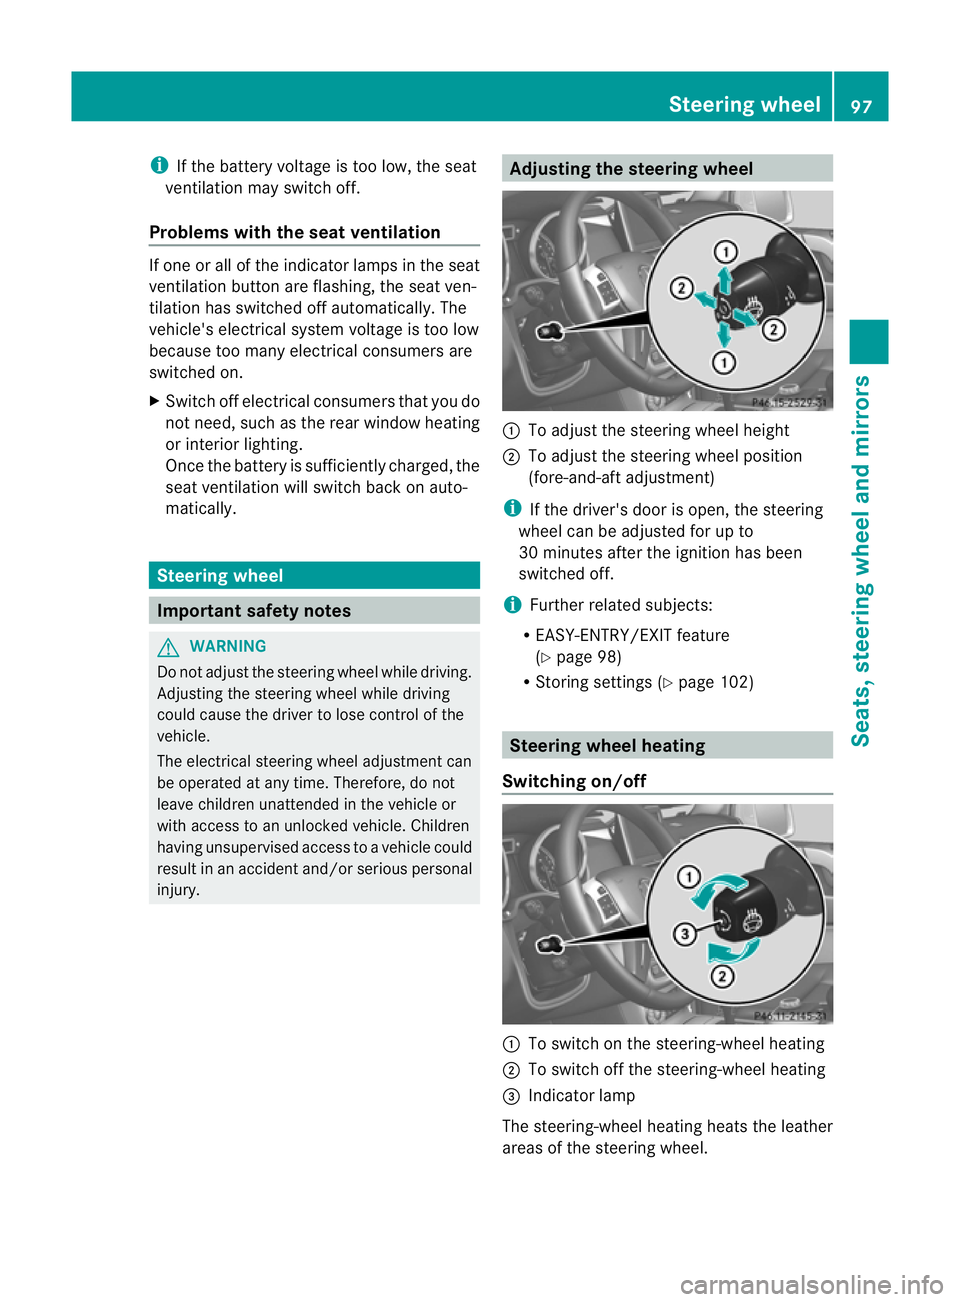
:
To adjust the steering wheel height
; To adjust the steering wheel position
(fore-and-aft adjustment)
i If the driver's door is open, the steering
wheel can be adjusted for up to
30 minutes after the ignition has been
switched off.
i Further related subjects:
R EASY-ENTRY/EXIT feature
(Y page 98)
R Storing settings (Y page 102) Steering wheel heating
Switching on/off :
To switch on the steering-wheel heating
; To switch off the steering-wheel heating
= Indicator lamp
The steering-wheel heating heats the leather
areas of the steering wheel. Steering wheel
97Seats, steering wheel and mirrors Z
Page 101 of 357
X
To activate: make sure tha tthe key is in
position 1or 2in the ignition lock.
X Turn the catch in the direction of
arrow :.
Indicator lamp =lights up.
X To deactivate: make sure that the key is
in position 1or 2in the ignition lock.
X Turn the catch in the direction of
arrow ;.
Indicator lamp =goes out.
i The steering wheel heating does not
switch off automatically.
Problems with the steering wheel heat-
ing :
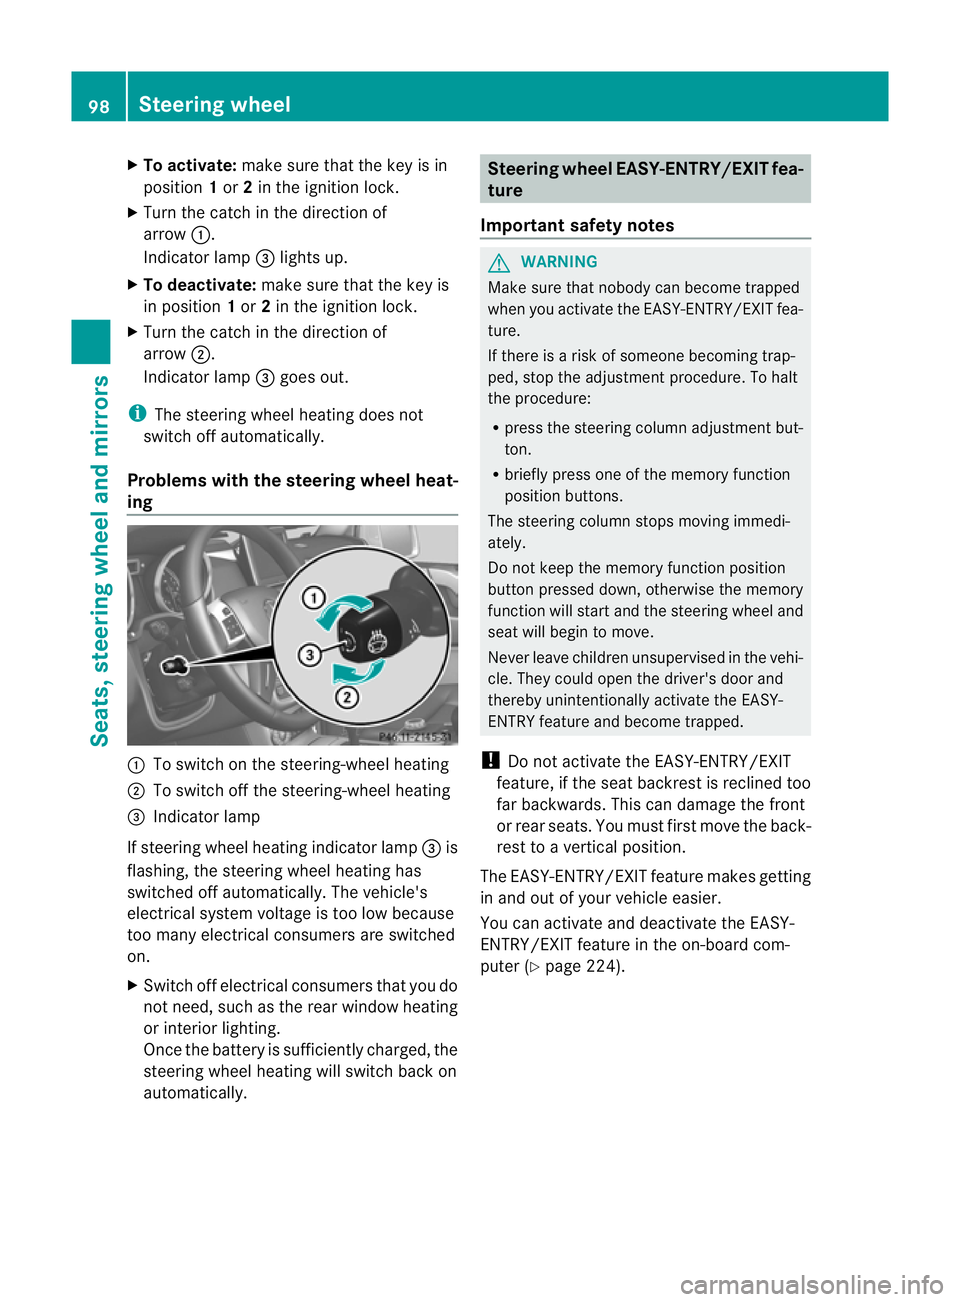
To switch on the steering-wheel heating
; To switch off the steering-wheel heating
= Indicator lamp
If steering wheel heating indicator lamp =is
flashing, the steering wheel heating has
switched off automatically .The vehicle's
electrical system voltage is too low because
too many electrical consumers are switched
on.
X Switch off electrical consumers that you do
not need, such as the rear window heating
or interior lighting.
Once the battery is sufficiently charged, the
steering wheel heating will switch back on
automatically. Steering wheel EASY-ENTRY/EXIT fea-
ture
Important safety notes G
WARNING
Make sure that nobody can become trapped
when you activate the EASY-ENTRY/EXIT fea-
ture.
If there is a risk of someone becoming trap-
ped, stop the adjustment procedure. To halt
the procedure:
R press the steering column adjustment but-
ton.
R briefly press one of the memory function
position buttons.
The steering column stops moving immedi-
ately.
Do not keep the memory function position
button pressed down, otherwise the memory
function will start and the steering wheel and
seat will begin to move.
Never leave children unsupervised in the vehi-
cle. They could open the driver's door and
thereby unintentionally activate the EASY-
ENTRY feature and become trapped.
! Do not activate the EASY-ENTRY/EXIT
feature, if the seat backrest is reclined too
far backwards. This can damage the front
or rear seats. You must first move the back-
rest to a vertical position.
The EASY-ENTRY/EXIT feature makes getting
in and out of your vehicle easier.
You can activate and deactivate the EASY-
ENTRY/EXIT feature in the on-board com-
puter (Y page 224). 98
Steering wheelSeats, steering wheel and mirrors
Page 103 of 357
X
Make sure that the key is in position 1or
2 (Y page 143) in the ignition lock.
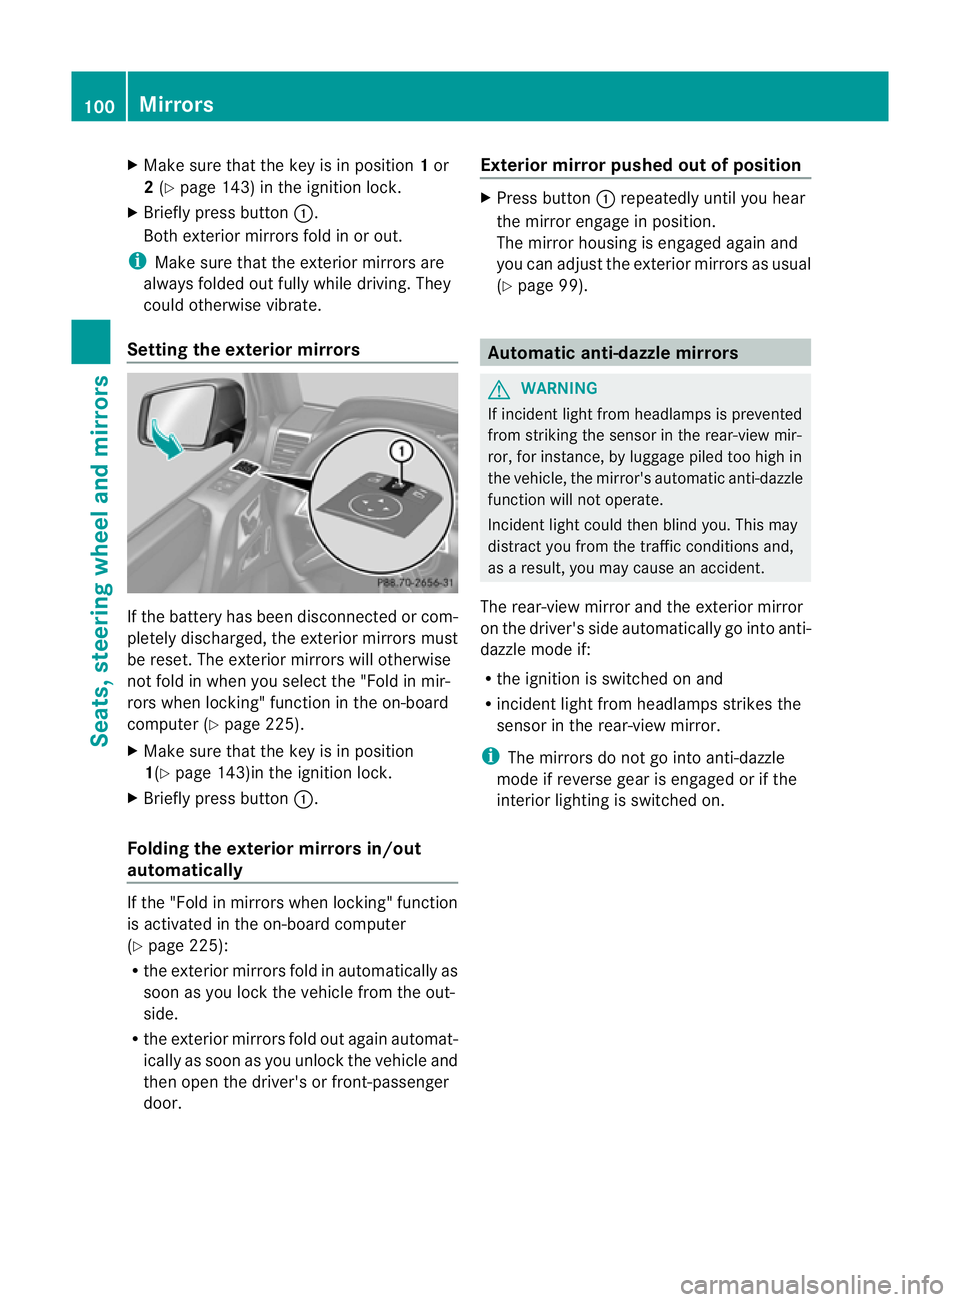
X Briefly press button :.
Both exterior mirrors fold in or out.
i Make sure that the exterior mirrors are
always folded out fully while driving. They
could otherwise vibrate.
Setting the exterior mirrors If the battery has been disconnected or com-
pletely discharged, the exterior mirrors must
be reset. The exterior mirrors will otherwise
not fold in when you select the "Fold in mir-
rors when locking" function in the on-board
computer (Y page 225).
X Make sure that the key is in position
1(Y page 143)in the ignition lock.
X Briefly press button :.
Folding the exterior mirrors in/out
automatically If the "Fold in mirrors when locking" function
is activated in the on-board computer
(Y
page 225):
R the exterior mirrors fold in automatically as
soon as you lock the vehicle from the out-
side.
R the exterior mirrors fold out again automat-
ically as soon as you unlock the vehicle and
then open the driver's or front-passenger
door. Exterior mirror pushed out of position X
Press button :repeatedly until you hear
the mirror engage in position.
The mirror housing is engaged again and
you can adjust the exterior mirrors as usual
(Y page 99). Automatic anti-dazzle mirrors
G
WARNING
If incident light from headlamps is prevented
from striking the sensor in the rear-view mir-
ror, for instance, by luggage piled too high in
the vehicle, the mirror's automatic anti-dazzle
function will not operate.
Incident light could then blind you. This may
distract you from the traffic conditions and,
as a result, you may cause an accident.
The rear-view mirror and the exterior mirror
on the driver's side automatically go into anti-
dazzle mode if:
R the ignition is switched on and
R incident light from headlamps strikes the
sensor in the rear-view mirror.
i The mirrors do not go into anti-dazzle
mode if reverse gear is engaged or if the
interior lighting is switched on. 100
MirrorsSeats, steering wheel and mirrors
Page 107 of 357
Useful information
i This Owner's Manual describes all mod-
els, series and optional equipment for your
vehicle that were available at the time of
going to press. Country-specific differen-
ces are possible. Note that your vehicle
may not be fitted with all features descri-
bed. This is also the case for systems and
functions relevant to safety.
i Read the information on qualified special-
ist workshops: (Y page 22). Exterior lighting
Important safety notes
For reasons of safety, Mercedes-Benz recom-
mends that you drive with the lights switched
on even during the daytime. In some coun-
tries, operation of the headlamps varies due
to legal requirements and self-imposed obli-
gations. Driving abroad
Converting to symmetrical dipped
beam If your journey takes you to countries where
vehicles are driven on the opposite side of the
road to the country in which the vehicle is
registered, your headlamps must be switched
to symmetrical dipped beam. This prevents
oncoming traffic from being dazzled. Sym-
metrical lights do not illuminate as large an
area of the edge of the carriageway.
Have the headlamps converted at a qualified
specialist workshop as close to the border as
possible before driving in these countries.
Converting to asymmetrical dipped
beam after returning Have the headlamps converted back to asym-
metrical dipped-beam headlamps at a quali- fied specialist workshop as soon as possible
after crossing the border again. Light switch
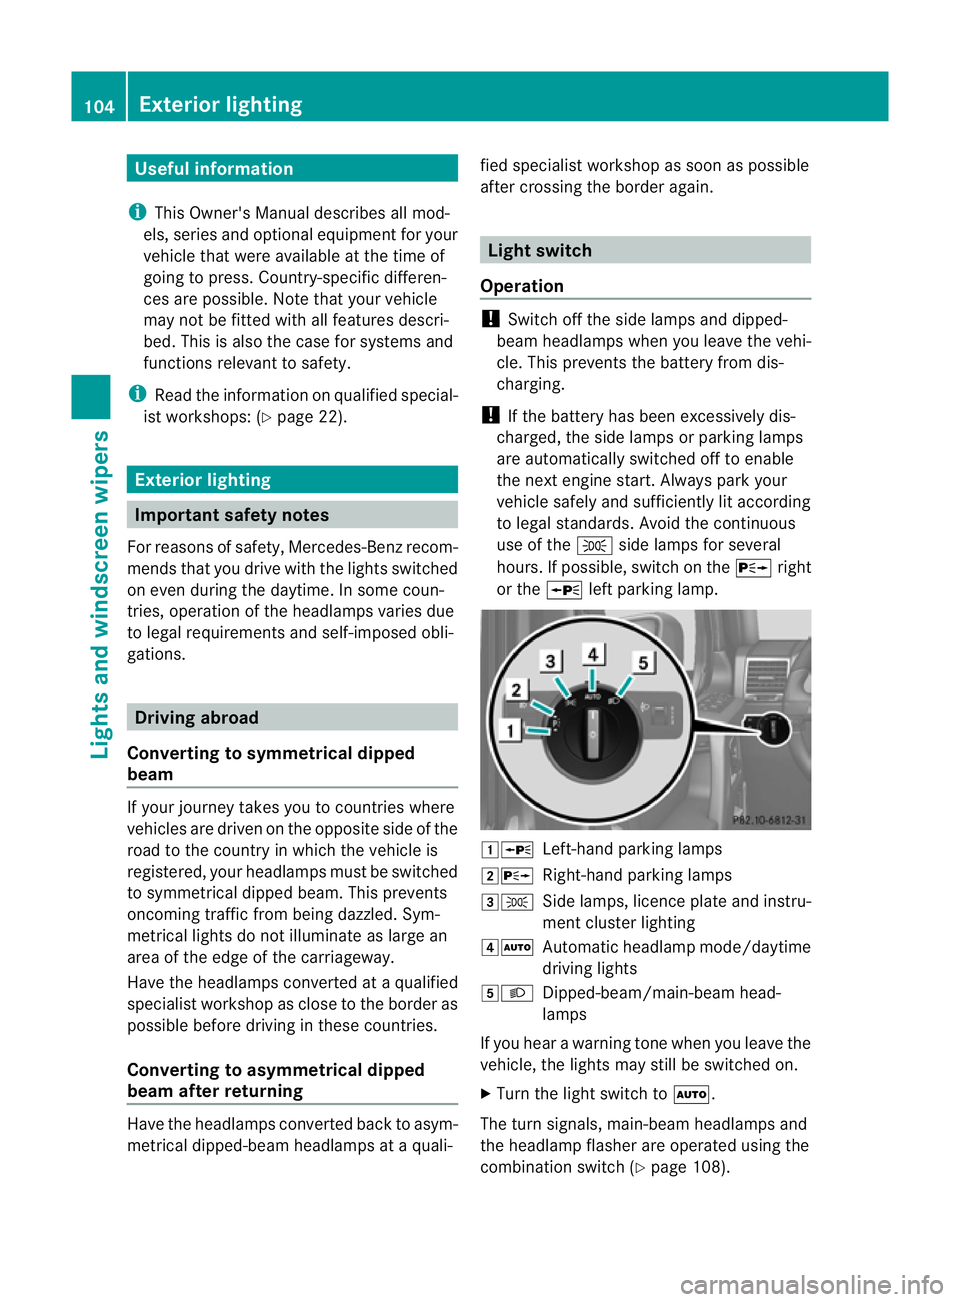
Operation !
Switch off the side lamps and dipped-
beam headlamps when you leave the vehi-
cle. This prevents the battery from dis-
charging.
! If the battery has been excessively dis-
charged, the side lamps or parking lamps
are automatically switched off to enable
the nex tengine start. Always park your
vehicle safely and sufficiently li taccording
to legal standards. Avoid the continuous
use of the Tside lamps for several
hours. If possible, switch on the Xright
or the Wleft parking lamp. 1W
Left-hand parking lamps
2X Right-hand parking lamps
3T Side lamps, licence plate and instru-
ment cluster lighting
4Ã Automati cheadlamp mode/daytime
driving lights
5L Dipped-beam/main-beam head-
lamps
If you hear a warning tone when you leave the
vehicle, the lights may still be switched on.
X Turn the light switch to Ã.
The turn signals, main-beam headlamps and
the headlamp flasher are operated using the
combination switch (Y page 108).104
Exterior lightingLights and windscreen wipers
Page 114 of 357
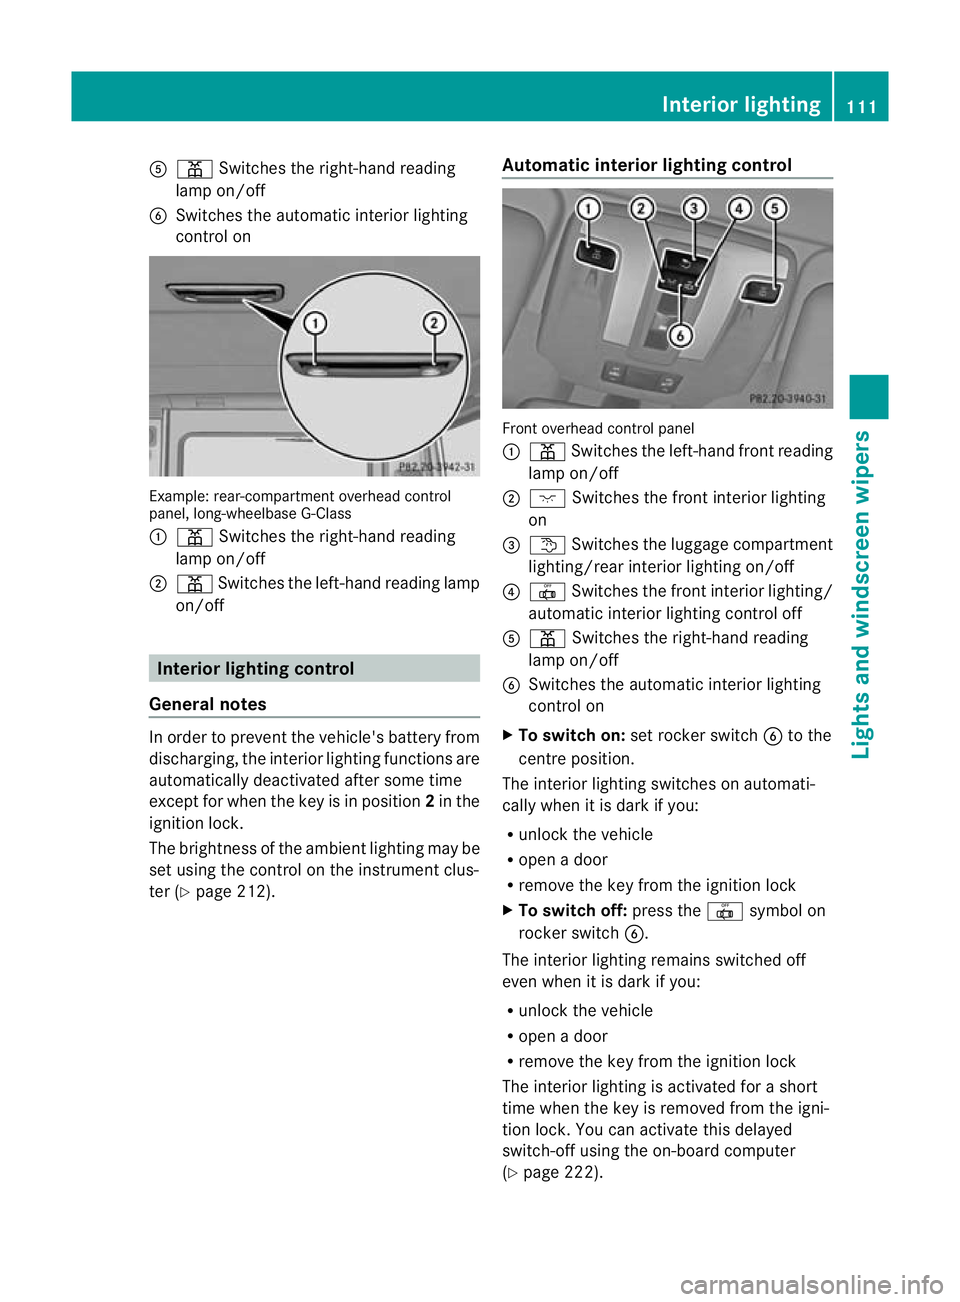
A
p Switches the right-hand reading
lamp on/off
B Switches the automatic interio rlighting
control on Example: rear-compartment overhead control
panel, long-wheelbase G-Class
: p Switches the right-hand reading
lamp on/off
; p Switches the left-hand reading lamp
on/off Interior lighting control
General notes In order to prevent the vehicle's battery from
discharging, the interior lighting functions are
automatically deactivated after some time
except for when the key is in position 2in the
ignition lock.
The brightness of the ambien tlighting may be
set using the control on the instrument clus-
ter (Y page 212). Automatic interior lighting control Front overhead control panel
:
p Switches the left-hand front reading
lamp on/off
; c Switches the front interior lighting
on
= t Switches the luggage compartment
lighting/rear interior lighting on/off
? | Switches the front interior lighting/
automatic interior lighting control off
A p Switches the right-hand reading
lamp on/off
B Switches the automatic interior lighting
control on
X To switch on: set rocker switch Bto the
centre position.
The interior lighting switches on automati-
cally when it is dark if you:
R unloc kthe vehicle
R open a door
R remove the key from the ignition lock
X To switch off: press the|symbol on
rocker switch B.
The interior lighting remains switched off
even when it is dark if you:
R unlock the vehicle
R open a door
R remove the key from the ignition lock
The interior lighting is activated for a short
time when the key is removed from the igni-
tion lock. You can activate this delayed
switch-off using the on-board computer
(Y page 222). Interior lighting
111Lights and windscreen wipers Z
Page 115 of 357
When a fron
tdoor is opened, the front interior
lighting comes on. When arear door is
opened, the rear interior lighting comes on.
In addition, the courtesy lights come on.
i If a door remains open and the ignition
key is not in the ignition lock, the interior
lighting switches off automatically after
approximately 30 minutes.
Manual interior lighting control Front interior lighting
!
If the interior lighting has been switched
on manually, it will not be switched off
automatically.
This can cause the starter battery to dis-
charge.
Make sure that the interior lighting does
not remain switched on too long after the
engine has been switched off. Front overhead control panel
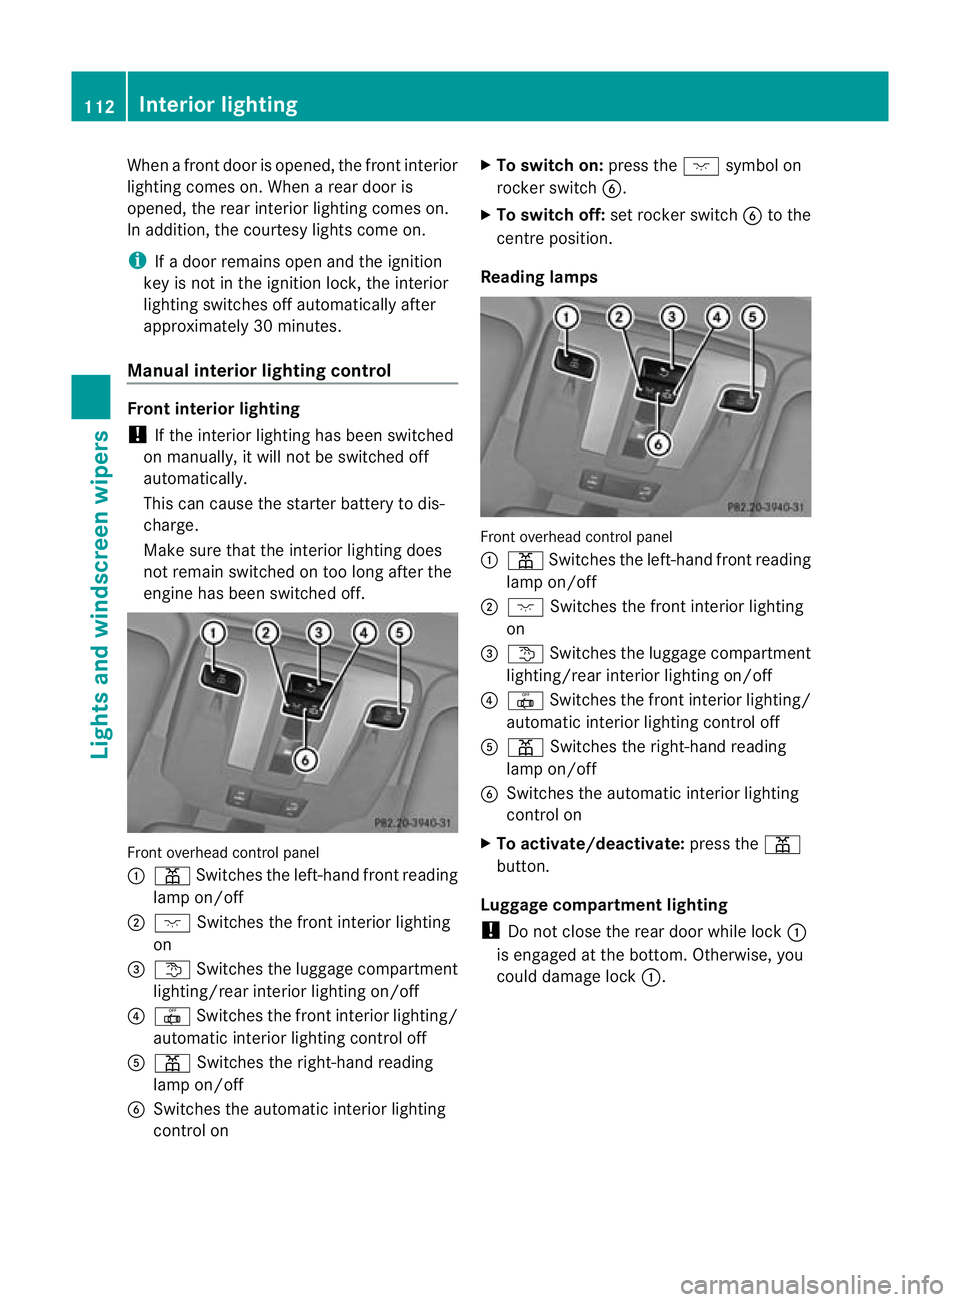
:
p Switches the left-hand fron treading
lamp on/off
; c Switches the front interior lighting
on
= t Switches the luggage compartment
lighting/rear interior lighting on/off
? | Switches the fron tinterior lighting/
automatic interio rlighting control off
A p Switches the right-hand reading
lamp on/off
B Switches the automatic interior lighting
control on X
To switch on: press thecsymbol on
rocker switch B.
X To switch off: set rocker switch Bto the
centre position.
Reading lamps Front overhead control panel
:
p Switches the left-hand front reading
lamp on/off
; c Switches the front interior lighting
on
= t Switches the luggage compartment
lighting/rear interior lighting on/off
? | Switches the front interior lighting/
automatic interior lighting control off
A p Switches the right-hand reading
lamp on/off
B Switches the automatic interior lighting
control on
X To activate/deactivate: press thep
button.
Luggage compartment lighting
! Do not close the rear door while lock :
is engaged at the bottom .Otherwise, you
could damage lock :.112
Interior lightingLights and
windscreen wipers
Page 116 of 357
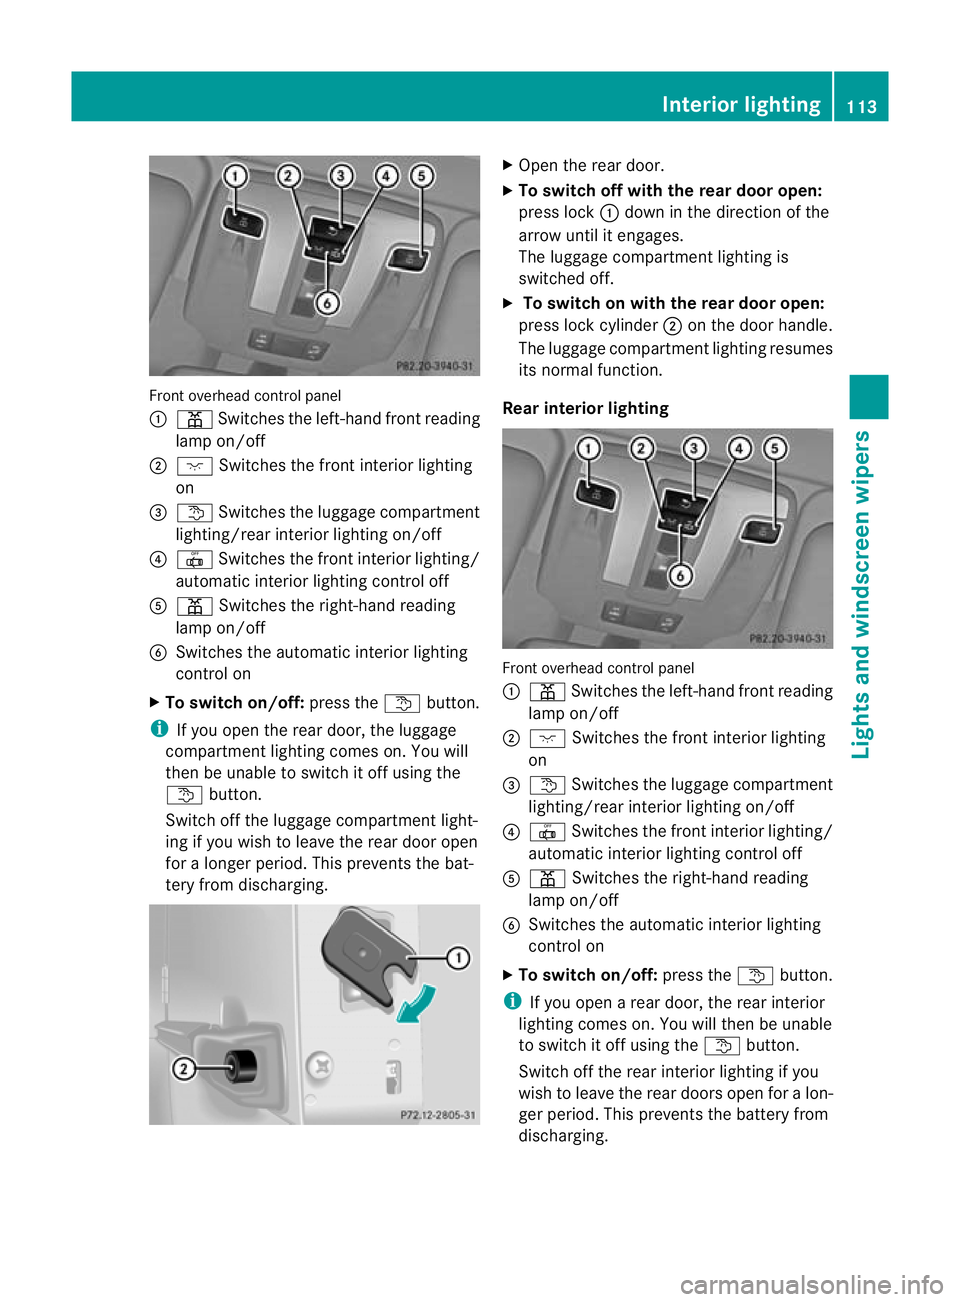
Front overhead control panel
:
p Switches the left-hand front reading
lamp on/off
; c Switches the front interior lighting
on
= t Switches the luggage compartment
lighting/rea rinterior lighting on/off
? | Switches the front interio rlighting/
automatic interior lighting control off
A p Switches the right-hand reading
lamp on/off
B Switches the automatic interior lighting
control on
X To switch on/off: press thetbutton.
i If you open the rear door, the luggage
compartmen tlighting comes on. You will
the nbe unable to switch it off using the
t button.
Switch off the luggage compartment light-
ing if you wish to leave the rear door open
for a longer period. This prevents the bat-
tery from discharging. X
Open the rear door.
X To switch off with the rear door open:
press lock :down in the direction of the
arrow until it engages.
The luggage compartment lighting is
switched off.
X To switch on with the rear door open:
press lock cylinder ;on the door handle.
The luggage compartment lighting resumes
its normal function.
Rear interior lighting Front overhead control panel
:
p Switches the left-hand fron treading
lamp on/off
; c Switches the front interior lighting
on
= t Switches the luggage compartment
lighting/rear interior lighting on/off
? | Switches the fron tinterior lighting/
automatic interio rlighting control off
A p Switches the right-hand reading
lamp on/off
B Switches the automatic interior lighting
control on
X To switch on/off: press thetbutton.
i If you open a rear door, the rear interior
lighting comes on. You will the nbe unable
to switch it off using the tbutton.
Switch off the rear interior lighting if you
wish to leave the rear doors open for a lon-
ger period. This prevents the battery from
discharging. Interior lighting
113Lights and windscreen wipers Z
Page 135 of 357
The climate control system switches to the
following functions:
R
cooling with air dehumidification (only
with engine running)
R high airflow (depending on the outside
temperature)
R high temperature (depending on the out-
side temperature)
R air distribution to the windscreen and
fronts ide windows
R air-recirculation mode off
X To deactivate: press the¬button.
The indicator lamp in the ¬button goes
out. The previous settings are reactivated.
The cooling with air dehumidification func-
tion remains on. Air-recirculation mode
remains deactivated.
or
X Press the Ãbutton.
The indicator lamp in the ¬button goes
out. Airflow and air distribution are set to
automatic mode.
or
X Turn controls :orB clockwise or anti-
clockwise (Y page 125).
or
X Press the KorI button. Demisting the windows
Windows misted up on th einside X
Activate the Ácooling with air dehu-
midification function.
X Activate automatic mode Ã.
X If the windows continue to mist up, activate
the demisting function (Y page 131).
i You should only select this setting until
the windscreen is clear again. Windows misted up on the outside X
Switch on the windscreen wipers
(Y page 119).
X Press the _button repeatedly until the
P orO symbol appears in the dis-
play.
i You should only select this setting until
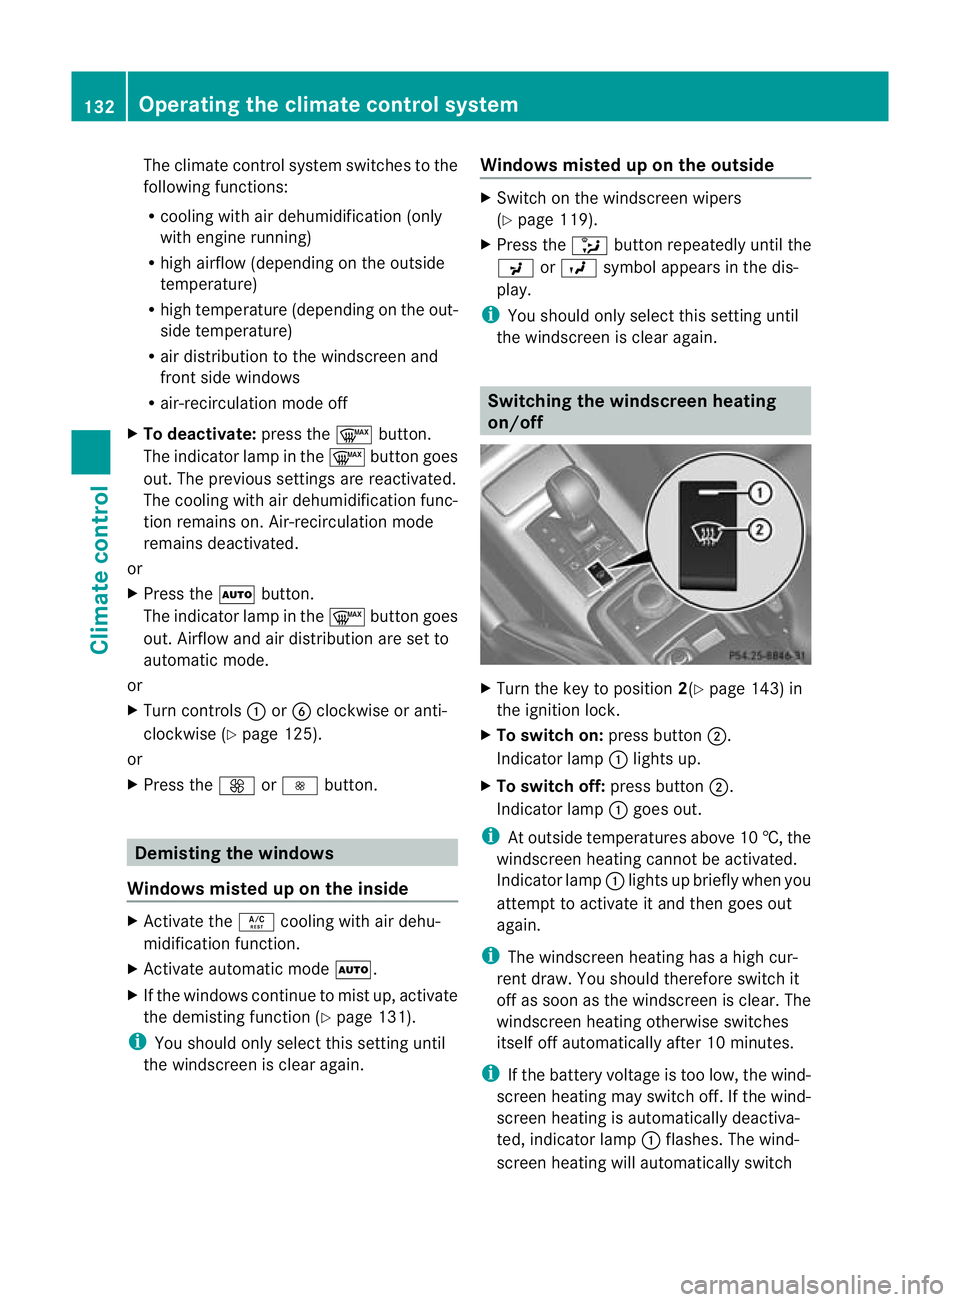
the windscreen is clear again. Switching the windscreen heating
on/off
X
Turn the key to position 2(Ypage 143) in
the ignition lock.
X To switch on: press button;.
Indicator lamp :lights up.
X To switch off: press button;.
Indicator lamp :goes out.
i At outside temperatures above 10 †, the
windscreen heating cannot be activated.
Indicator lamp :lights up briefly when you
attempt to activate it and then goes out
again.
i The windscreen heating has a high cur-
rent draw. You should therefore switch it
off as soon as the windscreen is clear. The
windscreen heating otherwise switches
itself off automatically after 10 minutes.
i If the battery voltage is too low, the wind-
screen heating may switch off. If the wind-
screen heating is automatically deactiva-
ted, indicator lamp :flashes. The wind-
screen heating will automatically switch 132
Operating the climate control systemClimate control
Page 136 of 357
back on as soon as ther
eis sufficient volt-
age. Switching the rear window heating
on/off
Switching on/off G
WARNING
Cleara ll windows of ice or snow before setting
off .O therwise, impaired visibility could
endanger you and others.
X Turn the key to position 2(Ypage 143) in
the ignition lock.
X USA only: press theªbutton.
The indicator lamp in the ªbutton lights
up or goes out.
i The rea rwindow heating has ahigh cur-
ren tdraw.Y ou should therefore switch it
off as soon as the window is clear. It only
switches itself off automatically after a few
minutes.
i If the battery voltage is too low, the rear
window heating may switch off.
Problems with the rear window heating If the indicator lamp in the
ªrear window
heating button flashes, the on-board voltage
is too low. The rear window heating has
switched off prematurely or cannot be acti-
vated.
X Switch off any consumers that are not
required, e.g. reading lamps or interior
lighting.
When the battery is sufficiently charged,
the rear window heating is activated again
automatically. Activating/deactivating air-recircula-
tion mode
G
WARNING
Only switch over to air-recirculation mode
briefly at low outside temperatures. Other-
wise, the windows could mist up, thus impair-
ing visibility and endangering yourself and
others. This may prevent you from observing
the traffic conditions, thereby causing an
accident.
X Turn the key to position 2(Ypage 143) in
the ignition lock.
X To switch on: press thedbutton.
The indicator lamp in the dbutton lights
up.
i Air-recirculation mode is automatically
activated at high levels of pollution or at
high outside temperatures. When air-recir-
culation mode is activated automatically,
the indicator lamp in the dbutton is not
lit.
Outside air is added after approximately
30 minutes.
X To deactivate: press thedbutton.
The indicator lamp in the dbutton goes
out.
i Air-recirculation mode switches off auto-
matically:
R after approximately five minutes at out-
side temperatures below approximately
5 †
R after approximately five minutes if cool-
ing with air dehumidification is deactiva-
ted
R after approximately 30 minutes at out-
side temperatures above approximately
5 † Activating/deactivating the residual
heat function
It is possible to make use of the residual heat
of the engine to continue heating the station- Operating the climate control system
133Climate control Z