change key battery MERCEDES-BENZ G-CLASS SUV 2012 Owners Manual
[x] Cancel search | Manufacturer: MERCEDES-BENZ, Model Year: 2012, Model line: G-CLASS SUV, Model: MERCEDES-BENZ G-CLASS SUV 2012Pages: 357, PDF Size: 8.86 MB
Page 74 of 357

batteries to a qualified spe-
cialist workshop or to a col-
lection point for used batter-
ies.
Mercedes-Benz recommends that you have
the batteries replaced at a qualified specialist
workshop.
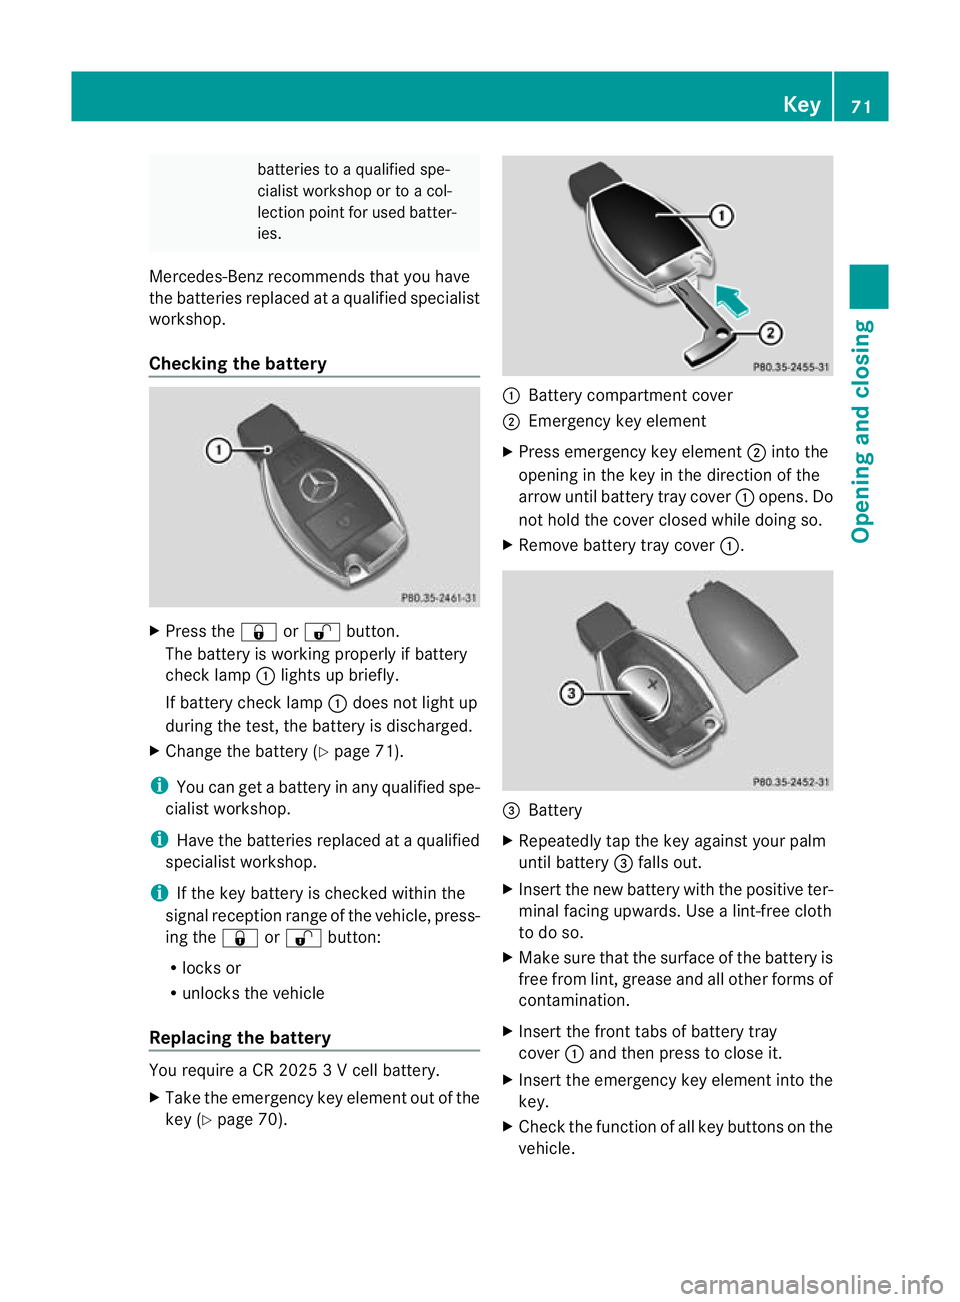
Checking the battery X
Press the &or% button.
The battery is working properly if battery
chec klamp :lights up briefly.
If battery check lamp :does no tlight up
during the test, the battery is discharged.
X Change the battery (Y page 71).
i You can get a battery in any qualified spe-
cialist workshop.
i Have the batteries replaced at a qualified
specialist workshop.
i If the key battery is checked within the
signal receptio nrange of the vehicle, press-
ing the &or% button:
R locks or
R unlocks the vehicle
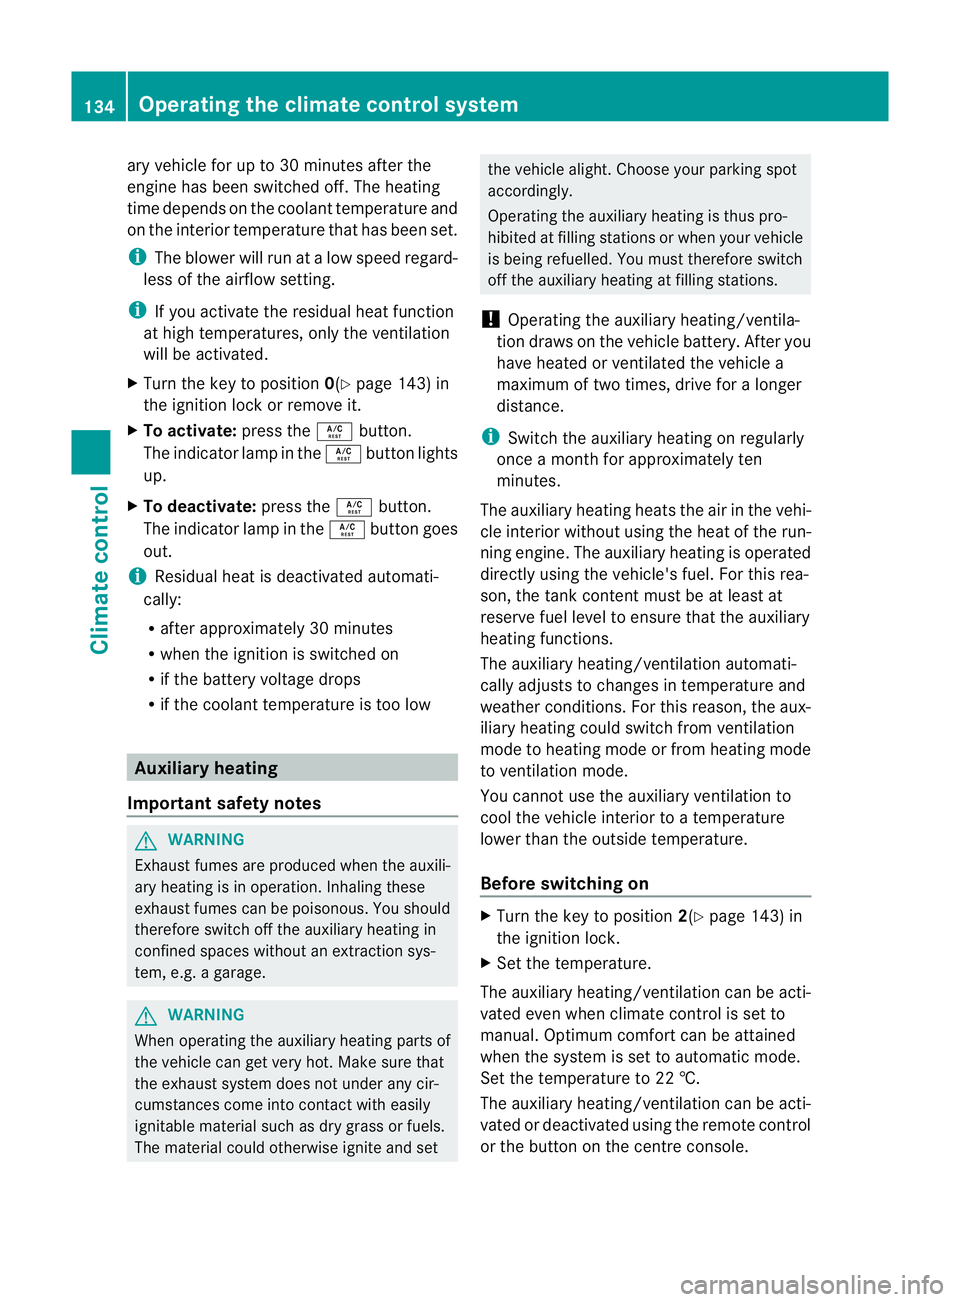
Replacing the battery You require a CR 2025 3 V cell battery.
X Take the emergency key elemen tout of the
key (Y page 70). :
Battery compartment cover
; Emergency key element
X Press emergency key element ;into the
opening in the key in the direction of the
arrow until battery tray cover :opens. Do
no th old the cover closed while doing so.
X Remove battery tray cover :. =
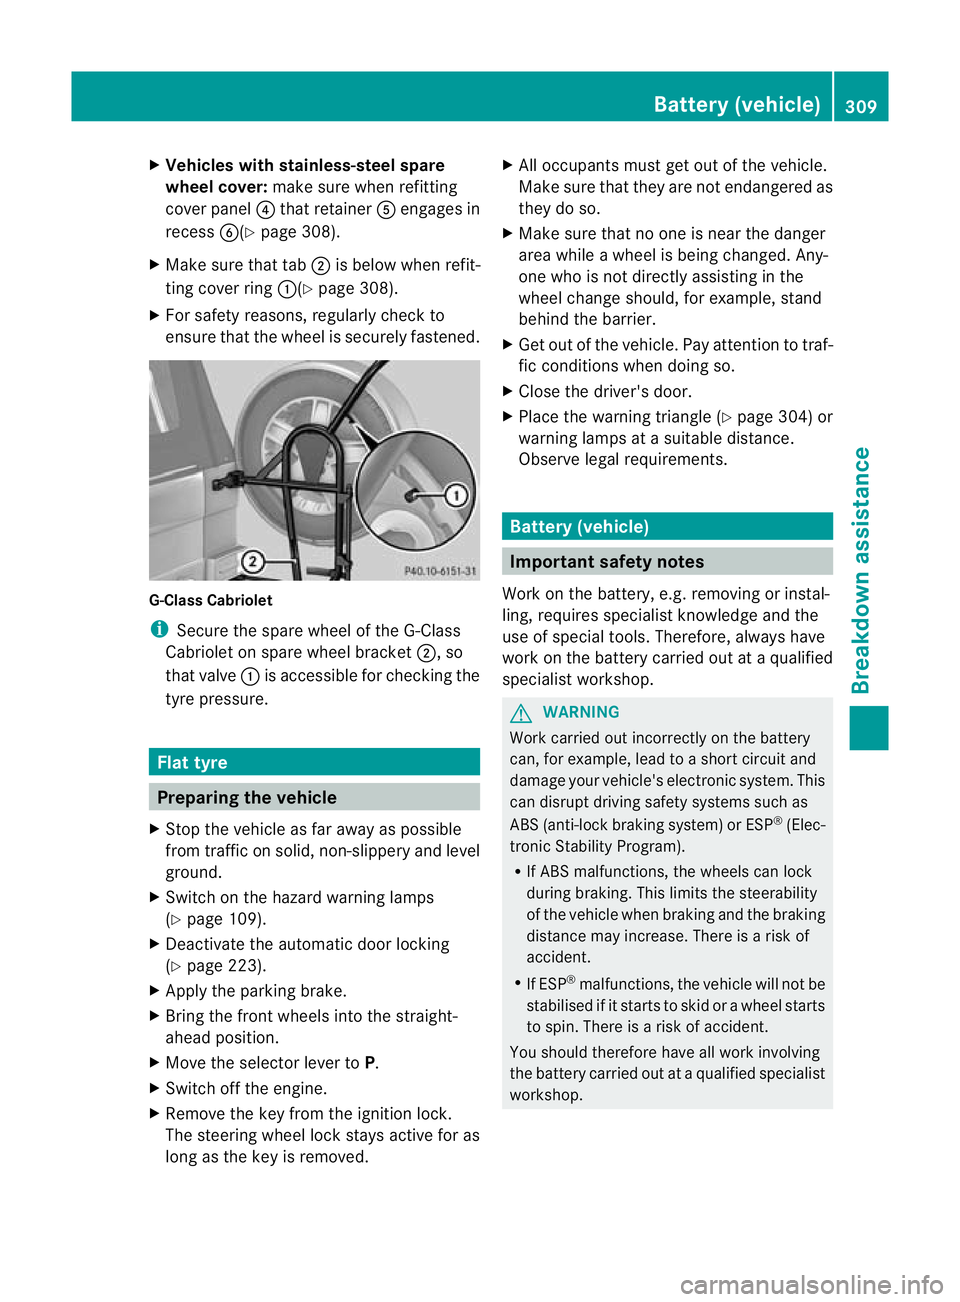
Battery
X Repeatedly tap the key against your palm
until battery =falls out.
X Insert the new battery with the positive ter-
minal facing upwards. Use a lint-free cloth
to do so.
X Make sure that the surface of the battery is
free from lint, grease and all other forms of
contamination.
X Insert the front tabs of battery tray
cover :and then press to close it.
X Insert the emergency key element into the
key.
X Check the function of all key buttons on the
vehicle. Key
71Opening and closing Z
Page 137 of 357

ary vehicle for up to 30 minutes after the
engine has been switched off
.The heating
time depends on the coolant temperature and
on the interior temperature that has been set.
i The blower will run at a low speed regard-
less of the airflow setting.
i If you activate the residual heat function
at high temperatures, only the ventilation
will be activated.
X Turn the key to position 0(Ypage 143) in
the ignition lock or remove it.
X To activate: press theÁbutton.
The indicator lamp in the Ábutton lights
up.
X To deactivate: press theÁbutton.
The indicator lamp in the Ábutton goes
out.
i Residual heat is deactivated automati-
cally:
R after approximately 30 minutes
R when the ignition is switched on
R if the battery voltage drops
R if the coolant temperature is too low Auxiliary heating
Important safety notes G
WARNING
Exhaust fumes are produced when the auxili-
ary heating is in operation. Inhaling these
exhaust fumes can be poisonous. You should
therefore switch off the auxiliary heating in
confined spaces without an extraction sys-
tem, e.g. a garage. G
WARNING
When operating the auxiliary heating parts of
the vehicle can get very hot. Make sure that
the exhaust system does not under any cir-
cumstances come into contact with easily
ignitable material such as dry grass or fuels.
The material could otherwise ignite and set the vehicle alight. Choose your parking spot
accordingly.
Operating the auxiliary heating is thus pro-
hibited at filling stations or when your vehicle
is being refuelled. You must therefore switch
off the auxiliary heating at filling stations.
! Operating the auxiliary heating/ventila-
tion draws on the vehicle battery. After you
have heated or ventilated the vehicle a
maximum of two times, drive for a longer
distance.
i Switch the auxiliary heating on regularly
once a month for approximately ten
minutes.
The auxiliary heating heats the air in the vehi-
cle interior without using the heat of the run-
ning engine. The auxiliary heating is operated
directly using the vehicle's fuel. For this rea-
son, the tank content must be at least at
reserve fuel level to ensure that the auxiliary
heating functions.
The auxiliary heating/ventilation automati-
cally adjusts to changes in temperature and
weather conditions. For this reason, the aux-
iliary heating could switch from ventilation
mode to heating mode or from heating mode
to ventilation mode.
You cannot use the auxiliary ventilation to
cool the vehicle interior to a temperature
lower than the outside temperature.
Before switching on X
Turn the key to position 2(Ypage 143) in
the ignition lock.
X Set the temperature.
The auxiliary heating/ventilation can be acti-
vated even when climate control is set to
manual. Optimum comfort can be attained
when the system is set to automatic mode.
Set the temperature to 22 †.
The auxiliary heating/ventilation can be acti-
vated or deactivated using the remote control
or the button on the centre console. 134
Operating the climate control systemClimate control
Page 312 of 357

X
Vehicles with stainless-steel spare
wheel cover: make sure when refitting
cove rpanel ?that retainer Aengages in
recess B(Ypage 308).
X Make sure that tab ;is below when refit-
ting cover ring :(Ypage 308).
X For safety reasons, regularly check to
ensure that the wheel is securely fastened. G-Class Cabriolet
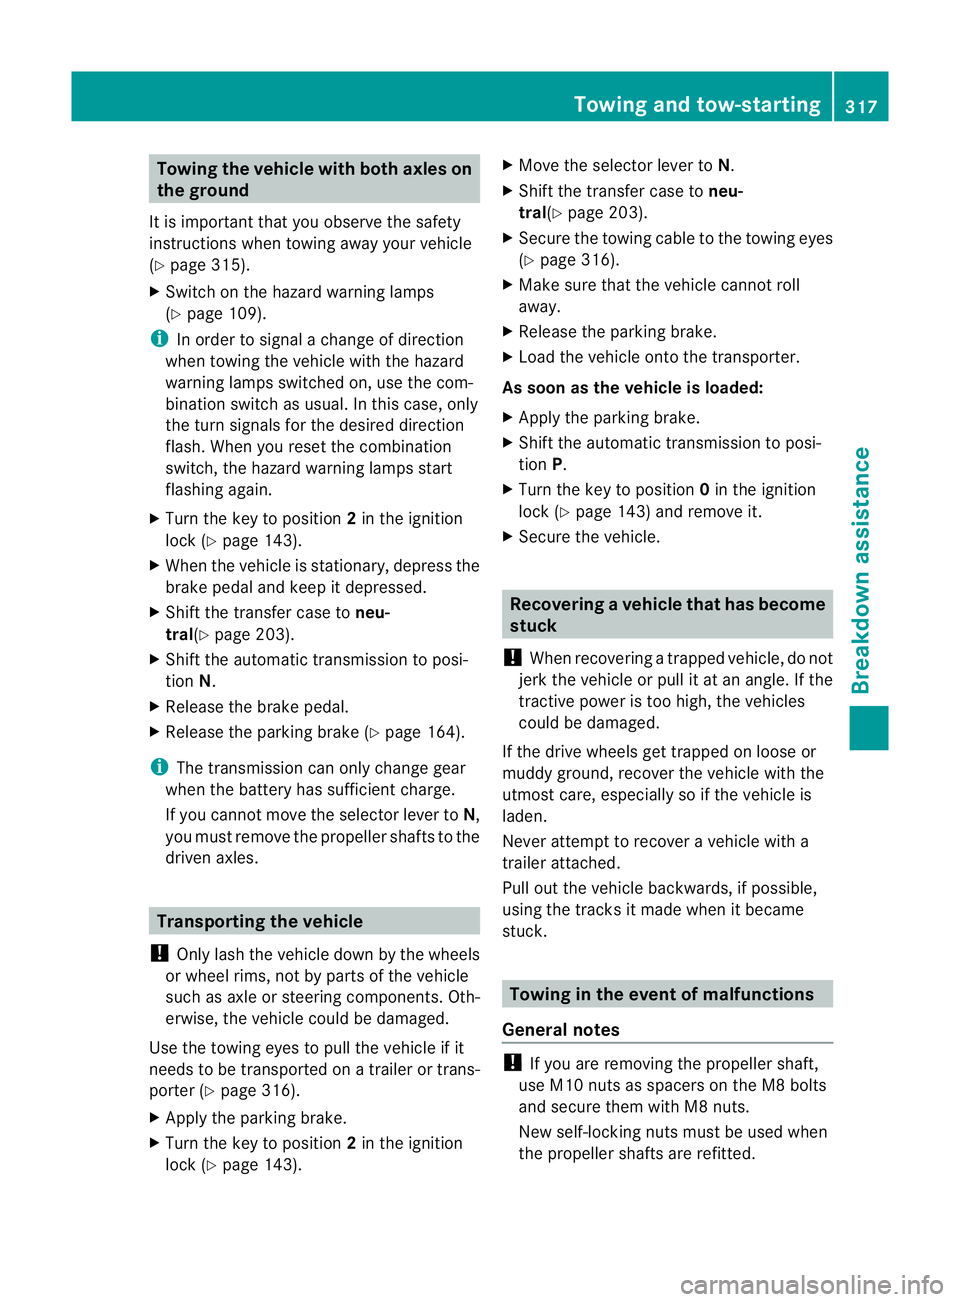
i
Secure the spare wheel of the G-Class
Cabriolet on spare wheel bracket ;, so
that valve :is accessible for checking the
tyre pressure. Flat tyre
Preparing the vehicle
X Stop the vehicle as far away as possible
from traffic on solid ,non-slippery and level
ground.
X Switch on the hazard warning lamps
(Y page 109).
X Deactivate the automatic door locking
(Y page 223).
X Apply the parking brake.
X Bring the front wheels into the straight-
ahead position.
X Move the selector lever to P.
X Switch off the engine.
X Remove the key from the ignition lock.
The steering wheel lock stays active for as
long as the key is removed. X
All occupants must get out of the vehicle.
Make sure that they are not endangered as
they do so.
X Make sure that no one is near the danger
area while a wheel is being changed. Any-
one who is not directly assisting in the
wheel change should, for example, stand
behind the barrier.
X Get out of the vehicle. Pay attention to traf-
fic conditions when doing so.
X Close the driver's door.
X Place the warning triangle (Y page 304) or
warning lamps at a suitable distance.
Observe legal requirements. Battery (vehicle)
Important safety notes
Work on the battery, e.g. removing or instal-
ling, requires specialist knowledge and the
use of special tools. Therefore, always have
work on the battery carried out at a qualified
specialist workshop. G
WARNING
Work carried out incorrectly on the battery
can, for example, lead to a short circuit and
damage your vehicle's electronic system. This
can disrupt driving safety systems such as
ABS (anti-lock braking system) or ESP ®
(Elec-
tronic Stability Program).
R If ABS malfunctions, the wheels can lock
during braking. This limits the steerability
of the vehicle when braking and the braking
distance may increase. There is a risk of
accident.
R If ESP ®
malfunctions, the vehicle will not be
stabilised if it starts to skid or a wheel starts
to spin. There is a risk of accident.
You should therefore have all work involving
the battery carried out at a qualified specialist
workshop. Battery (vehicle)
309Breakdown assistance Z
Page 320 of 357

Towing the vehicle with both axles on
the ground
It is important tha tyou observe the safety
instructions when towing away your vehicle
(Y page 315).
X Switch on the hazard warning lamps
(Y page 109).
i In order to signal a change of direction
when towing the vehicle with the hazard
warning lamps switched on, use the com-
bination switch as usual.Int his case, only
the turn signals for the desired direction
flash. When you reset the combination
switch, the hazard warning lamps start
flashing again.
X Turn the key to position 2in the ignition
lock (Y page 143).
X When the vehicle is stationary, depress the
brake pedal and keep it depressed.
X Shift the transfer case to neu-
tral(Y page 203).
X Shift the automatic transmission to posi-
tion N.
X Release the brake pedal.
X Release the parking brake (Y page 164).
i The transmission can only change gear
when the battery has sufficient charge.
If you cannot move the selector lever to N,
you must remove the propeller shafts to the
driven axles. Transporting the vehicle
! Only lash the vehicle down by the wheels
or wheel rims, not by parts of the vehicle
such as axle or steering components. Oth-
erwise, the vehicle could be damaged.
Use the towing eyes to pull the vehicle if it
needs to be transported on a trailer or trans-
porter (Y page 316).
X Apply the parking brake.
X Turn the key to position 2in the ignition
lock (Y page 143). X
Move the selector lever to N.
X Shift the transfer case to neu-
tral(Y page 203).
X Secure the towing cable to the towing eyes
(Y page 316).
X Make sure that the vehicle cannot roll
away.
X Release the parking brake.
X Load the vehicle onto the transporter.
As soon as the vehicle is loaded:
X Apply the parking brake.
X Shift the automatic transmission to posi-
tion P.
X Turn the key to position 0in the ignition
lock (Y page 143) and remove it.
X Secure the vehicle. Recovering
avehicle that has become
stuck
! When recovering a trapped vehicle, do not
jerk the vehicle or pull it at an angle. If the
tractive power is too high, the vehicles
could be damaged.
If the drive wheels get trapped on loose or
muddy ground, recover th evehicle with the
utmost care, especially so if the vehicle is
laden.
Never attempt to recover a vehicle with a
trailer attached.
Pull out the vehicle backwards, if possible,
using the tracks it made when it became
stuck. Towing in the event of malfunctions
General notes !
If you are removing the propeller shaft,
use M10 nuts as spacers on the M8 bolts
and secure them with M8 nuts.
New self-locking nuts must be used when
the propeller shafts are refitted. Towing and tow-starting
317Breakdown assistance Z