power steering MERCEDES-BENZ G-CLASS SUV 2012 Owners Manual
[x] Cancel search | Manufacturer: MERCEDES-BENZ, Model Year: 2012, Model line: G-CLASS SUV, Model: MERCEDES-BENZ G-CLASS SUV 2012Pages: 357, PDF Size: 8.86 MB
Page 146 of 357
G
WARNING
Unsuitable footwea rcan hinder correc tusage
of the pedals, e.g.:
R shoes with thick soles
R shoes with high heels
R slippers
There is a risk of an accident.
Wear suitable footwear to ensure correct
usage of the pedals. G
WARNING
If you switch off the ignition while driving,
safety-relevant functions are only available
with limitations, or not at all. This could affect,
for example, the power steering and the brake
boosting effect. You will require considerably
more effort to steer and brake. There is a risk
of an accident.
Do not switch off the ignition while driving. G
WARNING
If the parking brake has not been fully
released when driving, the parking brake can:
R overheat and cause a fire
R lose its hold function.
There is a risk of fire and an accident. Release
the parking brake fully before driving off.
! Warm up the engine quickly. Do not use
the engine's full performance until it has
reached operating temperature.
Only set the automatic transmission to the
respective drive positions when the vehicle
is stationary.
Where possible, avoid spinning the drive
wheels when pulling away on slippery
roads. Otherwise, you could damage the
drive train.
! Avoid high engine speeds when the
engine is cold. The engine's service life
could otherwise be significantly shortened.
Do not use the engine's full performance
until it has reached operating temperature. !
AMG vehicles: at low engine oil temper-
atures (below +20 †), the maximum
engine speed is restricted in order to pro-
tect the engine. To protect the engine and
maintain smooth engine operation, avoid
driving at full throttle when the engine is
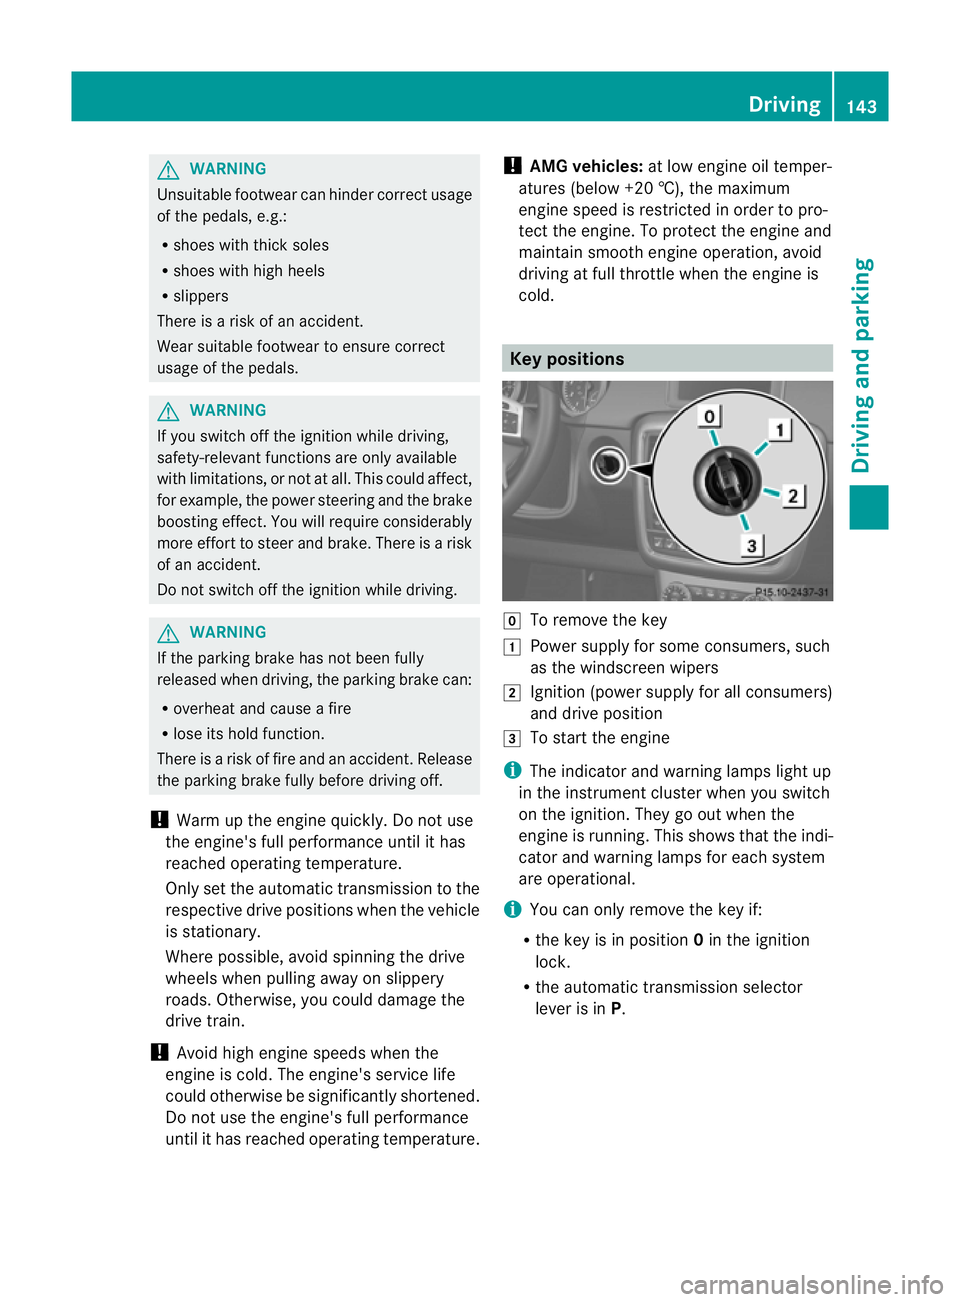
cold. Key positions
g
To remove the key
1 Power supply for some consumers, such
as the windscreen wipers
2 Ignition (power supply for all consumers)
and drive position
3 To start the engine
i The indicator and warning lamps light up
in the instrument cluster when you switch
on the ignition. They go out when the
engine is running. This shows that the indi-
cator and warning lamps for each system
are operational.
i You can only remove the key if:
R the key is in position 0in the ignition
lock.
R the automatic transmission selector
lever is in P. Driving
143Driving and parking Z
Page 166 of 357
X
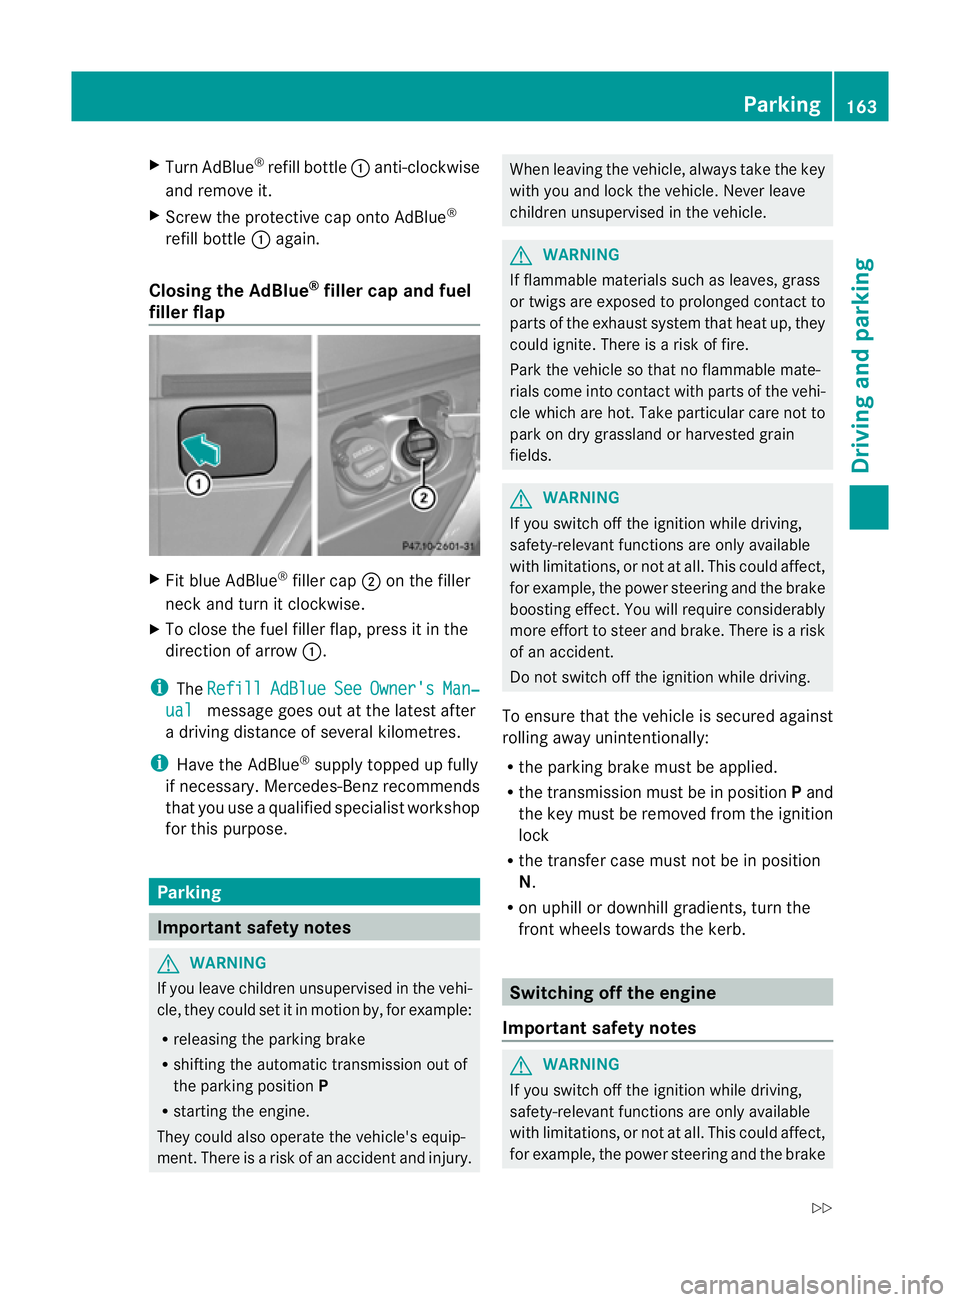
Turn AdBlue ®
refill bottle :anti-clockwise
and remove it.
X Screw the protective cap onto AdBlue ®
refill bottle :again.
Closing the AdBlue ®
filler cap and fuel
filler flap X
Fit blue AdBlue ®
filler cap ;on the filler
neck and turn it clockwise.
X To close the fuel filler flap, press it in the
direction of arrow :.
i The Refill AdBlue See Owner's Man‐
ual message goes out at the latest after
a driving distance of several kilometres.
i Have the AdBlue ®
supply topped up fully
if necessary. Mercedes-Benz recommends
that you use a qualified specialist workshop
for this purpose. Parking
Important safety notes
G
WARNING
If you leave children unsupervised in the vehi-
cle, they could set it in motion by, for example:
R releasing the parking brake
R shifting the automatic transmission out of
the parking position P
R starting the engine.
They could also operate the vehicle's equip-
ment.T here is a risk of an accident and injury. When leaving the vehicle, always take the key
with you and lock the vehicle. Never leave
children unsupervised in the vehicle.
G
WARNING
If flammable materials such as leaves, grass
or twigs are exposed to prolonged contact to
parts of the exhaust system that heat up, they
could ignite. There is a risk of fire.
Park the vehicle so that no flammable mate-
rials come into contact with parts of the vehi-
cle which are hot. Take particular care not to
park on dry grassland or harvested grain
fields. G
WARNING
If you switch off the ignition while driving,
safety-relevant functions are only available
with limitations, or not at all. This could affect,
for example, the power steering and the brake
boosting effect.Y ou will require considerably
more effort to steer and brake. There is a risk
of an accident.
Do not switch off the ignition while driving.
To ensure that the vehicle is secured against
rolling away unintentionally:
R the parking brake must be applied.
R the transmission must be in position Pand
the key must be removed from the ignition
lock
R the transfer case must not be in position
N.
R on uphill or downhill gradients, turn the
front wheels towards the kerb. Switching off the engine
Important safety notes G
WARNING
If you switch off the ignition while driving,
safety-relevant functions are only available
with limitations, or not at all. This could affect,
for example, the power steering and the brake Parking
163Driving and parking
Z
Page 253 of 357
Display messages Possible causes/consequences and
M Solutions
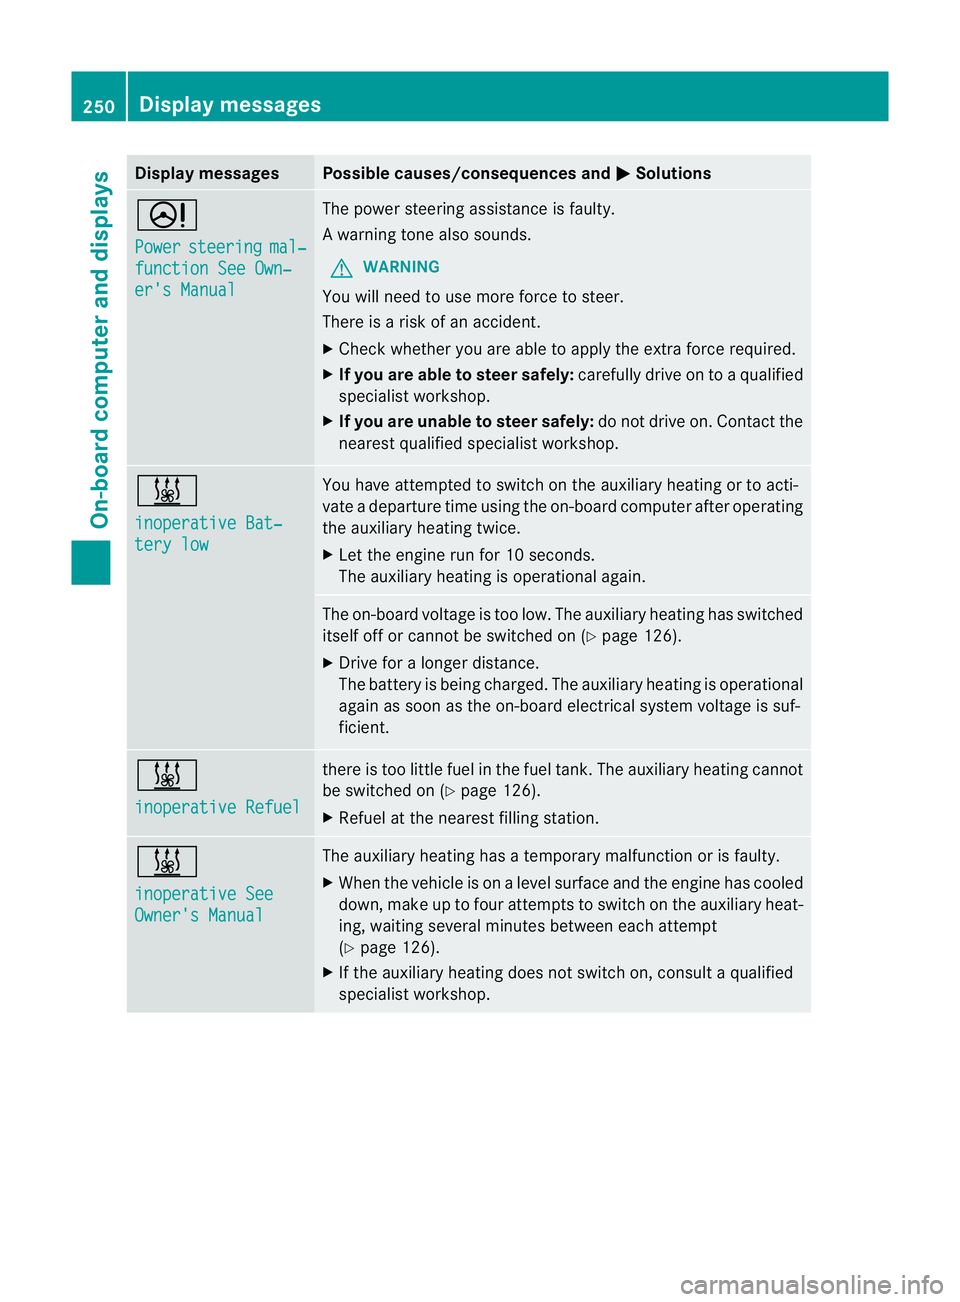
D
Power
steering mal‐
function See Own‐
er's Manual The powe
rsteering assistance is faulty.
Aw arning tone also sounds.
G WARNING
You will need to use more force to steer.
There is a ris kofanaccident.
X Check whethe ryou are able to apply the extra force required.
X If you are able to steer safely: carefully drive on to a qualified
specialist workshop.
X If you are unable to steer safely: do not drive on. Contact the
nearest qualified specialist workshop. &
inoperative Bat‐
tery low You have attempted to switch on the auxiliary heating or to acti-
vate a departure time using the on-board computer after operating
the auxiliary heating twice.
X
Let the engine run for 10 seconds.
The auxiliary heating is operational again. The on-board voltage is too low. The auxiliary heating has switched
itself off or cannot be switched on (Y
page 126).
X Drive for a longer distance.
The battery is being charged. The auxiliary heating is operational
again as soon as the on-board electrical system voltage is suf-
ficient. &
inoperative Refuel there is too little fuel in the fuel tank.T
he auxiliary heating cannot
be switched on (Y page 126).
X Refuel at the nearest filling station. &
inoperative See
Owner's Manual The auxiliary heating has a temporary malfunction or is faulty.
X
When the vehicle is on alevel surface and the engine has cooled
down, make up to four attempts to switch on the auxiliary heat-
ing, waiting several minutes between each attempt
(Y page 126).
X If the auxiliary heating does not switch on, consult a qualified
specialist workshop. 250
Display messagesOn-board computer and displays
Page 320 of 357
Towing the vehicle with both axles on
the ground
It is important tha tyou observe the safety
instructions when towing away your vehicle
(Y page 315).
X Switch on the hazard warning lamps
(Y page 109).
i In order to signal a change of direction
when towing the vehicle with the hazard
warning lamps switched on, use the com-
bination switch as usual.Int his case, only
the turn signals for the desired direction
flash. When you reset the combination
switch, the hazard warning lamps start
flashing again.
X Turn the key to position 2in the ignition
lock (Y page 143).
X When the vehicle is stationary, depress the
brake pedal and keep it depressed.
X Shift the transfer case to neu-
tral(Y page 203).
X Shift the automatic transmission to posi-
tion N.
X Release the brake pedal.
X Release the parking brake (Y page 164).
i The transmission can only change gear
when the battery has sufficient charge.
If you cannot move the selector lever to N,
you must remove the propeller shafts to the
driven axles. Transporting the vehicle
! Only lash the vehicle down by the wheels
or wheel rims, not by parts of the vehicle
such as axle or steering components. Oth-
erwise, the vehicle could be damaged.
Use the towing eyes to pull the vehicle if it
needs to be transported on a trailer or trans-
porter (Y page 316).
X Apply the parking brake.
X Turn the key to position 2in the ignition
lock (Y page 143). X
Move the selector lever to N.
X Shift the transfer case to neu-
tral(Y page 203).
X Secure the towing cable to the towing eyes
(Y page 316).
X Make sure that the vehicle cannot roll
away.
X Release the parking brake.
X Load the vehicle onto the transporter.
As soon as the vehicle is loaded:
X Apply the parking brake.
X Shift the automatic transmission to posi-
tion P.
X Turn the key to position 0in the ignition
lock (Y page 143) and remove it.
X Secure the vehicle. Recovering
avehicle that has become
stuck
! When recovering a trapped vehicle, do not
jerk the vehicle or pull it at an angle. If the
tractive power is too high, the vehicles
could be damaged.
If the drive wheels get trapped on loose or
muddy ground, recover th evehicle with the
utmost care, especially so if the vehicle is
laden.
Never attempt to recover a vehicle with a
trailer attached.
Pull out the vehicle backwards, if possible,
using the tracks it made when it became
stuck. Towing in the event of malfunctions
General notes !
If you are removing the propeller shaft,
use M10 nuts as spacers on the M8 bolts
and secure them with M8 nuts.
New self-locking nuts must be used when
the propeller shafts are refitted. Towing and tow-starting
317Breakdown assistance Z
Page 326 of 357
Regular checking of wheels and tyres
R Regularly check the wheels and tyres of
your vehicle for damage at leas tevery 14
days, as well as after driving off-road or on
rough roads. Damage includes cuts, punc-
tures, cracks and bulges on tyres or severe
corrosio nordeformation on wheels, for
example. Damaged wheels can cause a
loss of tyre pressure.
R Regularly chec kthe tyre tread depth and
the condition of the tread across the whole
width of the tyre (Y page 323). In order to
inspect the inner side of the tyre surface,
turn the steering wheel to full lock.
R All wheels must have a valve cap to protect
the valve against dirt and moisture. Do not
fit anything onto the valve other than the
standard valve cap or avalve cap approved
by Mercedes-Ben zfor your vehicle.
Do not fit anything onto the valve, such as
tyre pressure monitoring systems.
R You should regularly check the pressure of
all your tyres including the spare wheel,
particularly prior to long trips. Adjust the
tyre pressure as necessary (Y page 328).
The service life of tyres depends on various
factors, including the following:
R driving style
R tyre pressure
R tyre mileage Tyre tread
G
WARNING
Please keep in mind that:
R tyre grip decreases rapidly on wet roads
when the tread depth is less than 3mm.
Thus, you should replace tyres that have
insufficient tread.
R winter tyres should be replaced when the
tread depth is 4mmorless, as they no lon-
ger provide adequate grip.
R the tread on a tyre may not wear evenly.
Thus, you should regularly check the tread depth and the condition of the tread across
the entire width of all tyres. If necessary,
turn the fron
twheels to full lock in order to
inspect the tyre tread more easily.
Otherwise, you could lose control of the vehi-
cle and cause an accident due to the reduced
grip of the tyres on the road. Selecting, fitting and replacing tyres
R Only fit tyres and wheels of the same type
and make.
R Only fit approved tyres of the correct size
onto the wheels.
R Tyres are supplied with a protective layer
from the factory. Run in new tyres at mod-
erate speeds for the first 100 km. They only
reach their full performance after this dis-
tance.
R Do not drive with tyres which have too little
tread depth. This otherwise significantly
reduces the traction on wet roads (aqua-
planing).
R Replace the tyres after six years at the lat-
est, regardless of wear. This also applies to
the spare wheel. Winter operation
General notes
Have your vehicle winterproofed at a qualified
specialist workshop at the onset of winter.
Observe the notes in the "Changing a wheel"
section (Y page 329). Driving with summer tyres
At temperatures below +7 †, summer tyres
lose elasticity and therefore traction and
braking power. Change the tyres on your vehi-
cle to M+S tyres. Using summer tyres at very
cold temperatures could cause tears to form,
thereby damaging the tyres permanently. Winter operation
323Wheels and tyres Z