maintenance MERCEDES-BENZ G-CLASS SUV 2013 Owner's Manual
[x] Cancel search | Manufacturer: MERCEDES-BENZ, Model Year: 2013, Model line: G-CLASS SUV, Model: MERCEDES-BENZ G-CLASS SUV 2013Pages: 364, PDF Size: 9.62 MB
Page 298 of 364
Do not aim directly at any of the following:
R
tires
R door gaps, roof gaps, joints, etc.
R electrical components
R battery
R connectors
R lights
R seals
R trim
R ventilation slots
Damaged seals or electrical components
can lead to leaks or failures.
Cleaning the wheels !
Do not use acidic
wheel cleaning products
to remove brake dust. This could damage
wheel bolts and brake components.
! Do not park the vehicle for an extended
period straight after cleaning it, particularly
after having cleaned the wheels with wheel
cleaner. Wheel cleaners could cause
increased corrosion of the brake discs and
brake pads/linings. For this reason, you
should drive for a few minutes after
cleaning. Braking heats the brake discs and
the brake pads/linings, thus drying them.
The vehicle can then be parked.
Cleaning the paintwork !
Do not affix:
R stickers
R films
R magnetic plates or similar items
to painted surfaces. You could otherwise
damage the paintwork.
Scratches, corrosive deposits, areas
affected
by corrosion and damage caused by
inadequate care cannot always be completely
repaired. In such cases, visit a qualified
specialist workshop. X
Remove dirt immediately, where possible,
while avoiding rubbing too hard.
X Soak insect remains with insect remover
and rinse off the treated areas afterwards.
X Soak bird droppings with water and rinse
off the treated areas afterwards.
X Remove coolant, brake fluid, tree resin,
oils, fuels and greases by rubbing gently
with a cloth soaked in petroleum ether or
lighter fluid.
X Use tar remover to remove tar stains.
X Use silicone remover to remove wax.
If water no longer forms "beads" on the paint
surface, use the paint care products
recommended and approved by Mercedes-
Benz. This is the case approximately every
three to five months, depending on the
climate conditions and the
care product used.
If dirt has penetrated the paint surface or if
the paint has become dull, the paint cleaner
recommended and approved by Mercedes-
Benz should be used.
Do not use these care products in the sun or
on the hood while the hood is hot.
X Use a suitable touch-up stick, e.g. MB
Touch-Up Stick, to correct
smaller areas of
paint damage quickly and provisionally.
Matte finish care !
Never polish the vehicle or the light alloy
wheels. Polishing causes the finish to
shine.
! Never use paint cleaner, buffing or
polishing products, or gloss
preserver, e.g.
wax. These products are only suitable for
high-gloss surfaces. Their use on vehicles
with matte finish leads to considerable
surface damage (shiny, spotted areas).
Always have paintwork repairs carried out
at a qualified specialist workshop.
! Do not use wash programs with a hot wax
treatment under any circumstances. 296
Care
Maintenance and care
Page 299 of 364
If your vehicle has a clear matte finish,
observe the following
instructions
in order to
avoid damage to the paintwork due to
incorrect care.
These notes also apply to light alloy wheels
with a clear matte finish.
i The vehicle should preferably be washed
by hand using a soft sponge, car shampoo
and plenty of water.
i Use only insect remover and car shampoo
from the range of recommended and
approved Mercedes-Benz care products.
Cleaning the windows G
WARNING
Switch off the windshield wipers and remove
the SmartKey from the ignition lock before
cleaning the windshield or the wiper blades.
The windshield wipers could otherwise move
and injure you.
! Do not use dry
cloths, abrasive products,
solvents or cleaning agents containing
solvents to clean the inside of the windows.
Do not touch the insides of the windows
with hard objects, e.g. an ice scraper or
ring. There is otherwise a risk of damaging
the windows.
! Clean the water drainage channels of the
windshield and the rear window at regular
intervals. Deposits such as leaves, petals
and pollen may under certain
circumstances prevent water from draining
away. This can lead to corrosion damage
and damage to electronic components.
X Clean the inside and outside of the
windows with a damp cloth and a cleaning
agent that is recommended and approved
by Mercedes-Benz. Cleaning the wiper blades G
WARNING
Switch off the windshield wipers and remove
the SmartKey from the ignition lock before
cleaning the windshield or the wiper blades.
The windshield wipers could otherwise move
and injure you.
! Do not pull the wiper blade. Otherwise,
the wiper blade could be damaged.
! Do not clean wiper blades too often and
do not rub them too hard. Otherwise, the
graphite coating could be damaged. This
could cause wiper noise.
! Hold the wiper arm
securely when folding
back. The windshield could be damaged if
the wiper arm smacks against it suddenly.
X Fold the windshield wiper arms away from
the windshield.
X Carefully clean the wiper blades with a
damp cloth.
X Fold the windshield wiper arms back again
before switching on the ignition.
Cleaning the headlamps !
Only use cleaning agents or cleaning
cloths which are suitable for plastic
headlamp lenses. Unsuitable cleaning
agents or cleaning cloths could scratch or
damage the plastic headlamp lenses.
X Clean the headlamp lenses with a damp
sponge and a mild cleaning agent, e.g.
Mercedes-Benz car shampoo or cleaning
cloths.
Cleaning the sensors !
If you clean the sensors with a power
washer, make sure that you keep a
distance of at least
11.8 in (30 cm) between
the vehicle and the power washer nozzle.
Information about the correct distance is
available from the equipment
manufacturer. Care
297
Maintenance and care Z
Page 300 of 364
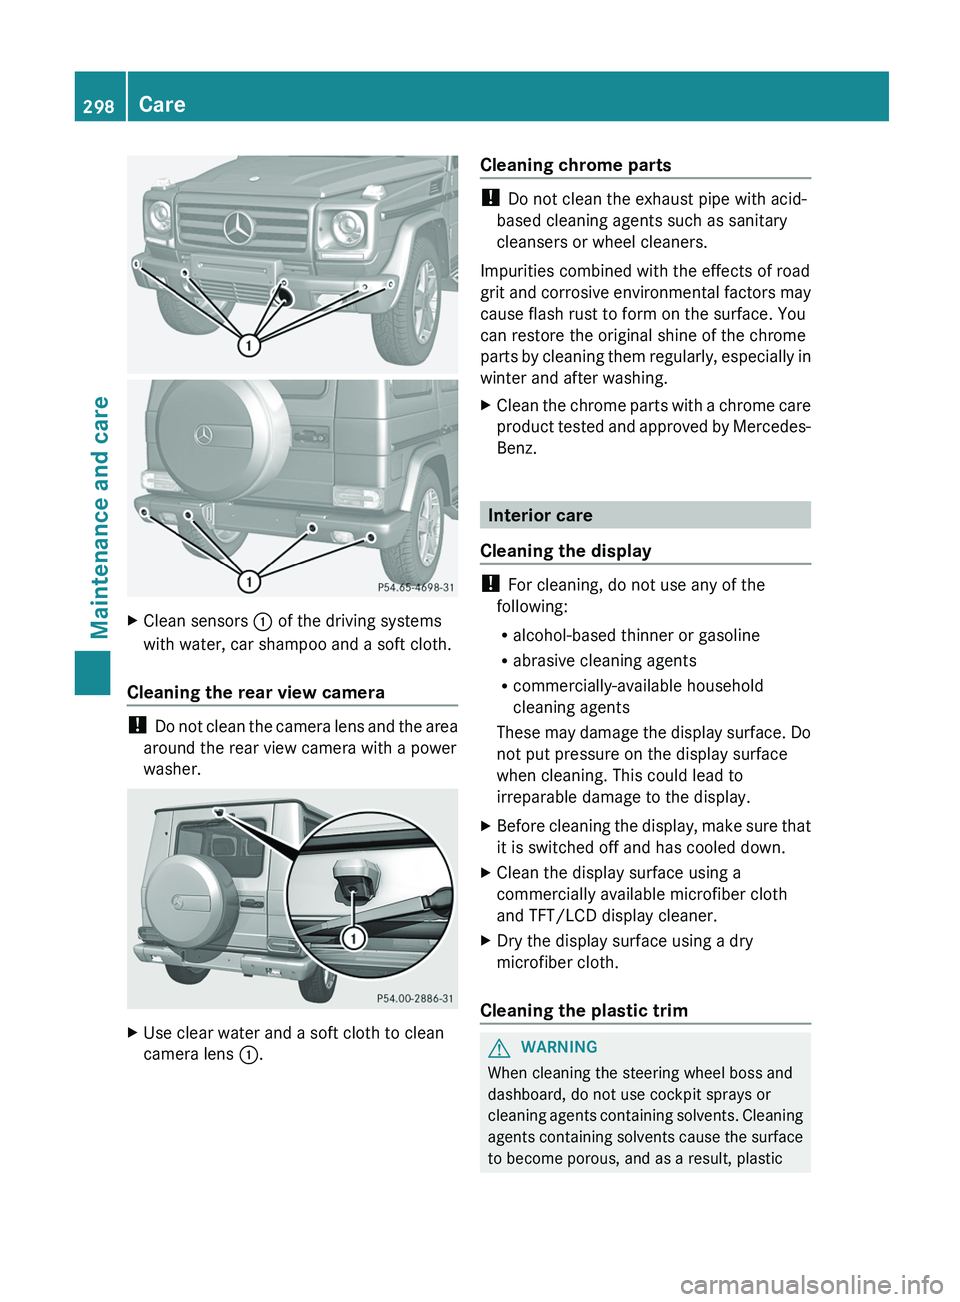
X
Clean sensors 0043 of the driving systems
with water, car shampoo and a soft cloth.
Cleaning the rear view camera !
Do not clean the
camera lens and the area
around the rear view camera with a power
washer. X
Use clear water and a soft cloth to clean
camera lens 0043. Cleaning chrome parts !
Do not clean the exhaust pipe with acid-
based cleaning agents such as sanitary
cleansers or wheel cleaners.
Impurities combined with the effects of road
grit and corrosive environmental
factors may
cause flash rust to form on the surface. You
can restore the original shine of the chrome
parts by cleaning them regularly, especially in
winter and after washing.
X Clean the chrome parts with a chrome care
product tested and approved
by Mercedes-
Benz. Interior care
Cleaning the display !
For cleaning, do not use any of the
following:
R alcohol-based thinner or gasoline
R abrasive cleaning agents
R commercially-available household
cleaning agents
These may damage the
display surface. Do
not put pressure on the display surface
when cleaning. This could lead to
irreparable damage to the display.
X Before cleaning the display, make sure that
it is switched off and has cooled down.
X Clean the display surface using a
commercially available microfiber cloth
and TFT/LCD display cleaner.
X Dry the display surface using a dry
microfiber cloth.
Cleaning the plastic trim G
WARNING
When cleaning the steering wheel boss and
dashboard, do not use cockpit sprays or
cleaning agents containing solvents.
Cleaning
agents containing solvents cause the surface
to become porous, and as a result, plastic 298
Care
Maintenance and care
Page 301 of 364
parts may break away and be thrown around
the interior when
an
air bag is deployed, which
may result in severe injuries.
! Do not affix the following to plastic
surfaces:
R stickers
R films
R scented oil bottles or similar items
You can otherwise damage the plastic.
! Do not allow cosmetics, insect repellent
or sunscreen to come into contact with the
plastic trim. This maintains the high-quality
look of the surfaces.
X Wipe the plastic trim with a damp, lint-free
cloth, e.g. a microfiber cloth.
X Heavy soiling: use car care and cleaning
products recommended and approved by
Mercedes-Benz.
The surface may change
color temporarily.
Wait until the surface is dry again.
Cleaning the steering wheel and gear or
selector lever X
Thoroughly wipe with a damp cloth or use
leather care agents that have been
recommended and approved by
Mercedes-
Benz.
Cleaning wooden trim and trim strips !
Do not use
solvent-based
cleaning agents
such as tar remover, wheel cleaners,
polishes or waxes. There is otherwise a risk
of damaging the surface.
! Do not use chrome polish for trim strips.
The trim strips have a chrome look but are
mostly made of anodized aluminum and
can lose their shine if chrome polish is
used. Use a damp, lint-free cloth instead
when cleaning the trim strips.
If the chrome-plated trim strips are very
dirty, you can use a chrome polish. If you
are unsure as to whether the trim strips are chrome-plated or not, consult an
authorized Mercedes-Benz Center.
X Wipe the wooden trim and trim strips with
a damp, lint-free cloth, e.g. a microfiber
cloth.
X Heavy soiling: use car care and cleaning
products recommended and approved by
Mercedes-Benz.
Cleaning the seat covers !
Do not use microfiber cloths to clean
genuine leather or artificial leather covers,
as these are too aggressive and, if used
often, may damage the cover.
! Observe the following when cleaning:
R clean genuine leather covers carefully
with a damp cloth and then wipe the
covers down with a
dry cloth. Make sure
that the leather does not become
soaked. It may otherwise become rough
and cracked. Only use leather care
agents that have been tested and
approved by Mercedes-Benz. You can
obtain these from a qualified specialist
workshop.
R clean artificial leather covers with a cloth
moistened with a solution containing 1%
detergent (e.g. dishwashing liquid).
R clean cloth covers with a microfiber cloth
moistened with a solution containing 1%
detergent (e.g. dishwashing liquid). Rub
carefully and always wipe entire seat
sections to avoid leaving visible lines.
Leave the seat to dry afterwards.
Cleaning results depend on the type of
dirt and how long it has been there.
i Note that regular care is essential to
ensure that the appearance and comfort of
the covers is retained over time. Care
299
Maintenance and care Z
Page 302 of 364
Cleaning the seat belts
G
WARNING
Do not bleach or dye seat belts as this may
severely weaken them. In a crash, they may
not be able to provide adequate protection.
! Do not clean the
seat belts using chemical
cleaning agents. Do not dry the seat belts
by heating at temperatures above 176 ‡
(80 †) or in direct sunlight.
X Use clean, lukewarm water and soap
solution.
Cleaning the headliner and carpets X
Headliner: if it is very dirty, use a soft brush
or dry shampoo.
X Carpets: use the carpet and textile
cleaning agents recommended and
approved by Mercedes-Benz. 300
Care
Maintenance and care
Page 308 of 364
over the battery. Keep children away from
batteries. Wash battery
acid
immediately with
water and seek medical attention.
! Have the battery checked regularly at a
qualified specialist workshop.
Observe the service intervals in the
Maintenance Booklet or contact a qualified
specialist workshop for more information.
! You should have all work involving the
battery carried out at a qualified specialist
workshop. In the exceptional case that it is
necessary for you to disconnect the battery
yourself, make sure that:
R you switch off the engine and remove the
SmartKey. Check that all the indicator
lamps in the instrument cluster are off.
Otherwise, electronic components, such
as the alternator, may be damaged.
R you first remove the negative terminal
clamp and then the positive terminal
clamp. Never swap the terminal clamps.
Otherwise, the vehicle's electronic
system may be damaged.
R on vehicles with automatic transmission,
the transmission is locked in position P
after disconnecting the battery. The
vehicle is secured against rolling away.
You can then no longer move the vehicle.
The battery and the cover of the positive
terminal clamp must be installed securely
during operation. H
Environmental note Batteries contain dangerous
substances. It is against the
law to dispose of them with
the household rubbish. They
must be collected
separately
and recycled to protect the
environment. Dispose of batteries in an
environmentally friendly
manner. Take discharged
batteries to a qualified
specialist workshop or a special collection point for
used batteries.
In order for the battery to achieve the
maximum possible service life,
it must always
be sufficiently charged.
Comply with safety precautions and take
protective measures when handling
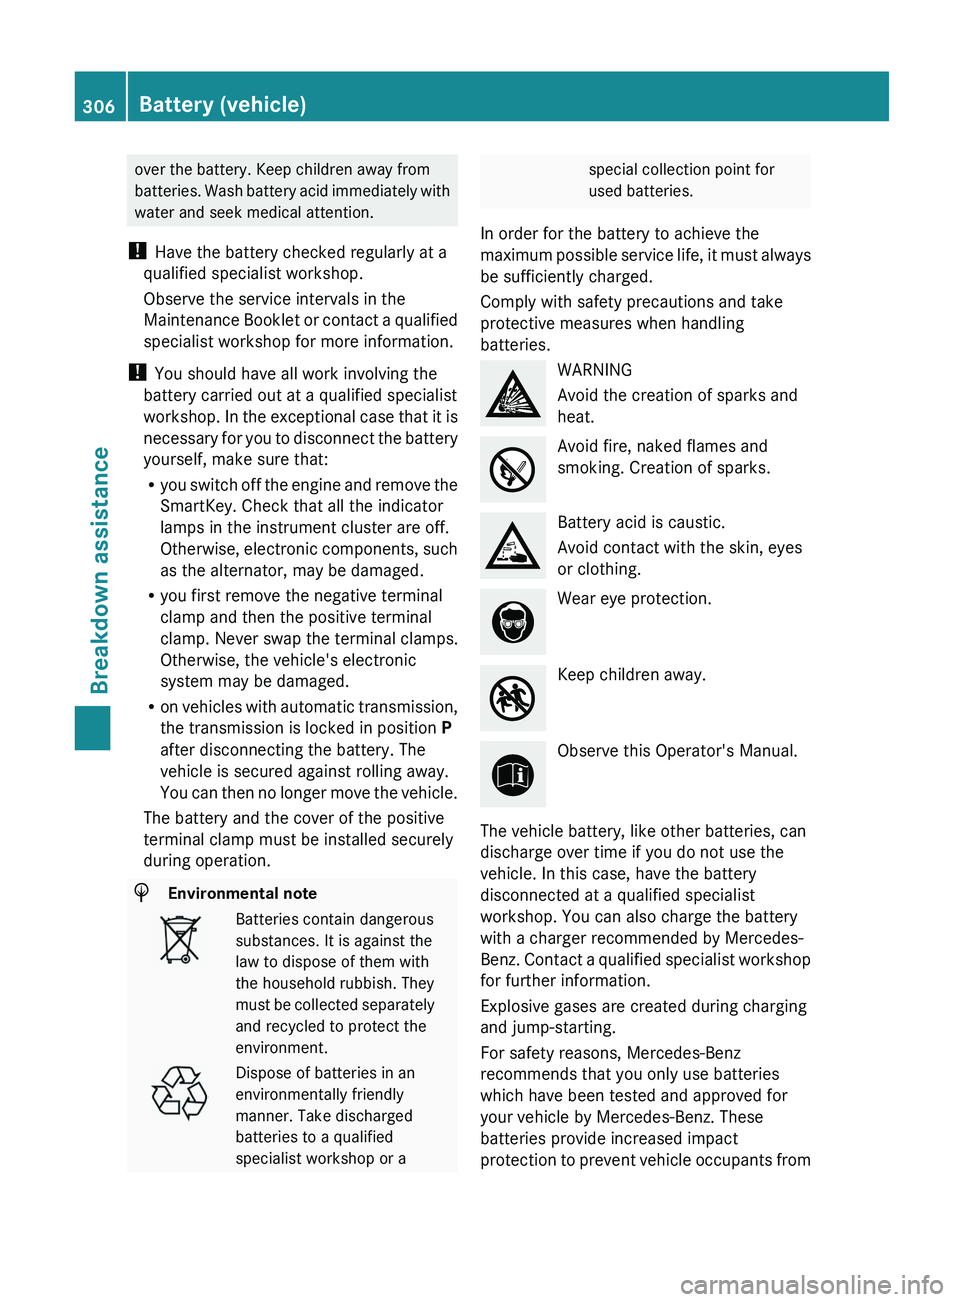
batteries. WARNING
Avoid the creation of sparks and
heat.
Avoid fire, naked flames and
smoking. Creation of sparks.
Battery acid is caustic.
Avoid contact with the skin, eyes
or clothing.
Wear eye protection.
Keep children away.
Observe this Operator's Manual.
The vehicle battery, like other batteries, can
discharge over time if you do not use the
vehicle. In this case, have the battery
disconnected at a qualified specialist
workshop. You can also charge the battery
with a charger recommended by Mercedes-
Benz. Contact a qualified
specialist workshop
for further information.
Explosive gases are created during charging
and jump-starting.
For safety reasons, Mercedes-Benz
recommends that you only use batteries
which have been tested and approved for
your vehicle by Mercedes-Benz. These
batteries provide increased impact
protection to prevent vehicle occupants from 306
Battery (vehicle)
Breakdown assistance
Page 327 of 364
Never exceed the maximum permissible tire
inflation pressure. Always observe the
recommended tire pressure for your vehicle
when adjusting the tire pressure
(Y page 338).
i
The actual values for tires are vehicle-
specific and may deviate
from the values in
the illustration. Checking the tire pressures
Important safety notes Observe the notes on tire pressure
(Y page 322).
Information on air pressure for the tires on
your vehicle can be found:
R
on the vehicle's Tire and Loading
Information placard on the B-pillar
(Y page 322)
R on the tire pressure label on the fuel filler
flap ( Y page 322)
R in the "Tire pressure information" section
R in the "Tire pressure information" section
(Y page 322)
Checking tire pressures manually To determine and set the correct tire
pressure, proceed as follows:
X
Remove the valve cap of the tire that is to
be checked.
X Press the tire pressure gauge securely onto
the valve.
X Read the tire pressure and compare it with
the recommended value on the Tire and
Loading Information
placard on
the B-pillar
on the driver's side of your vehicle
(Y page 322).
X The tire pressure is too low: increase the
tire pressure to the recommended value.
X The tire
pressure is too high: press down
the metal
pin in the valve using the tip of a
pen, for example.
Air is released from the tire. X
Check the tire pressure again with the tire
pressure gauge.
X Screw the valve cap onto the valve.
X Repeat these steps for the other tires. Tire pressure monitor
Important safety notes G
WARNING
Each tire, including the spare (if provided),
should be checked at least once a month
when cold and inflated to the pressure
recommended by the vehicle manufacturer
on the Tire and Loading Information placard
on the driver's door B-pillar or the tire
pressure label on the inside of the fuel filler
flap. If your vehicle
has tires of a different size
than the size indicated on the Tire and Loading
Information placard or the tire pressure label,
you should determine the proper tire pressure
for those tires.
As an added safety feature, your vehicle has
been equipped with a tire pressure monitoring
system (TPMS) that illuminates a low tire
pressure telltale when one or more of your
tires are significantly underinflated.
Accordingly, when the low tire pressure
telltale illuminates, you should stop and check
your tires as soon as possible, and inflate
them to the proper pressure. Driving on a
significantly underinflated tire causes the tire
to overheat and can lead to tire failure.
Underinflation also reduces fuel efficiency
and tire tread life, and may affect the vehicle's
handling and stopping ability.
Please note that the TPMS is not a substitute
for proper tire maintenance, and it is the
driver's responsibility to maintain correct tire
pressure, even if underinflation has not
reached the level to trigger illumination of the
TPMS low tire pressure telltale.
USA only:
Your vehicle has also been equipped with a
TPMS malfunction indicator to indicate if the
system is not operating properly. The TPMS Tire pressure
325
Wheels and tires
Z
Page 334 of 364

Step 3
Example 1 Example 2 Example 3
Permissible load
(maximum gross
vehicle weight
rating from the
Tire
and Loading
Information
placard minus the
gross weight of all
occupants) 1500 lbs (680 kg)
00FC750 lbs (340 kg) =
750 lbs (340 kg) 1500 lbs (680 kg)
00FC540 lbs (245 kg) =
960 lbs (435 kg) 1500 lbs (680 kg)
00FC150 lbs (68 kg) =
1350 lbs (612 kg)
Vehicle identification plate
Even if you have calculated the total load
carefully, you should still make sure that the
gross vehicle weight rating
and the gross axle
weight rating are not exceeded. Details can
be found on the vehicle identification plate on
the B-pillar on the driver's side of the vehicle
(Y page 328).
Permissible gross vehicle weight: the
gross weight of the vehicle, all passengers,
load and trailer load/noseweight (if
applicable) must not exceed the permissible
gross vehicle weight.
Gross axle weight rating: the maximum
permissible weight that can be carried by one
axle (front or rear axle).
To ensure that your vehicle does not exceed
the maximum permissible values (gross
vehicle weight and maximum gross axle
weight rating), have your loaded vehicle
(including driver, occupants, cargo, and full
trailer load if applicable) weighed on a
suitable vehicle weighbridge. Trailer load/noseweight
The trailer load/noseweight affects
the gross
weight of the vehicle. If a trailer is attached,
the trailer load/noseweight is included in the
load along with occupants and luggage. The
trailer load/noseweight is usually approximately 10% of the
gross
weight of the
trailer and its load.
Only use a trailer tow hitch that has been
approved for your vehicle by Mercedes-Benz.
Comply with the manufacturer's operating
instructions for operation, care and
maintenance. Uniform Tire Quality Grading
Standards
Overview of Tire Quality Grading
Standards
Uniform Tire Quality Grading Standards are
U.S. government specifications. Their
purpose is to provide drivers with uniform
reliable information on tire
performance data.
Tire manufacturers have to grade tires using
three performance factors: 0043 tread wear
grade, 0044 traction grade and 0087 temperature
grade. These regulations do not apply to 332
Uniform Tire Quality Grading Standards
Wheels and tires
Page 344 of 364
the wheel that is diagonally opposite the
wheel you wish to change.
X On downhill gradients: place chocks or
other suitable items in front of the wheels
of the front and rear axle.
Raising the vehicle G
WARNING
If you do not position the jack correctly at the
appropriate jacking point of the vehicle, the
jack could tip over with the vehicle raised.
There is a risk of injury.
Only position the jack at the appropriate
jacking point of the vehicle. The base of the
jack must be positioned vertically, directly
under the jacking point of the vehicle.
! The jack is designed exclusively for
jacking up the vehicle
at the jacking points.
Otherwise, your vehicle could be damaged.
The following must be observed when raising
the vehicle:
R to raise the vehicle, only use the vehicle-
specific jack that has been tested and
approved by Mercedes-Benz. If used
incorrectly, the jack could tip over with the
vehicle raised.
R the jack is designed only to raise and hold
the vehicle for a short time while a wheel
is being changed. It is not suited for
performing maintenance work under the
vehicle.
R avoid changing the wheel on uphill and
downhill slopes.
R before raising the vehicle, secure it from
rolling away by applying the parking brake
and inserting wheel chocks. Never
disengage the parking brake while the
vehicle is raised.
R the jack must be placed on a firm, flat and
non-slip surface. On a loose surface, a
large, load-bearing underlay must be used.
On a slippery surface, a non-slip underlay
must be used, e.g. rubber mats. R
do not use wooden blocks or similar
objects as a jack underlay. Otherwise, the
jack will not be able to achieve its load-
bearing capacity due to the restricted
height.
R make sure that the distance between the
underside of the tires
and the ground does
not exceed 1.2 inches (3 cm).
R never place your hands and feet under the
raised vehicle.
R never lie under the raised vehicle.
R never start the engine when the vehicle is
raised.
R never open or close a door or the tailgate
when the vehicle is raised.
R make sure that no persons are present in
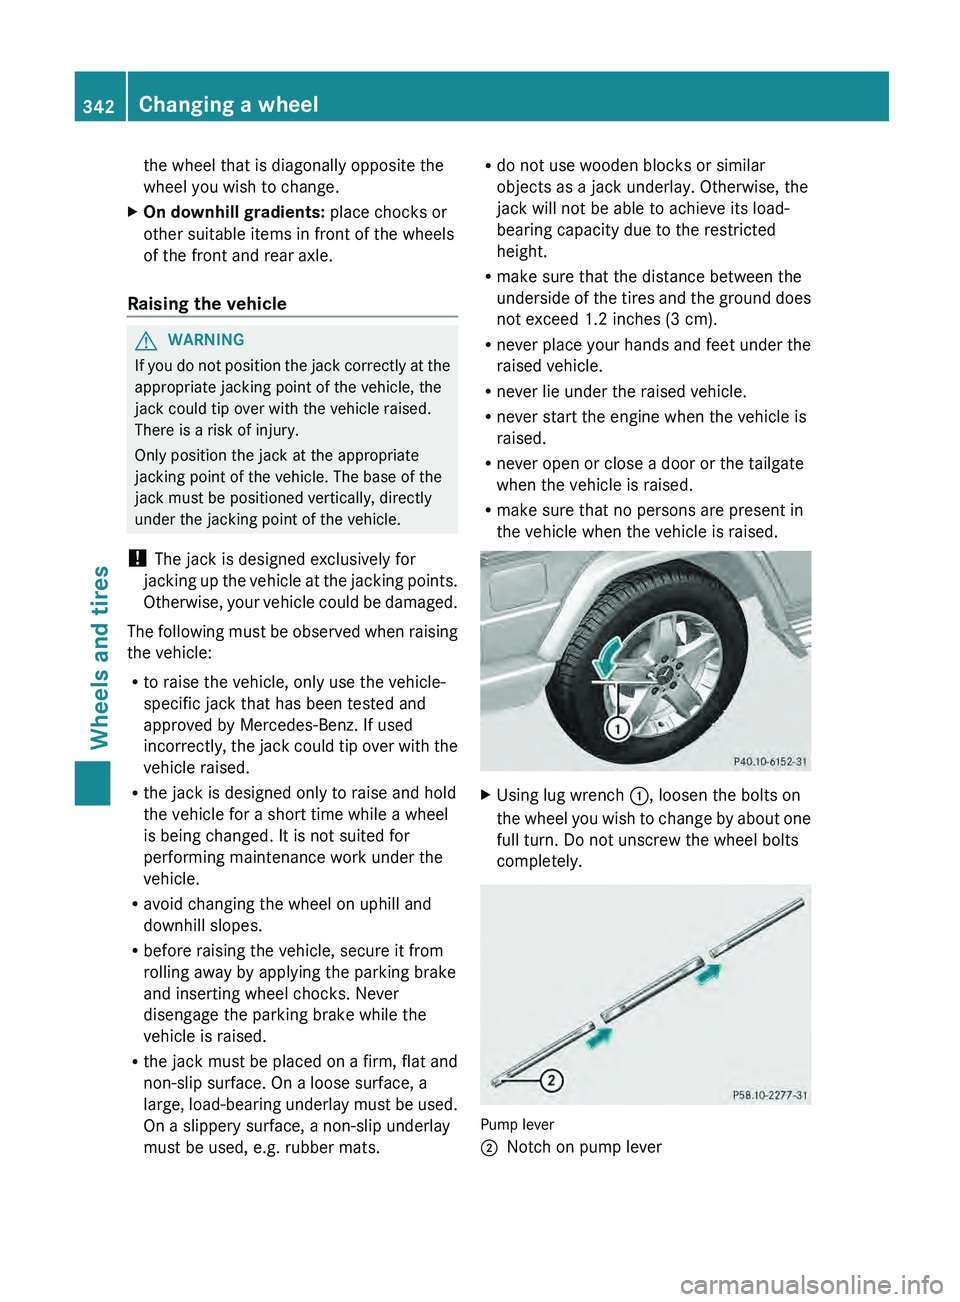
the vehicle when the vehicle is raised. X
Using lug wrench 0043, loosen the bolts on
the wheel you wish
to change by about one
full turn. Do not unscrew the wheel bolts
completely. Pump lever
0044
Notch on pump lever342
Changing a wheel
Wheels and tires
Page 347 of 364
nearest Mercedes-Benz Center or tire dealer
to be repaired.
G
WARNING
Do not drive with a flat tire. A flat tire affects
the ability to steer or brake the vehicle. You
might lose control of the vehicle. Continued
driving with a flat
tire or driving at high speed
with a flat tire will cause excessive heat build-
up and possibly a fire.
! For safety reasons, Mercedes-Benz
recommends that you only use tires,
wheels and accessories which have been
approved by Mercedes-Benz specifically
for your vehicle. These tires have been
specially adapted for use with the driving
safety systems, such as ABS or ESP ®
.
Only use tires, wheels or accessories
tested and approved by Mercedes-Benz.
Certain characteristics, e.g. handling,
vehicle noise emissions or fuel
consumption, may otherwise be adversely
affected. In addition, when driving with a
load, tire dimension variations could cause
the tires to come into contact with the
bodywork and axle components. This could
result in damage to the tires or the vehicle.
Mercedes-Benz accepts no liability for
damage resulting from the use of tires,
wheels or accessories other than those
tested and approved.
Further information about wheels, tires and
approved combinations can be obtained
from any authorized Mercedes-Benz
Center.
i The Tire and Loading Information placard
with the recommended tire pressures is
attached to the B-pillar on the driver's side.
Further information about driving at high
speeds or driving with vehicle loads that are
lighter than the maximum vehicle load can
be found in the tire pressure table on the
inside of the fuel filler flap. Check tire
pressures regularly, and only when the tires
are cold. Comply with the maintenance recommendations of the tire manufacturer
in the vehicle document wallet.
Further information on recommended tire
pressures as well as tire pressures for
specific driving situations, see (Y page 338).
i Notes
on the vehicle equipment – always
equip the vehicle with:
R tires of the same size on a given axle
(left/right)
R tires of the same type on your vehicle at
a given time (summer tires, winter tires,
all-weather tires, all-terrain tires)
i The following pages contain information
on approved wheels and tire sizes for
equipping your vehicle with winter tires.
Winter tires are not available at the factory
as standard equipment or optional extras.
If you wish to mount approved winter tires
on your vehicle, wheels of appropriate size
may also be required as the sizes of the
approved winter tires may differ from those
of the original tires. This is dependent on
the model and the equipment installed at
the factory.
The wheels and tires as well as further
information can be obtained at a qualified
specialist workshop.
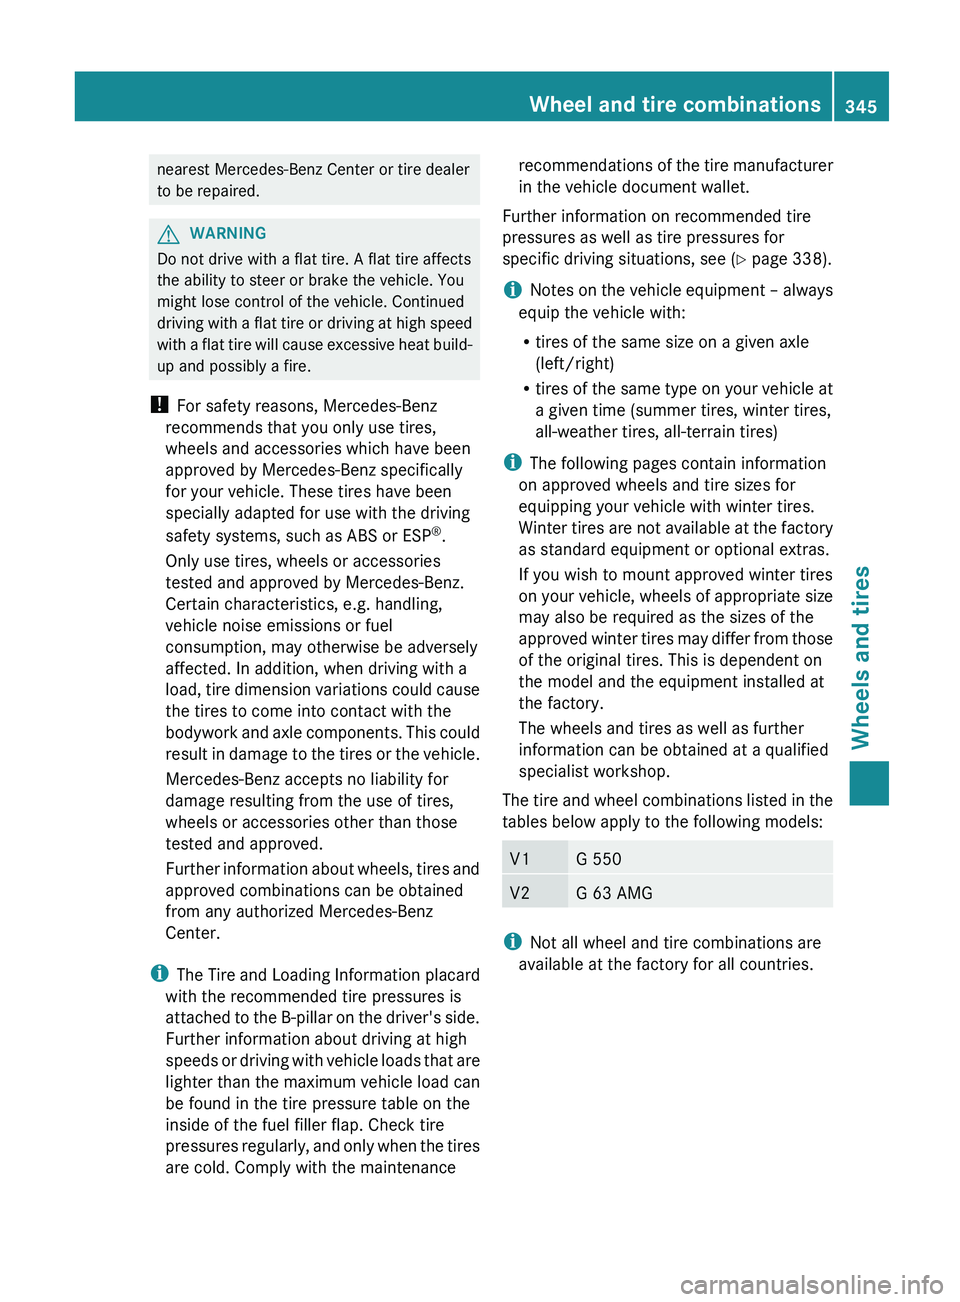
The tire and wheel combinations listed in the
tables below apply to the following models: V1 G 550
V2 G 63 AMG
i
Not all wheel and tire combinations are
available at the factory for all countries. Wheel and tire combinations
345
Wheels and tires Z