park assist MERCEDES-BENZ G-CLASS SUV 2015 Owners Manual
[x] Cancel search | Manufacturer: MERCEDES-BENZ, Model Year: 2015, Model line: G-CLASS SUV, Model: MERCEDES-BENZ G-CLASS SUV 2015Pages: 274, PDF Size: 31.95 MB
Page 5 of 274
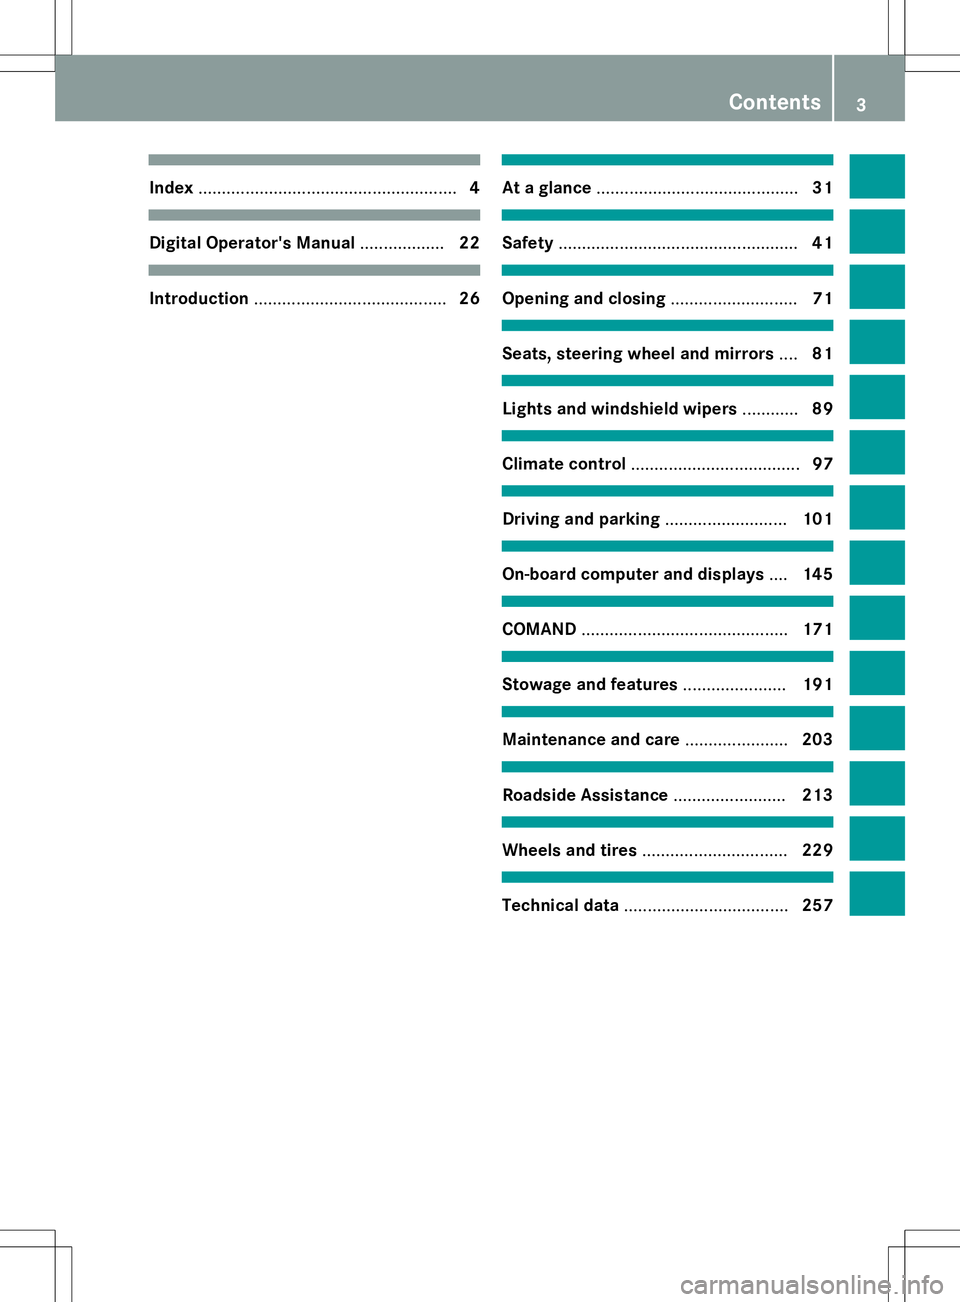
Index....................................................... 4
Digital Operator's Manual..................22
Introduction ......................................... 26
At a glance........................................... 31
Safety................................................... 41
Opening and closing...........................71
Seats, steering wheel and mirrors ....81
Lights and windshield wipers ............89
Climate control .................................... 97
Driving and parking..........................101
On-board computer and displays ....145
COMAND ............................................ 171
Stowage and features......................191
Maintenance and care ......................203
Roadside Assistance ........................213
Wheels and tires ............................... 229
Technical data................................... 257
Contents3
Page 7 of 274
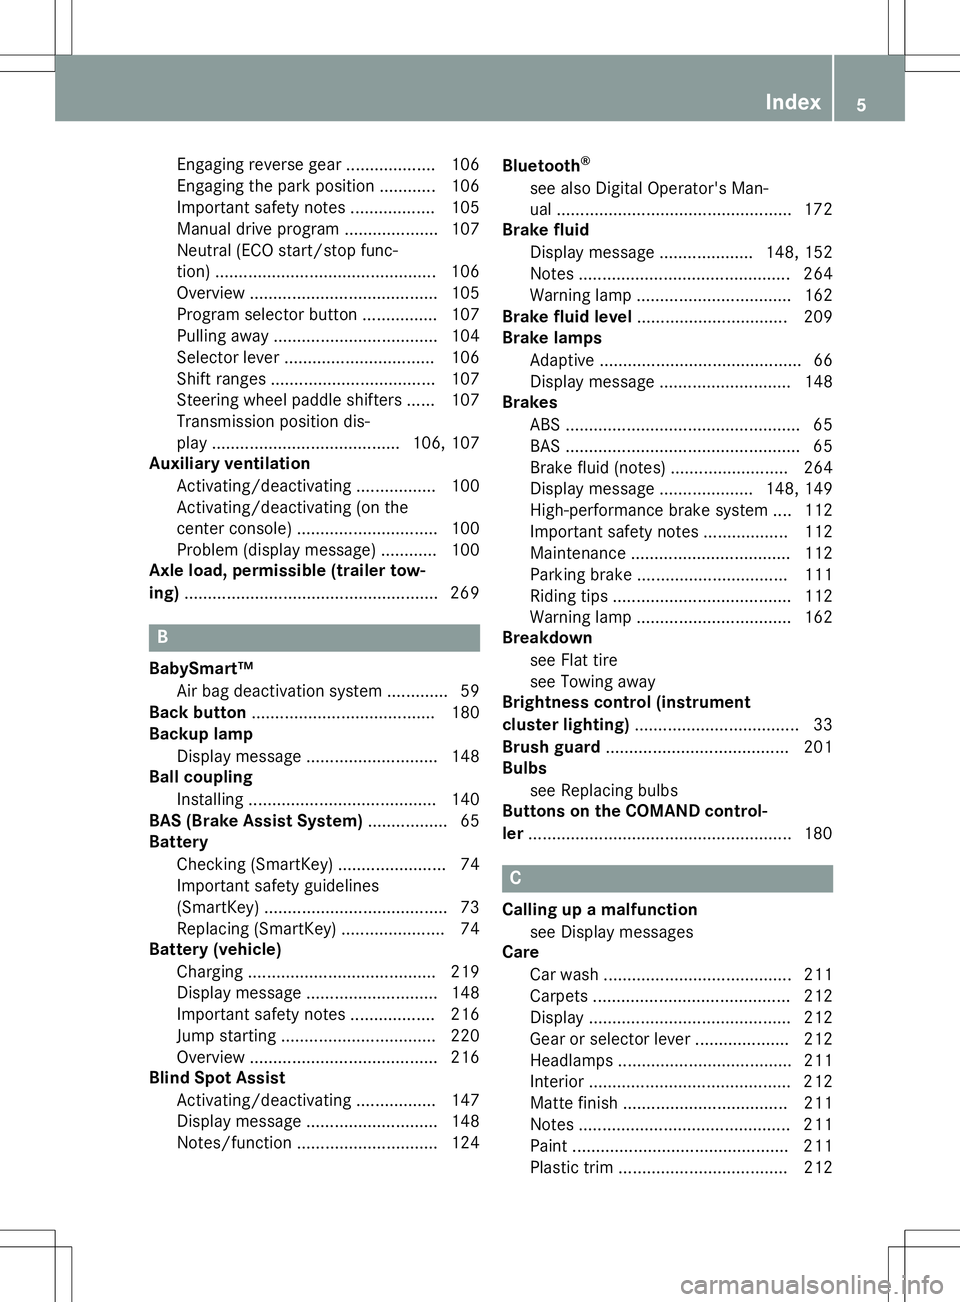
Engaging reverse gear ................... 106
Engaging the park position ............ 106
Important safety notes.................. 105
Manual drive progra m.................... 107
Neutral (ECO start/stop func-
tion) ............................................... 106
Overview ........................................ 105
Program selector button ................ 107
Pulling away ................................... 104
Selector lever ................................ 106
Shift ranges ................................... 107
Steering wheel paddle shifters ...... 107
Transmission position dis-
play ........................................ 106, 107
Auxiliary ventilation
Activating/deactivating ................. 100
Activating/deactivating (on the
center console ).............................. 100
Problem (display message) ............ 100
Axle load, permissible (trailer tow-
ing) ...................................................... 269
B
BabySmart™
Air bag deactivation system ............. 59
Back button ....................................... 180
Backup lamp
Display message ............................ 148
Ball coupling
Installing ........................................ 140
BAS (Brake Assist System) ................. 65
Battery
Checking (SmartKey) ....................... 74
Important safety guidelines
(SmartKey) ....................................... 73
Replacing (SmartKey) ...................... 74
Battery (vehicle)
Charging ........................................ 219
Display message ............................ 148
Important safety notes .................. 216
Jump starting ................................. 220
Overview ........................................ 216
Blind Spot Assist
Activating/deactivating ................. 147
Display message ............................ 148
Notes/function .............................. 124 Bluetooth
®
see also Digital Operator's Man-
ual .................................................. 172
Brake fluid
Display message .................... 148, 152
Notes ............................................. 264
Warning lamp ................................. 162
Brake fluid level ................................ 209
Brake lamps
Adaptive ........................................... 66
Display message ............................ 148
Brakes
ABS .................................................. 65
BAS .................................................. 65
Brake fluid (notes) ......................... 264
Display message .................... 148, 149
High-performance brake system .... 112
Important safety notes .................. 112
Maintenance .................................. 112
Parking brake ................................ 111
Riding tips ...................................... 112
Warning lamp ................................. 162
Breakdown
see Flat tire
see Towing away
Brightness control (instrument
cluster lighting) ................................... 33
Brush guard ....................................... 201
Bulbs
see Replacing bulbs
Buttons on the COMAND control-
ler ........................................................ 180
C
Calling up a malfunction
see Display messages
Care
Car wash ........................................ 211
Carpets .......................................... 212
Display ........................................... 212
Gear or selector lever .................... 212
Headlamps ..................................... 211
Interior ........................................... 212
Matte finish ................................... 211Note s............................................. 211
Paint .............................................. 211
Plastic trim .................................... 212
Index5
Page 10 of 274
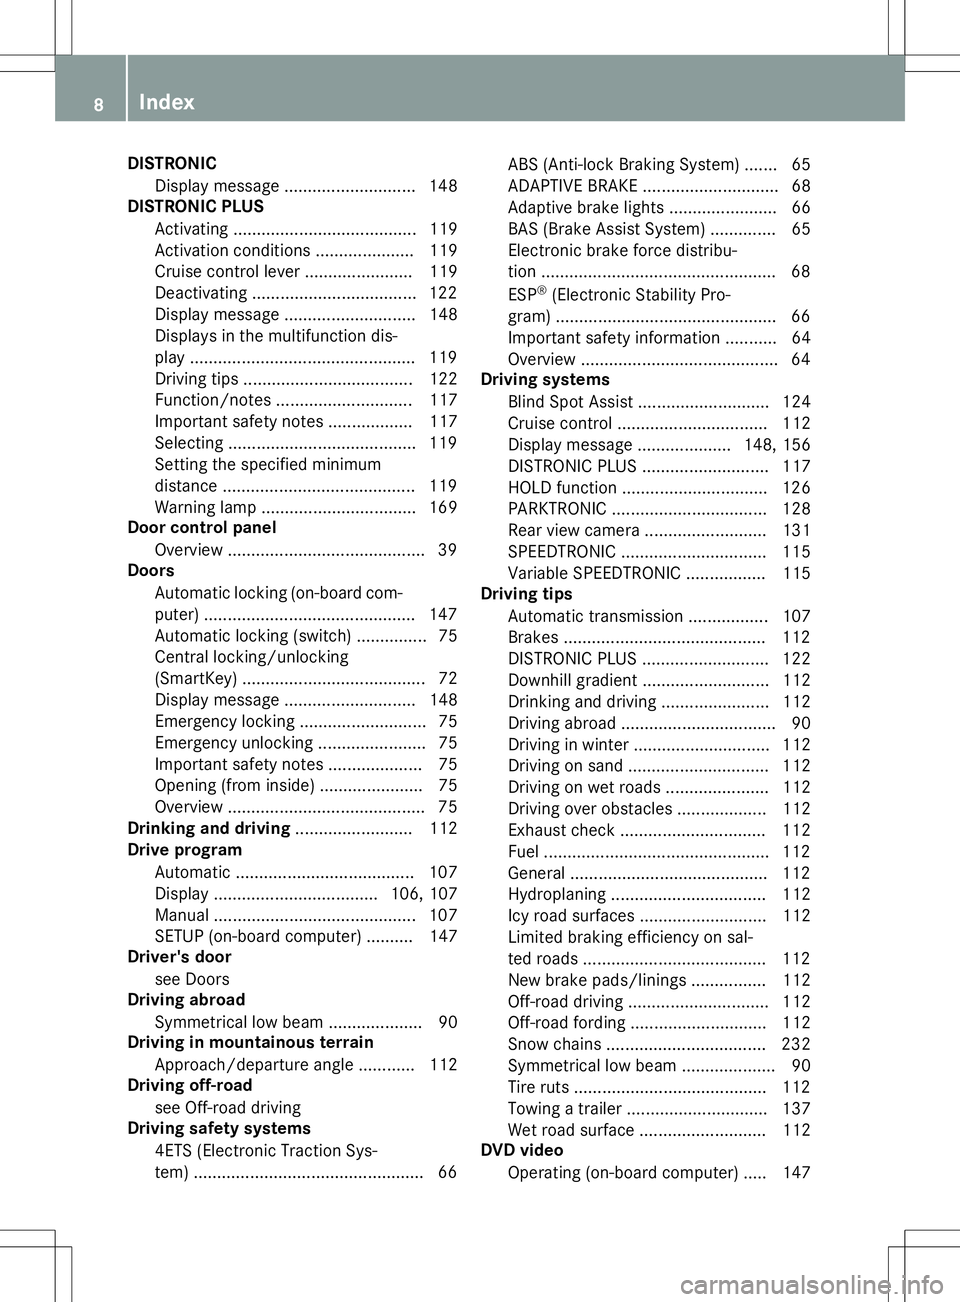
DISTRONICDisplay message ............................ 148
DISTRONIC PLUS
Activating ...................................... .119
Activation conditions ..................... 119
Cruise control lever ....................... 119
Deactivating ................................... 122
Display message ............................ 148
Displays in the multifunction dis-
play ................................................ 119
Driving tips ................................... .122
Function/notes ............................ .117
Important safety notes .................. 117
Selecting ........................................ 119
Setting the specified minimum
distance ......................................... 119
Warning lamp ................................. 169
Door control panel
Overview .......................................... 39
Doors
Automatic locking (on-board com-
puter) ............................................. 147
Automatic locking (switch) .............. .75
Central locking/unlocking
(SmartKey) ...................................... .72
Display message ............................ 148
Emergency locking ........................... 75
Emergency unlocking ....................... 75
Important safety note s.................... 75
Opening (from inside) ...................... 75
Overview .......................................... 75
Drinking and driving ......................... 112
Drive program
Automatic ...................................... 107
Display ................................... 106, 107
Manual ........................................... 107
SETUP (on-board computer) .......... 147
Driver's door
see Doors
Driving abroad
Symmetrical low beam .................... 90
Driving in mountainous terrain
Approach/departure angle ............ 112
Driving off-road
see Off-road driving
Driving safety systems
4ETS (Electronic Traction Sys-
tem) ................................................. 66 ABS (Anti-lock Braking System) ....... 65
ADAPTIVE BRAK
E............................. 68
Adaptive brake lights ....................... 66
BAS (Brake Assist System) .............. 65
Electronic brake force distribu-
tion .................................................. 68 ESP ®
(Electronic Stability Pro-
gram) ............................................... 66
Important safety information ........... 64
Overview .......................................... 64
Driving systems
Blind Spot Assist ............................ 124
Cruise control ................................ 112
Display message .................... 148, 156
DISTRONIC PLUS ........................... 117
HOLD function ............................... 126
PARKTRONIC ................................. 128
Rear view camera .......................... 131
SPEEDTRONIC ............................... 115
Variable SPEEDTRONIC ................. 115
Driving tips
Automatic transmission ................. 107
Brakes ........................................... 112
DISTRONIC PLUS ........................... 122
Downhill gradient ........................... 112
Drinking and driving ....................... 112
Driving abroad ................................. 90
Driving in winter ............................. 112
Driving on sand .............................. 112
Driving on wet roads ...................... 112
Driving over obstacles ................... 112
Exhaust check ............................... 112
Fuel ................................................ 112
General .......................................... 112
Hydroplaning ................................. 112
Icy road surfaces ........................... 112
Limited braking efficiency on sal-
ted roads ....................................... 112
New brake pads/linings ................ 112
Off-road driving .............................. 112
Off-road fording ............................. 112
Snow chains .................................. 232
Symmetrical low beam .................... 90
Tire ruts ......................................... 112
Towing a trailer .............................. 137
Wet road surface ........................... 112
DVD video
Operating (on-board computer) ..... 147
8Index
Page 14 of 274
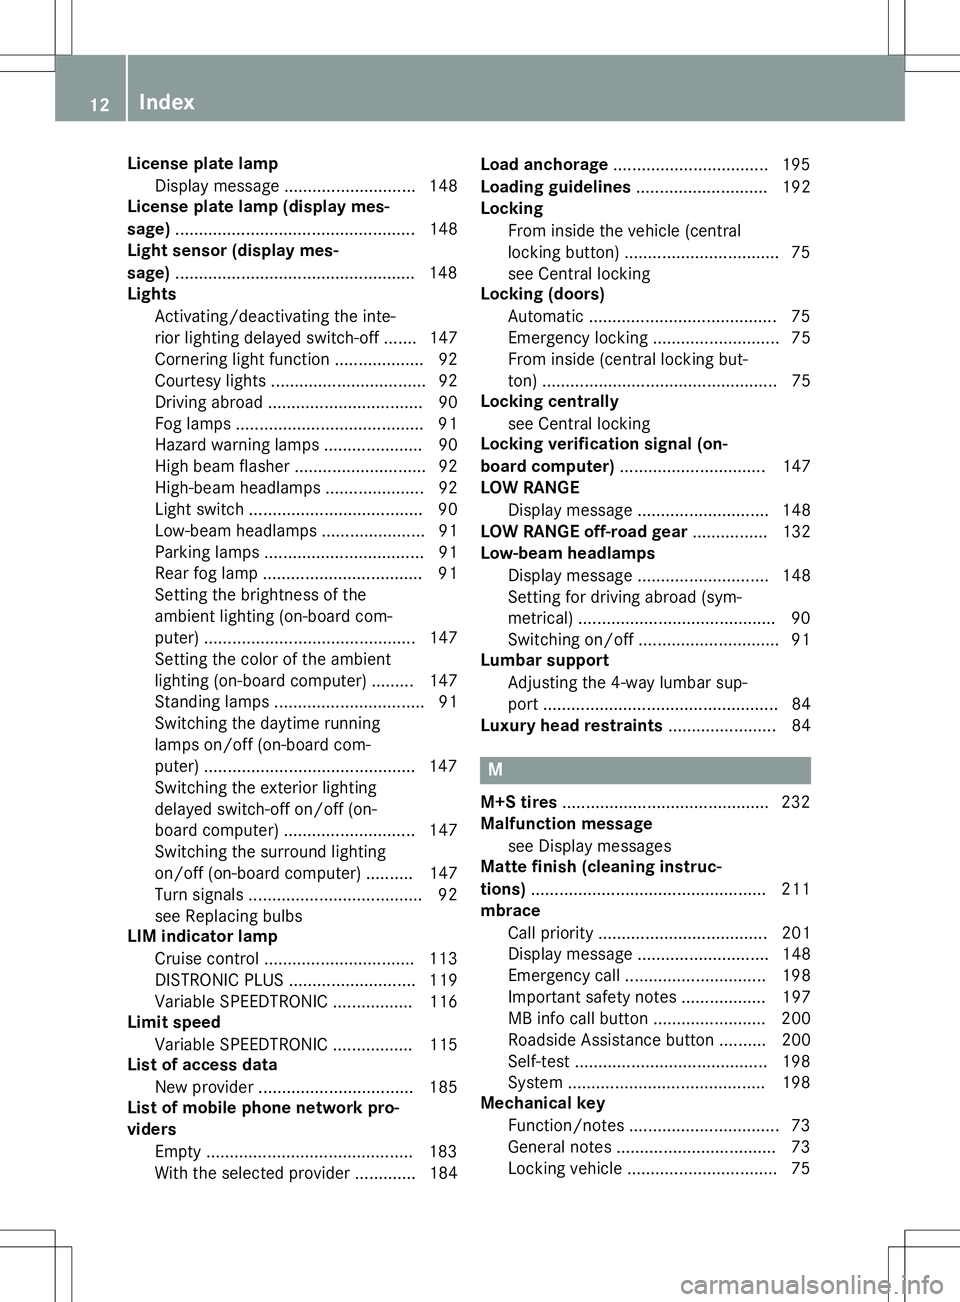
License plate lampDisplay message ............................ 148
License plate lamp (display mes- sage) .................................................. .148
Light sensor (display mes-
sage) ................................................... 148
Lights
Activating/deactivating the inte-
rior lighting delayed switch-off ....... 147
Cornering light function ................... 92
Courtesy lights ................................. 92
Driving abroad ................................. 90
Fog lamps ........................................ 91
Hazard warning lamps ..................... 90
High beam flasher ............................ 92
High-beam headlamps ..................... 92
Light switch ..................................... 90
Low-beam headlamps ..................... .91
Parking lamps ................................. .91
Rear fog lamp .................................. 91
Setting the brightness of the
ambient lighting (on-board com-
puter) ............................................ .147
Setting the color of the ambient
lighting (on-board computer) ......... 147
Standing lamps ................................ 91
Switching the daytime running
lamps on/off (on-board com-
puter) ............................................. 147
Switching the exterior lighting
delayed switch-off on/off (on-
board computer) ............................ 147
Switching the surround lighting
on/off (on-board computer) .......... 147
Turn signals ..................................... 92
see Replacing bulbs
LIM indicator lamp
Cruise control ................................ 113
DISTRONIC PLUS ........................... 119
Variable SPEEDTRONIC ................. 116
Limit speed
Variable SPEEDTRONIC ................. 115
List of access data
New provider ................................. 185
List of mobile phone network pro-
viders
Empty ............................................ 183
With the selected provider ............. 184 Load anchorage
................................. 195
Loading guidelines ............................ 192
Locking
From inside the vehicle (central
locking button) ................................. 75
see Central locking
Locking (doors)
Automatic ........................................ 75
Emergency locking ........................... 75
From inside (central locking but-
ton) ................................................. .75
Locking centrally
see Central locking
Locking verification signal (on-
board computer) .............................. .147
LOW RANGE
Display message ............................ 148
LOW RANGE off-road gear ................ 132
Low-beam headlamps
Display message ............................ 148
Setting for driving abroad (sym-
metrical) .......................................... 90
Switching on/off .............................. 91
Lumbar support
Adjusting the 4-way lumbar sup-
port ................................................. .84
Luxury head restraints .......................84
M
M+S tires............................................ 232
Malfunction message
see Display messages
Matte finish (cleaning instruc-
tions) .................................................. 211
mbrace
Call priority ................................... .201
Display message ............................ 148
Emergency call .............................. 198
Important safety notes .................. 197
MB info call button ........................ 200
Roadside Assistance button .......... 200
Self-test ......................................... 198
System .......................................... 198
Mechanical key
Function/notes ................................ 73
General notes .................................. 73
Locking vehicle ................................ 75
12Index
Page 95 of 274
The bulb may explode if:
R you touch it
R it is hot
R you drop it
R you scratch it
Only operate bulbs in enclosed lamps
designed for that purpose. Only install spare
bulbs of the same type and the specified volt- age.
Marks on the glass tube reduce the service
life of the bulbs. Do not touch the glass tube
with your bare hands. If necessary, clean the
glass tube when cold with alcohol or spirit and
rub it off with a lint-free cloth.
Protect bulbs from moisture during opera-
tion. Do not allow bulbs to come into contact
with liquids.
Xenon bulbs
If your vehicle is equipped with Xenon bulbs,
you can recognize this by the following: the
cone of light from the Xenon bulbs moves
from the top to the bottom and back again
when you start the engine. For this to be
observed, the lights must be switched on
before starting the engine.
Bulbs and lamps are an important aspect of
vehicle safety. You must therefore make sure that these function correctly at all times.
Have the headlamp setting checked regularly.
LED lamps
You can replace neither Xenon bulbs nor LED
bulbs. Have LED bulbs changed at a qualified specialist workshop.
Bulbs and lamps are an important aspect of
vehicle safety. You must therefore make sure
that these function correctly at all times.
Have the headlamp setting checked regularly.
Before changing bulbs
Have the following bulbs replaced at a quali-
fied specialist workshop:
R Additional turn signals in the exterior mir-rors
R High-mounted brake lamp R
High-beam/low-beam headlamps (Xenonbulbs)
R Daytime running lamps
R Parking lamps/standing lamps
R License plate lamp
iIndividual segments of the license plate
lamp LEDs may fail without a display mes-
sage appearing in the multifunction dis-
play. Regularly check the license plate
lamp. If necessary, visit a qualified special-
ist workshop.
You can replace the following bulbs:
R Fog lamp/cornering light with fog lamp
function
R Turn signal lamp (front)
R Brake/tail lamp
R Turn signal lamp (rear)
R Tail lamps/standing lamps
R Backup lamp
R Rear Fog Lamp
R Side marker lamps
Other bulbs
There are bulbs other than the Xenon bulbs
that you cannot replace yourself. Only replace the bulbs listed ( Ypage 94). Have the bulbs
that you cannot replace yourself replaced at a
qualified specialist workshop.
If you require assistance replacing bulbs, con-
sult a qualified specialist workshop.
Do not touch the glass tube of new bulbs with your bare hands. Even minor contamination
can burn into the glass surface and reduce
the service life of the bulbs. Always use a lint-
free cloth or only touch the base of the bulb
when installing.
Only use bulbs of the correct type.
If the new bulb still does not light up, consult a qualified specialist workshop.
Bulbs and lamps are an important aspect of
vehicle safety. You must therefore make surethat these function correctly at all times.
Have the headlamp setting checked regularly.
Replacing bulbs93
Lights and windshield wipers
Z
Page 107 of 274
!If a warning tone sounds and the
Release Park. BrakeRelease Park. Brakemessage appears
in the multifunction display, the parking
brake is still applied. Release the parkingbrake.
X Depress the brake pedal and keep itdepressed.
X Shift the automatic transmission to posi-tion Dor R.
iBefore driving off, wait until the gear
change is fully completed.
X Release the parking brake ( Ypage 111).
X Release the brake pedal.
X Carefully depress the accelerator pedal.
iIt is only possible to shift the automatic
transmission from position Pto a different
position if you depress the brake pedal.
Only then is the selector lever lock
released.
iThe vehicle locks centrally once you have
pulled away. The locking knobs in the doors
drop down.
You can open the doors from the inside at
any time.
You can also deactivate the automatic lock- ing feature ( Ypage 147).
iUpshifts take place at higher engine
speeds after a cold start. This helps the
catalytic converter to reach its operating
temperature more quickly.
Hill start assist
GWARNING
After a short time, hill start assist will no lon-
ger brake your vehicle and it could roll away.
There is a risk of an accident and injury.
Therefore, quickly move your foot from the
brake pedal to the accelerator pedal. Never
leave the vehicle when it is held by hill startassist.
Hill start assist helps you when pulling away
forwards or in reverse on an uphill gradient. It holds the vehicle for a short time after you
have removed your foot from the brake pedal.
This gives you enough time to move your footfrom the brake pedal to the accelerator pedal
and to depress it before the vehicle begins to
roll.
X Take your foot off the brake pedal.
iOnce you have taken your foot off the
brake pedal, the vehicle is held for around
one second.
X Pull away.
Hill start assist will not function if: R you are pulling away on a level road or on a
downhill gradient.
R the transmission is in position N.
R the parking brake is applied.
R ESP ®
is malfunctioning.
ECO start/stop function (AMG vehi-
cles)
In the Digital Operator's Manual, you will find
general notes on and information about: R Deactivating/activating the ECO start/
stop function
R Automatic engine switch-off/engine start
Automatic transmission
Important safety notes
GWARNING
If the engine speed is above the idling speed
and you engage transmission position Dor R,
the vehicle could pull away suddenly. There is a risk of an accident.
When engaging transmission position Dor R,
always firmly depress the brake pedal and do not simultaneously accelerate.
GWARNING
The automatic transmission switches to neu-
tral position Nwhen you switch off the engine.
Automatic transmission105
Driving and parking
Z
Page 110 of 274
GWARNING
Fuel is poisonous and hazardous to health.
There is a risk of injury.
You must make sure that fuel does not comeinto contact with your skin, eyes or clothing
and that it is not swallowed. Do not inhale fuel
vapors. Keep fuel away from children.
If you or others come into contact with fuel,
observe the following:
R Wash away fuel from skin immediately
using soap and water.
R If fuel comes into contact with your eyes,
immediately rinse them thoroughly with
clean water. Seek medical assistance with-
out delay.
R If fuel is swallowed, seek medical assis-
tance without delay. Do not induce vomit-ing.
R Immediately change out of clothing which
has come into contact with fuel.
!Do not use diesel to refuel vehicles with a
gasoline engine. Even small amounts of the wrong fuel result in damage to the fuel sys-
tem and engine.
!Do not switch on the ignition if you acci-
dentally refuel with the wrong fuel. Other-
wise, the fuel will enter the fuel lines. Notify
a qualified specialist workshop and have
the fuel tank and fuel lines drained com-
pletely.
!Overfilling the fuel tank could damage the
fuel system.
!Take care not to spill any fuel on painted
surfaces. You could otherwise damage the
paintwork.
!Use a filter when refueling from a fuel can.
Otherwise, the fuel lines and/or injection
system could be blocked by particles from
the fuel can.
If you overfill the fuel tank, pressure may build
up in the fuel tank. This could cause fuel to
spray out when the fuel pump nozzle is
removed. There is a risk of injury. The fuel tank is full when the fuel pump nozzle first
switches off. End the refueling process.
For further information on fuel and fuel quality
( Y page 259).
Refueling
Vehicles with a fuel filler flap
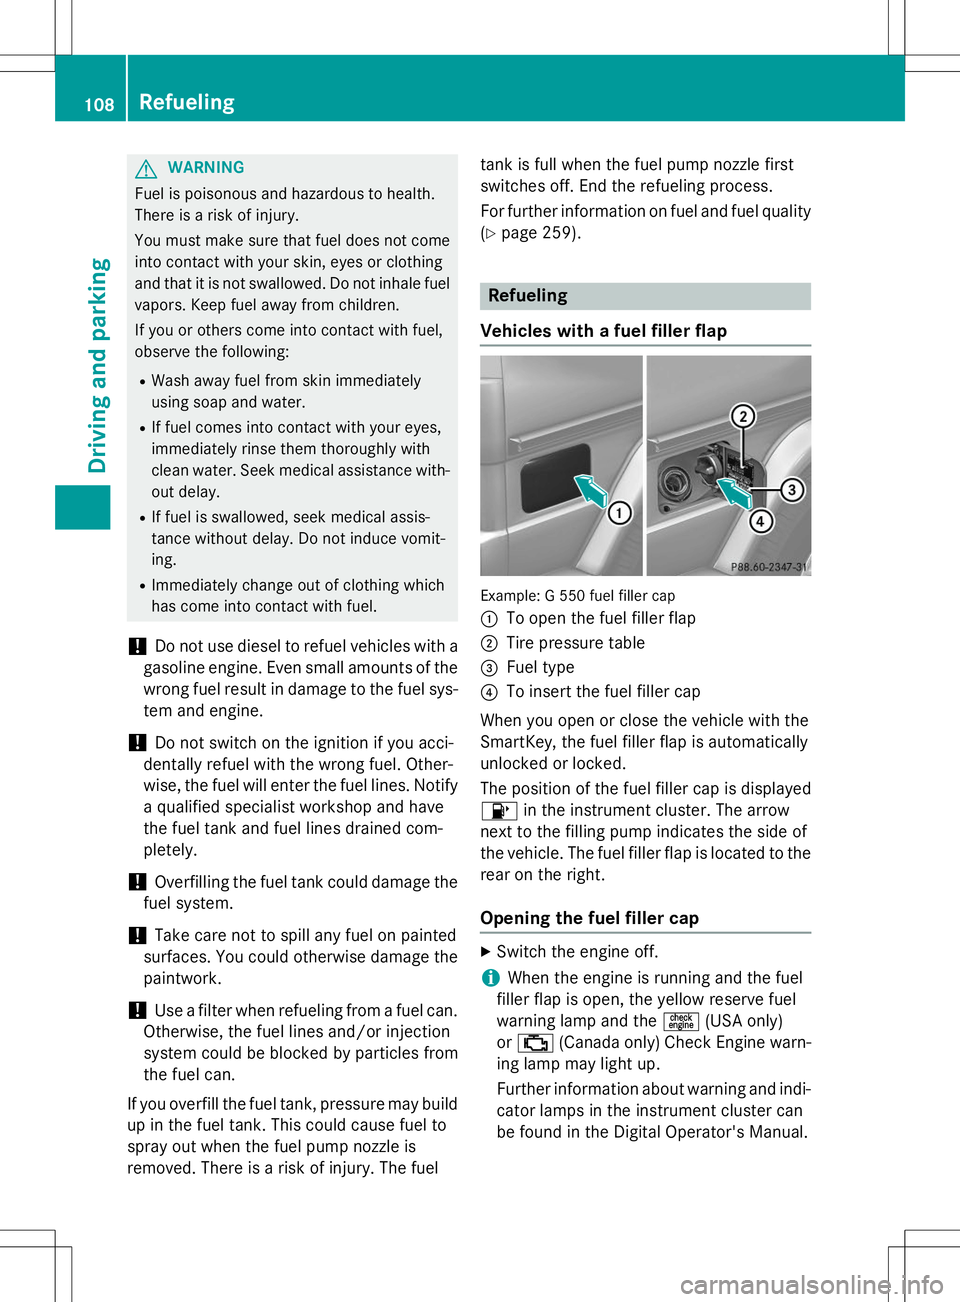
Example: G 550 fuel filler cap :
To open the fuel filler flap
;Tire pressure table
=Fuel type
?To insert the fuel filler cap
When you open or close the vehicle with the
SmartKey, the fuel filler flap is automatically
unlocked or locked.
The position of the fuel filler cap is displayed 8 in the instrument cluster. The arrow
next to the filling pump indicates the side of
the vehicle. The fuel filler flap is located to the rear on the right.
Opening the fuel filler cap
X Switch the engine off.
iWhen the engine is running and the fuel
filler flap is open, the yellow reserve fuel
warning lamp and the =(USA only)
or ; (Canada only) Check Engine warn-
ing lamp may light up.
Further information about warning and indi-
cator lamps in the instrument cluster can
be found in the Digital Operator's Manual.
108Refueling
Driving and parking
Page 120 of 274
time and for staying in your lane. Only engage
DISTRONIC PLUS when the current road,
weather and traffic conditions permit it to bedone safely, and adapt your driving style
accordingly. Drive carefully and maintain a
suitable distance to the vehicle in front.
When DISTRONIC PLUS detects a risk of col-
lision with the vehicle in front but is unable to
sufficiently decelerate the vehicle in order to
maintain the set distance from the vehicle in
front, you will be warned visually and acous-
tically. DISTRONIC PLUS cannot prevent a
collision without your intervention. An inter-
mittent warning tone will then sound and the distance warning lamp will light up in the
instrument cluster. Brake immediately in
order to increase the distance from the vehi-
cle in front, or take evasive action, provided it
is safe to do so.
DISTRONIC PLUS may not detect narrow
vehicles driving in front, e.g. motorcycles, or
vehicles driving on a different line. Therefore,
always pay attention to traffic conditions
even when DISTRONIC PLUS is activated.
Otherwise, you may fail to recognize dangers
in time, cause an accident and injure yourself and others.
In particular, the detection of obstacles can
be impaired if:
R the sensor is dirty or covered
R there is snow or heavy rain
R there is interference by other radar sources
R there is the possibility of strong radar
reflections, for example, in parking
garages.
If DISTRONIC PLUS is activated, the vehicle
brakes automatically in certain situations.
This can happen unexpectedly, especially
when towing or in a car wash. There is a risk of an accident. In these or similar situations,
deactivate DISTRONIC PLUS.
If you want DISTRONIC PLUS to assist you,
the following activation conditions must be
fulfilled ( Ypage 119) and the radar sensor
system must be operational.General notes
DISTRONIC PLUS regulates the speed and
automatically helps you maintain the dis-
tance to the vehicle detected in front.
DISTRONIC PLUS brakes automatically so
that the set speed is not exceeded.
On long and steep downhill gradients, espe-
cially if the vehicle is laden or towing a trailer,
you must select shift range 1,2 or 3in good
time. By doing so, you will make use of the
braking effect of the engine. This relieves the load on the brake system and prevents the
brakes from overheating and wearing too
quickly.
If DISTRONIC PLUS detects a slower-moving
vehicle in front, your vehicle is braked in order
to maintain the preset distance to the vehicle in front.
If there is no vehicle in front, DISTRONIC
PLUS operates in the same way as cruise
control in the speed range between 20 mph
(Canada: 30 km/h) and 120 mph (Canada:
200 km/h). If a vehicle is driving in front of
you, it operates in the speed range between
0 mph (0 km/h) and 120 mph (Canada:
200 km/h).
Do not use DISTRONIC PLUS while driving on
roads with steep gradients.
As DISTRONIC PLUS transmits radar waves, it
can resemble the radar detectors of the
responsible authorities. You can refer to the
relevant chapter in the Operator's Manual if
questions are asked about this.
iUSA only:
This device has been approved by the FCC as a "Vehicular Radar System". The radar
sensor is intended for use in an automotive
radar system only. Removing, tampering
with, or altering the device will void any
warranties, and is not permitted by the
FCC. Do not tamper with, alter, or use in
any non-approved way.
Any unauthorized modification to this
device could void the user’s authority to
operate the equipment.
118Driving systems
Driving an d parking
Page 124 of 274
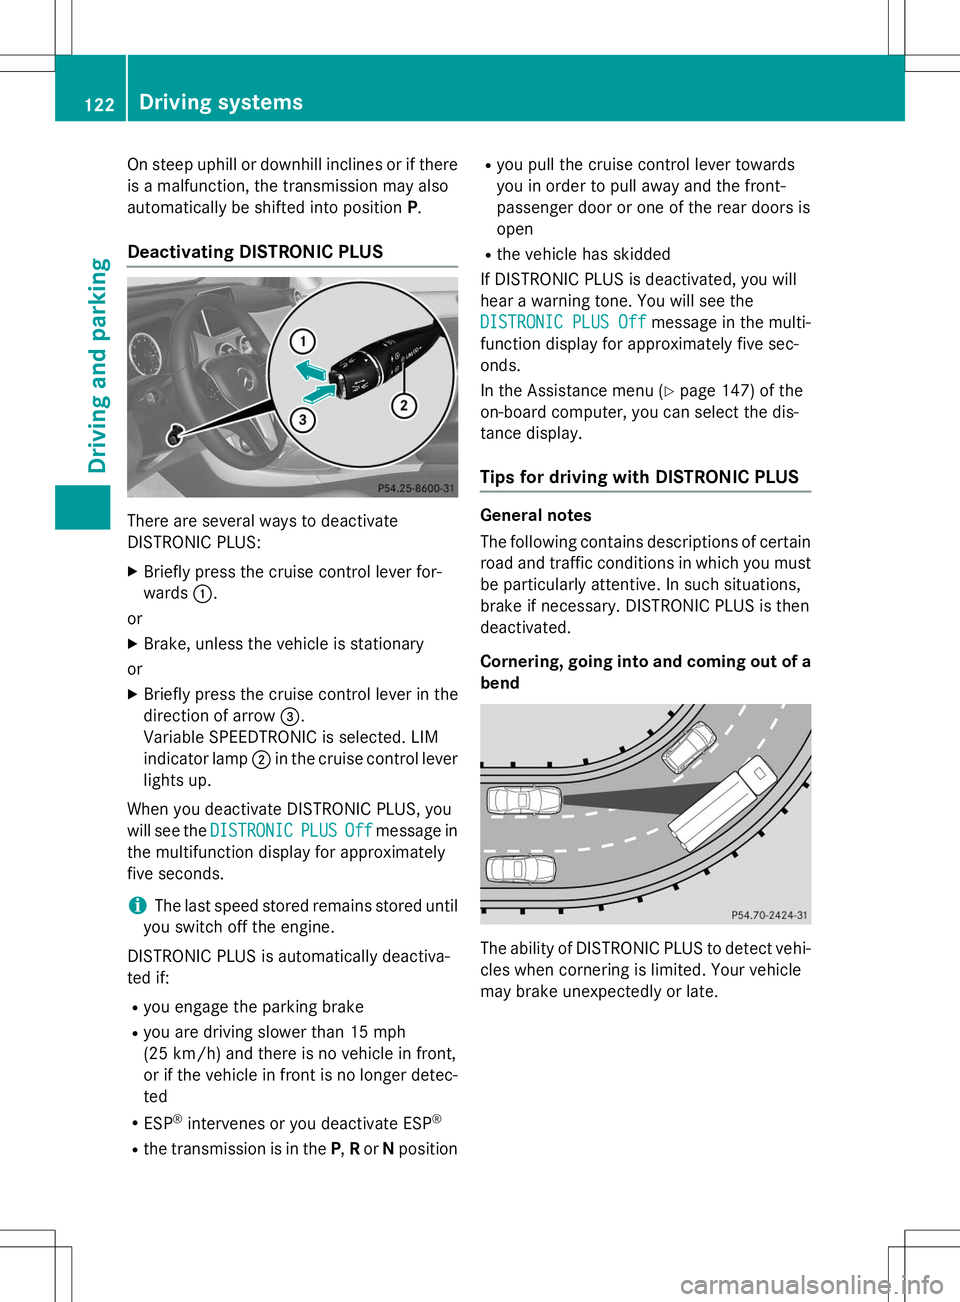
On steep uphill or downhill inclines or if there
is a malfunction, the transmission may also
automatically be shifted into positionP.
Deactivating DISTRONIC PLUS
There are several ways to deactivate
DISTRONIC PLUS:
X Briefly press the cruise control lever for-wards :.
or
X Brake, unless the vehicle is stationary
or X Briefly press the cruise control lever in the
direction of arrow =.
Variable SPEEDTRONIC is selected. LIM
indicator lamp ;in the cruise control lever
lights up.
When you deactivate DISTRONIC PLUS, you
will see the
DISTRONICPLUSOffmessage in
the multifunction display for approximately
five seconds.
iThe last speed stored remains stored until
you switch off the engine.
DISTRONIC PLUS is automatically deactiva-
ted if:
R you engage the parking brake
R you are driving slower than 15 mph
(25 km/h) and there is no vehicle in front,
or if the vehicle in front is no longer detec-
ted
R ESP ®
intervenes or you deactivate ESP ®
R the transmission is in the P,R or Nposition R
you pull the cruise control lever towards
you in order to pull away and the front-
passenger door or one of the rear doors isopen
R the vehicle has skidded
If DISTRONIC PLUS is deactivated, you will
hear a warning tone. You will see the
DISTRONIC PLUS Offmessage in the multi-
function display for approximately five sec- onds.
In the Assistance menu ( Ypage 147) of the
on-board computer, you can select the dis-
tance display.
Tips for driving with DISTRONIC PLUS
General notes
The following contains descriptions of certain
road and traffic conditions in which you must be particularly attentive. In such situations,
brake if necessary. DISTRONIC PLUS is thendeactivated.
Cornering, going into and coming out of a
bend
The ability of DISTRONIC PLUS to detect vehi- cles when cornering is limited. Your vehicle
may brake unexpectedly or late.
122Driving systems
Driving and parking
Page 126 of 274
Blind Spot Assist
Important safety notes
GWARNING
Blind Spot Assist does not react to: R vehicles overtaken too closely on the side,
placing them in the blind spot area
R vehicles which approach with a large speed
differential and overtake your vehicle
As a result, Blind Spot Assist may not give
warnings in such situations. There is a risk of an accident.
Always observe the traffic conditions care-
fully, and maintain a safe lateral distance.
GWARNING
Blind Spot Assist does not react to:
R vehicles overtaken too closely on the side,
placing them in the blind spot area
R vehicles being overtaken at a speed differ-
ence of more than 7.5 mph (12 km/h)
R vehicles which approach with a large speed
differential and overtake your vehicle
As a result, Blind Spot Assist may not give
warnings in such situations. There is a risk of
an accident.
Always observe the traffic conditions care-
fully, and maintain a safe lateral distance.
Blind Spot Assist is only an aid. It may fail to
detect some vehicles and is no substitute for
attentive driving.
In particular, the detection of obstacles can
be impaired if:
R there is dirt on the sensors or anything else
covering the sensors
R visibility is poor, e.g. due to fog, heavy rain
or snow
R there is a narrow vehicle traveling in front,
e.g. a motorcycle or bicycle
R the road has very wide lanes
R the road has narrow lanes R
you are not driving in the middle of the lane
R there are barriers or other road boundaries
iUSA only:
This device has been approved by the FCC as a "Vehicular Radar System". The radar
sensor is intended for use in an automotive
radar system only. Removing, tampering
with, or altering the device will void any
warranties, and is not permitted by the
FCC. Do not tamper with, alter, or use in
any non-approved way.
Any unauthorized modification to this
device could void the user’s authority to
operate the equipment.
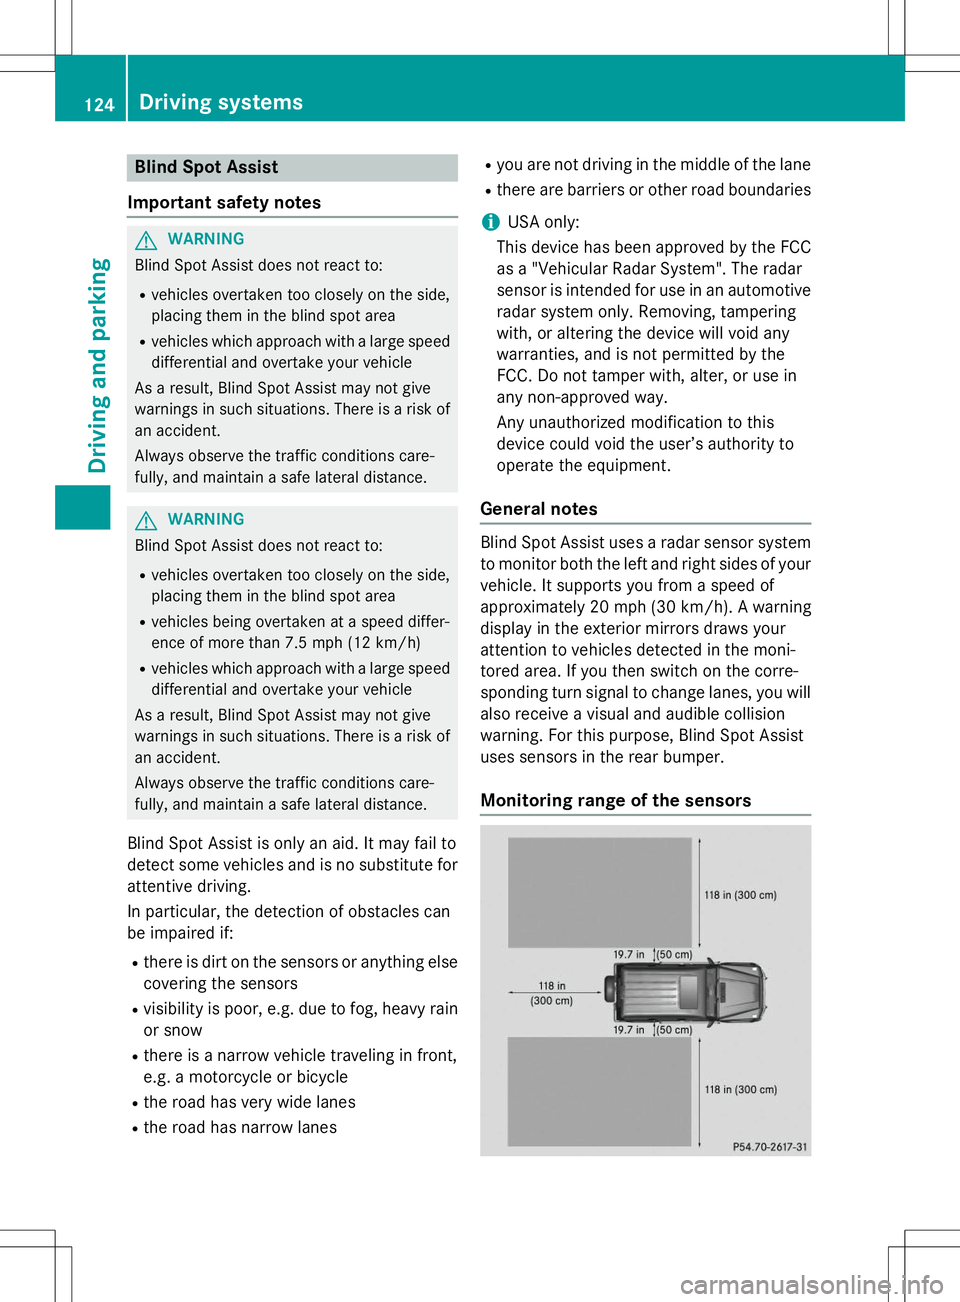
General notes
Blind Spot Assist uses a radar sensor system
to monitor both the left and right sides of your
vehicle. It supports you from a speed of
approximately 20 mph (30 km/h). A warning
display in the exterior mirrors draws your
attention to vehicles detected in the moni-
tored area. If you then switch on the corre-
sponding turn signal to change lanes, you will also receive a visual and audible collision
warning. For this purpose, Blind Spot Assist
uses sensors in the rear bumper.
Monitoring range of the sensors
124Driving systems
Driving an d parking