stop start MERCEDES-BENZ G500 2002 W463 Owner's Manual
[x] Cancel search | Manufacturer: MERCEDES-BENZ, Model Year: 2002, Model line: G500, Model: MERCEDES-BENZ G500 2002 W463Pages: 385, PDF Size: 30.37 MB
Page 50 of 385
47 Seats
Te ch n i c a l
data Instruments
and controlsOperationDrivingInstrument
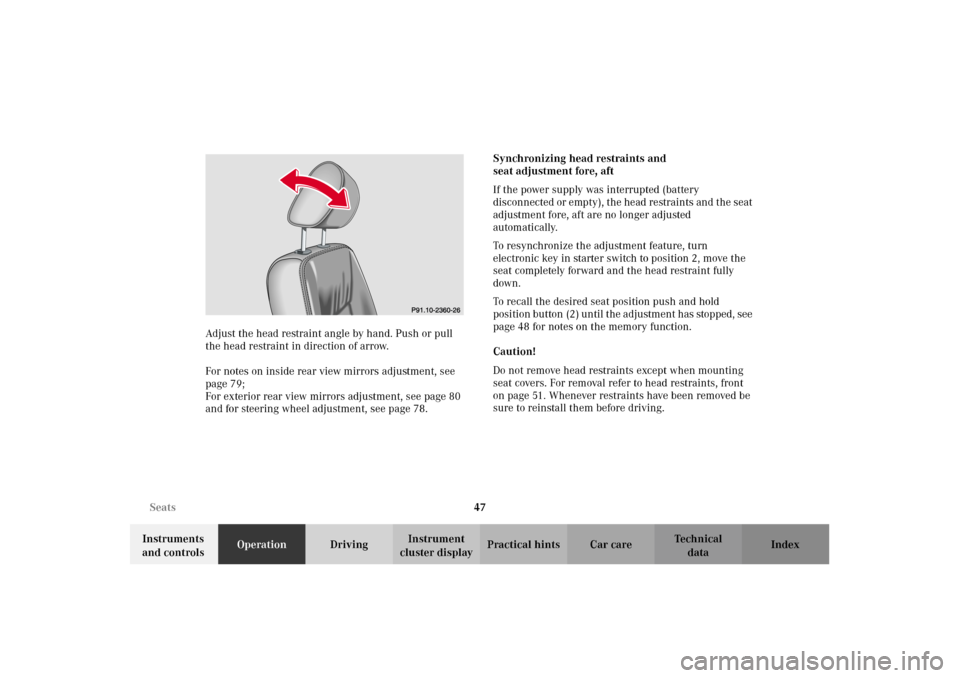
cluster displayPractical hints Car care Index Adjust the head restraint angle by hand. Push or pull
the head restraint in direction of arrow.
For notes on inside rear view mirrors adjustment, see
page 79;
For exterior rear view mirrors adjustment, see page 80
and for steering wheel adjustment, see page 78.Synchronizing head restraints and
seat adjustment fore, aft
If the power supply was interrupted (battery
disconnected or empty), the head restraints and the seat
adjustment fore, aft are no longer adjusted
automatically.
To resynchronize the adjustment feature, turn
electronic key in starter switch to position 2, move the
seat completely forward and the head restraint fully
down.
To recall the desired seat position push and hold
position button (2 ) un til t he ad justm ent has stop ped , see
page 48 for notes on the memory function.
Caution!
Do not remove head restraints except when mounting
seat covers. For removal refer to head restraints, front
on page 51. Whenever restraints have been removed be
sure to reinstall them before driving.
P91.10-2360-26
J_G463.book Seite 47 Mittwoch, 19. September 2001 8:06 08
Page 52 of 385
49 Seats
Te ch n i c a l
data Instruments
and controlsOperationDrivingInstrument
cluster displayPractical hints Car care Index Storing positions into memory:
With the electronic key in starter switch position 1 or 2
or with the relevant door open and the electronic key
inserted in the starter switch.
Adjust the seat to the desired position, see page 46.
Driver’s seat:
You can also adjust the steering wheel and the exterior
rear view mirrors electrically for the driver’s seat. See
page 80 for exterior rear view mirror adjustment and
page 78 for steering wheel adjustment.
Push memory button (1), release and push the position
button (2) within 3 seconds.Recalling positions from memory:
To recall a seat / steering wheel / exterior rear view
mirror position, push and hold button (2) to selected
memory position until the adjustment has stopped.
The seat / steering wheel / exterior rear view mirror
movement stops when the button is released.
Caution!
Do not operate the power seats using the memory
button if the backrest is in an excessively reclined
position. Doing so could cause damage to front or rear
seats.
First move backrest to an upright position.
J_G463.book Seite 49 Mittwoch, 19. September 2001 8:06 08
Page 126 of 385
123 Coolant temperature gauge
Te ch n i c a l
data Instruments
and controlsOperationDrivingInstrument
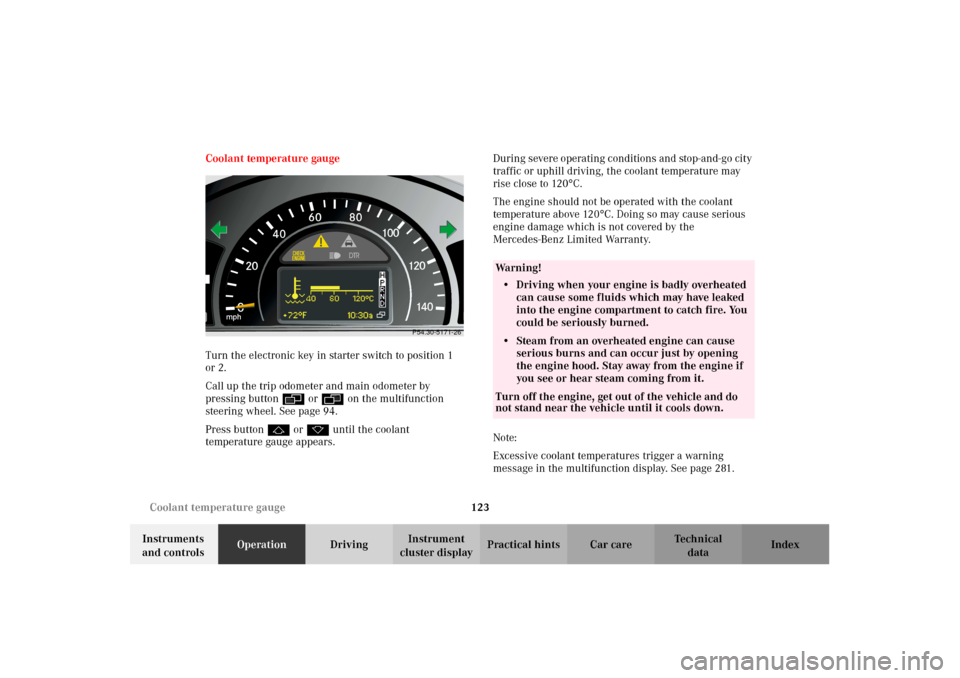
cluster displayPractical hints Car care Index Coolant temperature gauge
Turn the electronic key in starter switch to position 1
or 2.
Call up the trip odometer and main odometer by
pressing button è or ÿ on the multifunction
steering wheel. See page 94.
Press button j or k until the coolant
temperature gauge appears.During severe operating conditions and stop-and-go city
traffic or uphill driving, the coolant temperature may
rise close to 120
°C.
The engine should not be operated with the coolant
temperature above 120
°C. Doing so may cause serious
engine damage which is not covered by the
Mercedes-Benz Limited Warranty.
Note:
Excessive coolant temperatures trigger a warning
message in the multifunction display. See page 281.
0
60
40100
120
140
mph
2080
P54.30-5171-26
Wa r n i n g !
• Driving when your engine is badly overheated
can cause some fluids which may have leaked
into the engine compartment to catch fire. You
could be seriously burned.• Steam from an overheated engine can cause
serious burns and can occur just by opening
the engine hood. Stay away from the engine if
you see or hear steam coming from it.Turn off the engine, get out of the vehicle and do
not stand near the vehicle until it cools down.
J_G463.book Seite 123 Mittwoch, 19. September 2001 8:06 08
Page 208 of 385
205 Starter switch
Te ch n i c a l
data Instruments
and controlsOperationDrivingInstrument
cluster displayPractical hints Car care Index Important!
If the electronic key is left in the starter switch
position 0 for a extended period of time, it can no longer
be turned in the lock. In this case, remove electronic key
from starter switch and reinsert.
Caution!
To prevent accelerated battery discharge and a possible
dead battery, always remove the electronic key from the
starter switch. Do not leave the electronic key in starter
switch position 0.Notes:
A warning sounds when the driver’s door is opened
with the electronic key is in starter switch position 1
or 0.
If the electronic key cannot be turned in the starter
switch, the vehicle battery may not be sufficiently
charged. See battery on page 319 or jump starting on
page 321.
With the engine at idle speed, the charging rate of the
alternator (output) is limited.
It is therefore recommended that you turn off
unnecessary electrical consumers while driving in stop-
and-go traf fic. This precaution helps to avoid draining of
the battery.
Unnecessary strain on the battery and charging system
may be minimized by turning off the following power-
consuming devices, for example:
Heated seats, rear window defroster. In addition, the
automatic climate air volume control should be set to
the lowest position.
J_G463.book Seite 205 Mittwoch, 19. September 2001 8:06 08
Page 209 of 385
206 Starting and turning off the engine
Te ch n i c a l
data Instruments
and controlsOperationDrivingInstrument
cluster displayPractical hints Car care Index
Starting and turning off the engine
Before starting
Ensure that parking brake is engaged and that selector
lever is in position “P” or “N”. Turn electronic key in
starter switch to position 2.
Important!
In areas where temperatures frequently drop below -4
°F
(-20
°C) we recommend that an engine block heater be
installed. Your authorized Mercedes-Benz Light Truck
Center will advise you on this subject, see page 225.
Starting
Do n ot de pr ess accelerato r. B rie f ly turn electron ic key in
starter switch clockwise to the stop and release. The
starter will engage until the engine is running.
If engine will not run, and the starting procedure stops,
turn electronic key completely to the left and repeat
starting the engine.
After several unsuccessful attempts, have the system
checked at the nearest authorized Mercedes-Benz Light
Truck Center.Important!
Due to the installed starter non-repeat feature, the
electronic key must be turned completely to the left
before attempting to start the engine again.
Turning off
Turn the electronic key in the starter switch to
position 0 to stop the engine.
The electronic key can only be removed with the
selector lever in position “P”.
J_G463.book Seite 206 Mittwoch, 19. September 2001 8:06 08
Page 211 of 385
208 Automatic transmission
Te ch n i c a l
data Instruments
and controlsOperationDrivingInstrument
cluster displayPractical hints Car care Index
Driving
The selector lever is automatically locked while in
position “P”. To move the selector lever out of
position “P”, the service brake pedal must be firmly
depressed before the shift lock will release.
Shif t s elector leve r to t he d es ir ed pos ition on ly when t he
engine is idling normally and the service brake is
applied. Do not release the brake until ready to drive.
The vehicle may otherwise start creeping when the
selector lever is in drive or reverse position.Important!
After selecting any driving position from “N” or “P”,
wait a moment to allow the gear to fully engage before
accelerating, especially when the engine is cold.
Accelerator position
Partial throttle = early upshifting = normal acceleration
Full throttle = later upshifting = rapid acceleration
Kickdown (depressing the accelerator beyond full
throttle) = downshifting to a lower gear = maximum
ac celeration . On ce t he d es ire d s peed is attain ed , eas e up
on the accelerator – the transmission shifts up again.
Stopping
For brief stops, e.g. at traffic lights, leave the
transmission in gear and hold vehicle with the service
brake.
For longer stops with the engine idling, shift into “N”
or “P” and hold the vehicle with the service brake.
When stopping the vehicle on an uphill gradient, do not
hold it with the accelerator, use the brake. This avoids
unnecessary transmission heat build up.
Wa r n i n g !
It is dangerous to shift the selector lever out of “P”
or “N” if the engine speed is higher than idle speed.
If your foot is not firmly on the brake pedal, the
vehicle could accelerate quickly forward or in
reverse. You could lose control of the vehicle and
hit someone or something. Only shift into gear
when the engine is idling normally and when your
right foot is firmly on the brake pedal.
O n s l i p p e ry ro a d s u rfa c es , n eve r d ow n s h i f t i n o rd e r
to obtain braking action. This could result in drive
wheel slip and reduced vehicle control. Your
vehicle’s ABS will not prevent this type of loss of
control.
J_G463.book Seite 208 Mittwoch, 19. September 2001 8:06 08
Page 213 of 385
210 Automatic transmission
Te ch n i c a l
data Instruments
and controlsOperationDrivingInstrument
cluster displayPractical hints Car care Index
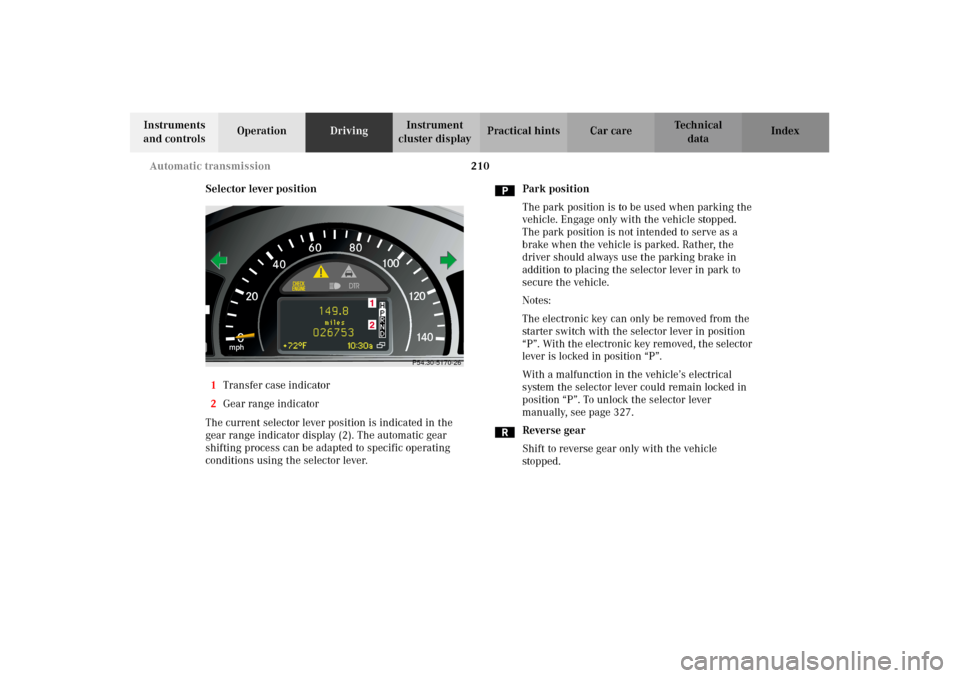
Selector lever position
1Transfer case indicator
2Gear range indicator
The current selector lever position is indicated in the
gear range indicator display (2). The automatic gear
shifting process can be adapted to specific operating
conditions using the selector lever.Park position
The park position is to be used when parking the
vehicle. Engage only with the vehicle stopped.
The park position is not intended to serve as a
brake when the vehicle is parked. Rather, the
driver should always use the parking brake in
addition to placing the selector lever in park to
secure the vehicle.
Notes:
The electronic key can only be removed from the
starter switch with the selector lever in position
“P”. With the electronic key removed, the selector
lever is locked in position “P”.
With a malfunction in the vehicle’s electrical
system the selector lever could remain locked in
position “P”. To unlock the selector lever
manually, see page 327.
Reverse gear
Shift to reverse gear only with the vehicle
stopped.
0
60
40100
120
140
mph
2080
P54.30-5170-26
J_G463.book Seite 210 Mittwoch, 19. September 2001 8:06 08
Page 218 of 385
215 Parking brake
Te ch n i c a l
data Instruments
and controlsOperationDrivingInstrument
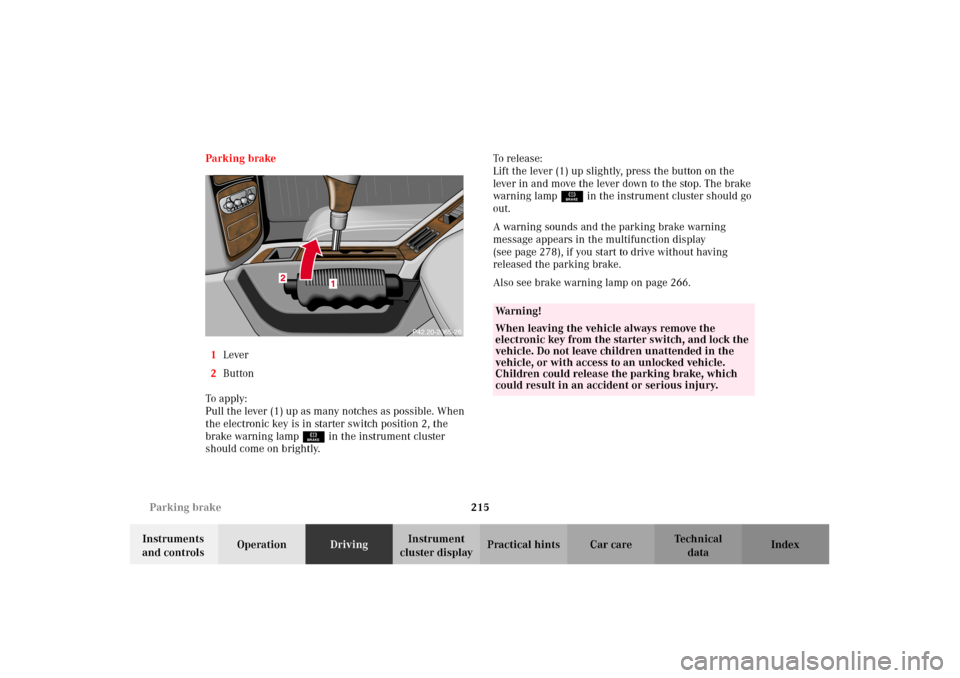
cluster displayPractical hints Car care Index Parking brake
1Lever
2Button
To a p ply:
Pull the lever (1) up as many notches as possible. When
the electronic key is in starter switch position 2, the
brake warning lampÉ in the instrument cluster
should come on brightly.To r e l e a s e :
Lift the lever (1) up slightly, press the button on the
lever in and move the lever down to the stop. The brake
warning lampÉ in the instrument cluster should go
out.
A warning sounds and the parking brake warning
message appears in the multifunction display
(see page 278), if you start to drive without having
released the parking brake.
Also see brake warning lamp on page 266.
Wa r n i n g !
When leaving the vehicle always remove the
electronic key from the starter switch, and lock the
vehicle. Do not leave children unattended in the
vehicle, or with access to an unlocked vehicle.
Children could release the parking brake, which
could result in an accident or serious injury.
J_G463.book Seite 215 Mittwoch, 19. September 2001 8:06 08
Page 232 of 385
229 Driving instructions
Te ch n i c a l
data Instruments
and controlsOperationDrivingInstrument
cluster displayPractical hints Car care Index Traction in steep terrain:
Be easy on the accelerator and watch for continuous
wheel traction when driving in steep terrain.
When the differential locks are not engaged, 4-ETS
helps greatly when starting out on a steep incline. The
front wheels have then the tendency to slip due to the
weight reduction over the front axle. The ETS
recognizes the situation and limits the torque for the
front wheels by braking them. Simultaneously the
torque for the rear wheels is increased.
See page 241 for four wheel electronic traction system
(4-ETS).
Driving across a hilltop:
To prevent the vehicle from speeding up too much after
climbing a hill, decelerate just ahead of a hilltop (do not
select gear range “N”). Use the momentum of the
vehicle to drive across the hilltop. Driving in this
manner prevents the vehicle from jumping across the
hilltop and thus loosing its forward momentum.
Driving downhill:
Select gear range “1” on the automatic transmission,
see page 207.Drive downhill observing the same rules as driving
uphill.
Driving on embankments, slopes and other steep
inclines should only be done straight up or downhill, i.e.
in the line of gravity.
Do not drive along the side of a slope (danger of vehicle
rollover). If in doing so, the vehicle begins to show a
tendency to roll, immediately steer into a line of gravity
(straight up or downhill).
Utilize the engine’s braking power when descending a
slope, observe the engine speed (do not overrev the
engine). Apply the service brake as needed.
The special LOW range ABS setting allows for precise
and brief (cyclical) blocking of the front wheels,
permitting them to dig into loose ground. Remember
that the front wheels when stopped, slide across a
surface, thus loose their ability to steer the vehicle.
Check the brakes after a lengthy downgrade drive.
Important!
Only apply the service brake if the vehicle travels
straight downhill, i.e. in the line of gravity.
J_G463.book Seite 229 Mittwoch, 19. September 2001 8:06 08
Page 233 of 385
230 Driving instructions
Te ch n i c a l
data Instruments
and controlsOperationDrivingInstrument
cluster displayPractical hints Car care Index
Driving through water
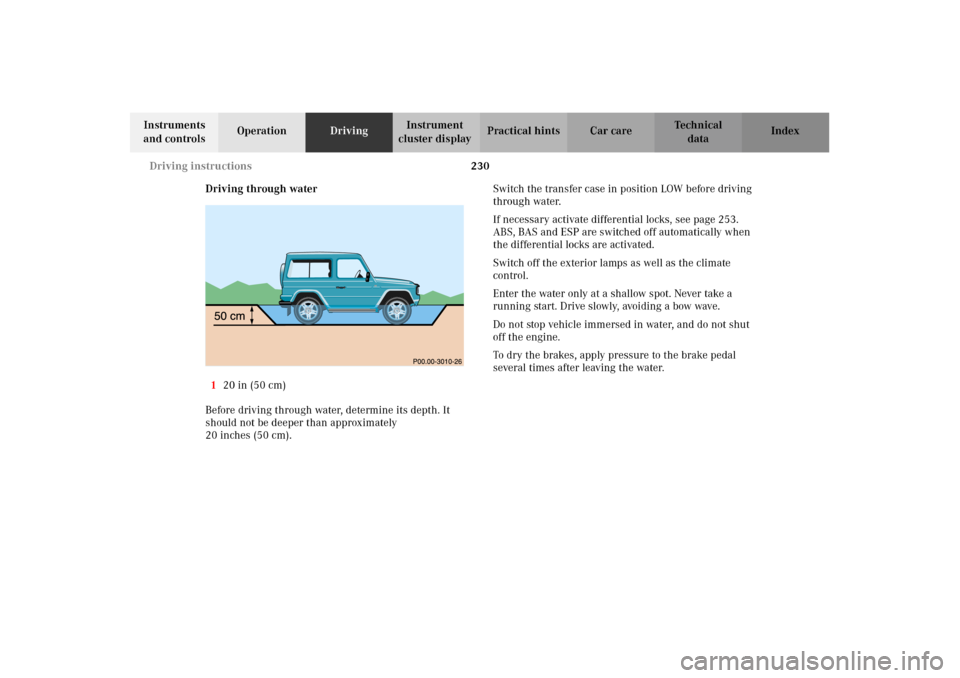
120 in (50 cm)
Before driving through water, determine its depth. It
should not be deeper than approximately
20 inches (50 cm).Switch the transfer case in position LOW before driving
through water.
If necessary activate differential locks, see page 253.
ABS, BAS and ESP are switched off automatically when
the differential locks are activated.
Switch off the exterior lamps as well as the climate
control.
Enter the water only at a shallow spot. Never take a
running start. Drive slowly, avoiding a bow wave.
Do not stop vehicle immersed in water, and do not shut
off the engine.
To dry the brakes, apply pressure to the brake pedal
several times after leaving the water.
J_G463.book Seite 230 Mittwoch, 19. September 2001 8:06 08