AUX MERCEDES-BENZ G550 2011 W463 Owner's Manual
[x] Cancel search | Manufacturer: MERCEDES-BENZ, Model Year: 2011, Model line: G550, Model: MERCEDES-BENZ G550 2011 W463Pages: 288, PDF Size: 11.16 MB
Page 142 of 288
Driving on wet roads
Hydroplaning
If water has accumulated to a certain depth
on the road surface, there is a danger of
hydroplaning occurring, even if:
R you drive at low speeds.
R the tires have adequate tread depth.
For this reason, in the event of heavy rain or
in conditions in which hydroplaning can occur
you must drive in the following manner:
R reduce your speed
R avoid ruts
R brake carefully
Driving on flooded roads
! Do not drive through flooded areas.
Check the depth of any water before driving
through it. Drive slowly through standing
water. Otherwise, water may enter the
vehicle interior or the engine compartment.
This can damage the electronic
components in the engine or AUTOTRONIC.
Water can also be drawn in by the engine's
air suction nozzles and this can cause
engine damage.
If you have to drive on stretches of road on
which water has collected, please bear in
mind that:
R the maximum permissible still water depth
is 50 cm.
R you should drive no faster than at walking
pace.
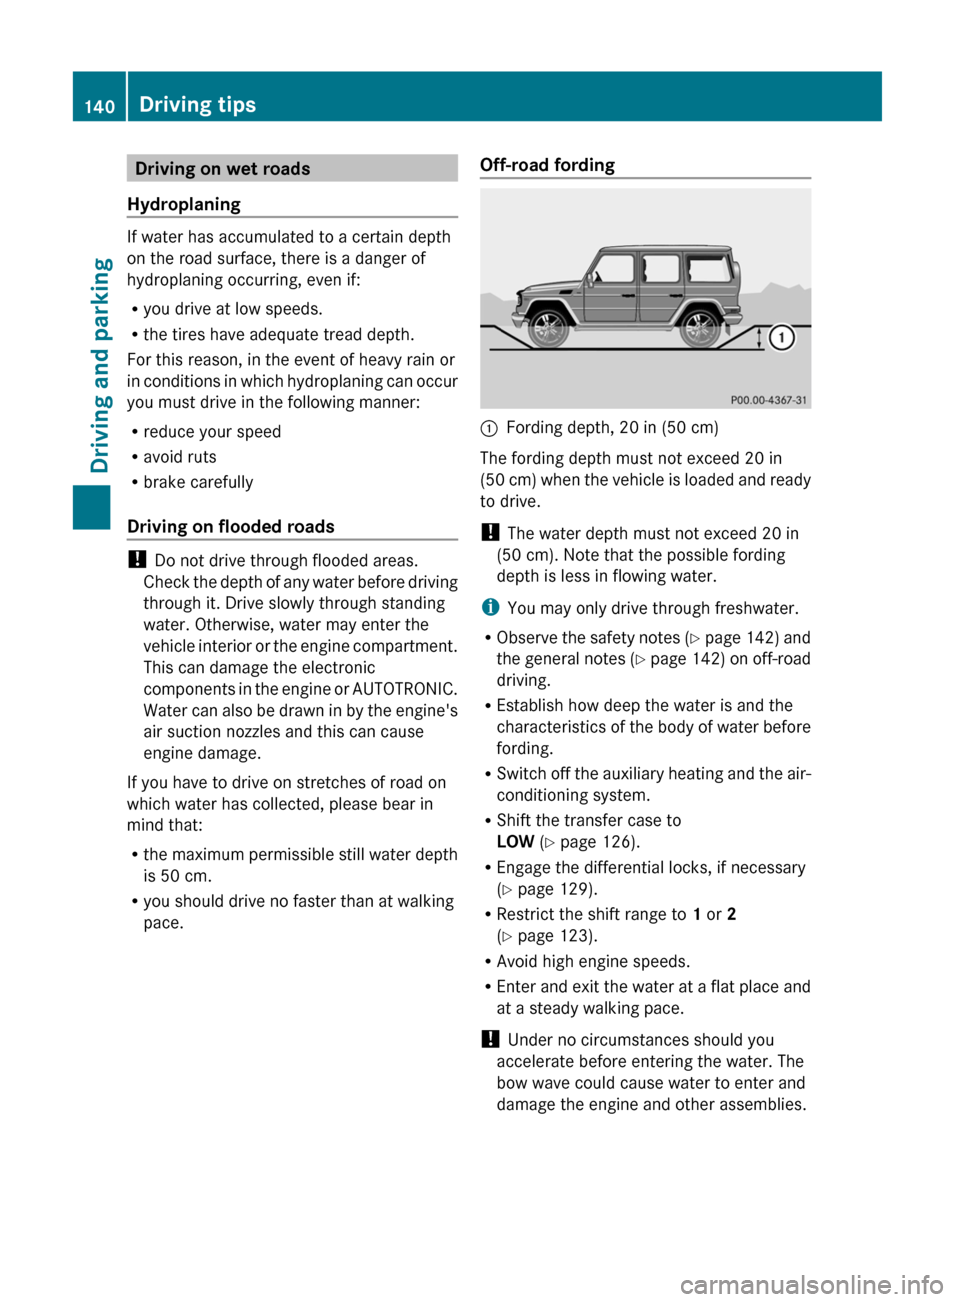
Off-road fording:Fording depth, 20 in (50 cm)
The fording depth must not exceed 20 in
(50 cm) when the vehicle is loaded and ready
to drive.
! The water depth must not exceed 20 in
(50 cm). Note that the possible fording
depth is less in flowing water.
i You may only drive through freshwater.
R Observe the safety notes (Y page 142) and
the general notes (Y page 142) on off-road
driving.
R Establish how deep the water is and the
characteristics of the body of water before
fording.
R Switch off the auxiliary heating and the air-
conditioning system.
R Shift the transfer case to
LOW (Y page 126).
R Engage the differential locks, if necessary
( Y page 129).
R Restrict the shift range to 1 or 2
( Y page 123).
R Avoid high engine speeds.
R Enter and exit the water at a flat place and
at a steady walking pace.
! Under no circumstances should you
accelerate before entering the water. The
bow wave could cause water to enter and
damage the engine and other assemblies.
140Driving tipsDriving and parking
Page 163 of 288
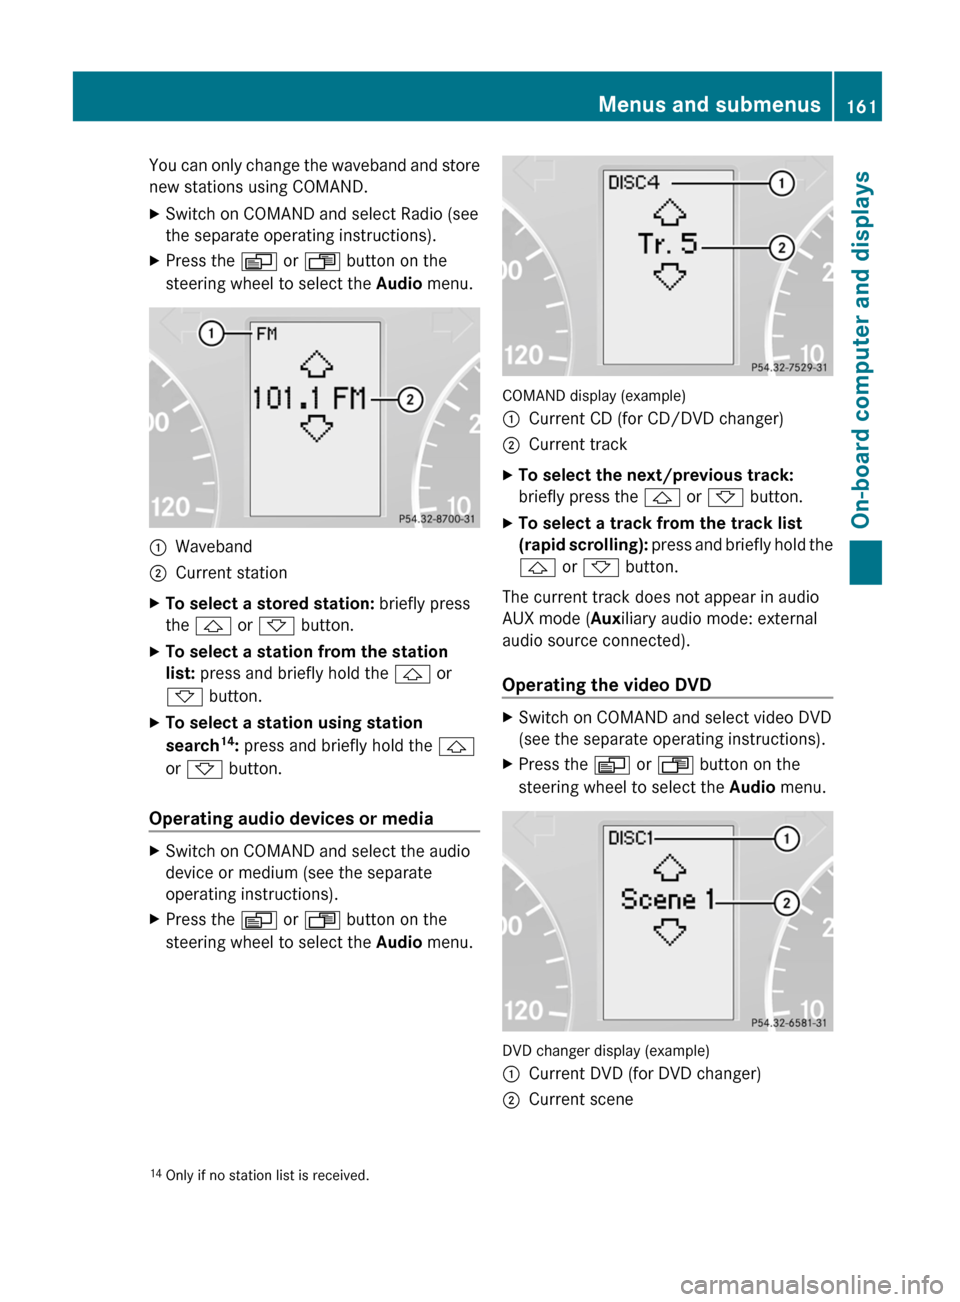
You can only change the waveband and store
new stations using COMAND.XSwitch on COMAND and select Radio (see
the separate operating instructions).XPress the V or U button on the
steering wheel to select the Audio menu.:Waveband;Current stationXTo select a stored station: briefly press
the & or * button.XTo select a station from the station
list: press and briefly hold the & or
* button.XTo select a station using station
search 14
: press and briefly hold the &
or * button.
Operating audio devices or media
XSwitch on COMAND and select the audio
device or medium (see the separate
operating instructions).XPress the V or U button on the
steering wheel to select the Audio menu.
COMAND display (example)
:Current CD (for CD/DVD changer);Current trackXTo select the next/previous track:
briefly press the & or * button.XTo select a track from the track list
(rapid scrolling): press and briefly hold the
& or * button.
The current track does not appear in audio
AUX mode ( Auxiliary audio mode: external
audio source connected).
Operating the video DVD
XSwitch on COMAND and select video DVD
(see the separate operating instructions).XPress the V or U button on the
steering wheel to select the Audio menu.
DVD changer display (example)
:Current DVD (for DVD changer);Current scene14
Only if no station list is received.Menus and submenus161On-board computer and displaysZ
Page 174 of 288
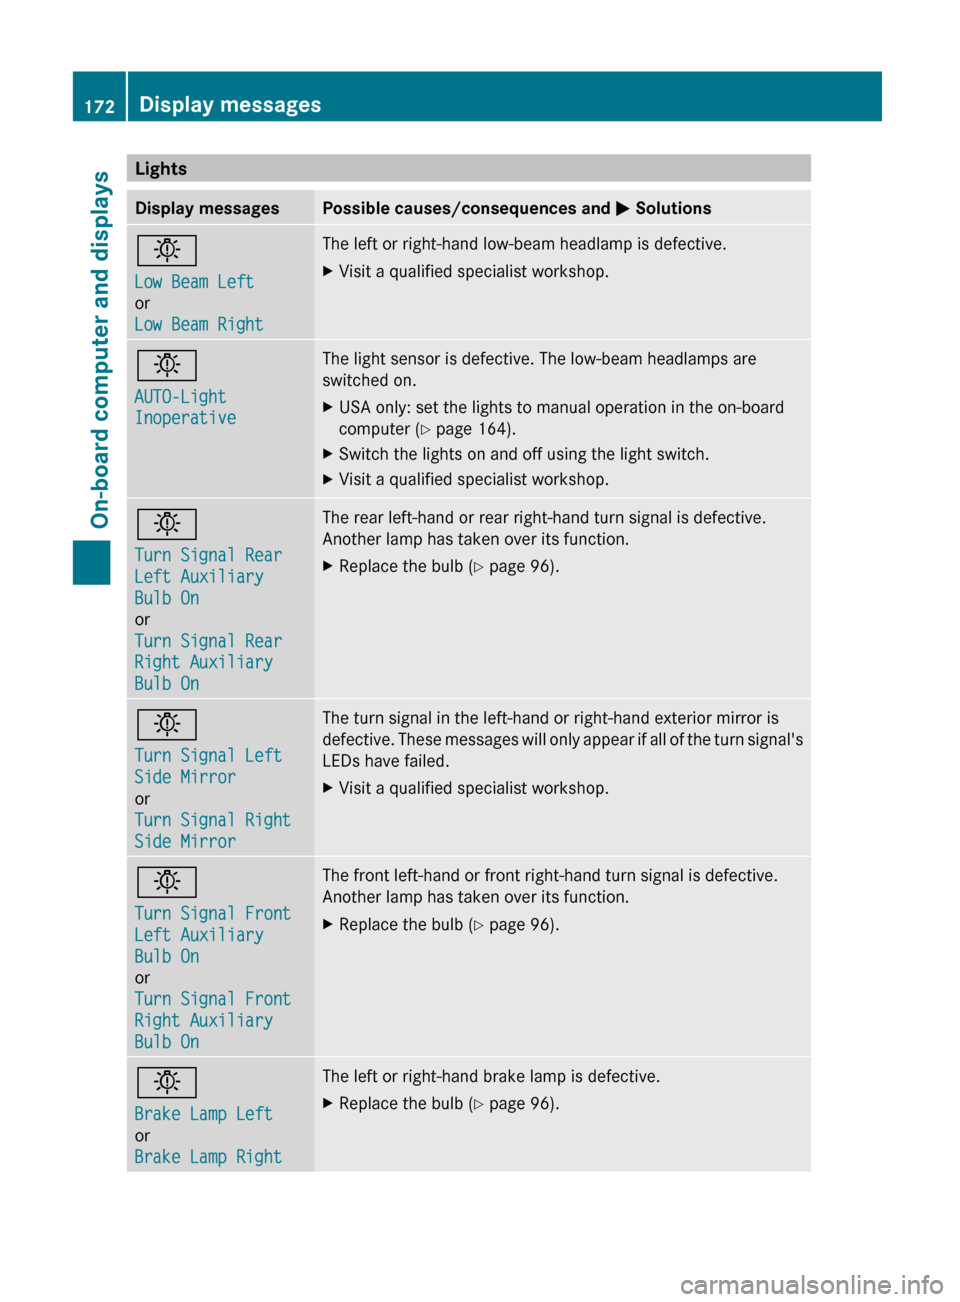
LightsDisplay messagesPossible causes/consequences and M Solutionsb
Low Beam Left
or
Low Beam RightThe left or right-hand low-beam headlamp is defective.XVisit a qualified specialist workshop.b
AUTO-Light
InoperativeThe light sensor is defective. The low-beam headlamps are
switched on.XUSA only: set the lights to manual operation in the on-board
computer ( Y page 164).XSwitch the lights on and off using the light switch.XVisit a qualified specialist workshop.b
Turn Signal Rear
Left Auxiliary
Bulb On
or
Turn Signal Rear
Right Auxiliary
Bulb OnThe rear left-hand or rear right-hand turn signal is defective.
Another lamp has taken over its function.XReplace the bulb ( Y page 96).b
Turn Signal Left
Side Mirror
or
Turn Signal Right
Side MirrorThe turn signal in the left-hand or right-hand exterior mirror is
defective. These messages will only appear if all of the turn signal's
LEDs have failed.XVisit a qualified specialist workshop.b
Turn Signal Front
Left Auxiliary
Bulb On
or
Turn Signal Front
Right Auxiliary
Bulb OnThe front left-hand or front right-hand turn signal is defective.
Another lamp has taken over its function.XReplace the bulb ( Y page 96).b
Brake Lamp Left
or
Brake Lamp RightThe left or right-hand brake lamp is defective.XReplace the bulb ( Y page 96).172Display messagesOn-board computer and displays
Page 175 of 288
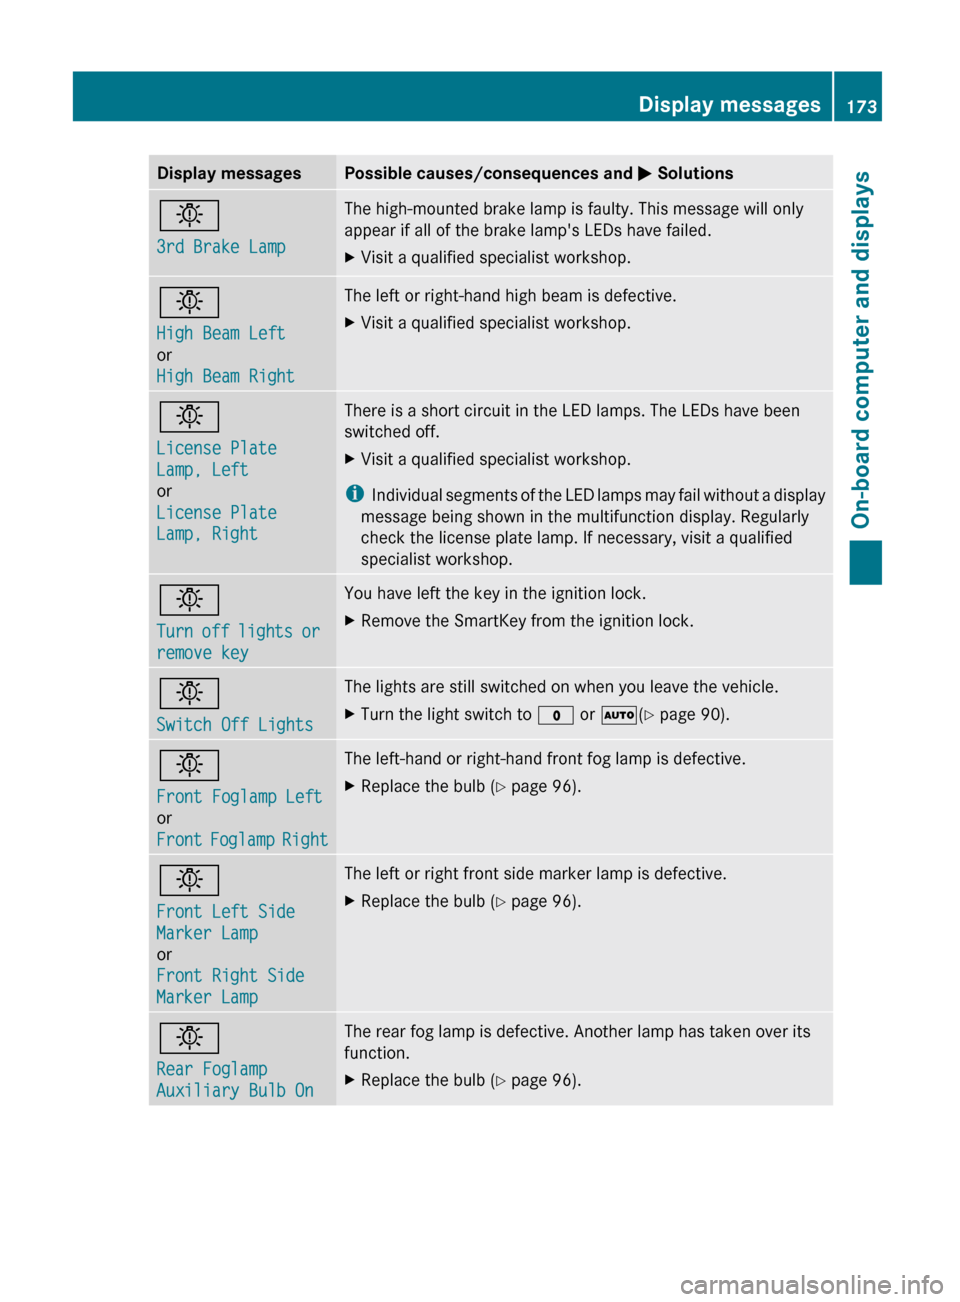
Display messagesPossible causes/consequences and M Solutionsb
3rd Brake LampThe high-mounted brake lamp is faulty. This message will only
appear if all of the brake lamp's LEDs have failed.XVisit a qualified specialist workshop.b
High Beam Left
or
High Beam RightThe left or right-hand high beam is defective.XVisit a qualified specialist workshop.b
License Plate
Lamp, Left
or
License Plate
Lamp, RightThere is a short circuit in the LED lamps. The LEDs have been
switched off.XVisit a qualified specialist workshop.
i Individual segments of the LED lamps may fail without a display
message being shown in the multifunction display. Regularly
check the license plate lamp. If necessary, visit a qualified
specialist workshop.
b
Turn off lights or
remove keyYou have left the key in the ignition lock.XRemove the SmartKey from the ignition lock.b
Switch Off LightsThe lights are still switched on when you leave the vehicle.XTurn the light switch to $ or à (Y page 90).b
Front Foglamp Left
or
Front Foglamp RightThe left-hand or right-hand front fog lamp is defective.XReplace the bulb ( Y page 96).b
Front Left Side
Marker Lamp
or
Front Right Side
Marker Lamp The left or right front side marker lamp is defective.XReplace the bulb ( Y page 96).b
Rear Foglamp
Auxiliary Bulb OnThe rear fog lamp is defective. Another lamp has taken over its
function.XReplace the bulb ( Y page 96).Display messages173On-board computer and displaysZ
Page 176 of 288
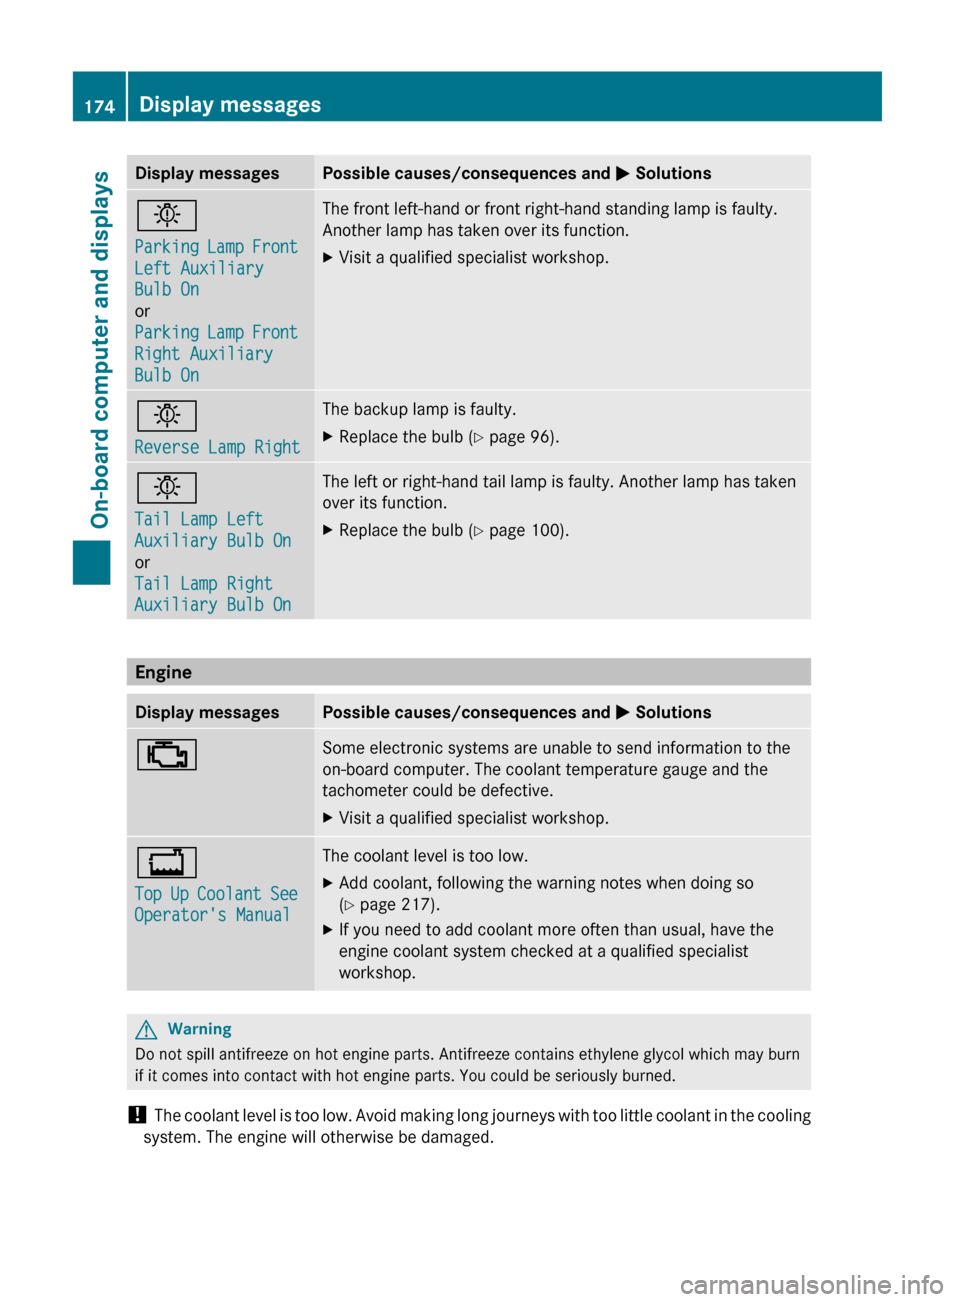
Display messagesPossible causes/consequences and M Solutionsb
Parking Lamp Front
Left Auxiliary
Bulb On
or
Parking Lamp Front
Right Auxiliary
Bulb OnThe front left-hand or front right-hand standing lamp is faulty.
Another lamp has taken over its function.XVisit a qualified specialist workshop.b
Reverse Lamp RightThe backup lamp is faulty.XReplace the bulb ( Y page 96).b
Tail Lamp Left
Auxiliary Bulb On
or
Tail Lamp Right
Auxiliary Bulb OnThe left or right-hand tail lamp is faulty. Another lamp has taken
over its function.XReplace the bulb ( Y page 100).
Engine
Display messagesPossible causes/consequences and M Solutions;Some electronic systems are unable to send information to the
on-board computer. The coolant temperature gauge and the
tachometer could be defective.XVisit a qualified specialist workshop.+
Top Up Coolant See
Operator's ManualThe coolant level is too low.XAdd coolant, following the warning notes when doing so
( Y page 217).XIf you need to add coolant more often than usual, have the
engine coolant system checked at a qualified specialist
workshop.GWarning
Do not spill antifreeze on hot engine parts. Antifreeze contains ethylene glycol which may burn
if it comes into contact with hot engine parts. You could be seriously burned.
! The coolant level is too low. Avoid making long journeys with too little coolant in the cooling
system. The engine will otherwise be damaged.
174Display messagesOn-board computer and displays
Page 180 of 288
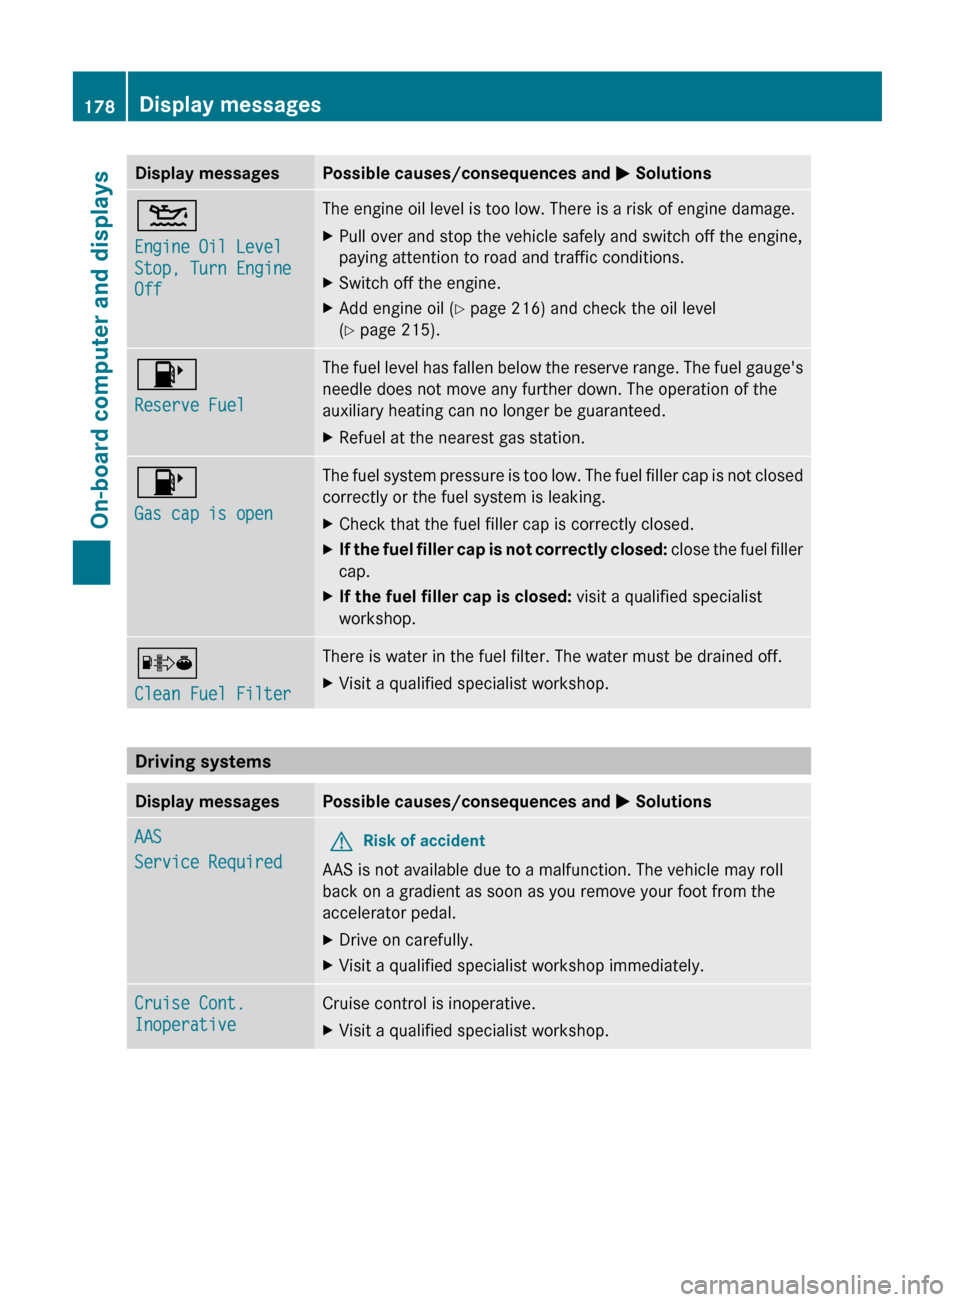
Display messagesPossible causes/consequences and M Solutions4
Engine Oil Level
Stop, Turn Engine
OffThe engine oil level is too low. There is a risk of engine damage.XPull over and stop the vehicle safely and switch off the engine,
paying attention to road and traffic conditions.XSwitch off the engine.XAdd engine oil ( Y page 216) and check the oil level
( Y page 215).8
Reserve FuelThe fuel level has fallen below the reserve range. The fuel gauge's
needle does not move any further down. The operation of the
auxiliary heating can no longer be guaranteed.XRefuel at the nearest gas station.8
Gas cap is openThe fuel system pressure is too low. The fuel filler cap is not closed
correctly or the fuel system is leaking.XCheck that the fuel filler cap is correctly closed.XIf the fuel filler cap is not correctly closed: close the fuel filler
cap.XIf the fuel filler cap is closed: visit a qualified specialist
workshop.´
Clean Fuel FilterThere is water in the fuel filter. The water must be drained off.XVisit a qualified specialist workshop.
Driving systems
Display messagesPossible causes/consequences and M SolutionsAAS
Service RequiredGRisk of accident
AAS is not available due to a malfunction. The vehicle may roll
back on a gradient as soon as you remove your foot from the
accelerator pedal.
XDrive on carefully.XVisit a qualified specialist workshop immediately.Cruise Cont.
InoperativeCruise control is inoperative.XVisit a qualified specialist workshop.178Display messagesOn-board computer and displays
Page 195 of 288
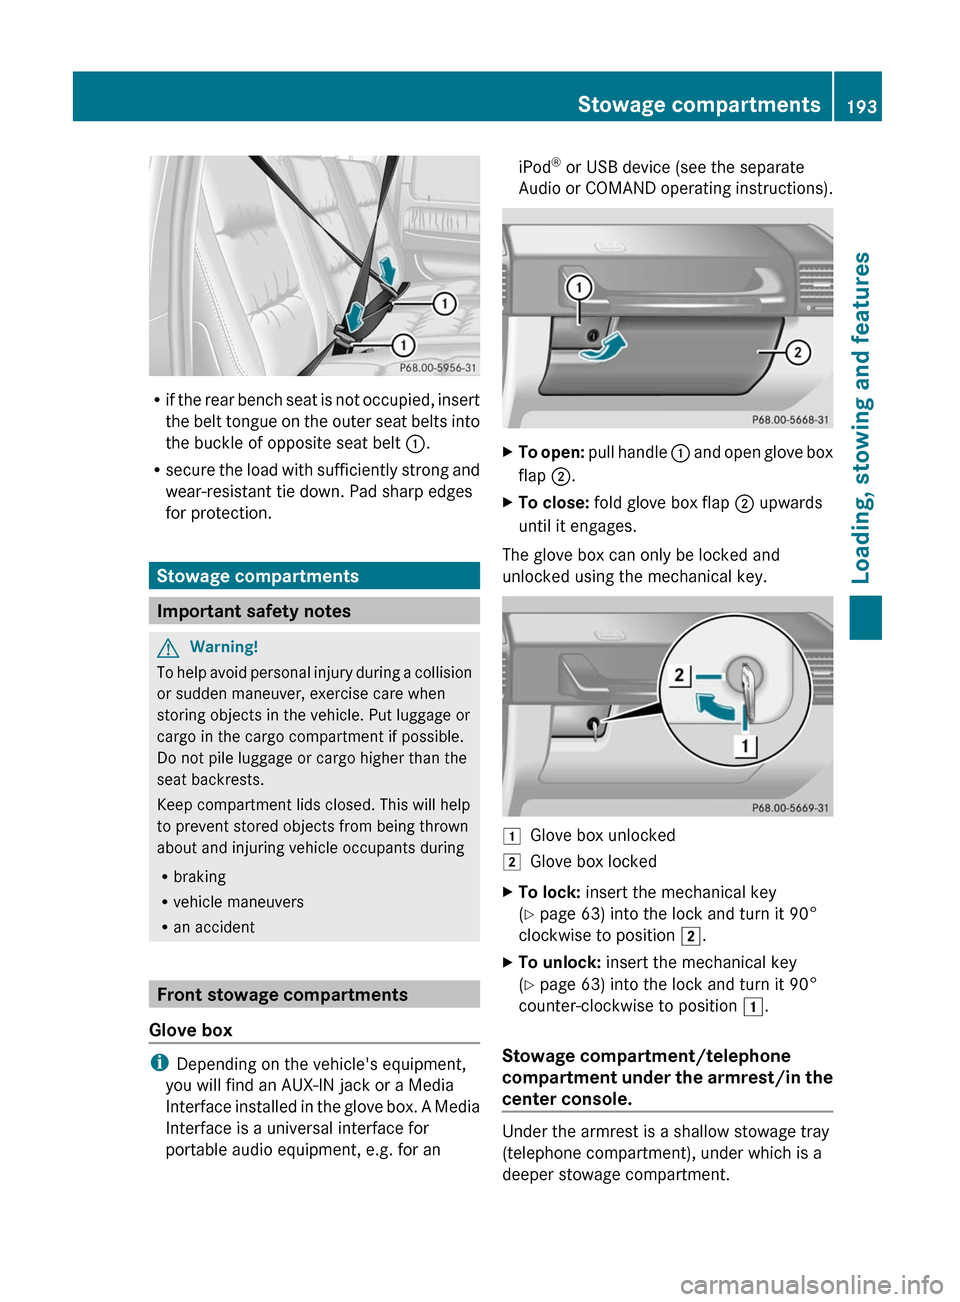
Rif the rear bench seat is not occupied, insert
the belt tongue on the outer seat belts into
the buckle of opposite seat belt :.
R secure the load with sufficiently strong and
wear-resistant tie down. Pad sharp edges
for protection.
Stowage compartments
Important safety notes
GWarning!
To help avoid personal injury during a collision
or sudden maneuver, exercise care when
storing objects in the vehicle. Put luggage or
cargo in the cargo compartment if possible.
Do not pile luggage or cargo higher than the
seat backrests.
Keep compartment lids closed. This will help
to prevent stored objects from being thrown
about and injuring vehicle occupants during
R braking
R vehicle maneuvers
R an accident
Front stowage compartments
Glove box
i Depending on the vehicle's equipment,
you will find an AUX-IN jack or a Media
Interface installed in the glove box. A Media
Interface is a universal interface for
portable audio equipment, e.g. for an
iPod ®
or USB device (see the separate
Audio or COMAND operating instructions).XTo open: pull handle : and open glove box
flap ;.XTo close: fold glove box flap ; upwards
until it engages.
The glove box can only be locked and
unlocked using the mechanical key.
1Glove box unlocked2Glove box lockedXTo lock: insert the mechanical key
( Y page 63) into the lock and turn it 90°
clockwise to position 2.XTo unlock: insert the mechanical key
( Y page 63) into the lock and turn it 90°
counter-clockwise to position 1.
Stowage compartment/telephone
compartment under the armrest/in the
center console.
Under the armrest is a shallow stowage tray
(telephone compartment), under which is a
deeper stowage compartment.
Stowage compartments193Loading, stowing and featuresZ