check engine light MERCEDES-BENZ GL SUV 2012 Owners Manual
[x] Cancel search | Manufacturer: MERCEDES-BENZ, Model Year: 2012, Model line: GL SUV, Model: MERCEDES-BENZ GL SUV 2012Pages: 441, PDF Size: 10.66 MB
Page 11 of 441
THERMATIC automatic climate
control (2-
zone) ............................. 137
THERMOTRONIC (3-zone) auto-
mati cclimate control ..................... 139
THERMOTRONIC automatic cli-
mate control with additiona lrear-
compartmen tclimate control (3-
zone) ............................................. .140
Coat hooks ......................................... 344
Cockpit Overview .......................................... 28
se eI nstrument cluster
COLLISIO NPREVENTION ASSIST .......63
COMAND display Clean ing. ........................................ 371
COMAND Online
ON&OFFROAD menu .....................256
se es eparat eoperating instructions
Combination switch ..........................121
Constant headlamp mode seeD aytime driving lights
Consumption statistic s(on-boa rd
computer) .......................................... 271
Conv enienc eclosin gfeature .............. 90
Conv enienc eopening/closing (air-
recirculation mode) ........................... 147
Conv enienc eopening feature ............90
Coolan t(engine)
Checkin gthe level ......................... 363
Display message ............................ 304
Important safety notes ..................429
Temperat ure( on-board computer) .286
Temperat ureg auge ........................ 268
Warning lamp ................................. 333
Cooling
see Climate control
Cornerin glight function
Display message ............................ 300
Function/notes ............................. 123
Crash-respon siveemergency light-
ing ...................................................... .128
Cro sswind drivin gassistance ............68
Crui secontrol
Activating ............. .......................... 194
Activatio ncondition s..................... 194
Cruis econtrol lever ....................... 193
Deactivating ................................... 195 Display message
............................ 314
Driving sy stem ............................... 193
Important safety notes ..................193
LIM ind icator lamp ......................... 193
Selecting ........................................ 193
Storing and maintaining current
spee d............................................. 194
Cu ph older
Centre console .............................. 346
Important safety notes ..................346
Rea rcompartmen t......................... 347
Temperat urec ontrolled ................. 347
Th irdr ow of seats .......................... 347 D
Dashboard seeI nstrument cluster
Dashboard lighting
see Instrument cluster lighting
Data
see Technical data
Daytime drivi nglights
Display message ............................ 303
Function/notes ............................. 119
Switch ingo n/off (on-board com-
puter) ............................................. 280
Dealer ship
see Qualified specialis tworkshop
Delayed switch-off
Exterior lighting (on-board com-
pute r)............................................. 282
Interior lighting .............................. 282
Diagn ostic sc onnec tion...................... 25
Dies el................................................. .426
Dies elparticl efilter .......................... 184
Differential loc k(display message) .308
Digital spe edometer ......................... 272
Dipped-b eamh eadlamps
Changing bulbs .............................. 129
Display message ............................ 300
Setting for driving abroa d(sym-
metrical) ........................................ 118
Setting for driving on the rig ht/
left ................................................. 281
Switch ingo n/off ........................... 120
DIRECT SE LECT lever
se eA utomatic transmission 8
Index
Page 14 of 441
Removin
g....................................... 415
Storage locatio n............................ 415
Techn ical data ............................... 417
Emergency unl ocking
Ta ilgate ............................................ 88
Veh icle ............................................ .84
Engine
Display message ............................ 304
ECO start/stop function ................163
Engine numb er............................... 423
Jump-starting ................................. 386
Runnin girregularl y......................... 166
Starting pro blems .......................... 166
Starting the engine wit hthe key ....161
Starting with KEYLESS GO .............161
Stopp ing. ....................................... 182
To w-st arting (vehicle )..................... 391
Warning lamp (eng ined iagnos-
tics) ............................................... 333
En gine electronics
Notes ............................................. 421
Pro blem (fault) ............................... 166
En gine oil
Additives ........................................ 429
Checking the oil level ...... ............... 362
Checking the oil leve lusing the
dipstick .......................................... 362
Display message ............................ 305
Fil ling capacity ............................... 428
Note sabout oil grades ...... ............. 428
Notes on oil level/cons umption.... 362
Temperat ure( on-board computer) .286
Topping up ..................................... 362
Viscosity ........................................ 429
En vironmental protection
Returning an end-of-life vehicle .......23
ESP ®
(Electronic Stability Pro-
gram) 4ETS ................................................ 66
AMG menu (on-bo ardc omputer )... 287
Deactivating/activating ...................67
Display message ............................ 291
Function/notes ................................ 66
Important safety gu idelines ............. 66
Traile rstabilisatio n.......................... 67
Warn ingl am p................................. 329
Exhaus tpipe (cleaning instruc-
tions) .................................................. 371Exterio
rlighting
see Lights
Exterior mirrors
Adjustin g....................................... 112
Anti-dazzle mod e(automatic) ........114
Fol ding in/ou t(automatically )....... 113
Fol ding in/ou t(electrically) ...........113
Fol ding in whe nlocki ng(on-board
computer) ...................................... 285
Ou tofp osition (troubleshooting) ...113
Parking positio n............................. 114
Resetting ....................................... 113
Storing settings (memory func-
tion) ............................................... 115 F
Faul tmessage
see Display messages
Filler cap
see Fuel filler flap
Fire extinguisher ............................... 377
First-aid kit ......................................... 376
Fittin gawheel
Removin gawheel .......................... 407
Fitting wheels
Fittin gaw heel............................... 408
Lowering the veh icle ...................... 409
Rais ingt he vehicle ......................... 406
Securing the veh icle against roll-
ing away ........................................ 405
Flat tyre
MOExtende dtyres ......................... 378
Pre paring th evehicle ..................... 378
TIREFIT kit ...................................... 379
Floormat ............................................ .358
Foglamps (extende drang e).............. 124
Foldin gthe rear be nchs eat for-
wards/back ....................................... 341
Fording Off-road ......................................... 186
On flo oded roads ........................... 186
Frequencies
Garage door op ener ....................... 354
Mobile phone ................................. 421
Tw o-way radio ................................ 421 Index
11
Page 44 of 441
SRS (Supplementa
lRestraint System)
Introduction SRS consist
sof:
R theS RS warning lamp6
R airbags
R the airbag control unit with crash sensors
R belt tensio ners forthe front seat belts and
the outer seat belts in the rear
R belt force limiters
SRS reduce sthe risk of occupants coming
int oc ontact with the vehicle' sinterior in the
event of an accident. It can also reduce the
forces to which occupant sare subjecte ddur-
ing an accident.
SRS warning lamp G
WARNING
If SRS is malfunctioning, individual systems
may be triggered unintentionally or might not
be triggered in the event of an accident with
ah igh rate of vehicle deceleration.
Am alfunction has occurred if:
R the 6 SRS warning lamp does not light
up when the ignition is switched on.
R the engine is running and the 6SRS
warning lamp does not go out after afew
seconds.
R the engine is running and the 6SRS
warning lamp lights up again.
In this case, have SRS checked immediately
at aq ualified specialist workshop.
SRS functions are checked regularly when
you switch on the ignitio nand whe nthe
engin eisrunning. Therefore, malfunctions
can be detected in good time.
The 6 SRS warning lamp in the instrument
cluster lights up when the ignition is switched
on. It goes out no later than afew seconds
after the engine is started. Triggering of belt tensioners, belt force
limiters and airbags During the first stage of
acollision ,the airbag
con trol unit evaluates important physical
data relatin gtovehicle deceleration or accel-
eration, such as:
R duration
R direction
R magnitude
Based on the evaluation of this data, the air-
bag control unit pre-emptively triggers the
belt tensioners in the first stage.
If there is an even higher rat eofvehicle decel-
eration or acceleration in alongitudinal direc-
tion ,the front airbags ar ealso deployed.
Your vehicle has adaptive, two-stage front air-
bags. The airbag control unit evaluates vehi-
cle deceleration or acceleration in the event
of ac ollision .Inthe first deploymen tstage,
the front airbag is filled with enoug hpropel-
lan tgas to reduce the risk of injuries. The
front airbag is fully deploye difasecond
deployment threshold is reached within afew
milliseconds.
The belt tensioner and airbag triggering
thresholds are variable and are adapted to the
rat eofd eceleration or acceleration of the
vehicle. This process is pre-emptive in nature.
The triggerin gprocess mus ttake place in
good time at the start of the collision.
The rate of vehicle deceleration or accelera-
tion and the direction of the force are essen-
tially determined by:
R the distribution of forces during the colli-
sion
R the collisio nangle
R the deformation characteris tics of the vehi-
cle
R the characteris tics of the object with which
the vehicle has collided
Factors which can only be seen and measured
after acollision has occurred do not play a
decisive role in the deployment of an airbag, Occupant safety
41Safety Z
Page 64 of 441
Important safety notes
If you fail to adapt your driving style or
become distracted, th edriving sa fetysys-
tems ca nneith er reduce th erisk of accident
no ro verri dethe law sofphysics. Driving
safety system sare mere ly aids desig nedto
assis tdrivi ng.You ar eresponsible for the dis-
tance to the vehicle in fr ont, forvehicle speed
and for braking in good time. Alway sadapt
your drivin gstyle to suit the prevailing road
and weather condition sand maintain asafe
distance from the vehicle in front .Drive care-
fully.
i Thed riving safet ysystems described only
work as effectively as possibl ewhen there
is adequate con tact betwee nthe tyres and
the roa dsurface. Pleas epay special atten-
tion to the notes on tyres, recommended
minimum tyre tread depths ,etc.
(Y page 396).
In wintry driving conditions, always use
winter tyres (M+S tyres) and if necessary,
snow chains .Only in this way will the driv-
ing safety systems described in this section
work as effectively as possible. ABS (Anti-lock Braking System)
Important safety notes i
Observe the "Important safety notes" sec-
tion (Y page61). G
WARNING
If ABS is faulty, the wheels could lock when
braking .The steerability and brakin gcharac-
teristics ma ybeseverely impaired. Addition-
ally, further driving safet ysystems are deac-
tivated. There is an increased danger of skid-
ding and accidents.
Drive on carefully. Have ABS checked imme-
diatel yata qualified specialist workshop.
When ABS is malfunctioning, other systems,
including driving safety systems, will also
become inoperative. Observe the infor mation on the ABS warning lamp (Y
page 326) and
display messages which may be shown in the
instrument cluster (Y page 291).
ABS regulate sbrake pressure in such away
that the wheels do not lock when you brake.
This allows you to continue steering the vehi-
cle when braking.
ABS works from aspeed of about 8km/h
upwards, regardless of road-surfac econdi-
tions. AB Sworksons lippery surfaces, even
when you only brake gently.
The yellow !ABS warnin glamp in the
instrument cluster lights up when the ignition
is switched on. It goes out when the engine is
running.
Brakes X
If ABS intervenes: continue to depress the
brake pedal with force until the braking sit-
uation is over.
X To mak eafull brake application:
depress th ebrake peda lwith full force.
If ABS intervenes when braking, you will feel
ap ulsing in the brake pedal.
The pulsating brake pedal can be an indica-
tion of hazardous road conditions, and func-
tions as areminder to take extr acare while
driving.
Off-road ABS An ABS system specifically suited to off-road
terrain is activated automatically once the off-
road program is activated on:
R
Vehicles without the ON&OFFROAD pack-
age (Y page 252)
R Vehicles with the ON&OFFROAD package
(Y page 253)
At speeds below 30 km/h, the front wheels
lock cyclically during braking. The digging-in
effect achieved in the process reduces the
stopping distance when driving off-road. This
limits steering capability. Driving safety systems
61Safety Z
Page 71 of 441
In this situation, ESP
®
assist syou and can
detec tifthe vehicle/trailer combination
begins to lurch. ESP ®
slows the vehicle down
by brakin gand limiting the engine outp ut until
the vehicle/trailer combinatio nhas stabi-
lised.
Trailer stabilisation is active above speeds of
about 60 km/h.
Trailer stabilisation does not work if ESP ®
is
deactivated or disabled because of amal-
function.
Crosswin dAssist Strong crosswinds can cause your vehicle to
deviate from astraight course. The crosswind
driving assistance function integrated into
ESP ®
significantly reduces thes eeffects.
ESP ®
intervene sautomatically according to
the direction and intensity of the crosswinds
affecting your vehicle.
When driving on straight roads or gentle
bends ,your vehicle is kept safel yonc ourse
by astabilising brake intervention.
Crosswind driving assistance is active above
av ehicle speed of 80 km /h.
Crosswind driving assistance does not work
if ESP ®
is deactivated or disabled because of
am alfunction. EBD (electronic brake force distribu-
tion)
i Observe the "Importan tsafety notes" sec-
tion (Y page 61). G
WARNING
If EBD has malfunctioned, the rear wheels can
still lock, e.g. under full braking. This increa-
ses the risk of skidding and an accident.
You should therefor eadapt your driving style
to the different handling characteristics. Have
the brak esystem checked at aqualified spe-
cialist workshop. Observe information regarding indicator and
warning lamps (Y
page 327) as well as dis-
play messages (Y page 293).
EBD monitors and controls the brake pres-
sure on the rear wheels to improve driving
stability while braking. ADAPTIVE BRAKE
ADAPTIVE BRAKE enhances braking safety
and offers increased braking comfort. In addi-
tion to the braking function, ADAPTIVE BRAKE
also has the HOLD function (Y page 211) and
hill start assist (Y page 162). PRE-SAFE
®
Brake
i Observe the "Important safety notes" sec-
tion (Y page 61).
PRE-SAFE ®
Brake is only available in vehicles
with DISTRONIC PLUS.
PRE-SAFE ®
Brake can help you to minimise
the risk of acollision with avehicle in front or
reduc ethe effect sofsuchacollision .IfPRE-
SAFE ®
Brake has detected arisk of collision,
you will be warned visually and acoustically
as well as by automatic braking. PRE-SAFE ®
Brake cannot prevent acollision withou tyour
interven tion.
This func tion will issue awarning if:
R at speeds of around 30 km/ horm ore over
several seconds, the distance maintained
to the vehicle travellin ginfront is insuffi-
cient.
The · distance warning lamp then lights
up in th einstrument cluster.
R at as peed of approximately 7km/h or
high er,y ou ver yquickly approach avehicle
in front.
An intermittent warning tone will then
sound and the ·distance warning lamp
will light up in the instrumen tcluster. 68
Driving safety systemsSafety
Page 80 of 441
Key functions
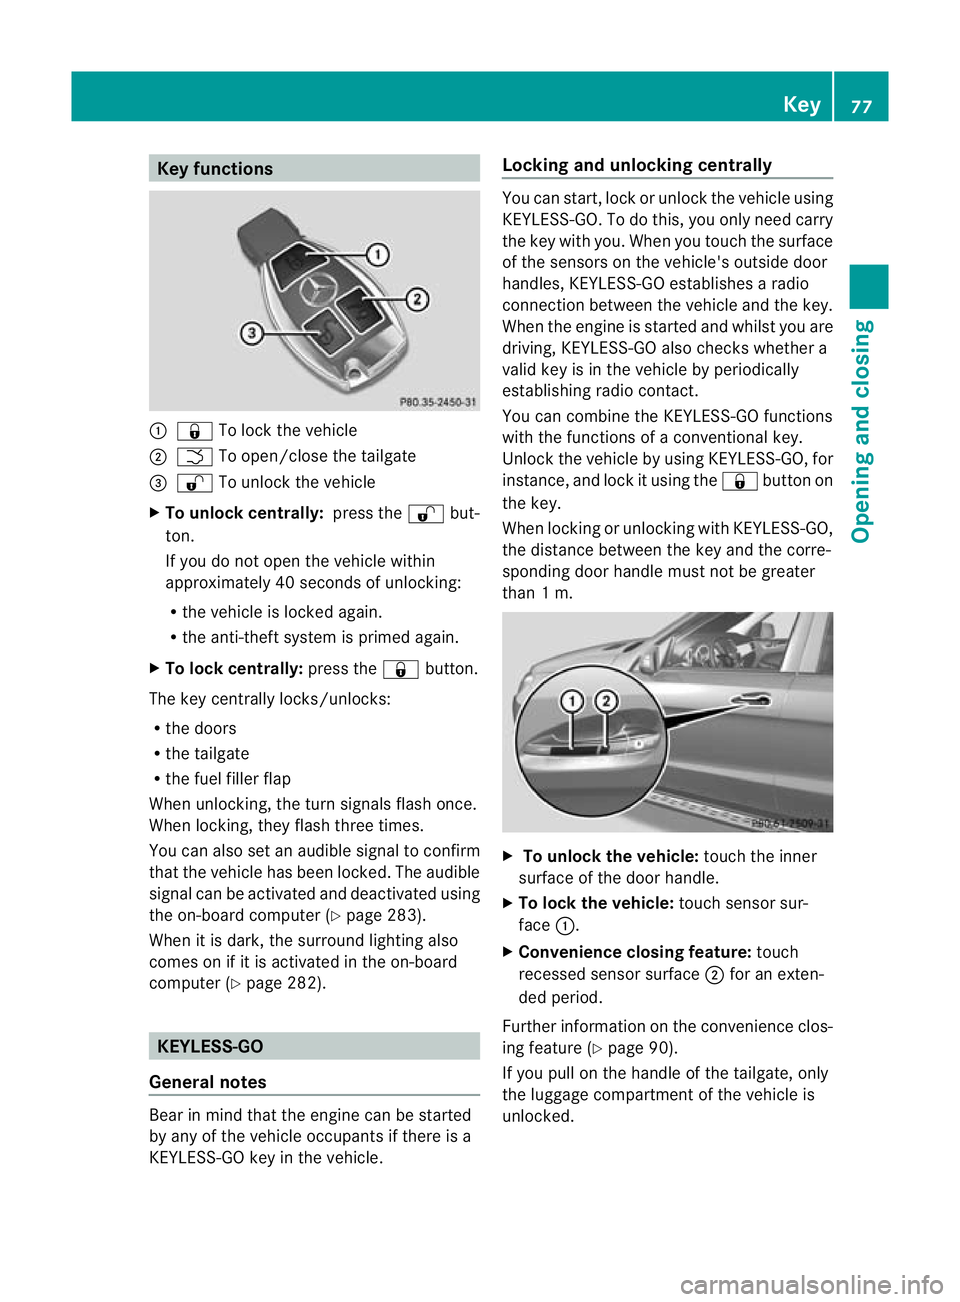
:
& To loc kthe vehicle
; F To open/close the tailgate
= % To unlock the vehicle
X To unlock centrally: press the%but-
ton.
If you do not open the vehicle within
approximatel y40seconds of unlocking:
R the vehicle is locked again.
R the anti-theft system is primed again.
X To lock centrally: press the&button.
The key centrally locks/unlocks:
R the doors
R the tailgate
R the fuel filler flap
When unlocking, the tur nsignals flash once.
When locking, they flash three times.
You can also set an audible signal to confirm
that the vehicle has been locked. The audible
signal can be activated and deactivated using
the on-board computer (Y page 283).
When it is dark, the surroun dlighting also
comes on if it is activated in the on-board
computer (Y page 282). KEYLESS-GO
Genera lnotes Bear in mind that the engine can be started
by any of the vehicle occupants if there is a
KEYL ESS-GO key in the vehicle. Locking and unlockin
gcentrally You can start, lock or unlock the vehicle using
KEYL
ESS-GO .Todot his, you only need carry
the key with you. When you touc hthe surface
of the sensor sonthe vehicle' soutside door
handles ,KEYLESS-GO establishes aradio
connection between the vehicle and the key.
When the engine is started and whils tyou are
driving, KEYLESS -GOa lso check swhether a
valid key is in the vehicle by periodically
establishin gradio contact.
You can combine the KEYLESS-GO functions
with the functions of aconventional key.
Unlock the vehicle by using KEYLESS -GO, for
instance, and lock it usin gthe & button on
the key.
When locking or unlocking with KEYL ESS-GO,
the distance between the key and the corre-
sponding doo rhandle must not be greater
than 1m. X
To unlock the vehicl e:touch the inner
surface of the doo rhandle.
X To lock the vehicle: touch sensorsur-
face :.
X Convenience closing featu re:touch
recessed sensor surface ;for an exten-
ded period.
Further information on the convenience clos-
ing feature (Y page 90).
If you pull on the handl eofthe tailgate, only
the luggage compartmen tofthe vehicle is
unlocked. Key
77Opening and closing Z
Page 85 of 441
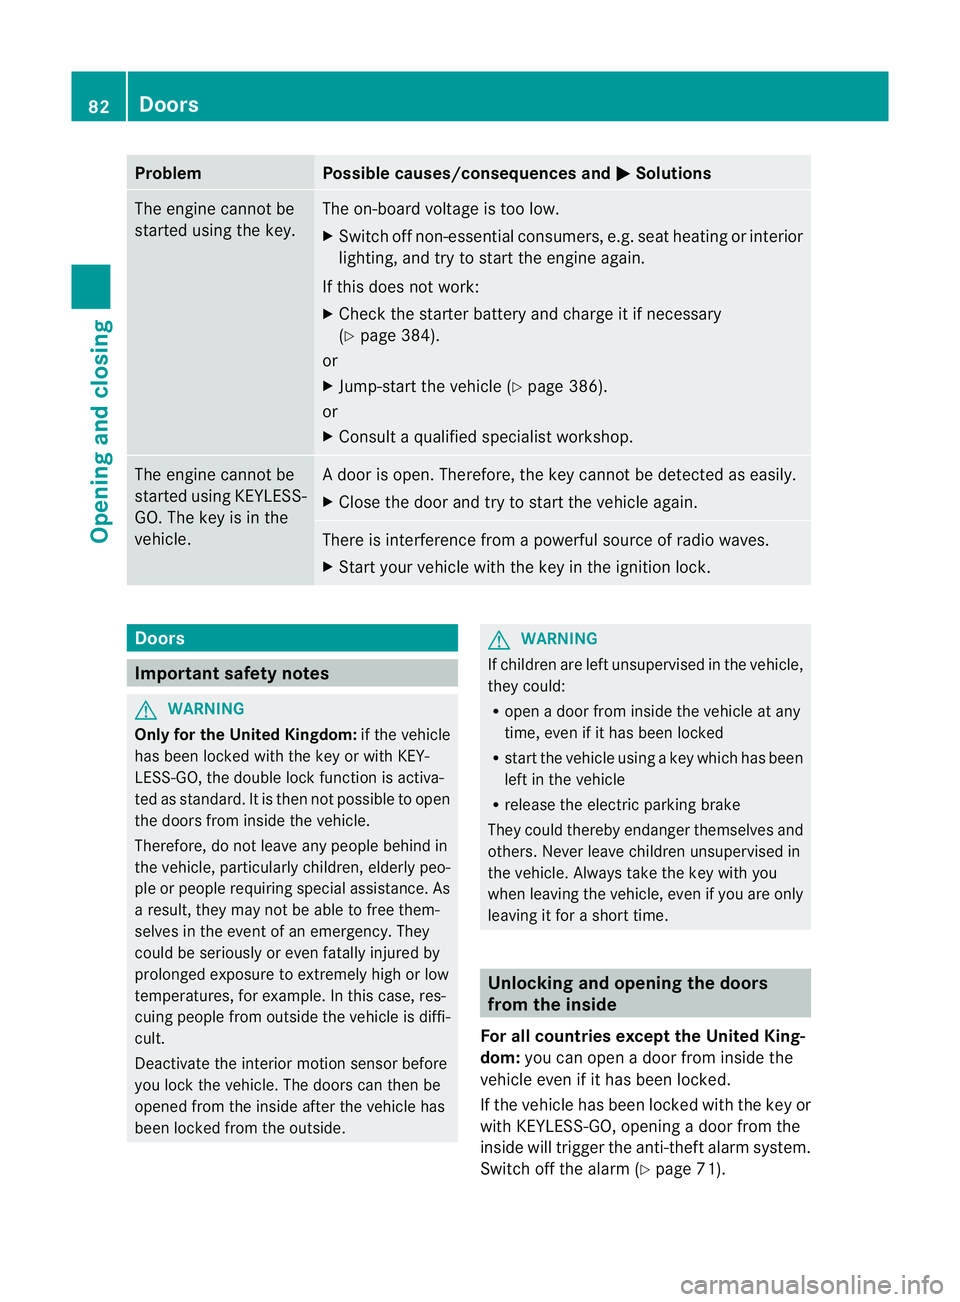
Problem Possible causes/consequences and
M Solutions
The engin
ecannot be
started using the key. The on-board voltage is too low.
X
Switch off non-essential consumers, e.g. seat heating or interior
lighting ,and try to start the engine again.
If this doe snot work:
X Check the starter battery and charge it if necessary
(Y page 384).
or
X Jump-start the vehicle (Y page 386).
or
X Consult aqualified specialist workshop. The engine cannot be
started using KEYLESS-
GO. The key is in the
vehicle. Ad
oor is open. Therefore, the key can notb ed etected as easily.
X Close the door and tr ytostart the vehicle again. There is interferenc
efrom apowerfu lsource of radio waves.
X Start your vehicle with the key in the ignition lock. Doors
Important safety notes
G
WARNING
Only fo rthe Unite dKingdom: if the vehicle
has been locked with the key or with KEY-
LESS-GO, the double lock func tion is activa-
ted as standard. It is then not possible to open
the doors from inside the vehicle.
Therefore, do not leav eany people behind in
the vehicle, particularly children, elderly peo-
ple or people requiring special assistance .As
ar esult, they may not be able to free them-
selves in the event of an emergency. They
could be seriously or even fatally injured by
prolonged exposur etoextremely hig horlow
tempera tures, for example. In this case ,res-
cuin gpeople from outside the vehicle is diffi-
cult.
Deac tivate the interior motion sensor before
you lock the vehicle .The doors can then be
opened from the insid eafter the vehicl ehas
been locked from the outside. G
WARNING
If children are left unsupervised in the vehicle,
they could:
R open adoor from inside the vehicle at any
time, even if it has been locked
R star tthe vehicle usin gakey which has been
left in the vehicle
R release the electric parking brake
They could thereby endanger themselves and
others. Never leave children unsupervised in
the vehicle. Alway stake the key with you
when leaving the vehicle, even if you are only
leaving it for ashort time. Unlocking and opening th
edoors
from the inside
For all countries except the United King-
dom: you can open adoor from inside the
vehicle even if it has been locked.
If the vehicle has been locked with the key or
with KEYLESS -GO, opening adoor from the
inside will trigger the anti-thef talarm system.
Switch off the alarm (Y page 71).82
DoorsOpening and closing
Page 131 of 441
A
p To switc hthe right-hand fron tread-
ing lam pon/off
B To switch the automati cinterior lighting
control on
X To switch on the front interior lighting:
set the switch to the cpositio n.
X To switch off the interior lighting: set the
switch to the |positio nor(if the door
is closed) to the centre position.
X To switch the rear interior lighting on/
off: press the ubutton.
X To switch the reading lamp son/off:
press the pbutton. Crash-responsive emergency lighting
The interior lightin gisa ctivated automatically
if the vehicle is involved in an accident.
X To switch off the crash-responsive
emergenc ylighting: press the hazard
warning lamp button.
or
X Lock and then unlock the vehicle using the
key. Replacing bulbs
Important safet
ynotes
Xenon bulbs G
DANGER
Xenon bulbs are under high voltage. If you
touch the electrical contact sofaxenon bulb,
you could suffer an electric shock and be seri-
ously or even fatally inju red. For this reason,
do not remove the cover of xenon bulbs.
Do not change the xenon bulbs yourself, but
have them replaced at aqualified workshop.
If your vehicle is equipped with xenon bulbs,
you can recognise this by the following :the
con eoflight from the xenon bulbs moves
from the top to the bottom and back again
when you start the engine. For this to be observed, the lights must be switched on
before starting the engine.
Bulbs and lamps are an important aspect of
vehicle safety. You must therefore make sure
that these function correctly at all times.
Hav
ethe headlamp setting checked regularly.
Other bulbs G
WARNING
Bulbs and lamps can be ver yhot. You should
therefore allow them to cool down befor eyou
change them .Otherwise, you could be burned
if you touch them.
Keep bulbs out of the reach of children .Oth-
erwise, the ycould damage the bulbs, for
example, and inj uret hemselves.
Never use abulbw hich ha sbeend ropped.
Suc hab ulbm ay break or even explode and
injure you.
Haloge nbulbs are pressurised and can
explode when you change them ,particularly
if they are ver yhot.Y ou should therefor ewear
eye protec tion and gloves when you are
changing them.
There are bulbs other than the xenon bulbs
that you can notreplace. Replace only the
bulbs listed (Y page 129). Hav ethe bulbs that
you can notreplace yourself changed at a
qualified specialist workshop.
If you require assistanc echanging bulbs, con-
sult aqualified specialist workshop.
Do not touch the glass tube of new bulbs with
your bare hands. Even minor contamination
can burn into the glass surface and reduce
the service life of the bulbs .Always use alint-
free cloth or only touch the base of the bulb
when fitting.
Only use bulbs of the correc ttype.
If the new bulb still does not light up, consult
aq ualified specialist workshop.
Bulbs and lamps are an importan taspect of
vehicle safety .You must therefor emake sure
that these function correctly at all times.
Have the headlamp setting checked regularly. 128
Replacing bulbsLights and windscree
nwipers
Page 136 of 441
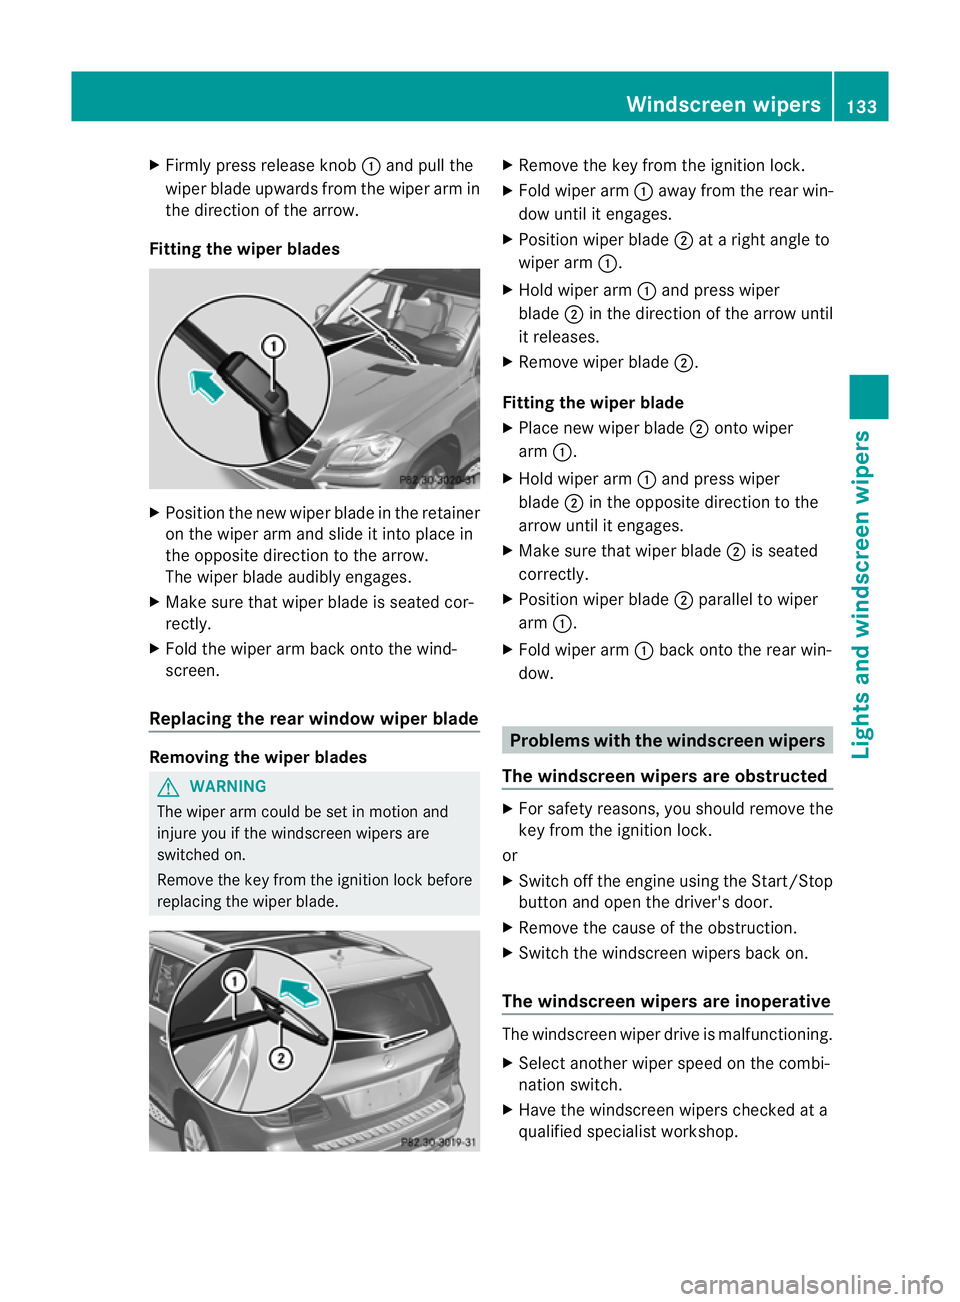
X
Firml ypress release knob :and pull the
wipe rblade upwards from the wiper arm in
the directio nofthe arrow.
Fitting th ewiper blades X
Position the new wiper blade in the retainer
on the wiper arm and slide it into place in
the opposite direction to the arrow.
The wiper blade audibly engages.
X Make sure that wiper blade is seated cor-
rectly.
X Fold the wiper arm back onto the wind-
screen.
Replacing the rear window wiper blade Removing the wiper blades
G
WARNING
The wiper arm could be set in motion and
injur eyou if the windscreen wiper sare
switched on.
Remove th ekey from the ignition lock before
replacing the wiper blade. X
Remov ethe key from the ignition lock.
X Fold wiper arm :away from the rea rwin-
dow until it engages.
X Position wiper blade ;atar ight angle to
wiper arm :.
X Hold wiper arm :and press wiper
blade ;in the direction of the arrow until
it releases.
X Remove wiper blade ;.
Fitting the wiper blade
X Place new wiper blade ;onto wiper
arm :.
X Hold wiper arm :and press wiper
blade ;in the opposite direction to the
arrow until it engages.
X Make sure that wiper blade ;is seated
correctly.
X Position wiper blade ;parallel to wiper
arm :.
X Fold wiper arm :back onto the rear win-
dow. Problems with the windscreen wipers
The windscreen wipers are obstructed X
For safety reasons, you should remov ethe
key from the ignition lock.
or
X Switc hoff th eengine using the Start/Stop
butto nand ope nthe driver's door.
X Remove the cause of the obstruction.
X Switc hthe windscreen wiper sback on.
The windscreen wipers are inoperative The windscreen wiper drive is malfunctioning.
X
Select another wiper spee donthe combi-
nation switch.
X Hav ethe windscreen wiper schecked at a
qualified specialist workshop. Windscreen wipers
133Lights and windscreen wipers Z
Page 193 of 441
Checklist after driving off-road
!
If you detect damag etothe vehicl eafter
dri ving off-road, have the vehicle checked
immediately at aqualified specialist work-
shop.
X Vehicles with th eON&O FFROAD pack-
age: activat ethe on-road program
(Y page 253).
X Vehicles without th eON&O FFROAD
package: deactivate the on- road program
(Y page 252).
X Deac tivate the LOW RANGE off-roa dgear
(Y page 254).
X Deactiva teDS R(Ypage 251).
X Lowe rthe vehicle level again to alevel suit-
able to the road conditions, e.g. to the high-
way/high-speed level.
X Clean the headlamps and rear lights and
check for damage.
X Clean the front and rear licence plates.
X Clean the wheels/tyres with awater jet and
remove any foreign objects.
X Clea nthe wheels, wheel arches and the
vehicle underside with awater jet; check
for any foreign objects and damage.
X Check whethe rtwigs or other parts of
plants have become trapped. These
increase the risk of fire and can damage
fuel pipes, brake hose sorthe rubber bel-
lows of the axl ejoint sand propeller shafts.
X After the trip, examine without fail the
entire undercarriage, wheels ,tyres, brakes,
bodywork structure, steering, chassis and
exhaus tsystem for damage.
X After driving for extended period sacross
sand ,mud, gravel, water or in similarly dirty
conditions, have the brake discs, wheels,
brake pads/lining sand axle joints checked
and cleaned.
X If you detect strong vibrations after off-road
travel, check for foreig nobject sinthe
wheels and drive train and remove them if
necessary. Foreign objec ts candisturb the
balance and cause vibrations. Driving over rough terrain places greater
demands on your vehicle than drivin
gonnor-
ma lroads. Af terd riving off- road, check the
vehicle. This allow syou to detec tdamage
promptly and reduce the risk of an accident
to yourself and other road users.
Driving on sand Observe the following rules when driving on
sand:
R
vehicle swith the ON&OFFROAD pack-
age: select off- road program 1
(Y page 253).
R vehicle swithou tthe ON&OFFROAD
package: select theoff-road program
(Y pag e252).
R select ahigher vehicle level.
R select ashift range appropriate to the ter-
rain.
R drive quickly to overcom ethe rolling resist-
ance. Otherwise, the vehicle' swheels
could becom estuck in loose ground.
R drive in the track sofother vehicle sifpos-
sible. Make sure that:
- the tyr eruts are not too deep.
- the sand is sufficiently firm.
- the ground clearance of the vehicle is
sufficient.
Tyr eruts and gravel roads !
Check that th eruts are not too deep and
that your vehicle has sufficient clearance.
Otherwise, your vehicle could be damaged
or bottom out and get stuck.
Observe the following rules when driving
along ruts in off-road terrain or on roads with
loos egravel:
R Activate th eoff-road program
(Y pag e252).
R Vehicle swith the AIRMATIC package:
select araised vehicle level.
R Avoid high engine speeds.
R Restrict the shift range to 1.190
Driving tipsDriving and parking