fuel consumption MERCEDES-BENZ GL350 BlueTEC 2011 X164 Owner's Manual
[x] Cancel search | Manufacturer: MERCEDES-BENZ, Model Year: 2011, Model line: GL350 BlueTEC, Model: MERCEDES-BENZ GL350 BlueTEC 2011 X164Pages: 376, PDF Size: 17.39 MB
Page 8 of 376
Central lockingAutomatic locking (on-board
computer) ...................................... 224
SmartKey ......................................... 72
Changing bulbs
Headlamps ..................................... 120
Changing gears .................................. 154
Changing the programming SmartKey ......................................... 75
Checklist
After driving off-road ...................... 175
Before driving off-road ...................175
Child-proof locks
Rear doors ....................................... 64
Special seat belt retractor ...............61
Children
In the vehicle ................................... 59
Restraint systems ............................ 59
Child seat
Automatic recognition .....................48
Automatic recognition/air bag
deactivation, self-test ......................50
ISOFIX (LATCH-type child seat
anchors) ........................................... 62
Special seat belt retractor ...............61
Top Tether ....................................... 62
Troubleshooting ............................... 51
Cigarette lighter ................................ 280
Climate control Activating/deactivating .................136
Activating/deactivating air-
recirculation mode .........................141
Controlling automatically ...............138
Cooling with air dehumidification ..137
Defrosting the windshield ..............140
Demisting the windows .................. 141
Dual-zone automatic climate
control ........................................... 131
Important safety information .........130
Indicator lamp ................................ 138
Multi-zone automatic climate
control ........................................... 132
Problems with "cooling with air
dehumidification" ........................... 138
Problems with the rear window
heating .......................................... 141
Rear control panel .................133, 136
Refrigerant ..................................... 369Setting the air distribution .............140
Setting the airflow .........................140
Setting the air vents ......................143
Setting the temperature ................139
Setting the temperature (rear
compartment) ................................ 139
Switching the MONO function on/
off .................................................. 140
Switching the rear window
heating on/off ............................... 141
Switching the residual heat
function on/off .............................. 142
Clock (on-board computer) ............... 222
Cockpit ................................................. 27
Combination switch .......................... 117
Compass ............................................ 291
Calling up ....................................... 291
Consumption statistics (on-board
computer) .......................................... 227
Convenience closing feature .............. 87
Convenience opening feature ............ 86
Coolant (engine) Checking the level .........................297
Display message ............................ 240
Notes ............................................. 369
Temperature gauge ........................ 218
Cooling
see Climate control
Cornering light (display message) ... 237
Crash-responsive emergency
lighting ............................................... 119
Crossbar Installing ........................................ 274
Setting the span width ...................276
Cross bar ............................................ 273
Cruise control .................................... 179
Cruise control lever .......................179
Display message ............................ 246
Cup holder ......................................... 277
Center console .............................. 277
Rear compartment .........................278
third row of seats ........................... 278
Current fuel consumption (on-
board computer) ............................... 227
Customer Assistance Center (CAC) ............................................... 22
Customer Relations Department ....... 236IndexBA 164.8 USA, CA Edition B 2011; 1; 2, en-USd2sboikeVersion: 3.0.3.52010-04-21T15:08:44+02:00 - Seite 6
Page 11 of 376
Storing settings (memory
function) ........................................ 110
Storing the parking position ..........109
Exterior view ........................................ 26
F
Filling capacity see Technical data
First-aid kit ......................................... 309
Flat tire Changing a wheel/mounting the
spare wheel ................................... 316
MOExtended run-flat system .........321
Preparing the vehicle .....................311
Raising the vehicle .........................318
TIREFIT kit ...................................... 312
Floormat ............................................. 291
Front fog lamp (display
message) ............................................ 239
Fuel Additives ........................................ 367
Notes ............................................. 366
Premium-grade unleaded gasoline . 366
Refueling ........................................ 159
Specifications ................................ 366
Troubleshooting ............................. 162
Fuel consumption
Current (on-board computer) .........227
Notes ............................................. 167
Fuel filler cap (display message) ..... 243
Fuel filler flap Emergency release ........................161
Opening/closing ............................ 160
Fuel filter (display message) ............ 243
Fuel level Calling up the range (on-board
computer) ...................................... 227
Fuses
Dashboard fuse box .......................330
Engine emergency stop .................331
Fuse allocation chart .....................330
Fuse box in the cargo
compartment ................................. 331
Fuse box in the engine
compartment ................................. 330
Notes ............................................. 329
G
Garage door opener Clearing the memory .....................291
Notes ............................................. 288
Opening/closing the garage door ..291
Programming the remote control ...289
Gear or selector lever (cleaning
guidelines) ......................................... 304
Genuine Mercedes-Benz parts ......... 362
Genuine wood trim and trim strips
(cleaning instructions) ...................... 304
Glove box ........................................... 265
GTW (Gross Trailer Weight)
(definition) ......................................... 355
H
Headlamp cleaning system .............. 117
Adding washer fluid .......................297
Notes ............................................. 370
Headlamp delayed switch-off
see Delayed switch-off, exterior lighting
Headlamp mode (daytime driving)
see Daytime running lamps
Headlamps
Cleaning ......................................... 302
Misting up ...................................... 118
Setting ........................................... 124
Head restraint
Adjusting (electrically) .....................97
Head restraints
Adjusting (manually) ........................97
Adjusting (rear) ................................ 98
Installing/removing (rear) ................99
Luxury .............................................. 97
see NECK-PRO head restraints
Heating
see Climate control
High beam flasher ............................. 117
Hill start assist .................................. 150
Hood Closing ........................................... 295
Opening ......................................... 294
Hydroplaning ..................................... 170
Index9BA 164.8 USA, CA Edition B 2011; 1; 2, en-USd2sboikeVersion: 3.0.3.52010-04-21T15:08:44+02:00 - Seite 9
Page 169 of 376
Driving tips
General driving tips
Important safety instructions
GWarning!
Please do not forget that your primary
responsibility is to drive the vehicle. A driver’s
attention to the road must always be his/her
primary focus when driving. For your safety
and the safety of others, we recommend that
you pull over to a safe location and stop
before placing or taking a telephone call.
If you choose to use the telephone 25
while
driving, please use the hands-free device and
only use the telephone when road, weather
and traffic conditions permit. Some
jurisdictions prohibit the driver from using a
mobile telephone while driving a vehicle.
Only operate the COMAND 25
(Cockpit
Management and Data System) if road,
weather and traffic conditions permit.
Otherwise, you may not be able to observe
traffic conditions and could endanger yourself
and others.
Bear in mind that at a speed of just 30 mph
(approximately 50 km/h), your vehicle is
covering a distance of 44 feet (approximately
14 m) every second.
Drive sensibly – save fuel
To save fuel, observe the following notes:
XKeep tires at the recommended inflation
pressures.XRemove unnecessary cargo.XRemove the roof carrier when not in use.XRemove the basic carrier bars when not in
use.XMaintain a low engine speed until the
engine is warm.XAvoid frequent acceleration and
deceleration.XHave all maintenance work performed at
the service intervals specified in the
Service Booklet or indicated by the service
interval indicator.
Fuel consumption is also increased by driving
in cold weather, in stop-and-go traffic, on
short trips and in mountainous areas.
Drinking and driving
GWarning
Drinking and driving and/or taking drugs and
driving are very dangerous combinations.
Even a small amount of alcohol or drugs can
affect your reflexes, perceptions and
judgment.
The possibility of a serious or even fatal
accident are greatly increased when you drink
or take drugs and drive.
Do not drink or take drugs and drive or allow
anyone to drive who has been drinking or
taking drugs.
Pedals
GWarning
Make sure absolutely no objects are
obstructing the pedals' range of movement.
Keep the driver's footwell clear of all
obstacles. If there are any floormats or
carpets in the footwell, make sure that the
pedals still have sufficient clearance.
During sudden driving or braking maneuvers,
the objects could get caught between the
pedals. You could then no longer brake or
accelerate. This could lead to accidents and
injury.
25 Observe all legal requirements.Driving tips167Driving and parkingBA 164.8 USA, CA Edition B 2011; 1; 2, en-USd2sboikeVersion: 3.0.3.52010-04-21T15:08:44+02:00 - Seite 167Z
Page 191 of 376
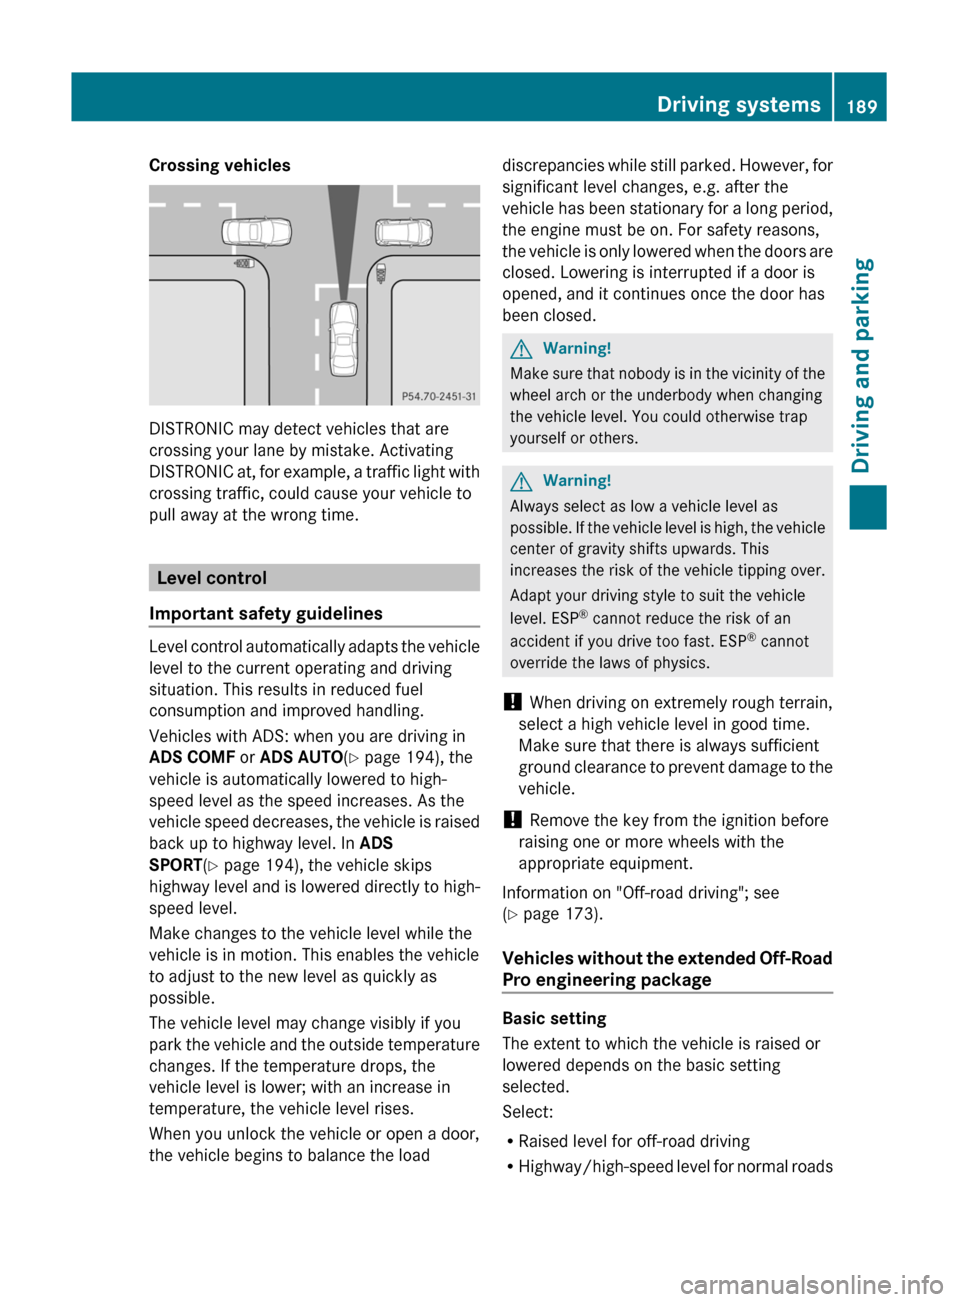
Crossing vehicles
DISTRONIC may detect vehicles that are
crossing your lane by mistake. Activating
DISTRONIC at, for example, a traffic light with
crossing traffic, could cause your vehicle to
pull away at the wrong time.
Level control
Important safety guidelines
Level control automatically adapts the vehicle
level to the current operating and driving
situation. This results in reduced fuel
consumption and improved handling.
Vehicles with ADS: when you are driving in
ADS COMF or ADS AUTO(Y page 194), the
vehicle is automatically lowered to high-
speed level as the speed increases. As the
vehicle speed decreases, the vehicle is raised
back up to highway level. In ADS
SPORT(Y page 194), the vehicle skips
highway level and is lowered directly to high-
speed level.
Make changes to the vehicle level while the
vehicle is in motion. This enables the vehicle
to adjust to the new level as quickly as
possible.
The vehicle level may change visibly if you
park the vehicle and the outside temperature
changes. If the temperature drops, the
vehicle level is lower; with an increase in
temperature, the vehicle level rises.
When you unlock the vehicle or open a door,
the vehicle begins to balance the load
discrepancies while still parked. However, for
significant level changes, e.g. after the
vehicle has been stationary for a long period,
the engine must be on. For safety reasons,
the vehicle is only lowered when the doors are
closed. Lowering is interrupted if a door is
opened, and it continues once the door has
been closed.
GWarning!
Make sure that nobody is in the vicinity of the
wheel arch or the underbody when changing
the vehicle level. You could otherwise trap
yourself or others.
GWarning!
Always select as low a vehicle level as
possible. If the vehicle level is high, the vehicle
center of gravity shifts upwards. This
increases the risk of the vehicle tipping over.
Adapt your driving style to suit the vehicle
level. ESP® cannot reduce the risk of an
accident if you drive too fast. ESP® cannot
override the laws of physics.
! When driving on extremely rough terrain,
select a high vehicle level in good time.
Make sure that there is always sufficient
ground clearance to prevent damage to the
vehicle.
! Remove the key from the ignition before
raising one or more wheels with the
appropriate equipment.
Information on "Off-road driving"; see
(Y page 173).
Vehicles without the extended Off-Road
Pro engineering package
Basic setting
The extent to which the vehicle is raised or
lowered depends on the basic setting
selected.
Select:
RRaised level for off-road driving
RHighway/high-speed level for normal roads
Driving systems189Driving and parkingBA 164.8 USA, CA Edition B 2011; 1; 2, en-USd2sboikeVersion: 3.0.3.52010-04-21T15:08:44+02:00 - Seite 189Z
Page 192 of 376
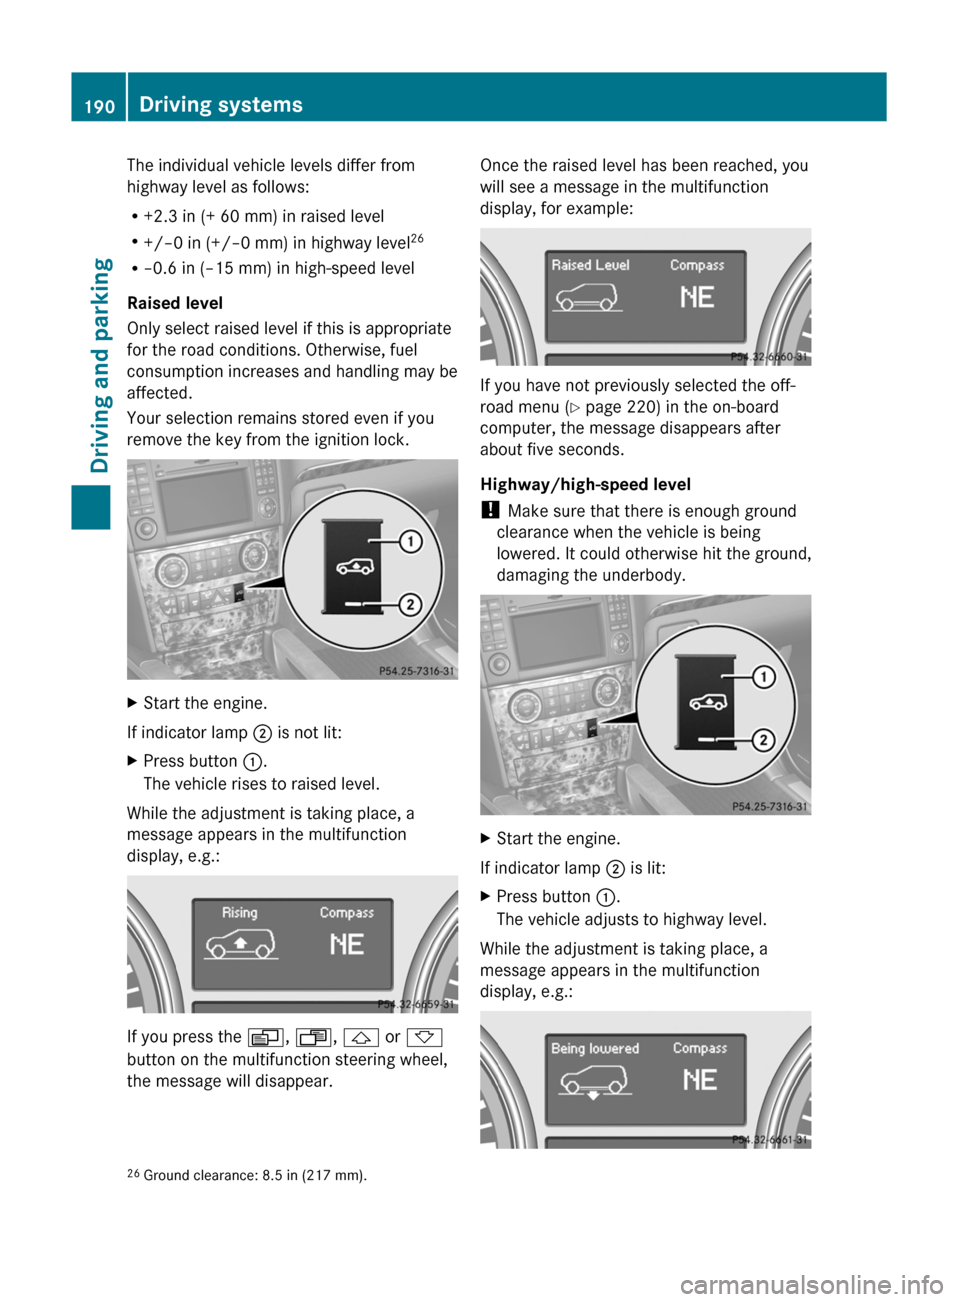
The individual vehicle levels differ from
highway level as follows:
R +2.3 in (+ 60 mm) in raised level
R +/–0 in (+/–0 mm) in highway level 26
R –0.6 in (–15 mm) in high-speed level
Raised level
Only select raised level if this is appropriate
for the road conditions. Otherwise, fuel
consumption increases and handling may be
affected.
Your selection remains stored even if you
remove the key from the ignition lock.XStart the engine.
If indicator lamp ; is not lit:
XPress button :.
The vehicle rises to raised level.
While the adjustment is taking place, a
message appears in the multifunction
display, e.g.:
If you press the V, U , & or *
button on the multifunction steering wheel,
the message will disappear.
Once the raised level has been reached, you
will see a message in the multifunction
display, for example:
If you have not previously selected the off-
road menu ( Y page 220) in the on-board
computer, the message disappears after
about five seconds.
Highway/high-speed level
! Make sure that there is enough ground
clearance when the vehicle is being
lowered. It could otherwise hit the ground,
damaging the underbody.
XStart the engine.
If indicator lamp ; is lit:
XPress button :.
The vehicle adjusts to highway level.
While the adjustment is taking place, a
message appears in the multifunction
display, e.g.:
26 Ground clearance: 8.5 in (217 mm).190Driving systemsDriving and parking
BA 164.8 USA, CA Edition B 2011; 1; 2, en-USd2sboikeVersion: 3.0.3.52010-04-21T15:08:44+02:00 - Seite 190
Page 193 of 376
If you press the V, U , & or *
button on the multifunction steering wheel,
the message will disappear.
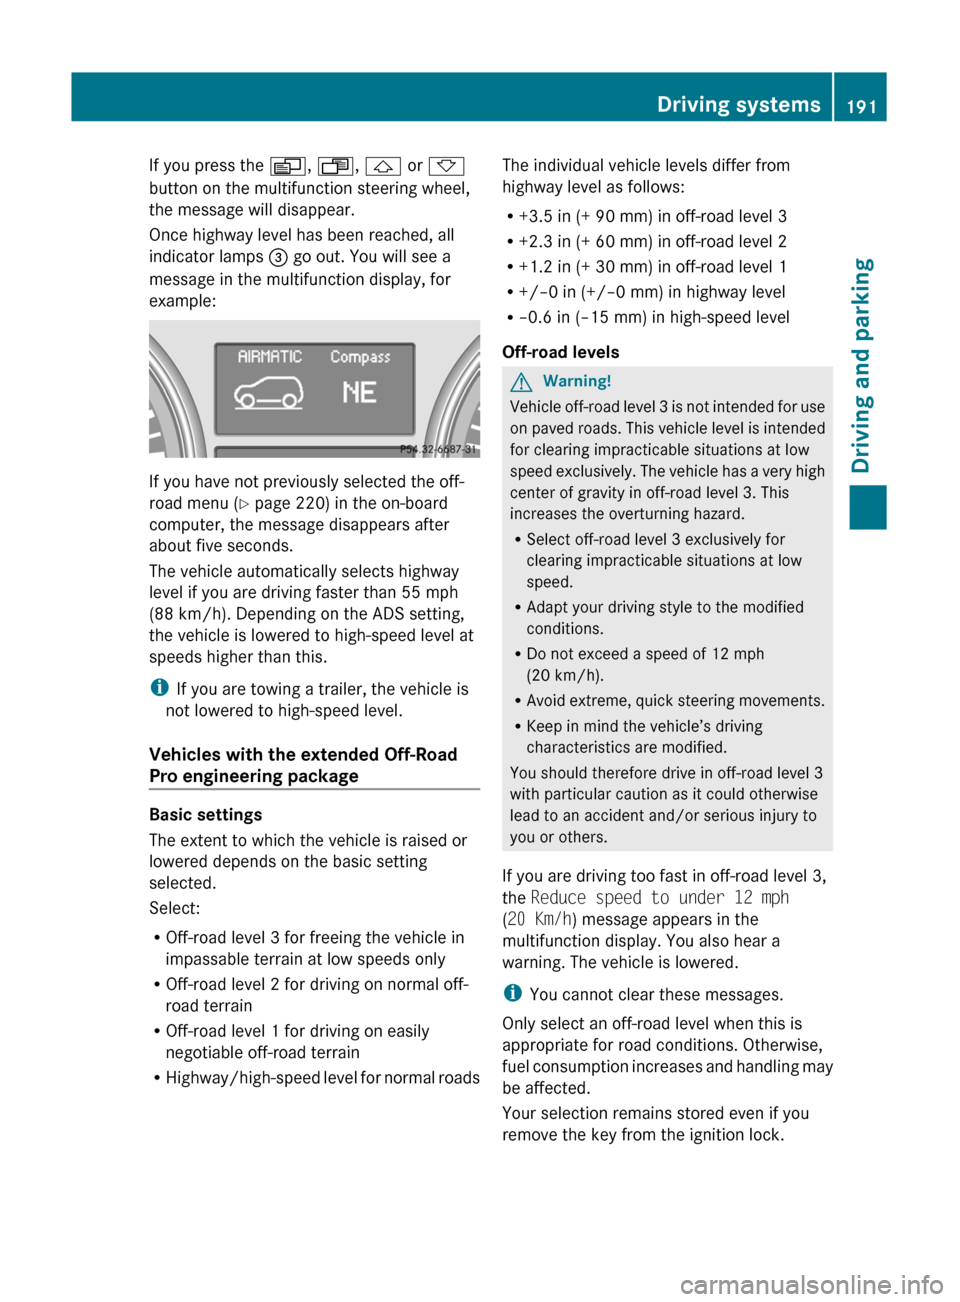
Once highway level has been reached, all
indicator lamps = go out. You will see a
message in the multifunction display, for
example:
If you have not previously selected the off-
road menu ( Y page 220) in the on-board
computer, the message disappears after
about five seconds.
The vehicle automatically selects highway
level if you are driving faster than 55 mph
(88 km/h). Depending on the ADS setting,
the vehicle is lowered to high-speed level at
speeds higher than this.
i If you are towing a trailer, the vehicle is
not lowered to high-speed level.
Vehicles with the extended Off-Road
Pro engineering package
Basic settings
The extent to which the vehicle is raised or
lowered depends on the basic setting
selected.
Select:
R Off-road level 3 for freeing the vehicle in
impassable terrain at low speeds only
R Off-road level 2 for driving on normal off-
road terrain
R Off-road level 1 for driving on easily
negotiable off-road terrain
R Highway/high-speed level for normal roads
The individual vehicle levels differ from
highway level as follows:
R +3.5 in (+ 90 mm) in off-road level 3
R +2.3 in (+ 60 mm) in off-road level 2
R +1.2 in (+ 30 mm) in off-road level 1
R +/–0 in (+/–0 mm) in highway level
R –0.6 in (–15 mm) in high-speed level
Off-road levelsGWarning!
Vehicle off-road level 3 is not intended for use
on paved roads. This vehicle level is intended
for clearing impracticable situations at low
speed exclusively. The vehicle has a very high
center of gravity in off-road level 3. This
increases the overturning hazard.
R Select off-road level 3 exclusively for
clearing impracticable situations at low
speed.
R Adapt your driving style to the modified
conditions.
R Do not exceed a speed of 12 mph
(20 km/h).
R Avoid extreme, quick steering movements.
R Keep in mind the vehicle’s driving
characteristics are modified.
You should therefore drive in off-road level 3
with particular caution as it could otherwise
lead to an accident and/or serious injury to
you or others.
If you are driving too fast in off-road level 3,
the Reduce speed to under 12 mph
( 20 Km/h ) message appears in the
multifunction display. You also hear a
warning. The vehicle is lowered.
i You cannot clear these messages.
Only select an off-road level when this is
appropriate for road conditions. Otherwise,
fuel consumption increases and handling may
be affected.
Your selection remains stored even if you
remove the key from the ignition lock.
Driving systems191Driving and parkingBA 164.8 USA, CA Edition B 2011; 1; 2, en-USd2sboikeVersion: 3.0.3.52010-04-21T15:08:44+02:00 - Seite 191Z
Page 229 of 376
Trip computer menu
Trip computer "From start" or "From
reset"
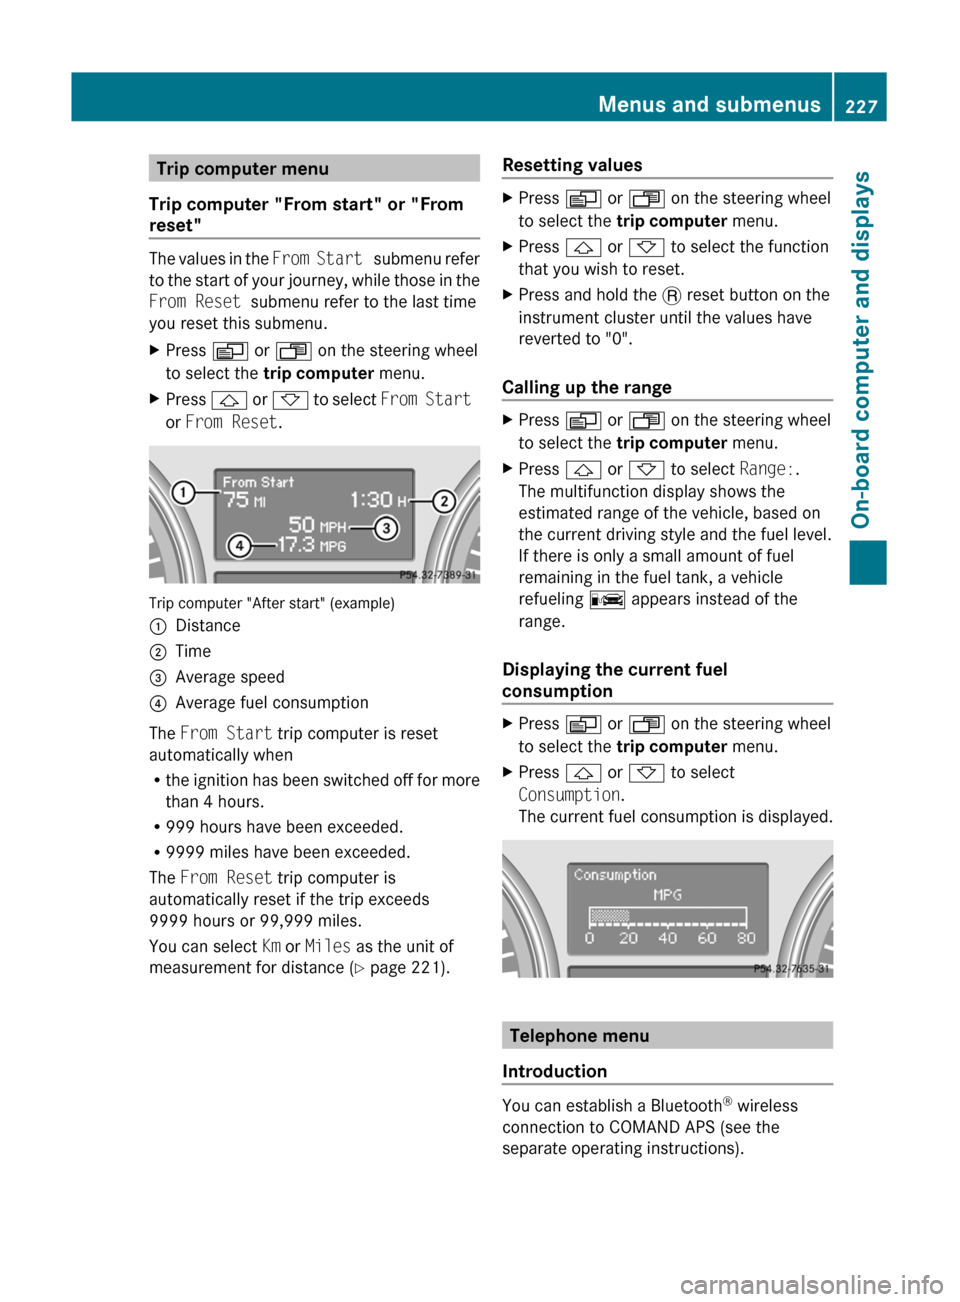
The values in the From Start submenu refer
to the start of your journey, while those in the
From Reset submenu refer to the last time
you reset this submenu.
XPress V or U on the steering wheel
to select the trip computer menu.XPress & or * to select From Start
or From Reset .
Trip computer "After start" (example)
:Distance;Time=Average speed?Average fuel consumption
The From Start trip computer is reset
automatically when
R the ignition has been switched off for more
than 4 hours.
R 999 hours have been exceeded.
R 9999 miles have been exceeded.
The From Reset trip computer is
automatically reset if the trip exceeds
9999 hours or 99,999 miles.
You can select Km or Miles as the unit of
measurement for distance ( Y page 221).
Resetting valuesXPress V or U on the steering wheel
to select the trip computer menu. XPress & or * to select the function
that you wish to reset.XPress and hold the . reset button on the
instrument cluster until the values have
reverted to "0".
Calling up the range
XPress V or U on the steering wheel
to select the trip computer menu.XPress & or * to select Range:.
The multifunction display shows the
estimated range of the vehicle, based on
the current driving style and the fuel level.
If there is only a small amount of fuel
remaining in the fuel tank, a vehicle
refueling C appears instead of the
range.
Displaying the current fuel
consumption
XPress V or U on the steering wheel
to select the trip computer menu.XPress & or * to select
Consumption .
The current fuel consumption is displayed.
Telephone menu
Introduction
You can establish a Bluetooth ®
wireless
connection to COMAND APS (see the
separate operating instructions).
Menus and submenus227On-board computer and displaysBA 164.8 USA, CA Edition B 2011; 1; 2, en-USd2sboikeVersion: 3.0.3.52010-04-21T15:08:44+02:00 - Seite 227Z
Page 359 of 376
Distribution of the vehicle occupants
Distribution of vehicle occupants over
designated seat positions in a vehicle.
Maximum permissible payload
weight
Nominal load and luggage load plus
68 kilograms (150 lb) multiplied by the
number of seats in the vehicle.
Wheel/tire combinations
Points to remember
GWarning
Observe the "Important safety information"
( Y page 334).
! For safety reasons, Mercedes-Benz
recommends that you only use tires,
wheels and accessories which have been
approved by Mercedes-Benz specifically
for your vehicle. These tires have been
specially adapted for use with the control
systems, such as ABS or ESP ®
, and are
marked as follows:
R MO = Mercedes-Benz Original
R MOE = Mercedes-Benz Original Extended
(tires with run-flat characteristics)
R MO1 = Mercedes-Benz Original (AMG)
Only use Mercedes-Benz Original Extended
tires on wheels that have been specifically
approved by Mercedes-Benz.
If you use other tires, wheels and
accessories, Mercedes-Benz cannot
accept any responsibility for damage that
may result from this. Further information
about tires, wheels and approved
combinations can be obtained from any
authorized Mercedes-Benz Center.
! If you mount tires other than those tested
and recommended by Mercedes-Benz,
characteristics such as handling, noise
levels and fuel consumption, etc. may be
adversely affected. In addition, when
driving with a load, tire dimensional
variations could cause the tires to come
into contact with the bodywork and axle
components. This could result in damage
to the tires or the vehicle.
i Further information about tires and
wheels can be obtained from any
authorized Mercedes-Benz Center.
i The Tire and Load Information placard
with the recommended tire pressures is
attached to the B-pillar on the driver's side.
Further information about driving at high
speeds or driving with vehicle loads that are
lighter than the maximum vehicle load can
be found in the tire pressure table on the
inside of the fuel filler flap. Check tire
pressures regularly, and only when the tires
are cold. Comply with the maintenance
recommendations of the tire manufacturer
in the vehicle document wallet.
Further information on the recommended tire
inflation pressure and on tire pressures for
specific driving conditions, see (Y page 336).
i Notes on the vehicle equipment:
R always mount tires of the same size on a
given axle (left/right).
R always mount the same type of tires on
your vehicle at a given time (summer
tires, winter tires, MOExtended tires).
i Vehicles featuring the MOExtended run-
flat system are not equipped with a TIREFIT
kit.
It is therefore recommended that you
additionally equip your vehicle with the
TIREFIT kit if you mount tires that do not
feature run-flat properties, e.g. winter tires.
A TIREFIT kit is available from any qualified
specialist workshop, e.g. an authorized
Mercedes-Benz Center.
i The following pages contain information
on approved wheel rims and tire sizes for
equipping your vehicle with winter tires.
Winter tires are not available at the factoryWheel/tire combinations357Tires and wheelsBA 164.8 USA, CA Edition B 2011; 1; 2, en-USd2sboikeVersion: 3.0.3.52010-04-21T15:08:44+02:00 - Seite 357Z