MERCEDES-BENZ GL550 2010 X164 Owner's Manual
Manufacturer: MERCEDES-BENZ, Model Year: 2010, Model line: GL550, Model: MERCEDES-BENZ GL550 2010 X164Pages: 380, PDF Size: 9.81 MB
Page 161 of 380
XSwitching off: Press switch : again.
Indicator lamp ; goes out. The symbol
Ç disappears.
Air suspension program
The system lets you select the chassis and
suspension setup. The chassis and
suspension setup adjusts the damping
behavior and the ride height for your vehicle.
The system consists of two components. The
Adaptive Damping System (ADS)
(Y page 159) and the vehicle level control
(Y page 159).
Adaptive Damping System (ADS)
The Adaptive Damping System (ADS) is
controlled electronically and operates
continuously. It adjusts the damping
characteristics to the current operating and
driving conditions. The damping is adjusted
individually for each wheel. Driving safety and
tire comfort are increased.
The fine tuning of the damping is dependent
on:
Ryour driving style
Rroad surface conditions
Ryour personal settings
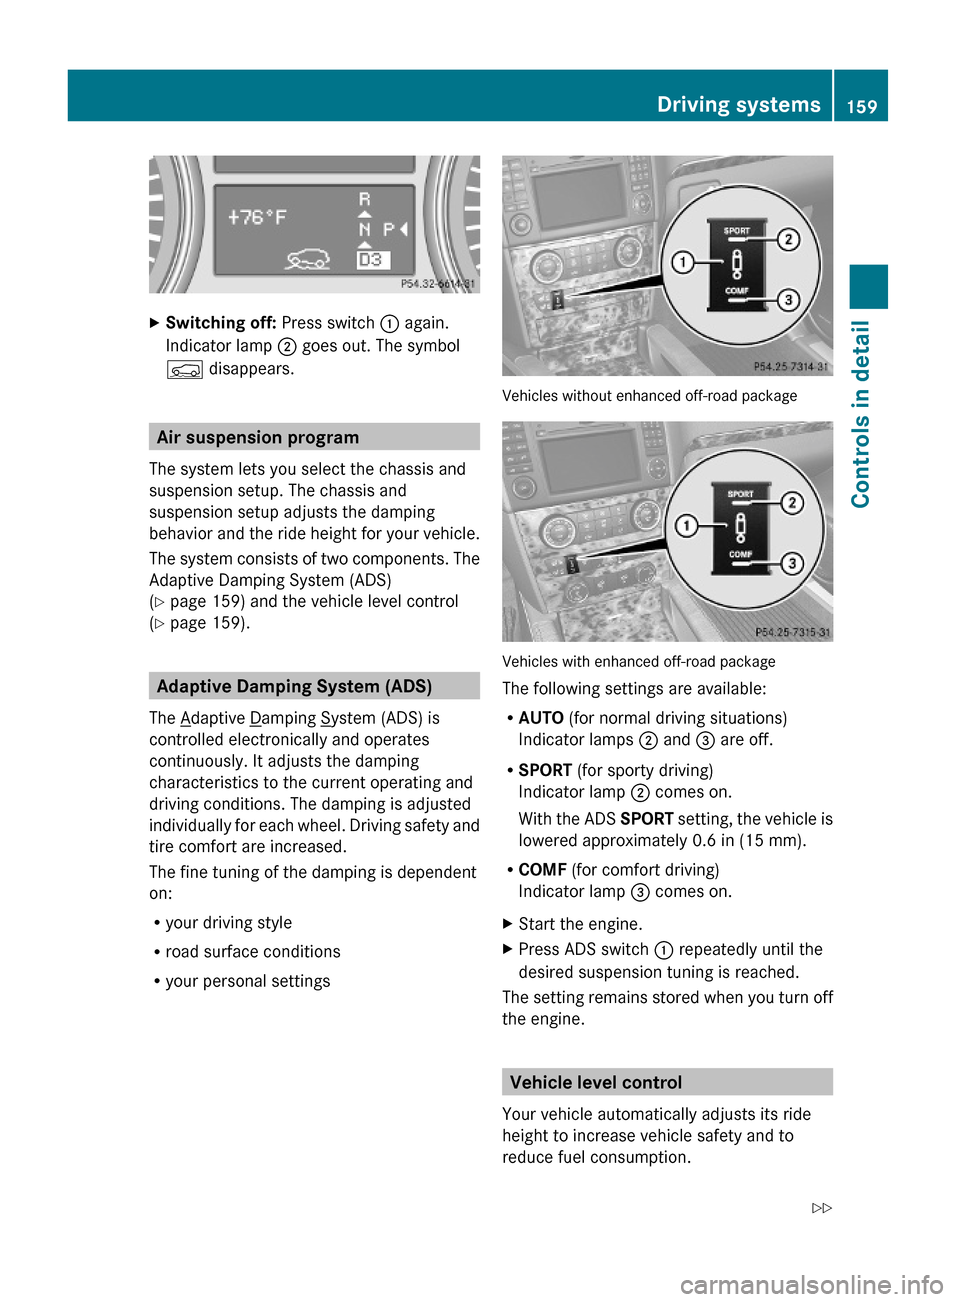
Vehicles without enhanced off-road package
Vehicles with enhanced off-road package
The following settings are available:
RAUTO (for normal driving situations)
Indicator lamps ; and = are off.
RSPORT (for sporty driving)
Indicator lamp ; comes on.
With the ADS SPORT setting, the vehicle is
lowered approximately 0.6 in (15 mm).
RCOMF (for comfort driving)
Indicator lamp = comes on.
XStart the engine.XPress ADS switch : repeatedly until the
desired suspension tuning is reached.
The setting remains stored when you turn off
the engine.
Vehicle level control
Your vehicle automatically adjusts its ride
height to increase vehicle safety and to
reduce fuel consumption.
Driving systems159Controls in detailX164_AKB; 5; 31, en-USd2ureepe,Version: 2.11.8.12009-09-11T12:30:16+02:00 - Seite 159Z
Page 162 of 380
Changes to the vehicle level should be made
while the vehicle is moving. The vehicle will
then reach the set level as fast as possible.
When you park the vehicle and the ambient
temperature changes, the vehicle level may
change visibly. When the temperature drops,
the vehicle lowers. When the temperature
rises, the vehicle raises.
The vehicle automatically regulates its ride
height based on the set vehicle height and the
current speed:
RAs your driving speed increases, the vehicle
is lowered by increments until it reaches
highspeed level.
RVehicles with ADS: If you are driving with
the ADS setting COMF or AUTO, the
vehicle is raised back to highway level as
your driving speed decreases.
RVehicles with ADS: You can select the
highspeed level via the ADS setting
SPORT. In ADS SPORT, the vehicle is
lowered directly to highspeed level as your
driving speed increases.
The vehicle begins adjusting to the set vehicle
level as soon as the doors or tailgate are
unlocked or opened or closed with the vehicle
unlocked.
In order to operate the vehicle level control
switch (Y page 160) or (Y page 162),
however, the engine must be running.
GWarning!
Make sure no one is near the wheel housing
or under the vehicle when you lower the
vehicle while it is standing still. Limbs could
become wedged into or under the vehicle.
For safety reasons, the vehicle can only be
lowered with all doors and the tailgate closed.
Lowering is interrupted if a door or the tailgate
is opened and will continue after the door is
closed again.
GWarning!
Please be aware that by raising the vehicle
level, the center of gravity also rises.
Therefore, always ensure that the vehicle
level is as low as possible. With higher ride
height the ESP® may activate earlier in certain
situations.
Adapt your speed and driving to possible
changed driving behavior of the vehicle after
changing the vehicle level. The ESP® cannot
prevent accidents, including those resulting
from excessive speed. The ESP® cannot
prevent the natural laws of physics from
acting on the vehicle.
! Keep in mind that in rough or uneven
terrain, adjusting the vehicle to a lower
level may cause the vehicle underbody to
come in contact with the ground and result
in damage to the vehicle underbody.
Always make sure the vehicle has sufficient
ground clearance before adjusting it to a
lower level.
! Before jacking up the vehicle with
equipment that lifts one or more of the
wheels completely off of the ground,
remove the SmartKey from the starter
switch.
For information on off-road driving, see “Off-
road driving” (Y page 262).
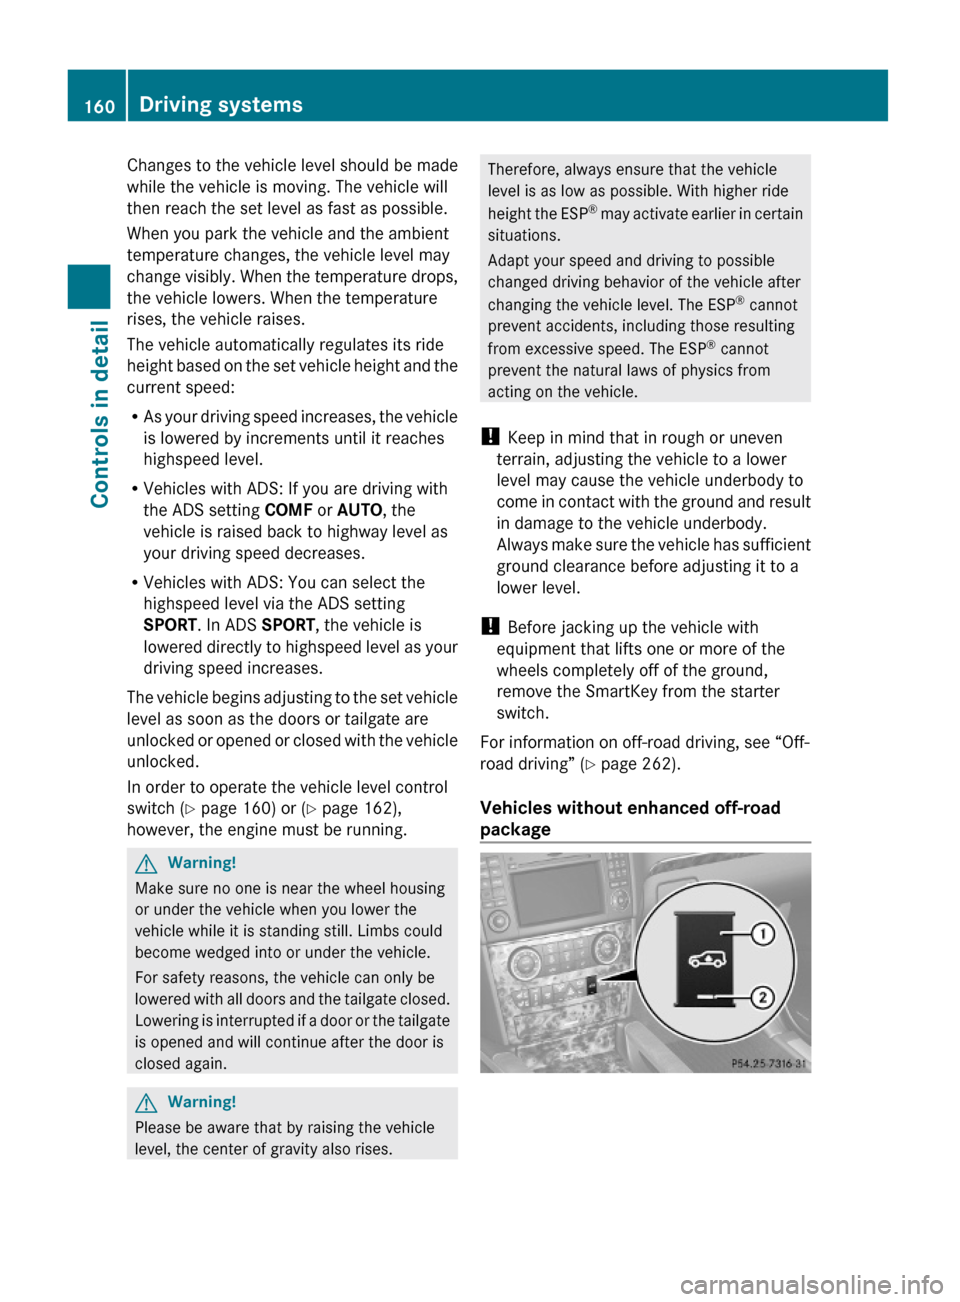
Vehicles without enhanced off-road
package
160Driving systemsControls in detail
X164_AKB; 5; 31, en-USd2ureepe,Version: 2.11.8.12009-09-11T12:30:16+02:00 - Seite 160
Page 163 of 380
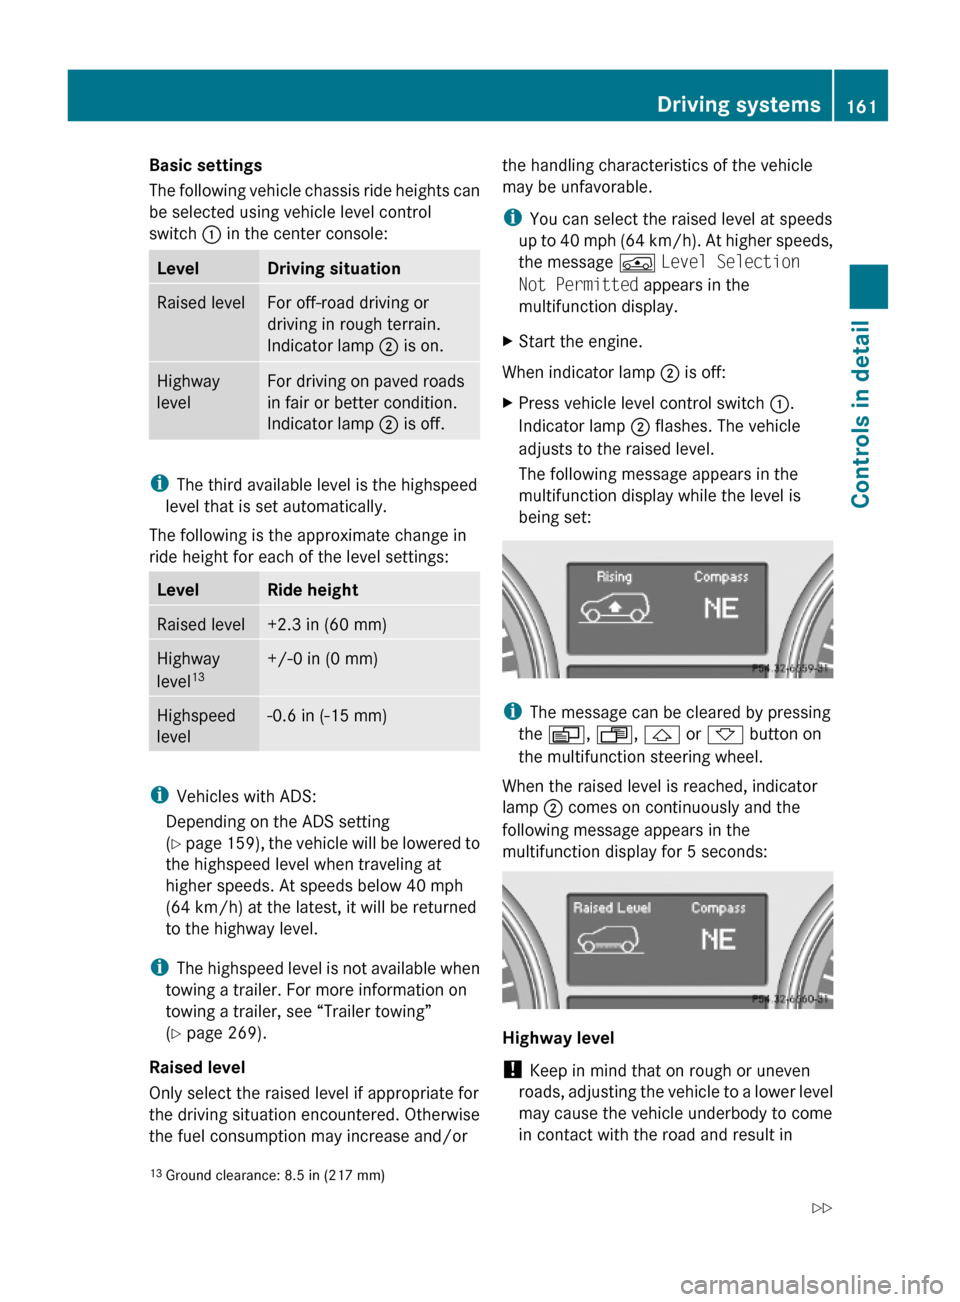
Basic settings
The following vehicle chassis ride heights can
be selected using vehicle level control
switch : in the center console:
LevelDriving situationRaised levelFor off-road driving or
driving in rough terrain.
Indicator lamp ; is on.
Highway
level
For driving on paved roads
in fair or better condition.
Indicator lamp ; is off.
iThe third available level is the highspeed
level that is set automatically.
The following is the approximate change in
ride height for each of the level settings:
LevelRide heightRaised level+2.3 in (60 mm)Highway
level13+/-0 in (0 mm)Highspeed
level
-0.6 in (-15 mm)
iVehicles with ADS:
Depending on the ADS setting
(Y page 159), the vehicle will be lowered to
the highspeed level when traveling at
higher speeds. At speeds below 40 mph
(64 km/h) at the latest, it will be returned
to the highway level.
iThe highspeed level is not available when
towing a trailer. For more information on
towing a trailer, see “Trailer towing”
(Y page 269).
Raised level
Only select the raised level if appropriate for
the driving situation encountered. Otherwise
the fuel consumption may increase and/or
the handling characteristics of the vehicle
may be unfavorable.
iYou can select the raised level at speeds
up to 40 mph (64 km/h). At higher speeds,
the message Á Level Selection
Not Permitted appears in the
multifunction display.
XStart the engine.
When indicator lamp ; is off:
XPress vehicle level control switch :.
Indicator lamp ; flashes. The vehicle
adjusts to the raised level.
The following message appears in the
multifunction display while the level is
being set:
iThe message can be cleared by pressing
the V, U, & or * button on
the multifunction steering wheel.
When the raised level is reached, indicator
lamp ; comes on continuously and the
following message appears in the
multifunction display for 5 seconds:
Highway level
! Keep in mind that on rough or uneven
roads, adjusting the vehicle to a lower level
may cause the vehicle underbody to come
in contact with the road and result in
13Ground clearance: 8.5 in (217 mm)Driving systems161Controls in detailX164_AKB; 5; 31, en-USd2ureepe,Version: 2.11.8.12009-09-11T12:30:16+02:00 - Seite 161Z
Page 164 of 380
damage to the vehicle underbody. Always
make sure the vehicle has sufficient ground
clearance before adjusting it to a lower
level.
XStart the engine.
When indicator lamp ; is on:
XPress vehicle level control switch :.
Indicator lamp ; flashes. The vehicle
adjusts to the highway level.
The following message appears in the
multifunction display while the level is
being set:
iThe message can be cleared by pressing
the V, U, & or * button on
the multifunction steering wheel.
When the highway level is reached, indicator
lamp ; goes out and the following message
appears in the multifunction display for
5 seconds:
iThe vehicle is lowered to the highway level
automatically if the vehicle speed is above
55 mph (88 km/h) or if the vehicle speed
stays between 40 mph (64 km/h) and
55 mph (88 km/h) for approximately 20
seconds.
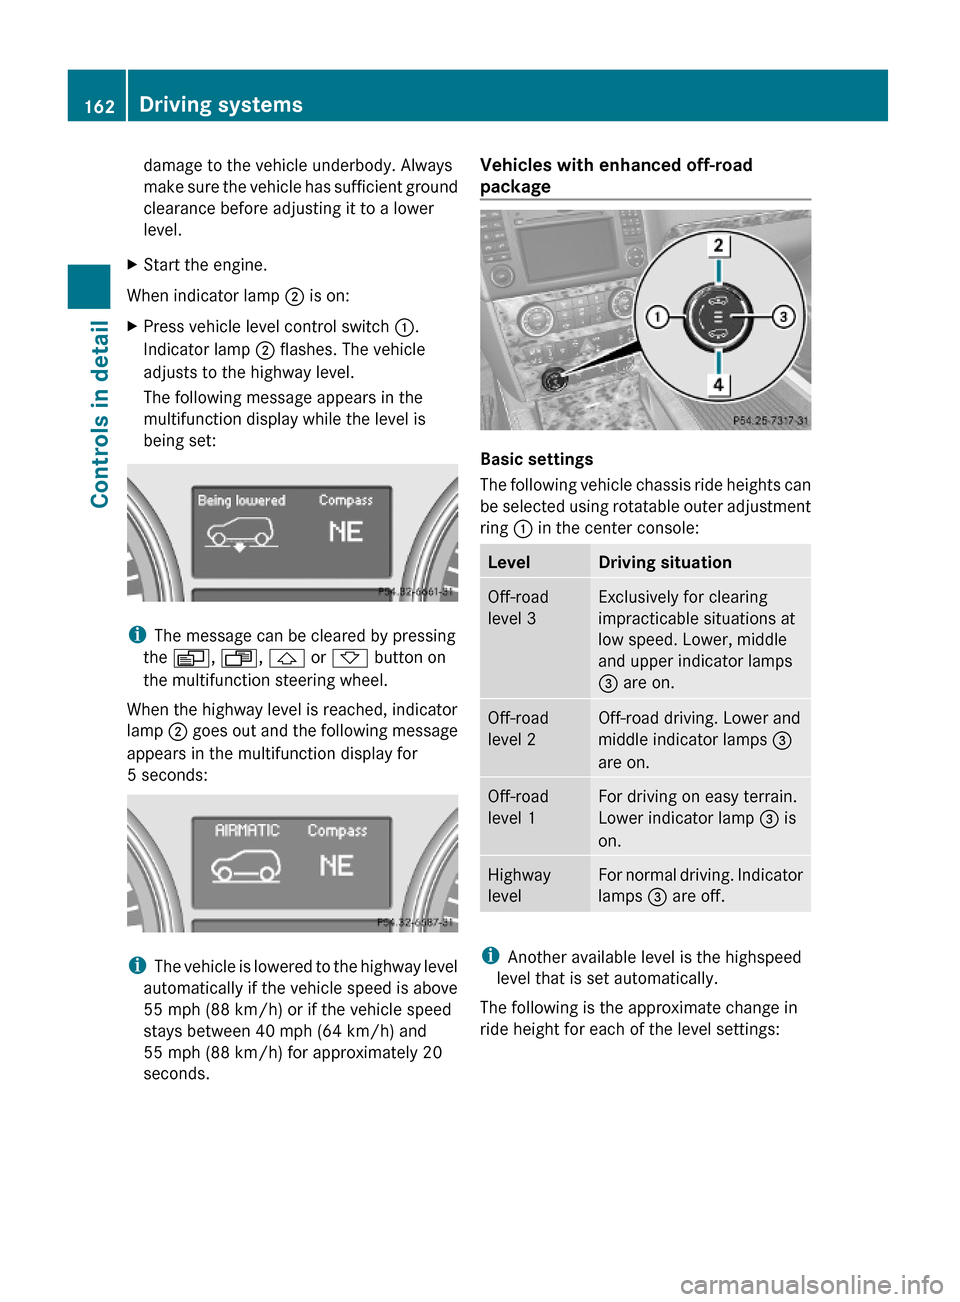
Vehicles with enhanced off-road
package
Basic settings
The following vehicle chassis ride heights can
be selected using rotatable outer adjustment
ring : in the center console:
LevelDriving situationOff-road
level 3
Exclusively for clearing
impracticable situations at
low speed. Lower, middle
and upper indicator lamps
= are on.
Off-road
level 2
Off-road driving. Lower and
middle indicator lamps =
are on.
Off-road
level 1
For driving on easy terrain.
Lower indicator lamp = is
on.
Highway
level
For normal driving. Indicator
lamps = are off.
iAnother available level is the highspeed
level that is set automatically.
The following is the approximate change in
ride height for each of the level settings:
162Driving systemsControls in detail
X164_AKB; 5; 31, en-USd2ureepe,Version: 2.11.8.12009-09-11T12:30:16+02:00 - Seite 162
Page 165 of 380
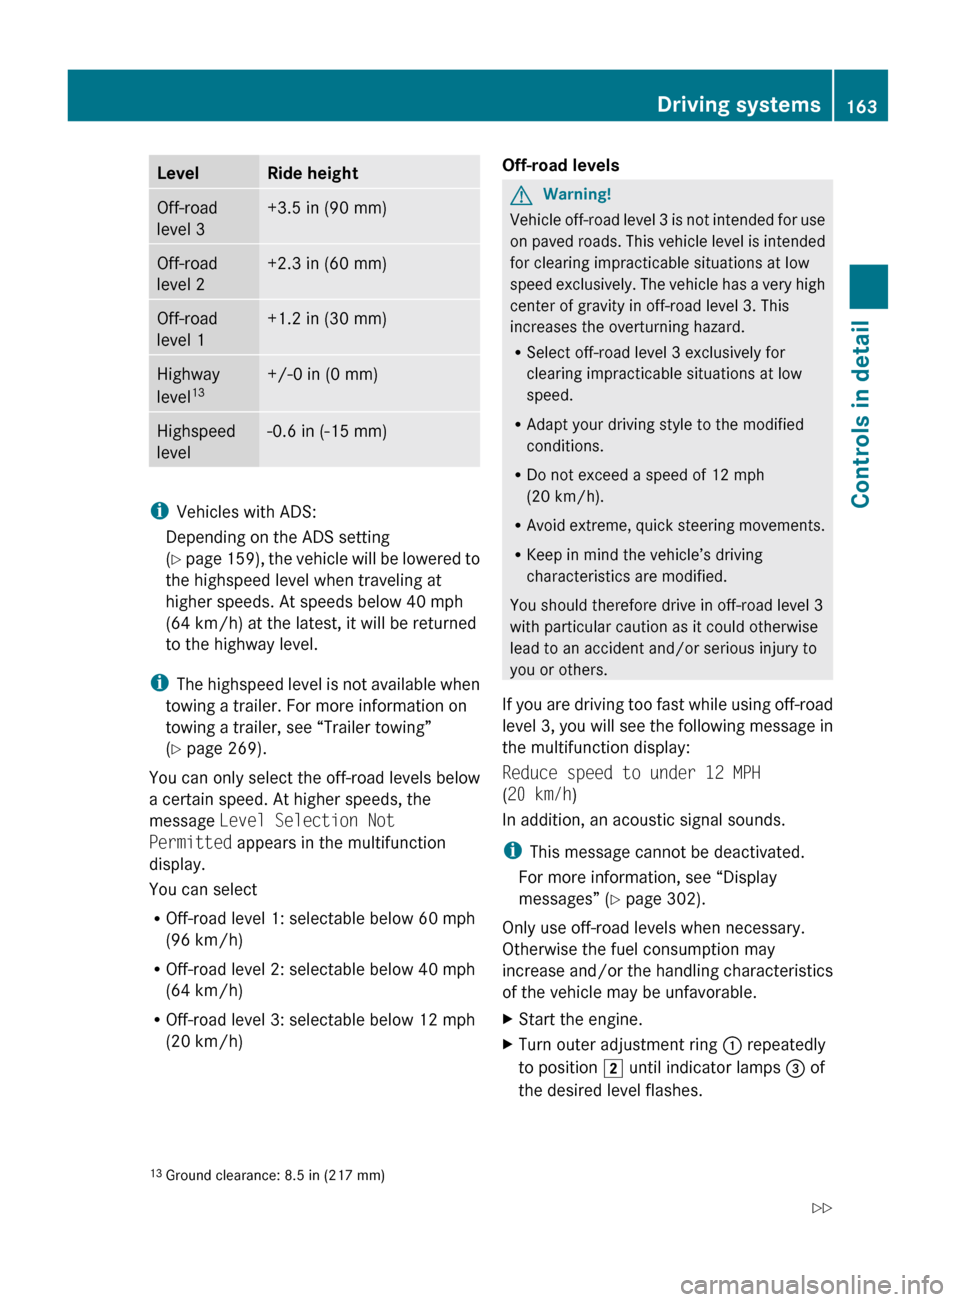
LevelRide heightOff-road
level 3+3.5 in (90 mm)Off-road
level 2+2.3 in (60 mm)Off-road
level 1+1.2 in (30 mm)Highway
level 13+/-0 in (0 mm)Highspeed
level-0.6 in (-15 mm)
i Vehicles with ADS:
Depending on the ADS setting
( Y page 159), the vehicle will be lowered to
the highspeed level when traveling at
higher speeds. At speeds below 40 mph
(64 km/h) at the latest, it will be returned
to the highway level.
i The highspeed level is not available when
towing a trailer. For more information on
towing a trailer, see “Trailer towing”
( Y page 269).
You can only select the off-road levels below
a certain speed. At higher speeds, the
message Level Selection Not
Permitted appears in the multifunction
display.
You can select
R Off-road level 1: selectable below 60 mph
(96 km/h)
R Off-road level 2: selectable below 40 mph
(64 km/h)
R Off-road level 3: selectable below 12 mph
(20 km/h)
Off-road levelsGWarning!
Vehicle off-road level 3 is not intended for use
on paved roads. This vehicle level is intended
for clearing impracticable situations at low
speed exclusively. The vehicle has a very high
center of gravity in off-road level 3. This
increases the overturning hazard.
R Select off-road level 3 exclusively for
clearing impracticable situations at low
speed.
R Adapt your driving style to the modified
conditions.
R Do not exceed a speed of 12 mph
(20 km/h).
R Avoid extreme, quick steering movements.
R Keep in mind the vehicle’s driving
characteristics are modified.
You should therefore drive in off-road level 3
with particular caution as it could otherwise
lead to an accident and/or serious injury to
you or others.
If you are driving too fast while using off-road
level 3, you will see the following message in
the multifunction display:
Reduce speed to under 12 MPH
( 20 km/h )
In addition, an acoustic signal sounds.
i This message cannot be deactivated.
For more information, see “Display
messages” ( Y page 302).
Only use off-road levels when necessary.
Otherwise the fuel consumption may
increase and/or the handling characteristics
of the vehicle may be unfavorable.
XStart the engine.XTurn outer adjustment ring : repeatedly
to position 2 until indicator lamps = of
the desired level flashes.13 Ground clearance: 8.5 in (217 mm)Driving systems163Controls in detailX164_AKB; 5; 31, en-USd2ureepe,Version: 2.11.8.12009-09-11T12:30:16+02:00 - Seite 163Z
Page 166 of 380
ROff-road level 1, lower indicator lamp
flashes
ROff-road level 2, lower and middle
indicator lamps flashes
ROff-road level 3, lower, middle and upper
indicator lamps flashes
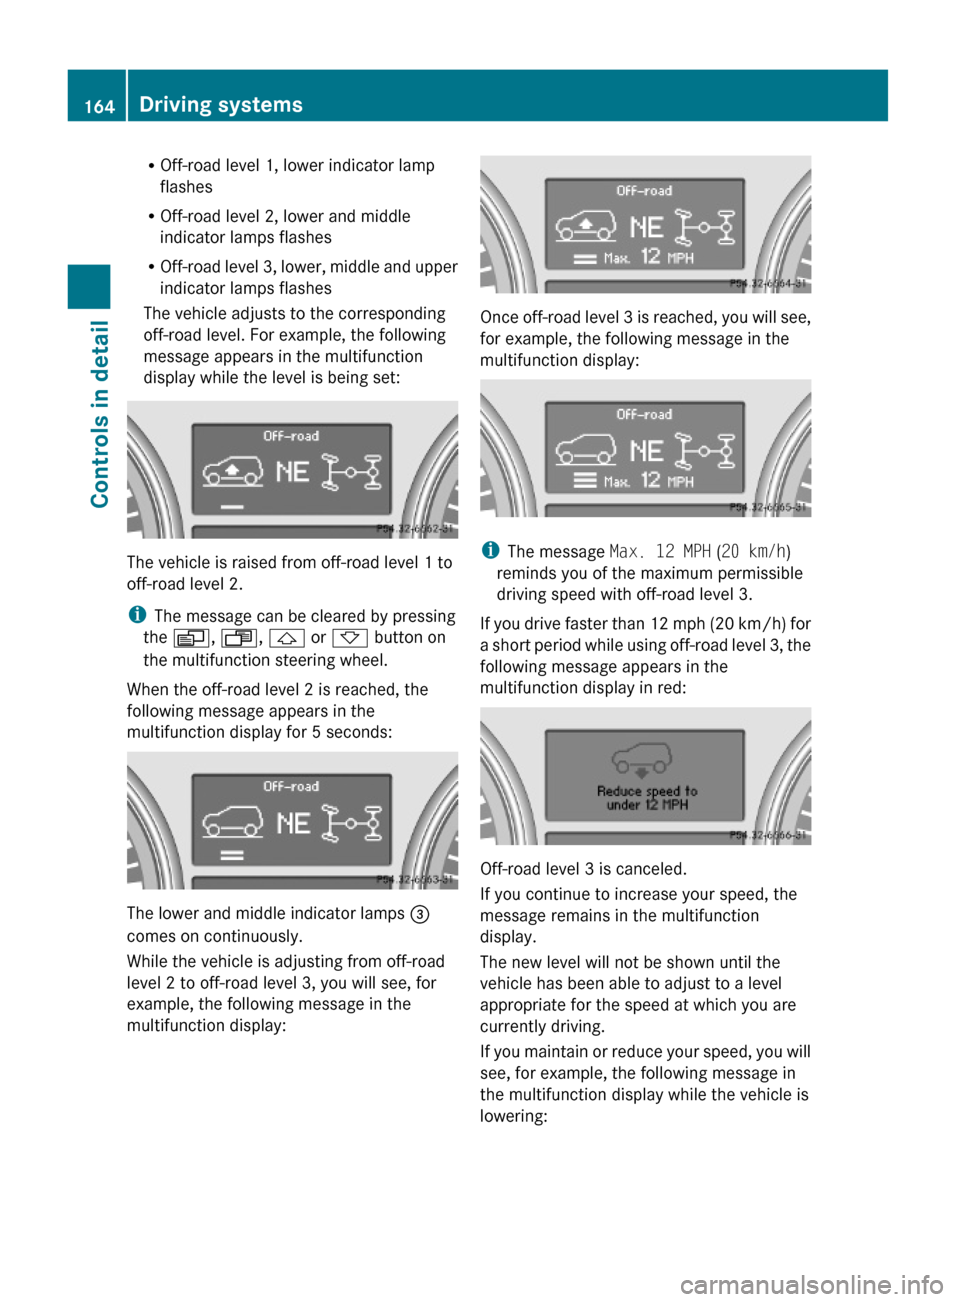
The vehicle adjusts to the corresponding
off-road level. For example, the following
message appears in the multifunction
display while the level is being set:
The vehicle is raised from off-road level 1 to
off-road level 2.
iThe message can be cleared by pressing
the V, U, & or * button on
the multifunction steering wheel.
When the off-road level 2 is reached, the
following message appears in the
multifunction display for 5 seconds:
The lower and middle indicator lamps =
comes on continuously.
While the vehicle is adjusting from off-road
level 2 to off-road level 3, you will see, for
example, the following message in the
multifunction display:
Once off-road level 3 is reached, you will see,
for example, the following message in the
multifunction display:
iThe message Max. 12 MPH (20 km/h)
reminds you of the maximum permissible
driving speed with off-road level 3.
If you drive faster than 12 mph (20 km/h) for
a short period while using off-road level 3, the
following message appears in the
multifunction display in red:
Off-road level 3 is canceled.
If you continue to increase your speed, the
message remains in the multifunction
display.
The new level will not be shown until the
vehicle has been able to adjust to a level
appropriate for the speed at which you are
currently driving.
If you maintain or reduce your speed, you will
see, for example, the following message in
the multifunction display while the vehicle is
lowering:
164Driving systemsControls in detail
X164_AKB; 5; 31, en-USd2ureepe,Version: 2.11.8.12009-09-11T12:30:16+02:00 - Seite 164
Page 167 of 380
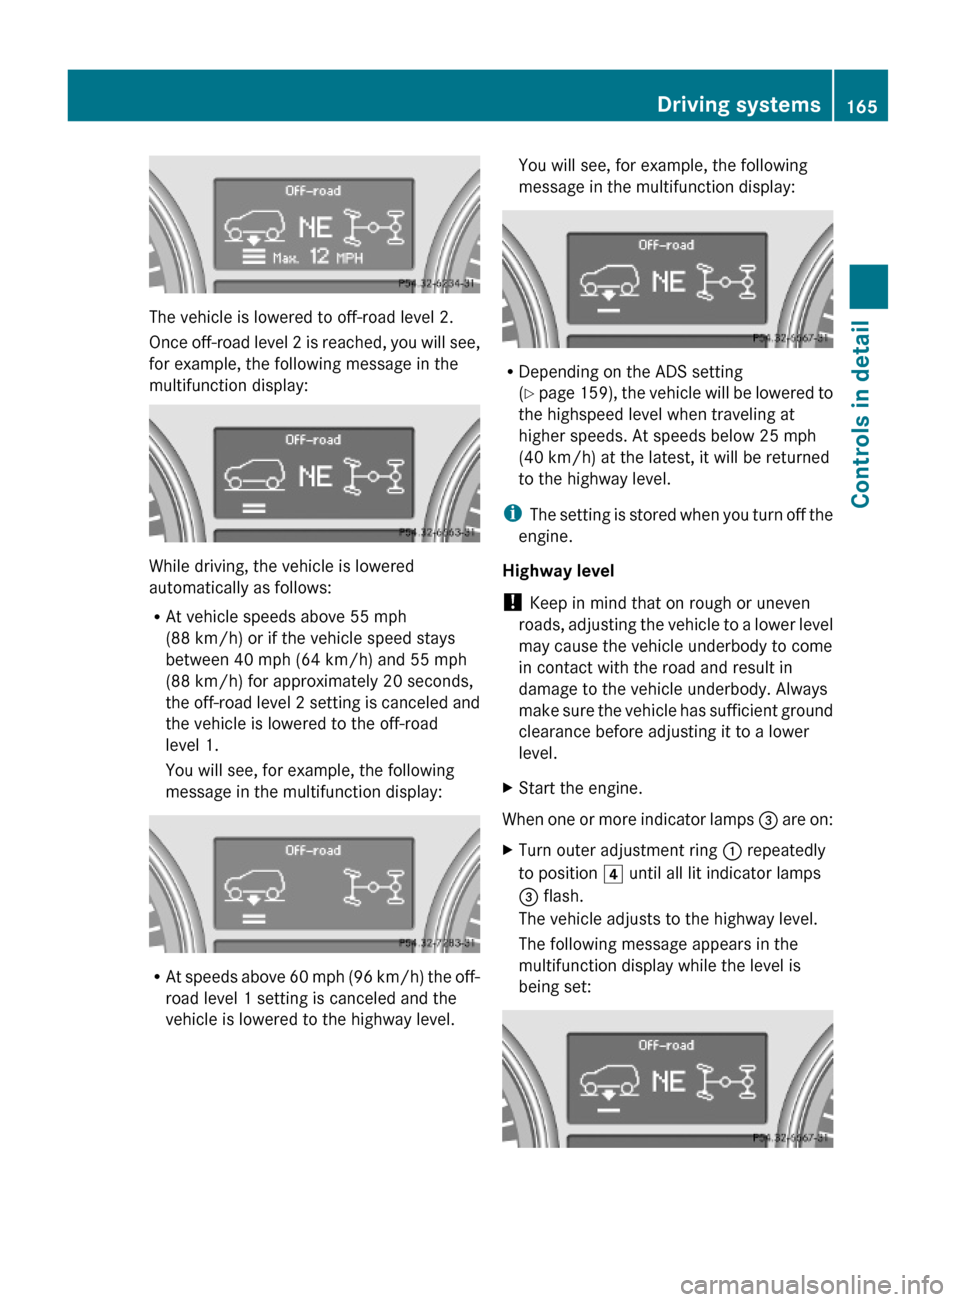
The vehicle is lowered to off-road level 2.
Once off-road level 2 is reached, you will see,
for example, the following message in the
multifunction display:
While driving, the vehicle is lowered
automatically as follows:
RAt vehicle speeds above 55 mph
(88 km/h) or if the vehicle speed stays
between 40 mph (64 km/h) and 55 mph
(88 km/h) for approximately 20 seconds,
the off-road level 2 setting is canceled and
the vehicle is lowered to the off-road
level 1.
You will see, for example, the following
message in the multifunction display:
RAt speeds above 60 mph (96 km/h) the off-
road level 1 setting is canceled and the
vehicle is lowered to the highway level.
You will see, for example, the following
message in the multifunction display:
RDepending on the ADS setting
(Y page 159), the vehicle will be lowered to
the highspeed level when traveling at
higher speeds. At speeds below 25 mph
(40 km/h) at the latest, it will be returned
to the highway level.
iThe setting is stored when you turn off the
engine.
Highway level
! Keep in mind that on rough or uneven
roads, adjusting the vehicle to a lower level
may cause the vehicle underbody to come
in contact with the road and result in
damage to the vehicle underbody. Always
make sure the vehicle has sufficient ground
clearance before adjusting it to a lower
level.
XStart the engine.
When one or more indicator lamps = are on:
XTurn outer adjustment ring : repeatedly
to position 4 until all lit indicator lamps
= flash.
The vehicle adjusts to the highway level.
The following message appears in the
multifunction display while the level is
being set:
Driving systems165Controls in detailX164_AKB; 5; 31, en-USd2ureepe,Version: 2.11.8.12009-09-11T12:30:16+02:00 - Seite 165Z
Page 168 of 380
iThe message can be cleared by pressing
the V, U, & or * button on
the multifunction steering wheel.
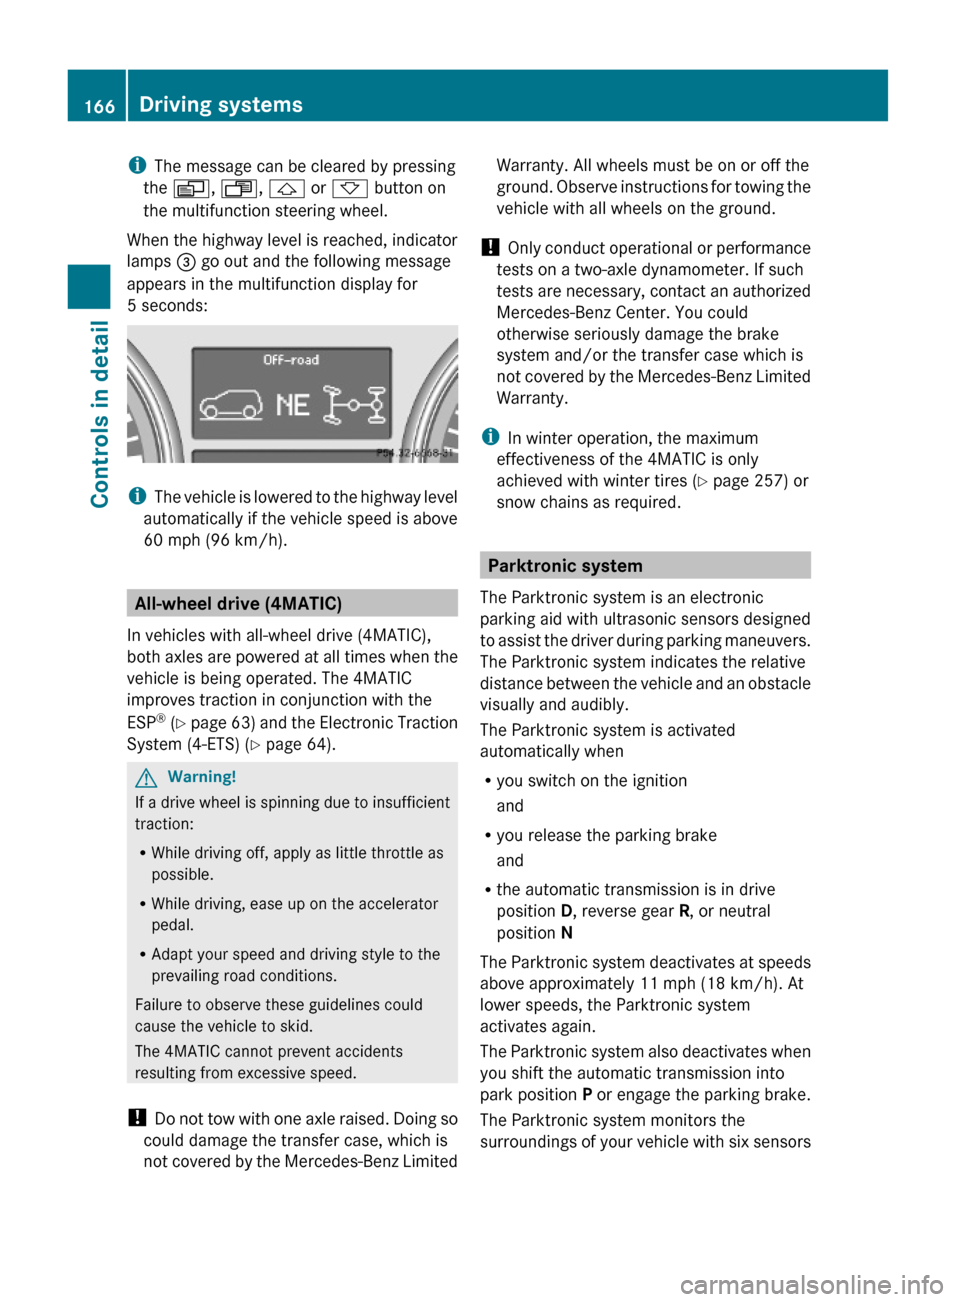
When the highway level is reached, indicator
lamps = go out and the following message
appears in the multifunction display for
5 seconds:
iThe vehicle is lowered to the highway level
automatically if the vehicle speed is above
60 mph (96 km/h).
All-wheel drive (4MATIC)
In vehicles with all-wheel drive (4MATIC),
both axles are powered at all times when the
vehicle is being operated. The 4MATIC
improves traction in conjunction with the
ESP® (Y page 63) and the Electronic Traction
System (4-ETS) (Y page 64).
GWarning!
If a drive wheel is spinning due to insufficient
traction:
RWhile driving off, apply as little throttle as
possible.
RWhile driving, ease up on the accelerator
pedal.
RAdapt your speed and driving style to the
prevailing road conditions.
Failure to observe these guidelines could
cause the vehicle to skid.
The 4MATIC cannot prevent accidents
resulting from excessive speed.
! Do not tow with one axle raised. Doing so
could damage the transfer case, which is
not covered by the Mercedes-Benz Limited
Warranty. All wheels must be on or off the
ground. Observe instructions for towing the
vehicle with all wheels on the ground.
! Only conduct operational or performance
tests on a two-axle dynamometer. If such
tests are necessary, contact an authorized
Mercedes-Benz Center. You could
otherwise seriously damage the brake
system and/or the transfer case which is
not covered by the Mercedes-Benz Limited
Warranty.
iIn winter operation, the maximum
effectiveness of the 4MATIC is only
achieved with winter tires (Y page 257) or
snow chains as required.
Parktronic system
The Parktronic system is an electronic
parking aid with ultrasonic sensors designed
to assist the driver during parking maneuvers.
The Parktronic system indicates the relative
distance between the vehicle and an obstacle
visually and audibly.
The Parktronic system is activated
automatically when
Ryou switch on the ignition
and
Ryou release the parking brake
and
Rthe automatic transmission is in drive
position D, reverse gear R, or neutral
position N
The Parktronic system deactivates at speeds
above approximately 11 mph (18 km/h). At
lower speeds, the Parktronic system
activates again.
The Parktronic system also deactivates when
you shift the automatic transmission into
park position P or engage the parking brake.
The Parktronic system monitors the
surroundings of your vehicle with six sensors
166Driving systemsControls in detail
X164_AKB; 5; 31, en-USd2ureepe,Version: 2.11.8.12009-09-11T12:30:16+02:00 - Seite 166
Page 169 of 380
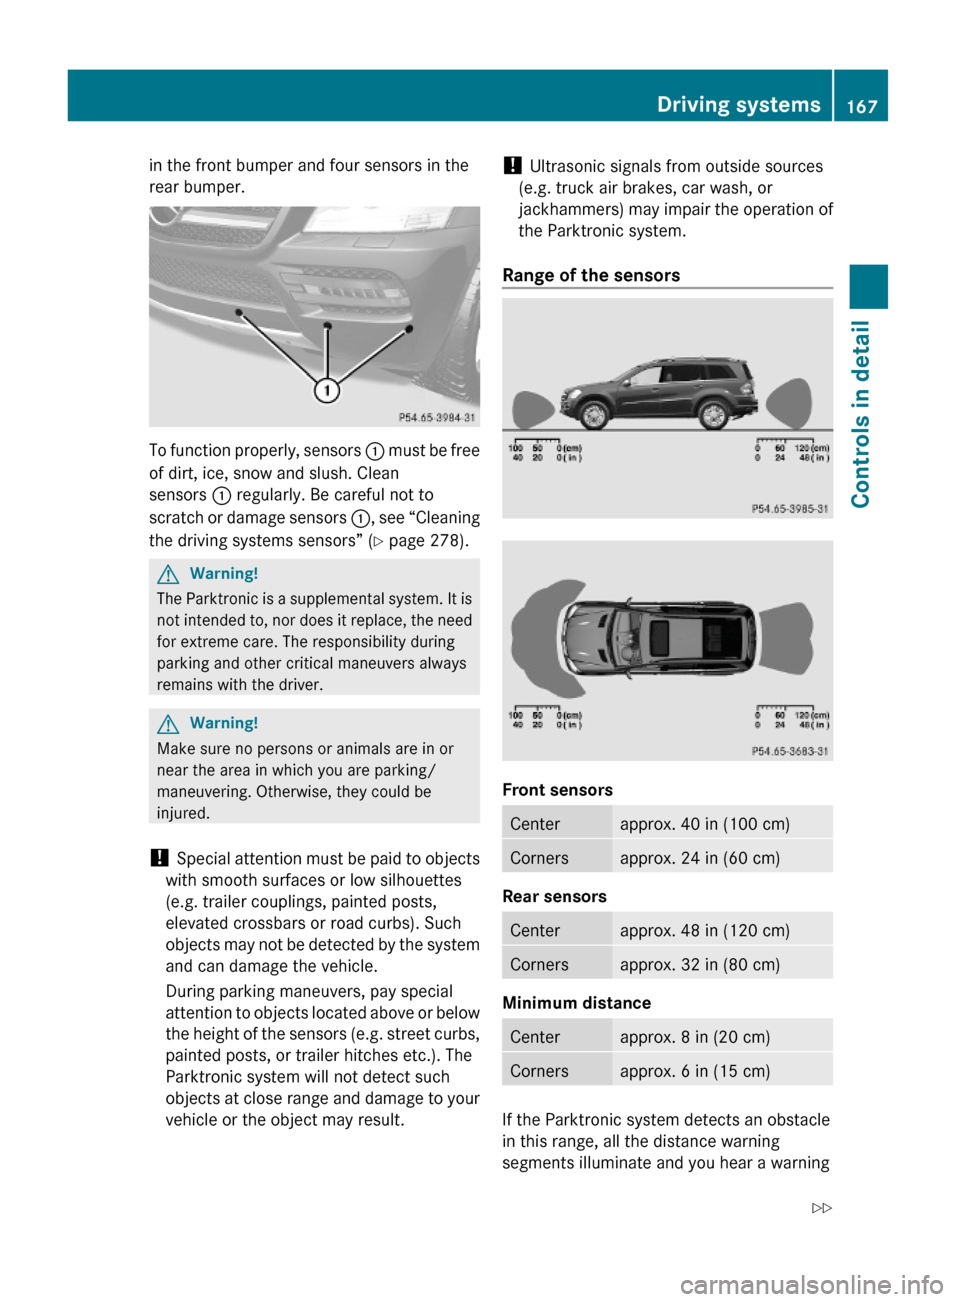
in the front bumper and four sensors in the
rear bumper.
To function properly, sensors : must be free
of dirt, ice, snow and slush. Clean
sensors : regularly. Be careful not to
scratch or damage sensors :, see “Cleaning
the driving systems sensors” (Y page 278).
GWarning!
The Parktronic is a supplemental system. It is
not intended to, nor does it replace, the need
for extreme care. The responsibility during
parking and other critical maneuvers always
remains with the driver.
GWarning!
Make sure no persons or animals are in or
near the area in which you are parking/
maneuvering. Otherwise, they could be
injured.
! Special attention must be paid to objects
with smooth surfaces or low silhouettes
(e.g. trailer couplings, painted posts,
elevated crossbars or road curbs). Such
objects may not be detected by the system
and can damage the vehicle.
During parking maneuvers, pay special
attention to objects located above or below
the height of the sensors (e.g. street curbs,
painted posts, or trailer hitches etc.). The
Parktronic system will not detect such
objects at close range and damage to your
vehicle or the object may result.
! Ultrasonic signals from outside sources
(e.g. truck air brakes, car wash, or
jackhammers) may impair the operation of
the Parktronic system.
Range of the sensors
Front sensors
Centerapprox. 40 in (100 cm)Cornersapprox. 24 in (60 cm)
Rear sensors
Centerapprox. 48 in (120 cm)Cornersapprox. 32 in (80 cm)
Minimum distance
Centerapprox. 8 in (20 cm)Cornersapprox. 6 in (15 cm)
If the Parktronic system detects an obstacle
in this range, all the distance warning
segments illuminate and you hear a warning
Driving systems167Controls in detailX164_AKB; 5; 31, en-USd2ureepe,Version: 2.11.8.12009-09-11T12:30:16+02:00 - Seite 167Z
Page 170 of 380

signal. If the obstacle is closer than the
minimum distance, the actual distance may
no longer be indicated by the Parktronic
system.
Warning indicators
Visual signals indicate the relative distance
between the sensors and an obstacle.
Front area warning indicators
Rear area warning indicators
Each warning indicator is divided into five
yellow and two red distance segments for left
side : and right side ; of the vehicle. The
Parktronic system is ready to measure when
the yellow readiness indicators = are
illuminated.
The current transmission position determines
which warning indicator will be activated.
Current
transmission
position
Warning indicatorDFront area activatedR or NFront and rear area
activated
As your vehicle approaches an object, one or
more distance segments will illuminate,
depending on the distance. When the seventh
distance segment illuminates, you have
reached the minimum distance.
RFront area: An intermittent acoustic
warning lasting a maximum of 2 seconds
will sound as the first red distance segment
illuminates. A constant acoustic warning
lasting a maximum of 2 seconds will sound
for the second red distance segment. The
signal is canceled when the automatic
transmission is shifted into park
position P or the parking brake is engaged.
RRear area: An intermittent acoustic
warning lasting a maximum of 2 seconds
will sound as the first red distance segment
illuminates. A constant acoustic warning
lasting a maximum of 2 seconds will sound
for the second red distance segment. The
signal is canceled when the automatic
transmission is shifted into drive
position D, or park position P, or the
parking brake is engaged.
Switching the Parktronic system on/
off
The Parktronic system switches on
automatically when the ignition is switched
on.
168Driving systemsControls in detail
X164_AKB; 5; 31, en-USd2ureepe,Version: 2.11.8.12009-09-11T12:30:16+02:00 - Seite 168