fuel cap MERCEDES-BENZ GLA-Class 2015 X156 Owner's Manual
[x] Cancel search | Manufacturer: MERCEDES-BENZ, Model Year: 2015, Model line: GLA-Class, Model: MERCEDES-BENZ GLA-Class 2015 X156Pages: 374, PDF Size: 6.85 MB
Page 13 of 374
F
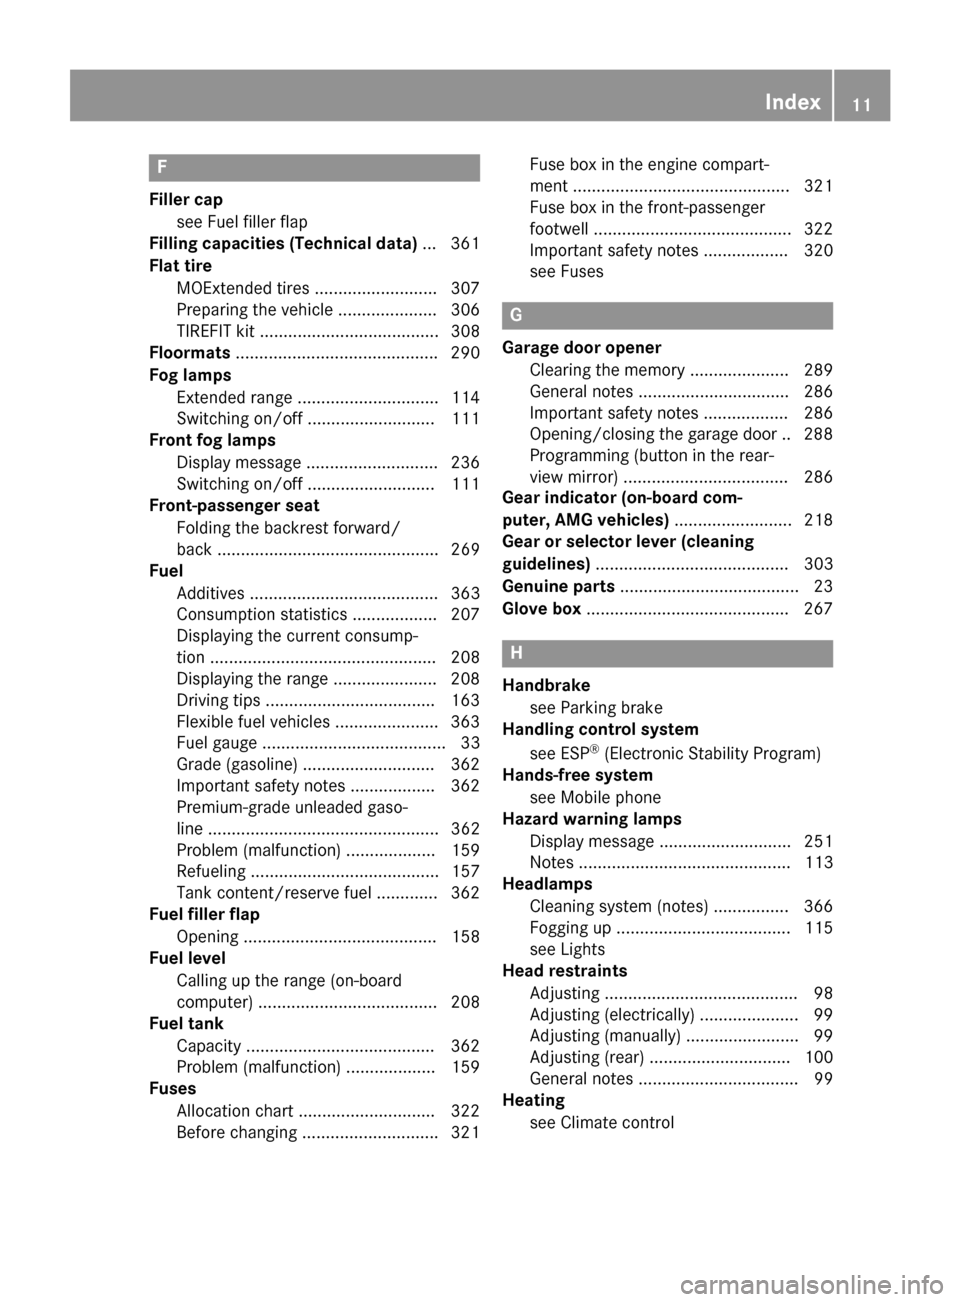
Filler cap see Fuel filler flap
Filling capacities (Technical data) ...3 61
Flat tire MOExtended tires .......................... 307
Preparing the vehicle ..................... 306
TIREFIT kit ...................................... 308
Floormats .......................................... .290
Fog lamps Extended range .............................. 114
Switching on/off ........................... 111
Front fog lamps
Display message ............................ 236
Switching on/off ........................... 111
Front-passenger seat
Folding the backrest forward/
back ............................................... 269
Fuel
Additives ........................................ 363
Consumption statistics .................. 207
Displaying the current consump-
tion ................................................ 208
Displaying the range ..................... .208
Driving tips ................................... .163
Flexible fuel vehicles ..................... .363
Fuel gauge ....................................... 33
Grade (gasoline) ............................ 362
Important safety notes .................. 362
Premium-grade unleaded gaso-
line ................................................. 362
Problem (malfunction) ................... 159
Refueling ........................................ 157
Tank content/reserve fuel ............. 362
Fuel filler flap
Opening ......................................... 158
Fuel level
Calling up the range (on-board
computer) ...................................... 208
Fuel tank
Capacity ........................................ 362
Problem (malfunction) ................... 159
Fuses
Allocation chart ............................ .322
Before changing ............................ .321 Fuse box in the engine compart-
ment .............................................. 321
Fuse box in the front-passenger
footwell .......................................... 322
Important safety notes .................. 320
see Fuses G
Garage door opener Clearing the memory ..................... 289
General notes ................................ 286
Important safety notes .................. 286
Opening/closing the garage door .. 288
Programming (button in the rear-
view mirror) ................................... 286
Gear indicator (on-board com-
puter, AMG vehicles) ......................... 218
Gear or selector lever (cleaning
guidelines) ......................................... 303
Genuine parts ...................................... 23
Glove box .......................................... .267 H
Handbrake see Parking brake
Handling control system
see ESP ®
(Electronic Stability Program)
Hands-free system
see Mobile phone
Hazard warning lamps
Display message ............................ 251
Notes ............................................. 113
Headlamps
Cleaning system (notes) ................ 366
Fogging up ..................................... 115
see Lights
Head restraints
Adjusting ......................................... 98
Adjusting (electrically) ..................... 99
Adjusting (manually) ........................ 99
Adjusting (rear) .............................. 100
General notes .................................. 99
Heating
see Climate control Index
11
Page 160 of 374
!
Overfilling the fuel tank could damage the
fuel system.
! Take care not to spill any fuel on painted
surfaces. You could otherwise damage the
paintwork.
! Use a filter when refueling from a fuel can.
Otherwise, the fuel lines and/or injection
system could be blocked by particles from
the fuel can.
Do not get into the vehicle again during the
refueling process. Otherwise, electrostatic
charge could build up again.
If you overfill the fuel tank, fuel could spray
out when the fuel pump nozzle is removed.
For further information on fuel and fuel quality (Y page 362). Refueling
General information The fuel filler flap is unlocked or locked auto-
matically when you open or close the vehicle
with the SmartKey.
The position of the fuel filler cap is displayed
00D4 in the instrument cluster. The arrow on
the filling pump indicates the side of the vehi-
cle.
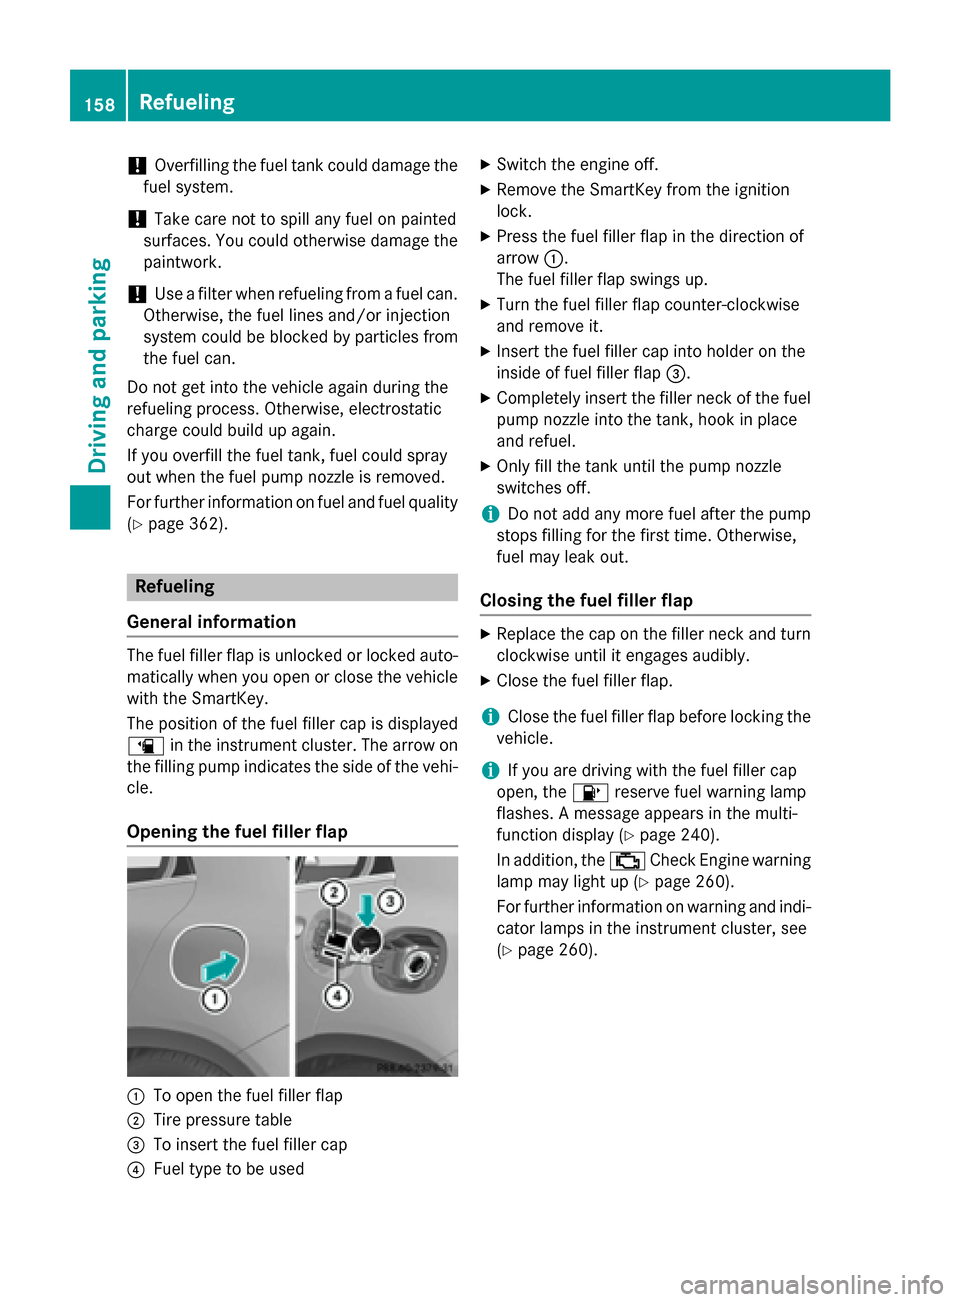
Opening the fuel filler flap 0043
To open the fuel filler flap
0044 Tire pressure table
0087 To insert the fuel filler cap
0085 Fuel type to be used X
Switch the engine off.
X Remove the SmartKey from the ignition
lock.
X Press the fuel filler flap in the direction of
arrow 0043.
The fuel filler flap swings up.
X Turn the fuel filler flap counter-clockwise
and remove it.
X Insert the fuel filler cap into holder on the
inside of fuel filler flap 0087.
X Completely insert the filler neck of the fuel
pump nozzle into the tank, hook in place
and refuel.
X Only fill the tank until the pump nozzle
switches off.
i Do not add any more fuel after the pump
stops filling for the first time. Otherwise,
fuel may leak out.
Closing the fuel filler flap X
Replace the cap on the filler neck and turn
clockwise until it engages audibly.
X Close the fuel filler flap.
i Close the fuel filler flap before locking the
vehicle.
i If you are driving with the fuel filler cap
open, the 00B6reserve fuel warning lamp
flashes. A message appears in the multi-
function display (Y page 240).
In addition, the 00B9Check Engine warning
lamp may light up (Y page 260).
For further information on warning and indi- cator lamps in the instrument cluster, see
(Y page 260). 158
RefuelingDriving and parking
Page 243 of 374
Display messages
Possible causes/consequences and
0050
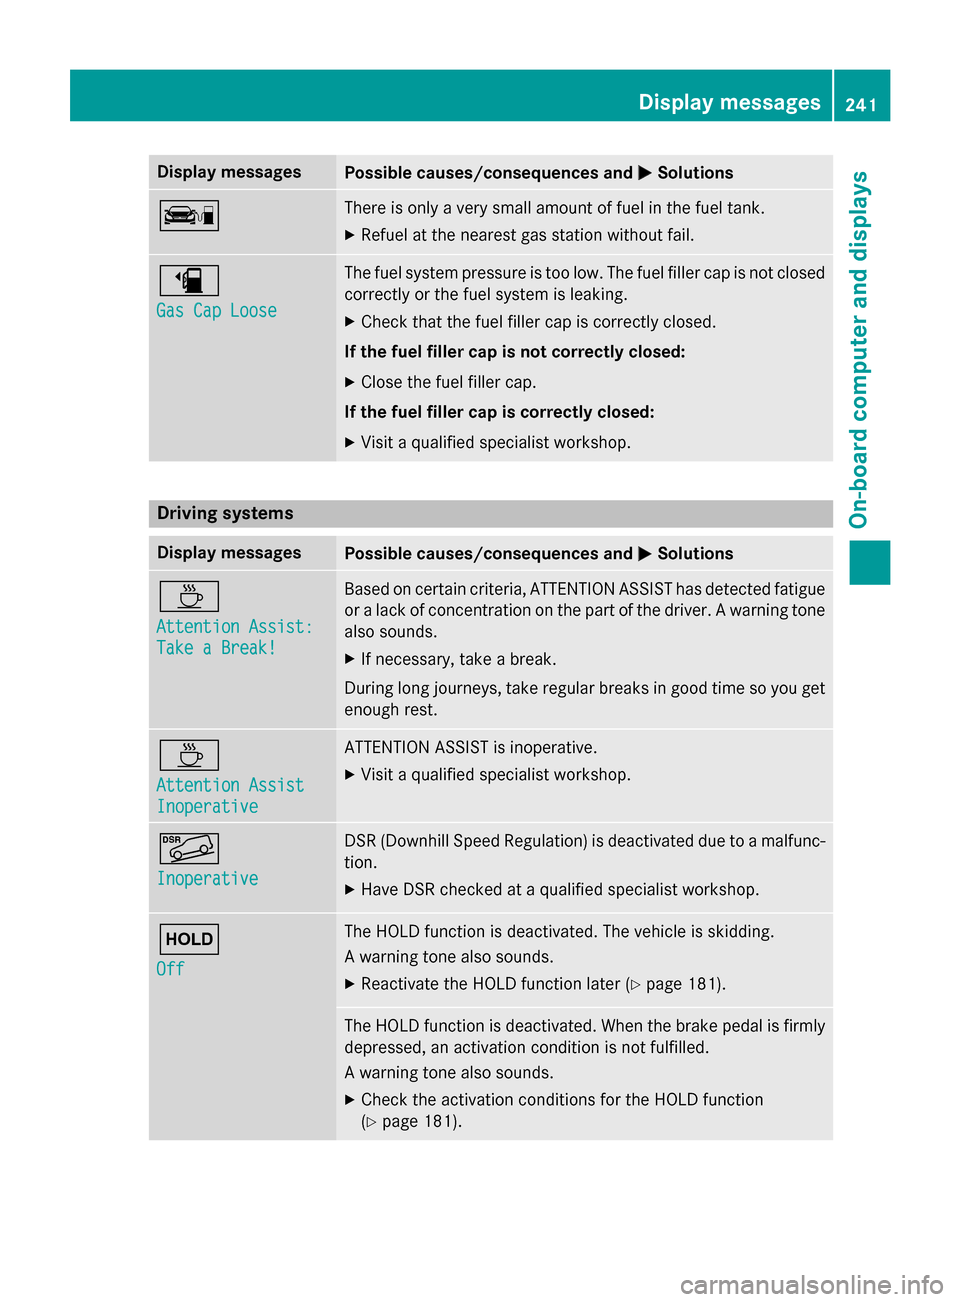
0050Solutions 00D5 There is only a very small amount of fuel in the fuel tank.
X Refuel at the nearest gas station without fail. 00D4
Gas Cap Loose Gas Cap Loose The fuel system pressure is too low. The fuel filler cap is not closed
correctly or the fuel system is leaking.
X Check that the fuel filler cap is correctly closed.
If the fuel filler cap is not correctly closed: X Close the fuel filler cap.
If the fuel filler cap is correctly closed: X Visit a qualified specialist workshop. Driving systems
Display messages
Possible causes/consequences and
0050
0050Solutions 00AD
Attention Assist: Attention Assist:
Take a Break! Take a Break! Based on certain criteria, ATTENTION ASSIST has detected fatigue
or a lack of concentration on the part of the driver. A warning tone also sounds.
X If necessary, take a break.
During long journeys, take regular breaks in good time so you get enough rest. 00AD
Attention Assist Attention Assist
Inoperative Inoperative ATTENTION ASSIST is inoperative.
X Visit a qualified specialist workshop. 00C6
Inoperative Inoperative DSR (Downhill Speed Regulation) is deactivated due to a malfunc-
tion.
X Have DSR checked at a qualified specialist workshop. 00D9
Off Off The HOLD function is deactivated. The vehicle is skidding.
A warning tone also sounds.
X Reactivate the HOLD function later (Y page 181). The HOLD function is deactivated. When the brake pedal is firmly
depressed, an activation condition is not fulfilled.
A warning tone also sounds.
X Check the activation conditions for the HOLD function
(Y page 181). Display
messages
241On-board computer and displays Z
Page 262 of 374
Engine
Problem
Possible causes/consequences and
0050
0050Solutions 00B9
The yellow Check
Engine warning lamp
lights up while the
engine is running.
There may be a malfunction, for example:
R in the engine management
R in the fuel injection system
R in the exhaust system
R in the ignition system
R in the fuel system
The emission limit values may be exceeded and the engine may be
in emergency mode.
X Have the vehicle checked as soon as possible at a qualified
specialist workshop.
i In some states, you must immediately visit a qualified special-
ist workshop as soon as the yellow Check Engine warning lamp
lights up. This depends on the locally applicable legal require-
ments. If in doubt, check whether such legal regulations apply in the state in which you are currently driving. 00D4
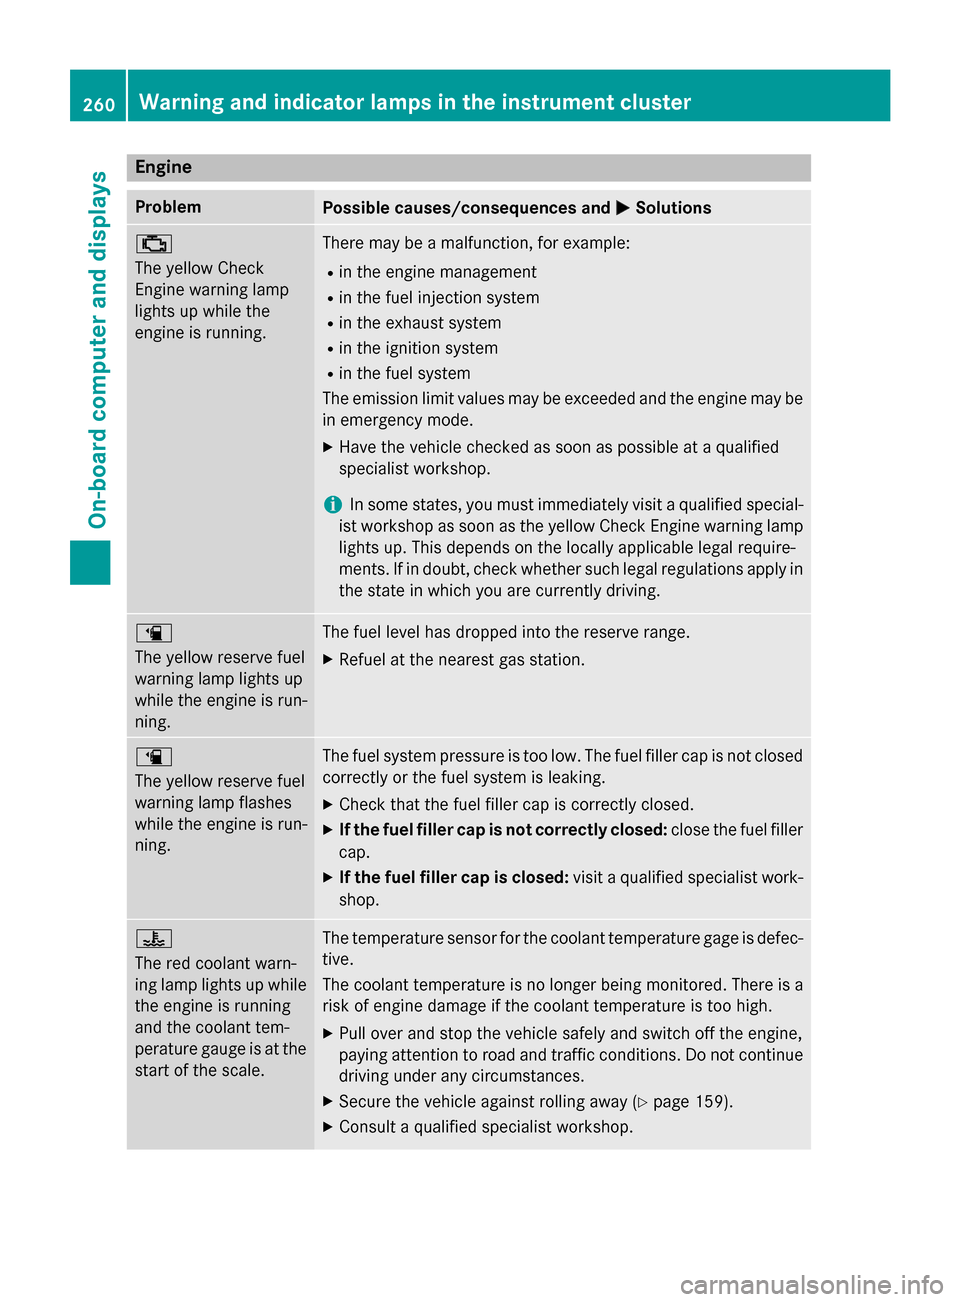
The yellow reserve fuel
warning lamp lights up
while the engine is run-
ning.
The fuel level has dropped into the reserve range.
X Refuel at the nearest gas station. 00D4
The yellow reserve fuel
warning lamp flashes
while the engine is run-
ning.
The fuel system pressure is too low. The fuel filler cap is not closed
correctly or the fuel system is leaking.
X Check that the fuel filler cap is correctly closed.
X If the fuel filler cap is not correctly closed: close the fuel filler
cap.
X If the fuel filler cap is closed: visit a qualified specialist work-
shop. 00AC
The red coolant warn-
ing lamp lights up while
the engine is running
and the coolant tem-
perature gauge is at the start of the scale. The temperature sensor for the coolant temperature gage is defec-
tive.
The coolant temperature is no longer being monitored. There is a risk of engine damage if the coolant temperature is too high.
X Pull over and stop the vehicle safely and switch off the engine,
paying attention to road and traffic conditions. Do not continue
driving under any circumstances.
X Secure the vehicle against rolling away (Y page 159).
X Consult a qualified specialist workshop. 260
Warning and indicator lamps in the instrument clusterOn-board computer and displays
Page 317 of 374
Jump-starting
For the jump-starting procedure, use only the jump-starting connection point, consisting of a positive terminal and a ground point, in the engine compartment. G
WARNING
Battery acid is caustic. There is a risk of injury.
Avoid contact with the skin, eyes or clothing. Do not inhale any battery gases. Do not lean over the battery. Keep children away from batteries. Wash battery acid immediately with water and seek
medical attention. G
WARNING
During charging and jump-starting, explosive gases can escape from the battery. There is a risk of an explosion.
Particularly avoid fire, open flames, creating sparks and smoking. Ensure there is sufficient ven-
tilation while charging and jump-starting. Do not lean over a battery. G
WARNING
During the charging process, a battery produces hydrogen gas. If a short circuit occurs or sparks
are created, the hydrogen gas can ignite. There is a risk of an explosion.
R Make sure that the positive terminal of a connected battery does not come into contact with
vehicle parts.
R Never place metal objects or tools on a battery.
R It is important that you observe the described order of the battery terminals when connecting
and disconnecting a battery.
R When jump-starting, make sure that the battery poles with identical polarity are connected.
R It is particularly important to observe the described order when connecting and disconnecting
the jumper cables.
R Never connect or disconnect the battery terminals while the engine is running. G
WARNING
A discharged battery can freeze at temperatures below freezing point. When jump-starting the
vehicle or charging the battery, gases can escape from the battery. There is a risk of an explosion.
Allow the frozen battery to thaw out before charging it or jump-starting.
! Avoid repeated and lengthy starting attempts. Otherwise, the catalytic converter could be
damaged by the non-combusted fuel.
If, at low temperatures, the indicator lamps/warning lamps in the instrument cluster do not
light up, it is highly likely that the discharged battery has frozen. In this case you may neither
jump-start the vehicle nor charge the battery. The service life of a thawed-out battery may be
shorter. The starting characteristics can be impaired, particularly at low temperatures. Have
the thawed-out battery checked at a qualified specialist workshop. Jump-starting
315Breakdown assistance Z
Page 333 of 374
Information on air pressure for the tires on
your vehicle can be found:
R on the vehicle's Tire and Loading Informa-
tion placard on the B-pillar
R on the tire pressure label on the fuel filler
flap
R in the "Tire pressure information" section
Checking tire pressures manually To determine and set the correct tire pres-
sure, proceed as follows:
X
Remove the valve cap of the tire that is to
be checked.
X Press the tire pressure gauge securely onto
the valve.
X Read the tire pressure and compare it with
the recommended value on the Tire and
Loading Information placard on the B-pillar on the driver's side of your vehicle.
X If necessary, increase the tire pressure to
the recommended value (Y page 328).
X If the tire pressure is too high, release air by
pressing down the metal pin in the valve
using the tip of a pen, for example. Then,
check the tire pressure again using the tire
pressure gauge.
X Screw the valve cap onto the valve.
X Repeat these steps for the other tires. Tire pressure loss warning system
(Canada only)
General notes While the vehicle is in motion, the tire pres-
sure loss warning system monitors the set
tire pressure using the rotational speed of the wheels. This enables the system to detect
significant pressure loss in a tire. If the speed
of rotation of a wheel changes as a result of a loss of pressure, a corresponding warning
message will appear in the multifunction dis- play. You can recognize the tire pressure loss warn-
ing in the multifunction display in the Serv.
Serv.
menu, by the Run RunFlat
Flat Indicator
Indicator Active
Active
Press 'OK' to Restart
Press 'OK' to Restart message. Further
information on the message display can be
found under "Restarting the tire pressure loss
warning system" (Y page 331).
Important safety notes The tire pressure warning system does not
warn you of an incorrectly set tire pressure.
Observe the notes on the recommended tire
pressure (Y page 328).
The tire pressure loss warning does not
replace the need to regularly check the tire
pressure. An even loss of pressure on several tires at the same time cannot be detected by
the tire pressure loss warning system.
The tire pressure monitor is not able to warn
you of a sudden loss of pressure, e.g. if the
tire is penetrated by a foreign object. In the
event of a sudden loss of pressure, bring the
vehicle to a halt by braking carefully. Avoid
abrupt steering maneuvers.
The function of the tire pressure loss warning system is limited or delayed if:
R snow chains are mounted on your vehicle's
tires.
R road conditions are wintry.
R you are driving on sand or gravel.
R you adopt a very sporty driving style (cor-
nering at high speeds or driving with high
rates of acceleration).
R you are driving with a heavy load (in the
vehicle or on the roof).
Restarting the tire pressure loss warn-
ing system Restart the tire pressure loss warning system
if you have:
R changed the tire pressure
R changed the wheels or tires
R mounted new wheels or tires Tire pressure
331Wheels and tires Z
Page 348 of 374
Speed rating
The speed rating is part of the tire identifica-
tion. It specifies the speed range for which the tire is approved. GVW (Gross Vehicle Weight)
The gross vehicle weight includes the weight
of the vehicle including fuel, tools, the spare
wheel, accessories installed, occupants, lug-
gage and the drawbar noseweight, if applica- ble. The gross vehicle weight must not exceed
the gross vehicle weight rating GVWR as
specified on the vehicle identification plate on the B-pillar on the driver's side. GVWR (Gross Vehicle Weight Rating)
The GVWR is the maximum permissible gross weight of a fully loaded vehicle (the weight of the vehicle including all accessories, occu-
pants, fuel, luggage and the drawbar nose-
weight, if applicable). The gross vehicle
weight rating is specified on the vehicle iden-
tification plate on the B-pillar on the driver's
side. Maximum loaded vehicle weight
The maximum weight is the sum of:
R the curb weight of the vehicle
R the weight of the accessories
R the load limit
R the weight of the factory installed optional
equipment Kilopascal (kPa)
Metric unit for tire pressure. 6.9 kPa corre-
sponds to 1 psi. Another unit for tire pressure
is bar. 100 kilopascal (kPa) is the equivalent
of 1 bar. Load index
In addition to the load-bearing index, the load
index may also be imprinted on the sidewall of the tire. This specifies the load-bearing capa- city more precisely. Curb weight
The weight of a vehicle with standard equip-
ment including the maximum capacity of fuel, oil and coolant. It also includes the air-condi- tioning system and optional equipment if
these are installed in the vehicle, but does not
include passengers or luggage. Maximum load rating
The maximum load rating in kilograms or
pounds is the maximum weight for which a
tire is approved. Maximum permissible tire pressure
Maximum permissible tire pressure for one
tire. Maximum load on one tire
Maximum load on one tire. This is calculated
by dividing the maximum axle load of one axle by two. PSI (pounds per square inch)
A standard unit of measure for tire pressure. Aspect ratio
Relationship between tire height and tire
width in percent. 346
Definition of terms for tires and loadingWheels and tires
Page 363 of 374
VIN
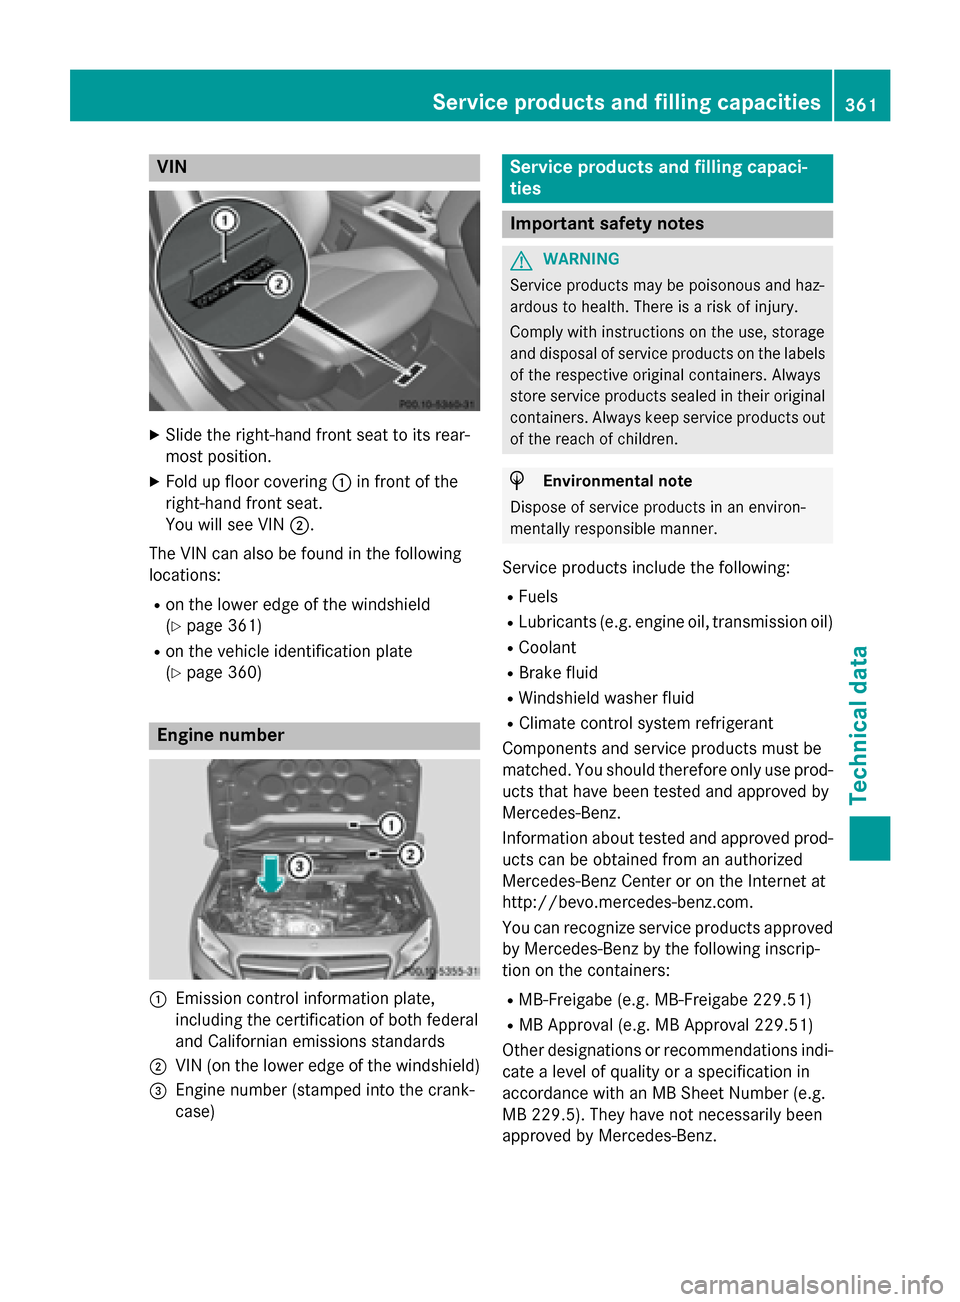
X
Slide the right-hand front seat to its rear-
most position.
X Fold up floor covering 0043in front of the
right-hand front seat.
You will see VIN 0044.
The VIN can also be found in the following
locations:
R on the lower edge of the windshield
(Y page 361)
R on the vehicle identification plate
(Y page 360) Engine number
0043
Emission control information plate,
including the certification of both federal
and Californian emissions standards
0044 VIN (on the lower edge of the windshield)
0087 Engine number (stamped into the crank-
case) Service products and filling capaci-
ties
Important safety notes
G
WARNING
Service products may be poisonous and haz-
ardous to health. There is a risk of injury.
Comply with instructions on the use, storage
and disposal of service products on the labels of the respective original containers. Always
store service products sealed in their original containers. Always keep service products out
of the reach of children. H
Environmental note
Dispose of service products in an environ-
mentally responsible manner.
Service products include the following:
R Fuels
R Lubricants (e.g. engine oil, transmission oil)
R Coolant
R Brake fluid
R Windshield washer fluid
R Climate control system refrigerant
Components and service products must be
matched. You should therefore only use prod- ucts that have been tested and approved by
Mercedes-Benz.
Information about tested and approved prod- ucts can be obtained from an authorized
Mercedes-Benz Center or on the Internet at
http://bevo.mercedes-benz.com.
You can recognize service products approved
by Mercedes-Benz by the following inscrip-
tion on the containers:
R MB-Freigabe (e.g. MB-Freigabe 229.51)
R MB Approval (e.g. MB Approval 229.51)
Other designations or recommendations indi- cate a level of quality or a specification in
accordance with an MB Sheet Number (e.g.
MB 229.5). They have not necessarily been
approved by Mercedes-Benz. Service products and filling capacities
361Technical data Z
Page 364 of 374
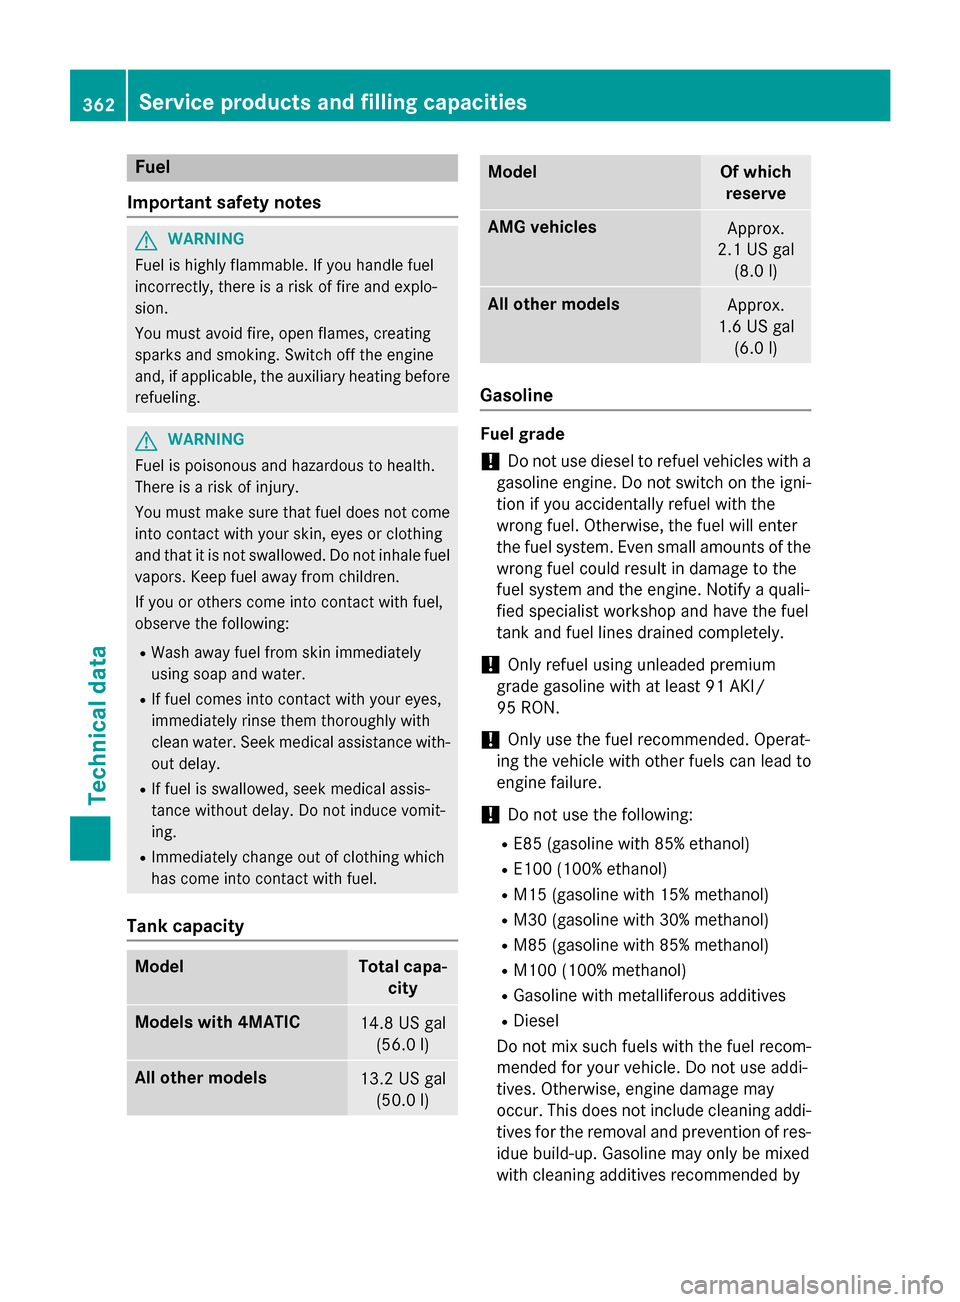
Fuel
Important safety notes G
WARNING
Fuel is highly flammable. If you handle fuel
incorrectly, there is a risk of fire and explo-
sion.
You must avoid fire, open flames, creating
sparks and smoking. Switch off the engine
and, if applicable, the auxiliary heating before refueling. G
WARNING
Fuel is poisonous and hazardous to health.
There is a risk of injury.
You must make sure that fuel does not come into contact with your skin, eyes or clothing
and that it is not swallowed. Do not inhale fuel
vapors. Keep fuel away from children.
If you or others come into contact with fuel,
observe the following:
R Wash away fuel from skin immediately
using soap and water.
R If fuel comes into contact with your eyes,
immediately rinse them thoroughly with
clean water. Seek medical assistance with-
out delay.
R If fuel is swallowed, seek medical assis-
tance without delay. Do not induce vomit-
ing.
R Immediately change out of clothing which
has come into contact with fuel.
Tank capacity Model Total capa-
city Models with 4MATIC
14.8 US gal
(56.0 l) All other models
13.2 US gal
(50.0 l) Model Of which
reserve AMG vehicles
Approx.
2.1 US gal (8.0 l) All other models
Approx.
1.6 US gal (6.0 l) Gasoline
Fuel grade
!
Do not use diesel to refuel vehicles with a
gasoline engine. Do not switch on the igni- tion if you accidentally refuel with the
wrong fuel. Otherwise, the fuel will enter
the fuel system. Even small amounts of the
wrong fuel could result in damage to the
fuel system and the engine. Notify a quali-
fied specialist workshop and have the fuel
tank and fuel lines drained completely.
! Only refuel using unleaded premium
grade gasoline with at least 91 AK I/
95 RON.
! Only use the fuel recommended. Operat-
ing the vehicle with other fuels can lead to
engine failure.
! Do not use the following:
R E85 (gasoline with 85% ethanol)
R E100 (100% ethanol)
R M15 (gasoline with 15% methanol)
R M30 (gasoline with 30% methanol)
R M85 (gasoline with 85% methanol)
R M100 (100% methanol)
R Gasoline with metalliferous additives
R Diesel
Do not mix such fuels with the fuel recom-
mended for your vehicle. Do not use addi-
tives. Otherwise, engine damage may
occur. This does not include cleaning addi-
tives for the removal and prevention of res- idue build-up. Gasoline may only be mixed
with cleaning additives recommended by 362
Service products and filling capacitiesTechnical data
Page 365 of 374
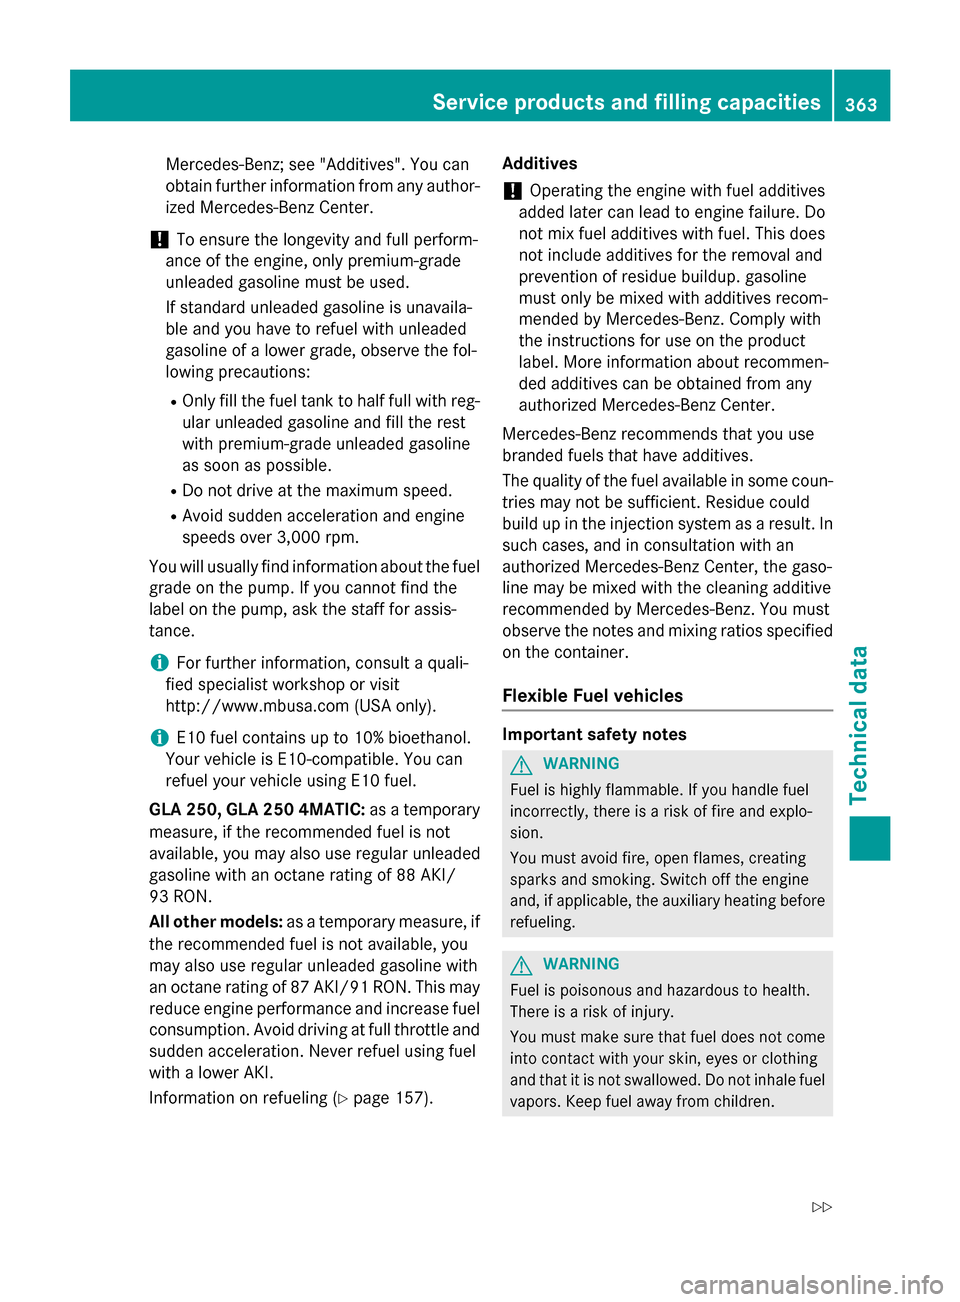
Mercedes-Benz; see "Additives". You can
obtain further information from any author- ized Mercedes-Benz Center.
! To ensure the longevity and full perform-
ance of the engine, only premium-grade
unleaded gasoline must be used.
If standard unleaded gasoline is unavaila-
ble and you have to refuel with unleaded
gasoline of a lower grade, observe the fol-
lowing precautions:
R Only fill the fuel tank to half full with reg-
ular unleaded gasoline and fill the rest
with premium-grade unleaded gasoline
as soon as possible.
R Do not drive at the maximum speed.
R Avoid sudden acceleration and engine
speeds over 3,000 rpm.
You will usually find information about the fuel
grade on the pump. If you cannot find the
label on the pump, ask the staff for assis-
tance.
i For further information, consult a quali-
fied specialist workshop or visit
http://www.mbusa.com (USA only).
i E10 fuel contains up to 10% bioethanol.
Your vehicle is E10-compatible. You can
refuel your vehicle using E10 fuel.
GLA 250, GLA 250 4MATIC: as a temporary
measure, if the recommended fuel is not
available, you may also use regular unleaded
gasoline with an octane rating of 88 AKI/
93 RON.
All other models: as a temporary measure, if
the recommended fuel is not available, you
may also use regular unleaded gasoline with
an octane rating of 87 AKI/91 RON. This may reduce engine performance and increase fuelconsumption. Avoid driving at full throttle and
sudden acceleration. Never refuel using fuel
with a lower AKI.
Information on refueling (Y page 157).Additives
! Operating the engine with fuel additives
added later can lead to engine failure. Do
not mix fuel additives with fuel. This does
not include additives for the removal and
prevention of residue buildup. gasoline
must only be mixed with additives recom-
mended by Mercedes-Benz. Comply with
the instructions for use on the product
label. More information about recommen-
ded additives can be obtained from any
authorized Mercedes-Benz Center.
Mercedes-Benz recommends that you use
branded fuels that have additives.
The quality of the fuel available in some coun- tries may not be sufficient. Residue could
build up in the injection system as a result. In
such cases, and in consultation with an
authorized Mercedes-Benz Center, the gaso-
line may be mixed with the cleaning additive
recommended by Mercedes-Benz. You must
observe the notes and mixing ratios specified on the container.
Flexible Fuel vehicles Important safety notes
G
WARNING
Fuel is highly flammable. If you handle fuel
incorrectly, there is a risk of fire and explo-
sion.
You must avoid fire, open flames, creating
sparks and smoking. Switch off the engine
and, if applicable, the auxiliary heating before refueling. G
WARNING
Fuel is poisonous and hazardous to health.
There is a risk of injury.
You must make sure that fuel does not come into contact with your skin, eyes or clothing
and that it is not swallowed. Do not inhale fuel
vapors. Keep fuel away from children. Service products and filling capacities
363Technical data
Z