child restraint MERCEDES-BENZ GLA SUV 2013 Owners Manual
[x] Cancel search | Manufacturer: MERCEDES-BENZ, Model Year: 2013, Model line: GLA SUV, Model: MERCEDES-BENZ GLA SUV 2013Pages: 401, PDF Size: 11.9 MB
Page 10 of 401
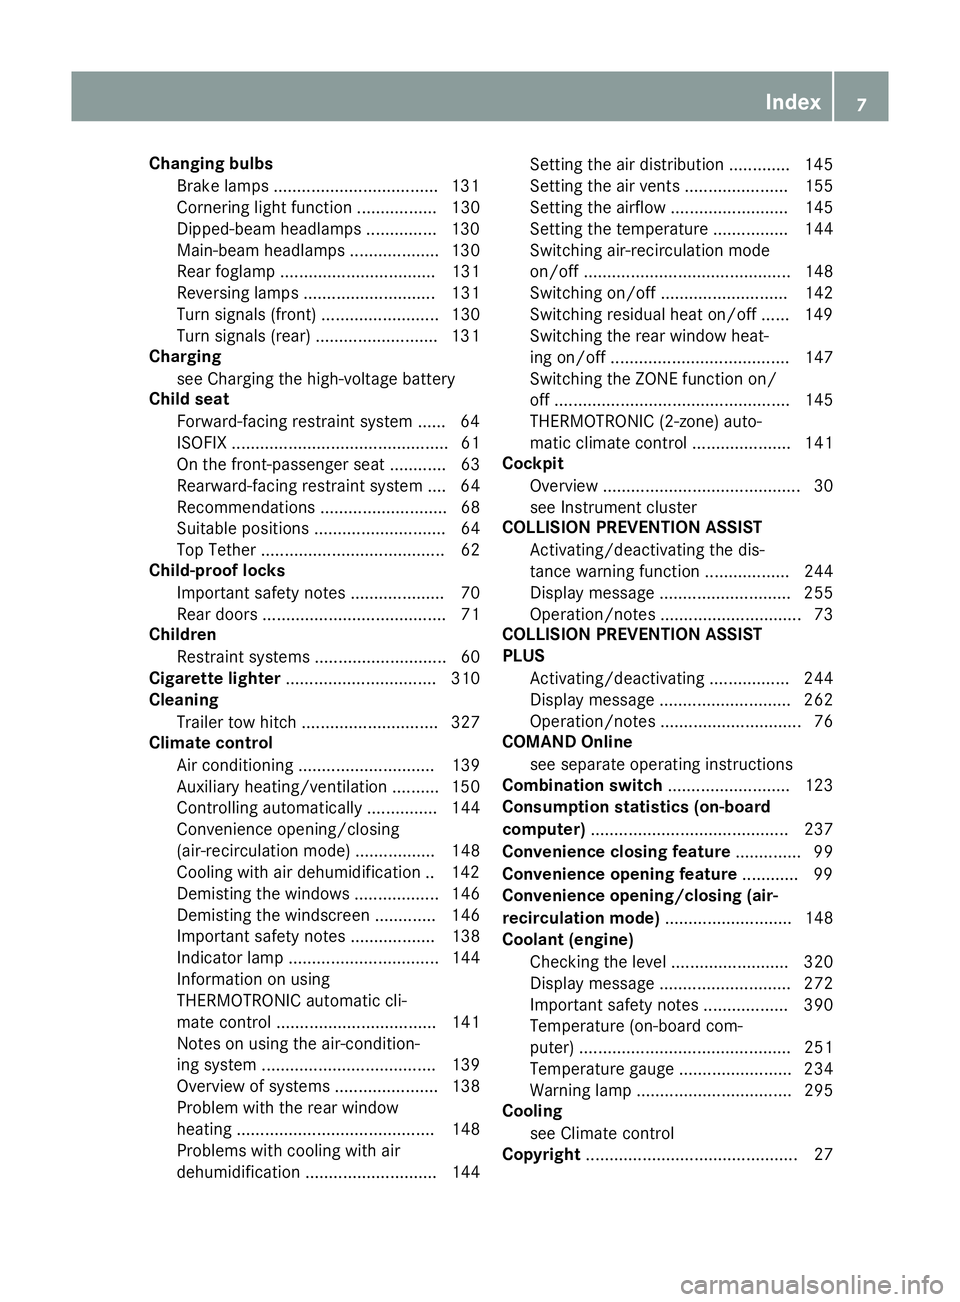
Changing bulbs
Brake lamps .................................. .131
Cornering light function ................. 130
Dipped-beam headlamps .............. .130
Main-beam headlamps ................... 130
Rear foglamp ................................. 131
Reversing lamps ............................ 131
Turn signals (front) ......................... 130
Turn signals (rear) .......................... 131
Charging
see Charging the high-voltage battery
Child seat
Forward-facing restraint system ...... 64
ISOFIX .............................................. 61
On the front-passenger sea t............ 63
Rearward-facing restraint system .... 64
Recommendations ........................... 68
Suitable positions ............................ 64
Top Tether ....................................... 62
Child-proof locks
Important safety notes .................... 70
Rear doors ....................................... 71
Children
Restraint systems ............................ 60
Cigarette lighter ................................ 310
Cleaning
Trailer tow hitch ............................. 327
Climate control
Air conditioning ............................. 139
Auxiliary heating/ventilation .......... 150
Controlling automaticall y............... 144
Convenience opening/closing
(air-recirculation mode) ................. 148
Cooling with air dehumidification .. 142
Demisting the windows .................. 146
Demisting the windscreen ............. 146
Important safety notes .................. 138
Indicator lamp ................................ 144
Information on using
THERMOTRONIC automatic cli-
mate control .................................. 141
Notes on using the air-condition-
ing system ..................................... 139
Overview of systems ...................... 138
Problem with the rear window
heating .......................................... 148
Problems with cooling with air
dehumidification ............................ 144 Setting the air distribution ............. 145
Setting the air vents ...................... 155
Setting the airflow ......................... 145
Setting the temperature ................ 144
Switching air-recirculation mode
on/of
f............................................ 148
Switching on/of f........................... 142
Switching residual heat on/off ...... 149
Switching the rear window heat-
ing on/of f...................................... 147
Switching the ZONE function on/
off .................................................. 145
THERMOTRONIC (2-zone) auto-
matic climate control ..................... 141
Cockpit
Overview .......................................... 30
see Instrument cluster
COLLISION PREVENTION ASSIST
Activating/deactivating the dis-
tance warning function .................. 244
Display message ............................ 255
Operation/note s.............................. 73
COLLISION PREVENTION ASSIST
PLUS
Activating/deactivating ................. 244
Display message ............................ 262
Operation/note s.............................. 76
COMAND Online
see separate operating instructions
Combination switch .......................... 123
Consumption statistics (on-board
computer) .......................................... 237
Convenience closing feature .............. 99
Convenience opening feature ............ 99
Convenience opening/closing (air-
recirculation mode) ........................... 148
Coolant (engine)
Checking the level ......................... 320
Display message ............................ 272
Important safety notes .................. 390
Temperature (on-board com-
puter) ............................................. 251
Temperature gaug e........................ 234
Warning lamp ................................. 295
Cooling
see Climate control
Copyright ............................................. 27 Index
7
Page 15 of 401
H
Handbrake see Parking brake
Hazard warning lamps ...................... 123
Display message ............................ 287
Head restraints
Adjusting ....................................... 111
Adjusting (electrically) ................... 111
Adjusting (manually) ...................... 111
Adjusting (rear) .............................. 112
Fitting/removing (rear) .................. 112
Headlamp
Cleaning system (function) ............ 124
Cleaning system (notes) ............... .391
Headlamps
Misting up ...................................... 126
Topping up the cleaning system .... 321
see Automatic headlamp mode
Heating
see Climate control
High-pressure cleaners .................... 324
Hill start assist .................................. 161
HOLD function
Activating ....................................... 202
Deactivating ................................... 202
Display message ............................ 275
Function/notes ............................ .201 I
Ignition lock see Key positions
Immobiliser .......................................... 81
Indicator and warning lamp
Restraint system ............................ 294
Indicator and warning lamps
Coolant .......................................... 295
DISTRONIC PLUS ........................... 297
Engine diagnostics ......................... 295
SPORT handling mode ................... 292
Indicator lamps
Display message ............................ 269
see Warning and indicator lamps
Indicators
see Turn signals
Instrument cluster
Overview .......................................... 32 Settings ......................................... 246
Warning and indicator lamps ........... 34
Instrument cluster lighting .............. 234
Intelligent Light System
Activating/deactivating ................. 247
Display message ............................ 271
Overview ........................................ 124
Setting the dipped-beam head-
lamps for driving on the right/left .. 247
Interior lighting ................................. 127
Automatic control system .............. 127
Delayed switch-off (on-board
computer) ...................................... 248
Emergency lighting ........................ 128
Manual control ............................... 128
Overview ........................................ 127
Reading lamp ................................. 127
Setting the ambient lighting
brightness (on-board computer) .... 247
Interior motion sensor
Deactivating ..................................... 83
Function .......................................... .82
Priming ............................................ 82
Switching off .................................... 82
ISOFIX child seat securing system ....61 J
Jack Storage location ............................3 33
Using ............................................. 363
Jump starting (engine) ......................342 K
Key Changing the battery ....................... 89
Checking the battery ....................... 88
Convenience closing feature ............ 99
Convenience opening feature .......... 99
Display message ............................ 287
Door central locking/unlocking ....... 87
Emergency key element ................... 87
Important safety notes .................... 86
Loss ................................................. 90
Modifying the programming ............. 87
Positions (ignition lock) ................. 159
Problem (malfunction) ..................... 90 12
Index
Page 20 of 401
Roller sunblind
Opening/closing ............................ 104
Panorama sliding sunroof .............. 103
Roof carrier ........................................ 307
Roof lining and carpets (cleaning
instructions) ...................................... 329
Roof load (maximum) ........................ 391
Route (navigation)
see Route guidance (navigation)
Route guidance (navigation) ............ 239S
Safety Automatic front-passenger front
airbag deactivation system .............. 51
Child restraint systems .................... 60
Children in the vehicle ..................... 59
Safety system
see Driving safety systems
Seat
Adjusting (Performance Seat) ........ 113
Seat belt
Correct usage .................................. 46
Switching belt adjustment on/off
(on-board computer) ...................... 250
Seat belts
Adjusting the driver's and front-
passenger seat bel t......................... 47
Adjusting the height ......................... 46
Cleaning ......................................... 329
Display message ............................ 263
Fastening ......................................... 46
Important safety guidelines ............. 44
Introduction ..................................... 44
Rear seat belt status indicator ......... 48
Releasing ......................................... 47
Warning lamp ................................. 288
Warning lamp (function) ................... 47
Seats
Adjusting (electrically) ................... 110
Adjusting (manually) ...................... 110
Adjusting the 4-way lumbar sup-
port ................................................ 112
Adjusting the head restraint .......... 111
Cleaning the cover ......................... 328
Correct driver's seat position ........ 108
Important safety notes .................. 109 Seat heating problem .................... 114
Storing settings (memory func-
tion) ............................................... 117
Switching seat heating on/of
f....... 113
Sensors (cleaning instructions) ....... 326
Service
see ASSYST PLUS
Service Centre
see Qualified specialist workshop
Service menu (on-board com-
puter) .................................................. 245
Service products
Brake fluid ..................................... 390
Coolant (engine) ............................ 390
Engine oil ....................................... 388
Fuel ................................................ 385
Important safety notes .................. 384
Washer fluid ................................... 391
Setting the air distribution ............... 145
Setting the airflow ............................ 145
Settings
Factory (on-board computer) ......... 251
On-board compute r....................... 245
SETUP (on-board computer) ............. 251
Shifting to neutral (manual trans-
mission) ............................................. 167
Side lamps
Switching on/of f........................... 122
Side windows
Convenience closing ........................ 99
Convenience opening ...................... 99
Important safety notes .................... 98
Opening/closing .............................. 98
Problem (malfunction) ................... 101
Resetting ....................................... 100
Sidebag ................................................ 50
Sliding sunroof
see Panorama sliding sunroof
Snow chains ...................................... 355
Socket
Luggage compartment ................... 312
Points to observe before use ......... 311
Sockets
Centre console .............................. 311
Rear compartment ......................... 311
Specialist workshop ............................ 25
Spectacles compartment ................. 301 Index
17
Page 45 of 401
Useful information
i This Owner's Manual describes all mod-
els, series and optional equipment for your
vehicle that were available at the time of
going to press. National variations are pos- sible. Note that your vehicle may not be
equipped with all of the functions descri-
bed. This is also the case for systems and
functions relevant to safety.
i Read the information on qualified special-
ist workshops: (Y page 25). Panic alarm
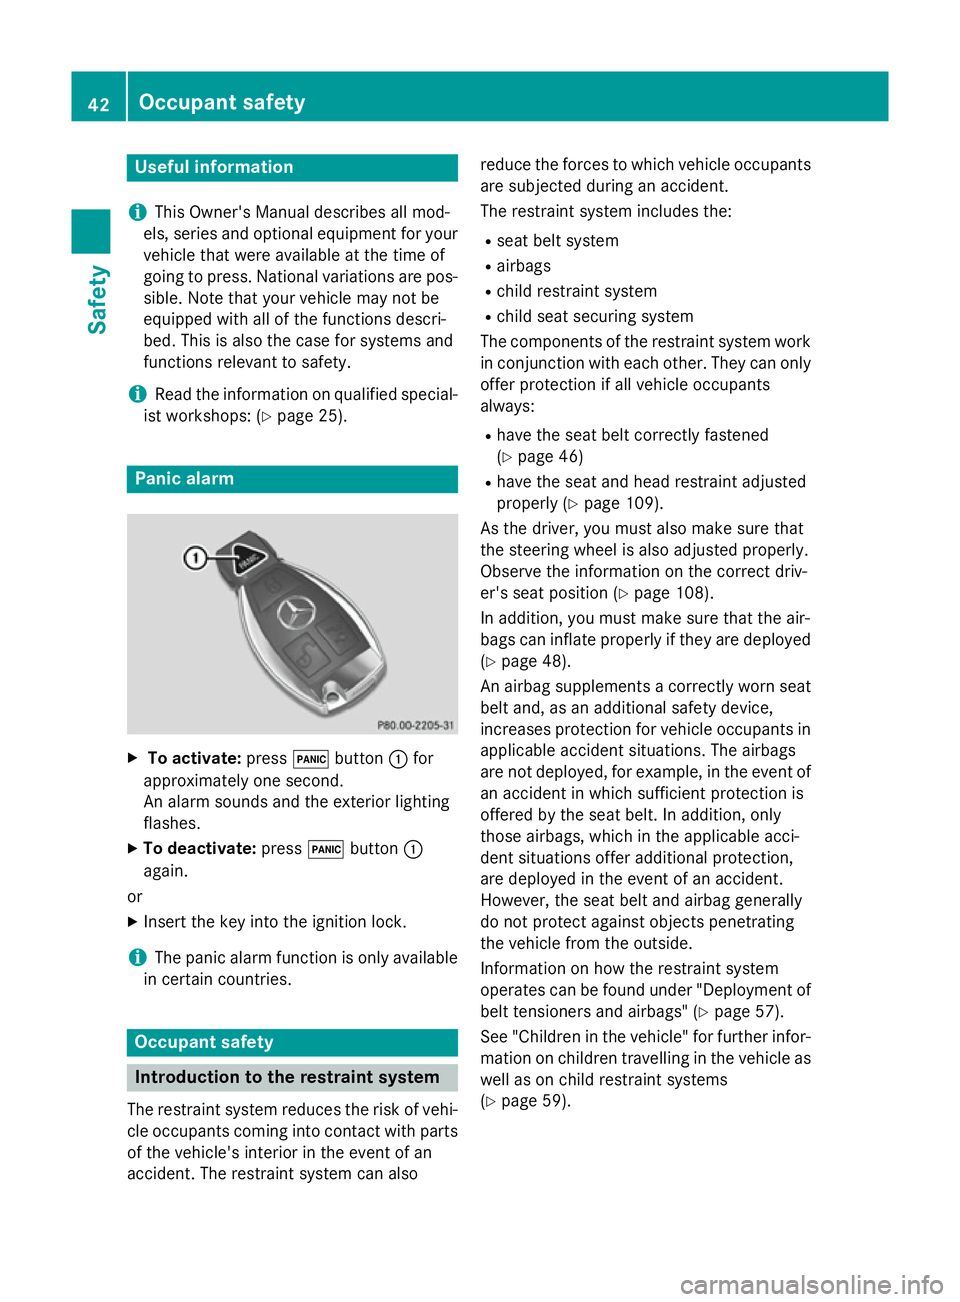
X
To activate: press!button :for
approximately one second.
An alarm sounds and the exterior lighting
flashes.
X To deactivate: press!button :
again.
or
X Insert the key into the ignition lock.
i The panic alarm function is only available
in certain countries. Occupant safety
Introduction to the restraint system
The restraint system reduces the risk of vehi-
cle occupants coming into contact with parts of the vehicle's interior in the event of an
accident. The restraint system can also reduce the forces to which vehicle occupants
are subjected during an accident.
The restraint system includes the:
R seat belt system
R airbags
R child restraint system
R child seat securing system
The components of the restraint system work
in conjunction with each other. They can only
offer protection if all vehicle occupants
always:
R have the seat belt correctly fastened
(Y page 46)
R have the seat and head restraint adjusted
properly (Y page 109).
As the driver, you must also make sure that
the steering wheel is also adjusted properly.
Observe the information on the correct driv-
er's seat position (Y page 108).
In addition, you must make sure that the air-
bags can inflate properly if they are deployed (Y page 48).
An airbag supplements a correctly worn seat
belt and, as an additional safety device,
increases protection for vehicle occupants in
applicable accident situations. The airbags
are not deployed, for example, in the event of an accident in which sufficient protection is
offered by the seat belt. In addition, only
those airbags, which in the applicable acci-
dent situations offer additional protection,
are deployed in the event of an accident.
However, the seat belt and airbag generally
do not protect against objects penetrating
the vehicle from the outside.
Information on how the restraint system
operates can be found under "Deployment of
belt tensioners and airbags" (Y page 57).
See "Children in the vehicle" for further infor- mation on children travelling in the vehicle as
well as on child restraint systems
(Y page 59). 42
Occupant safetySafety
Page 46 of 401
Important safety notes
G
WARNING
If the restraint system is modified, it may no
longer work as intended. The restraint system
may then not perform its intended protective function by failing in an accident or triggering
unexpectedly, for example. There is an
increased risk of injury, possibly even fatal.
Never modify parts of the restraint system. Do not attempt to modify the wiring as well as
electronic components or their software.
If it is necessary to modify an airbag system to
accommodate a person with disabilities, con- tact a Mercedes-Benz Service Centre. Restraint system warning lamp
The functions of the restraint system are
checked after the ignition is switched on and at regular intervals while the engine is run-
ning. Therefore, malfunctions can be detec-
ted in good time.
The restraint system warning lamp in the
instrument cluster lights up when the ignition is switched on. It goes out no later than a few
seconds after the engine is started. The com- ponents of the restraint system are in opera-
tional readiness.
A malfunction has occurred if the 6
restraint system warning lamp:
R does not light up after the ignition is
switched on
R does not go out after a few seconds with
the engine running
R lights up again while the engine is running G
WARNING
If the restraint system is malfunctioning,
restraint system components may be trig-
gered unintentionally or might not be trig-
gered at all in the event of an accident with a high rate of vehicle deceleration. This can
effect belt tensioners or airbags, for example. There is an increased risk of serious or even
fatal injuries.
Have the restraint system checked and
repaired immediately at a qualified specialist
workshop.
PASSENGER AIRBAG indicator lamp
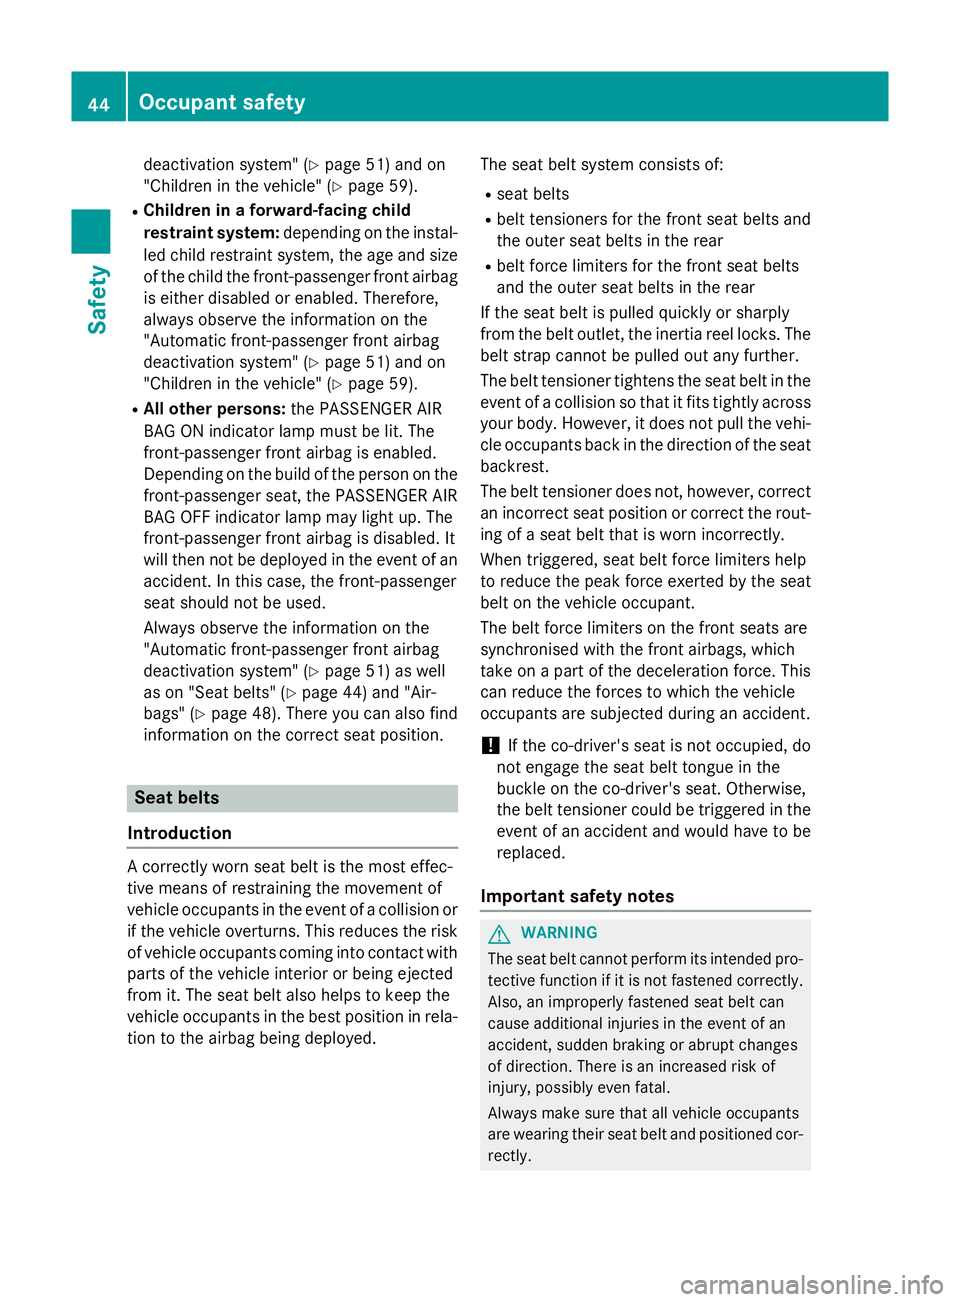
On vehicles with the automatic front-
passenger front airbag deactivation system,
the indicator lamps display the status of the
front-passenger front airbag.
R PASSENGER AIR BAG ON :lights up: the
front-passenger front airbag is enabled. If,
in the case of an accident, all deployment
criteria are met, the front-passenger front
airbag is deployed.
R PASSENGER AIR BAG OFF ;lights up: the
front-passenger front airbag is disabled. It
will then not be deployed in the event of an
accident.
Depending on the person in the front-
passenger seat, the front-passenger front air-
bag must either be disabled or enabled. You
must make sure of this both before and during
a journey.
R Children in a rearward-facing child
restraint system: the PASSENGER AIR
BAG OFF indicator lamp must be lit. The
front-passenger front airbag is disabled.
Always observe the information on the
"Automatic front-passenger front airbag Occupant safety
43Safety Z
Page 47 of 401
deactivation system" (Y
page 51) and on
"Children in the vehicle" (Y page 59).
R Children in a forward-facing child
restraint system: depending on the instal-
led child restraint system, the age and size of the child the front-passenger front airbag
is either disabled or enabled. Therefore,
always observe the information on the
"Automatic front-passenger front airbag
deactivation system" (Y page 51) and on
"Children in the vehicle" (Y page 59).
R All other persons: the PASSENGER AIR
BAG ON indicator lamp must be lit. The
front-passenger front airbag is enabled.
Depending on the build of the person on the front-passenger seat, the PASSENGER AIR
BAG OFF indicator lamp may light up. The
front-passenger front airbag is disabled. It
will then not be deployed in the event of an
accident. In this case, the front-passenger
seat should not be used.
Always observe the information on the
"Automatic front-passenger front airbag
deactivation system" (Y page 51) as well
as on "Seat belts" (Y page 44) and "Air-
bags" (Y page 48). There you can also find
information on the correct seat position. Seat belts
Introduction A correctly worn seat belt is the most effec-
tive means of restraining the movement of
vehicle occupants in the event of a collision or
if the vehicle overturns. This reduces the risk of vehicle occupants coming into contact with
parts of the vehicle interior or being ejected
from it. The seat belt also helps to keep the
vehicle occupants in the best position in rela-
tion to the airbag being deployed. The seat belt system consists of:
R seat belts
R belt tensioners for the front seat belts and
the outer seat belts in the rear
R belt force limiters for the front seat belts
and the outer seat belts in the rear
If the seat belt is pulled quickly or sharply
from the belt outlet, the inertia reel locks. The
belt strap cannot be pulled out any further.
The belt tensioner tightens the seat belt in the event of a collision so that it fits tightly across
your body. However, it does not pull the vehi- cle occupants back in the direction of the seat
backrest.
The belt tensioner does not, however, correct an incorrect seat position or correct the rout-
ing of a seat belt that is worn incorrectly.
When triggered, seat belt force limiters help
to reduce the peak force exerted by the seat
belt on the vehicle occupant.
The belt force limiters on the front seats are
synchronised with the front airbags, which
take on a part of the deceleration force. This
can reduce the forces to which the vehicle
occupants are subjected during an accident.
! If the co-driver's seat is not occupied, do
not engage the seat belt tongue in the
buckle on the co-driver's seat. Otherwise,
the belt tensioner could be triggered in the
event of an accident and would have to be
replaced.
Important safety notes G
WARNING
The seat belt cannot perform its intended pro- tective function if it is not fastened correctly. Also, an improperly fastened seat belt can
cause additional injuries in the event of an
accident, sudden braking or abrupt changes
of direction. There is an increased risk of
injury, possibly even fatal.
Always make sure that all vehicle occupants
are wearing their seat belt and positioned cor-
rectly. 44
Occupant safetySafety
Page 48 of 401
G
WARNING
The seat belt does not offer the intended level of protection if you have not moved the back-
rest to an almost vertical position. When brak-
ing or in the event of an accident, you could
slide underneath the seat belt and sustain
abdomen or neck injuries, for example. This
poses an increased risk of injury or even fatal injury.
Adjust the seat properly before beginning
your journey. Always ensure that the backrest
is in an almost vertical position and that the
shoulder section of your seatbelt is routed
across the centre of your shoulder. G
WARNING
Persons under 1.50 mtall cannot wear the
seat belts correctly without a suitable, addi-
tional restraint system. The seat belt cannot
perform its intended protective function if it is not fastened correctly. Also, an improperly
fastened seat belt can cause additional inju-
ries in the event of an accident, sudden brak-
ing or abrupt changes of direction. There is an increased risk of injury, possibly even fatal.
Secure persons less than 1.50 mtall in a suit-
able restraint system.
If a child younger than 12 years old and under 1.50 m in height is travelling in the vehicle:
R always secure the child in a child restraint
system suitable for this Mercedes-Benz
vehicle. The child restraint system must be appropriate to the age, weight and size of
the child.
R be sure to observe the instructions and
safety notes on the automatic front-
passenger front airbag deactivation system
(Y page 51)
R always observe the instructions and safety
notes on "Children in the vehicle" in this
Owner's Manual (Y page 59) in addition
to the child restraint system manufactur-
er's installation instructions G
WARNING
Seat belts cannot protect as intended, if:
R they are damaged, have been modified, are
extremely dirty, bleached or dyed
R the seat belt buckle is damaged or
extremely dirty
R modifications have been made to the belt
tensioners, belt anchorages or inertia reels
Damage caused to safety belts in an accident may not be visible, e.g. by splinters of glass.
Modified or damaged seat belts can tear or
fail, for example in the event of an accident.
Modified seat belt tensioners may be
deployed unintentionally or fail to be deployed
when required. There is an increased risk of
injury, possibly even fatal.
Never modify safety belts, seat belt tension-
ers, seat belt anchorages and inertia reels.
Ensure that seat belts are not damaged or
worn and are clean. After an accident, have
the seat belts checked immediately at a quali- fied specialist workshop.
Mercedes-Benz recommends that you only
use seat belts which have been approved
specifically for your vehicle by Mercedes-
Benz.
Vehicles with sports seats or AMG Per-
formance Seats: these seats are equipped
with the standard three-point seat belt. If you
fit a different multi-point seat belt, e.g. sports
or racing seat belts, the restraint system can-
not offer maximum protection. G
WARNING
If you feed seat belts through the opening in
the seat backrest, the seat backrest may be
damaged or may even break in the event of an accident. This poses an increased risk of
injury or even fatal injury.
Only use the standard three-point seat belt.
Never modify the seat belt system. Occupant safety
45Safety Z
Page 52 of 401
the door or side window. You may other-
wise be in the deployment area of the air-
bags.
R Always keep your feet in the footwell in
front of the seat. Do not put your feet on the
dashboard, for example. Your feet may oth-
erwise be in the deployment area of the
airbag.
R Always secure persons less than 1.50 mtall
in suitable restraint systems. Up to this
height, the seat belt cannot be worn cor-
rectly.
If a child is travelling in your vehicle, also
observe the following notes:
R Always secure children under 12 years of
age and less than 1.50 m tall in suitable
child restraint systems.
R Child restraint systems should be fitted to
the rear seats.
R Only secure a child to the front-passenger
seat when the front-passenger front airbag
is disabled, and only then in a rearward-
facing child restraint system. If the
PASSENGER AIR BAG OFF indicator lamp is
permanently lit, the front-passenger front
airbag is disabled (Y page 43).
R Always observe the instructions and safety
notes on the automatic front-passenger
front airbag deactivation system
(Y page 51) and on "Children in the vehi-
cle" (Y page 59) in addition to the child
restraint system manufacturer's installa-
tion instructions.
Objects in the vehicle interior may pre-
vent the airbag from functioning cor-
rectly. Before starting your journey and to
avoid risks resulting from the speed of the
airbag as it deploys, make sure that:
R there are no people, animals or objects
between the vehicle occupants and an air-
bag.
Do not place any objects on the dashboard
e.g. above the front-passenger front airbag.
R there are no objects between the seat, door
and B-pillar. R
no hard objects, e.g. coat hangers, are
hanging on the grab handles or coat hooks.
R no accessories, such as cup holders, are
attached to the vehicle within the deploy-
ment area of an airbag, e.g. to doors, side
windows, rear side trim or side walls.
R no heavy, sharp-edged or fragile objects
are in the pockets of your clothing. Store
such objects in a suitable place. G
WARNING
If you modify an airbag cover or affix objects
such as stickers to it, the airbag can no longer function correctly. There is an increased risk
of injury.
Never modify an airbag cover or affix objects
to it. G
WARNING
Sensors to control the airbags are located in
the doors. Modifications or work not per-
formed correctly to the doors or door panel-
ling, as well as damaged doors, can lead to the function of the sensors being impaired. The
airbags might therefore not function properly any more. Consequently, the airbags cannot
protect vehicle occupants as they are
designed to do. This poses an increased risk
of injury.
Never modify the doors or parts of the doors.
Always have work on the doors or door pan-
elling carried out at a qualified specialist
workshop.
Front airbags !
Do not place heavy objects on the front-
passenger seat. This could cause the sys-
tem to identify the seat as being occupied.
In the event of an accident, the restraint
systems on the front-passenger side may
be triggered and have to be replaced. Occupant safety
49Safety Z
Page 54 of 401
In the event of a side impact, the sidebag is
deployed on the side on which the impact
occurs.
Vehicles with automatic front-passenger
front airbag deactivation: the sidebag on the
front-passenger side deploys under the fol-
lowing conditions:
R an occupant is detected on the front-
passenger seat or
R the belt tongue is engaged in the belt
buckle of the front-passenger seat
If the belt tongue is engaged in the belt
buckle, the sidebag on the front-passenger
side deploys if an appropriate accident situa- tion occurs. In this case, deployment is inde-
pendent of whether the front-passenger seat is occupied or not.
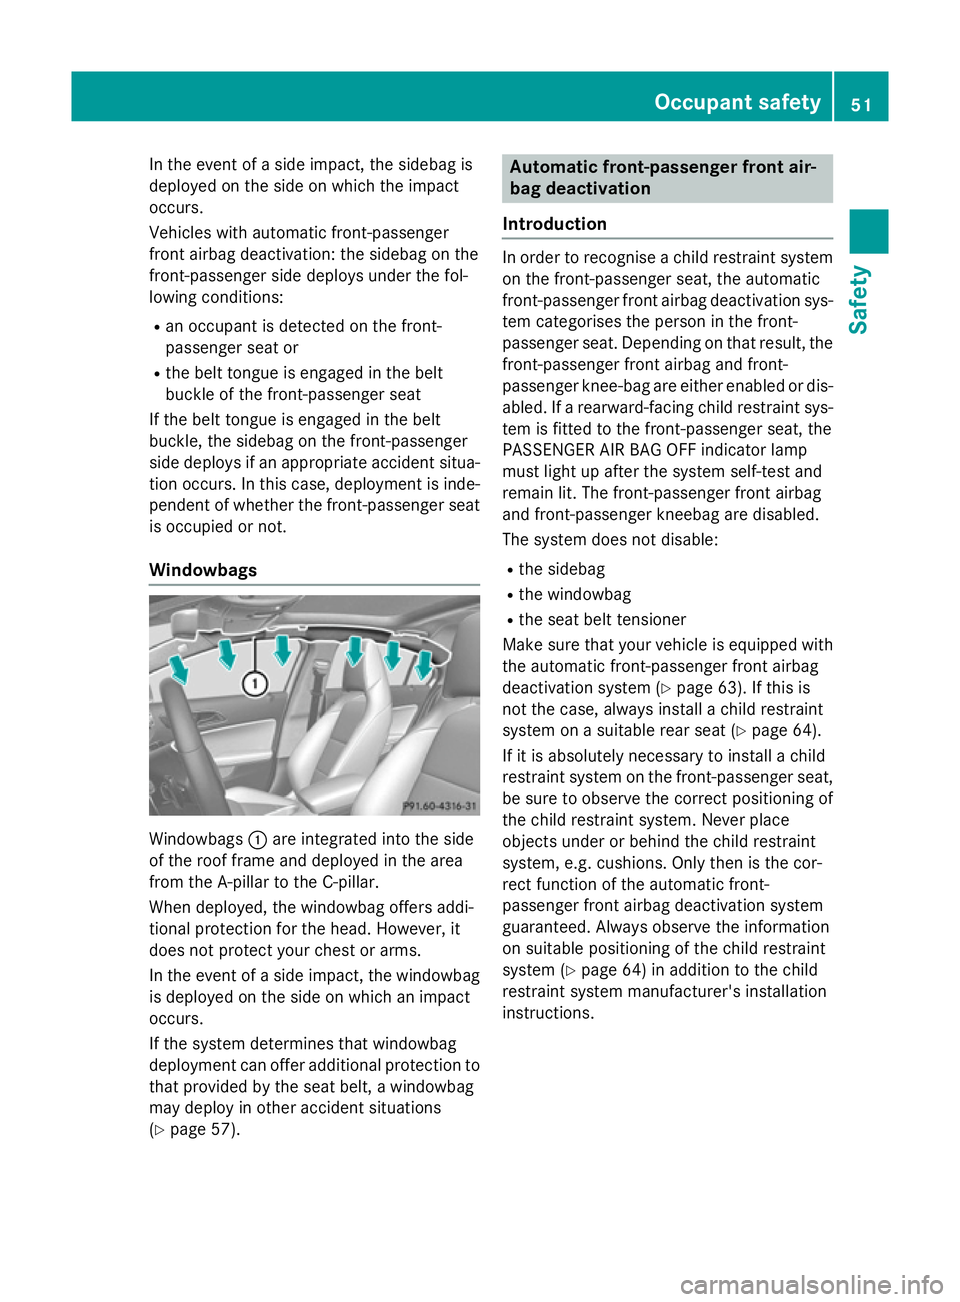
Windowbags Windowbags
:are integrated into the side
of the roof frame and deployed in the area
from the A-pillar to the C-pillar.
When deployed, the windowbag offers addi-
tional protection for the head. However, it
does not protect your chest or arms.
In the event of a side impact, the windowbag
is deployed on the side on which an impact
occurs.
If the system determines that windowbag
deployment can offer additional protection to
that provided by the seat belt, a windowbag
may deploy in other accident situations
(Y page 57). Automatic front-passenger front air-
bag deactivation
Introduction In order to recognise a child restraint system
on the front-passenger seat, the automatic
front-passenger front airbag deactivation sys- tem categorises the person in the front-
passenger seat. Depending on that result, the
front-passenger front airbag and front-
passenger knee-bag are either enabled or dis- abled. If a rearward-facing child restraint sys-
tem is fitted to the front-passenger seat, the
PASSENGER AIR BAG OFF indicator lamp
must light up after the system self-test and
remain lit. The front-passenger front airbag
and front-passenger kneebag are disabled.
The system does not disable:
R the sidebag
R the windowbag
R the seat belt tensioner
Make sure that your vehicle is equipped with
the automatic front-passenger front airbag
deactivation system (Y page 63). If this is
not the case, always install a child restraint
system on a suitable rear seat (Y page 64).
If it is absolutely necessary to install a child
restraint system on the front-passenger seat,
be sure to observe the correct positioning of
the child restraint system. Never place
objects under or behind the child restraint
system, e.g. cushions. Only then is the cor-
rect function of the automatic front-
passenger front airbag deactivation system
guaranteed. Always observe the information
on suitable positioning of the child restraint
system (Y page 64) in addition to the child
restraint system manufacturer's installation
instructions. Occupant safety
51Safety Z
Page 55 of 401
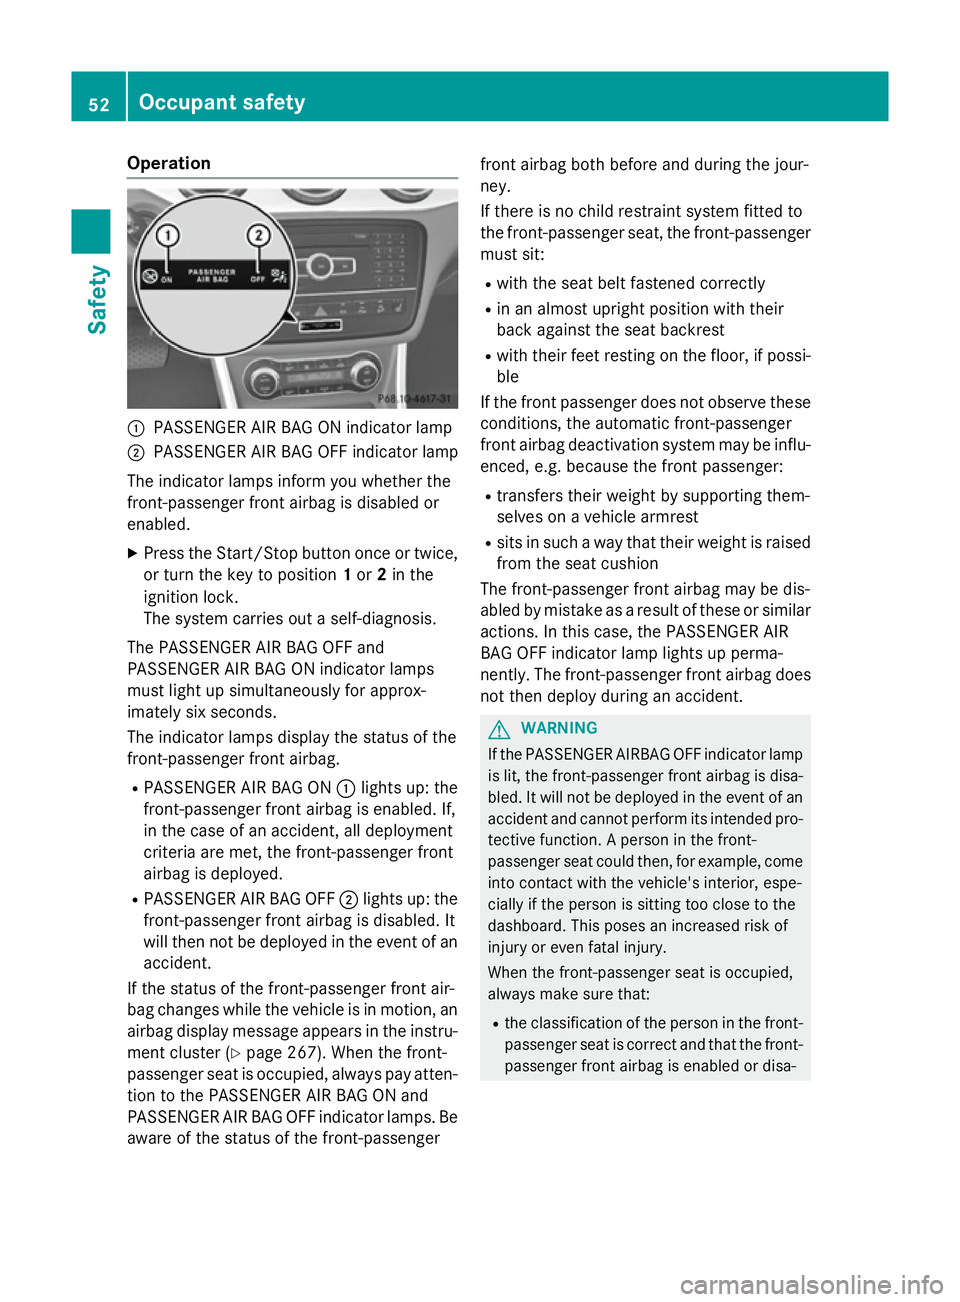
Operation
:
PASSENGER AIR BAG ON indicator lamp
; PASSENGER AIR BAG OFF indicator lamp
The indicator lamps inform you whether the
front-passenger front airbag is disabled or
enabled.
X Press the Start/Stop button once or twice,
or turn the key to position 1or 2in the
ignition lock.
The system carries out a self-diagnosis.
The PASSENGER AIR BAG OFF and
PASSENGER AIR BAG ON indicator lamps
must light up simultaneously for approx-
imately six seconds.
The indicator lamps display the status of the
front-passenger front airbag.
R PASSENGER AIR BAG ON :lights up: the
front-passenger front airbag is enabled. If,
in the case of an accident, all deployment
criteria are met, the front-passenger front
airbag is deployed.
R PASSENGER AIR BAG OFF ;lights up: the
front-passenger front airbag is disabled. It
will then not be deployed in the event of an accident.
If the status of the front-passenger front air-
bag changes while the vehicle is in motion, an
airbag display message appears in the instru-
ment cluster (Y page 267). When the front-
passenger seat is occupied, always pay atten-
tion to the PASSENGER AIR BAG ON and
PASSENGER AIR BAG OFF indicator lamps. Be aware of the status of the front-passenger front airbag both before and during the jour-
ney.
If there is no child restraint system fitted to
the front-passenger seat, the front-passenger
must sit:
R with the seat belt fastened correctly
R in an almost upright position with their
back against the seat backrest
R with their feet resting on the floor, if possi-
ble
If the front passenger does not observe these
conditions, the automatic front-passenger
front airbag deactivation system may be influ- enced, e.g. because the front passenger:
R transfers their weight by supporting them-
selves on a vehicle armrest
R sits in such a way that their weight is raised
from the seat cushion
The front-passenger front airbag may be dis-
abled by mistake as a result of these or similar
actions. In this case, the PASSENGER AIR
BAG OFF indicator lamp lights up perma-
nently. The front-passenger front airbag does not then deploy during an accident. G
WARNING
If the PASSENGER AIRBAG OFF indicator lamp is lit, the front-passenger front airbag is disa-
bled. It will not be deployed in the event of an
accident and cannot perform its intended pro-
tective function. A person in the front-
passenger seat could then, for example, come
into contact with the vehicle's interior, espe-
cially if the person is sitting too close to the
dashboard. This poses an increased risk of
injury or even fatal injury.
When the front-passenger seat is occupied,
always make sure that:
R the classification of the person in the front-
passenger seat is correct and that the front-
passenger front airbag is enabled or disa- 52
Occupant safetySafety