length MERCEDES-BENZ GLA SUV 2018 Owner's Manual
[x] Cancel search | Manufacturer: MERCEDES-BENZ, Model Year: 2018, Model line: GLA SUV, Model: MERCEDES-BENZ GLA SUV 2018Pages: 338, PDF Size: 5.59 MB
Page 50 of 338

passenger front air bag is enabled or disa-
bled in accordance with the person in the
front-passenger seat
Rthe front-passenger seat has been moved
back as far back as possible.
Rthe person is seated correctly.
Make sure, both before and during the jour-
ney, that the status of the front-passenger
front air bag is correct.
GWARNING
If you secure a child in a rearward-facing child
restraint system on the front-passenger seat
and the PASSENGER AIR BAG OFF indicator
lamp is off, the front-passenger front air bag
can deploy in the event of an accident. The
child could be struck by the air bag. This poses an increased risk of injury or even fatal injury.
Make sure that the front-passenger front air
bag has been deactivated. The PASSENGER
AIR BAG OFF indicator lamp must be lit.
NEVER use a rearward-facing child restraint
on a seat protected by an ACTIVE FRONT AIR-
BAG in front of it; DEATH or SERIOUS INJURY
to the child can occur.
If the PASSENGER AIR BAG OFF indicator lamp
stays off, do not install a rearward-facing child
restraint system on the front-passenger seat.
You can find more information on OCS under
"Problems with the Occupant Classification Sys-
tem" (
Ypage 50).
GWARNING
If you secure a child in a forward-facing child
restraint system on the front-passenger seat
and you position the front-passenger seat too close to the dashboard, in the event of an
accident, the child could:
Rcome into contact with the vehicle's inte-
rior if the PASSENGER AIR BAG OFF indi-
cator lamp is lit, for example
Rbe struck by the air bag if the PASSENGER
AIR BAG OFF indicator lamp is off
This poses an increased risk of injury or even fatal injury.
Always move the front-passenger seat as far
back as possible and fully retract the seat
cushion length. Always make sure that the
shoulder belt strap is correctly routed from
the vehicle belt sash guide to the shoulder
belt guide on the child restraint system. The
shoulder belt strap must be routed forwards
and downwards from the vehicle belt sash
guide. If necessary, adjust the vehicle belt
sash guide and the front-passenger seat
accordingly. Always observe the child
restraint system manufacturer's installation
instructions.
If OCS determines that:
RThe front-passenger seat is unoccupied, the
PASSENGER AIR BAG OFF indicator lamp
lights up after the system self-test and
remains lit. This indicates that the front-
passenger front air bag is deactivated.
RThe front-passenger seat is occupied by a
child of up to twelve months old, in a standard
child restraint system, the PASSENGER AIR
BAG OFF indicator lamp lights up after the
system self-test and remains lit. This indi-
cates that the front-passenger front air bag is
deactivated.
But even in the case of a twelve-month-old
child, in a standard child restraint system, the
PASSENGER AIR BAG OFF indicator lamp can
go out after the system self-test. This indi-
cates that the front-passenger front air bag is
activated. The result of the classification is
dependent on, among other factors, the child
restraint system and the child's stature. It is
recommended that you install the child
restraint system on a suitable rear seat.
RThe front-passenger seat is occupied by a
person of smaller stature (e.g. a teenager or
small adult), the PASSENGER AIR BAG OFF
indicator lamp lights up and remains lit after
the system self-test depending on the result
of the classification or, alternatively, goes out.
-If the PASSENGER AIR BAG OFF indicator
lamp is off, move the front-passenger seat
48Occupant safety
Safety
Page 53 of 338

ProblemPossible causes/consequences andMSolutions
The PASSENGER AIR
BAG OFF indicator lamp
lights up and remains lit,
even though the front-
passenger seat is occu-
pied by an adult or a per-
son of a stature corre-
sponding to that of an
adult.The classification of the person on the front-passenger seat is incor-
rect.
XMake sure the conditions for a correct classification of the person
on the front-passenger seat are met (Ypage 47).
XIf the PASSENGER AIR BAG OFF indicator lamp remains lit, the front-
passenger seat may not be used.
XHave OCS checked as soon as possible at an authorized Mercedes- Benz Center.
The PASSENGER AIR
BAG OFF indicator lamp
does not light up and/or
does not stay on.
The front-passenger seat
is:
Runoccupied
Roccupied by the
weight of a child up to
twelve months old in a
child restraint system
OCS is malfunctioning.
XMake sure there is nothing between the seat cushion and the child
seat.
XMake sure that the entire base of the child restraint system rests on
the seat cushion of the front-passenger seat. The backrest of the
forward-facing child restraint system must lie as flat as possible
against the backrest of the front-passenger seat. If necessary,
adjust the position of the front-passenger seat.
XMake sure that the seat cushion length is fully retracted.
XWhen installing the child restraint system, make sure that the seat
belt is tight. Do not pull the seat belt tight using the front-passenger seat adjustment. This could result in the seat belt and the child
restraint system being pulled too tightly.
XCheck for correct installation of the child restraint system.
Make sure that the head restraint does not apply a load to the child
restraint system. If necessary, adjust the head restraint accord-
ingly.
XMake sure that no objects are applying additional weight onto the
seat.
XIf the PASSENGER AIR BAG OFF indicator lamp remains off and/or
the PASSENGER AIR BAG ON indicator lamp lights up, do not install a child restraint system on the front-passenger seat. It is recom-
mended that you install the child restraint system on a suitable rear
seat.
XHave OCS checked as soon as possible at an authorized Mercedes-Benz Center.
Deployment of Emergency Tensioning
Devices and air bags
Important safety notes
GWARNING
The air bag parts are hot after an air bag has
been deployed. There is a risk of injury.
Do not touch the air bag parts. Have a
deployed air bag replaced at a qualified spe-
cialist workshop as soon as possible.
GWARNING
A deployed air bag no longer offers any pro-
tection and cannot provide the intended pro-
tection in an accident. There is an increased
risk of injury.
Have the vehicle towed to a qualified special-
ist workshop in order to have a deployed air
bag replaced.
It is important for your safety and that of your
passenger to have deployed air bags replaced
Occupant safety51
Safety
Z
Page 60 of 338
Rearward-facing child restraint system
If it is absolutely necessary to install a rearward-
facing child restraint system on the front-
passenger seat, always make sure that the
front-passenger front air bag is deactivated.
Only if the PASSENGER AIR BAG OFF indicator
lamp is permanently lit (
Ypage 40) is the front-
passenger front air bag deactivated.
Always observe the child restraint system man-
ufacturer's installation and operating instruc-
tions.
Forward-facing child restraint system
If it is absolutely necessary to install a forward-
facing child restraint system on the front-
passenger seat, always move the front-
passenger seat as far back as possible. Fully
retract the seat cushion length. The entire base
of the child restraint system must always rest on
the seat cushion of the front-passenger seat.
The backrest of the child restraint system must
lie as flat as possible against the backrest of the front-passenger seat. The child restraint system
must not touch the roof or be subjected to a load
by the head restraint. Adjust the angle of the
seat backrest and the head restraint position
accordingly. Always make sure that the shoul-
der belt strap is correctly routed from the vehi-
cle belt outlet to the shoulder belt guide on the
child restraint system. The shoulder belt strap
must be routed forward and down from the vehi-
cle belt outlet. If necessary, adjust the vehicle
belt outlet and the front-passenger seat accord-
ingly.
Always observe the child restraint system man-
ufacturer's installation and operating instruc-
tions.
Child-proof locks
Important safety notes
GWARNING
If children are traveling in the vehicle, they
could:
Ropen doors, thus endangering other people
or road users
Rexit the vehicle and be caught by oncoming
traffic
Roperate vehicle equipment and become
trapped
There is a risk of an accident and injury.
Always activate the child-proof locks and
override feature if children are traveling in the vehicle. When leaving the vehicle, always take
the key with you and lock the vehicle. Never
leave children unattended in the vehicle.
Override feature for:
Rthe rear doors (Ypage 59)
Rthe rear side windows (Ypage 59)
GWARNING
If you leave children unsupervised in the vehi-
cle, they could set it in motion by, for example:
Rrelease the parking brake.
Rshift the automatic transmission out of the
parking position P.
Rstart the engine.
In addition, they may operate vehicle equip-
ment and become trapped. There is a risk of
an accident and injury.
When leaving the vehicle, always take the
SmartKey with you and lock the vehicle. Never
leave children unsupervised in the vehicle.
GWARNING
If persons, particularly children are subjected to prolonged exposure to extreme heat or
cold, there is a risk of injury, possibly even
fatal. Never leave children unattended in the
vehicle.
58Children in the vehicle
Safety
Page 95 of 338
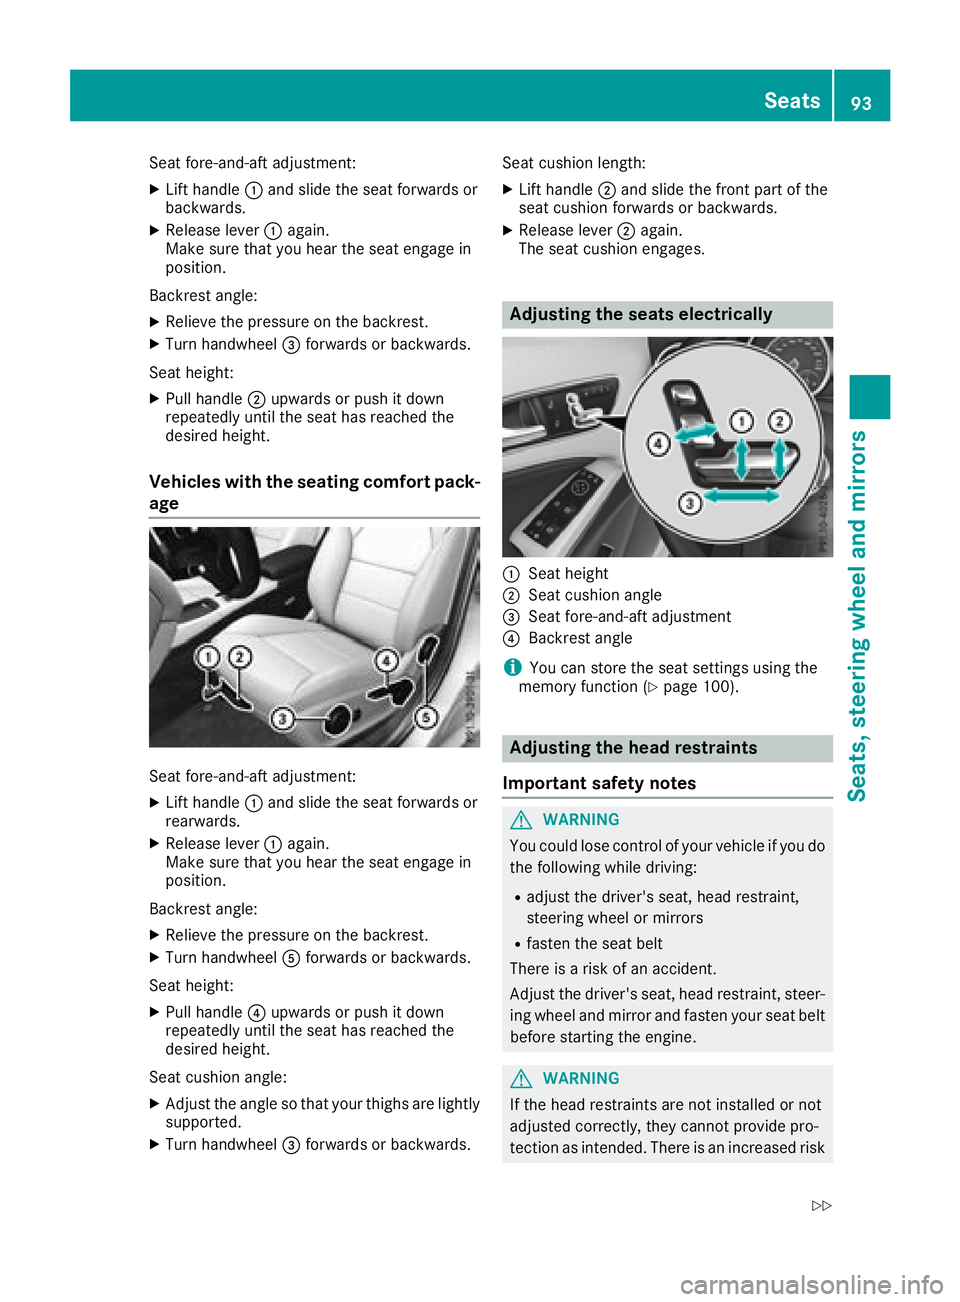
Seat fore-and-aft adjustment:
XLift handle:and slide the seat forwards or
backwards.
XRelease lever :again.
Make sure that you hear the seat engage in
position.
Backrest angle:
XRelieve the pressure on the backrest.
XTurn handwheel =forwards or backwards.
Seat height:
XPull handle ;upwards or push it down
repeatedly until the seat has reached the
desired height.
Vehicles with the seating comfort pack-
age
Seat fore-and-aft adjustment:
XLift handle :and slide the seat forwards or
rearwards.
XRelease lever :again.
Make sure that you hear the seat engage in
position.
Backrest angle:
XRelieve the pressure on the backrest.
XTurn handwheel Aforwards or backwards.
Seat height:
XPull handle ?upwards or push it down
repeatedly until the seat has reached the
desired height.
Seat cushion angle:
XAdjust the angle so that your thighs are lightly
supported.
XTurn handwheel =forwards or backwards. Seat cushion length:
XLift handle
;and slide the front part of the
seat cushion forwards or backwards.
XRelease lever ;again.
The seat cushion engages.
Adjusting the seats electrically
:Seat height
;Seat cushion angle
=Seat fore-and-aft adjustment
?Backrest angle
iYou can store the seat settings using the
memory function (Ypage 100).
Adjusting the head restraints
Important safety notes
GWARNING
You could lose control of your vehicle if you do the following while driving:
Radjust the driver's seat, head restraint,
steering wheel or mirrors
Rfasten the seat belt
There is a risk of an accident.
Adjust the driver's seat, head restraint, steer-
ing wheel and mirror and fasten your seat belt before starting the engine.
GWARNING
If the head restraints are not installed or not
adjusted correctly, they cannot provide pro-
tection as intended. There is an increased risk
Seats93
Seats, steering wheel and mirrors
Z
Page 147 of 338

Applying automatically
The electric parking brakeis automatically
applie dwhen th etransmission is in position j
and :
Rtheengin eis switched off or
Rth edriver is no twearing aseat belt and th e
driver's door is opened
To preven tth eelectric parking brak efrom bein g
automatically applied, pull handle :.
The electric parking brak eis also engage dauto -
matically if:
RDistanc ePilo tDISTRONI Cbring sth evehicl e
to astandstill or
Rth eHOLD function is keepin gth evehicl esta-
tionary
RParking Pilo tis keepin gth evehicl estationary
In addition ,at least on eof th efollowin gcondi-
tion smus tbe fulfilled :
Rtheengin eis switched off
Rth edriver is no twearing aseat belt and th e
driver's door is opened
Rthere is asystem malfunction
Rth epowe rsupply is insufficien t
Rthevehicl eis stationary for alengthy period
The red F(USAonly) or !(Canada only)
indicator lamp in th einstrumen tcluste rgoe s
out .
The electric parking brak eis no tautomatically
engage dif th eengin eis switched off by th eECO
start/sto pfunction .
Releasing automatically
Your vehicle's electric parking brak eis auto -
matically release dif all of th efollowin gcondi-
tion sare met :
Rtheengin eis running.
Rth etransmission is in position hork and
you depress th eaccelerato rpedal or shif t
from position jtoh ork
Rtheseat belt has been fastened.
If th etransmission is in position k,thetailgat e
mus tbe closed. If your seat belt is no
tfastened, th efollowin g
condition smus tbe fulfilled to automatically
release th eelectric parking brake:
RThe driver's door is closed.
RYou are shifting from transmission position
j or hav epreviously driven at speeds
greate rthan 2mph (3 km/h)
Ensur ethat you do no tdepress th eaccelerato r
pedal unintentionally. Otherwise ,th eparking
brak ewill be release dand th evehicl ewill start
to move.
Eme rgency braking
The vehicl ecan also be braked during an emer-
gency by usin gth eelectric parking brake.
XWhil edriving, push handle :of th eelectric
parking brak e (Ypage 144).
The vehicl eis braked as lon gas you keep
handle :of th eelectric parking brak e
pressed. The longer th eelectric parking brak e
handle :is depressed, th egreate rth ebrak -
ing force .
During braking :
Rawarning tone sounds
Rth eReleas eParkin gBrakemessage
appear s
Rthered F (USAonly) or !(Canada
only) indicator lamp in th einstrumen tcluste r
flashes
When th evehicl ehas been braked to astand -
still, th eelectric parking brak eis engaged.
Park ing the vehicle for a long period
If you leav eth evehicl eparked for longer than
four weeks, th ebattery may be damaged by
exhaustive discharging.
If you leav eth evehicl eparked for longer than six
weeks, th evehicl emay suffer damag eas a
result of lack of use.
XVisit aqualified specialist workshop and see k
advice .
iYou can obtain information about trickle
chargers from aqualified specialist work-
shop.
Parking145
Driving and parking
Z
Page 182 of 338
For further information on the COMAND con-
troller; see the digital COMAND operating
instructions.
Activating the 360° camera using
reverse gear
The 360° camera images can be automatically
displayed by engaging reverse gear.
XMake sure that the SmartKey is in position2
in the ignition lock.
XMake sure that the Activation by R gearfunction is selected in COMAND (see Digital
Operator's Manual).
XTo show the 360° camera image: engage
reverse gear.
The COMAND display shows the area behind
the vehicle in split screen:
Rvehicle with guide lines
Rtop view of the vehicle
Information in the Digital Operator's
Manual
In the Digital Operator's Manual you will find
information on the following topics:
RDisplays in the COMAND display
RDisplay with the PARKTRONIC display
Exiting 360° camera display mode
As soon as your vehicle exceeds a speed of
10 mph (16 km/h) with the function activated,
the function switches off. The COMAND display
switches back to the previously selected view.
You can also switch the display by selecting the & symbol in the display and pressing Wthe
COMAND controller to confirm.
ATTENTION ASSIST
General notes
ATTENTION ASSIST helps you during long,
monotonous journeys, such as on highways. It is
active in the 37 mph (60 km/h) to 125 mph
(200 km/h) range. If ATTENTION ASSIST
detects typical indicators of fatigue or increas-
ing lapses in concentration on the part of the
driver, it suggests taking a break.
Important safety notes
ATTENTION ASSIST is only an aid to the driver. It
might not always recognize fatigue or increasing inattentiveness in time or fail to recognize them
at all. The system is not a substitute for a well-
rested and attentive driver.
The functionality of ATTENTION ASSIST is
restricted and warnings may be delayed or not
occur at all:
Rif the length of the journey is less than approx-
imately 30 minutes
Rif the road condition is poor, e.g. if the surface
is uneven or if there are potholes
Rif there is a strong side wind
Rif you have adopted a sporty driving style with
high cornering speeds or high rates of accel-
eration
Rif you are predominantly driving slower than
37 mph (60 km/h) or faster than 125 mph
(200 km/h)
Rif the time has been set incorrectly
Rin active driving situations, such as when you
change lanes or change your speed
ATTENTION ASSIST is reset when you continue
your journey and starts assessing your tiredness
again if:
Ryou switch off the engine
Ryou take off your seat belt and open the driv-
er's door, e.g. for a change of drivers or to
take a break
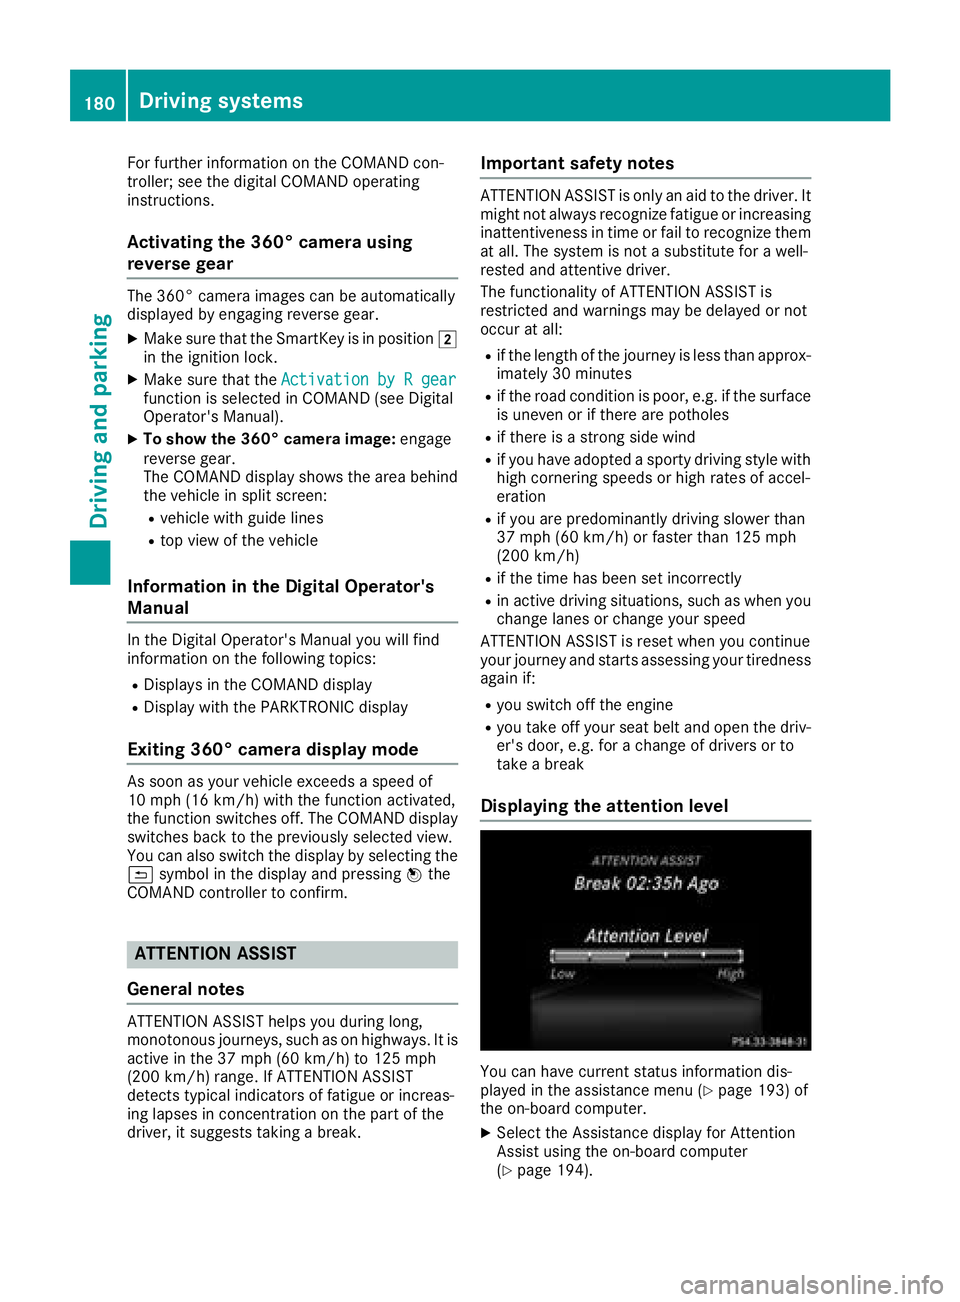
Displaying the attention level
You can have current status information dis-
played in the assistance menu (Ypage 193) of
the on-board computer.
XSelect the Assistance display for Attention
Assist using the on-board computer
(
Ypage 194).
180Driving systems
Driving and parking
Page 183 of 338
The following information is displayed:
RThe length of the journey since the last break.
RTheAttentionLeveldetermined by ATTEN-
TION ASSIST, displayed in a bar display in five
levels from high to low.
RIf ATTENTION ASSIST is unable to calculate
the attention level and cannot output a warn-
ing, the System Suspended
message
appears. The bar display then changes the
display, such as when you are driving at a
speed below 37 mph (60 km/h) or above
125 mph (200 km/h) .
Activating ATTENTION ASSIST
XActivateATTENTION ASSIST usin gth eon -
boar dcomputer (Ypage 195).
The system determine sth eattention level of
th edriver depending on th esetting selected:
Standard
selected: th esensitivit ywit hwhic h
th esystem determine sth eattention level is set
to normal.
Sensitive
selected: th esensitivit yis set
higher. The attention level detecte dby Attention
Assis tis adapted accordingly and th edriver is
warned earlier .
When ATTENTION ASSIST is deactivated, th e
é symbol appear sin th emultifunction dis-
play in th eassistanc egraphic display.
When ATTENTION ASSIST has been deactivated,
it is automatically reactivated after th eengin e
has been stopped. The sensitivit yselected cor-
responds to th elast selection activated (stand -
ard/sensitive).
Warn ing in the multifunction display
If fatigue or increasing lapse sin concentration
are detected, awarning appear sin th emulti-
function display: ATTENTION ASSIST
Take aBreak!.
In addition to th emessage shown in th emulti-
function display, you will then hear awarning
tone .
XIf necessary, tak e abreak.
XConfir mthemessage by pressing th ea
butto non th esteering wheel.
On lon gjourneys, tak eregular breaks in goo d
time to allow yourself to res tproperly. If you do
no ttak e a break and ATTENTION ASSIST still
detects increasing lapse sin concentration ,you
will be warned again after 15 minute sat th e earliest
.This will only happe nif ATTEN-
TIO NASSIST still detects typical indicators of
fatigue or increasing lapse sin concentration .
Vehicles wit hth eCOMAND multimedi asys -
tem :if awarning is output in th emultifunction
display, aservic estation search is performed in
th emultimedia system. You can select aservic e
station and navigation to this servic estation will
then begin. This function can be activated or
deactivated in th emultimedia system; see th e
Digital Operator' sManual.
Lane Tracking package
Gene ral notes
The Lan eTracking packag econsist sof Blind
Spot Assis t (Ypage 181) and Lan eKeepin g
Assis t (Ypage 183).
Blind Spot Assist
Generalnotes
Blind Spot Assis tmonitors th eareas on either
side of th evehicl ethat are no tvisible to th e
driver wit htwo lateral ,rear-facin gradar sen -
sors. Awarning display in th eexterio rmirror s
draw syour attention to vehicles detecte din th e
monitore darea. If you then switch on th ecor-
respondin gtur nsignal to chang elane, you will
also receiv ean optical and audible warning .
Blind Spot Assis tsupport syou from aspee dof
approximately 20 mph (30 km/h).
Important safety notes
GWARNING
Blind Spot Assist does not react to:
Rvehicles overtaken too closely on the side,
placing them in the blind spot area
Rvehicles which approach with a large speed
differential and overtake your vehicle
As a result, Blind Spot Assist may not give
warnings in such situations. There is a risk of
an accident.
Always observe the traffic conditions care-
fully, and maintain a safe lateral distance.
Blin d Spot Assist is only an aid. It may fail to
detect some vehicles and is no substitute for
attentive driving. Always ensure that there is
Driving systems181
Driving and parking
Z
Page 201 of 338

XPress the%button on the steering wheel.
XConfirm Yeswitha.
The RACE TIMER interrupts timing if you stop the
vehicle and turn the SmartKey to position 1in
the ignition lock. If you turn the SmartKey to
position 3and then press aStart
to con-
firm, timing is continued.
Resetting the current lap
XStop the RACE TIMER.
XPress the =or; button to select
Reset Lap.
XPress ato reset the lap time to "0".
Deleting all laps
If you switch off the engine, the RACE TIMER is
reset to "0" after 30 seconds. All laps are
deleted.
You cannot delete individual stored laps. If you
have stopped 16 laps, the current lap does not
have to be reset.
XReset the current lap.
XPress ato confirm Reset.
Reset Race-Timer?appears in the multi-
function display.
XPress the :button to select Yesand press
the a button to confirm.
All laps are deleted.
Overall statistics
:RACETIMER overall evaluation
;Total time driven
=Average speed
?Distance covered
AMaximum speed
This function is shown if you have stored at least
one lap and stopped the RACETIMER.
XPress the =or; button on the steering
wheel to select the AMGmenu.
XPress the9button repeatedly until the
overall evaluation appears.
Lap statistics
:Lap
;Lap time
=Average lap speed
?Lap length
ATop speed during lap
This function is only available if you have stored
at least two laps and have stopped the RACE-
TIMER.
XPress the =or; button on the steering
wheel to select the AMGmenu.
XPress9repeatedly until a lap evaluation
appears.
Each lap appears in a separate submenu. The
fastest lap is indicated by flashing symbol :.
XPress the9or: button to select a dif-
ferent lap evaluation.
Menus and submenus199
On-board computer and displays
Z
Page 252 of 338
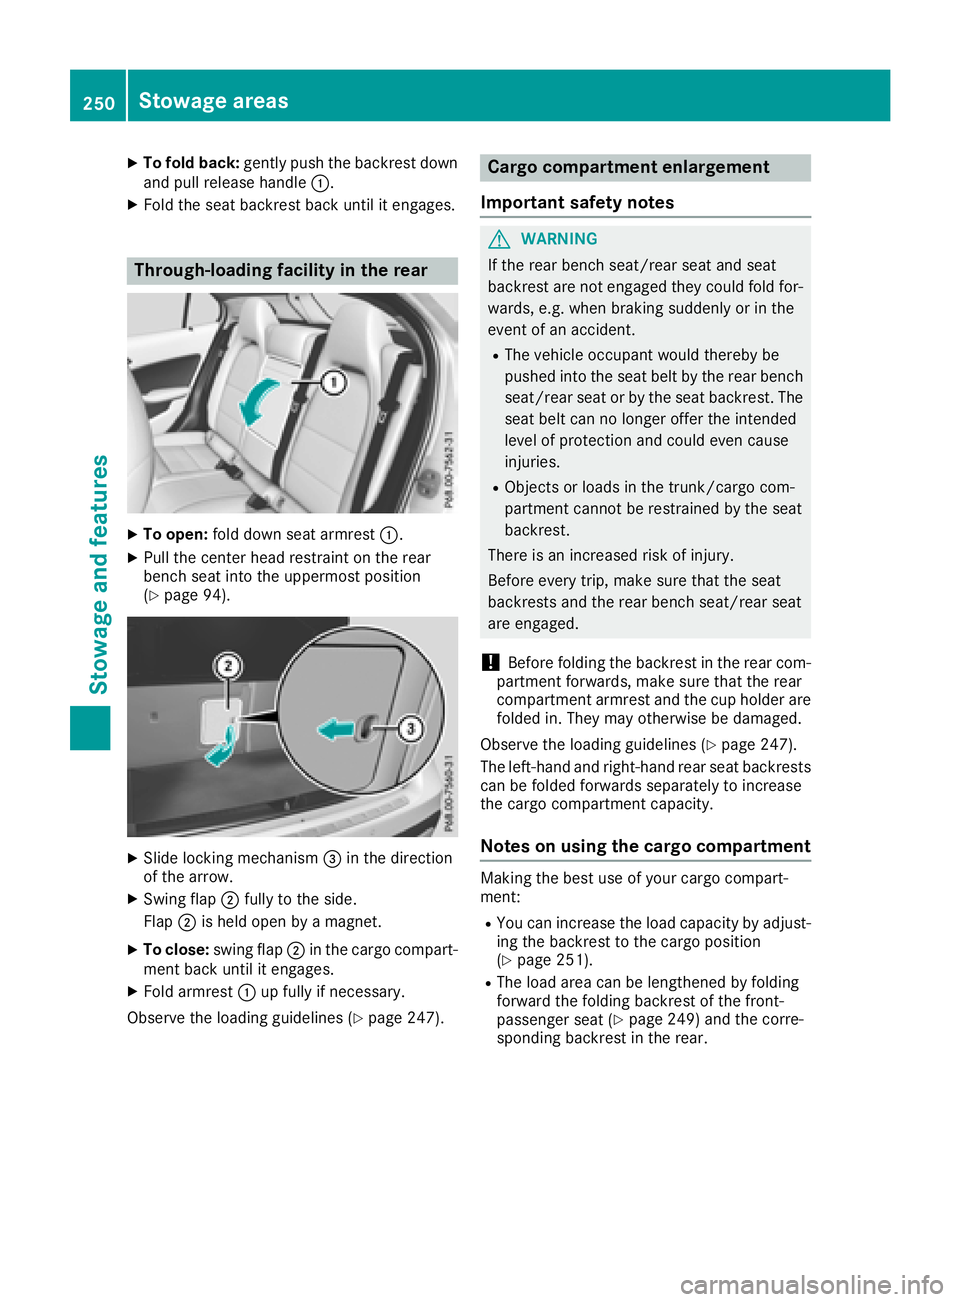
XTo fold back:gently push the backrest down
and pull release handle :.
XFold the seat backrest back until it engages.
Through-loading facility in the rear
XTo open:fold down seat armrest :.
XPull the center head restraint on the rear
bench seat into the uppermost position
(
Ypage 94).
XSlide locking mechanism =in the direction
of the arrow.
XSwing flap ;fully to the side.
Flap ;is held open by a magnet.
XTo close: swing flap ;in the cargo compart-
ment back until it engages.
XFold armrest :up fully if necessary.
Observe the loading guidelines (
Ypage 247).
Cargo compartment enlargement
Important safety notes
GWARNING
If the rear bench seat/rear seat and seat
backrest are not engaged they could fold for-
wards, e.g. when braking suddenly or in the
event of an accident.
RThe vehicle occupant would thereby be
pushed into the seat belt by the rear bench
seat/rear seat or by the seat backrest. The
seat belt can no longer offer the intended
level of protection and could even cause
injuries.
RObjects or loads in the trunk/cargo com-
partment cannot be restrained by the seat
backrest.
There is an increased risk of injury.
Before every trip, make sure that the seat
backrests and the rear bench seat/rear seat
are engaged.
!Before folding the backrest in the rear com-
partment forwards, make sure that the rear
compartment armrest and the cup holder are
folded in. They may otherwise be damaged.
Observe the loading guidelines (
Ypage 247).
The left-hand and right-hand rear seat backrests
can be folded forwards separately to increase
the cargo compartment capacity.
Notes on using the cargo compartment
Making the best use of your cargo compart-
ment:
RYou can increase the load capacity by adjust-
ing the backrest to the cargo position
(
Ypage 251).
RThe load area can be lengthened by folding
forward the folding backrest of the front-
passenger seat (
Ypage 249) and the corre-
sponding backrest in the rear.
250Stowage areas
Stowag ean d features
Page 292 of 338
Observe the service intervals in the Mainte-
nance Booklet or contact a qualified specialist
workshop for more information.
!You should have all work involving the bat-
tery carried out at a qualified specialist work-
shop. In the exceptional case that it is neces-
sary for you to disconnect the battery your-
self, make sure that:
Rswitch off the engine and remove the
SmartKey. On vehicles with KEYLESS-GO,
make sure that the ignition is switched off.
Check that all the indicator lamps in the
instrument cluster are off. Otherwise, elec-
tronic components, such as the alternator,
may be damaged.
Ryou first remove the negative terminal
clamp and then the positive terminal
clamp. Never swap the terminal clamps.
Otherwise, the vehicle's electronic system
may be damaged.
Rin vehicles with automatic transmission,
the transmission is locked in position j
after the battery is disconnected. The vehi-
cle is secured against rolling away. You can
then no longer move the vehicle.
The battery and the cover of the positive ter-
minal clamp must be installed securely during
operation.
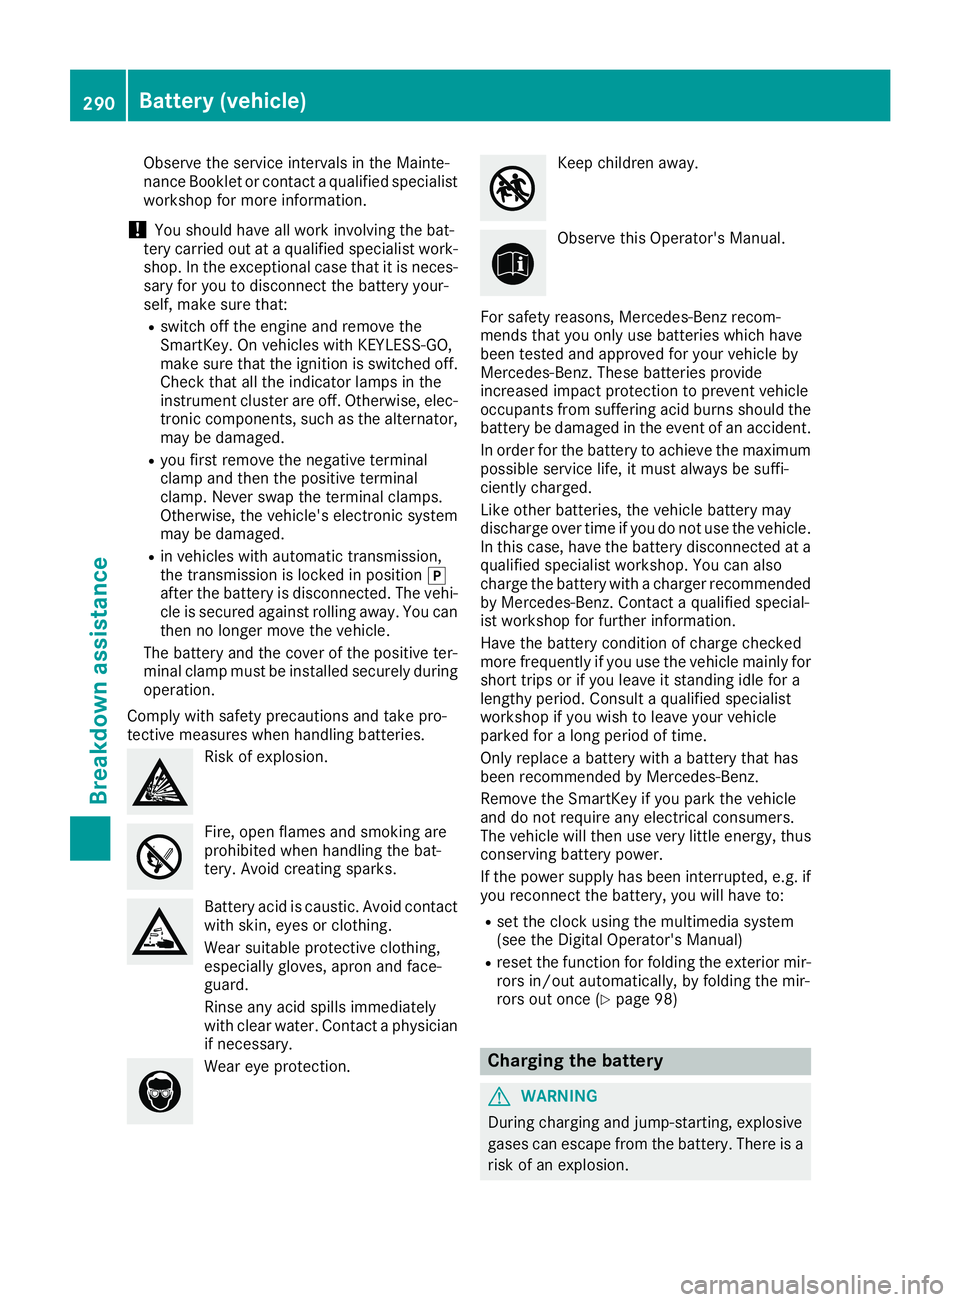
Comply with safety precautions and take pro-
tective measures when handling batteries.
Risk of explosion.
Fire, open flames and smoking are
prohibited when handling the bat-
tery. Avoid creating sparks.
Battery acid is caustic. Avoid contact
with skin, eyes or clothing.
Wear suitable protective clothing,
especially gloves, apron and face-
guard.
Rinse any acid spills immediately
with clear water. Contact a physician
if necessary.
Wear eye protection.
Keep children away.
Observe this Operator's Manual.
For safety reasons, Mercedes-Benz recom-
mends that you only use batteries which have
been tested and approved for your vehicle by
Mercedes-Benz. These batteries provide
increased impact protection to prevent vehicle
occupants from suffering acid burns should the
battery be damaged in the event of an accident.
In order for the battery to achieve the maximum
possible service life, it must always be suffi-
ciently charged.
Like other batteries, the vehicle battery may
discharge over time if you do not use the vehicle.
In this case, have the battery disconnected at a
qualified specialist workshop. You can also
charge the battery with a charger recommended
by Mercedes-Benz. Contact a qualified special-
ist workshop for further information.
Have the battery condition of charge checked
more frequently if you use the vehicle mainly for
short trips or if you leave it standing idle for a
lengthy period. Consult a qualified specialist
workshop if you wish to leave your vehicle
parked for a long period of time.
Only replace a battery with a battery that has
been recommended by Mercedes-Benz.
Remove the SmartKey if you park the vehicle
and do not require any electrical consumers.
The vehicle will then use very little energy, thus conserving battery power.
If the power supply has been interrupted, e.g. if
you reconnect the battery, you will have to:
Rset the clock using the multimedia system
(see the Digital Operator's Manual)
Rreset the function for folding the exterior mir-
rors in/out automatically, by folding the mir-
rors out once (
Ypage 98)
Charging the battery
GWARNING
During charging and jump-starting, explosive
gases can escape from the battery. There is a risk of an explosion.
290Battery (vehicle)
Breakdown assistance