heating MERCEDES-BENZ GLA SUV 2018 Owner's Manual
[x] Cancel search | Manufacturer: MERCEDES-BENZ, Model Year: 2018, Model line: GLA SUV, Model: MERCEDES-BENZ GLA SUV 2018Pages: 338, PDF Size: 5.59 MB
Page 14 of 338
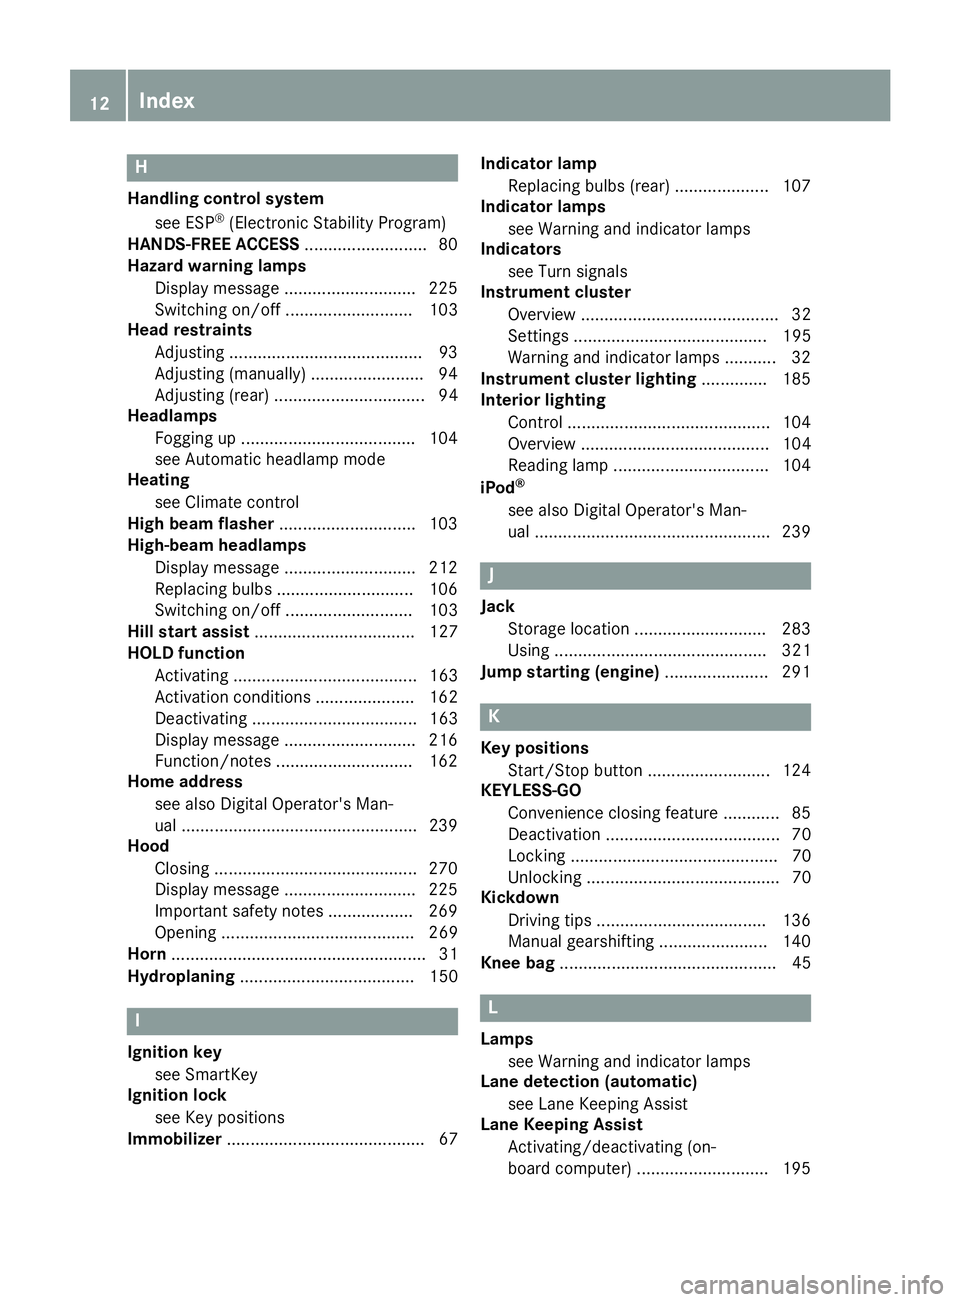
H
Handling control systemsee ESP®(Electronic Stability Program)
HANDS-FREE ACCESS ..........................80
Hazard warning lamps
Display message ............................ 225
Switching on/off ........................... 103
Head restraints
Adjusting .........................................9 3
Adjusting (manually) ........................ 94
Adjusting (rear) ................................ 94
Headlamps
Fogging up .....................................1 04
see Automatic headlamp mode
Heating
see Climate control
High beam flasher .............................1 03
High-beam headlamps
Display message ............................ 212
Replacing bulbs .............................1 06
Switching on/off ........................... 103
Hill start assist .................................. 127
HOLD function
Activating ....................................... 163
Activation conditions ..................... 162
Deactivating ................................... 163
Display message ............................ 216
Function/notes .............................1 62
Home address
see also Digital Operator's Man-
ual ..................................................2 39
Hood
Closing ...........................................2 70
Display message ............................ 225
Important safety notes .................. 269
Opening ......................................... 269
Horn ...................................................... 31
Hydroplaning ..................................... 150
I
Ignition key
see SmartKey
Ignition lock
see Key positions
Immobilizer .......................................... 67 Indicator lamp
Replacing bulbs (rear) .................... 107
Indicator lamps
see Warning and indicator lamps
Indicators
see Turn signals
Instrument cluster
Overview .......................................... 32
Settings ......................................... 195
Warning and indicator lamps ........... 32
Instrument cluster lighting .............. 185
Interior lighting
Control ...........................................1 04
Overview ........................................ 104
Reading lamp ................................. 104
iPod
®
see also Digital Operator's Man-
ual ..................................................2 39
J
Jack
Storage location ............................ 283
Using ............................................. 321
Jump starting (engine) ......................291
K
Key positions
Start/Stop button .......................... 124
KEYLESS-GO
Convenience closing feature ............ 85
Deactivation ..................................... 70
Locking ............................................ 70
Unlocking ......................................... 70
Kickdown
Driving tips ....................................1 36
Manual gearshifting ....................... 140
Knee bag .............................................. 45
L
Lamps
see Warning and indicator lamps
Lane detection (automatic)
see Lane Keeping Assist
Lane Keeping Assist
Activating/deactivating (on-
board computer) ............................ 195
12Index
Page 19 of 338
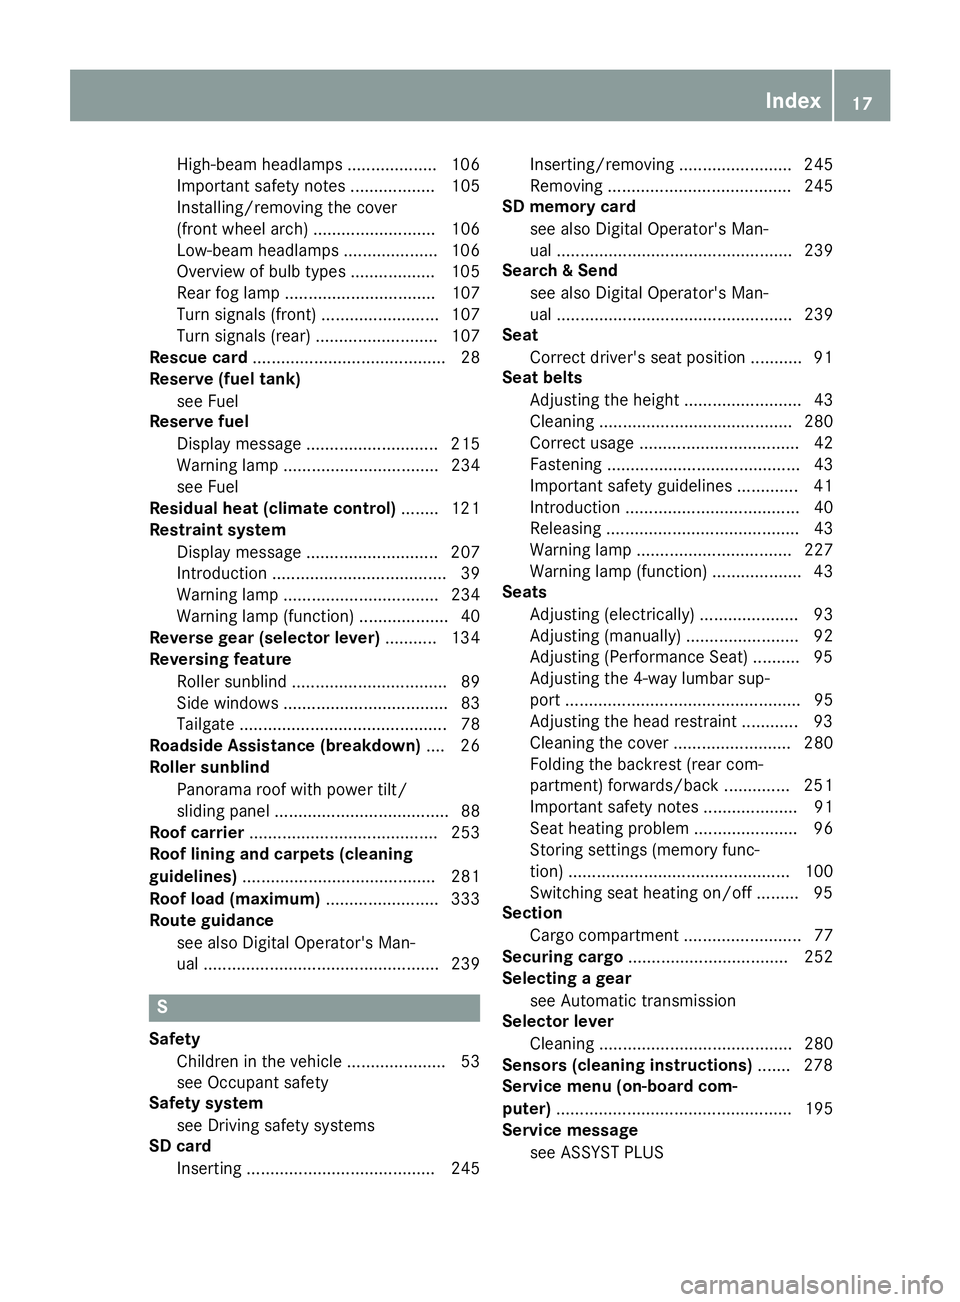
High-beam headlamps ................... 106
Important safety notes .................. 105
Installing/removing the cover
(front wheel arch) .......................... 106
Low-beam headlamps .................... 106
Overview of bulb types .................. 105
Rear fog lamp ................................ 107
Turn signals (front) ......................... 107
Turn signals (rear) .......................... 107
Rescue card ......................................... 28
Reserve (fuel tank)
see Fuel
Reserve fuel
Display message ............................ 215
Warning lamp ................................. 234
see Fuel
Residual heat (climate control) ........ 121
Restraint system
Display message ............................ 207
Introduction ..................................... 39
Warning lamp ................................. 234
Warning lamp (function) ................... 40
Reverse gear (selector lever) ........... 134
Reversing feature
Roller sunblind ................................. 89
Side windows ................................... 83
Tailgate ............................................ 78
Roadside Assistance (breakdown) .... 26
Roller sunblind
Panorama roof with power tilt/
sliding panel ..................................... 88
Roof carrier ........................................ 253
Roof lining and carpets (cleaning
guidelines) ......................................... 281
Roof load (maximum) ........................ 333
Route guidance
see also Digital Operator's Man-
ual .................................................. 239
S
SafetyChildren in the vehicle ..................... 53
see Occupant safety
Safety system
see Driving safety systems
SD card
Inserting ........................................ 245 Inserting/removing ........................ 245
Removing ....................................... 245
SD memory card
see also Digital Operator's Man-
ual .................................................. 239
Search & Send
see also Digital Operator's Man-
ual .................................................. 239
Seat
Correct driver's seat position ........... 91
Seat belts
Adjusting the height ......................... 43
Cleaning ......................................... 280
Correct usage .................................. 42
Fastening ......................................... 43
Important safety guidelines ............. 41
Introduction ..................................... 40
Releasing ......................................... 43
Warning lamp ................................. 227
Warning lamp (function) ................... 43
Seats
Adjusting (electrically) ..................... 93
Adjusting (manually) ........................ 92
Adjusting (Performance Seat) .......... 95
Adjusting the 4-way lumbar sup-
port .................................................. 95
Adjusting the head restraint ............ 93
Cleaning the cover ......................... 280
Folding the backrest (rear com-
partment) forwards/back .............. 251
Important safety notes .................... 91
Seat heating problem ...................... 96
Storing settings (memory func-
tion) ............................................... 100
Switching seat heating on/off ......... 95
Section
Cargo compartment ......................... 77
Securing cargo .................................. 252
Selecting a gear
see Automatic transmission
Selector lever
Cleaning ......................................... 280
Sensors (cleaning instructions) ....... 278
Service menu (on-board com-
puter) .................................................. 195
Service message
see ASSYST PLUS
Index17
Page 36 of 338
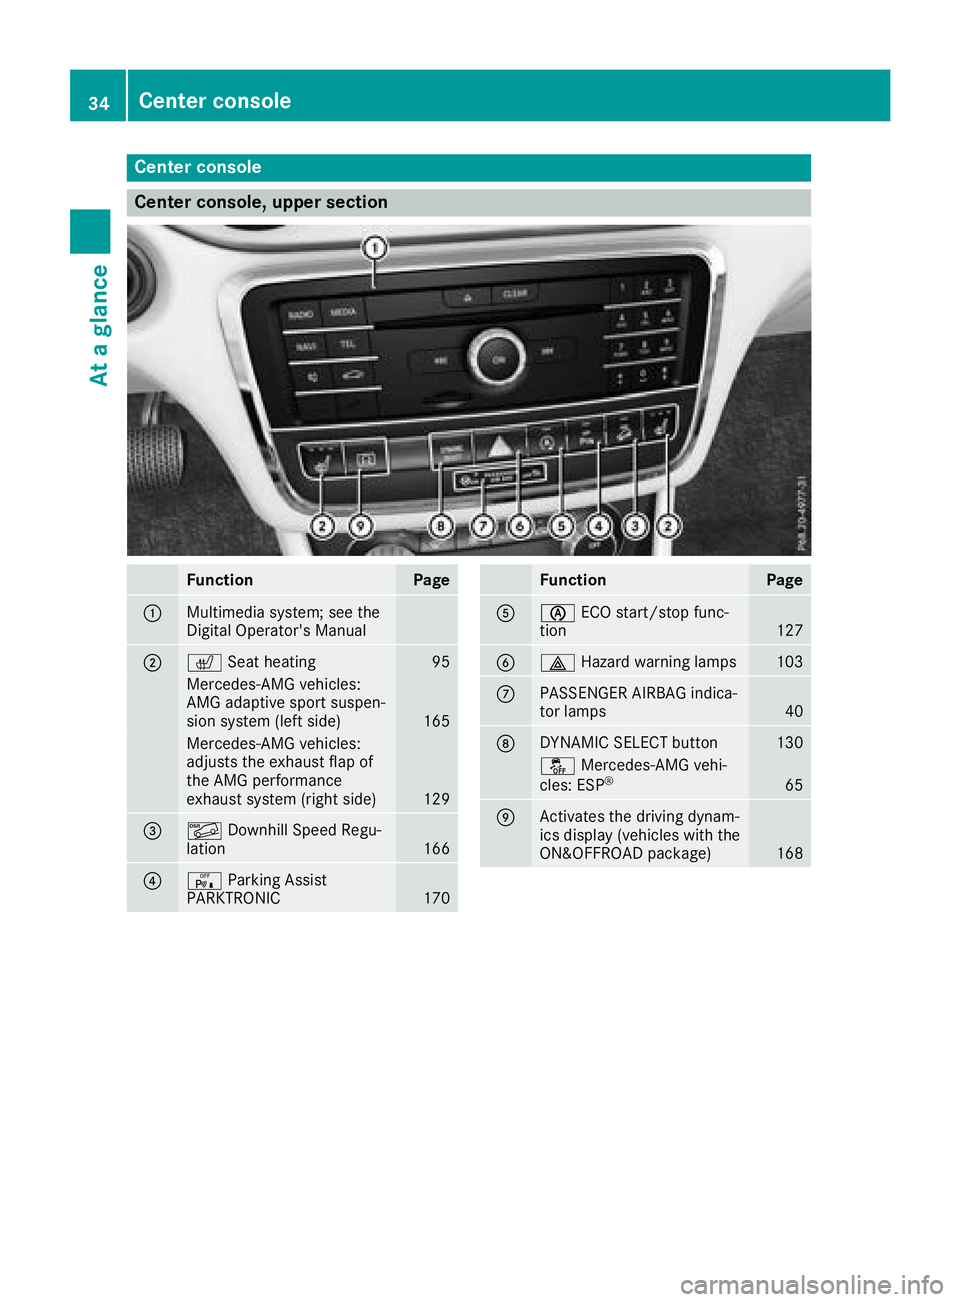
Center console
Center console, upper section
FunctionPage
:Multimedia system; see the
Digital Operator's Manual
;cSeat heating95
Mercedes-AMG vehicles:
AMG adaptive sport suspen-
sion system (left side)
165
Mercedes-AMG vehicles:
adjusts the exhaust flap of
the AMG performance
exhaust system (right side)
129
=ÃDownhill Speed Regu-
lation166
?c Parking Assist
PARKTRONIC170
FunctionPage
Aè ECO start/stop func-
tion127
B£ Hazard warning lamps103
CPASSENGER AIRBAG indica-
tor lamps40
DDYNAMIC SELECT button130
åMercedes-AMG vehi-
cles: ESP®65
EActivates the driving dynam-
ics display (vehicles with the
ON&OFFROAD package)
168
34Center console
At a glance
Page 76 of 338
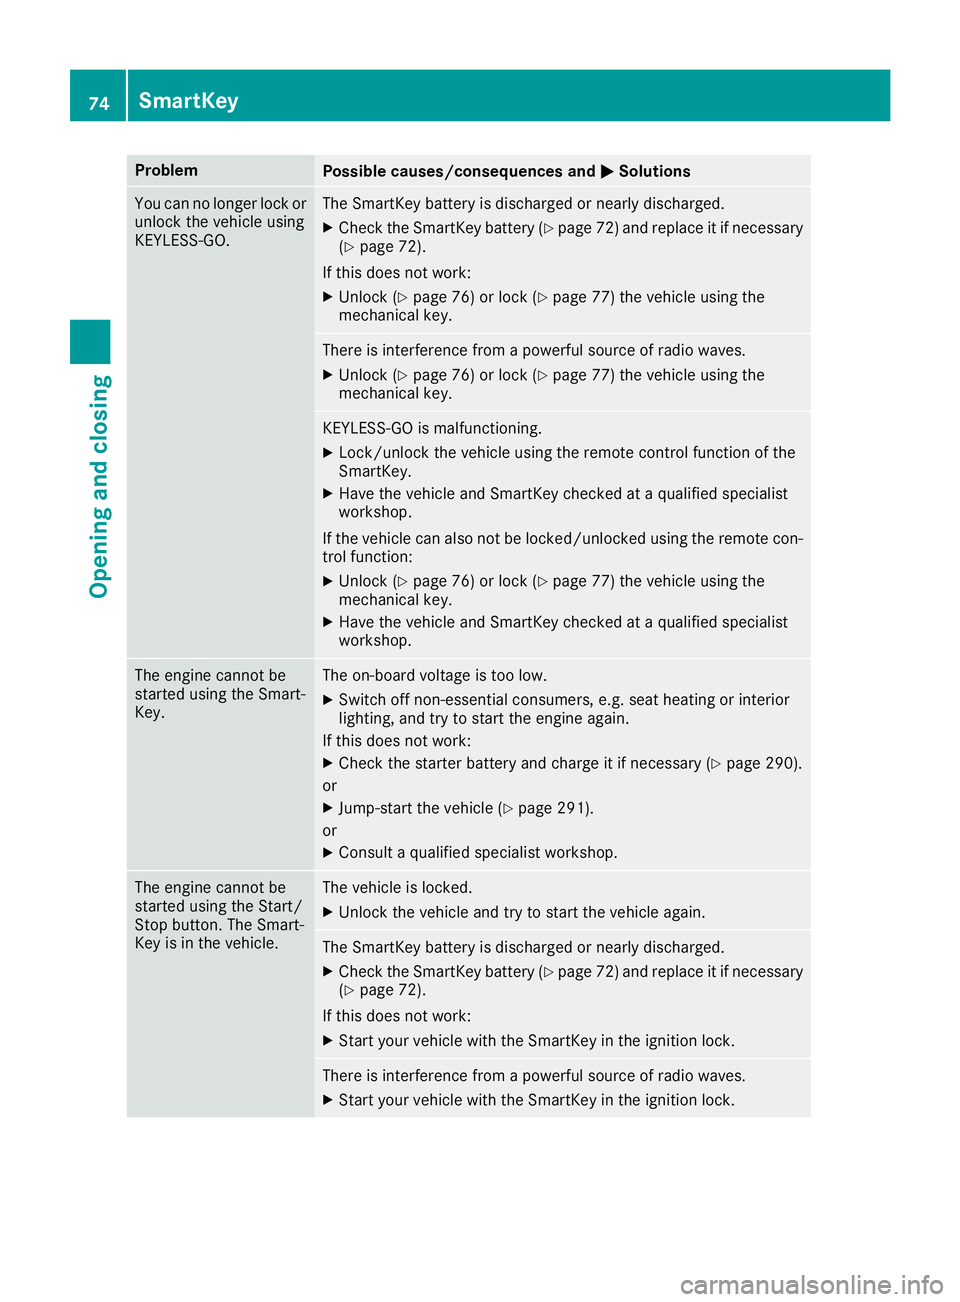
ProblemPossible causes/consequences andMSolutions
You can no longer lock or
unlock the vehicle using
KEYLESS-GO.The SmartKey battery is discharged or nearly discharged.
XCheck the SmartKey battery (Ypage 72) and replace it if necessary
(Ypage 72).
If this does not work:
XUnlock (Ypage 76) or lock (Ypage 77) the vehicle using the
mechanical key.
There is interference from a powerful source of radio waves.
XUnlock (Ypage 76) or lock (Ypage 77) the vehicle using the
mechanical key.
KEYLESS-GO is malfunctioning.
XLock/unlock the vehicle using the remote control function of the
SmartKey.
XHave the vehicle and SmartKey checked at a qualified specialist
workshop.
If the vehicle can also not be locked/unlocked using the remote con-
trol function:
XUnlock (Ypage 76) or lock (Ypage 77) the vehicle using the
mechanical key.
XHave the vehicle and SmartKey checked at a qualified specialist
workshop.
The engine cannot be
started using the Smart-
Key.The on-board voltage is too low.
XSwitch off non-essential consumers, e.g. seat heating or interior
lighting, and try to start the engine again.
If this does not work:
XCheck the starter battery and charge it if necessary (Ypage 290).
or
XJump-start the vehicle (Ypage 291).
or
XConsult a qualified specialist workshop.
The engine cannot be
started using the Start/
Stop button. The Smart-
Key is in the vehicle.The vehicle is locked.
XUnlock the vehicle and try to start the vehicle again.
The SmartKey battery is discharged or nearly discharged.
XCheck the SmartKey battery (Ypage 72) and replace it if necessary
(Ypage 72).
If this does not work:
XStart your vehicle with the SmartKey in the ignition lock.
There is interference from a powerful source of radio waves.
XStart your vehicle with the SmartKey in the ignition lock.
74SmartKey
Opening and closing
Page 94 of 338
against your seat belt by the unsecured driv-
er's seat.
This could cause you to lose control of the
vehicle. The seat belt cannot protect as inten-
ded and could result in additional injury.
There is a risk of an accident and injury.
Before every journey, make sure that the driv-
er's seat is fully engaged.
Observe the safety notes on "Air bags"
(
Ypage 44) and "Children in the vehicle"
(Ypage 53).
GWARNING
If the driver's seat is not engaged, it could
move unexpectedly while the vehicle is in
motion. This could cause you to lose control of the vehicle. There is a risk of an accident.
Always make sure that the driver's seat is
engaged before starting the vehicle.
GWARNING
You could lose control of your vehicle if you do the following while driving:
Radjust the driver's seat, head restraint,
steering wheel or mirrors
Rfasten the seat belt
There is a risk of an accident.
Adjust the driver's seat, head restraint, steer-
ing wheel and mirror and fasten your seat belt before starting the engine.
GWARNING
If you adjust the seat height carelessly, you or
other vehicle occupants could be trapped and
thereby injured. Children in particular could
accidentally press the electrical seat adjust-
ment buttons and become trapped. There is a
risk of injury.
While moving the seats, make sure that your
hands or other body parts do not get under the
lever assembly of the seat adjustment sys-
tem.
!To prevent damage to the seats and the seat
heating, observe the following notes:
RDo not spill liquids onto the seats. Dry the
seats as soon as possible if liquid does get
spilled on the seats.
RIf the seat covers are damp or wet, do not
switch on the seat heating. Also, do not use
the seat heating to dry the seats.
RClean the seat covers as recommended;
see the "Interior care" section.
RDo not transport heavy loads on the seats.
Do not place pointed objects on the seat
cushions such as knives, nails or tools.
Where possible, use the seats only for car-
rying passengers.
RWhen operating the seat heating, do not
cover the seats with insulating materials,
e.g. blankets, coats, bags, protective cov-
ers, child seats or booster seats.
RWhen the seat heating is switched on, the
seat surface can be damaged as a result of objects being placed on the seats; for
exam ple, seat c
ushions, child seats and
protective covers not approved by
Mercedes-Benz.
!Make sure that there are no objects in the
footwell under or behind the seats when mov-
ing the seats back. There is a risk that the
seats and/or the objects could be damaged.
iFurther related subjects:
RCargo compartment enlargement (folding
down the rear seats) (Ypage 250)
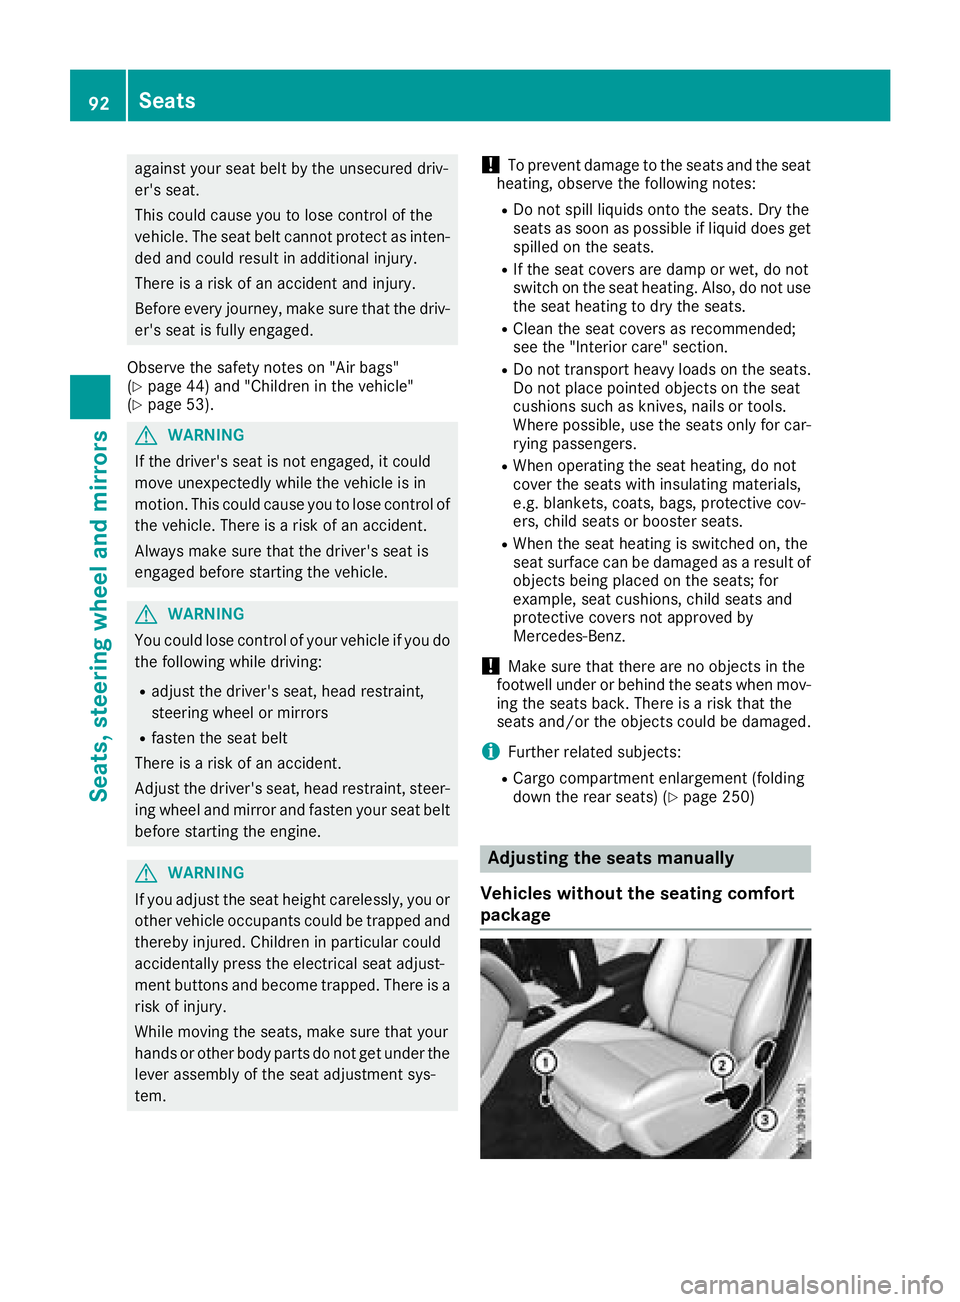
Adjusting the seats manually
Vehicles without the seating comfort
package
92Seats
Seats, steering wheel and mirrors
Page 97 of 338
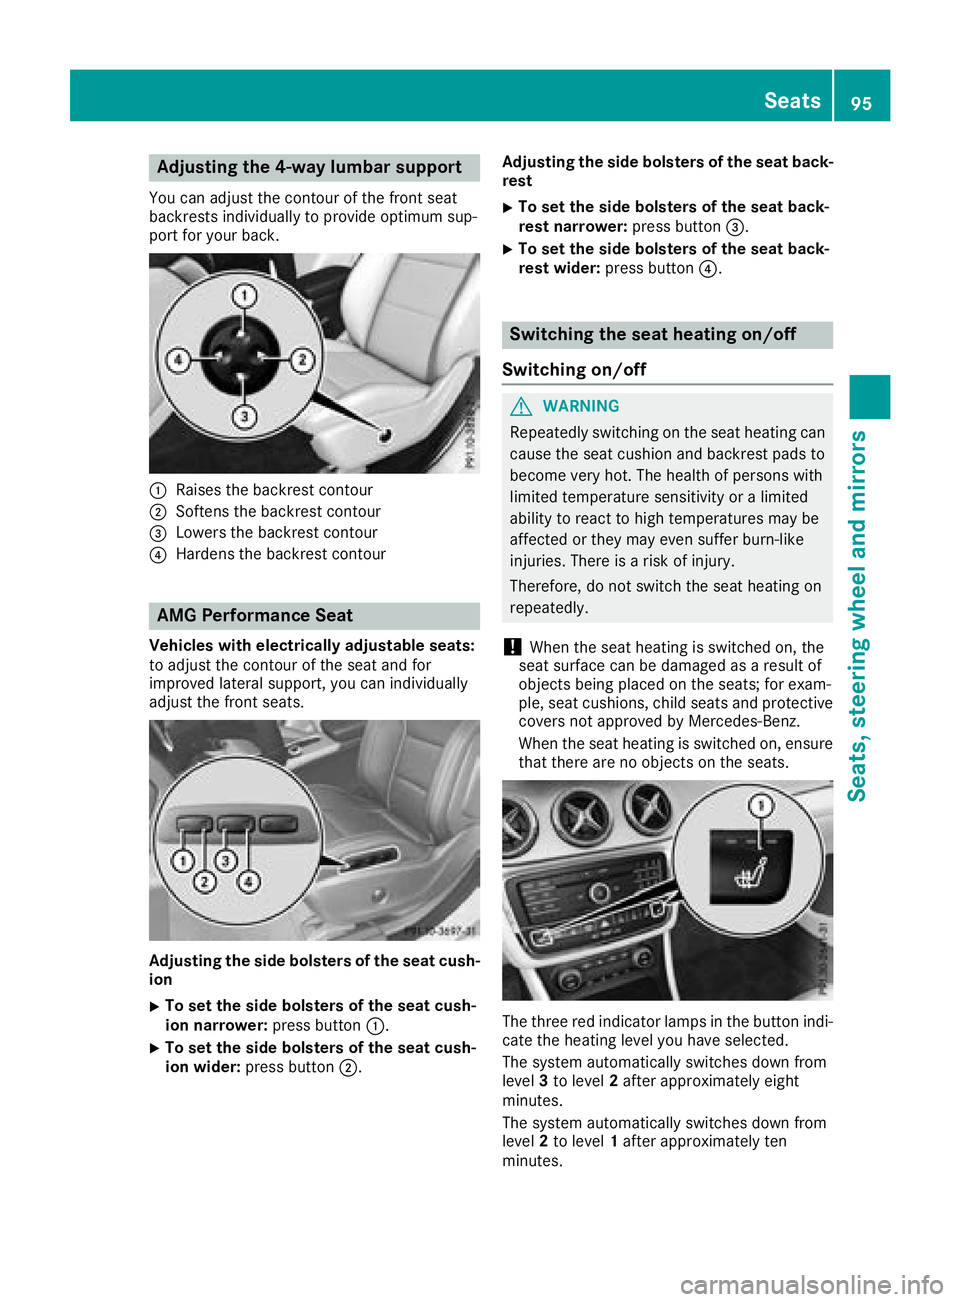
Adjusting the 4-way lumbar support
You can adjust thecontour of th efron tseat
backrest sindividually to provid eoptimum sup-
por tfor your back.
:Raises th ebackrest contour
;Soften sth ebackrest contour
=Lowers th ebackrest contour
?Harden sth ebackrest contour
AMG Perfor mance Seat
Vehicles wit helectricall yadjustabl eseats :
to adjust th econtour of th eseat and for
improve dlateral support ,you can individually
adjust th efron tseats.
Adjusting th esid ebolsters of th esea tcush -
ion
XTo set th esid ebolsters of th esea tcush -
ion narrower: press button:.
XTo set th esid ebolsters of th esea tcush -
ion wider: press butto n;. Adjusting th
esid ebolsters of th esea tback -
res t
XTo set th esid ebolsters of th esea tback -
res tnarrower: press butto n=.
XTo set th esid ebolsters of th esea tback -
res twider: press butto n?.
Switching the seat heating on/off
Switching on/off
GWARNIN G
Repeatedly switching on th eseat heating can
caus eth eseat cushion and backrest pads to
become ver yhot .The healt hof person swit h
limite dtemperature sensitivit yor alimite d
abilit yto reac tto high temperatures may be
affecte dor they may eve nsuffer burn-like
injuries. There is aris kof injury.
Therefore ,do no tswitch th eseat heating on
repeatedly.
!When th eseat heating is switched on ,th e
seat surfac ecan be damaged as aresult of
objects bein gplaced on th eseats; for exam-
ple, seat cushions, child seat sand protective
cover sno tapprove dby Mercedes-Benz .
When th eseat heating is switched on ,ensur e
that there are no objects on th eseats.
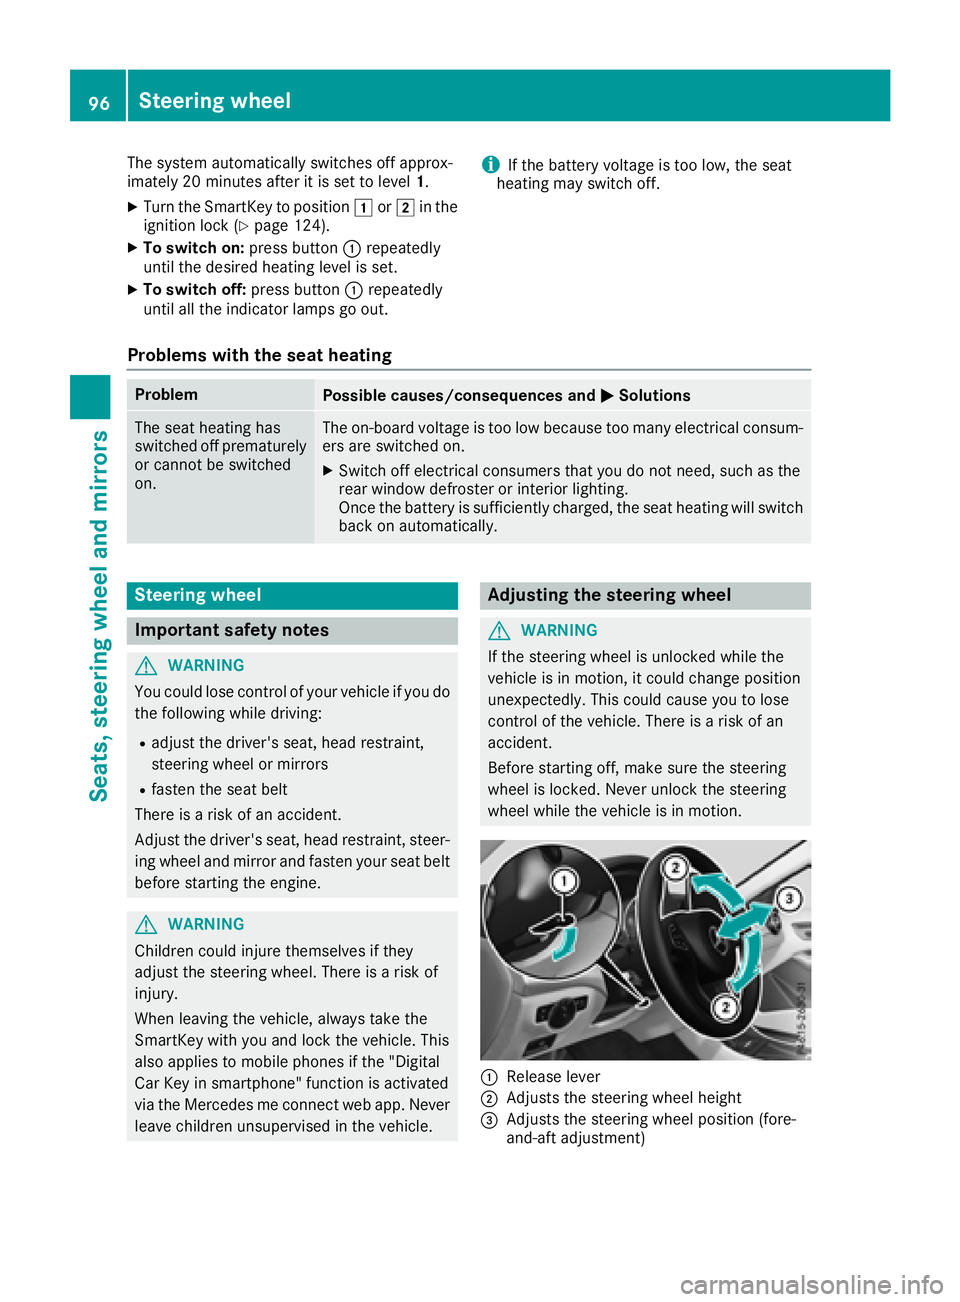
The three red indicator lamp sin th ebutto nindi-
cat eth eheating level you hav eselected.
The system automatically switches down from
level 3to level 2after approximately eigh t
minutes.
The system automatically switches down from
level 2to level 1after approximately te n
minutes.
Seats95
Seats, steering wheel and mirrors
Z
Page 98 of 338
The system automatically switches off approx-
imately 20 minutes after it is set to level1.
XTurn the SmartKey to position1or2 in the
ignition lock (Ypage 124).
XTo switch on: press button:repeatedly
until the desired heating level is set.
XTo switch off: press button:repeatedly
until all the indicator lamps go out.
iIf the battery voltage is too low, the seat
heating may switch off.
Problems with the seat heating
ProblemPossible causes/consequences and MSolutions
The seat heating has
switched off prematurely
or cannot be switched
on.The on-board voltage is too low because too many electrical consum-
ers are switched on.
XSwitch off electrical consumers that you do not need, such as the
rear window defroster or interior lighting.
Once the battery is sufficiently charged, the seat heating will switch
back on automatically.
Steering wheel
Important safety notes
GWARNING
You could lose control of your vehicle if you do the following while driving:
Radjust the driver's seat, head restraint,
steering wheel or mirrors
Rfasten the seat belt
There is a risk of an accident.
Adjust the driver's seat, head restraint, steer-
ing wheel and mirror and fasten your seat belt before starting the engine.
GWARNING
Children could injure themselves if they
adjust the steering wheel. There is a risk of
injury.
When leaving the vehicle, always take the
SmartKey with you and lock the vehicle. This
also applies to mobile phones if the "Digital
Car Key in smartphone" function is activated
via the Mercedes me connect web app. Never leave children unsupervised in the vehicle.
Adjusting the steering wheel
GWARNING
If the steering wheel is unlocked while the
vehicle is in motion, it could change position
unexpectedly. This could cause you to lose
control of the vehicle. There is a risk of an
accident.
Before starting off, make sure the steering
wheel is locked. Never unlock the steering
wheel while the vehicle is in motion.
:Release lever
;Adjusts the steering wheel height
=Adjusts the steering wheel position (fore-
and-aft adjustment)
96Steering wheel
Seats, steering wheel and mirrors
Page 99 of 338
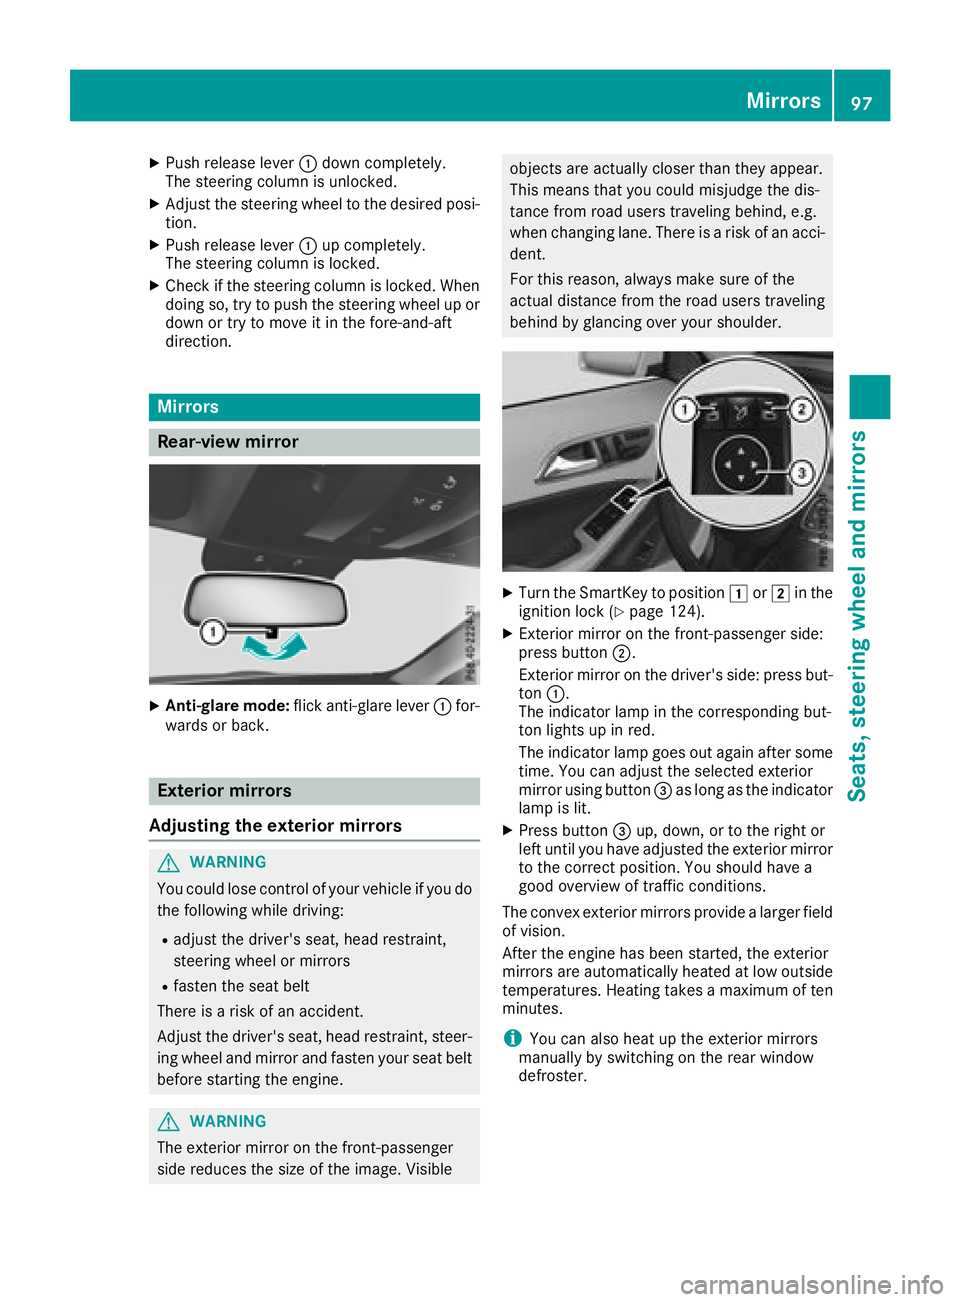
XPush release lever:down completely.
The steering column is unlocked.
XAdjust the steering wheel to the desired posi-
tion.
XPush release lever :up completely.
The steering column is locked.
XCheck if the steering column is locked. When
doing so, try to push the steering wheel up or down or try to move it in the fore-and-aft
direction.
Mirrors
Rear-view mirror
XAnti-glare mode: flick anti-glare lever :for-
wards or back.
Exterior mirrors
Adjusting the exterior mirrors
GWARNING
You could lose control of your vehicle if you do the following while driving:
Radjust the driver's seat, head restraint,
steering wheel or mirrors
Rfasten the seat belt
There is a risk of an accident.
Adjust the driver's seat, head restraint, steer-
ing wheel and mirror and fasten your seat belt before starting the engine.
GWARNING
The exterior mirror on the front-passenger
side reduces the size of the image. Visible
objects are actually closer than they appear.
This means that you could misjudge the dis-
tance from road users traveling behind, e.g.
when changing lane. There is a risk of an acci-
dent.
For this reason, always make sure of the
actual distance from the road users traveling
behind by glancing over your shoulder.
XTurn the SmartKey to position 1or2 in the
ignition lock (Ypage 124).
XExterior mirror on the front-passenger side:
press button ;.
Exterior mirror on the driver's side: press but-
ton :.
The indicator lamp in the corresponding but-
ton lights up in red.
The indicator lamp goes out again after some
time. You can adjust the selected exterior
mirror using button =as long as the indicator
lamp is lit.
XPress button =up, down, or to the right or
left until you have adjusted the exterior mirror
to the correct position. You should have a
good overview of traffic conditions.
The convex exterior mirrors provide a larger field of vision.
After the engine has been started, the exterior
mirrors are automatically heated at low outside
temperatures. Heating takes a maximum of ten
minutes.
iYou can also heat up the exterior mirrors
manually by switching on the rear window
defroster.
Mirrors97
Seats, steering wheel and mirrors
Z
Page 116 of 338
BSwitches cooling with air dehumidification on/off (Ypage 117)
CSwitches the rear window defroster on/off (Ypage 120)
Notes on using the air-conditioning
system
Air-conditioning system
Below, you can find a number of notes and rec-
ommendations to help you use the air-condi-
tioning system optimally.
RSwitch on the air-conditioning system by turn- ing control knob Aclockwise to the desired
position (except position 0).
RSet the temperature to 72 ‡ (22 †).
RRecommendation for avoiding misted
windows at low exterior temperatures or
in rain: switch on the ¿cooling with dehu-
midification function (
Ypage 117).
Set air distribution to ¯and if possible
switch off PandO (
Ypage 118).
Deactivate air-recirculation mode e
(
Ypage 121).
Set airflow control Ato a setting between 3
and 6(
Ypage 119).
RRecommendation for rapid cooling or
heating of the vehicle interior: briefly set
airflow control Ato a setting between 3and
6 (
Ypage 119).
RRecommendation for a constant vehicle
interior temperature: set airflow controlA
to a setting between 1and 3(
Ypage 119).
RRecommendation for air distribution in
winter: select the Oand¯ settings
(
Ypage 118).
Recommendation for air distribution in
summer: select the PorP and¯
settings (
Ypage 118).
ROnly use the "Windshield defrosting" function
briefly until the windshield is clear again.
ROnly use air-recirculation mode briefly, e.g. if
there are unpleasant outside odors or when in
a tu
nnel. The windows could otherwise fog up,
since no fresh air is drawn into the vehicle in
air-recirculation mode.
RIf you change the settings of the climate con-
trol system, the climate status display
appears for approximately three seconds at
the bottom of the screen on the multimedia
system display; see Digital Operator's Man-
ual. You will see the current settings of the
various climate control functions.
DYNAMIC SELECT button (except
Mercedes-AMG vehicles)
You can choose between various drive programs
with the DYNAMIC SELECT button
(
Ypage 130).
If you have selected drive program E:
Rwhen heating, the electrical heater booster is
deactivated and in the warming-up phase
heat output is reduced
Rthe rear window defroster running time is
reduced
Depending on the configuration, climate set-
tings may also be influenced in the drive pro-
gram I.
If you have selected drive program Cor S, cli-
mate settings are not influenced.
ECO start/stop function
During automatic engine switch-off, the climate
control system only operates at a reduced capa-
city. If you require the full climate control output,
you can switch off the ECO start/stop function
by pressing the ECO button (
Ypage 129).
114Overview of climate control systems
Climate control
Page 119 of 338
ual. Youwillsee the current settings of the
various climate control functions.
DYNAMIC SELECT button (except
Mercedes-AMG vehicles)
You can choose between various drive programs
wit h the DYNAM IC SELECT button
(
Ypage 130).
If you have selected drive program E:
Rwhen heating, the electrical heater booster is
deactivated and inthe warming-up phase
heat output isreduced
Rthe rear window defroster running time is
reduced
Dependin g on the configuration, climate set-
tings may also beinfluenced inthe drive pro-
gram I.
If you have selected drive program Cor S,cli-
mate settings are not influenced.
ECO start/stop function
During automat icengine switch-off, the climate
control system only operates at a reduced capa-
city. Ifyou require the full climate control output,
you can switch off the ECO start /stop function
by pressing the ECO button (
Ypage 129).
Operating the climate control sys-
tems
Activating/deactivating climate con-
trol
General notes
When the climate control is switched off, the air
supply and air circulation are also switched off.
The wind ows could fog up. Therefore, switch off
clim ate control only brie fly
Air-conditioning system
XTurn theSmartKey to position 2inthe igni-
tion lock (Ypage 124).
XTo switch on: turn controlAclock wiseto
the desired position (except position 0)
(
Ypage 113).
XTo switch off: turn controlAcounter-clock-
wise to position 0(Ypage 113).
Dual-zone automatic climate control
XTurn the SmartKey to position 2inthe igni-
tion lock (Ypage 124).
XTo activate: press theÃbutton.
The indicator lamp inthe à button lights
up. Airflow and air distribution are set to auto-
mat icmode.
or
XPress the ^button.
The indicator lamp inthe ^ button goes
out. The previously selected settings are
restored.
XTo deactivate: press the^button.
The indicator lamp inthe ^ button lights
up.
iDual-zone automatic climate control: switch
on clim ate control primarily using the Ã
button.
Switching cooling with air dehumidi-
fication on/off
General notes
If you deactivate the "Cooling with air-dehumid-
ification" function, the air inside the vehicle will
not becooled. The air inside the vehicle willalso
not be dehumidif ied. The windows can fog up
more quickly. Therefore, only deactivate the
"Cooling with air-dehumidif ication" function
briefly.
The "Cooling with air dehumidif ication" function
is only availab lewhen the engine isrunning. The
air inside the vehicle iscooled and dehumidif ied
according to the temperature selected.
Condensation may drip from the underside of
the vehicle when it is in cooling mode. This is
normal and not a sign that there is a malfunc-
tion.
Activating/deactivating
XPress the ¿button.
The indicator lamp inthe ¿ button lights
up or goes out.
The indicator lamp inthe button indicates that
the respective function isactivated. The
"Cooling with air dehumidif ication" function
has a delayed switch-off feature.
Operating the climate control systems117
Climate control