MERCEDES-BENZ GLC 2018 Owners Manual
Manufacturer: MERCEDES-BENZ, Model Year: 2018, Model line: GLC, Model: MERCEDES-BENZ GLC 2018Pages: 390, PDF Size: 9.04 MB
Page 331 of 390
available engine and care oils are suitable for
this.
For heavier soiling, you can apply a fine paint-
work polish with a microfiber cloth. Remove
the excess polish residue after polishing.
Impurities combined with the effects of road grit
and corrosive environmental factors may cause
flash rust to form on the surface. You can
restore the original shine of the exhaust pipe by
cleaning it regularly, especially in winter and
after washing. X
Clean the exhaust pipe with a care product
tested and approved by Mercedes-Benz.
Cleaning the trailer tow hitch
H Environmental note
Dispose of rags soaked in oil and grease in an
environmentally responsible manner.
! Please note the care instructions in the
trailer coupling manufacturer's operating
instructions.
The ball coupling must be cleaned if it becomes
dirty or corroded. X
Remove rust on the ball, e.g. with a wire
brush. X
Remove dirt with a clean, lint-free cloth or a
brush. X
After cleaning, lightly oil or grease the ball
coupling. X
Check that the vehicle's trailer tow hitch is
working properly.
You can also have the maintenance work on the
ball coupling and the trailer tow hitch carried out
by a qualified specialist workshop.
Interior care
Cleaning the display
! For cleaning, do not use any of the following: R
alcohol-based thinner or gasoline R
abrasive cleaning agents R
commercially-available household cleaning
agents
These may damage the display surface. Do
not put pressure on the display surface when cleaning. This could lead to irreparable dam-
age to the display. X
Before cleaning the display, make sure that it
is switched off and has cooled down. X
Clean the display surface using a commer-
cially available microfiber cloth and TFT/LCD
display cleaner. X
Dry the display surface using a dry microfiber
cloth.
Cleaning the plastic trim
G WARNING
Care products and cleaning agents containing
solvents cause surfaces in the cockpit to
become porous. As a result, plastic parts may
come loose in the event of air bag deploy-
ment. There is a risk of injury.
Do not use any care products and cleaning
agents to clean the cockpit.
! Never attach the following to plastic surfa-
ces: R
stickers R
films R
perfume oil container or similar
You could otherwise damage the plastic.
! Do not allow cosmetics, insect repellent or
sunscreen to come into contact with the plas-
tic trim. This maintains the high-quality look of
the surfaces. X
Wipe the plastic trim with a damp, lint-free
cloth, e.g. a microfiber cloth. X
Heavy soiling: use care and cleaning prod-
ucts recommended and approved by
Mercedes-Benz.
The surface may change color temporarily.
Wait until the surface is dry again.
Cleaning the steering wheel and selec-
tor lever X
Thoroughly wipe with a damp cloth or use
leather care agents that have been recom-
mended and approved by Mercedes-Benz. Care 329
Maintenance and care Z
Page 332 of 390
Cleaning genuine wood and trim ele-
ments
! Do not use solvent-based cleaning agents
such as tar remover, wheel cleaners, polishes
or waxes. There is otherwise a risk of damag-
ing the surface.
! Do not use chrome polish on trim pieces.
The trim pieces have a chrome look but are
mostly made of anodized aluminum and can
lose their shine if chrome polish is used. Use
a damp, lint-free cloth instead when cleaning
the trim pieces.
If the chrome-plated trim pieces are very
dirty, you can use a chrome polish. If you are
unsure as to whether the trim pieces are
chrome-plated or not, consult an authorized
Mercedes-Benz Center. X
Wipe the wooden trim and trim pieces with a
damp, lint-free cloth, e.g. a microfiber cloth. X
Trim elements with piano black finish:
wipe with a soft, damp cotton cloth. Use clean
water. X
Heavy soiling: use care and cleaning prod-
ucts recommended and approved by
Mercedes-Benz.
Cleaning the seat covers
General notes
! Do not use a microfiber cloth to clean covers
made out of real leather, artificial leather or
DINAMICA. If used often, these can damage
the cover.
Note that regular care is essential to ensure that
the appearance and comfort of the covers is
retained over time.
Genuine leather seat covers
! To retain the natural appearance of the
leather, observe the following cleaning
instructions: R
Clean genuine leather covers carefully with
a damp cloth and then wipe the covers
down with a dry cloth. R
Make sure that the leather does not
become soaked. It may otherwise become
rough and cracked. R
Only use leather care agents that have
been tested and approved by Mercedes- Benz. You can obtain these from a qualified
specialist workshop.
Leather is a natural product.
It exhibits natural surface characteristics, for
example: R
differences in the texture R
marks caused by growth and injury R
slight nuances of color
These are characteristics of leather and not
material defects.
Seat covers of other materials
! Observe the following when cleaning: R
clean artificial leather covers with a cloth
moistened with a solution containing 1%
detergent (e.g. dish washing liquid). R
clean cloth covers with a microfiber cloth
moistened with a solution containing 1%
detergen t (e.g. dish washing liquid). Rub
c
arefully and always wipe entire seat sec-
tions to avoid leaving visible lines. Leave
the seat to dry afterwards. Cleaning results
depend on the type of dirt and how long it
has been there. R
clean DINAMICA covers with a damp cloth.
Make sure that you wipe entire seat sec-
tions to avoid leaving visible lines.
Cleaning the seat belts
G WARNING
Seat belts can become severely weakened if
bleached or dyed. This could cause the seat
belts to tear or fail, for instance, in the event of
an accident. This poses an increased risk of
injury or fatal injury.
Never bleach or dye the seat belts.
! Do not clean the seat belts using chemical
cleaning agents. Do not dry the seat belts by
heating at temperatures above 176 ‡( 80 †)
or in direct sunlight. X
Use clean, lukewarm water and soap solution.330
Care
Maintenance and care
Page 333 of 390
Cleaning the headliner and carpets X
Headliner: if it is very dirty, use a soft brush or
dry shampoo. X
Carpets: use the carpet and textile cleaning
agents recommended and approved by
Mercedes-Benz.
Care 331
Maintenance and care Z
Page 334 of 390
Where will I find...?
Reflective safety jacket
Removing/replacing the reflective
safety jacket
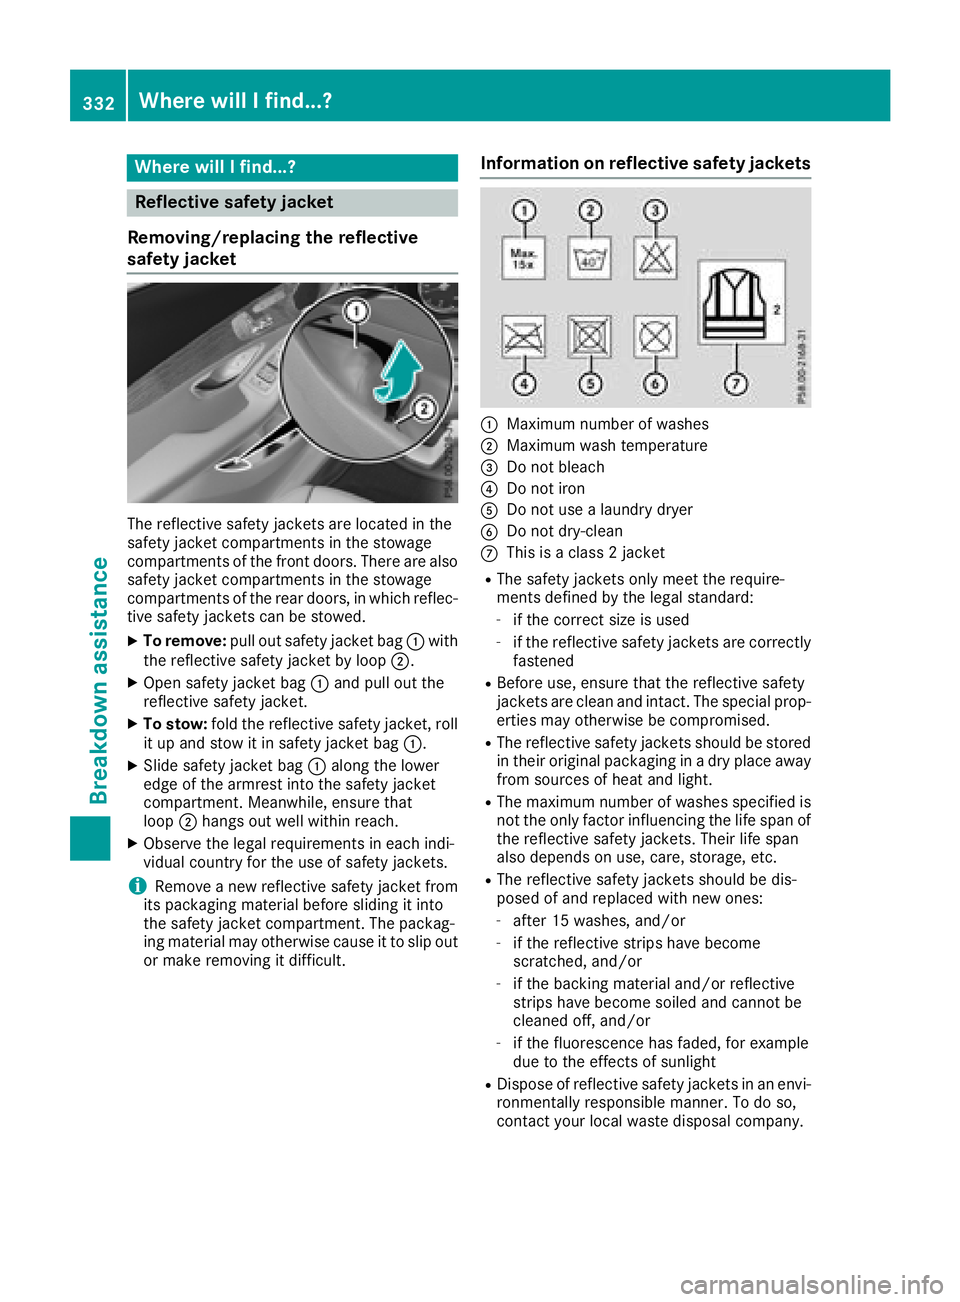
The reflective safety jackets are located in the
safety jacket compartments in the stowage
compartments of the front doors. There are also
safety jacket compartments in the stowage
compartments of the rear doors, in which reflec-
tive safety jackets can be stowed. X
To remove: pull out safety jacket bag �C with
the reflective safety jacket by loop �D .X
Open safety jacket bag �C and pull out the
reflective safety jacket. X
To stow: fold the reflective safety jacket, roll
it up and stow it in safety jacket bag �C .X
Slide safety jacket bag �C along the lower
edge of the armrest into the safety jacket
compartment. Meanwhile, ensure that
loop �D hangs out well within reach.X
Observe the legal requirements in each indi-
vidual country for the use of safety jackets.
i Remove a new reflective safety jacket from
its packaging material before sliding it into
the safety jacket compartment. The packag-
ing material may otherwise cause it to slip out
or make removing it difficult. Information on reflective safety jackets
�C
Maximum number of washes �D
Maximum wash temperature �
Page 335 of 390
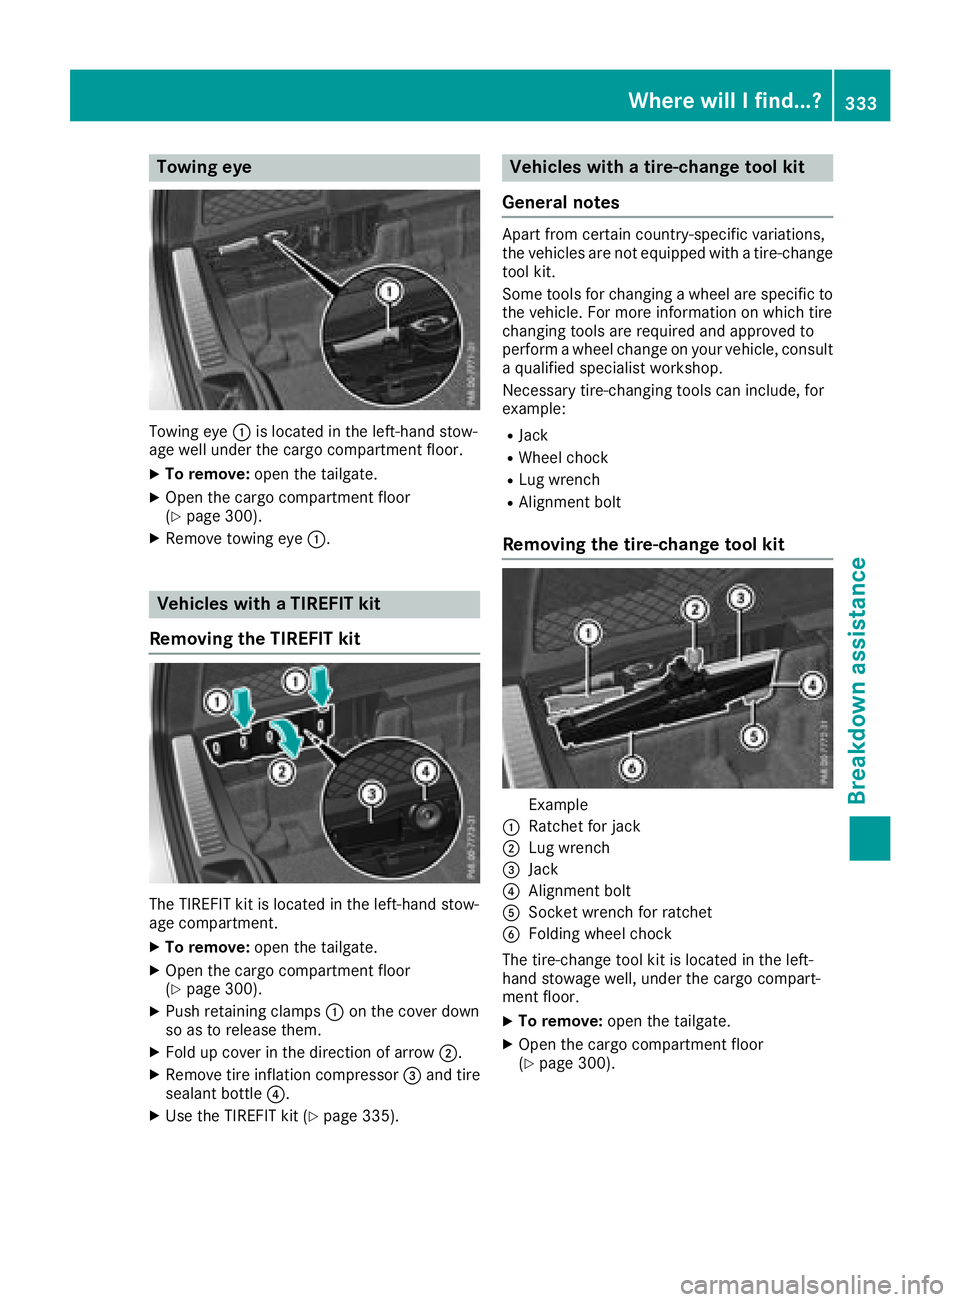
Towing eye
Towing eye �C is located in the left-hand stow-
age well under the cargo compartment floor. X
To remove: open the tailgate.X
Open the cargo compartment floor
( Y
page 300). X
Remove towing eye �C .
Vehicles with a TIREFIT kit
Removing the TIREFIT kit
The TIREFIT kit is located in the left-hand stow-
age compartment. X
To remove: open the tailgate.X
Open the cargo compartment floor
( Y
page 300). X
Push retaining clamps �C on the cover down
so as to release them. X
Fold up cover in the direction of arrow �D .X
Remove tire inflation compressor �
Page 336 of 390
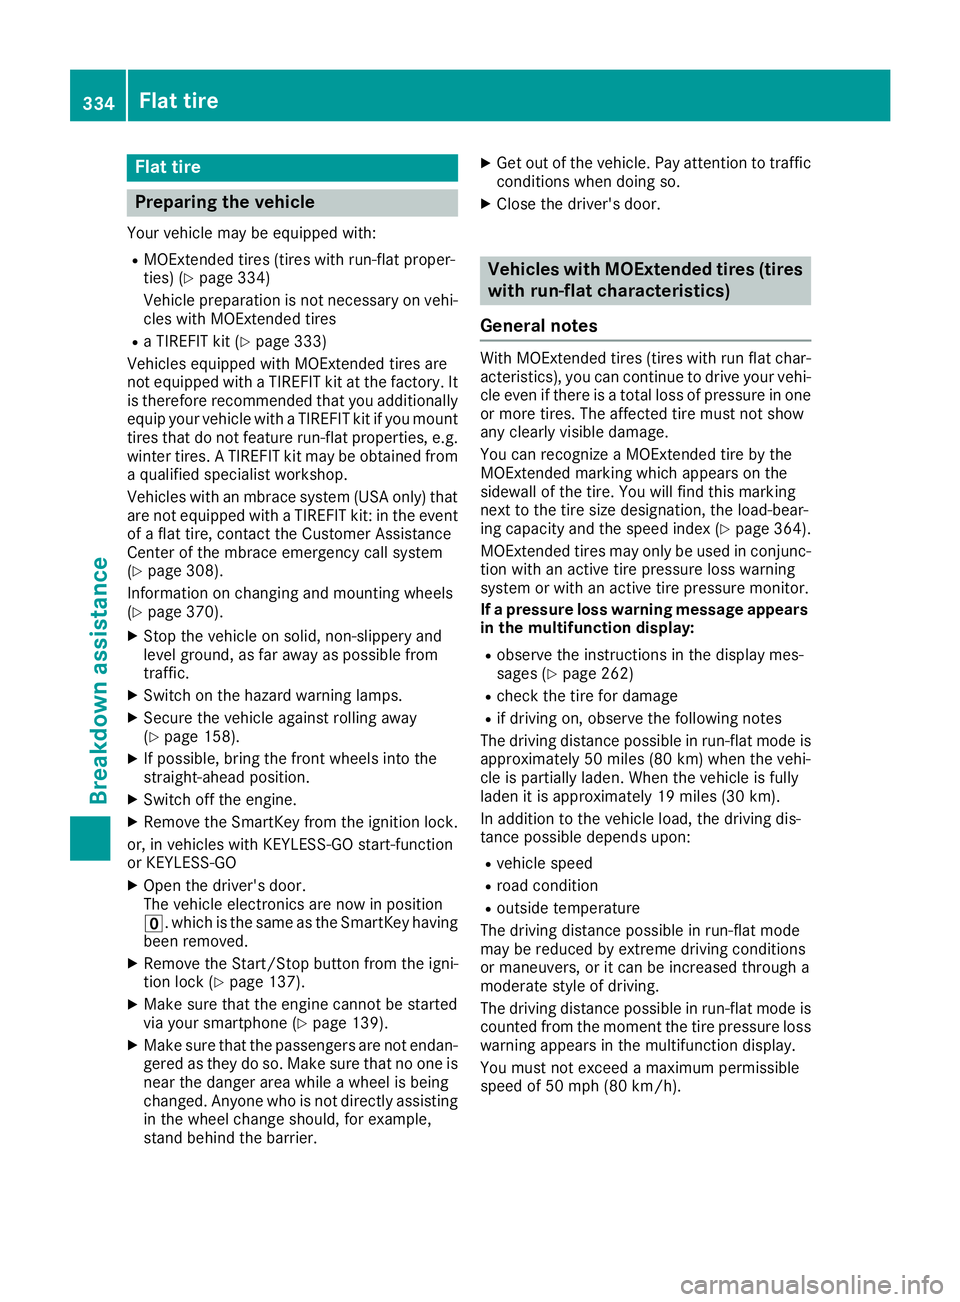
Flat tire
Preparing the vehicle Your vehicl e may be equipped with:R
MOExtended tires (tires wit h run-flat proper -
ties) ( Y
page 334)
Vehicl e preparation is no t necessar y on vehi-
cle s wit h MOExtended tiresR
a TIREFI T kit ( Y
page 333)
Vehicles equipped wit h MOExtended tires are
no t equipped wit h a TIREFI T kit at th e factory. It
is therefor e recommended that you additionally
equip your vehicl e wit h a TIREFI T kit if you moun t
tires that do no t feature run-flat properties, e.g.
winte r tires . A TIREFI T kit may be obtained from
a qualified specialist workshop.
Vehicles wit h an mbrace system (US A only) that
are no t equipped wit h a TIREFI T kit : in th e event
of a flat tire, contact th e Custome r Assistanc e
Cente r of th e mbrace emergenc y call system
( Y
page 308).
Information on changing and mounting wheels
( Y
page 370). X
Stop th e vehicl e on solid, non-slippery and
leve l ground , as far away as possible from
traffic. X
Switc h on th e hazard warning lamps.X
Secur e th e vehicl e against rollin g away
( Y
page 158).X
If possible , brin g th e fron t wheels int o th e
straight-ahead position .X
Switc h off th e engine.X
Remove th e SmartKey from th e ignition lock.
or, in vehicles wit h KEY LESS-GO start-function
o r KEYLESS ‑ GOX
Open th e driver' s door .
The vehicl e electronics are no w in position
�
Page 337 of 390
When replacing one or all tires, please observe
the following specifications for your vehicle's
tires: R
size R
the type and R
the "MOExtended" marking
If a tire has gone flat and cannot be replaced
with a MOExtended tire, a standard tire may be
used as a temporary measure. Make sure that
you use the proper size and type (summer or
winter tires).
Vehicles equipped with MOExtended tires are
not equipped with a TIREFIT kit at the factory. It
is therefore recommended that you additionally
equip your vehicle with a TIREFIT kit if you mount
tires that do not feature run-flat properties, e.g.
winter tires. A TIREFIT kit may be obtained from
a qualified specialist workshop.
Important safety notes
G WARNING
When driving in emergency mode, the driving
characteristics deteriorate, e.g. when corner-
ing, accelerating quickly and when braking.
There is a risk of an accident.
Do not exceed the stated maximum speed.
Avoid abrupt steering and driving maneuvers,
and driving over obstacles (curbs, potholes,
off-road). This applies in particular to a laden
vehicle.
Stop driving in emergency mode if: R
you hear banging noises. R
the vehicle starts to shake. R
you see smoke and smell rubber. R
ESP ®
is intervening constantly.R
there are tears in the sidewalls of the tire.
After driving in emergency mode, have the
wheel rims checked at a qualified specialist
workshop with regard to their further use. The
defective tire must be replaced in every case. TIREFIT kit
Important safety notes TIREFIT is a tire sealant.
You can use TIREFIT to seal punctures of up to
0.16 in (4 mm), particularly those in the tire
tread. You can use TIREFIT at outside tempera-
tures down to �
Page 338 of 390
Therefore, place the tire sealant bottle with
filler hose in the plastic bag which is con-
tained in the TIREFIT kit.
H Environmental note
Have the used tire sealant bottle disposed of
professionally, e.g. at a qualified specialist
workshop.
! Do not operate the tire inflation compressor
for longer than ten minutes at a time without
a break. It may otherwise overheat.
The tire inflation compressor can be operated
again once it has cooled down.
Comply with the manufacturer’s safety instruc-
tions on the sticker on the tire inflation com-
pressor.
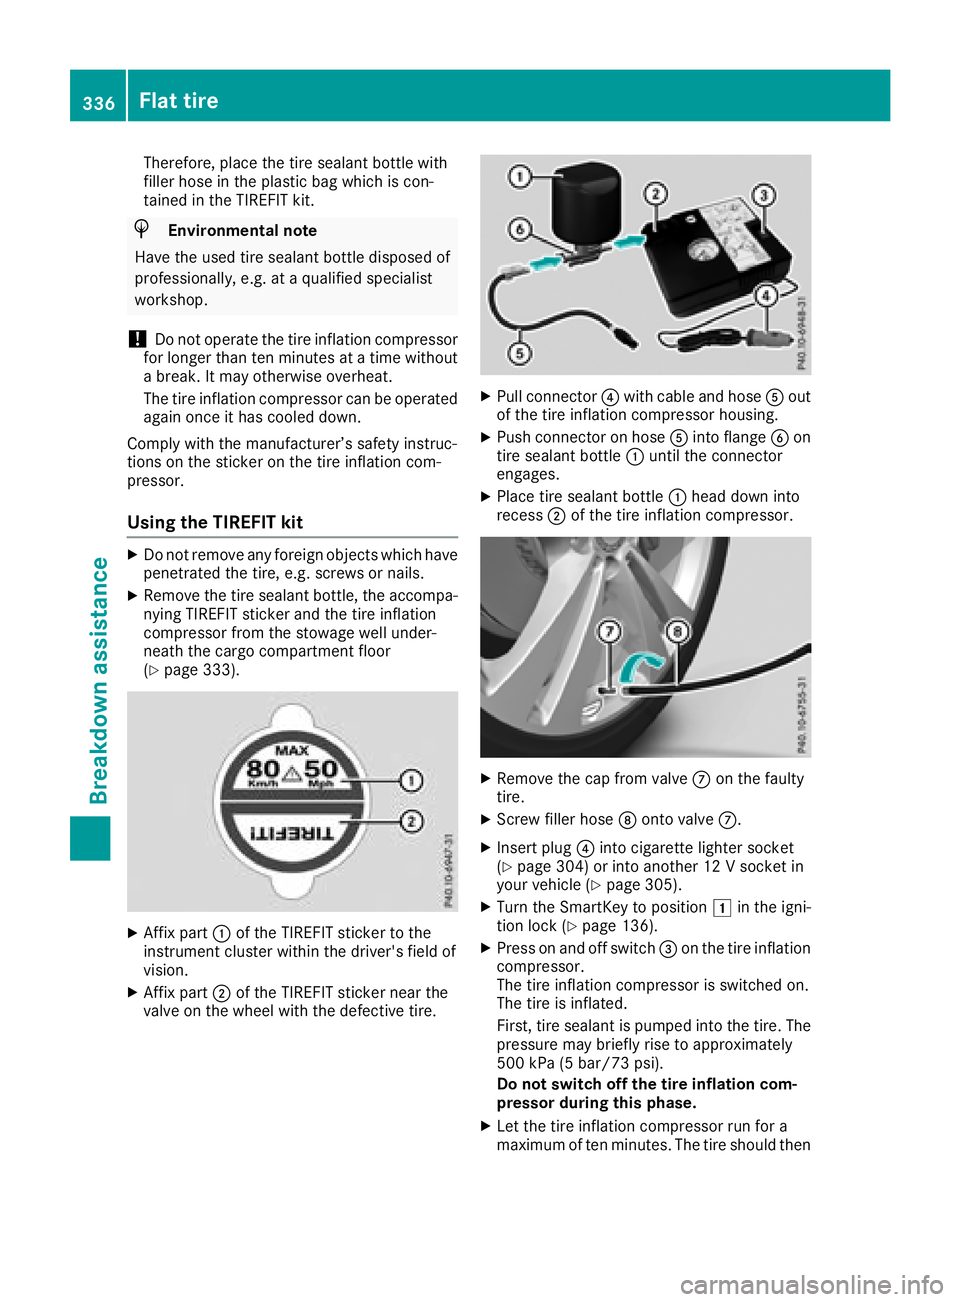
Using the TIREFIT kit X
Do not remove any foreign objects which have
penetrated the tire, e.g. screws or nails. X
Remove the tire sealant bottle, the accompa-
nying TIREFIT sticker and the tire inflation
compressor from the stowage well under-
neath the cargo compartment floor
( Y
page 333).
X
Affix part �C of the TIREFIT sticker to the
instrument cluster within the driver's field of
vision. X
Affix part �D of the TIREFIT sticker near the
valve on the wheel with the defective tire. X
Pull connector �
Page 339 of 390
have attained a pressure of at least 200 kPa
(2.0 bar/29 psi).
If a pressure of 200 kPa (2.0 bar/29 psi) has
been attained after five minutes, see "Tire pres-
sure reached" ( Y
page 337).
If a tire pressure of 200 kPa (2.0 bar/29 psi) has
not been attained after five minutes, see "Tire
pressure not reached" ( Y
page 337).
If tire sealant has escaped, clean it off affected
areas as quickly as possible. Use plain water if
possible.
If your clothes are soiled with tire sealant, have
them cleaned with perchloroethylene at a dry
cleaner as soon as possible.
Tire pressure not reached If a tire pressure of 200 kPa (2.0 bar/29 psi) has
not been attained after ten minutes: X
Switch off the tire inflation compressor. X
Unscrew the filler hose from the valve of the
faulty tire.
Tire sealant may escape when the filler hose is
unscrewed. X
Very slowly drive forwards or reverse approx-
imately 30 ft (10 m). X
Pump up the tire again.
After a maximum of ten minutes, the tire pres-
sure must be at least 200 kPa (2.0 bar/
29 psi).
G WARNING
If the required tire pressure is not reached
after the specified time, the tire is too badly
damaged. The tire sealant cannot repair the
tire in this instance. Damaged tires and a tire
pressure that is too low can significantly
impair the vehicle's braking and driving char-
acteristics. There is a risk of accident.
Do not continue driving. Contact a qualified
specialist workshop.
Tire pressure reached
G WARNING
A tire temporarily sealed with tire sealant
impairs the driving characteristics and is not
suitable for higher speeds. There is a risk of
accident. You should therefore adapt your driving style
accordingly and drive carefully. Do not exceed
the specified maximum speed with a tire that
has been repaired using tire sealant.
The maximum permissible speed for a tire
sealed with tire sealant is 50 mph (80 km/h).
The upper part of the TIREFIT sticker must be
affixed to the instrument cluster in the driver's
field of vision.
If a tire pressure of 200 kPa (2.0 bar/29 psi) has
been attained after ten minutes: X
Switch off the tire inflation compressor. X
Unscrew the filler hose from the valve of the
faulty tire.
Tire sealant may escape when the filler hose is
unscrewed. X
Stow the tire sealant bottle and the tire infla-
tion compressor. X
Pull away immediately .X
Stop after driving for approximately ten
minutes and check the tire pressure with the
tire inflation compressor.
The tire pressure must now be at least
130 kPa (1.3 bar/19 psi).
G WARNING
If the required tire pressure is not reached
after driving for a short period, the tire is too
badly damaged. The tire sealant cannot repair
the tire in this instance. Damaged tires and a
tire pressure that is too low can significantly
impair the vehicle's braking and driving char-
acteristics. There is a risk of accident.
Do not continue driving. Contact a qualified
specialist workshop.
In cases such as the one mentioned above, con-
tact an authorized Mercedes-Benz Center. Or
call 1-800-FOR-MERCedes (in the USA) or
1-800-387-0100 (in Canada). X
Correct the tire pressure if it is still at least
130 kPa (1.3 bar/19 psi). See the Tire and
Loading Information placard on the B-pillar on
the driver's side or the tire pressure table in
the fuel filler flap for values. X
To increase the tire pressure: switch on the
tire inflation compressor. Flat tire 337
Breakdown assistance Z
Page 340 of 390
X
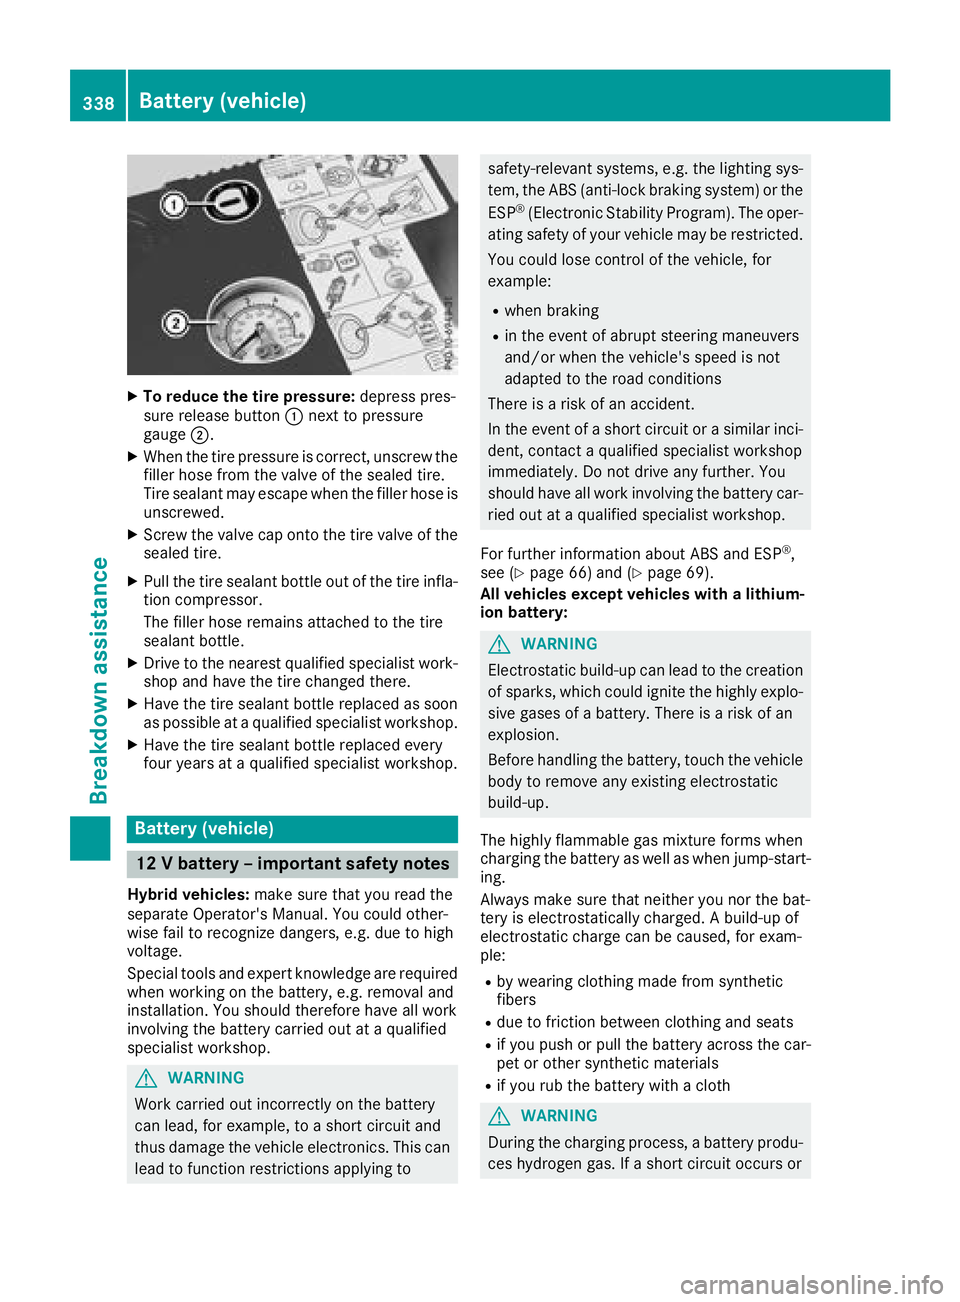
To reduce the tire pressure: depress pres-
sure release button �C next to pressure
gauge �D .X
When the tire pressure is correct, unscrew the
filler hose from the valve of the sealed tire.
Tire sealant may escape when the filler hose is
unscrewed. X
Screw the valve cap onto the tire valve of the
sealed tire. X
Pull the tire sealant bottle out of the tire infla-
tion compressor.
The filler hose remains attached to the tire
sealant bottle. X
Drive to the nearest qualified specialist work-
shop and have the tire changed there. X
Have the tire sealant bottle replaced as soon
as possible at a qualified specialist workshop. X
Have the tire sealant bottle replaced every
four years at a qualified specialist workshop.
Battery (vehicle)
12 V battery – important safety notes Hybrid vehicles: make sure that you read the
separate Operator's Manual. You could other-
wise fail to recognize dangers, e.g. due to high
voltage.
Special tools and expert knowledge are required
when working on the battery, e.g. removal and
installation. You should therefore have all work
involving the battery carried out at a qualified
specialist workshop.
G WARNING
Work carried out incorrectly on the battery
can lead, for example, to a short circuit and
thus damage the vehicle electronics. This can
lead to function restrictions applying to safety-relevant systems, e.g. the lighting sys-
tem, the ABS (anti-lock braking system) or the
ESP ®
(Electronic Stability Program). The oper-
ating safety of your vehicle may be restricted.
You could lose control of the vehicle, for
example: R
when braking R
in the event of abrupt steering maneuvers
and/or when the vehicle's speed is not
adapted to the road conditions
There is a risk of an accident.
In the event of a short circuit or a similar inci-
dent, contact a qualified specialist workshop
immediately. Do not drive any further. You
should have all work involving the battery car-
ried out at a qualified specialist workshop.
For further information about ABS and ESP ®
,
see ( Y
page 66) and ( Y
page 69).
All vehicles except vehicles with a lithium-
ion battery:
G WARNING
Electrostatic build-up can lead to the creation
of sparks, which could ignite the highly explo-
sive gases of a battery. There is a risk of an
explosion.
Before handling the battery, touch the vehicle
body to remove any existing electrostatic
build-up.
The highly flammable gas mixture forms when
charging the battery as well as when jump-start-
ing.
Always make sure that neither you nor the bat-
tery is electrostatically charged. A build-up of
electrostatic charge can be caused, for exam-
ple: R
by wearing clothing made from synthetic
fibers R
due to friction between clothing and seats R
if you push or pull the battery across the car-
pet or other synthetic materials R
if you rub the battery with a cloth
G WARNING
During the charging process, a battery produ-
ces hydrogen gas. If a short circuit occurs or338
Battery (vehicle)
Breakdo wn assis tance