fuel cap MERCEDES-BENZ GLC 2018 Owners Manual
[x] Cancel search | Manufacturer: MERCEDES-BENZ, Model Year: 2018, Model line: GLC, Model: MERCEDES-BENZ GLC 2018Pages: 390, PDF Size: 9.04 MB
Page 14 of 390
Exhaust pipe
Cleaning ........................................ .3 28
Exterior lighting
Cleaning ......................................... 327
Setting options .............................. 112
see Lights
Exterior mirrors
Adjusting ....................................... 107
Dipping (automatic) ....................... 108
Folding in/out (automatically) ....... 108
Folding in/out (electrically) ........... 108
Out of position (troubleshooting) ... 108
Setting ........................................... 108
Storing settings (memory func-
tion) ............................................... 110
Storing the parking position .......... 109
Eyeglasses compartment ................. 291
FFavorites
Overview ........................................ 283
Features ............................................. 302
Flat tire
Changing a wheel/mounting the
spare wheel ................................... 369
MOExtended tires .......................... 334
Preparing the vehicle ..................... 334
TIREFIT kit ...................................... 335
Floormats ........................................... 317
Frequencies
Mobile phone ................................. 375
Two-way radio ................................ 375
Front wheel arch
Removing/installing the cover ....... 118
Front wheel arch cover
Installing/removing ....................... 118
Fuel
Additives ........................................ 379
Consumption statistics .................. 225
Displaying the current consump-
tion ................................................ 225
Displaying the range ...................... 225
Driving tips .................................... 161
E10 ................................................ 378
Fuel gauge ....................................... 37
Gasoline ......................................... 378
Grade (gasoline) ............................ 378 Important safety notes .................. 378
Problem (malfunction) ................... 157
Refueling ........................................ 155
Tank content/reserve fuel ............. 378
Fuel level
Calling up the range (on-board
computer) ...................................... 225
Fuel tank
Capacity ........................................ 378
Problem (malfunction) ................... 157
Fuses
Allocation chart ............................. 348
Before changing ............................. 347
Dashboard fuse box ....................... 347
Fuse box in the cargo compart-
ment .............................................. 348
Fuse box in the engine compart-
ment .............................................. 348
Fuse box in the front-passenger
footwell .......................................... 347
Important safety notes .................. 347
G G-Meter (on-board computer,
Mercedes-AMG vehicles) .................. 236
Garage door opener
Clearing the memory ..................... 317
General notes ................................ 314
Important safety notes .................. 314
Opening/closing the garage doo r. .3 16
Problems when programming ....... .3 16
Programming (button in the rear-
view mirror) ................................... 315
Synchronizing the rolling code ....... 315
Gasoline ............................................. 378
Gear indicator (on-board com-
puter, Mercedes-AMG vehicles) ....... 235
Genuine parts ...................................... 28
Glove box .......................................... .2 91
Google™ Local Search
see also Digital Operator's Man-
ual ................................................. .2 80
H
Handling control system
see ESP ®
(Electronic Stability Program)12
Index
Page 23 of 390
Switching on/off ........................... 113
Start button
Display message ............................ 268
Start/Stop button
Key positions ................................. 137
Starting the engine ........................ 138
Start/stop function
see ECO start/stop function
Starting (engine) ................................ 138
STEER CONTROL .................................. 76
Steering
Display message ............................ 267
Warning lamps ............................... 279
Steering assistant STEER CON-
TROL
see STEER CONTROL
Steering Pilot
Display message ............................ 261
with Distance Pilot DISTRONIC ...... 177
Steering wheel
Adjusting (electrically) ................... 105
Adjusting (manually) ...................... 105
Button overview ............................... 38
Buttons (on-board computer) ......... 221
Cleaning ......................................... 329
EASY ENTRY/EXIT feature ............. 106
Important safety notes .................. 105
Storing settings (memory func-
tion) ............................................... 110
Steering wheel heating
Problem (malfunction) ................... 106
Switching on/off ........................... 105
Steering wheel paddle shifters ........ 152
Stopwatch (RACETIMER) ................... 237
Stowage areas ................................... 290
Stowage compartments
Armrest (under) ............................. 291
Center console .............................. 291
Cup holders ................................... 302
Door ............................................... 292
Eyeglasses compartment ............... 291
Glove box ....................................... 291
Important safety information ......... 290
Map pockets .................................. 292
Rear ............................................... 292
Stowage net ................................... 292
see Stowage areas Stowage net ....................................... 292
Summer tires
In winter ........................................ 351
Sun visor ............................................ 303
Suspension settings
AIR BODY CONTROL ...................... 184
Suspension tuning
AMG sports suspension based on
AIR BODY CONTROL ...................... 186
SETUP (on-board computer,
Mercedes-AMG vehicles) ............... 236
SUV
(Sport Utility Vehicle) ....................... 31
Switc hing ai r-recirculation mode
o
n/off ................................................. 131
Switching on media mode
Via the device list .......................... 288
T Tachometer ........................................ 221
Tail lamps
Display message ............................ 251
Tailgate
Display message ............................ 266
Emergency unlocking ....................... 90
HANDS-FREE ACCESS ..................... 88
Important safety notes .................... 85
Limiting the opening angle ............... 90
object detection ............................... 86
Opening dimensions ...................... 382
Opening/closing (automatically
from inside) ...................................... 89
Opening/closing (automatically
from outside) ................................... 87
Opening/closing (manually from
outside) ............................................ 86
Reversing feature ............................. 86
Tank content
Fuel gauge ....................................... 37
Technical data
Capacities ...................................... 377
Drawbar load (maximum) ............... 384
Information .................................... 375
Trailer loads ................................... 384
Vehicle data ................................... 382 Index 21
Page 159 of 390
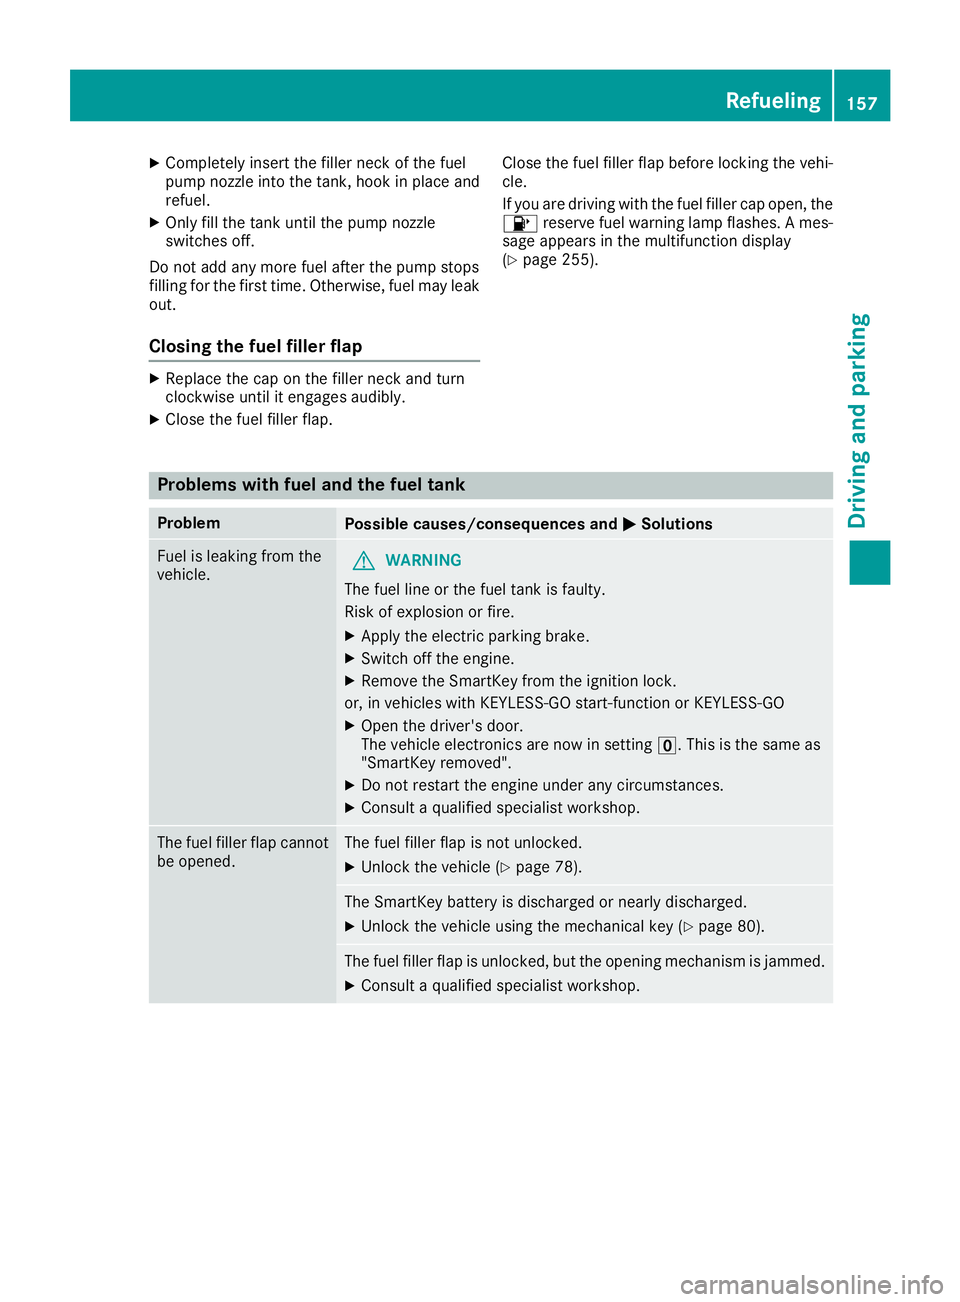
X
Completely insert the fille r neck of the fuel
pump nozz le into the tank, hook in plac e and
refuel. X
On ly fill the tank unt il the pump nozz le
swit ches off.
Do not add any more fuel after the pump stops
filli ng for the first time. Otherwise, fuel may leak
out.
Closing the fuel filler flap X
Replac e the cap on the fille r neck and turn
clock wise unt il it engages audibly.X
Close the fuel fille r flap. Close the fuel filler flap before locking the vehi-
cle.
If you are driving wit h the fuel filler cap open, the
�
Page 169 of 390
R
Take care when turning on an uphill or down-
hill slope or when driving across a slope. The
vehicle could otherwise tip over. R
Always keep the side windows and the pano-
rama roof with power tilt/sliding panel closed
during the journey. R
Do not deviate from marked routes.
Do not use the HOLD function when driving off-
road, on steep uphill or downhill gradients or on
slippery or loose surfaces. The HOLD function
cannot hold the vehicle on such surfaces.
Checklist before driving off-road X
Engine oil level: check the engine oil level
and add oil if necessary.
When driving on steep gradients, the engine
oil level must be sufficiently high to ensure a
correct oil supply in the vehicle. X
Wheels and tires: check the tire tread depth
and tire pressure. X
Check for damage and remove any foreign
objects, e.g. small stones, from the wheels/
tires. X
Replace any missing valve caps. X
Replace dented or damaged wheels. X
Rims: dented or bent rims can result in a loss
of tire pressure and damage the tire bead.
Before driving off-road, check the wheels and
replace them if necessary.
Checklist after driving off-road
! If you detect damage to the vehicle after
driving off-road, have the vehicle checked
immediately at a qualified specialist work-
shop. X
Deactivate off-road program ( Y
page 181).X
Deactivate DSR ( Y
page 180).X
Clean the headlamps and rear lights and
check for damage. X
Clean the front and rear license plates. X
Clean the wheels/tires with a water jet and
remove any foreign objects. X
Clean the wheels, wheel housings and the
vehicle underside with a water jet; check for
any foreign objects and damage. X
Check whether twigs or other parts of plants
have become trapped. These increase the risk
of fire and can damage fuel pipes, brake hoses or the rubber bellows of the axle joints
and propeller shafts. X
After the trip, examine without fail the entire
undercarriage, wheels, tires, brakes, body-
work structure, steering, chassis and exhaust
system for damage. X
After driving in sand, mud, gravel, water or
similar dirty conditions, have the following
checked and cleaned: R
brake discs R
wheels R
brake pads R
axle joints X
If you detect strong vibrations after off-road
travel, check for foreign objects in the wheels
and drive train and remove them if necessary.
Foreign objects can disturb the balance and
cause vibrations.
Driving over poor road surfaces places greater
demands on your vehicle than driving on normal
roads. After driving off-road, check the vehicle.
This allows you to detect damage promptly and
reduce the risk of an accident to yourself and
other road users.
Driving on sand Observe the following rules when driving on
sand: R
Select the off-road program ( Y
page 181).R
Avoid high engine speeds. R
Use the left-hand steering wheel paddle
shifter to shift to a lower gear appropriate to
the terrain. R
Drive quickly to overcome the rolling resist-
ance. Otherwise the vehicle's wheels could
become stuck in loose ground. R
Drive in the tracks of other vehicles if possi-
ble. Make sure that: -
the tire ruts are not too deep. -
the sand is sufficiently firm. -
the ground clearance of the vehicle is suf-
ficient.
Tire ruts and gravel roads
! Check that the ruts are not too deep and
that your vehicle has sufficient clearance.
Otherwise, your vehicle could be damaged or
bottom out and get stuck. Driving tips 167
Driving and parking Z
Page 217 of 390
For more information, please contact a qualified
specialist workshop.
Please observe the manufacturer's operating
instructions for the trailer coupling if a detach-
able trailer coupling is used.
Couple and uncouple the trailer carefully. If you
do not couple the trailer to the towing vehicle
correctly, the trailer could become detached.
Make sure that the following values are not
exceeded: R
the permissible trailer drawbar noseweight R
the permissible trailer load R
the permissible rear axle load of the towing
vehicle R
the maximum permissible gross vehicle
weight of both the towing vehicle and the
trailer
The applicable permissible values, which must
not be exceeded, can be found: R
in the vehicle documents R
on the type plate for the trailer R
on the vehicle identification plate
If the values differ, the lowest value applies.
When towing a trailer, your vehicle's handling
characteristics will be different in comparison
with when driving without a trailer.
The vehicle/trailer combination: R
is heavier R
is restricted in its acceleration and gradient-
climbing capability R
has an increased braking distance R
is affected more by strong crosswinds R
demands more sensitive steering R
has a larger turning circle
This could impair the handling characteristics.
When towing a trailer, always adjust your speed
to the current road and wea ther conditions. Do
not
exceed the maximum permissible speed for
your vehicle/trailer combination.
Notes on towing a trailer
General notes R
Do not exceed the maximum permissible
speed for vehicle/trailer combinations in the
relevant country. This lowers the risk of an accident. R
Only install an approved trailer coupling on
your vehicle.
Further information on availability and on
installation is available from any authorized
Mercedes-Benz Center. R
The bumpers of your vehicle are not suitable
for installing detachable trailer couplings. R
Do not install hired trailer couplings or other
detachable trailer couplings on the bumpers
of your vehicle. R
If you no longer need the ball coupling,
remove it from the ball coupling recess. This
will reduce the risk of damage to the ball cou-
pling.
When towing a trailer, set the tire pressure on
the rear axle of the towing vehicle for a maxi-
mum load; see the tire pressure table in the fuel
filler flap ( Y
page 367).
Please note that when towing a trailer, the fol-
lowing driving systems have limited availability
or are not available at all: R
PARKTRONIC ( Y
page 191) R
Blind Spot Assist ( Y
page 205)R
Active Lane Keeping Assist ( Y
page 212)
On vehicles without level control, the height of
the ball coupling will alter according to the load
placed on the vehicle. If necessary, use a trailer
with a height-adjustable drawbar.
You will find permissible trailer loads under
"Technical data" ( Y
page 384).
Driving tips Observe the information on ESP ®
trailer stabili-
zation ( Y
page 72) and on pulling away with a
trailer ( Y
page 140).
The maximum permissible speed for vehicle/
trailer combinations depends on the type of
trailer. Before beginning the journey, check the
trailer's documents to see what the maximum
permitted speed is. Observe the maximum per-
missible speed in the relevant country.
For certain Mercedes-Benz vehicles, the maxi-
mum permissible rear axle load is increased
when towing a trailer. See the "Technical data"
section to find out whether this applies to your
vehicle ( Y
page 384). In the event of increased
rear axle load, the vehicle/trailer combination
may not exceed a maximum speed of 60 mph
(100 km/h) for reasons concerning the operat-
ing permit. This also applies in countries inTowing a trailer 215
Driving and parking Z
Page 218 of 390
which the maximum permissible speed for vehi-
cle/trailer combinations is above 60 mph
(100 km/h).
When towing a trailer, your vehicle's handling
characteristics will be different in comparison to
when driving without a trailer and it will con-
sume more fuel.
Shift to a lower gear on long and steep downhill
gradients.
This also applies to: R
activated DISTRONIC PLUS R
activated cruise control
This will use the braking effect of the engine, so
that less braking will be required to maintain the
speed. This relieves the load on the brake sys-
tem and prevents the brakes from overheating
and wearing too quickly. If you need additional
braking, depress the brake pedal repeatedly
rather than continuously.
Driving tips If the trailer swings from side to side: X
Do not accelerate. X
Do not counter-steer. X
Brake if necessary. R
Maintain a greater distance from the vehicle
in front than when driving without a trailer. R
Avoid braking abruptly. If possible, brake gen-
tly at first to allow the trailer to run on. Then,
increase the braking force rapidly. R
The values given for gradient-climbing capa-
bilities from a standstill refer to sea level.
When driving in mountainous areas, note that
the power output of the engine and, conse-
quently, the vehicle's gradient-climbing capa-
bility, decreases with increasing altitude.
Installing the ball coupling
G WARNING
If the ball coupling is not correctly installed
and secured, it could come loose while driving
and endanger other road users. There is a risk
of an accident and injury.
Install and secure the ball coupling as descri-
bed in the ball coupling manufacturer's instal-
lation instructions. Make sure that the ball coupling is correctly installed and secured
before every journey.
G WARNING
If the ball coupling is not installed and secured
correctly the trailer may come loose. There is
a risk of an accident.
Install and secure the ball coupling as descri-
bed in the ball coupling installation instruc-
tions. Make sure that the ball coupling is
installed and secured correctly before every
journey.
X
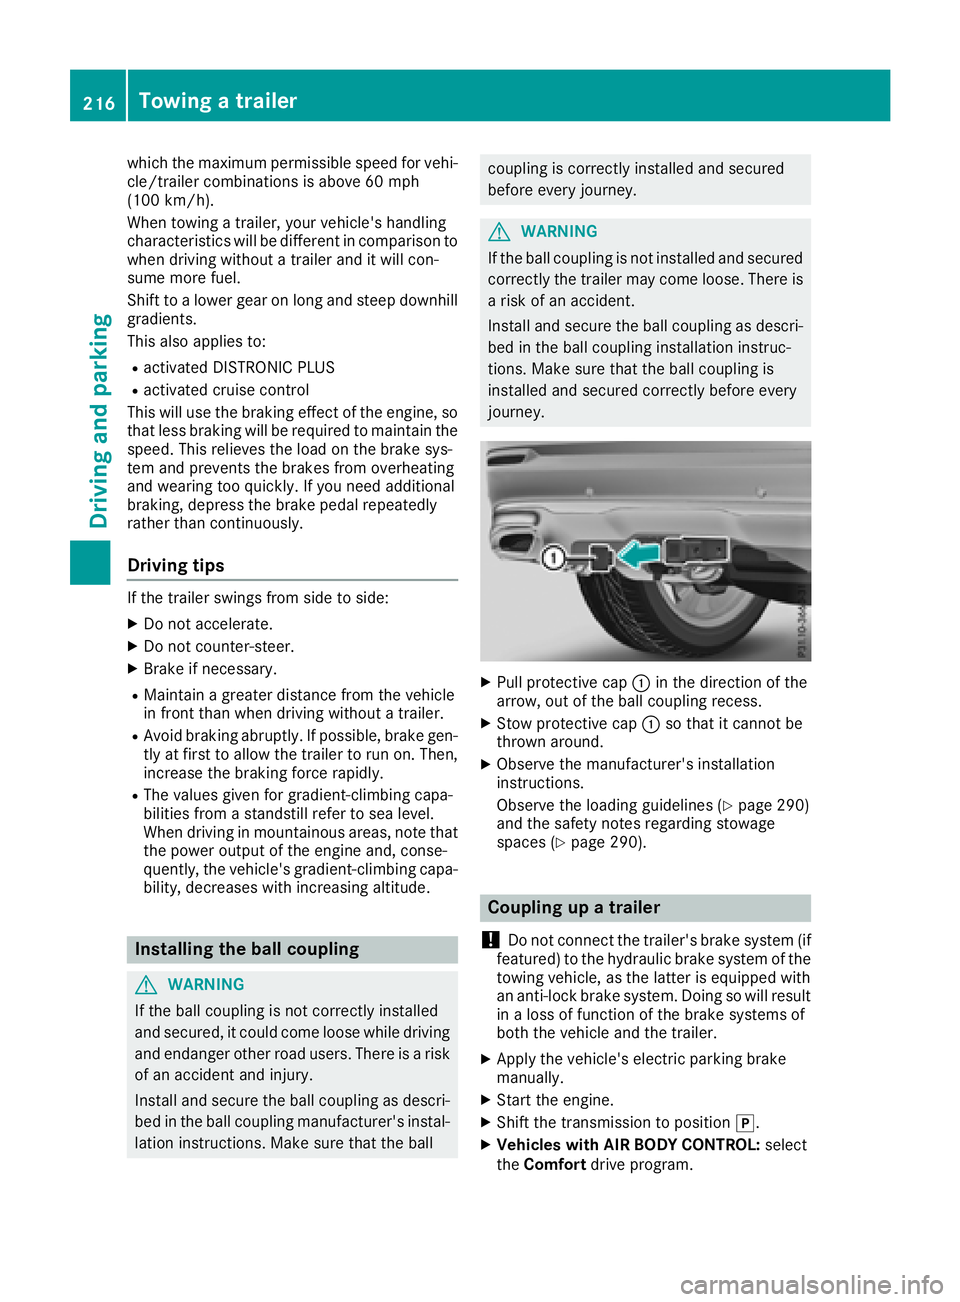
Pull protective cap �C in the direction of the
arrow, out of the ball coupling recess. X
Stow protective cap �C so that it cannot be
thrown around. X
Observe the manufacturer's installation
instructions.
Observe the loading guidelines ( Y
page 290)
and the safety notes regarding stowage
spaces ( Y
page 290).
Coupling up a trailer
! Do not connect the trailer's brake system (if
featured) to the hydraulic brake system of the
towing vehicle, as the latter is equipped with
an anti-lock brake system. Doing so will result
in a loss of function of the brake systems of
both the vehicle and the trailer. X
Apply the vehicle's electric parking brake
manually. X
Start the engine. X
Shift the transmission to position �] .X
Vehicles with AIR BODY CONTROL: select
the Comfort drive program.216
Towing a trailer
Driving and parking
Page 339 of 390
have attained a pressure of at least 200 kPa
(2.0 bar/29 psi).
If a pressure of 200 kPa (2.0 bar/29 psi) has
been attained after five minutes, see "Tire pres-
sure reached" ( Y
page 337).
If a tire pressure of 200 kPa (2.0 bar/29 psi) has
not been attained after five minutes, see "Tire
pressure not reached" ( Y
page 337).
If tire sealant has escaped, clean it off affected
areas as quickly as possible. Use plain water if
possible.
If your clothes are soiled with tire sealant, have
them cleaned with perchloroethylene at a dry
cleaner as soon as possible.
Tire pressure not reached If a tire pressure of 200 kPa (2.0 bar/29 psi) has
not been attained after ten minutes: X
Switch off the tire inflation compressor. X
Unscrew the filler hose from the valve of the
faulty tire.
Tire sealant may escape when the filler hose is
unscrewed. X
Very slowly drive forwards or reverse approx-
imately 30 ft (10 m). X
Pump up the tire again.
After a maximum of ten minutes, the tire pres-
sure must be at least 200 kPa (2.0 bar/
29 psi).
G WARNING
If the required tire pressure is not reached
after the specified time, the tire is too badly
damaged. The tire sealant cannot repair the
tire in this instance. Damaged tires and a tire
pressure that is too low can significantly
impair the vehicle's braking and driving char-
acteristics. There is a risk of accident.
Do not continue driving. Contact a qualified
specialist workshop.
Tire pressure reached
G WARNING
A tire temporarily sealed with tire sealant
impairs the driving characteristics and is not
suitable for higher speeds. There is a risk of
accident. You should therefore adapt your driving style
accordingly and drive carefully. Do not exceed
the specified maximum speed with a tire that
has been repaired using tire sealant.
The maximum permissible speed for a tire
sealed with tire sealant is 50 mph (80 km/h).
The upper part of the TIREFIT sticker must be
affixed to the instrument cluster in the driver's
field of vision.
If a tire pressure of 200 kPa (2.0 bar/29 psi) has
been attained after ten minutes: X
Switch off the tire inflation compressor. X
Unscrew the filler hose from the valve of the
faulty tire.
Tire sealant may escape when the filler hose is
unscrewed. X
Stow the tire sealant bottle and the tire infla-
tion compressor. X
Pull away immediately .X
Stop after driving for approximately ten
minutes and check the tire pressure with the
tire inflation compressor.
The tire pressure must now be at least
130 kPa (1.3 bar/19 psi).
G WARNING
If the required tire pressure is not reached
after driving for a short period, the tire is too
badly damaged. The tire sealant cannot repair
the tire in this instance. Damaged tires and a
tire pressure that is too low can significantly
impair the vehicle's braking and driving char-
acteristics. There is a risk of accident.
Do not continue driving. Contact a qualified
specialist workshop.
In cases such as the one mentioned above, con-
tact an authorized Mercedes-Benz Center. Or
call 1-800-FOR-MERCedes (in the USA) or
1-800-387-0100 (in Canada). X
Correct the tire pressure if it is still at least
130 kPa (1.3 bar/19 psi). See the Tire and
Loading Information placard on the B-pillar on
the driver's side or the tire pressure table in
the fuel filler flap for values. X
To increase the tire pressure: switch on the
tire inflation compressor. Flat tire 337
Breakdown assistance Z
Page 356 of 390

G WARNING
If you fit unsuitable accessories onto tire
valves, the tire valves may be overloaded and
malfunction, which can cause tire pressure
loss. Due to their design, retrofitted tire pres-
sure monitors keep the tire valve open. This
can also result in tire pressure loss. There is a
risk of an accident.
Only screw the standard valve cap or other
valve caps approved by Mercedes-Benz for
your vehicle onto the tire valve.
Use a suitable pressure gauge to check the tire
pressure. The outer appearance of a tire does
not permit any reliable conclusion about the tire
pressure. On vehicles equipped with the elec-
tronic tire pressure monitor, the tire pressure
can be checked in the on-board computer.
The tire temperature and pressure increase
when the vehicle is in motion. This is dependent
on the driving speed and the load.
Therefore, you should only correct tire pres-
sures when the tires are cold.
The tires are cold: R
if the vehicle has been parked with the tires
out of direct sunlight for at least three hours
and R
if the vehicle has not been driven further than
1 mile (1.6 km)
The tire temperature changes depending on the
outside temperature, the vehicle speed and the
tire load. If the tire temperature changes by
18 ‡ (10 †), the tire pressure changes by
approximately 10 kPa (0.1 bar/1.5 psi). Take
this into account when checking the pressure of
warm tires. Only correct the tire pressure if it is
too low for the current operating conditions. If
you check the tire pressure when the tires are
warm, the resulting value will be higher than if
the tires were cold. This is normal. Do not
reduce the tire pressure to the value specified
for cold tires. The tire pressure would otherwise
be too low.
Observe the recommended tire pressures for
cold tires: R
on the Tire and Loading Information placard
on the B-pillar on the driver's side R
in the tire pressure table on the fuel filler flap
( Y
page 352) Underinflated or overinflated tires
Underinflated tires
G WARNING
Tires with pressure that is too low can over-
heat and burst as a consequence. In addition,
they also suffer from excessive and/or irreg-
ular wear, which can severely impair the brak-
ing properties and the driving characteristics.
There is a risk of an accident.
Avoid tire pressures that are too low in all the
tires, including the spare wheel.
Underinflated tires may: R
overheat, leading to tire defects R
adversely affect handling R
wear excessively and/or unevenly R
have an adverse effect on fuel consumption
Overinflated tires
G WARNING
Tires with excessively high pressure can burst
because they are damaged more easily by
road debris, potholes etc. In addition, they
also suffer from irregular wear, which can
severely impair the braking properties and the
driving characteristics. There is a risk of an
accident.
Avoid tire pressures that are too high in all the
tires, including the spare wheel.
Overinflated tires may: R
increase the braking distance R
adversely affect handling R
wear excessively and/or unevenly R
have an adverse effect on ride comfort R
be more susceptible to damage354
Tire pressure
Wheels and tires
Page 357 of 390
Maximum tire pressures
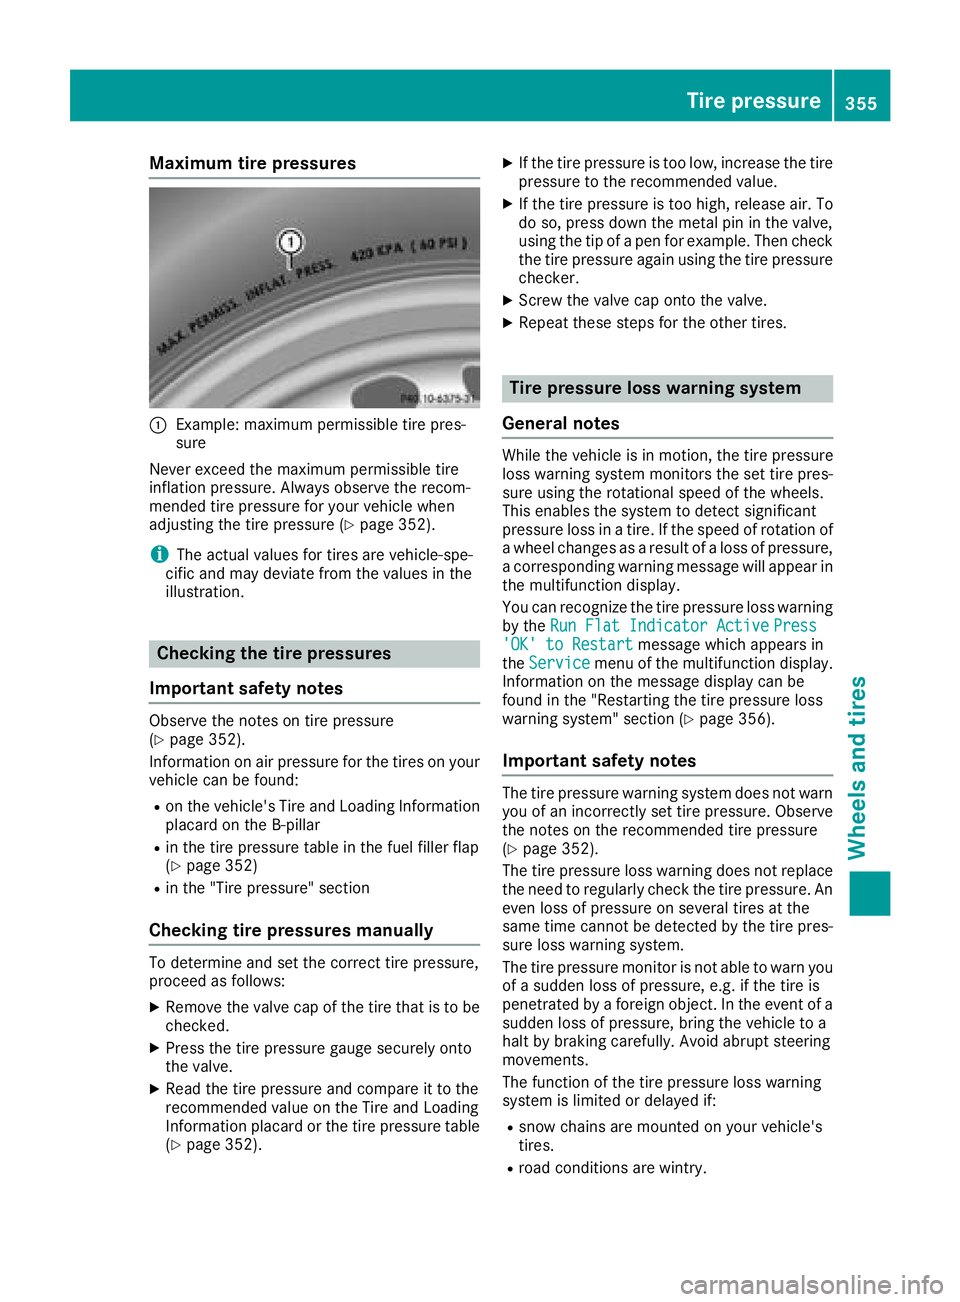
�C
Example: maximum permissible tire pres-
sure
Never exceed the maximum permissible tire
inflation pressure. Always observe the recom-
mended tire pressure for your vehicle when
adjusting the tire pressure ( Y
page 352).
i The actual values for tires are vehicle-spe-
cific and may deviate from the values in the
illustration.
Checking the tire pressures
Important safety notes Observe the notes on tire pressure
( Y
page 352).
Information on air pressure for the tires on your
vehicle can be found: R
on the vehicle's Tire and Loading Information
placard on the B-pillar R
in the tire pressure table in the fuel filler flap
( Y
page 352) R
in the "Tire pressure" section
Checking tire pressures manually To determine and set the correct tire pressure,
proceed as follows: X
Remove the valve cap of the tire that is to be
checked. X
Press the tire pressure gauge securely onto
the valve. X
Read the tire pressure and compare it to the
recommended value on the Tire and Loading
Information placard or the tire pressure table
( Y
page 352). X
If the tire pressure is too low, increase the tire
pressure to the recommended value. X
If the tire pressure is too high, release air. To
do so, press down the metal pin in the valve,
using the tip of a pen for example. Then check
the tire pressure again using the tire pressure
checker. X
Screw the valve cap onto the valve. X
Repeat these steps for the other tires.
Tire pressure loss warning system
General notes While the vehicle is in motion, the tire pressure
loss warning system monitors the set tire pres-
sure using the rotational speed of the wheels.
This enables the system to detect significant
pressure loss in a tire. If the speed of rotation of
a wheel changes as a result of a loss of pressure,
a corresponding warning message will appear in
the multifunction display.
You can recognize the tire pressure loss warning
by the Run Flat Indicator Active Press
'OK' to Restart message which appears in
the Service menu of the multifunction display.
Information on the message display can be
found in the "Restarting the tire pressure loss
warning system" section ( Y
page 356).
Important safety notes The tire pressure warning system does not warn
you of an incorrectly set tire pressure. Observe
the notes on the recommended tire pressure
( Y
page 352).
The tire pressure loss warning does not replace
the need to regularly check the tire pressure. An
even loss of pressure on several tires at the
same time cannot be detected by the tire pres-
sure loss warning system.
The tire pressure monitor is not able to warn you
of a sudden loss of pressure, e.g. if the tire is
penetrated by a foreign object. In the event of a
sudden loss of pressure, bring the vehicle to a
halt by braking carefully. Avoid abrupt steering
movements.
The function of the tire pressure loss warning
system is limited or delayed if: R
snow chains are mounted on your vehicle's
tires. R
road conditions are wintry.Tire pressure 355
Wheels and tires Z
Page 370 of 390
Speed rating The speed rating is part of the tire identification.
It specifies the speed range for which the tire is
approved.
GVW (Gross Vehicle Weight) The gross vehicle weight includes the weight of
the vehicle including fuel, tools, the spare wheel,
accessories installed, occupants, luggage and
the drawbar noseweight, if applicable. The gross
vehicle weight must not exceed the gross vehi-
cle weight rating GVWR as specified on the vehi-
cle identification plate on the B-pillar on the
driver's side.
GVWR (Gross Vehicle Weight Rating) The GVWR is the maximum permissible gross
weight of a fully loaded vehicle (the weight of the
vehicle including all accessories, occupants,
fuel, luggage and the drawbar noseweight, if
applicable). The gross vehicle weight rating is
specified on the vehicle identification plate on
the B-pillar on the driver's side.
Maximum loaded vehicle weight The maximum weight is the sum of: R
the curb weight of the vehicle R
the weight of the accessories R
the load limit R
the weight of the factory installed optional
equipment
Kilopascal (kPa) Metric unit for tire pressure. 6.9 kPa corre-
sponds to 1 psi. Another unit for tire pressure is
bar. 100 kilopascals (kPa) are the equivalent of
1 bar.
Load index
In addition to the load-bearing index, the load
index may also be imprinted on the sidewall of
the tire. This specifies the load-bearing capacity
more precisely.
Curb weight
The weight of a vehicle with standard equipment
including the maximum capacity of fuel, oil and
coolant. It also includes the air-conditioning sys-
tem and optional equipment if these are instal-
led in the vehicle, but does not include passen-
gers or luggage. Maximum load rating The maximum tire load is the maximum permis-
sible weight in kilograms or lbs for which a tire is
approved.
Maximum permissible tire pressure Maximum permissible tire pressure for one tire.
Maximum load on one tire Maximum load on one tire. This is calculated by
dividing the maximum axle load of one axle by
two.
PSI (pounds per square inch) A standard unit of measure for tire pressure.
Aspect ratio Relationship between tire height and tire width
in percent.
Tire pressure This is pressure inside the tire applying an out-
ward force to each square inch of the tire's sur-
face. The tire pressure is specified in pounds per
square inch (psi), in kilopascal (kPa) or in bar.
The tire pressure should only be corrected when
the tires are cold.
Cold tire pressure The tires are cold: R
if the vehicle has been parked with the tires
out of direct sunlight for at least three hours
and R
if the vehicle has not been driven further than
1 mile (1.6 km)
Tread
The part of the tire that comes into contact with
the road.
Bead
The tire bead ensures that the tire sits securely
on the wheel. There are several steel wires in the
bead to prevent the tire from coming loose from
the wheel rim.
Sidewall
The part of the tire between the tread and the
bead.368
All about wheels and tires
Wheels and tires