ECO mode MERCEDES-BENZ GLC-Class 2016 X253 Comand Manual
[x] Cancel search | Manufacturer: MERCEDES-BENZ, Model Year: 2016, Model line: GLC-Class, Model: MERCEDES-BENZ GLC-Class 2016 X253Pages: 222, PDF Size: 6.39 MB
Page 56 of 222
Object detection
The rear view camera can detect moving and
stationary objects. If, for example, a pedes-
trian or another vehicle is detected, these
objects are marked with bars. The system is
able to detect and mark stationary objects
when your vehicle is moving. Moving objects
will always be detected and marked.
Switching object detection on/off
XTo select Object Detectionin the rear
view camera menu: turn and press the con-
troller.
The function is switched on Oor off ª,
depending on the previous status.
Opening the camera cover for clean-
ing
XTo select Open Camera Coverin the rear
view camera menu: turn and press the con-
troller.
The Please
Wait...message appears for
approximately three seconds.
The camera cover opens.
The camera cover closes automatically if:
Rthe ignition is switched off
Rthe vehicle pulls away
Climate control settings
Overview
You can adjust the climate control settings
using the climate control bar (
Ypage 54) or
the climate control menu (
Ypage 55).
You can set the most important climate con-
trol functions, such as temperature
(
Ypage 54), airflow (Ypage 55) and air
distribution (
Ypage 55) using the climate
control bar. The climate control bar is visible
in most displays.
You can find all available climate control func-
tions in the climate control menu. You can use the climate control bar (
Ypage 54) to
switch to the climate control menu.
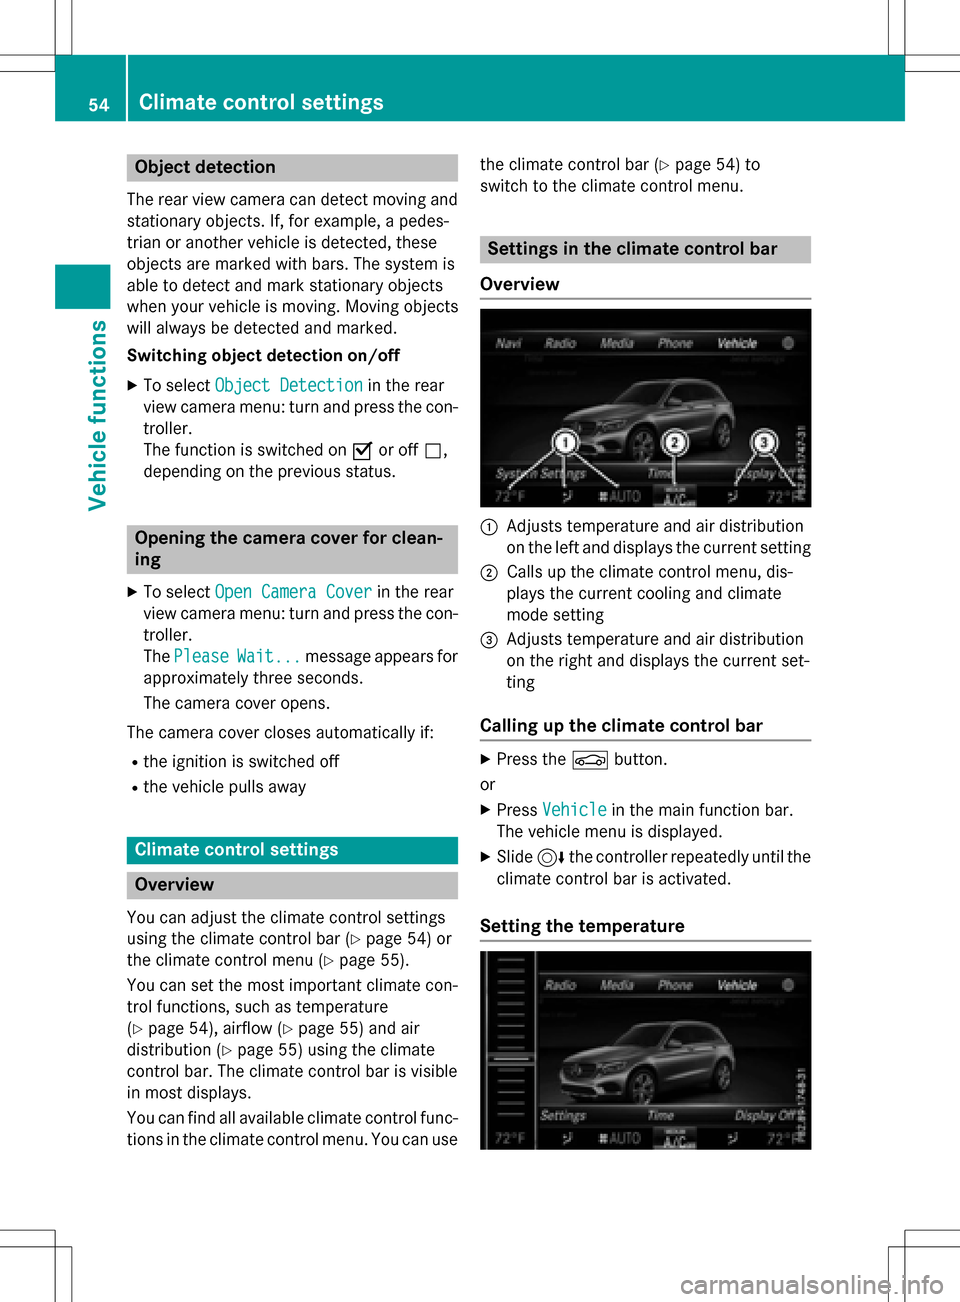
Settings in the climate control bar
Overview
:Adjusts temperature and air distribution
on the left and displays the current setting
;Calls up the climate control menu, dis-
plays the current cooling and climate
mode setting
=Adjusts temperature and air distribution
on the right and displays the current set-
ting
Calling up the climate control bar
XPress the Øbutton.
or
XPress Vehiclein the main function bar.
The vehicle menu is displayed.
XSlide 6the controller repeatedly until the
climate control bar is activated.
Setting the temperature
54Climate control settings
Vehicle functions
Page 60 of 222
Setting off-road program
XTo switch the off-road program on:press
the
button.
A window appears after a short while.
XTo confirm Adjust: press the controller.
The Offroad Settings
menu appears.
XTo select SlipperyOffroad,Incline,
Trailer
, Rocking Assistor Off: turn
and press the controller.
The menu symbol, text and image show the
selected setting.
The Rocking free program can be selected up
to a speed of 20 km/h.
If you switch off the off road program, the
Comfort drive program is configured auto-
matically.
For further information on the off-road pro-
gram; see the vehicle Operator's Manual.
Displaying vehicle data
i
There may be fewer displays depending
on your vehicle's equipment.
XPress button Ø.
The vehicle menu is displayed.
XTo select DYNAMICSELECT: turn and press
the controller.
The Individual Configuration
,Off‐
road Settings, Vehicle Dataand
Engine Data
menus appear.
XSelect Vehicle Data.
Updates of the following data are dis-
played:
ROff-road-/type of road to match the
selected drive program
RG-Force cross to display longitudinal and
lateral acceleration
RAccelerator and brake pedal activity
RVehicle level setting animation
RVehicle level display
RActivity of the spring struts
RWheel angle
ROverrun mode animation
RCompass display
RLongitudinal and latitudinal angle
RDSR
Daytime or night-time view is shown depend-
ing on the automatic light sensor.
Displaying engine data
i
There may be fewer displays depending
on your vehicle's equipment.
XPress button Ø.
The vehicle menu is displayed.
XTo select DYNAMICSELECT: turn and press
the controller.
The Individual Configuration
,Off‐
road Settings, Vehicle Dataand
Engine Data
menus appear.
XSelect Engine Data.
The following current data is displayed:
REngine output
REngine torque
REngine oil temperature
ROn-board voltage
Individual configuration setting
options
You can choose from the following settings
for the drive:
CComfort
SSport
S+Sport +
MManual
EEco
58DYNAMIC SELECT
Vehicle functions
Page 65 of 222
soon as the speed falls below approximately
2 mph (3 km/h), the restriction becomes
inactive.
When the restriction is active, certain entries
cannot be made. Menu items are shown in
gray and cannot be selected.
For example:
Rentering the destination city and street
Rentering a destination via the map
Rentering POIs in the vicinity of a city or via a
name search
Rediting entries
Other entries are possible, such as entering
points of interest in the vicinity of the desti-
nation or current position.
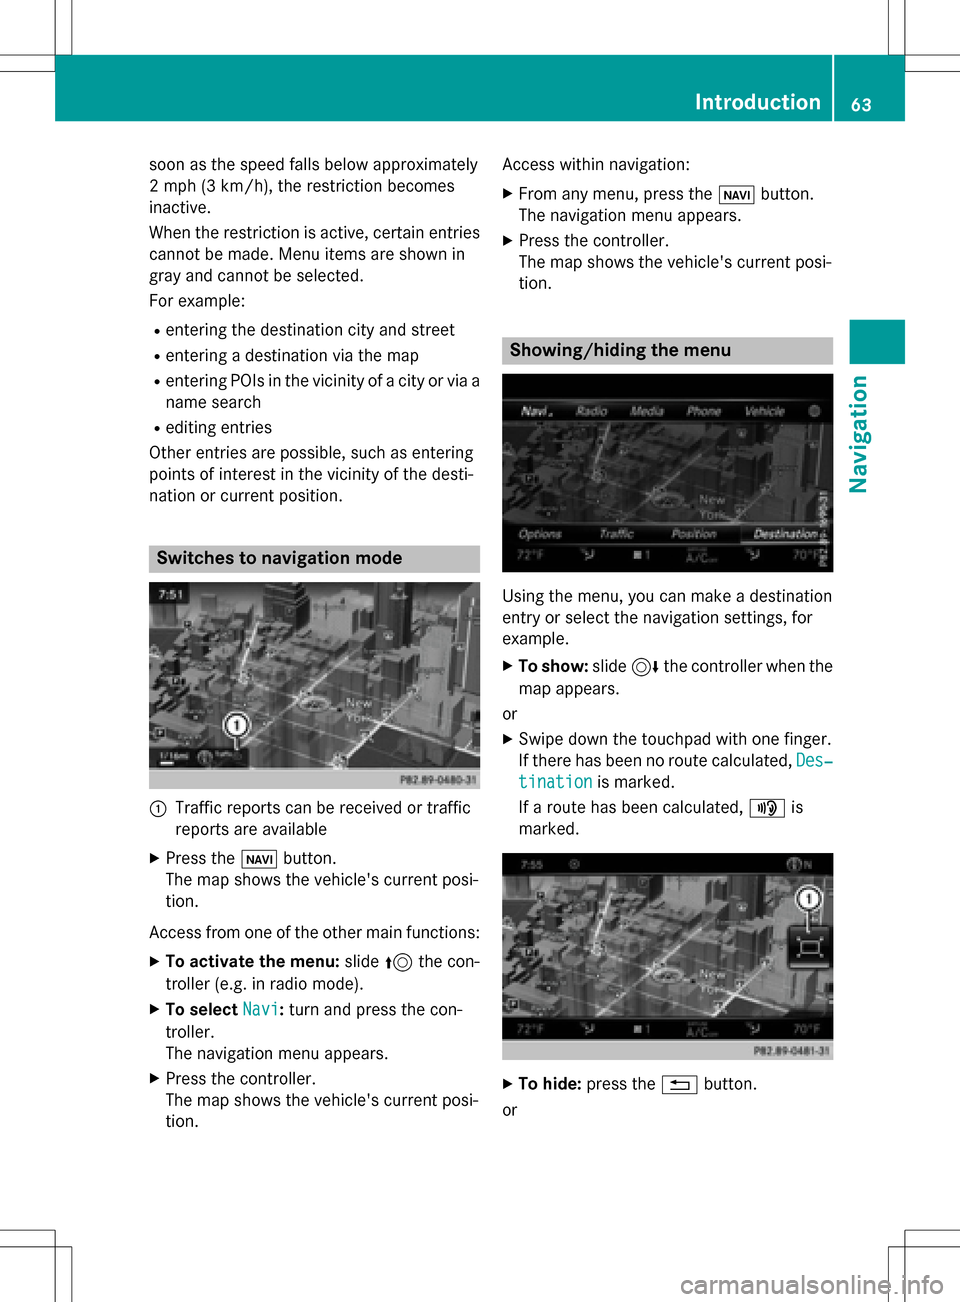
Switches to navigation mode
:Traffic reports can be received or traffic
reports are available
XPress the ßbutton.
The map shows the vehicle's current posi-
tion.
Access from one of the other main functions:
XTo activate the menu: slide5the con-
troller (e.g. in radio mode).
XTo select Navi:turn and press the con-
troller.
The navigation menu appears.
XPress the controller.
The map shows the vehicle's current posi-
tion. Access within navigation:
XFrom any menu, press the
ßbutton.
The navigation menu appears.
XPress the controller.
The map shows the vehicle's current posi-
tion.
Showing/hiding the menu
Using the menu, you can make a destination
entry or select the navigation settings, for
example.
XTo show: slide6the controller when the
map appears.
or
XSwipe down the touchpad with one finger.
If there has been no route calculated, Des‐
tinationis marked.
If a route has been calculated, yis
marked.
XTo hide: press the %button.
or
Introduction63
Navigation
Z
Page 66 of 222
XSlide5the controller.
Full screen symbol :appears.
XPress the controller.
Moving the map
Requirement: the map is in full screen mode,
the menu is faded out (
Ypage 63).
XPress the controller.
The crosshair is shown.
XSlide 1, 4or2 the controller.
The map moves in the corresponding direc- tion under the crosshair.
iEnter a destination using the map
(
Ypage 75).
Basic settings
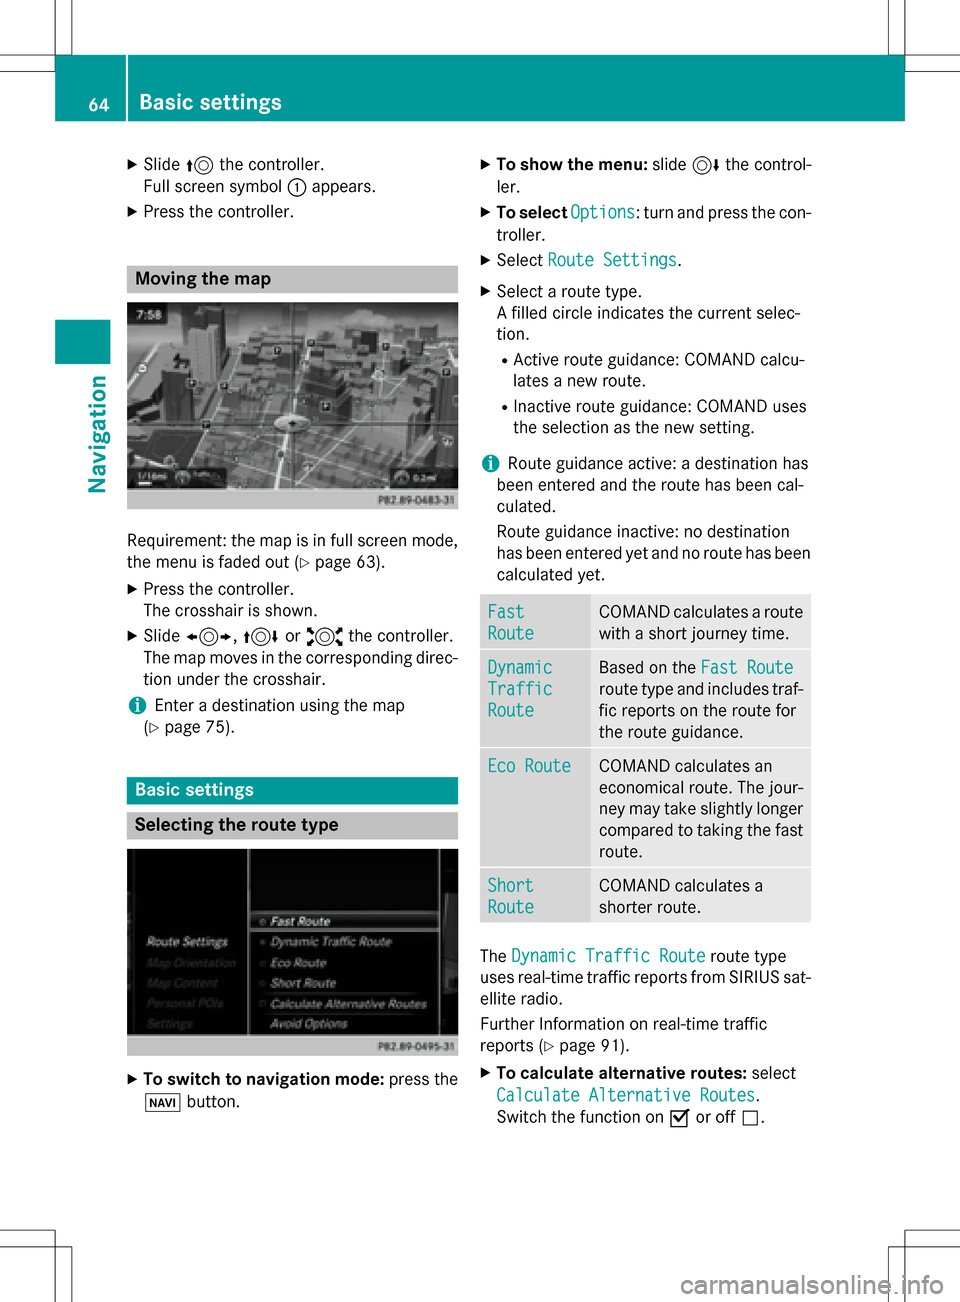
Selecting the route type
XTo switch to navigation mode: press the
Ø button.
XTo show the menu: slide6the control-
ler.
XTo select Options: turn and press the con-
troller.
XSelect Route Settings.
XSelect a route type.
A filled circle indicates the current selec-
tion.
RActive route guidance: COMAND calcu-
lates a new route.
RInactive route guidance: COMAND uses
the selection as the new setting.
iRoute guidance active: a destination has
been entered and the route has been cal-
culated.
Route guidance inactive: no destination
has been entered yet and no route has been calculated yet.
Fast
Route
COMAND calculates a route
with a short journey time.
Dynamic
Traffic
Route
Based on the Fast Route
route type and includes traf-
fic reports on the route for
the route guidance.
Eco RouteCOMAND calculates an
economical route. The jour-
ney may take slightly longer
compared to taking the fast
route.
Short
Route
COMAND calculates a
shorter route.
TheDynamic Traffic Routeroute type
uses real-time traffic reports from SIRIUS sat-
ellite radio.
Further Information on real-time traffic
reports (
Ypage 91).
XTo calculate alternative routes: select
Calculate Alternative Routes
.
Switch the function on Oor off ª.
64Basic settings
Navigation
Page 72 of 222
Keyword search
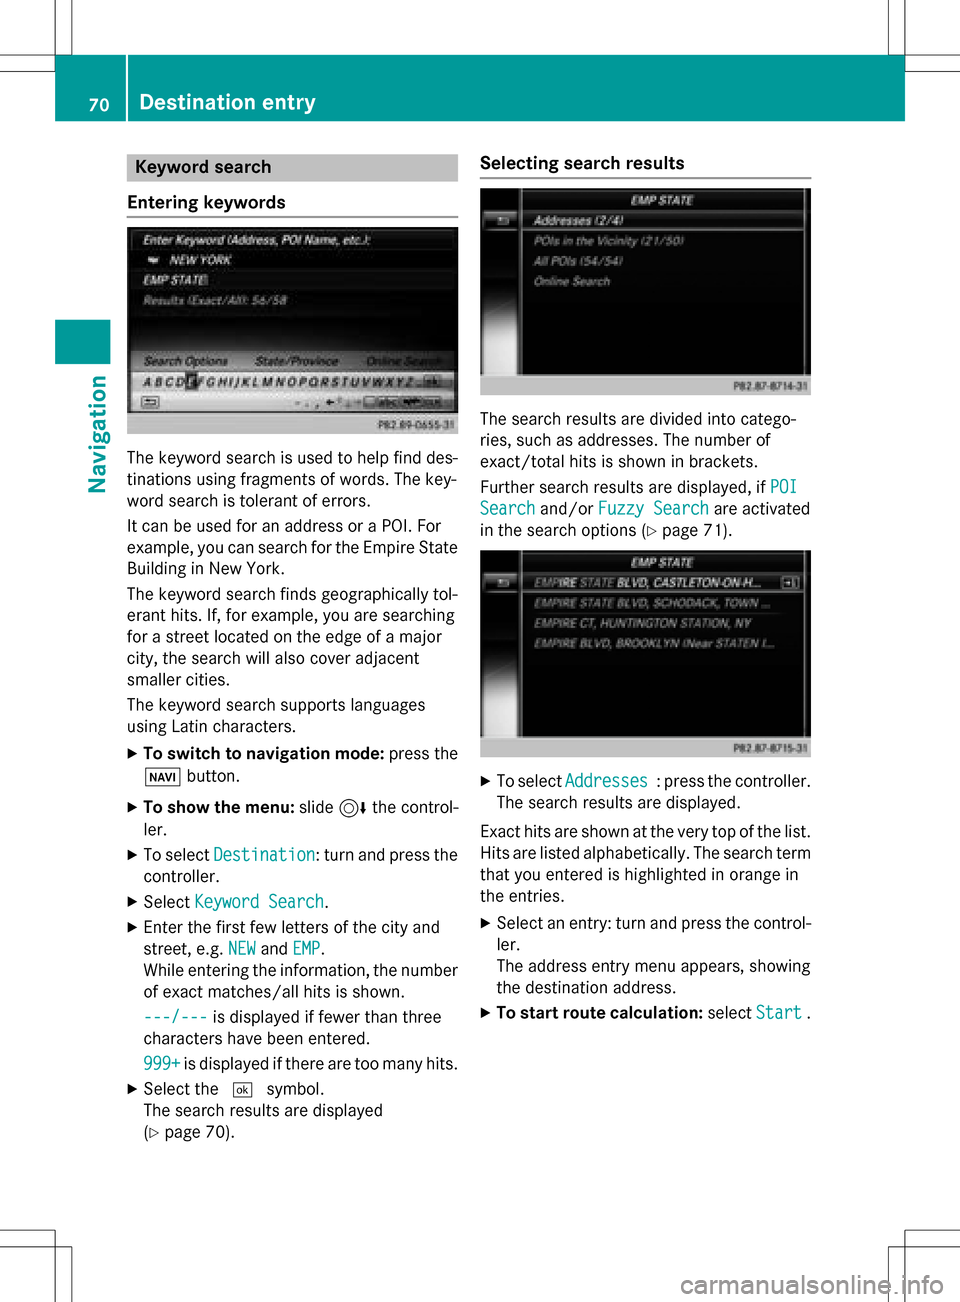
Entering key words
The keywor dsearch is used to help fin ddes-
tination susin gfragment sof words. The key-
wor dsearch is tolerant of errors .
It can be used for an address or a POI.For
example, you can search for th eEmpir eState
Buildin gin New York.
The keywor dsearch finds geographically tol-
eran thits. If ,for example, you are searching
for astree tlocate don th eedge of amajor
city, th esearch will also cover adjacent
smaller cities.
The keywor dsearch support slanguage s
usin gLatin characters .
XTo switch to navigation mode: press the
Ø button.
XTo sho wthemenu: slide6 thecontrol -
ler .
XTo select Destination:tur nand press th e
controller .
XSelectKeywor dSearch.
XEnte rth efirst few letters of th ecit yand
street, e.g. NEW
andEMP.
Whil eenterin gth einformation ,th enumber
of exact matches/all hit sis shown.
---/-- -
is displayed if fewer than three
characters hav ebeen entered .
999 +
is displayed if there are to oman yhits.
XSelec tth e¬ symbol.
The search result sare displayed
(
Ypage 70) .
Selecting search results
The search result sare divided into catego -
ries, suc has addresses. The number of
exact/total hit sis shown in brackets .
Further search result sare displayed, if POI
Searchand/orFuzzy Searchare activated
in th esearch option s (
Ypage 71).
XTo selectAddresses:press th econtroller .
The search result sare displayed.
Exact hit sare shown at th ever yto pof th elist .
Hit sare listed alphabetically. The search term
that you entered is highlighte din orange in
th eentries.
XSelec tan entry: tur nand press th econtrol -
ler .
The address entr ymen uappears, showin g
th edestination address .
XTo startroute calculation: selectStart.
70Destination entry
Navigation
Page 77 of 222
Requirementsfor "Viewin gth evicinit yof th e
destination "and "Loadin gdat afrom th eInter-
net" (Canada): amobile phone mus tbe con-
nected via Bluetoot h
®(Ypage 112) or USB
(
Ypage 198) wit hCOMAND .
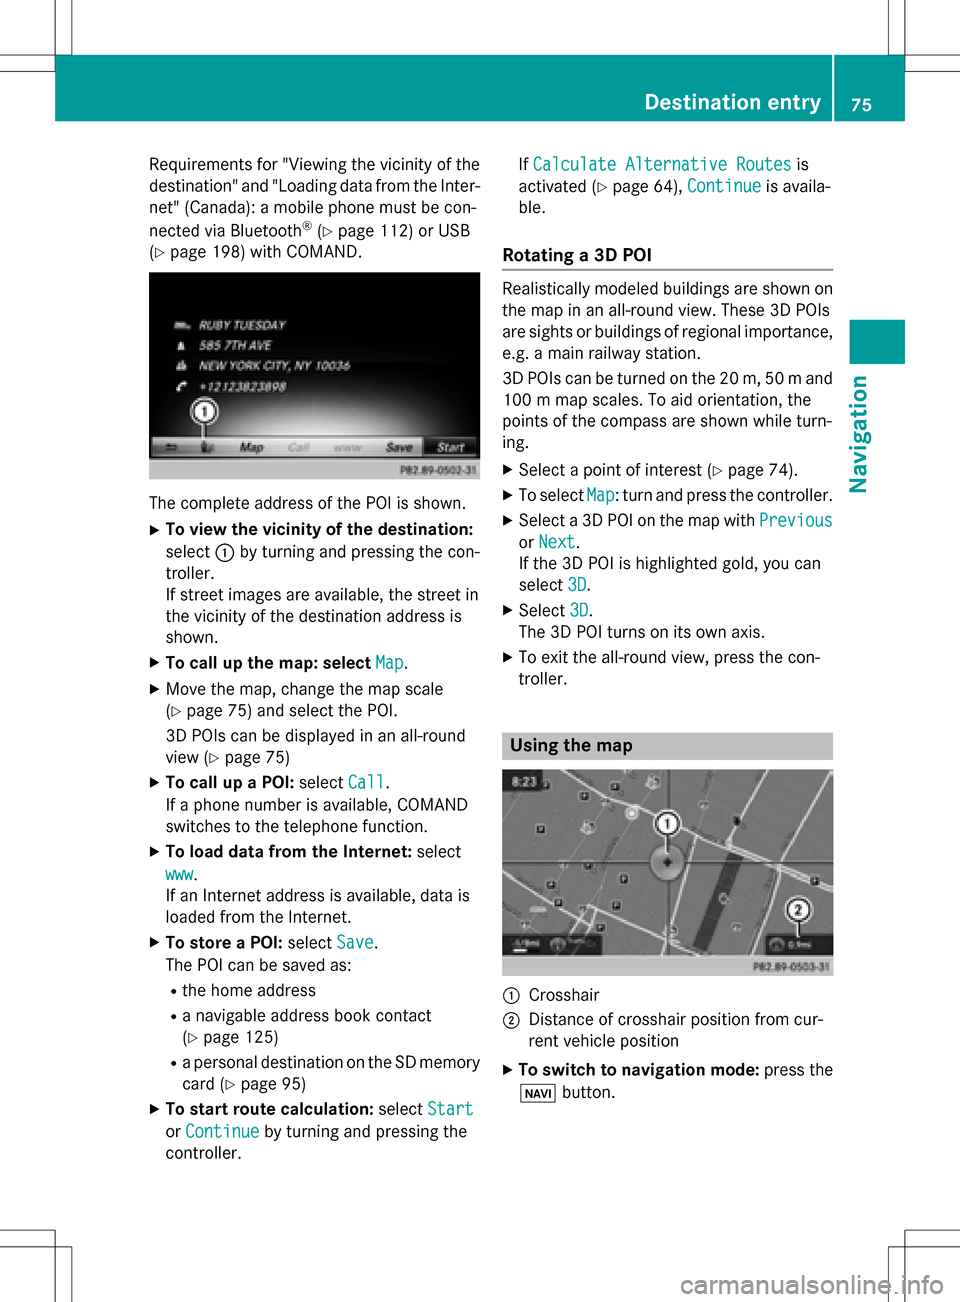
The complet eaddress of th ePOI is shown.
XTo view th evicinit yof th edestination:
select :by turning and pressing th econ-
troller.
If stree timages are available, th estree tin
th evicinit yof th edestination address is
shown.
XTo call up th emap: select Map.
XMoveth emap, chang eth emap scale
(
Ypage 75) and select th ePOI .
3D POI scan be displayed in an all-roun d
vie w (
Ypage 75 )
XTo call up aPOI: select Call.
If aphone number is available, COMAND
switches to th etelephon efunction .
XTo load data from th eInternet :select
www
.
If an Internet address is available, dat ais
loade dfrom th eInternet .
XTo store aPOI: select Save.
The POI can be saved as:
Rth ehom eaddress
Ranavigabl eaddress boo kcontact
(
Ypage 125)
Ra personal destination on th eSD memory
car d (
Ypage 95)
XTo star trout ecalculation: selectStart
orContinueby turning and pressing th e
controller . If
Calculate Alternative Routes
is
activated (
Ypage 64), Continueis availa-
ble.
Rotating a3D POI
Realisticall ymodeled building sare shown on
th emap in an all-roun dview. These 3D POI s
are sights or building sof regional importance,
e.g. amain railway station .
3D POI scan be turne don th e20 m, 50 mand
10 0 m map scales. To aid orientation ,th e
points of th ecompas sare shown while turn-
ing.
XSelec t apoin tof interes t (Ypage 74).
XTo selectMap:tur nand press th econtroller .
XSelect a3D POI on th emap wit hPrevious
or Nex t.
If th e3D POI is highlighte dgold ,you can
select 3D
.
XSelect3D.
The 3D POI turns on it sown axis.
XTo exit th eall-roun dview, press th econ-
troller.
Usin gth ema p
:Crosshai r
;Distanceof crosshair position from cur -
ren tvehicl eposition
XTo switch to navigation mode: press the
ß button.
Destination entry75
Navigation
Z
Page 81 of 222
If the fuel tank reserve level is displayed, you
will see theReserve Fuel Would you
liketostartasearchforsurround‐
ing gas stations?message.
XTo selectYesorNo: turn and press the con-
troller.
If you select Yes
, the gas station search
starts. When the search is complete, a list
of the gas stations available along the route
or in the vicinity is displayed.
If you select No
, the search is canceled.
XSelect the gas station.
The address of the gas station is displayed.
XTo selectStart: press the controller.
The selected gas station is entered into
position 1 of the intermediate destinations
menu. Route guidance begins.
If the intermediate destinations menu
already contains four intermediate desti-
nations, a prompt will be displayed, asking
you whether you wish to enter the gas sta-
tion into position 1. If you select Yes
, the
gas station is transferred into the list and
intermediate destination 4 is deleted.
Entering a destination from
Mercedes-Benz Apps
Requirement (USA): mbrace is activated for
the Mercedes-Benz Apps (
Ypage 146).
Requirement (Canada): a mobile phone must be connected via Bluetooth
®(Ypage 112) or
USB (
Ypage 198) with COMAND.
XTo switch to navigation mode: press the
Ø button.
XTo show the menu: slide6the control-
ler.
XTo select Destination: turn and press the
controller.
XSelect From Mercedes-Benz Apps.
The list of Mercedes-Benz Apps appears
(
Ypage 155).
Using geo-coordinates
XTo switch to navigation mode: press the
ß button.
XTo show the menu: slide6the control-
ler.
XTo select Destination: turn and press the
controller.
XSelect Using Geo-Coordinates.
Geo-coordinates (longitude and latitude)
are entered in degrees, minutes and sec-
onds.
XTo enter geo-coordinates: turn the con-
troller.
The value for degree, minute or second
changes.
XTo move the selection within the line: slide
1 the controller.
XTo move the selection between lines: slide
4the controller.
XTo confirm the value: press the controller.
XTo store geo-coordinates: selectSaveby
turning and pressing the controller.
The destination with the geo-coordinates
can be stored as:
Ra home address in the address book
Ra navigable address book contact
For further information on the address
book, see (
Ypage 125).
Ra personal destination on the SD memory
card (
Ypage 95)
XTo start route calculation: selectStart
Route Guidanceby turning and pressing
the controller.
Personal POIs and routes
General notes
The use of personal POIs for displaying traffic surveillance equipment is not permitted in
every country. Please observe the country-
specific regulations and always drive at a suit-
able speed.
Personal POIs and routes79
Navigation
Z
Page 85 of 222
XSet the map scale (Ypage 96).
XTo switch to the menu: press the%but-
ton.
XTo call the personal POI: turn and press
the controller to select Call
.
If a mobile phone is connected to COMAND
and the telephone number is available, the
call is connected (
Ypage 118).
XTo save a personal POI: turn and press the
controller to select Save
.
XTo continue saving (Ypage 94).
XTo edit the name and symbol: turn and
press the controller to select Edit
.
XSelectChange NameorEdit Icon.
XCharacter entry (Ypage 31).
XSelect a symbol.
XTo delete a personal POI or route: turn
and press the controller to select Delete
.
A prompt will appear.
XSelect YesorNo.
If you select Yes
, the personal destination
or personal route is deleted.
XTo select the outward and return
routes: turn and press the controller to
select Swap
.
The starting and destination positions of
your personal route, and thus the direction
for route guidance, are switched round.
One-way streets or restricted intersections
are taken into consideration. Therefore, the outward and return routes may differ from
each other.
XTo start route guidance: turn and press
the controller to select Start
.
Recording the route
General notes
Routes are recorded on the SD memory card.
Requirement: the SD memory card is format-
ted using the FAT file system (e.g. FAT32). When recording the route, bear in mind the
following:
Rif the SD memory card is inserted, it must
not be removed during recording.
Rif route recording is started manually, it
must be finished manually before COMAND
is switched off (e
.g. when the engine is
switched off).
RCOMAND minimizes the number of route
points recorded. Therefore when the recor-
ded route is subsequently commenced, it
may differ from the route that was originally
recorded.
Starting/finishing route recording
XInsert the SD memory card (Ypage 182).
XTo switch to navigation mode: press the
ß button.
XTo show the menu: slide6the control-
ler.
XTo select Destination, turn and press the
controller.
XSelect From Memory Card.
XSelectStart Route Recording.
The route is recorded and REC appears at
the bottom edge of the screen.
XTo stop recording, select End Route
Recordingfrom the menu.
The route is stored under Personal
Routes.
Displaying/editing the recorded route
XInsert the SD memory card (Ypage 182).
XTo switch to navigation mode: press the
ß button.
XTo show the menu: slide6the control-
ler.
XTo select Destination: turn and press the
controller.
XSelect From Memory Card.
Personal POIs and routes83
Navigation
Z
Page 86 of 222
XSelectPersonal Routes.
Previously recorded routes are displayed.
XTo select a route, turn and press the con-
troller.
The map appears with a menu. The recor-
ded route is shown on the map in blue.
XTo calculate a route: selectStart.
XTo change the name and symbol: select
Edit
.
XSelect Change NameorEdit Icon.
XCharacter entry (Ypage 31).
XSelect a symbol.
Route guidance
General notes
COMAND calculates the route to the destina-
tion without taking account of the following,
for example:
Rtraffic lights
Rstop and yield signs
Rparking or stopping restrictions
Rroad narrowing
Rtemporary traffic rules and regulations
The navigation system can give differing driv-
ing recommendations if the actual street/
traffic situation does not correspond with the
digital map's data. For example, if the road
layout or the direction of a one-way street has
been changed.
For this reason, you must always observe
road and traffic rules and regulations during
your journey. Road and traffic rules and reg-
ulations always have priority over system
driving recommendations.
Route guidance begins once a route has been
calculated (
Ypage 69).
COMAND guides you to your destination by
means of navigation announcements in the
form of audible navigation announcements
and route guidance displays.
The route guidance displays can be seen if
navigation mode is switched on. If you do not follow the navigation announce-
ments or if you leave the calculated route,
COMAND automatically calculates a new
route to the destination.
If the digital map contains the corresponding
information, the following applies:
Rduring route guidance, COMAND tries to
a
void roads with restricted access. Those
roads, for example, that are closed to
through-traffic.
Rroads that have time restrictions (e.g.
closed on Sundays and public holidays) are considered for route guidance on days
when they are open. For this purpose, the
relevant times must be correctly stored in
the database.
Change of direction
Overview
Changes of direction have three phases:
RPreparation phase
RAnnouncement phase
RChange-of-direction phase
Changes in direction are also shown in the
multifunction display of the instrument clus-
ter (see the vehicle Operator's Manual).
Preparation phase
COMAND prepares you for the upcoming
change of direction, e.g. with the announce-
ment "Prepare to turn right". You see the full- screen map.
84Route guidance
Navigation
Page 88 of 222

Possible lane;: you will only be able to com-
plete the next change of direction in this lane.
Recommended lane =: in this lane you will
be able to complete the next change of direc-
tion and the one after that.
COMAND shows the lane recommendations
for the next two changes of direction. Lane
recommendations are also shown in the mul- tifunction display of the instrument cluster
(see the vehicle Operator's Manual).
Approaching new lanes
:Approaching new lane
During the change of direction, new lanes
may be added. These will be shown in the dis-
play of lane recommendations with a lower
boundary line.
Highway information
Display mode
Requirement: the Highway Information
map content must be enabled (Ypage 98).
While driving on the highway, gas stations,
rest stops, rest areas and highway exits are displayed along with their immediate distan-
ces from the current vehicle position.
Calling up the selection mode
XWhen highway information is displayed,
slide
9 the controller.
The marker is on the highway information.
The associated position is highlighted on
the map.
XTo select the desired rest stop/freeway
exit: turn and press the controller.
The available POIs are displayed.
Starting route guidance to a POI
XTo select a POI: turn the controller and
press to confirm.
The POI details are displayed.
You can perform the following functions:
Rstore in the address book (Ypage 94)
Rview on the map (Ypage 99)
Rcall if a phone is connected and a phone
number is available (
Ypage 118).
Rselect for route guidance and a route to it
calculated (
Ypage 69).
86Route guidance
Navigation