change time MERCEDES-BENZ GLC-Class 2016 X253 Comand Manual
[x] Cancel search | Manufacturer: MERCEDES-BENZ, Model Year: 2016, Model line: GLC-Class, Model: MERCEDES-BENZ GLC-Class 2016 X253Pages: 222, PDF Size: 6.39 MB
Page 105 of 222
The update can only be performed:
Rat an authorized Mercedes-Benz Center
Rfor map data for North America
The map software is not provided on DVD.
Carrying out a manual update
After the free update of the map data has
expired or when buying map data, you can
update the data yourself.
The update process may take some time (up
to 45 minutes), depending on the size of the
digital map. The update will be completed
more quickly if the vehicle is stationary. If you
start the update with the engine switched off
and the starter battery has insufficient power,
COMAND may automatically switch off. This
protects the battery. In order to prevent this,
a suitable power supply to the vehicle must be
maintained.
Navigation functions
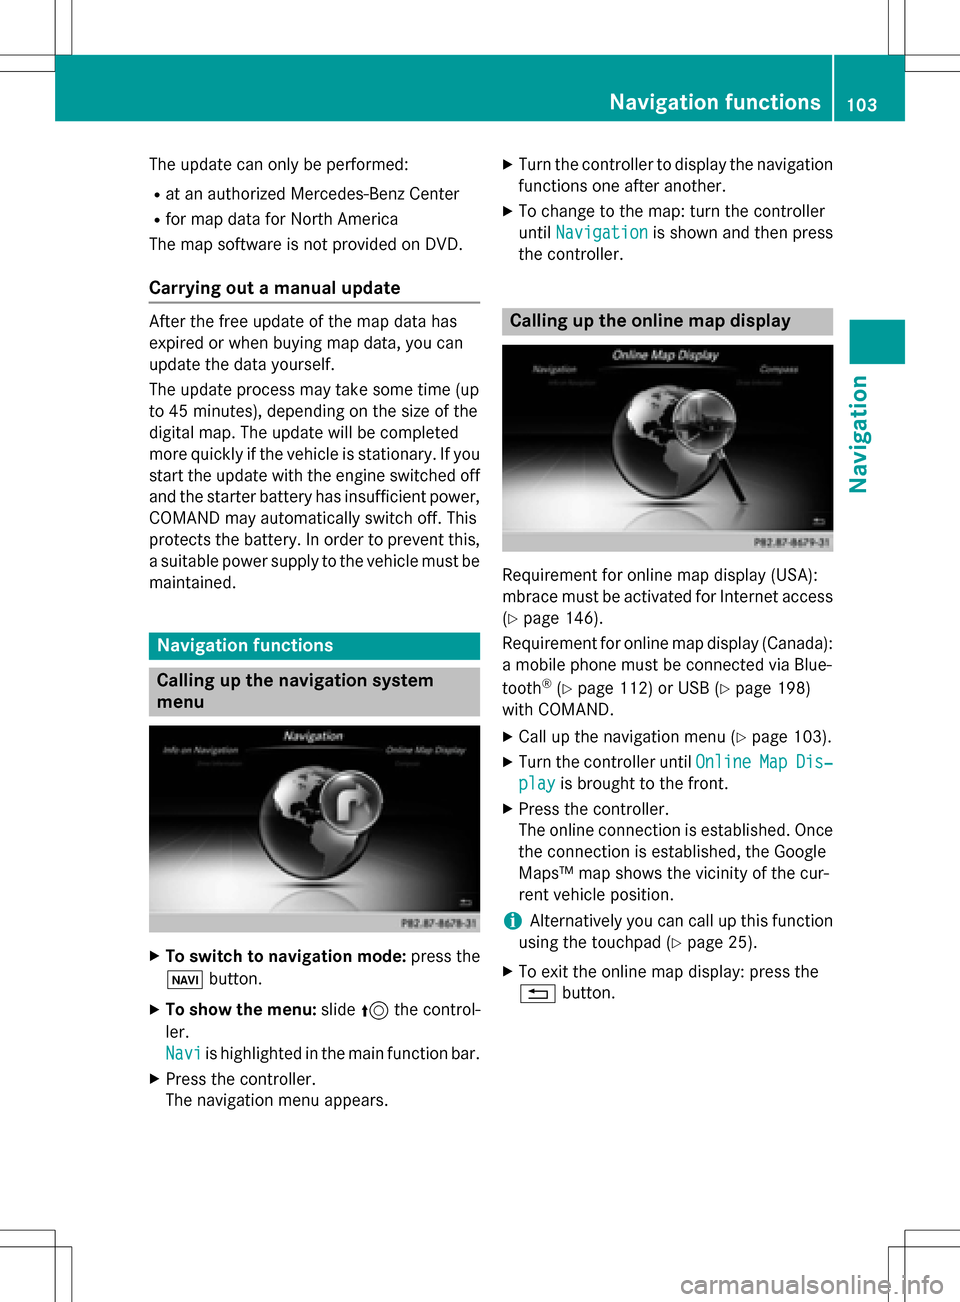
Calling up the navigation system
menu
XTo switch to navigation mode: press the
ß button.
XTo show the menu: slide5the control-
ler.
Navi
is highlighted in the main function bar.
XPress the controller.
The navigation menu appears.
XTurn the controller to display the navigation
functions one after another.
XTo change to the map: turn the controller
until Navigation
is shown and then press
the controller.
Calling up the online map display
Requirement for online map display (USA):
mbrace must be activated for Internet access
(
Ypage 146).
Requirement for online map display (Canada):
a mobile phone must be connected via Blue-
tooth
®(Ypage 112) or USB (Ypage 198)
with COMAND.
XCall up the navigation menu (Ypage 103).
XTurn the controller until OnlineMapDis‐
playis brought to the front.
XPress the controller.
The online connection is established. Once
the connection is established, the Google
Maps™ map shows the vicinity of the cur-
rent vehicle position.
iAlternatively you can call up this function
using the touchpad (
Ypage 25).
XTo exit the online map display: press the
% button.
Navigation functions103
Navigation
Z
Page 114 of 222
If you have an unread text message or e-mail,
the0 mail symbol is displayed at the top
in the status bar. The symbol disappears once
you have read the text message or e-mail. The
ú symbol is displayed as soon as the mes-
sage memory on the mobile phone or SIM
card is full. The symbol disappears once you
delete at least one message.
Connecting/disconnecting a mobile
phone
Prerequisites
For telephony via the Bluetooth®interface,
you require a Bluetooth®-capable mobile
phone. The mobile phone must support
Hands-Free Profile 1.0 or above.
On COMAND
XActivate Bluetooth®(Ypage 44).
On the mobile phone
XSwitch on the mobile phone and enter the
PIN when prompted to do so (see the man-
ufacturer's operating instructions).
XActivate Bluetooth®and, if necessary,
Bluetooth®visibility for other devices (see
the manufacturer's operating instructions).
This visibility is for restricted periods of
time on some mobile phones (see the man-
ufacturer's operating instructions).
XSet the Bluetooth®device name for the
mobile phone if necessary.
The Bluetooth
®device names for all of one
manufacturer's products might be identical.
To make it possible to clearly identify your
mobile phone, change the device name (see
the manufacturer's operating instructions).
The name can be freely selected. If the mobile phone supports the PBAP
(Phone
BookAccess Profile) and MAP
(Message Access Profile) Bluetooth
®pro-
files, the following information will be trans-
mitted after you connect:
RPhone book
RCall lists
RMessages
Further information on allowing or suppress-
ing the automatic download of the phone
book (
Ypage 130).
The battery of the mobile phone should
always be kept sufficiently charged in order to
prevent malfunctions.
iNot all mobile phones available on the
market are equally suitable. You can obtain
more detailed information about suitable
mobile phones and about the connection
between the mobile phone and COMAND
on the Internet at
www.mercedes-benz-mobile.com .
You can also obtain more information by
calling.
In the USA, you can get in touch with the
Mercedes-Benz Customer Assistance Cen-
ter on 1-800-FOR-MERCedes
(1-800-367-6372).
In Canada, you can get in touch with the
Customer Relations Center on
1-800-387-0100.
iSome displays (e.g. the signal strength)
depend on the su
pported version of the
Hands-Free Profile.
Procedure and general information
Searching for and authorizing (connect-
ing) a mobile phone
Before using your mobile phone with
COMAND for the first time, you will need to
search for the phone (
Ypage 113) and then
authorize it (
Ypage 114). Depending on the
mobile phone, authorization either takes
place by means of Secure Simple Pairing or by
112Connecting/disconnecting a mobile phone
Telephone
Page 124 of 222

XTo call up the telephone menu: press the
%button.
XTo select Namein the telephone menu: turn
and press the controller.
If the phone book contains contacts, they
will be displayed in alphabetical order. The character bar at the bottom of the display is
active.
You can now search for a contact
(
Ypage 122).
Further information on the symbols shown
(
Ypage 122).
iYou can also call up the phone book with
the multifunction steering wheel; see the
separate operating instructions.
Symbol overview
Sym-
bolExplanation
ÆContact that has been entered, edi-
ted or saved on COMAND.
\Contact with voice tag
These contacts have also been
assigned a voice tag. Voice tags are
available in vehicles with the Voice
Control System (see the vehicle
Operator's Manual).
ÃContact that was called up from a
mobile phone
¯Contact imported from the SD
memory card or USB device.
®Contact imported via the Blue-
tooth®interface.
Find contact
Using the character bar
You determine the first letter of the contact
you are looking for with the first character you
enter.
XTo select characters: turn the controller
and press to confirm.
The first contact with the selected first
character is highlighted in the phone book.
If there are similar contacts, the next dif-
ferent character is shown. For example,
with contacts such as Jana
andJohn, the
beginnings of the names are identical. The
next different character A
andOare offered
for selection.
XSelect the characters of the contact you are
searching for one by one, pressing and con- firming with the controller each time.
XTo select ¬: turn and press the control-
ler.
The contacts in the phone book are dis-
played.
XTo select a contact: turn and press the con-
troller.
The Gsymbol indicates that a contact con-
tains more than one phone number.
XTo select a contact with the Gsymbol:
turn the controller and press to confirm.
The phone numbers are displayed. The G
symbol changes to I.
Back to the character bar:
XPress the %button repeatedly until the
character bar is displayed.
122Phone book
Telephone
Page 134 of 222
iIf you switch to another main function,
e.g. navigation, while receiving vCards, the reception of vCards will be terminated.
Deleting imported contacts
XTo change to the menu bar when in the
address book or the telephone menu: slide
6 the controller.
XTo select Options: turn and press the con-
troller.
XTo select Delete Contacts: turn and
press the controller.
XSelect one of the following options:
RInternal Contacts
RImported from Storage Device
RImported from Bluetooth Devices
RDownloaded from Phone
Turn and press the controller.
XTo select Yes: turn and press the controller.
The contacts are deleted.
or
XTo select No: turn and press the controller.
The process is canceled.
Closing the address book
XPress the %button one or more times.
Call lists
Introduction
If your mobile phone supports the PBAP Blue-
tooth®profile, the call lists from the mobile
phone are displayed in COMAND. When con- necting the mobile phone, you may have to
confirm the connection for the PBAP Blue-
tooth
®profile.
If your mobile phone does not support the
PBAP Bluetooth
®profile, COMAND generates
its own call lists. These are not the same as
the call lists in your mobile phone. The Call list option is not available unless a
mobile phone is connected to COMAND.
If the contact for an incoming call is not saved
in the address book, you can use the call list
to save the telephone number. You can save
this telephone number as a new contact in the
address book or add it to an existing contact
(
Ypage 133).
iIf you connect a different mobile phone to
COMAND, the call lists from the new mobile phone are displayed.
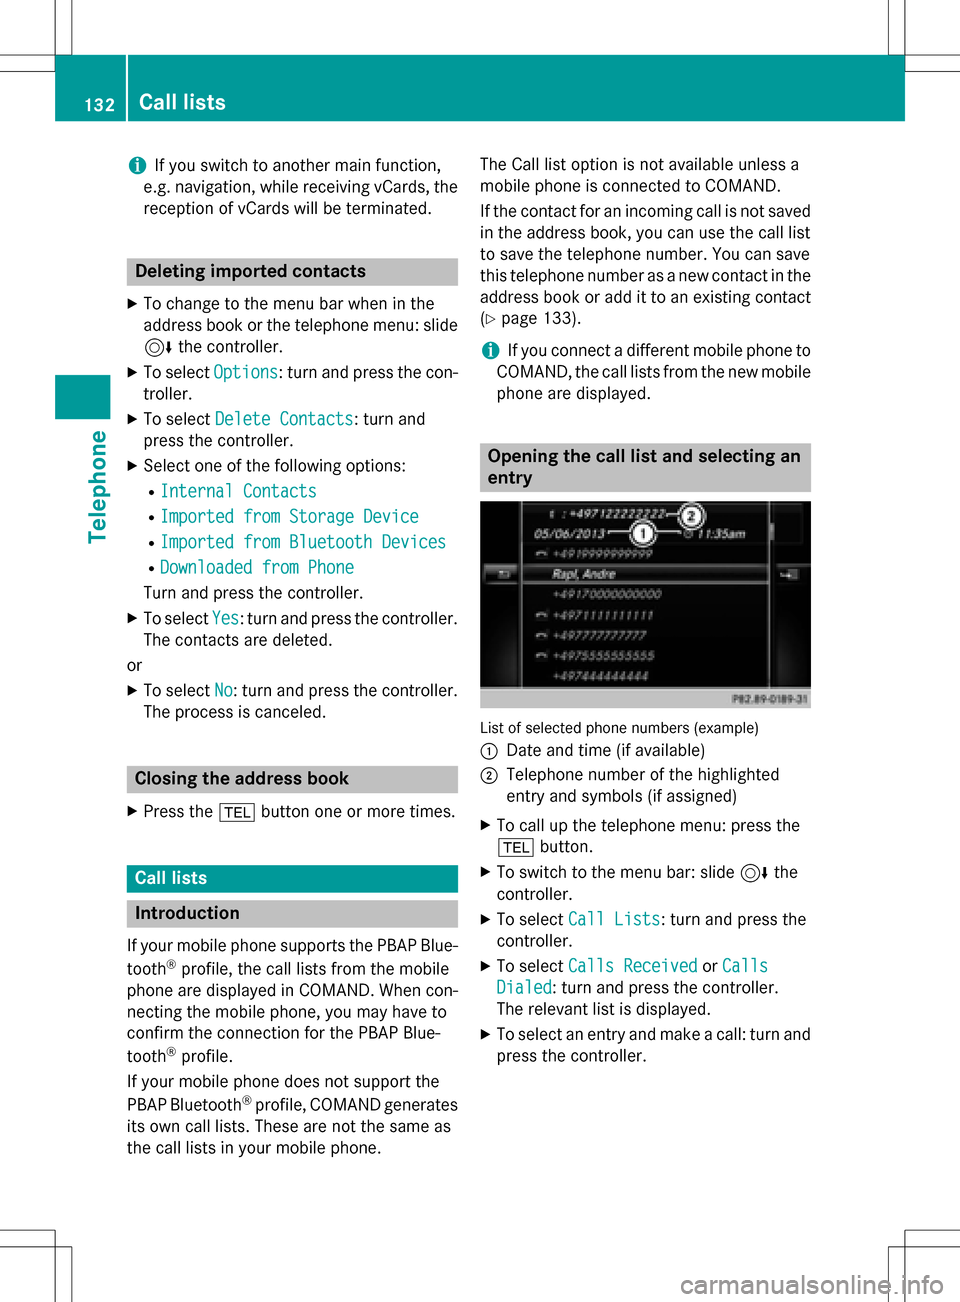
Opening the call list and selecting an
entry
List of selected phone numbers (example)
:
Date and time (if available)
;Telephone number of the highlighted
entry and symbols (if assigned)
XTo call up the telephone menu: press the
% button.
XTo switch to the menu bar: slide 6the
controller.
XTo select Call Lists: turn and press the
controller.
XTo select Calls ReceivedorCalls
Dialed: turn and press the controller.
The relevant list is displayed.
XTo select an entry and make a call: turn and
press the controller.
132Call lists
Telephone
Page 153 of 222

XTo selectG: slide 9the controller.
XTo select Delete Configuration: turn
and press the controller.
A prompt appears asking whether you wish
to delete the Internet configuration.
XTo select Yes: turn and press the controller.
The Internet access permission for the
mobile phone is now canceled. The mobile
phone can now no longer be used by the
system for Internet functions.
or
XTo select No: turn and press the controller.
The process is canceled.
Changing the device name of the mobile
phone
XCall up the device list (Ypage 150).
XTo highlight the desired mobile phone in the
device list: turn the controller.
XTo select G: slide 9the controller.
XSelect Change Internet Device Name.
A character entry appears.
XEnter name and confirm with ¬.
The device name is changed.
Setting automatic disconnection of
the Internet connection
If a preset time has elapsed during which the
Internet functions have not been used, the
Internet automatically disconnects.
XCall up the device list (Ypage 150).
XTo highlight the desired mobile phone in the
device list: turn the controller.
XTo select G: slide 9the controller.
XTo select Disconnect Automatically
When Inactive: turn and press the con-
troller.
XTo select 5 Minutes,10 Minutesor 20
Minutes: turn and press the controller.
Establishing/ending the connection
Establishing the connection
Read the conditions for establishing a con-
nection (
Ypage 146).
A connection can be established by:
Rentering a web address (Ypage 158)
Rcalling up the Mercedes-Benz mobile web-
site (
Ypage 157)
Rcalling up a Mercedes-Benz App
(
Ypage 157)
Rcalling up a favorite
Restablishing an Internet connection via a
wireless networking device. The "Allow
shared WiFi usage" option must be activa-
ted on COMAND for this (
Ypage 42)
Ending the connection
XPress Cancelin the connections window.
Calling up Internet functions
XTo show the main function bar: slide 5
the controller.
XTo select ®: turn and press the controller.
The menu with the Internet functions is dis-
played.
Connection status
:Display of existing connection and signal
strength of the mobile phone network
In most cases, the current connection status
is then shown in the status bar when you
switch to another main function.
Establishing/ending the connection151
Online and Internet functions
Z
Page 163 of 222

XTo show the menu:press the%but-
ton.
XTo select 3: turn and press the control-
ler.
A menu appears.
XSelect Settings.
You can activate or deactivate the following
settings:
RDownload Images Automatically
It may take some time to download the
contents of websites that contain a large
amount of images. Therefore, it may be
useful to deactivate this option.
RBlock Pop-Ups
Pop-ups are windows (usually with adver-
tisements) which are displayed automati-
cally when you call up a website. You can
block these displays.
RActivate Javascript
Javascript makes it possible to display and
interact with dynamic content on the web-
site.
RAllow Cookies
Some websites save information in small
text files (cookies) on your system. You can
determine whether cookies may be stored.
REnable Internet Audio
You can switch the browser's audio play-
back on or off here.
RHide Scroll Bars
You can show or hide the scroll bar here.
RShow Link Target
You can display the link's URL here.
RCharacter Size
You can select the font size which is used
when displaying the website.
RCharacter Code
You can select a different character set
here, e.g. if the characters of a website
appear distorted.
Changing settings
XTo select the desired setting: turn and
press the controller.
Switch the setting on Oor off ª.
Changing the character size or character code.
XSelect Character SizeorCharacter
Code.
XTo select the setting you require: turn and
press the controller.
iIf you change the settings, the websites
may not be displayed correctly.
Deleting private data
XTo call up Internet functions (Ypage 151).
XTo show the menu: slide 6the controller.
XTo select Settings: slide6, turn and
press the controller.
A menu appears.
XTo select DeletePrivateData: turn and
press the controller.
A menu appears. The #dot indicates the
current setting.
XTo select the setting you require: turn and
press the controller.
or
XSelect Delete All Data On Exit.
Switch the setting on Oor off ª.
Web browser161
Online and Internet functions
Z
Page 183 of 222
Selecting an active partition
XTo selectOptionsin the media menu bar:
turn and press the controller.
XSelect Select Active Partition.
Notes on copyright
Audio/video files that you create or repro-
duce yourself for playback are generally sub-
ject to copyright protection.
In many countries, reproductions, even for
private use, are not permitted without the
prior consent of the copyright holder.
Make sure that you know about the applicable
copyright regulations and that you comply
with these.
Notes on CDs/DVDs
!COMAND is designed to play discs that
comply with the EN 60908 standard. There-
fore, you can only use discs with a maxi-
mum thickness of 1.3 mm.
If you insert thicker discs, e.g. those that
contain data on both sides (DVD on one
side and audio data on the other), they can-
not be ejected and can damage the device.
Only use round discs with a diameter of
12 cm. Do not use discs with a diameter of
8 cm, even with an adapter.
Discs with copy protection are not compati-
ble with the audio CD standard and therefore
may not be able to be played by COMAND.
Playback problems may occur when playing
copied discs.
There may be playback problems if you play
CDs that you have copied yourself with a stor-
age capacity of more than 700 MB.
iCOMAND is able to play back audio CDs in
multichannel audio format.
Inserting and removing a disc from
the single CD/DVD drive
Before inserting or removing a CD/DVD,
ensure that the cup holder is empty.
XTo insert: press theþbutton on the
single drive.
If there is a disc already inserted, it will be
ejected.
XInsert a disc into the disc slot with the prin-
ted side facing upwards.
The drive closes and the disc is played.
If the CD/DVD is operated in Media mode,
the corresponding basic menu will be
shown. If the CD/DVD is started using
another application (e.g. navigation), the
display will not change.
iThe drive may not be able to play discs
with copy protection.
XTo remove: press theþbutton.
The drive ejects the disc.
XRemove the ejected disc from the slot.
If you do not take the disc out of the slot, it
is drawn in again automatically after a short
while.
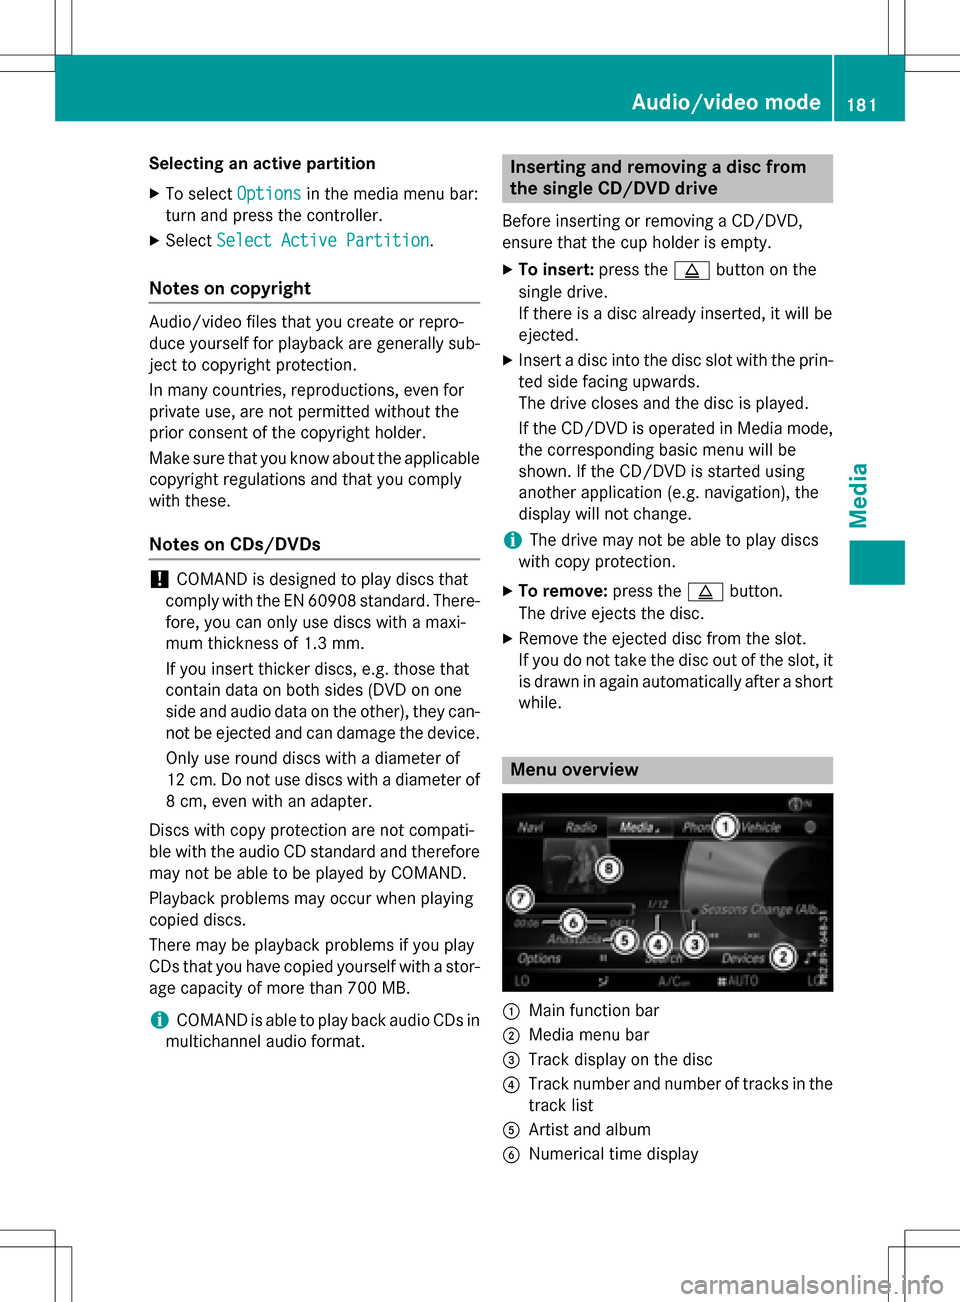
Menu overview
:Main function bar
;Media menu bar
=Track display on the disc
?Track number and number of tracks in the
track list
AArtist and album
BNumerical time display
Audio/video mode181
Media
Z
Page 184 of 222
CGraphic time display
DCover view (if available)
Inserting and ejecting an SD memory
card
Important safety notes
GWAR NING
SD memory car dsare small parts. They can be
swallo wed and cause asphyxiation. This
poses an increased risk of injury or even fatal injury.
Keep SDmemory car dsout of the reach of
ch ildr en. Ifan SD memory card is swallowed,
seek immediate medical attention.
!If you are no longer using the SD memory
card, you should remove it and take it out of
the vehicle. High temperatures can dam-
age the card.
COMAND supports SD memory cards
(Secure Digital), SDHC memory cards
(Secure DigitalHigh Capacity), and SDXC
memory cards ( SecureDigital e Xtended
Capacity.
Inserting an SD memory card
XInsert the SD memory card into the SD card
slot until it engages. The side with the con- tacts must face downwards.
If the memory card has been selected as a
media source, the medium is played and
the files are loaded in the background. If
there are no supported audio/video files,
you will see a message to this effect.
XSelect the media source (Ypage 178).
Ejecting an SD memory card
XPress the memory card.
The memory card is ejected.
XRemove the memory card.
Connecting USB devices
There are two USB ports in the stowage space
under the armrest.
XConnect the USB device to the USB port.
If the corresponding media display is visi-
ble, the medium is played and the files are
loaded in the background. If there are no
supported audio/video files, you will see a
message to this effect.
iMP3 players must support Media Transfer
Protocol (MTP).
Activating media mode
Switching on automatically
After inserting a CD/DVD, this media mode is
automatically switched on by COMAND.
If playable music files are found, they will be
played by COMAND.
If a media function is already switched on in
COMAND, this will be interrupted and the
basic display of the CD/DVD mode will
appear. If another function, such as naviga-
tion, is being operated, the basic display will
not change. Only the music from the last
inserted CD/DVD will be played.
Depending on the vehicle equipment, the
default display must already be turned on
when using with USB devices or SD memory
cards.
XInsert the CDs/DVDs (Ypage 181)
or
XInsert an SD memory card: (Ypage 182)
or
XConnect a USB device: (Ypage 182)
COMAND loads the medium inserted and
starts to play it automatically.
Further options for switching on
RUsing the main function bar: (Ypage 178)
RUsing the device list: (Ypage 179)
RUsing the Õbutton: (Ypage 178)
182Audio/video mode
Media
Page 192 of 222

XTo selectTarget Folder: turn and press
the controller.
XSelect a folder.
XSelect Continue.
XTo select Start: press the controller.
The copying procedure starts and is shown
in the progress bar.
It may take some time for the copying proc-
ess to be completed, depending on the
amount of data. If there is not enough mem-
ory space, a message to this effect
appears.
Once the copying procedure is complete,
you will hear the first track of the copied
album. You can now copy more files to the MEDIA REGISTER.
XTo cancel copying: selectCancel.
Files are stored in the MEDIA REGISTER up until the point of cancellation.
iIt is possible to change to a different func-
tion (e.g. radio) during the copying proce-
dure. The copying procedure continues in
the background. While the copying proce-
dure is taking place, this is shown by a sym-
bol in the status bar.
Renaming/deleting files
XIn media mode: press the Õbutton.
The menu appears with the available media sources.
XTo select the media source: turn the con-
troller and press to confirm.
XTo switch to the menu bar: slide 6the
controller.
XTo select Options: turn and press the con-
troller.
XSelect Manage Media Register.
XSelectRename / Delete Files.
The file list is displayed.
XTo highlight the selected files: turn and
press the controller.
XSlide 9the controller.
You can select between Edit
andDelete.
XTo select Editfor the file: turn and press
the controller.
The following entry field appears:
XRename the file.
XTo save changes with ¬: turn and press
the controller.
Renaming a file only changes the name.
Depending on whether or not the Show
Track Informationoption has been
selected, this change may not be seen in
the main display field.
XTo select Deletefor the file: press the con-
troller.
190Media Register
Media
Page 194 of 222
XIn media mode: press theÕbutton.
The menu appears with the available media sources.
XTo select the media source: turn the con-
troller and press to confirm.
XTo switch to the menu bar: slide 6the
controller.
XTo select Options: turn and press the con-
troller.
XSelect Playback Mode.
The options list appears. The #dot indi-
cates the current setting.
XSelect the desired option.
The option is switched on. For all options
except Normal Track Sequence
, you will
see a corresponding icon in the main dis-
play.
iThe Normal Track Sequenceoption is
automatically selected when you change
the disc you are currently listening to or
when you select a different medium. If an
option is selected, it remains selected after
COMAND is switched on or off.
Bluetooth®audio mode
Connecting Bluetooth®audio devices
Prerequisites
XActivate the Bluetooth®function in
COMAND (
Ypage 44).
Bluetooth
®audio mode requires a Blue-
tooth®-capable audio device.
Check your Bluetooth
®audio device for the
following (see the manufacturer's operating
instructions):
RBluetooth®audio profile
The Bluetooth
®audio device must support
the A2DP and AVRCP Bluetooth®audio
profiles.
RBluetooth®visibility
Certain Bluetooth
®audio devices do not
just require activation of the Bluetooth®
function. In addition, your device must be
made "visible" to other devices.
RBluetooth®device name
This device name is predetermined but can
usually be changed. For a clear selection of the Bluetooth
®device, Mercedes-Benz rec-
ommends that you customize the device
name.
iA2DP ( Advanced Audio Distribution
Profile): Bluetooth®audio profile for audio
data transmission
AVRCP (A udioVideo Remote Control
Profile): Bluetooth
®audio profile for audio
data playback.
iThe Bluetooth®device must be visible for
authorization. After authorization,
COMAND even finds the Bluetooth
®device
when it is not visible.
General notes
Before using your Bluetooth®audio device
with COMAND for the first time, you will need
to authorize it.
When you authorize a new Bluetooth
®audio
device, it is connected automatically. Con-
nection involves first searching for a Blue-
tooth
®audio device and then authorizing it.
You can authorize up to fifteen Bluetooth
®
devices.
iIf you authorize a mobile phone that sup-
ports Bluetooth®audio, the A2DP and
AVRCP Bluetooth®audio profiles are con-
nected automatically.
The mobile phone is then entered:
Rin the Bluetooth®telephone list
(
Ypage 113)
Rin the Bluetooth®device list
(
Ypage 193)
Mercedes-Benz recommends authorizing a
mobile phone in Bluetooth
®telephony
(
Ypage 114).
192Bluetooth®audio mode
Media