navigation system MERCEDES-BENZ GLC-Class 2016 X253 Comand Manual
[x] Cancel search | Manufacturer: MERCEDES-BENZ, Model Year: 2016, Model line: GLC-Class, Model: MERCEDES-BENZ GLC-Class 2016 X253Pages: 222, PDF Size: 6.39 MB
Page 50 of 222
Reset function
You can reset COMAND to the factory set-
tings. Amongst other things, this will delete all
personal COMAND data. Example:
RStation presets
REntries in the destination memory
REntries in the list of previous destinations in
the navigation system
REntries in the address book
RAuthorized telephone
In addition, an activated PIN protection,
which you have used to protect your data
against unwanted export, will be deactivated.
Resetting is recommended before selling or
transferring ownership of your vehicle, for
example.
Data on the internal hard drive, e.g. music
files in the MEDIA REGISTER, will be deleted.
Mercedes-Benz is not liable for any loss of
data.
XPress the Øbutton.
or
XPress Vehiclein the main function bar.
The vehicle menu is displayed.
XTo select System Settings: slide6,
turn and press the controller to confirm.
A menu appears.
XTo select Reset: turn and press the con-
troller.
A prompt appears asking whether you wish
to reset.
XSelect YesorNo.
If you select No
the process is canceled.
If you select Yes
a prompt will appear again
asking whether you really wish to reset.
XSelect YesorNo.
If you select Yes
a message will be shown.
COMAND is reset to the factory settings
and restarted.
If you select No
the process is canceled.
48Reset function
System settings
Page 64 of 222
Your COMANDequipment
i
These operatin ginstruction sdescribe all
th estandar dan doptional equipmen tof
your COMAN Dsystem, as available at th e
time of going to print .Country-specifi cdif -
ference sare possible. Bear in min dthat
your vehicle may no tfeature all function s
described here. Thi salso applies to safety-
relevant systems an dfunctions.
iRead th einformation on qualified special-
ist workshop sin th evehicle Operator's
Manual.
Introduction
Important safet ynotes
GWARNING
If you operat einformation systems an dcom-
munication equipment integrated in th evehi-
cl e whil edriving, you will be distracted from
traffic conditions. You could also los econtro l
of th evehicle. There is aris kof an accident.
Only operat eth eequipment when th etraffic
situation permits. If you are no tsur ethat this
is possible, par kth evehicle payin gattention
to traffic condition san doperat eth eequip-
men twhen th evehicle is stationary.
You mus tobserv eth elega lrequirements fo r
th ecountry in whic hyou are currentl ydrivin g
when operatin gCOMAND.
COMAN Dcalculates th erout eto th edestina -
tion without taking accoun tof th efollowing,
fo rexample:
Rtraffic lights
Rstop an dyield signs
Rmergin glanes
Rparking or stoppin gin ano parking/n o
stoppin gzone
Rother road an dtraffic rule san dregulation s
Rnarrow bridge s
COMAN Dcan giv eincorrec tnavigation com-
mands if th eactual street/traffic situation doe
sno tcorrespon dwit hth edigita lmap's
data. Fo rexample, arout emay hav ebee n
diverted or th edirection of aon
e-w
ay stree t
may hav echanged .
Fo rthis reason ,you mus talways observ e
road an dtraffic rule san dregulation sdurin g
your journey. Road an dtraffic rule san dreg -
ulation salways hav epriorit yover th esys -
tem' sdrivin grecommendations.
Navigation announcement sare intended to
direc tyou whil edrivin gwithout divertin gyour
attention from th eroad an ddriving.
Please always use this feature instead of con-
sultin gth emap display fo rdirections. Look -
in g at th eicon sor map display can distract
you from traffic condition san ddriving, an d
increase th eris kof an accident.
General notes
Operationa lreadines sof th enavigation
syste m
The navigation syste mmus tdetermin eth e
position of th evehicle befor efirst use or
wheneve roperational status is restored .
Therefore, you may hav eto drive fo r awhil e
befor eprecise rout eguidance is possible.
GP Sreception
Amon gother things, correc tfunctionin gof
th enavigation syste mdepend son GPS recep-
tion .In certain situations, GPS reception may
be impaired, there may be interferenc eor
there may be no reception at all, e.g. in tun-
nels or parking garages .
iUsing roof carriers may impair th ecorrec t
functionin gof aroof antenn a(phone, sat -
ellite radio, GPS).
Entry restriction
Fo rvehicles in certain countries, there is a
dat aentr yrestriction .
The restriction is active from avehicle speed
of abov eapproximately 3mph (5 km/h). As
62Introduction
Navigation
Page 68 of 222
XTo show the menu:slide6the control-
ler.
XTo select Options: turn and press the con-
troller.
XSelect Settings.
XSelect an option.
Switch the option on Oor off ª.
Announce
Street
Names
COMAND announces the
names of the streets to which
the impending change of
direction will lead.
The function is not available
in all countries.
Audio
Fadeout
The volume of an active
media source is automati-
cally reduced during a navi-
gation announcement.
Gas on
Reserve
Function activated: once the
reserve fuel tank level is
reached, a message appears
to help you start a gas station
search.
Atten‐
tion
Assist
Function activated: if ATTEN-
TION ASSIST displays a warn-
ing in the multifunction dis-
play, a message appears in
the COMAND display when
driving on a highway. This can
help you start a rest stop
search.
For further information on
ATTENTION ASSIST, see the
vehicle Operator's Manual.
Using car pool lanes
You can include carpool lanes (HOV or car
sharing lanes) in the route calculation.
If you use HOV or carpool lanes, please
observe the applicable laws as well as the
local and time limitation conditions.
Carpool lanes may only be used under certain
conditions. They can normally be used when there are two people in the vehicle. However,
there are also carpool lanes which can only be
used when there are three or more people in
the vehicle. In California, lone drivers may
also use the carpool lanes if the vehicle's
emission or consumption values are below
the prescribed levels.
Carpool lanes may be reserved for specific
times (e.g. during the peak period).
Carpool lanes are indicated by a diamond
symbol on specific road signs and on the road
surface. The road signs may also include the
designation CARPOOL. The lanes are
arranged as a separate lane next to the others
or are built as a physically separate lane.
Depending on the setting under Use Car‐
pool Lanes, COMAND uses carpool lanes
when calculating the route. During route guid-
ance, visual and audible driving directions
provide guidance into and out of carpool
lanes.
XTo switch to navigation mode: press the
ß button.
XTo show the menu: slide6the control-
ler.
XTo select Options: turn and press the con-
troller.
XSelect Route Settings.
XSelectAvoid Options.
XSelectUse Carpool Lanes.
Carpool lanes will either be used Oor
avoided ªwhen calculating the route.
Destination entry
Important safety notes
GWARNING
If you operate information systems and com-
munication equipment integrated in the vehi-
cle while driving, you will be distracted from
traffic conditions. You could also lose control
of the vehicle. There is a risk of an accident.
Only operate the equipment when the traffic
situation permits. If you are not sure that this
66Destination entry
Navigation
Page 71 of 222
XAsthe home address: selectAs "My
Address".
COMAND stores your home address under
My Address
in the list of contacts.
XAs a contact: selectAs New Contact.
XSelect Not Classified,Homeor Work.
XEnter a surname and first name
(
Ypage 31).
XTo select OK: turn and press the controller.
The destination addressissaved inthe
addr ess book as a navigable contact.
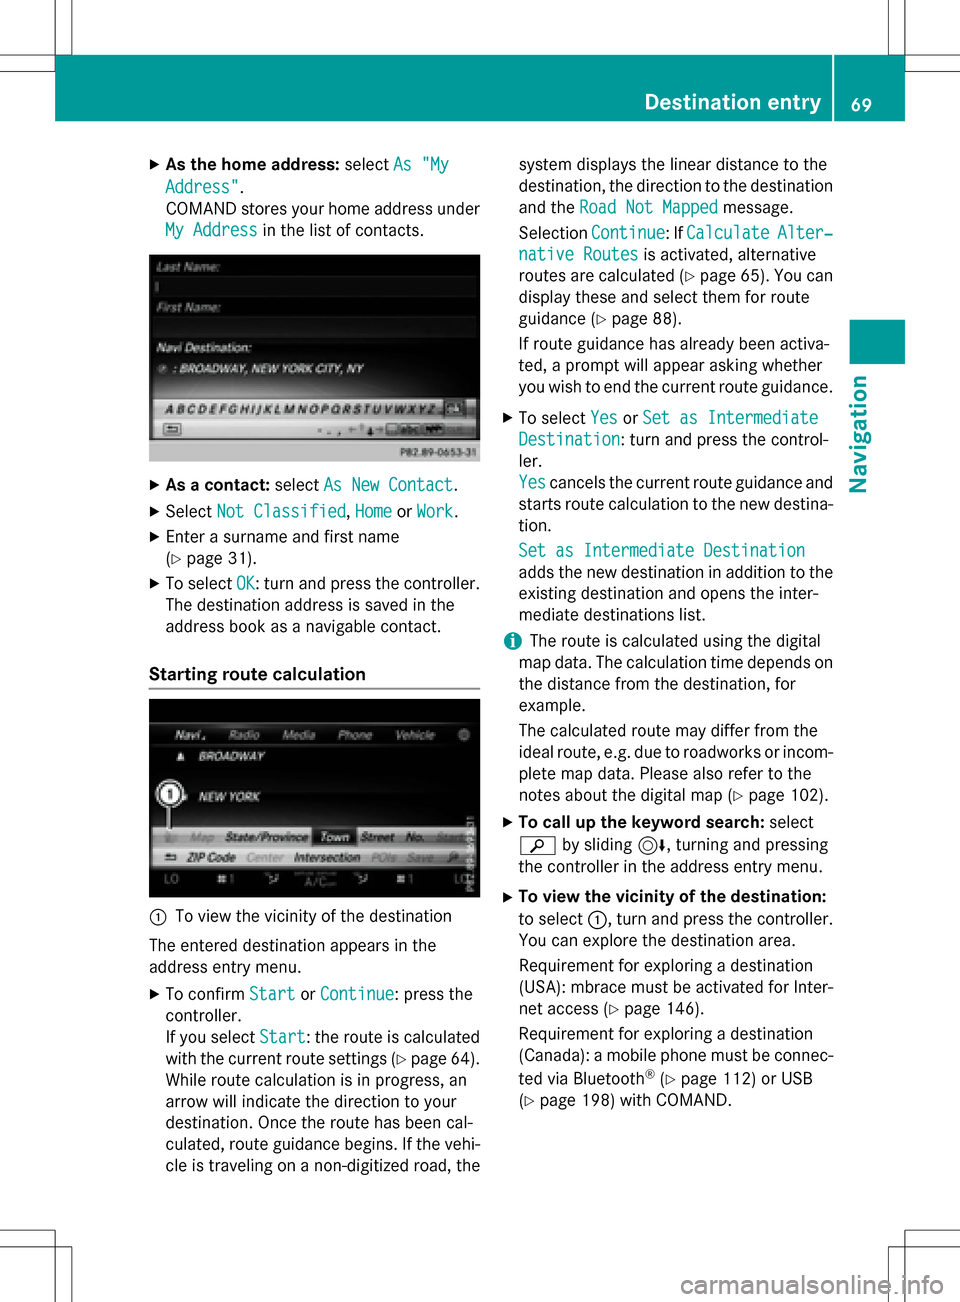
Starting route calculation
:To view the vicinity of the destination
The entered destination appears inthe
addr ess entry menu.
XTo confirm StartorContinue: press the
controller.
If you select Start
: the route is calculated
wit h the current route settings (
Ypage 64).
While route calculation is inprogress, an
arrow willindicate the direction to your
destination. Once the route has been cal-
culated, route guidance begins. Ifthe veh i-
cle istraveling on a non-digitized road, the system displays the linear
distance to the
destination, the direction to the destination
and the Road Not Mapped
message.
Se lection Continue
:If CalculateAlter‐
native Routesis act ivat ed, alternati ve
routes are calculated (
Ypage 65). You can
disp lay these and select them for route
guidance (
Ypage 88).
If route guidance has already been act iva-
te d, a prompt willappear asking whether
you wish to end the current route guidance.
XTo select YesorSet as Intermediate
Destination: turn and press the control-
ler.
Yes
cancels the current route guidance and
starts route calculation to the new destina-
tion.
Set as Intermediate Destination
adds the new destination inaddition to the
existing destination and opens the inter-
mediate destinations list.
iThe route iscalculated using the digital
map data. The calculation time depends on the distance from the destination, for
example.
The calculated route may differ from the
ideal route, e.g. due to roadworks or incom-
plet e map data. Please also refer to the
notes about the digital map (
Ypage 102).
XTo call up the keyword search: select
è bysliding 6, turning and pressing
the controller inthe address entry menu.
XTo view the vicinity of the destination:
to select :, turn and press the controller.
You can explor e the destination area.
Requir ement for explor ing a destination
(USA): mbrace must beact ivat ed for Inter-
net access (
Ypage 146).
Requirement for explor ing a destination
(Can ada): a mobile phone must beconnec-
ted via Bluetooth
®(Ypage 112) or USB
(
Ypage 198) with COMAND.
Destination entry69
Navigation
Z
Page 80 of 222
XTo store an intermediate destination inthe destination memory: selectSave
(Ypage 94).
XTo accept an intermediate destination:
select Start
by pressing the controller.
The destination is entered in the intermedi- ate destinations menu.
If Calculate Alternative Routes
is
activated (
Ypage 64), instead of Start,
menu point Continue
is available.
Editing intermediate destinations
You can perform the following functions:
Rchange intermediate destinations
Rswitch the sequence of the intermediate
destinations in the intermediate destina-
tions menu
Rdelete intermediate destinations
iYou cannot edit POIs.
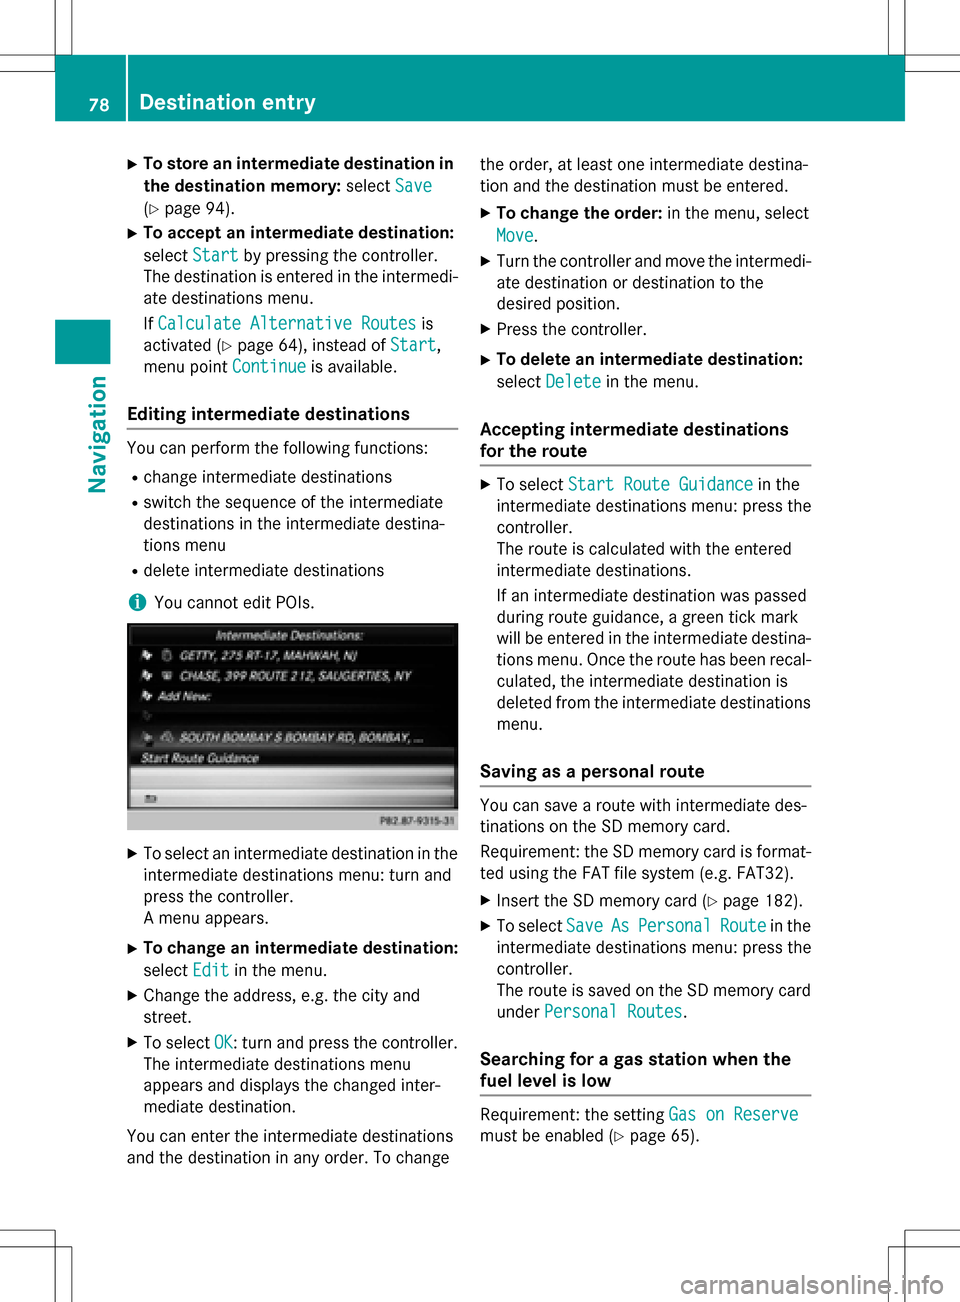
XTo select an intermediate destination in the
intermediate destinations menu: turn and
press the controller.
A menu appears.
XTo change an intermediate destination:
selectEdit
in the menu.
XChange the address, e.g. the city and
street.
XTo select OK: turn and press the controller.
The intermediate destinations menu
appears and displays the changed inter-
mediate destination.
You can enter the intermediate destinations
and the destination in any order. To change the order, at least one intermediate destina-
tion and the destination must be entered.
XTo change the order:
in the menu, select
Move
.
XTurn the controller and move the intermedi-
ate destination or destination to the
desired position.
XPress the controller.
XTo delete an intermediate destination:
select Delete
in the menu.
Accepting intermediate destinations
for the route
XTo select Start Route Guidancein the
intermediate destinations menu: press the
controller.
The route is calculated with the entered
intermediate destinations.
If an intermediate destination was passed
during route guidance, a green tick mark
will be entered in the intermediate destina-
tions menu. Once the route has been recal-
culated, the intermediate destination is
deleted from the intermediate destinations
menu.
Saving as a personal route
You can save a route with intermediate des-
tinations on the SD memory card.
Requirement: the SD memory card is format-
ted using the FAT file system (e.g. FAT32).
XInsert the SD memory card (Ypage 182).
XTo select SaveAsPersonalRoutein the
intermediate destinations menu: press the
controller.
The route is saved on the SD memory card
under Personal Routes
.
Searching for a gas station when the
fuel level is low
Requirement: the setting Gas on Reserve
must be enabled (Ypage 65).
78Destination entry
Navigation
Page 82 of 222

Personal POIs are filed in categories:
RNot Classified
Standard entry for personal POIs
RMercedes-Benz Apps
Personal POIs (destinations, routes) that
you have imported via the online functions
(
Ypage 156)
RCategories which you have created your-
self, e.g. on your PC
Personal routes are not categorized.
Settings for personal POIs
Displaying on the map
Requirements: an SD memory card with per-
sonal POIs is inserted (
Ypage 182).
The SD memory card is formatted using the
FAT file system (e.g. FAT32).
All personal POIs of the selected category are
displayed on the map with a corresponding
symbol.
If the "Alert when approaching" function is
activated (
Ypage 80) the symbols are dis-
played up to a map scale of 2 km.
XTo switch to navigation mode: press the
ß button.
XTo show the menu: slide6the control-
ler.
XTo select Options, turn and press the con-
troller.
XSelect Personal POIs.
XSelectDisplay on the Map.
The menu displays the categories available
on the SD memory card.
XTo select a category: turn the controller
and press to confirm.
All personal POIs in the selected category
are displayed Oor not displayed ª,
depending on the previous status.
Alert when approaching
Requirements: an SD memory card with per-
sonal POIs is inserted (
Ypage 182).
The SD memory card is formatted using the
FAT file system (e.g. FAT32).
If the vehicle is approaching a personal POI,
this is highlighted on the map and/or an audi- ble signal sounds.
For this purpose both the corresponding func-
tion Approaching POI Cue
, and the cate-
gory containing the personal POI must be
activated.
XTo switch to navigation mode: press the
ß button.
XTo show the menu: slide6the control-
ler.
XTo select Options, turn and press the con-
troller.
XSelect Personal POIs.
XSelectApproaching POI Cue.
The menu displays the categories available
on the SD memory card.
80Personal POIs and routes
Navigation
Page 83 of 222

XSelectAudibleorOptical.
The function is switched on Oor off ª,
depending on the previous status.
XTo select a category: turn the controller
and press to confirm.
The function is switched on Oor off ª, for
all personal POIs of this category, depend-
ing on the previous setting.
Saving personal POIs and routes
General notes
Personal POIs and routes are geodata which
are saved in the open GPX ( GPS Exchange)
format on the SD memory card.
Requirement: the SD memory card is format-
ted using the FAT file system (e.g. FAT32).
Personal POI from current vehicle posi-
tion or crosshair position
XInsert the SD memory card (Ypage 182).
XTo switch to navigation mode: press the
ß button.
XWhen the map is displayed, press the con-
troller until a message appears.
The current vehicle position is saved to the
Not
Classifiedcategory on the SD mem-
ory card and also stored in the "Last desti-
nations" memory (
Ypage 96).
If the "Move map" function is selected
(
Ypage 64), the crosshair position is saved.
iIf no SD memory card is inserted, the per-
sonal POI will only be stored in the "Last
destinations" memory.
Personal POI from destination address
XInsert the SD memory card (Ypage 182).
XTo switch to navigation mode: press the
ß button.
XCall up the address entry menu and enter
the destination address (
Ypage 67).
XSelect Saveby sliding 6the controller.
XTurn and press the controller.
XTo select ToMemoryCard: turn and press
the controller.
XEnter the name.
XSelect a category.
The current address is saved as a personal
point of interest on the SD memory card.
iYou can select a destination from the
From Previous Destinations
or From
Contactsmemories and save it on the SD
memory card.
RFrom Previous Destinations
(Ypage 72)
RFrom Contacts(Ypage 72)
Personal route from a tour including
intermediate destinations
XInsert the SD memory card (Ypage 182).
XTo switch to navigation mode: press the
ß button.
XEnter a destination, e.g. by address
(
Ypage 67).
XStart route calculation (Ypage 69).
XEnter an intermediate destination
(
Ypage 76).
XSelect Save As Personal Routein the
intermediate destinations menu.
The route is saved in the Personal
Routes
folder on the SD memory card.
Importing personal destinations and
routes via Mercedes-Benz Apps
You can use Mercedes-Benz Apps (e .g. Down-
load POI, Local Search) to import destinations
to navigation (
Ypage 155). These have their
own symbol and are filed in the Mercedes-
Benz Appscategory.
You can save the imported destinations and
routes as personal POIs and routes
(
Ypage 81).
Personal POIs and routes81
Navigation
Z
Page 85 of 222
XSet the map scale (Ypage 96).
XTo switch to the menu: press the%but-
ton.
XTo call the personal POI: turn and press
the controller to select Call
.
If a mobile phone is connected to COMAND
and the telephone number is available, the
call is connected (
Ypage 118).
XTo save a personal POI: turn and press the
controller to select Save
.
XTo continue saving (Ypage 94).
XTo edit the name and symbol: turn and
press the controller to select Edit
.
XSelectChange NameorEdit Icon.
XCharacter entry (Ypage 31).
XSelect a symbol.
XTo delete a personal POI or route: turn
and press the controller to select Delete
.
A prompt will appear.
XSelect YesorNo.
If you select Yes
, the personal destination
or personal route is deleted.
XTo select the outward and return
routes: turn and press the controller to
select Swap
.
The starting and destination positions of
your personal route, and thus the direction
for route guidance, are switched round.
One-way streets or restricted intersections
are taken into consideration. Therefore, the outward and return routes may differ from
each other.
XTo start route guidance: turn and press
the controller to select Start
.
Recording the route
General notes
Routes are recorded on the SD memory card.
Requirement: the SD memory card is format-
ted using the FAT file system (e.g. FAT32). When recording the route, bear in mind the
following:
Rif the SD memory card is inserted, it must
not be removed during recording.
Rif route recording is started manually, it
must be finished manually before COMAND
is switched off (e
.g. when the engine is
switched off).
RCOMAND minimizes the number of route
points recorded. Therefore when the recor-
ded route is subsequently commenced, it
may differ from the route that was originally
recorded.
Starting/finishing route recording
XInsert the SD memory card (Ypage 182).
XTo switch to navigation mode: press the
ß button.
XTo show the menu: slide6the control-
ler.
XTo select Destination, turn and press the
controller.
XSelect From Memory Card.
XSelectStart Route Recording.
The route is recorded and REC appears at
the bottom edge of the screen.
XTo stop recording, select End Route
Recordingfrom the menu.
The route is stored under Personal
Routes.
Displaying/editing the recorded route
XInsert the SD memory card (Ypage 182).
XTo switch to navigation mode: press the
ß button.
XTo show the menu: slide6the control-
ler.
XTo select Destination: turn and press the
controller.
XSelect From Memory Card.
Personal POIs and routes83
Navigation
Z
Page 86 of 222
XSelectPersonal Routes.
Previously recorded routes are displayed.
XTo select a route, turn and press the con-
troller.
The map appears with a menu. The recor-
ded route is shown on the map in blue.
XTo calculate a route: selectStart.
XTo change the name and symbol: select
Edit
.
XSelect Change NameorEdit Icon.
XCharacter entry (Ypage 31).
XSelect a symbol.
Route guidance
General notes
COMAND calculates the route to the destina-
tion without taking account of the following,
for example:
Rtraffic lights
Rstop and yield signs
Rparking or stopping restrictions
Rroad narrowing
Rtemporary traffic rules and regulations
The navigation system can give differing driv-
ing recommendations if the actual street/
traffic situation does not correspond with the
digital map's data. For example, if the road
layout or the direction of a one-way street has
been changed.
For this reason, you must always observe
road and traffic rules and regulations during
your journey. Road and traffic rules and reg-
ulations always have priority over system
driving recommendations.
Route guidance begins once a route has been
calculated (
Ypage 69).
COMAND guides you to your destination by
means of navigation announcements in the
form of audible navigation announcements
and route guidance displays.
The route guidance displays can be seen if
navigation mode is switched on. If you do not follow the navigation announce-
ments or if you leave the calculated route,
COMAND automatically calculates a new
route to the destination.
If the digital map contains the corresponding
information, the following applies:
Rduring route guidance, COMAND tries to
a
void roads with restricted access. Those
roads, for example, that are closed to
through-traffic.
Rroads that have time restrictions (e.g.
closed on Sundays and public holidays) are considered for route guidance on days
when they are open. For this purpose, the
relevant times must be correctly stored in
the database.
Change of direction
Overview
Changes of direction have three phases:
RPreparation phase
RAnnouncement phase
RChange-of-direction phase
Changes in direction are also shown in the
multifunction display of the instrument clus-
ter (see the vehicle Operator's Manual).
Preparation phase
COMAND prepares you for the upcoming
change of direction, e.g. with the announce-
ment "Prepare to turn right". You see the full- screen map.
84Route guidance
Navigation
Page 92 of 222
XTo show the menu:slide6the control-
ler.
XTo select Route: turn and press the con-
troller.
XSelect Detour.
XTo specify the start of the traffic jam
section: selectBeginning
.
The next possible traffic jam section start-
ing point is marked.
XTurn the controller.
The marking moves along the route to the
next starting position.
XPress the controller.
The start of the traffic jam is set.
XTo specify the end of a traffic jam sec-
tion: select End
.
The next possible traffic jam section end
point is marked.
XTurn the controller.
The marking moves along the route to the
next end position.
XPress the controller.
The end of the traffic jam is determined.
XTo calculate the detour: selectStart.
Off-road
General notes
The navigation system may guide you to off-
road routes that your vehicle cannot drive on
without causing damage to the tires or wheels
or the vehicle itself. It is the driver’s sole
responsibility to determine the suitability of
the route. The condition of the off-road routes
may vary. The navigability of off-road routes
may be influenced by various factors such as
time of day, time of year and prevailing
weather conditions. The navigation system
cannot judge these factors or take them into
account for route guidance.
Route guidance to an off-road destina-
tion
COMAND can guide you to destinations
which are within the area of the digital map,
but which are not themselves on the map.
These destinations are known as off-road
destinations, which you can enter using the
map, for example. In these cases, COMAND
guides you for as long as possible with navi-
gation announcements and displays on roads
known to the system.
If the vehicle reaches an area which is not part
of the digital map, the display appears as a
split-screen view. On the right, an arrow
appears that points to the off-road destina-
tion. You hear the announcement: "Please
follow the arrow on the display". As the vehi-
cle approaches the destination, you will see a
display to this effect.
Route guidance from an off-road loca-
tion to a destination
Off-road location: the vehicle's position is on
the digital map, but the map does not contain
any information about that location.
COMAND is able to guide you to a destination
even from an off-road location.
At the start of route guidance, you will see the
Road Not Mapped
message, an arrow and
the distance to the destination. The arrow
shows the compass heading to the actual
destination.
As soon as the vehicle is back on a road
known to the system, route guidance contin-
ues in the usual way.
Off-road during route guidance
Due to road construction, for example, there
may be differences between the data on the
digital map and the actual course of the road.
In such cases, the system will temporarily be
unable to locate the vehicle position on the
digital map. The vehicle is therefore in an off-
road position.
90Route guidance
Navigation