light MERCEDES-BENZ GLC-Class 2016 X253 Comand Manual
[x] Cancel search | Manufacturer: MERCEDES-BENZ, Model Year: 2016, Model line: GLC-Class, Model: MERCEDES-BENZ GLC-Class 2016 X253Pages: 222, PDF Size: 6.39 MB
Page 79 of 222
XTo select a POI category orOther: turn and
press the controller.
After selecting one of the eight POI cate-
gories, available POIs are displayed:
Ralong the route
Rin the vicinity
COMAND first searches for destinations on
the route. The search for destinations is
then initiated in the area around the current
vehicle position.
XAfter selecting Other, select one of the
destination entry options.
SelectionStep
Address
Entry
XEnter a destination by
address (
Ypage 67).
Keyword
Search
XSelect a destination by
means of a keyword
search (
Ypage 70).
From Previ‐
ous Destina‐
tions
XSelect a destination
from the list of last des-
tinations (
Ypage 72).
From Con‐
tacts
XSelect a contact from
the address book as
the destination
(
Ypage 72).
From POIsXSelect a point of inter-
est (
Ypage 72).
Using MapXEnter a destination
using the map
(
Ypage 75).
From Memory
Card
XSelect a personal POI
(
Ypage 82).
From
Mercedes-
Benz Apps
XEnter a destination
from Mercedes-Benz
Apps (
Ypage 79).
Using Geo-
Coordinates
XEnter a destination
using the geo-coordi-
nates (
Ypage 79).
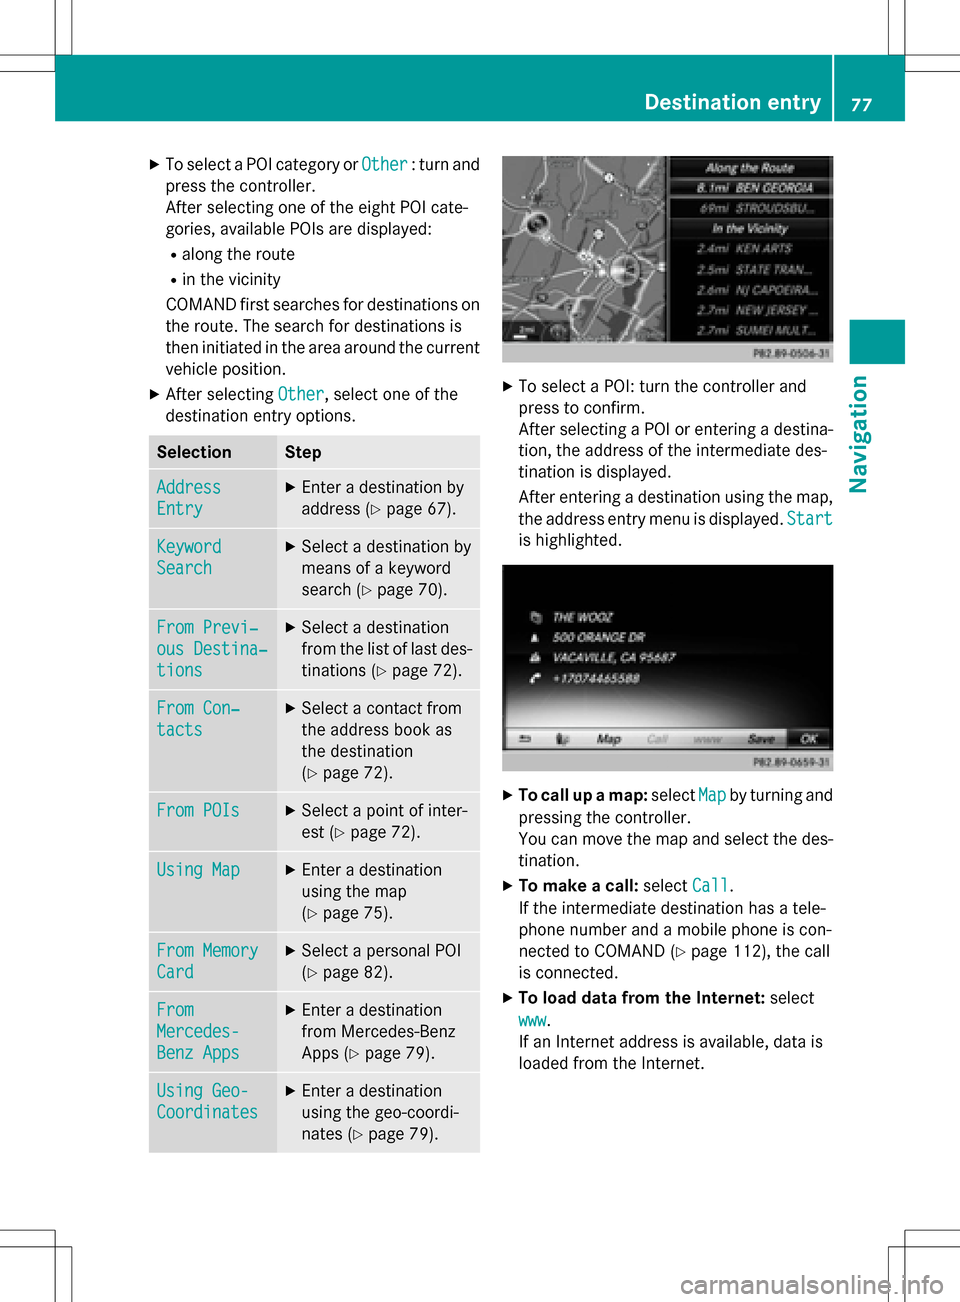
XTo select a POI: turn the controller and
press to confirm.
After selecting a POI or entering a destina-
tion, the address of the intermediate des-
tination is displayed.
After entering a destination using the map,
the address entry menu is displayed. Start
is highlighted.
XTo call up a map:selectMapby turning and
pressing the controller.
You can move the map and select the des-
tination.
XTo make a call: selectCall.
If the intermediate destination has a tele-
phone number and a mobile phone is con-
nected to COMAND (
Ypage 112), the call
is connected.
XTo load data from the Internet: select
www
.
If an Internet address is available, data is
loaded from the Internet.
Destination entry77
Navigation
Z
Page 82 of 222

Personal POIs are filed in categories:
RNot Classified
Standard entry for personal POIs
RMercedes-Benz Apps
Personal POIs (destinations, routes) that
you have imported via the online functions
(
Ypage 156)
RCategories which you have created your-
self, e.g. on your PC
Personal routes are not categorized.
Settings for personal POIs
Displaying on the map
Requirements: an SD memory card with per-
sonal POIs is inserted (
Ypage 182).
The SD memory card is formatted using the
FAT file system (e.g. FAT32).
All personal POIs of the selected category are
displayed on the map with a corresponding
symbol.
If the "Alert when approaching" function is
activated (
Ypage 80) the symbols are dis-
played up to a map scale of 2 km.
XTo switch to navigation mode: press the
ß button.
XTo show the menu: slide6the control-
ler.
XTo select Options, turn and press the con-
troller.
XSelect Personal POIs.
XSelectDisplay on the Map.
The menu displays the categories available
on the SD memory card.
XTo select a category: turn the controller
and press to confirm.
All personal POIs in the selected category
are displayed Oor not displayed ª,
depending on the previous status.
Alert when approaching
Requirements: an SD memory card with per-
sonal POIs is inserted (
Ypage 182).
The SD memory card is formatted using the
FAT file system (e.g. FAT32).
If the vehicle is approaching a personal POI,
this is highlighted on the map and/or an audi- ble signal sounds.
For this purpose both the corresponding func-
tion Approaching POI Cue
, and the cate-
gory containing the personal POI must be
activated.
XTo switch to navigation mode: press the
ß button.
XTo show the menu: slide6the control-
ler.
XTo select Options, turn and press the con-
troller.
XSelect Personal POIs.
XSelectApproaching POI Cue.
The menu displays the categories available
on the SD memory card.
80Personal POIs and routes
Navigation
Page 86 of 222
XSelectPersonal Routes.
Previously recorded routes are displayed.
XTo select a route, turn and press the con-
troller.
The map appears with a menu. The recor-
ded route is shown on the map in blue.
XTo calculate a route: selectStart.
XTo change the name and symbol: select
Edit
.
XSelect Change NameorEdit Icon.
XCharacter entry (Ypage 31).
XSelect a symbol.
Route guidance
General notes
COMAND calculates the route to the destina-
tion without taking account of the following,
for example:
Rtraffic lights
Rstop and yield signs
Rparking or stopping restrictions
Rroad narrowing
Rtemporary traffic rules and regulations
The navigation system can give differing driv-
ing recommendations if the actual street/
traffic situation does not correspond with the
digital map's data. For example, if the road
layout or the direction of a one-way street has
been changed.
For this reason, you must always observe
road and traffic rules and regulations during
your journey. Road and traffic rules and reg-
ulations always have priority over system
driving recommendations.
Route guidance begins once a route has been
calculated (
Ypage 69).
COMAND guides you to your destination by
means of navigation announcements in the
form of audible navigation announcements
and route guidance displays.
The route guidance displays can be seen if
navigation mode is switched on. If you do not follow the navigation announce-
ments or if you leave the calculated route,
COMAND automatically calculates a new
route to the destination.
If the digital map contains the corresponding
information, the following applies:
Rduring route guidance, COMAND tries to
a
void roads with restricted access. Those
roads, for example, that are closed to
through-traffic.
Rroads that have time restrictions (e.g.
closed on Sundays and public holidays) are considered for route guidance on days
when they are open. For this purpose, the
relevant times must be correctly stored in
the database.
Change of direction
Overview
Changes of direction have three phases:
RPreparation phase
RAnnouncement phase
RChange-of-direction phase
Changes in direction are also shown in the
multifunction display of the instrument clus-
ter (see the vehicle Operator's Manual).
Preparation phase
COMAND prepares you for the upcoming
change of direction, e.g. with the announce-
ment "Prepare to turn right". You see the full- screen map.
84Route guidance
Navigation
Page 87 of 222
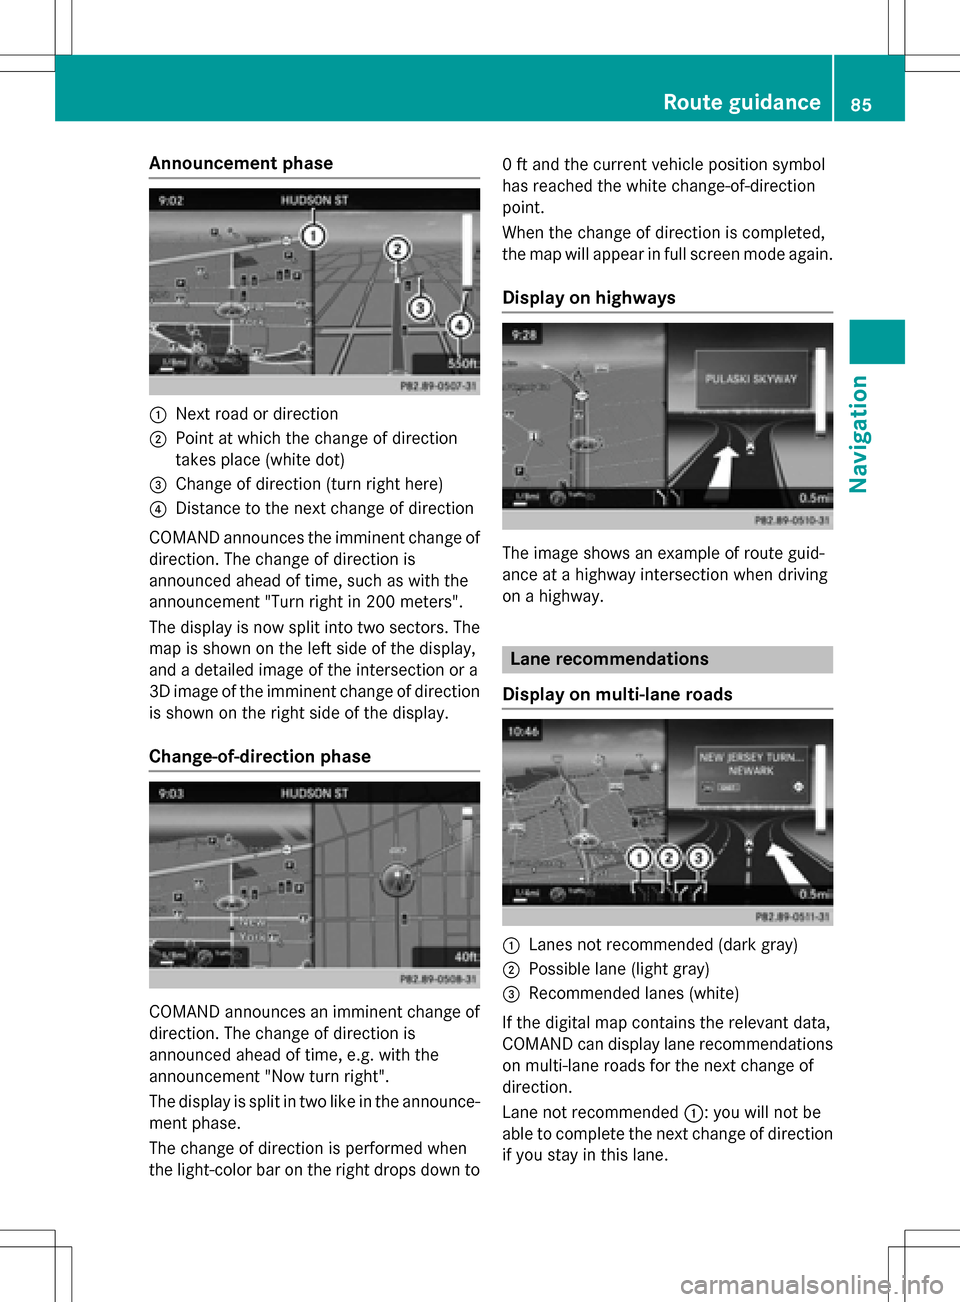
Announcement phase
:Nextroad or direction
;Poin tat whic hth echang eof direction
takes plac e(whit edot )
=Change of direction (turn right here)
?Distanc eto th ene xt chang eof direction
COMAND announce sth eimminent chang eof
direction .The chang eof direction is
announce dahead of time, suc has wit hth e
announcemen t"Turn right in 20 0meters".
The display is no wsplit int otwo sectors .The
map is shown on th elef tside of th edisplay,
and adetailed imag eof th eintersection or a
3D imag eof th eimminent chang eof direction
is shown on th eright side of th edisplay.
Change-of-directi onphase
COMAND announce san imminent chang eof
direction .The chang eof direction is
announce dahead of time, e.g. wit hth e
announcemen t"Now tur nright".
The display is split in two lik ein th eannounce -
men tphase.
The chang eof direction is performed when
th elight-color bar on th eright drops down to 0
ft and th ecurren tvehicl eposition symbol
has reached th ewhit echange-of-direction
point.
When th echang eof direction is completed,
th emap will appear in full scree nmod eagain .
Display onhighways
The imag eshows an exampl eof rout eguid-
anc eat ahighway intersection when driving
on ahighway.
Lane rec ommendations
Display on multi-lane roads
:Lanes no trecommended (dar kgray)
;Possible lan e(ligh tgray)
=Recommended lanes (white)
If th edigital map contain sth erelevan tdata,
COMAND can display lan erecommendation s
on multi-lane road sfor th ene xt chang eof
direction .
Lane notrecommended ::you will no tbe
able to complete th ene xtchang eof direction
if you stay in this lane.
Route guidance85
Navigation
Z
Page 88 of 222

Possible lane;: you will only be able to com-
plete the next change of direction in this lane.
Recommended lane =: in this lane you will
be able to complete the next change of direc-
tion and the one after that.
COMAND shows the lane recommendations
for the next two changes of direction. Lane
recommendations are also shown in the mul- tifunction display of the instrument cluster
(see the vehicle Operator's Manual).
Approaching new lanes
:Approaching new lane
During the change of direction, new lanes
may be added. These will be shown in the dis-
play of lane recommendations with a lower
boundary line.
Highway information
Display mode
Requirement: the Highway Information
map content must be enabled (Ypage 98).
While driving on the highway, gas stations,
rest stops, rest areas and highway exits are displayed along with their immediate distan-
ces from the current vehicle position.
Calling up the selection mode
XWhen highway information is displayed,
slide
9 the controller.
The marker is on the highway information.
The associated position is highlighted on
the map.
XTo select the desired rest stop/freeway
exit: turn and press the controller.
The available POIs are displayed.
Starting route guidance to a POI
XTo select a POI: turn the controller and
press to confirm.
The POI details are displayed.
You can perform the following functions:
Rstore in the address book (Ypage 94)
Rview on the map (Ypage 99)
Rcall if a phone is connected and a phone
number is available (
Ypage 118).
Rselect for route guidance and a route to it
calculated (
Ypage 69).
86Route guidance
Navigation
Page 94 of 222
XTo switch to navigation mode:press the
Ø button.
XTo show the menu: slide6the control-
ler.
XTo select Traffic: turn and press the con-
troller.
If satellite signals cannot be received or
there are no traffic reports, you will see a
message to this effect.
XTo close the report: press the controller.
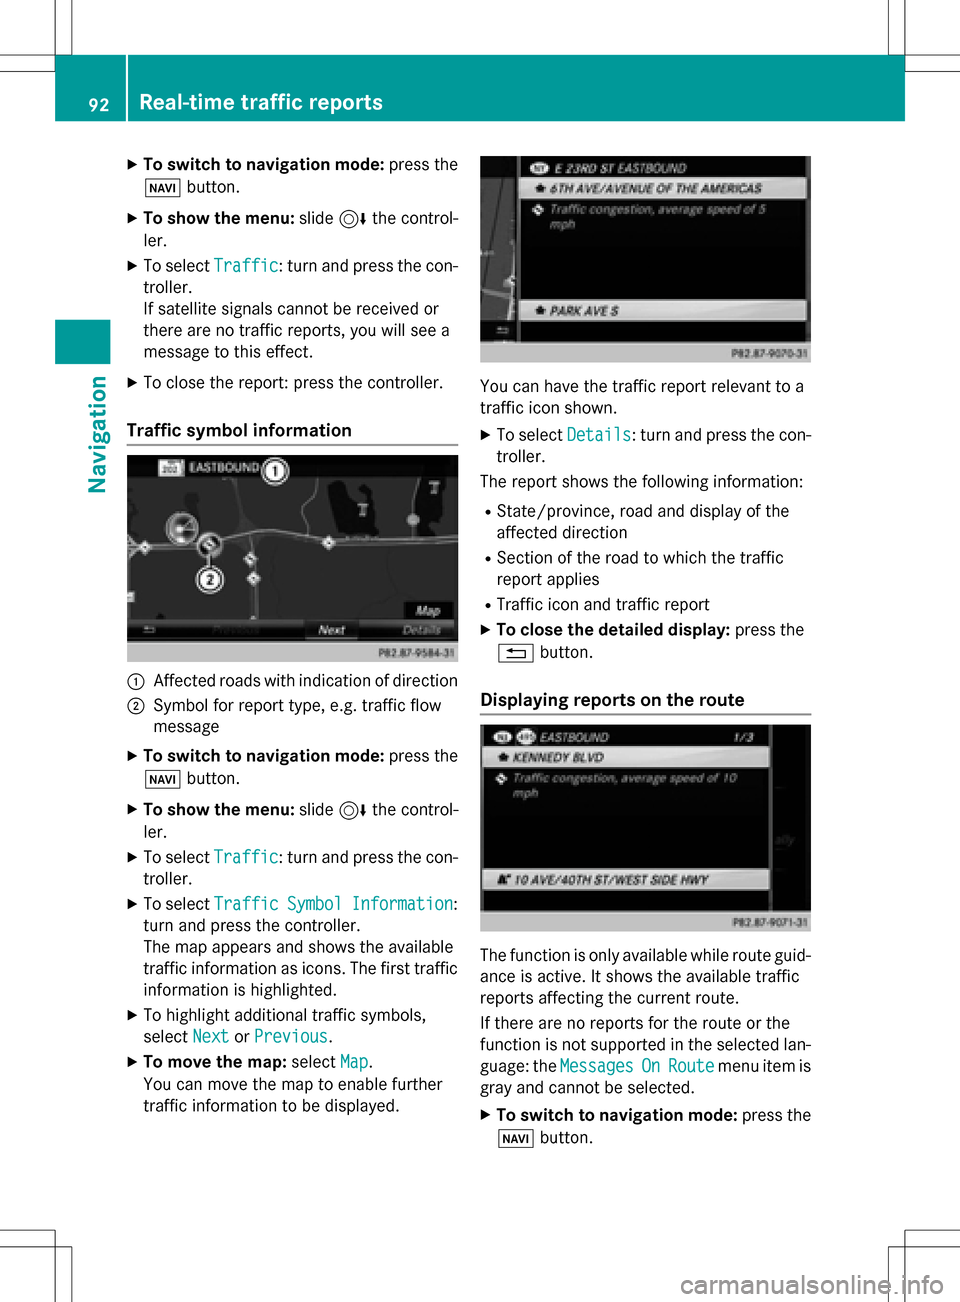
Traffic symbol information
:Affected roads with indication of direction
;Symbol for report type, e.g. traffic flow
message
XTo switch to navigation mode: press the
Ø button.
XTo show the menu: slide6the control-
ler.
XTo select Traffic: turn and press the con-
troller.
XTo select TrafficSymbolInformation:
turn and press the controller.
The map appears and shows the available
traffic information as icons. The first traffic
information is highlighted.
XTo highlight additional traffic symbols,
select Next
orPrevious.
XTo move the map: selectMap.
You can move the map to enable further
traffic information to be displayed.
You can have the traffic report relevant to a
traffic icon shown.
XTo select Details: turn and press the con-
troller.
The report shows the following information:
RState/province, road and display of the
affected direction
RSection of the road to which the traffic
report applies
RTraffic icon and traffic report
XTo close the detailed display: press the
% button.
Displaying reports on the route
The function is only available while route guid-
ance is active. It shows the available traffic
reports affecting the current route.
If there are no reports for the route or the
function is not supported in the selected lan-
guage: the Messages
OnRoutemenu item is
gray and cannot be selected.
XTo switch to navigation mode: press the
Ø button.
92Real-time traffic reports
Navigation
Page 98 of 222
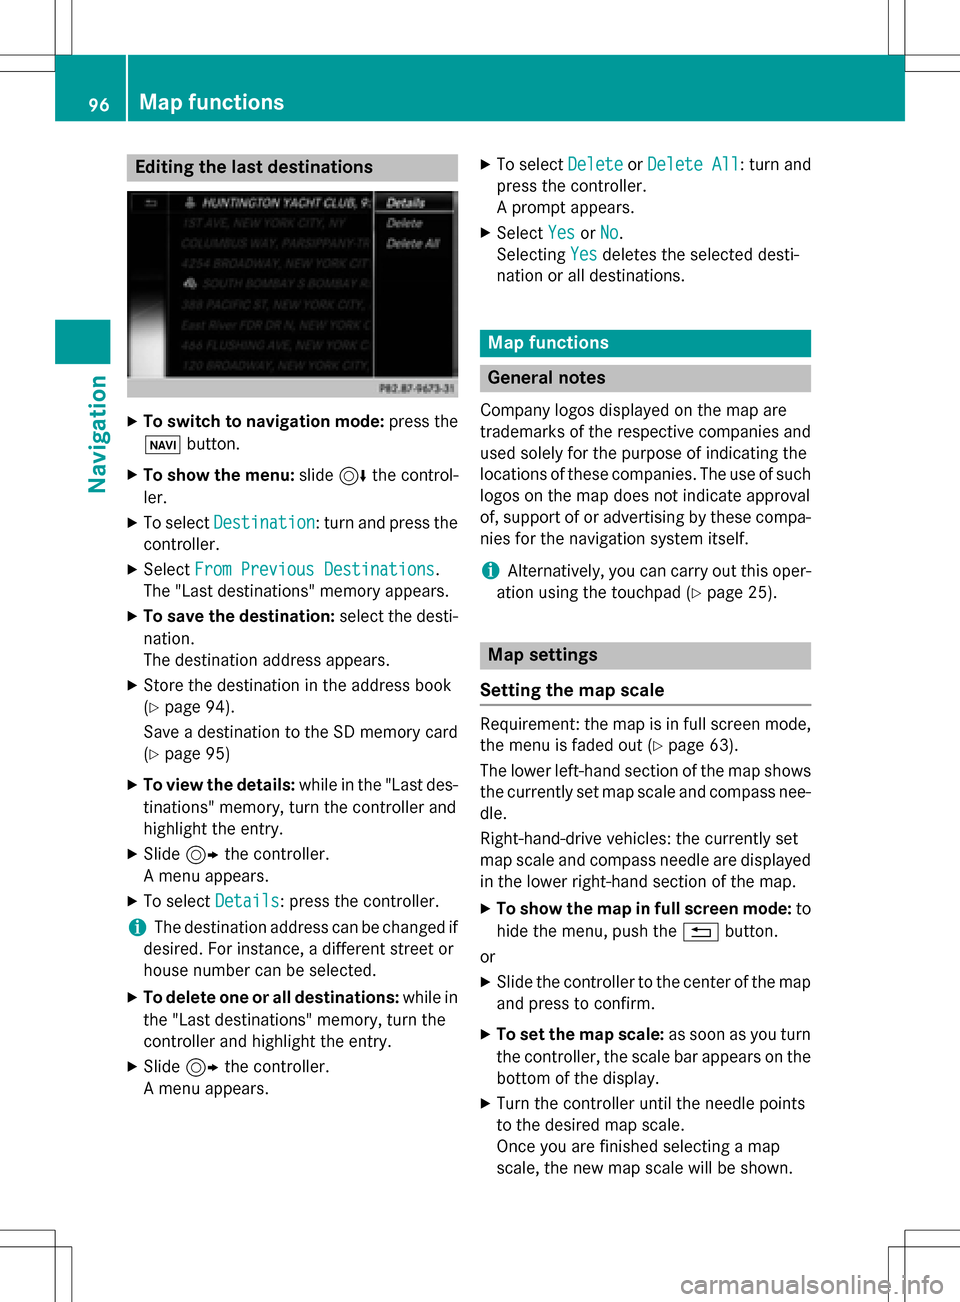
Editing the last destinations
XTo switch to navigation mode:press the
ß button.
XTo show the menu: slide6the control-
ler.
XTo select Destination: turn and press the
controller.
XSelect From Previous Destinations.
The "Last destinations" memory appears.
XTo save the destination: select the desti-
nation.
The destination address appears.
XStore the destination in the address book
(
Ypage 94).
Save a destination to the SD memory card
(
Ypage 95)
XTo view the details: while in the "Last des-
tinations" memory, turn the controller and
highlight the entry.
XSlide 9the controller.
A menu appears.
XTo select Details: press the controller.
iThe destination address can be changed if
desired. For instance, a different street or
house number can be selected.
XTo delete one or all destinations: while in
the "Last destinations" memory, turn the
controller and highlight the entry.
XSlide 9the controller.
A menu appears.
XTo select DeleteorDelete All: turn and
press the controller.
A prompt appears.
XSelect YesorNo.
Selecting Yes
deletes the selected desti-
nation or all destinations.
Map functions
General notes
Company logos displayed on the map are
trademarks of the respective companies and
used solely for the purpose of indicating the
locations of these companies. The use of such
logos on the map does not indicate approval
of, support of or advertising by these compa-
nies for the navigation system itself.
iAlternatively, you can carry out this oper-
ation using the touchpad (
Ypage 25).
Map settings
Setting the map scale
Requirement: the map is in full screen mode, the menu is faded out (
Ypage 63).
The lower left-hand section of the map shows
the currently set map scale and compass nee-
dle.
Right-hand-drive vehicles: the currently set
map scale and compass needle are displayed
in the lower right-hand section of the map.
XTo show the map in full screen mode: to
hide the menu, push the %button.
or
XSlide the controller to the center of the map
and press to confirm.
XTo set the map scale: as soon as you turn
the controller, the scale bar appears on the
bottom of the display.
XTurn the controller until the needle points
to the desired map scale.
Once you are finished selecting a map
scale, the new map scale will be shown.
96Map functions
Navigation
Page 105 of 222
The update can only be performed:
Rat an authorized Mercedes-Benz Center
Rfor map data for North America
The map software is not provided on DVD.
Carrying out a manual update
After the free update of the map data has
expired or when buying map data, you can
update the data yourself.
The update process may take some time (up
to 45 minutes), depending on the size of the
digital map. The update will be completed
more quickly if the vehicle is stationary. If you
start the update with the engine switched off
and the starter battery has insufficient power,
COMAND may automatically switch off. This
protects the battery. In order to prevent this,
a suitable power supply to the vehicle must be
maintained.
Navigation functions
Calling up the navigation system
menu
XTo switch to navigation mode: press the
ß button.
XTo show the menu: slide5the control-
ler.
Navi
is highlighted in the main function bar.
XPress the controller.
The navigation menu appears.
XTurn the controller to display the navigation
functions one after another.
XTo change to the map: turn the controller
until Navigation
is shown and then press
the controller.
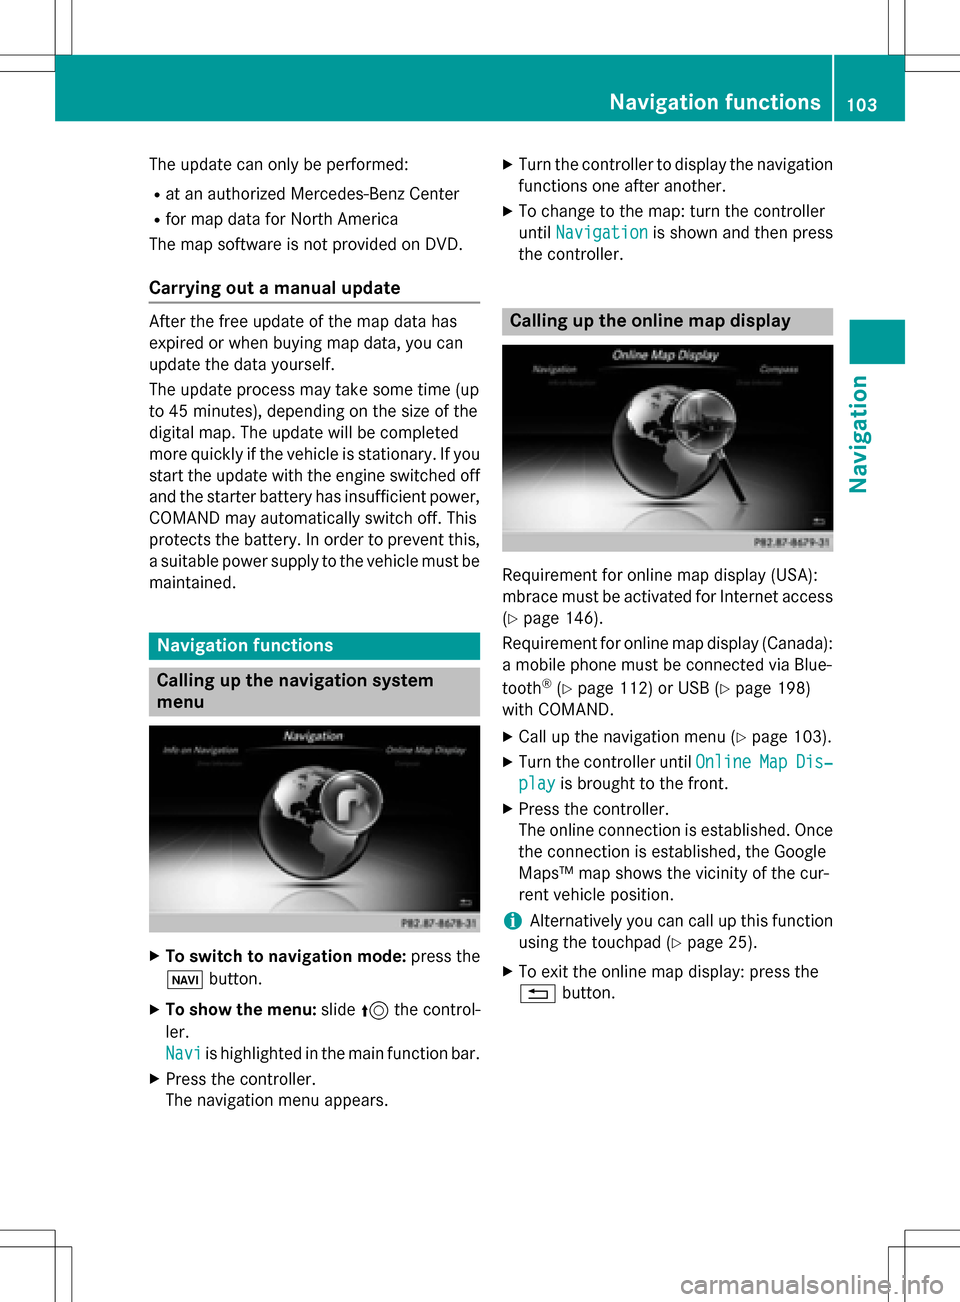
Calling up the online map display
Requirement for online map display (USA):
mbrace must be activated for Internet access
(
Ypage 146).
Requirement for online map display (Canada):
a mobile phone must be connected via Blue-
tooth
®(Ypage 112) or USB (Ypage 198)
with COMAND.
XCall up the navigation menu (Ypage 103).
XTurn the controller until OnlineMapDis‐
playis brought to the front.
XPress the controller.
The online connection is established. Once
the connection is established, the Google
Maps™ map shows the vicinity of the cur-
rent vehicle position.
iAlternatively you can call up this function
using the touchpad (
Ypage 25).
XTo exit the online map display: press the
% button.
Navigation functions103
Navigation
Z
Page 106 of 222
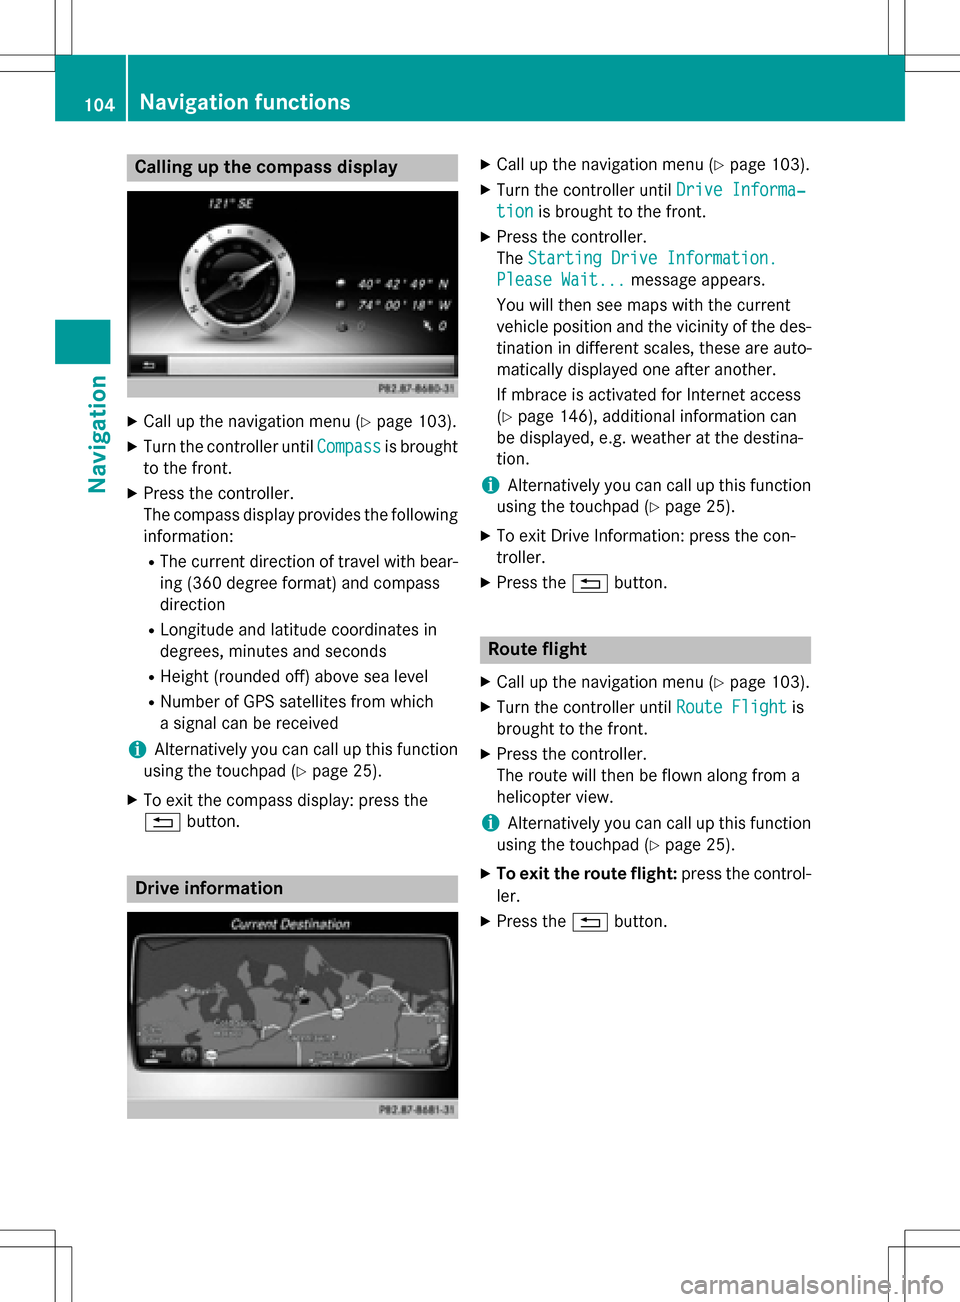
Calling up the compass display
XCall up the navigation menu (Ypage 103).
XTurn the controller untilCompassis brought
to the front.
XPress the controller.
The compass display provides the following information:
RThe current direction of travel with bear-
ing (360 degree format) and compass
direction
RLongitude and latitude coordinates in
degrees, minutes and seconds
RHeight (rounded off) above sea level
RNumber of GPS satellites from which
a signal can be received
iAlternatively you can call up this function
using the touchpad (
Ypage 25).
XTo exit the compass display: press the
% button.
Drive information
XCall up the navigation menu (Ypage 103).
XTurn the controller until Drive Informa‐
tionis brought to the front.
XPress the controller.
TheStarting Drive Information.
Please Wait...message appears.
You will then see maps with the current
vehicle position and the vicinity of the des-
tination in different scales, these are auto-
matically displayed one after another.
If mbrace is activated for Internet access
(
Ypage 146), additional information can
be displayed, e.g. weather at the destina-
tion.
iAlternatively you can call up this function
using the touchpad (
Ypage 25).
XTo exit Drive Information: press the con-
troller.
XPress the %button.
Route flight
XCall up the navigation menu (Ypage 103).
XTurn the controller until Route Flightis
brought to the front.
XPress the controller.
The route will then be flown along from a
helicopter view.
iAlternatively you can call up this function
using the touchpad (
Ypage 25).
XTo exit the route flight: press the control-
ler.
XPress the %button.
104Navigation functions
Navigation
Page 118 of 222
De-authorizing (disconnecting)a
mobile phone
Mercedes-Ben zUSA, LL Crecommends de-
authorization in COMAN Dand on th emobile
phone .Subsequen tauthorization may other -
wise fail .
XTo callup th etelephon emenu: press th e
% button.
XTo sho wthemen ubar :slid e6 thecon-
troller.
XTo selec tConnec tDevice:turn and press
th econtroller .
XTo highlight th edesire dmobile phone in th e
devic elist :turn th econtroller .
XTo selectG: slide9 thecontroller .
XTo selectDeauthorize:turn and press th e
controller .
A prompt appears ,askin gwhether you
really wish to de-authoriz ethis device.
XTo selec tYes:turn and press th econtroller .
The mobile phone is de-authorized.
iBefore re-authorizin gth emobile phone ,
you should also delete th edevic enam eMB
Bluetoothfrom your mobile phone's Blue-
toot h®list.
Displaying connection detail s
XTo callup th etelephon emenu: press th e
% button.
XTo switch to th emen ubar in th etelephon e
menu: slid e6 thecontroller .
XTo selectConnec tDevice:turn and press
th econtroller .
XTo highlight th edesire dmobile phone in th e
devic elist :turn th econtroller .
XTo selectG: slide9 thecontroller .
XTo selectDetail s:turn and press th econ-
troller.
The following information concernin gth e
selecte dmobile phone is shown :
RBluetooth®devicenam e
RBluetoot h®address
RAvailabilit ystatus (shown after ane w
search )
RAuthorization status
XTo close th edetailed display :slid e8
th econtroller .
Reception an dtransmission volume
Once th emobile phone has been authorized,
you can optimize th etransmissio nand recep-
tion volume settings. To fin dout about th e
bes tpossible setting sfo ryour mobile phone ,
visit www.mercedes-benz-mobile.com .
Or cal lth eMercedes-Ben zCustomer Assis -
tanc eCente rat 1-800-FOR-MERCedes
(1-800-367-6372 ) (USA) or Customer Rela-
tions at 1-800-387-0100 (Canada).
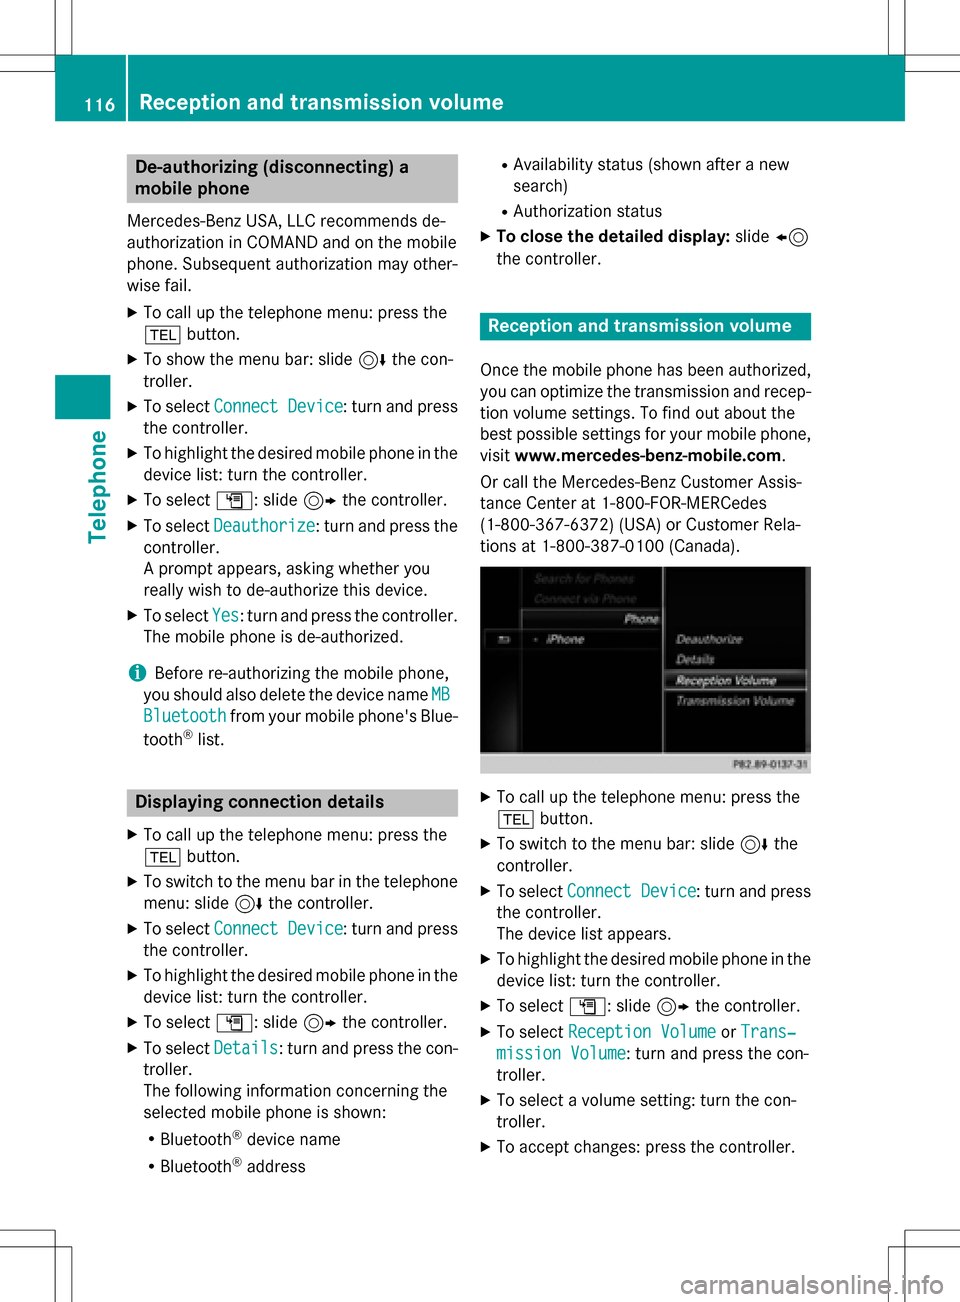
XTo call up the telephone menu: press the
% button.
XTo switch to the menu bar: slide 6the
controller.
XTo select Connect Device: turn and press
the controller.
The device list appears.
XTo highlight the desired mobile phone in the
device list: turn the controller.
XTo select G: slide 9the controller.
XTo select Reception VolumeorTrans‐
mission Volume: turn and press the con-
troller.
XTo select a volume setting: turn the con-
troller.
XTo accept changes: press the controller.
116Reception and transmission volume
Telephone