tire pressure MERCEDES-BENZ GLE 2016 Owners Manual
[x] Cancel search | Manufacturer: MERCEDES-BENZ, Model Year: 2016, Model line: GLE, Model: MERCEDES-BENZ GLE 2016Pages: 450, PDF Size: 12.92 MB
Page 22 of 450
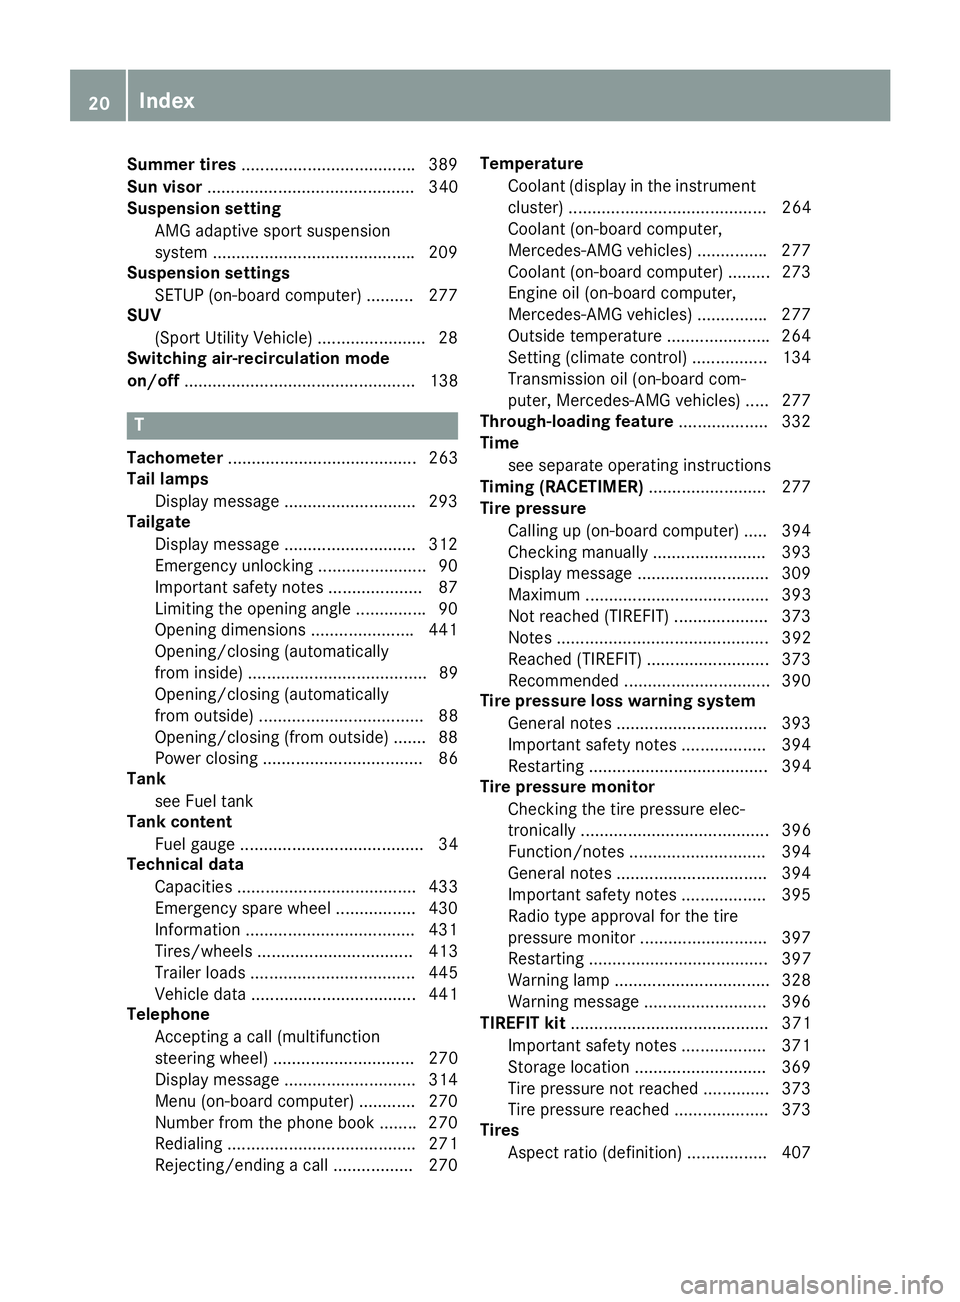
Summer tires .................................... .3 89
Sun visor ............................................ 340
Suspension setting
AMG adaptive sport suspension
system .......................................... .2 09
Suspension settings
SETUP (on-board computer) .......... 277
SUV
(Sport Utility Vehicle) ....................... 28
Switching air-recirculation mode
on/off ................................................. 138
TTachometer ........................................ 263
Tail lamps
Display message ............................ 293
Tailgate
Display message ............................ 312
Emergency unlocking ....................... 90
Important safety notes .................... 87
Limiting the opening angle .............. .9 0
Opening dimensions ..................... .4 41
Opening/closing (automatically
from inside) ...................................... 89
Opening/closing (automatically
from outside) ................................... 88
Opening/closing (from outside) ....... 88
Power closing .................................. 86
Tank
see Fuel tank
Tank content
Fuel gauge ....................................... 34
Technical data
Capacities ...................................... 433
Emergency spare wheel ................. 430
Information ................................... .4 31
Tires/wheels ................................. 413
Trailer loads ................................... 445
Vehicle data ................................... 441
Telephone
Accepting a call (multifunction
steering wheel) .............................. 270
Display message ............................ 314
Menu (on-board computer) ............ 270
Number from the phone book ....... .2 70
Redialing ........................................ 271
Rejecting/ending a call ................. 270 Temperature
Coolant (display in the instrument
cluster) .......................................... 264
Coolant (on-board computer,
Mercedes-AMG vehicles) .............. .2 77
Coolant (on-board computer) ......... 273
Engine oil (on-board computer,
Mercedes-AMG vehicles) .............. .2 77
Outside temperature ..................... .2 64
Setting (climate control) ................ 134
Transmission oil (on-board com-
puter, Mercedes-AMG vehicles) ..... 277
Through-loading feature ................... 332
Time
see separate operating instructions
Timing (RACETIMER) ......................... 277
Tire pressure
Calling up (on-board computer) ..... 394
Checking manually ........................ 393
Displ ay message ............................ 309
Ma xi
mum ....................................... 393
Not reached (TIREFIT) .................... 373
Notes ............................................. 392
Reached (TIREFIT) .......................... 373
Recommended ............................... 390
Tire pressure loss warning system
General notes ................................ 393
Important safety notes .................. 394
Restarting ...................................... 394
Tire pressure monitor
Checking the tire pressure elec-
tronically ........................................ 396
Function/notes ............................ .3 94
General notes ................................ 394
Important safety notes .................. 395
Radio type approval for the tire
pressure monitor ........................... 397
Restarting ...................................... 397
Warning lamp ................................. 328
Warning message .......................... 396
TIREFIT kit .......................................... 371
Important safety notes .................. 371
Storage location ............................ 369
Tire pressure not reached .............. 373
Tire pressure reached .................... 373
Tires
Aspect ratio (definition) ................. 40720
Index
Page 23 of 450
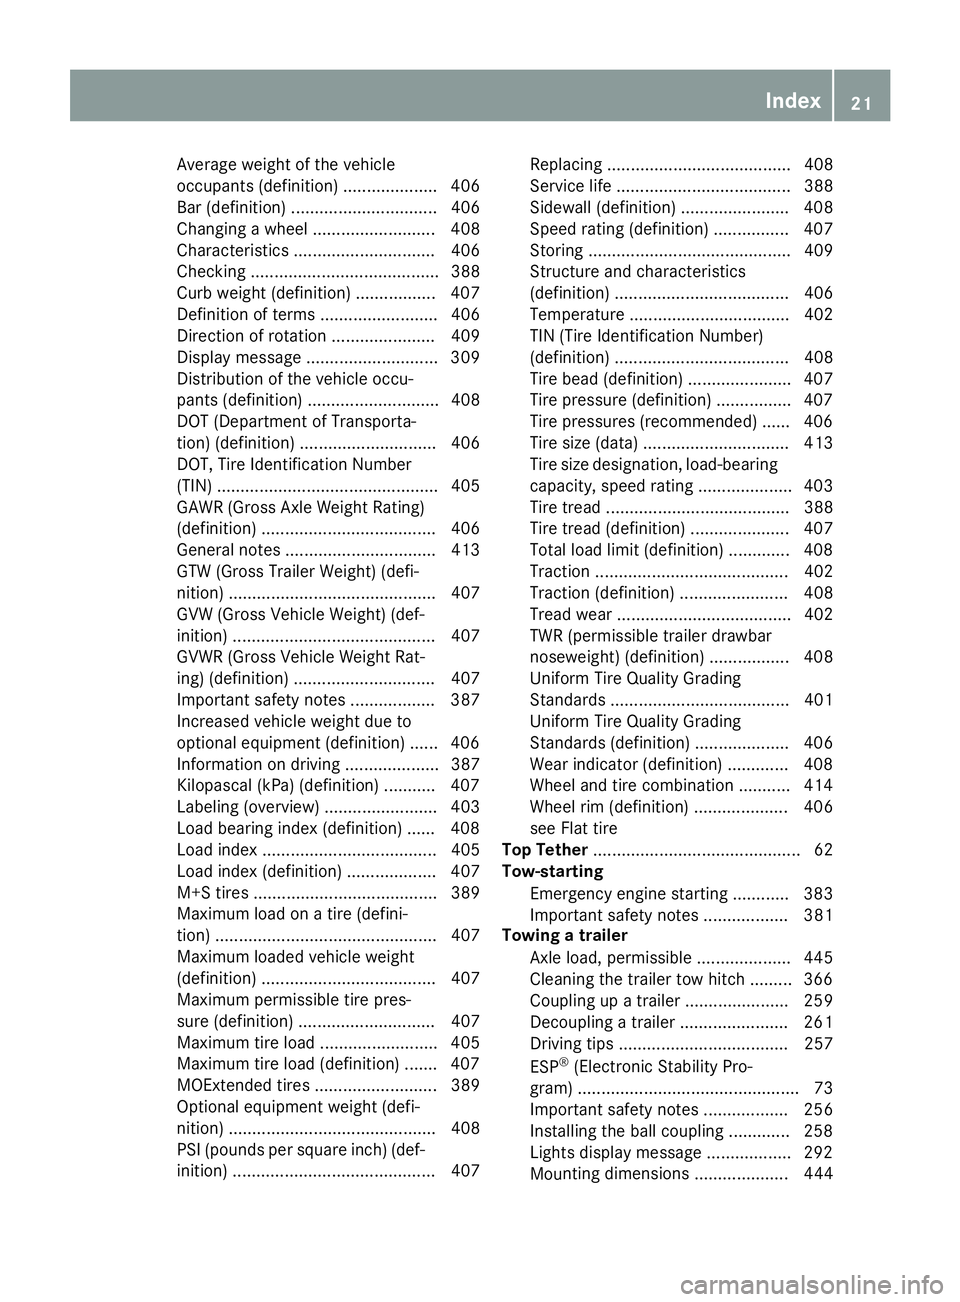
Average weight of the vehicle
occupants (definition) .................... 406
Bar (definition) ............................... 406
Changing a wheel .......................... 408
Characteristics .............................. 406
Checking ........................................ 388
Curb weight (definition) ................. 407
Definition of terms ......................... 406
Direction of rotation ...................... 409
Display message ............................ 309
Distribution of the vehicle occu-
pants (definition) ............................ 408
DOT (Department of Transporta-
tion) (definition) ............................. 406
DOT, Tire Identification Number
(TIN) ............................................... 405
GAWR (Gross Axle Weight Rating)
(definition) ..................................... 406
General notes ................................ 413
GTW (Gross Trailer Weight) (defi-
nition) ............................................ 407
GVW (Gross Vehicle Weight) (def-
inition) ........................................... 407
GVWR (Gross Vehicle Weight Rat-
ing) (definition) .............................. 407
Important safety notes .................. 387
Increased vehicle weight due to
optional equipment (definition) ...... 406
Information on driving .................... 387
Kilopascal (kPa) (definition) ........... 407
Labeling (overview) ........................ 403
Load bearing index (definition) ...... 408
Load index ..................................... 405
Load index (definition) ................... 407
M+S tires ....................................... 389
Maximum load on a tire (defini-
tion) ............................................... 407
Maximum loaded vehicle weight
(definition) ..................................... 407
Maximum permissible tire pres-
sure (definition) ............................. 407
Maximum tire load ......................... 405
Maximum tire load (definition) ....... 407
MOExtended tires .......................... 389
Optional equipment weight (defi-
nition) ............................................ 408
PSI (pounds per sq uare inch) (def-
i
nition) ........................................... 407 Replacing ....................................... 408
Service life ..................................... 388
Sidewall (definition) ....................... 408
Speed rating (definition) ................ 407
Storing ........................................... 409
Structure and characteristics
(definition) ..................................... 406
Temperature .................................. 402
TIN (Tire Identification Number)
(definition) ..................................... 408
Tire bead (definition) ...................... 407
Tire pressure (definition) ................ 407
Tire pressures (recommended) ...... 406
Tire size (data) ............................... 413
Tire size designation, load-bearing
capacity, speed rating .................... 403
Tire tread ....................................... 388
Tire tread (definition) ..................... 407
Total load limit (definition) ............. 408
Traction ......................................... 402
Traction (definition) ....................... 408
Tread wear ..................................... 402
TWR (permissible trailer drawbar
noseweight) (definition) ................. 408
Uniform Tire Quality Grading
Standards ...................................... 401
Uniform Tire Quality Grading
Standards (definition) .................... 406
Wear indicator (definition) ............. 408
Wheel and tire combination ........... 414
Wheel rim (definition) .................... 406
see Flat tire
Top Tether ............................................ 62
Tow-starting
Emergency engine starting ............ 383
Important safety notes .................. 381
Towing a trailer
Axle load, permissible .................... 445
Cleaning the trailer tow hitch ......... 366
Coupling up a trailer ...................... 259
Decoupling a trailer ....................... 261
Driving tips .................................... 257
ESP ®
(Electronic Stability Pro-
gram) ............................................... 73
Important safety notes .................. 256
Installing the ball coupling ............. 258
Lights display message .................. 292
Mo u nting dimensions .................... 444 Index 21
Page 25 of 450
Vehicle data ................................... 441
Vehicle battery
see Battery (vehicle)
Vehicle data ....................................... 441
Vehicle data (off-road driving)
Approach/departure angle ............ 443
Fording depth ................................ 442
Maximum gradient climbing abil-
ity .................................................. 444
Vehicle dimensions ........................... 441
Vehicle emergency locking ................ 86
Vehicle identification number
see VIN
Vehicle identification plate .............. 432
Vehicle level
AIRMATIC ...................................... 207
Vehicle level (display message) ....... 302
Vehicle tool kit .................................. 369
Video
Operating the DVD ........................ .2 70
VIN ...................................................... 432
Seat ............................................... 433
Type plate ...................................... 432
W
Warning
Stickers .......................................... .4 2
Warning and indicator lamps
ABS ................................................ 319
Brakes .......................................... .3 17
Check Engine ................................. 325
Coolant .......................................... 325
Distance warning ........................... 327
DISTRONIC PLUS ........................... 327
ESP ®
.............................................. 321
ESP ®
OFF ....................................... 322
Fuel tank ........................................ 325
Hybrid drive system ....................... 318
Overview .......................................... 35
Parking brake ................................ 324
PASSENGER AIR BAG ..................... .4 5
RBS (Recuperative Brake Sys -
tem) .............................................. .3 18
Reserve fuel ................................... 325
Restraint system ............................ 324
Seat belt ........................................ 316
Tire pressure monitor .................... 328 Warranty .............................................. 26
Washer fluid
Display message ............................ 314
Wheel and tire combinations
Tires ............................................... 414
Wheel bolt tightening torque ........... 412
Wheel chock ...................................... 409
Wheels
Changing a wheel .......................... 408
Checking ........................................ 388
Cleaning ......................................... 364
Emergency spare wheel ................. 426
General notes ................................ 413
Important safety notes .................. 387
Information on driving .................... 387
Interchanging/changing ................ 408
Mounting a new wheel ................... 411
Mounting a wheel .......................... 409
Overview ........................................ 387
Removing a wheel .......................... 411
Storing .......................................... .4 09
Tightening torque ........................... 412
Wheel size/tire si ze ....................... 413
Wi
ndow curtain air bag
Display message ............................ 289
Operation ......................................... 51
Windows
see Side windows
Windshield
Defrosting ...................................... 136
Windshield washer fluid
see Windshield washer system
Windshield washer system
Adding washer fluid ....................... 359
Important safety notes .................. 439
Windshield wipers
Problem (malfunction) ................... 125
Rear window wiper ........................ 122
Replacing the wiper blades ............ 122
Switching on/off ........................... 121
Winter driving
Slippery road surfaces ................... 186
Snow chains .................................. 390
Winter operation
General notes ................................ 389
Overview ........................................ 389
Radiator cover ............................... 357 Index 23
Page 27 of 450
Protection of the environment
General notes
H Environmental note
Daimler's declared policy is one of compre-
hensive environmental protection.
The objectives are for the natural resources
that form the basis of our existence on this
planet to be used sparingly and in a manner
that takes the requirements of both nature
and humanity into account.
You too can help to protect the environment
by operating your vehicle in an environmen-
tally responsible manner.
Fuel consumption and the rate of engine,
transmission, brake and tire wear are affected
by these factors: R
operating conditions of your vehicle R
your personal driving style
You can influence both factors. You should
bear the following in mind:
Operating conditions: R
avoid short trips as these increase fuel con-
sumption. R
always make sure that the tire pressures
are correct. R
do not carry any unnecessary weight. R
remove roof racks once you no longer need
them. R
a regularly serviced vehicle will contribute
to environmental protection. You should
therefore adhere to the service intervals. R
always have service work carried out at a
qualified specialist workshop.
Personal driving style: R
do not depress the accelerator pedal when
starting the engine. R
do not warm up the engine when the vehicle
is stationary. R
drive carefully and maintain a safe distance
from the vehicle in front. R
avoid frequent, sudden acceleration and
braking. R
change gear in good time and use each gear
only up to �
Page 68 of 450
Drivin g safet y systems
Overview of drivin g safet y systemsIn this section , you will fin d information about
th e followin g drivin g safet y systems :R
AB S ( A n ti-loc k B rakin g S ystem)
( Y
page 66)R
BA S ( B rak e A ssist S ystem) ( Y
page 67)R
BA S PLU S wit h Cross-Traffic Assis t ( B r ak e
A ssist S ystem PLU S wit h Cross-Traffic Assist)
( Y
page 67)R
COLLISION PREVENTION ASSIST PLU S
( Y
page 69 )R
ES P ®
( E lectronic S t ability P r ogram)
( Y
page 72)R
EB D ( E lectroni c B rak e forc e D istribution )
( Y
page 74 )R
ADAPTIV E BRAKE ( Y
page 74 )R
PRE-SAF E ®
Brak e ( Y
page 74 )R
STEE R CONTROL ( Y
page 76)
Important safet y notesIf you fail to adapt your drivin g style or if you are
inattentive , th e drivin g safet y systems can nei-
ther reduce th e ris k of an acciden t no r override
th e laws of physics. Driving safet y systems are
merely aids designed to assist driving. You are
responsible fo r maintainin g th e distanc e to th e
vehicle in front, fo r vehicle speed, fo r braking in
goo d time, and fo r stayin g in lane. Always adapt
your drivin g style to suit th e prevailin g road and
weather condition s and maintain a saf e distanc e
from th e vehicle in front. Drive carefully.
The drivin g safet y systems described only wor k
as effectively as possible when there is ade-
quat e contact between th e tires and th e road
surface. Pay particular attention to th e informa-
tion regardin g tires , recommended minimum
tire tread depths etc. in th e "Wheels and tires "
section ( Y
page 387).
In wintr y drivin g conditions, always use winte r
tires (M+ S tires ) and , if necessary, snow chains.
Only in this way will th e drivin g safet y systems
described in this section wor k as effectively as
possible. ABS (Anti-lock Braking System)
General information AB S regulates brake pressure in suc h a way that
th e wheels do no t loc k when you brake . Thi s
allow s you to continue steerin g th e vehicle when
braking .
The �% AB S warnin g lamp in th e instrumen t
cluster lights up when th e ignition is switched
on . It goe s out when th e engin e is running .
AB S works from a speed of about 5 mph
(8 km/h), regardles s of road-surfac e conditions.
AB S works on slipper y surfaces, eve n when you
only brake gently.
Important safet y notes
i Observ e th e "Important safet y notes" sec -
tion ( Y
page 66).
G WARNING
If AB S is faulty, th e wheels could loc k when
braking . The steerability and braking charac -
teristics may be severely impaired. Addition -
ally, further drivin g safet y systems are deac -
tivated. There is an increase d danger of skid-
din g and accidents .
Drive on carefully. Hav e AB S checke d imme-
diately at a qualified specialis t workshop .
Whe n AB S is malfunctioning, other systems ,
includin g drivin g safet y systems , will also
becom e inoperative . Observ e th e information
on th e AB S warnin g lamp ( Y
page 319) and dis -
play messages whic h may be shown in th e
instrumen t cluster ( Y
page 281).
Braking X
If ABS intervenes: continue to depress th e
brake peda l vigorousl y until th e braking sit -
uation is over. X
To make a full brak e application: depress
th e brake peda l wit h full force.
If AB S intervenes when braking , you will feel a
pulsin g in th e brake pedal.
The pulsatin g brake peda l can be an indication
of hazardous road conditions, and function s as a
reminder to take extr a car e whil e driving.66
Driving safety systems
Safety
Page 184 of 450
Drive sensibly – save fuelObserv e th e followin g tips to sav e fuel:X
The tires should always be inflate d to th e rec -
ommended tire pressure. X
Remov e unnecessary loads.X
Remov e roof carriers when they are no t nee-
ded. X
War m up th e engin e at low engin e speeds .X
Avoid frequent acceleration or braking .X
Hav e all maintenance wor k carrie d out as
indicated by th e servic e intervals in th e Main -
tenance Booklet or by th e servic e interval dis -
play.
Fue l consumption also increase s when drivin g in
cold weather , in stop-start traffic and in hill y ter-
rain .
Drinking an d drivin g
G WARNING
Drinking and drivin g and/o r taking drugs and
drivin g are ver y dangerous combinations.
Even a small amount of alcoho l or drugs can
affec t your reflexes, perception s and judg-
ment.
The possibilit y of a serious or eve n fatal acci-
den t is greatly increase d when you drink or
take drugs and drive.
Do no t drink or take drugs and drive or allow
anyon e to drive who has bee n drinkin g or tak-
in g drugs.
Emission contro l
G WARNING
Combustion engines emi t poisonous exhaus t
gases suc h as carbon monoxide. Inhaling
these exhaus t gases lead s to poisoning. There
is a ris k of fatal injury. Therefor e never leav e
th e engin e running in enclose d spaces with-
out sufficien t ventilation .
Certain engin e systems are designed to keep
th e level of poisonous component s in exhaus t
fumes within lega l limits.
These systems only wor k at peak efficiency if
they are serviced exactly in accordance wit h th e
manufacturer's specifications. Always hav e wor k on th e engin e carrie d out at a qualified
specialis t workshop . Mercedes-Ben z recom -
mends that you use an authorized Mercedes -
Benz Cente r fo r this purpose. In particular, wor k
relevant to safet y or on safety-related systems
mus t be carrie d out at a qualified specialis t
workshop .
The engin e setting s mus t no t be changed under
any circumstances. Furthermore, all specific
servic e wor k mus t be carrie d out at regular
intervals and in accordance wit h th e Mercedes -
Benz servic e requirements . Details can be found
in th e Maintenance Booklet .
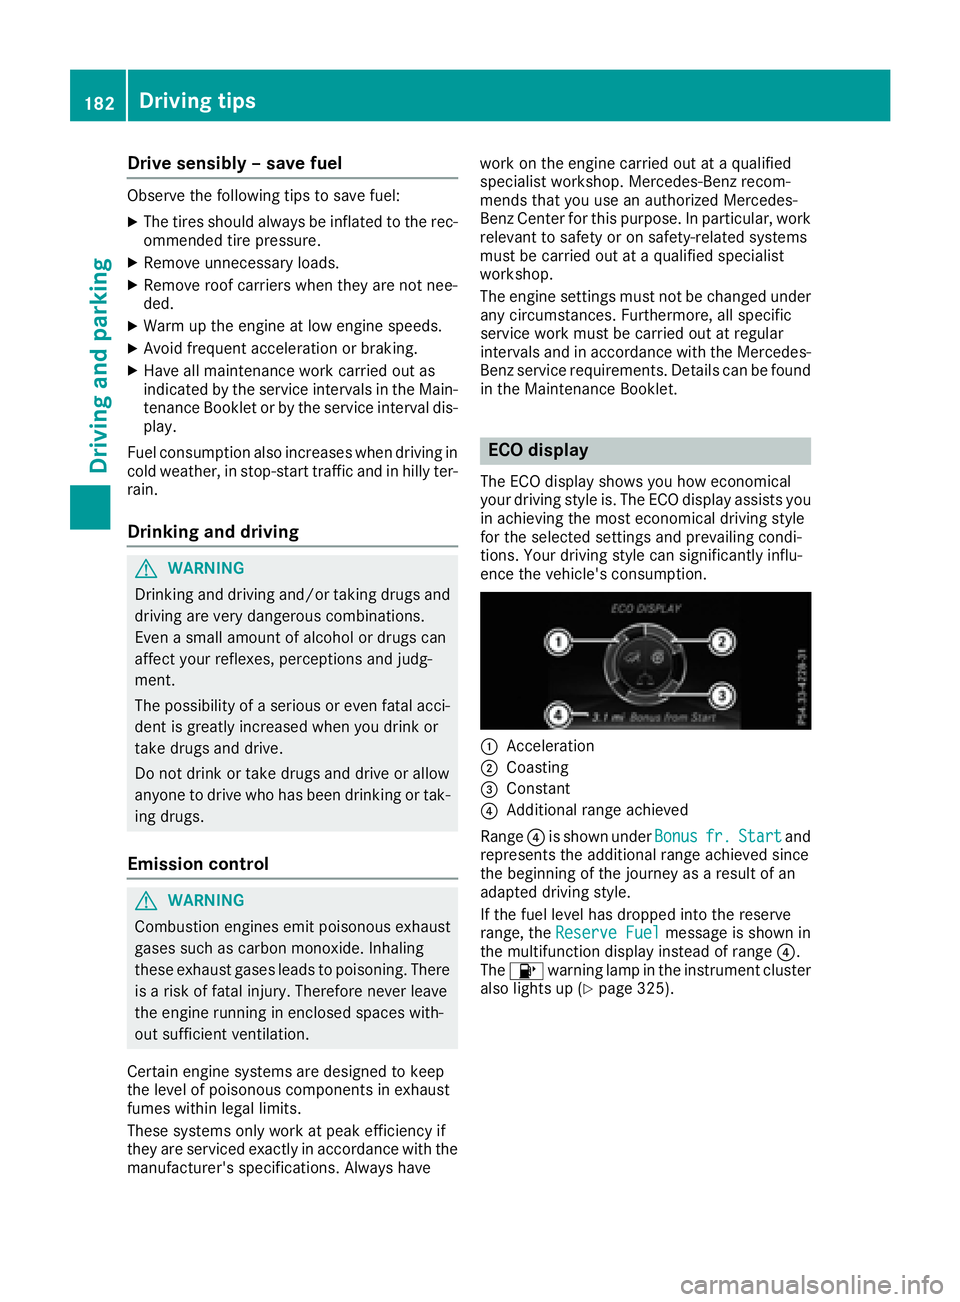
ECO display The EC O display shows you how economical
your drivin g style is. The EC O display assist s you
in achievin g th e most economical drivin g style
fo r th e selecte d setting s and prevailin g condi-
tions. Your drivin g style can significantly influ-
ence th e vehicle' s consumption .
�C
Acceleration �D
Coasting �
Page 190 of 450
Observe the following notes: R
Stop the vehicle before starting to drive along
an off-road route. If necessary, select the off-
road program ( Y
page 237) or shift to the
LOW RANGE off-road gear ( Y
page 239).R
Select a vehicle level that is suitable for the
terrain. To avoid damaging the vehicle, make
sure there is always sufficient ground clear-
ance. R
Check that items of luggage and loads are
stowed safely and are well secured
( Y
page 333).R
Always keep the engine running and in gear
when driving on a downhill gradient. Activate
DSR ( Y
page 236).R
Always keep the engine running and in gear
when driving on a slope. R
Adapt your speed to the terrain. The rougher,
steeper or more ruts on the terrain, the slower
your speed should be. R
Do not jump with the vehicle as this will inter-
rupt the vehicle's propulsion. R
Drive with extreme care on unfamiliar off-road
routes where visibility is poor. For safety rea-
sons, get out of the vehicle first and survey
the off-road route. R
Look out for obstacles, such as rocks, holes,
tree stumps and furrows. R
Always keep the doors, the tailgate, the side
windows and the sliding sunroof closed while
the vehicle is in motion. R
Do not shift the automatic transmission to
transmission position N .R
Observe the notes on off-road fording
( Y
page 185).
i Do not use the HOLD function when driving
off-road, on steep uphill or downhill gradients
or on slippery or loose surfaces. The HOLD
function cannot hold the vehicle on such sur-
faces.
Checklist before driving off-road
! If the engine oil warning lamp lights up while
the vehicle is in motion, stop the vehicle in a
safe place as soon as possible. Check the
engine oil level. The engine oil warning lamp
warning must not be ignored. Continuing the
journey while the symbol is displayed could
lead to engine damage. X
Engine oil level: check the engine oil level
and add oil if necessary.
When driving on steep gradients, the engine
oil level must be sufficiently high to ensure a
correct oil supply in the vehicle. X
DEF tank (BlueTEC vehicles): check the
level and add if necessary ( Y
page 167).X
Tire-changing tool kit: check that the jack is
working and make sure you have the lug
wrench, a robust tow cable and a folding
spade in the vehicle. X
Wheels and tires: check the tire tread depth
and tire pressure. X
Check for damage and remove any foreign
objects, e.g. small stones, from the wheels/
tires. X
Replace any missing valve caps. X
Replace dented or damaged wheels. X
Rims: dented or bent rims can result in a loss
of tire pressure and damage the tire bead.
Before driving off-road, check the wheels and
replace them if necessary.
Checklist after driving off-road
! If you detect damage to the vehicle after
driving off-road, have the vehicle checked
immediately at a qualified specialist work-
shop.
Driving over rough terrain places greater
demands on your vehicle than driving on normal
roads. After driving off-road, check the vehicle.
This allows you to detect damage promptly and
reduce the risk of an accident to yourself and
other road users. X
If the Offroad or Offroad Plus drive program
is selected: select the Individual , Sport ,
Comfort or Slippery drive program
( Y
page 152). X
Deactivate the LOW RANGE off-road gear
( Y
page 239). X
Deactivate DSR ( Y
page 236).X
Lower the vehicle level again to a level suita-
ble to the road conditions, e.g. to the normal
level. X
Clean the headlamps and rear lights and
check for damage. X
Clean the front and rear license plates. X
Clean the wheels and tires with a water jet
and remove any foreign objects.188
Driving tips
Driving and parking
Page 202 of 450
ings (left and right), and only on the vehicle in
front if lane markings are missing.
Steering Assist and Stop&Go Pilot do not pro-
vide any support if these conditions do not exist.
DISTRONIC PLUS must be active in order for the
function to be available.
Important safety notes If you fail to adapt your driving style, DISTRONIC
PLUS with Steering Assist and Stop&Go Pilot
can neither reduce the risk of an accident nor
override the laws of physics. It cannot take
account of road, weather and traffic conditions.
DISTRONIC PLUS with Steering Assist and
Stop&Go Pilot is only an aid. You are responsible
for the distance to the vehicle in front, for vehi-
cle speed, for braking in good time and for stay-
ing in your lane.
DISTRONIC PLUS with Steering Assist and
Stop&Go Pilot does not detect road and traffic
conditions. If you are following a vehicle which is
driving towards the edge of the road, your vehi-
cle could come into contact with the curb or
other road boundaries. Be particularly aware of
other road users, e.g. cyclists, that are directly
next to your vehicle.
Obstacles such as traffic pylons on the lane or
projecting out into the lane are not detected.
An inappropriate steering intervention, e.g. after
intentionally driving over a lane marking, can be
corrected at any time if you steer slightly in the
opposite direction.
DISTRONIC PLUS with Steering Assist and
Stop&Go Pilot cannot continuously keep your
vehicle in lane. In some cases, the steering
intervention is not sufficient to bring the vehicle
back to the lane. In such cases, you must steer
the vehicle yourself to ensure that it does not
leave the lane.
The support provided by the system can be
impaired if: R
there is poor visibility, e.g. due to insufficient
illumination of the road, or due to snow, rain,
fog or spray R
there is glare, e.g. from oncoming traffic, the
sun or reflections (e.g. when the road surface
is wet) R
the windshield is dirty, fogged up, damaged or
covered, for instance by a sticker, in the vicin-
ity of the camera R
there are no, several or unclear lane markings
for a lane, e.g. in areas with road construction
work R
the lane markings are worn away, dark or cov-
ered up, e.g. by dirt or snow R
the distance to the vehicle in front is too small
and the lane markings thus cannot be detec-
ted R
the lane markings change quickly, e.g. lanes
branch off, cross one another or merge R
the road is narrow and winding R
there are strong shadows cast on the road
The system is switched to passive and no longer
assists you by performing steering interventions
if: R
you actively change lane R
you switch on the turn signal R
take your hands off the steering wheel or do
not steer for a prolonged period of time
i Steering Assist and Stop&Go Pilot are acti-
vated again automatically after a lane change
is completed.
Steering Assist and Stop&Go Pilot do not pro-
vide any support: R
on very sharp corners R
when a loss of tire pressure or a defective tire
has been detected and displayed
Pay attention also to the important safety notes
for DISTRONIC PLUS ( Y
page 193).
The steering interventions are carried out wit h a
limited steering moment. The system requires
the driver to keep his hands on the steering
wheel and to steer himself.
If you do not steer yourself or if you take your
hands off the steering wheel for a prolonged
period of time, the system will first alert you with
a visual warning. A steering wheel symbol
appears in the multifunction display. If you have
still not started to steer and have not taken hold
of the steering wheel after five seconds at the
latest, a warning tone also sounds to remind you
to take control of the vehicle. Steering Assist
and Stop&Go Pilot are switched to passive.
DISTRONIC PLUS remains active.
Activating Steering Assist and Stop&Go
Pilot X
Activate the DISTRONIC PLUS with Steering
Assist and Stop&Go Pilot function using the
on-board computer ( Y
page 272).
The DTR+: Steering Assistant On mes-
sage appears in the multifunction display.
Steering Assist and Stop&Go Pilot are active.200
Driving systems
Driving and parking
Page 216 of 450
R
Snowfall or heavy rain may lead to a parking
space being measured inaccurately. R
Pay attention to the PARKTRONIC
( Y
page 211) warning messages during the
parking procedure. R
At any time, you can intervene in the steering
procedure to correct it. Active Parking Assist
will then be canceled. R
When transporting a load which protrudes
from your vehicle, you should not use Active
Parking Assist. R
Never use Active Parking Assist when snow
chains are installed. R
Make sure that the tire pressures are always
correct. This has a direct influence on the
parking characteristics of the vehicle.
Use Active Parking Assist for parking spaces: R
parallel or at right angles to the direction of
travel R
that are on straight roads, not bends R
that are on the same level as the road, e.g. not
on the pavement
Detecting parking spaces Objects located above the height range of Active
Parking Assist will not be detected when the
parking space is measured. These are not taken
into account when the parking procedure is cal-
culated, e.g. overhanging loads, tail sections or
loading ramps of goods vehicles.
G WARNING
If there are objects above the detection range: R
Active Park Assist may steer too early R
the vehicle may not stop in front of these
objects
You may cause a collision as a result. There is
a risk of an accident.
If objects are located above the detection
range, stop and deactivate Active Parking
Assist.
For further information on the detection range
( Y
page 210). Active Parking Assist does not assist you park-
ing in spaces at right angles to the direction of
travel if: R
two parking spaces are located directly next
to one another R
the parking space is directly next to a low
obstacle such as a low curb R
you park forwards
Active Parking Assist does not assist you park-
ing in spaces that are parallel or at right angles
to the direction of travel if: R
the parking space is on a curb R
the system reads the parking space as being
blocked, for example by foliage or grass pav-
ing blocks R
the area is too small for the vehicle to maneu-
ver into R
the parking space is bordered by an obstacle,
e.g. a tree, a post or a trailer
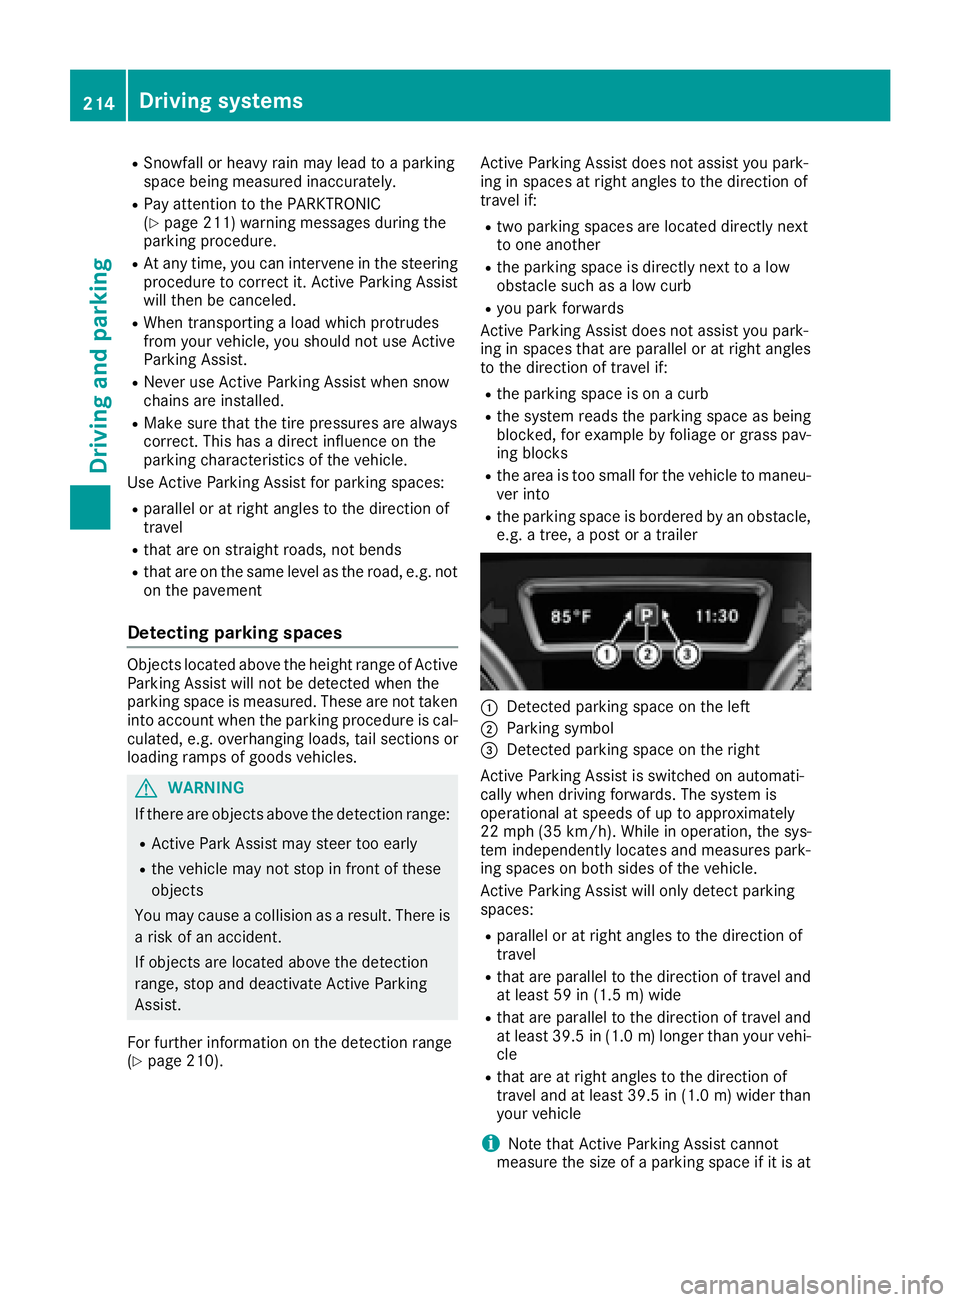
�C
Detected parking space on the left �D
Parking symbol �
Page 235 of 450
R
a driving safety system intervenes, e.g. ESP ®
or PRE-SAFE ®
Brake.R
ESP ®
is switched off.R
the offroad program is activated (vehicles
without the Offroad Engineering package). R
the Offroad or Offroad Plus drive program is
activated (vehicles with the Off-Road Engi-
neering package). R
the LOW RANGE offroad gear is activated
(vehicles with the Offroad Engineering pack-
age). R
a loss of tire pressure or a defective tire is
detected.
Switching on Active Blind Spot Assist X
Make sure that Active Blind Spot Assist is
activated in the on-board computer
( Y
page 272). X
Turn the SmartKey to position 2 in the ignition
lock.
Warning lamps �C in the exterior mirrors light
up red for approximately 1.5 seconds and
then turn yellow.
Towing a trailer When you attach a trailer, make sure you have
correctly established the electrical connection.
This can be accomplished by checking the trailer
lighting. Active Blind Spot Assist is then deacti-
vated. The indicator lamp lights up yellow in the
exterior mirrors and the Active Blind Spot
Asst. Not Available When Towing a
Trailer See Operator's Manual message
appears in the multifunction display.
Active Lane Keeping Assist
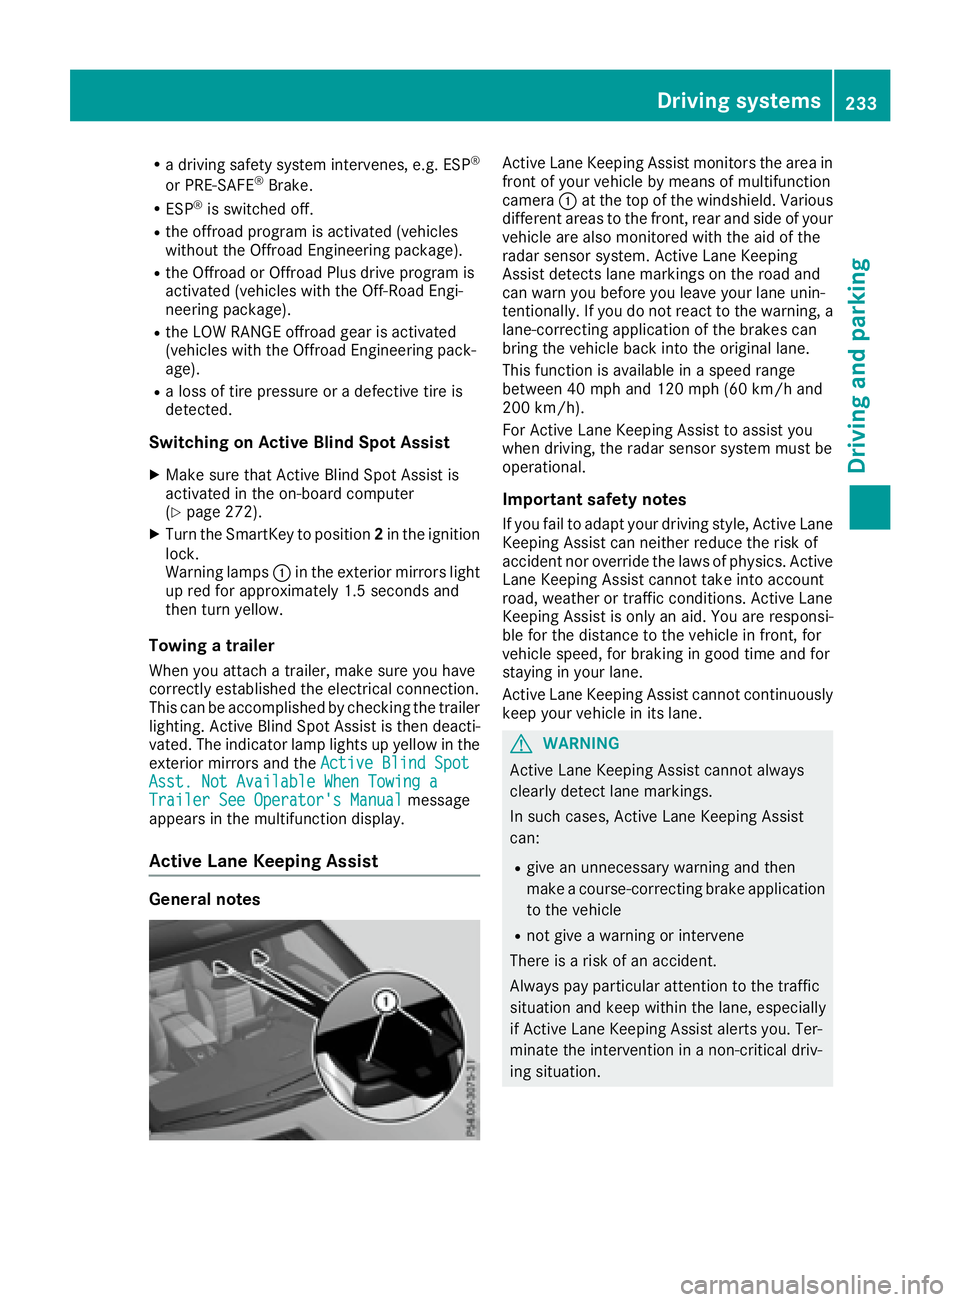
General notes Active Lane Keeping Assist monitors the area in
front of your vehicle by means of multifunction
camera �C at the top of the windshield. Various
different areas to the front, rear and side of your
vehicle are also monitored with the aid of the
radar sensor system. Active Lane Keeping
Assist detects lane markings on the road and
can warn you before you leave your lane unin-
tentionally. If you do not react to the warning, a
lane-correcting application of the brakes can
bring the vehicle back into the original lane.
This function is available in a speed range
between 40 mph and 120 mph (60 km/h and
200 km/h).
For Active Lane Keeping Assist to assist you
when driving, the radar sensor system must be
operational.
Important safety notes If you fail to adapt your driving style, Active Lane
Keeping Assist can neither reduce the risk of
accident nor override the laws of physics. Active
Lane Keeping Assist cannot take into account
road, weather or traffic conditions. Active Lane
Keeping Assist is only an aid. You are responsi-
ble for the distance to the vehicle in front, for
vehicle speed, for braking in good time and for
staying in your lane.
Active Lane Keeping Assist cannot continuously
keep your vehicle in its lane.
G WARNING
Active Lane Keeping Assist cannot always
clearly detect lane markings.
In such cases, Active Lane Keeping Assist
can: R
give an unnecessary warning and then
make a course-correcting brake application
to the vehicle R
not give a warning or intervene
There is a risk of an accident.
Always pay particular attention to the traffic
situation and keep within the lane, especially
if Active Lane Keeping Assist alerts you. Ter-
minate the intervention in a non-critical driv-
ing situation.Driving systems 233
Driving and parking Z