fuel cap release MERCEDES-BENZ GLE-Class 2016 C292 Owner's Manual
[x] Cancel search | Manufacturer: MERCEDES-BENZ, Model Year: 2016, Model line: GLE-Class, Model: MERCEDES-BENZ GLE-Class 2016 C292Pages: 382, PDF Size: 8.83 MB
Page 11 of 382

Deactivating/activating ................. 139
General information ....................... 138
Important safety notes .................. 138
Introduction ................................... 138
Emergency
Automatic measures after an acci-
dent ................................................. 53
Emergency release
Driver's door .................................... 80
Vehicle ............................................. 80
Emergency spare wheel
General notes ................................ 360
Important safety notes .................. 360
Removing ....................................... 361
Storage location ............................ 361
Stowing .......................................... 361
Technical data ............................... 364
Emergency Tensioning Devices
Activation ......................................... 50
Emergency unlocking
Tailgate ............................................ 85
Emissions control
Service and warranty information .... 23
Engine
Check Engine warning lamp ........... 274
Display message ............................ 249
ECO start/stop function ................ 138
Engine number ............................... 367
Irregular running ............................ 141
Jump-starting ................................. 323
Starting (important safety notes) ... 136
Starting problems .......................... 141
Starting the engine with the
SmartKey ....................................... 136
Starting via smartphone ................ 136
Starting with KEYLESS-GO ............. 136
Switching off .................................. 157
Tow-starting (vehicle) ..................... 327
Engine electronics
Problem (malfunction) ................... 141
Engine oil
Adding ........................................... 304
Additives ........................................ 371
Checking the oil level ..................... 303
Checking the oil level using the
dipstick .......................................... 303
Display message ............................ 251
Filling capacity ............................... 371 Notes about oil grades ................... 370
Notes on oil level/consumption .... 303
Temperature (on-board computer,
Mercedes-AMG vehicles) ............... 231
Viscosity ........................................ 371
ESP
®(Electronic Stability Pro-
gram)
AMG menu (on-board computer) ... 232
Characteristics ................................. 66
Deactivating/activating ................... 66
Display message ............................ 235
Function/notes ................................ 65
General notes .................................. 65
Important safety information ........... 65
Trailer stabilization ........................... 67
Warning lamp ................................. 270
ETS/4ETS (Electronic Traction Sys-
tem) ...................................................... 65
Exhaust check ................................... 160
Exhaust pipe (cleaning instruc-
tions) .................................................. 312
Exterior mirrors
Adjusting ....................................... 104
Dipping (automatic) ....................... 105
Folding in when locking (on-board
computer) ...................................... 231
Folding in/out (automatically) ....... 105
Folding in/out (electrically) ........... 105
Out of position (troubleshooting) ... 105
Setting ........................................... 105
Storing settings (memory func-
tion) ............................................... 107
Storing the parking position .......... 106
Eyeglasses compartment ................. 280
F
Filler cap
see Refueling
Flat tire
MOExtended tires .......................... 316
Preparing the vehicle ..................... 315
TIREFIT kit ...................................... 317
see Emergency spare wheel
Floormats ........................................... 301
Folding the rear bench seat for-
wards/back ....................................... 281
Index9
Page 83 of 382

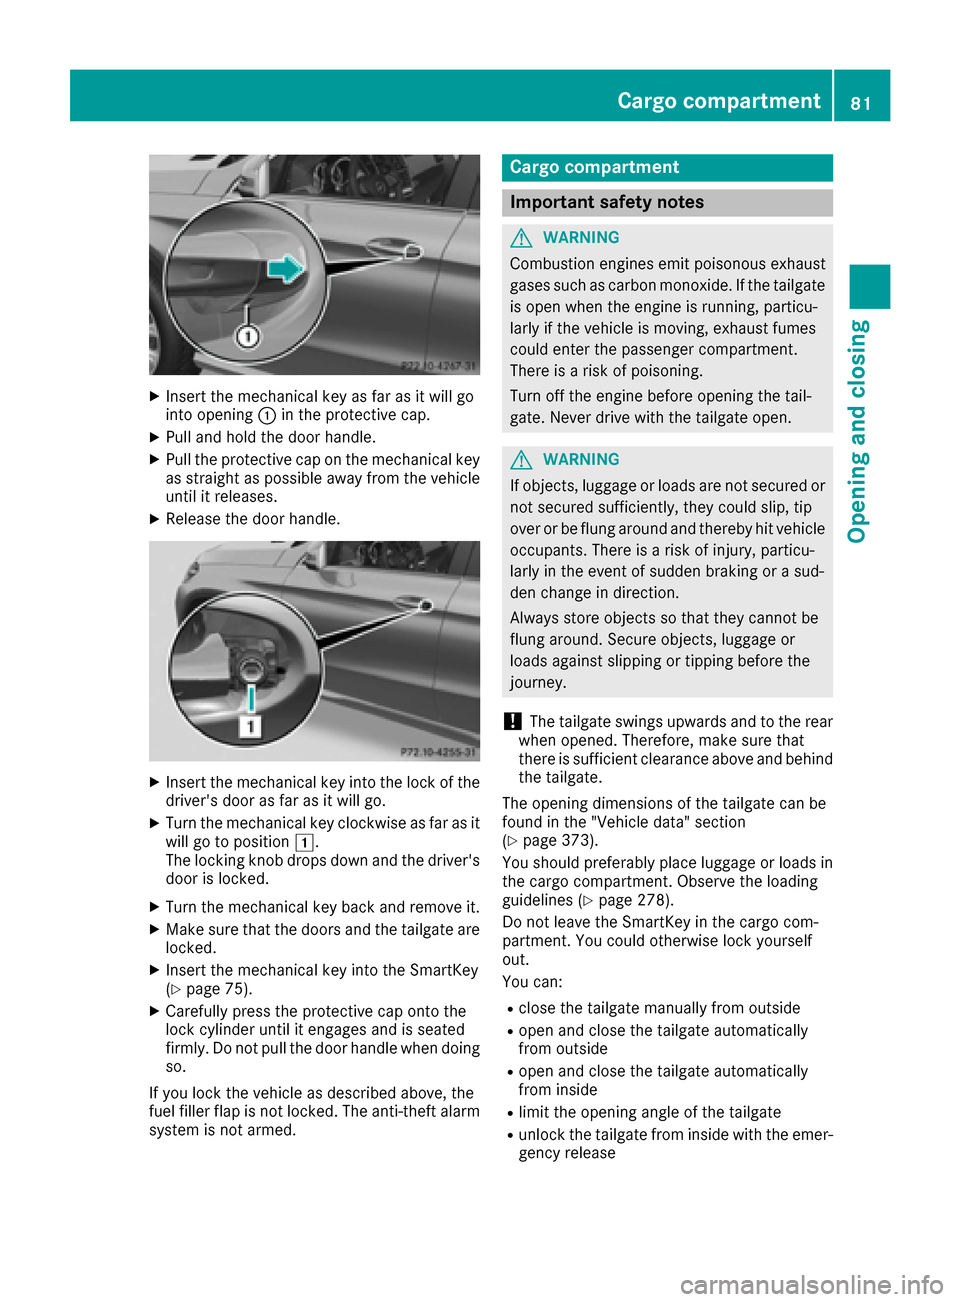
XInsert the mechanical key as far as it will go
into opening:in the protective cap.
XPull and hold the door handle.
XPull the protective cap on the mechanical key
as straight as possible away from the vehicle
until it releases.
XRelease the door handle.
XInsert the mechanical key into the lock of the
driver's door as far as it will go.
XTurn the mechanical key clockwise as far as it
will go to position 1.
The locking knob drops down and the driver's
door is locked.
XTurn the mechanical key back and remove it.
XMake sure that the doors and the tailgate are locked.
XInsert the mechanical key into the SmartKey
(Ypage 75).
XCarefully press the protective cap onto the
lock cylinder until it engages and is seated
firmly. Do not pull the door handle when doing
so.
If you lock the vehicle as described above, the
fuel filler flap is not locked. The anti-theft alarm system is not armed.
Cargo compartment
Important safety notes
GWARNING
Combustion engines emit poisonous exhaust
gases such as carbon monoxide. If the tailgate is open when the engine is running, particu-
larly if the vehicle is moving, exhaust fumes
could enter the passenger compartment.
There is a risk of poisoning.
Turn off the engine before opening the tail-
gate. Never drive with the tailgate open.
GWARNING
If objects, luggage or loads are not secured or
not secured sufficiently, they could slip, tip
over or be flung around and thereby hit vehicle
occupants. There is a risk of injury, particu-
larly in the event of sudden braking or a sud-
den change in direction.
Always store objects so that they cannot be
flung around. Secure objects, luggage or
loads against slipping or tipping before the
journey.
!The tailgate swings upwards and to the rear
when opened. Therefore, make sure that
there is sufficient clearance above and behind
the tailgate.
The opening dimensions of the tailgate can be
found in the "Vehicle data" section
(
Ypage 373).
You should preferably place luggage or loads in
the cargo compartment. Observe the loading
guidelines (
Ypage 278).
Do not leave the SmartKey in the cargo com-
partment. You could otherwise lock yourself
out.
You can:
Rclose the tailgate manually from outside
Ropen and close the tailgate automatically
from outside
Ropen and close the tailgate automatically
from inside
Rlimit the opening angle of the tailgate
Runlock the tailgate from inside with the emer- gency release
Cargo compartment81
Opening and closing
Z
Page 158 of 382

the vehicle's DEF tank offers no protection
against overfilling. DEF may leak if overfilled.
Mercedes-Benz offers a special disposable hose
with overfill protection. You can obtain this from
any authorized Mercedes-Benz Center. DEF is
available in a variety of containers and recepta-
cles. Only use the disposable hose with the
Mercedes-Benz DEF refill canisters.
DEF refill bottle
!Only screw on the DEF refill bottle hand-
tight. It could otherwise be damaged.
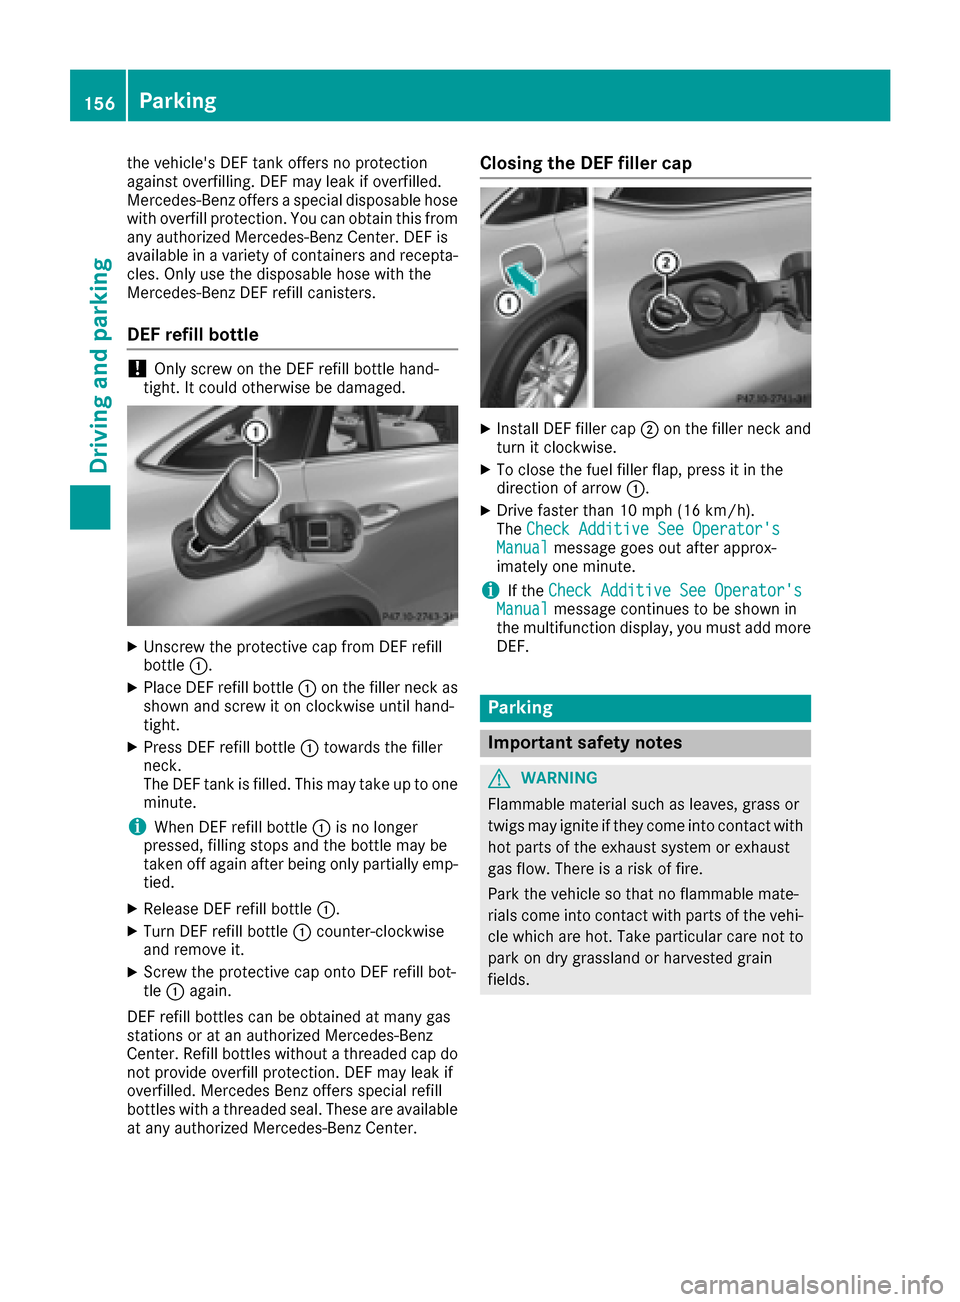
XUnscrew the protective cap from DEF refill
bottle :.
XPlace DEF refill bottle :on the filler neck as
shown and screw it on clockwise until hand-
tight.
XPress DEF refill bottle :towards the filler
neck.
The DEF tank is filled. This may take up to one
minute.
iWhen DEF refill bottle :is no longer
pressed, filling stops and the bottle may be
taken off again after being only partially emp-
tied.
XRelease DEF refill bottle :.
XTurn DEF refill bottle:counter-clockwise
and remove it.
XScrew the protective cap onto DEF refill bot-
tle : again.
DEF refill bottles can be obtained at many gas
stations or at an authorized Mercedes-Benz
Center. Refill bottles without a threaded cap do
not provide overfill protection. DEF may leak if
overfilled. Mercedes Benz offers special refill
bottles with a threaded seal. These are available
at any authorized Mercedes-Benz Center.
Closing the DEF filler cap
XInstall DEF filler cap ;on the filler neck and
turn it clockwise.
XTo close the fuel filler flap, press it in the
direction of arrow :.
XDrive faster than 10 mph (16 km/h).
TheCheck Additive See Operator's
Manualmessage goes out after approx-
imately one minute.
iIf the Check Additive See Operator'sManualmessage continues to be shown in
the multifunction display, you must add more
DEF.
Parking
Important safety notes
GWARNING
Flammable material such as leaves, grass or
twigs may ignite if they come into contact with
hot parts of the exhaust system or exhaust
gas flow. There is a risk of fire.
Park the vehicle so that no flammable mate-
rials come into contact with parts of the vehi-
cle which are hot. Take particular care not to
park on dry grassland or harvested grain
fields.
156Parking
Driving an d parking
Page 338 of 382

Underinflated tires may:
Roverheat, leading to tire defects
Radversely affect handling
Rwear excessively and/or unevenly
Rhave an adverse effect on fuel consumption
Overinflated tires
GWARNING
Tires with excessively high pressure can burst
because they are damaged more easily by
road debris, potholes etc. In addition, they
also suffer from irregular wear, which can
severely impair the braking properties and the driving characteristics. There is a risk of an
accident.
Avoid tire pressures that are too high in all the
tires, including the spare wheel.
Overinflated tires may:
Rincrease the braking distance
Radversely affect handling
Rwear excessively and/or unevenly
Rhave an adverse effect on ride comfort
Rbe more susceptible to damage
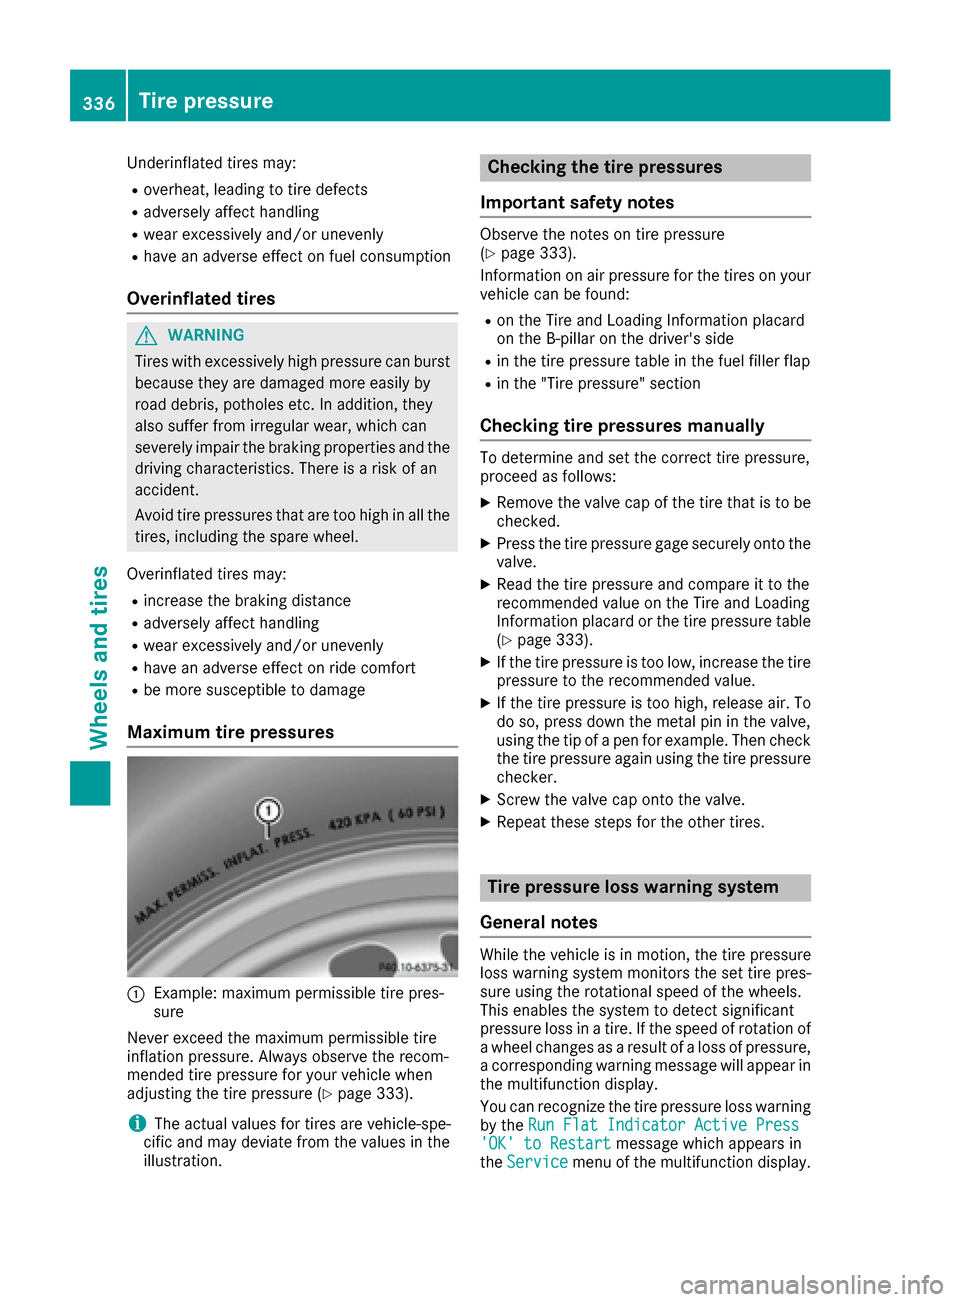
Maximum tire pressures
:Example: maximum permissible tire pres-
sure
Never exceed the maximum permissible tire
inflation pressure. Always observe the recom-
mended tire pressure for your vehicle when
adjusting the tire pressure (
Ypage 333).
iThe actual values for tires are vehicle-spe-
cific and may deviate from the values in the
illustration.
Checking the tire pressures
Important safety notes
Observe the notes on tire pressure
(Ypage 333).
Information on air pressure for the tires on your
vehicle can be found:
Ron the Tire and Loading Information placard
on the B-pillar on the driver's side
Rin the tire pressure table in the fuel filler flap
Rin the "Tire pressure" section
Checking tire pressures manually
To determine and set the correct tire pressure,
proceed as follows:
XRemove the valve cap of the tire that is to be
checked.
XPress the tire pressure gage securely onto the
valve.
XRead the tire pressure and compare it to the
recommended value on the Tire and Loading
Information placard or the tire pressure table (
Ypage 333).
XIf the tire pressure is too low, increase the tire
pressure to the recommended value.
XIf the tire pressure is too high, release air. To
do so, press down the metal pin in the valve,
using the tip of a pen for example. Then check
the tire pressure again using the tire pressure
checker.
XScrew the valve cap onto the valve.
XRepeat these steps for the other tires.
Tire pressure loss warning system
General notes
While the vehicle is in motion, the tire pressure
loss warning system monitors the set tire pres-
sure using the rotational speed of the wheels.
This enables the system to detect significant
pressure loss in a tire. If the speed of rotation of
a wheel changes as a result of a loss of pressure,
a corresponding warning message will appear in
the multifunction display.
You can recognize the tire pressure loss warning
by the Run Flat Indicator Active Press
'OK' to Restartmessage which appears in
the Servicemenu of the multifunction display.
336Tire pressure
Wheels and tires