wheels MERCEDES-BENZ GLE-CLASS SUV 2016 Owner's Manual
[x] Cancel search | Manufacturer: MERCEDES-BENZ, Model Year: 2016, Model line: GLE-CLASS SUV, Model: MERCEDES-BENZ GLE-CLASS SUV 2016Pages: 450, PDF Size: 10.52 MB
Page 147 of 450
GWARNING
If you switch off the ignition while driving,
safety-relevant functions are only available
with limitations, or not at all. This could affect, for example, the power steering and the brake
boosting effect. You will require considerably
more effort to steer and brake. There is a risk
of an accident.
Do not switch off the ignition while driving.
GWARNING
If the parking brake has not been fully
released when driving, the parking brake can:
Roverheat and cause a fire
Rlose its hold function.
There is a risk of fire and an accident. Release
the parking brake fully before driving off.
!Do not warm up the engine with the vehicle
stationary. Drive off immediately. Avoid high
engine speeds and driving at full throttle until
the engine has reached its operating temper-
ature.
Only shift the automatic transmission to the
desired drive position when the vehicle is sta-
tionary.
Where possible, avoid spinning the drive
wheels when pulling away on slippery roads.
You could otherwise damage the drive train.
!Mercedes-AMG vehicles: at low engine oil
temperatures below 68 ‡ (+20 †), the max-
imum engine speed is restricted in order to
protect the engine. To protect the engine and
maintain smooth engine operation, avoid driv-
ing at full throttle when the engine is cold.
Observe the important safety notes for PLUG-IN
HYBRID vehicles (
Ypage 42).
SmartKey positions
SmartKey
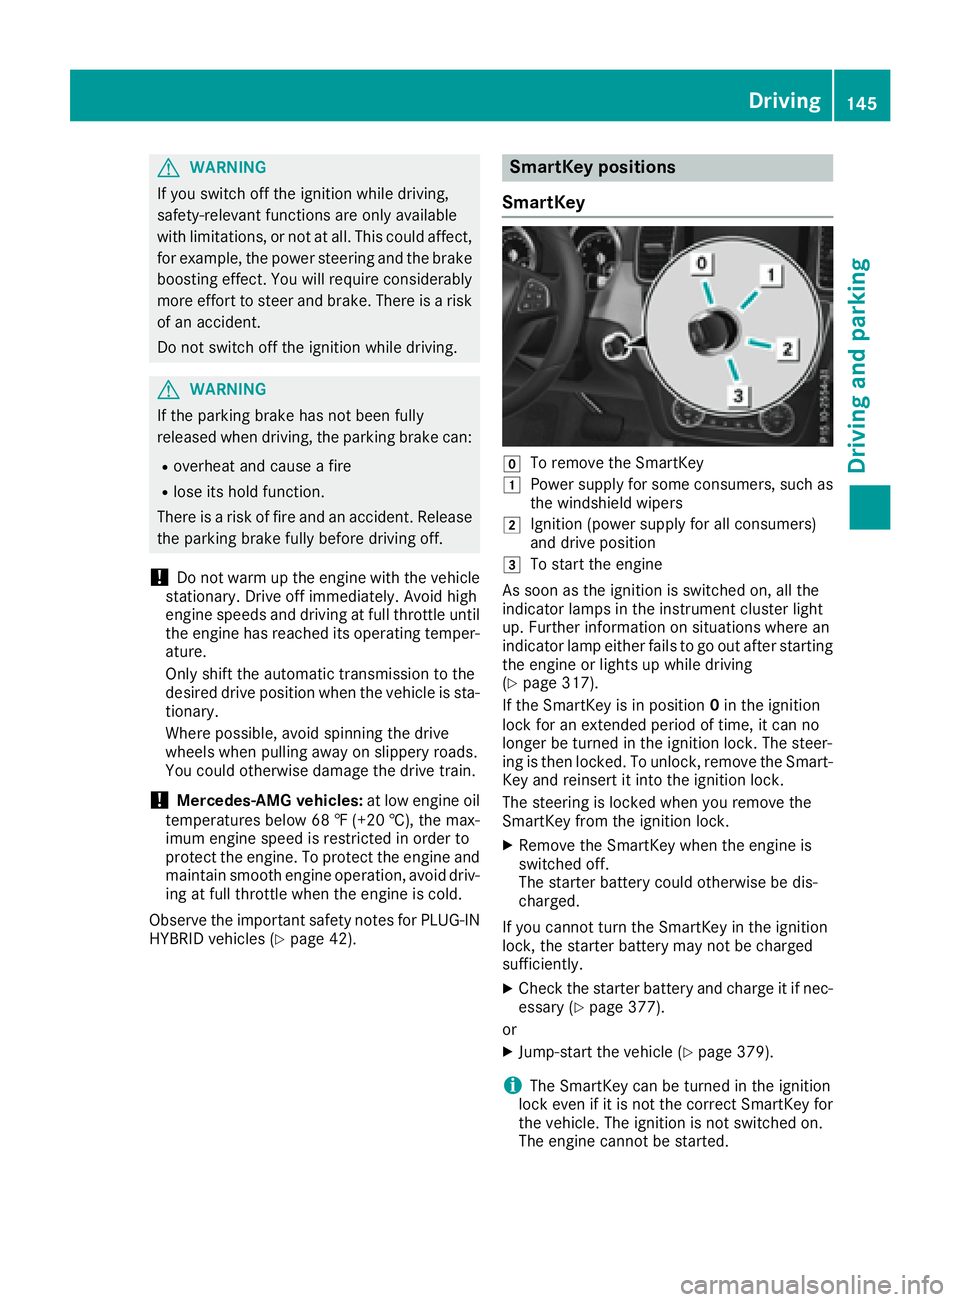
gTo remove the SmartKey
1Power supply for some consumers, such as
the windshield wipers
2Ignition (power supply for all consumers)
and drive position
3To start the engine
As soon as the ignition is switched on, all the
indicator lamps in the instrument cluster light
up. Further information on situations where an
indicator lamp either fails to go out after starting
the engine or lights up while driving
(
Ypage 317).
If the SmartKey is in position 0in the ignition
lock for an extended period of time, it can no
longer be turned in the ignition lock. The steer-
ing is then locked. To unlock, remove the Smart-
Key and reinsert it into the ignition lock.
The steering is locked when you remove the
SmartKey from the ignition lock.
XRemove the SmartKey when the engine is
switched off.
The starter battery could otherwise be dis-
charged.
If you cannot turn the SmartKey in the ignition
lock, the starter battery may not be charged
sufficiently.
XCheck the starter battery and charge it if nec-
essary (Ypage 377).
or
XJump-start the vehicle (Ypage 379).
iThe SmartKey can be turned in the ignition
lock even if it is not the correct SmartKey for
the vehicle. The ignition is not switched on.
The engine cannot be started.
Driving145
Driving and parking
Z
Page 159 of 450
ANeutral
Do not shift the transmission toN
while driving. Otherwise, the auto-
matic transmission could be dam-
aged.
No power is transmitted from the
engine to the drive wheels.
Releasing the brakes will allow you to
move the vehicle freely, e.g. to push
it or tow it.
If ESP
®is deactivated or faulty: shift
the transmission to position Nif the
vehicle is in danger of skidding, e.g.
on icy roads.
If you switch the engine off with the
transmission in position Ror D, the
automatic transmission shifts to N
automatically.
!Rolling in neutral Ncan damage
the drive train.
7Drive
The automatic transmission changes
gear automatically. All forward gears
are available.
Driving tips
Changing gear
The automatic transmission shifts to the indi-
vidual gears automatically when it is in trans-
mission position D. This automatic gear shifting
behavior is determined by:
Rthe selected drive program
Rthe position of the accelerator pedal
Rthe road speed
Accelerator pedal position
Your style of driving influences how the auto-
matic transmission shifts gear:
Rlittle throttle: early upshifts
Rmore throttle: late upshifts
Kickdown
Use kickdown for maximum acceleration.
XDepress the accelerator pedal beyond the
pressure point.
The automatic transmission shifts to a lower
gear depending on the engine speed.
XEase off the accelerator pedal once the
desired speed is reached.
The automatic transmission shifts back up.
Rocking the vehicle free
Shifting the transmission repeatedly between
gears Dand Rmay help to free the vehicle if it
has become stuck in slush or snow. The vehi-
cle's engine management system limits the
speed to a maximum of 5 mph (9 km/h) when
shifting back and forth. To shift back and forth
between transmission positions Dand R, move
the DIRECT SELECT lever up and down past the
point of resistance.
Gliding mode
All vehicles (except Mercedes-AMG vehi-
cles)
Gliding mode is characterized by the following:
Rthe combustion engine is disconnected from
the drive train.
Rthe engine speed corresponds to the idling
speed.
Rthe gear indicated after the transmission
position Ddisappears in the multifunction
display (
Ypage 154).
Gliding mode can be activated under the follow-
ing conditions:
Ryou select the "ECO" setting for the drive sys-
tem within the Individualdrive program. You
can find information about this in the Digital
Operator's Manual.
Rthe speed is within a suitable range.
Rthe course of the road is suitable, e.g. there
are no steep up or downhill gradients.
Ryou are no longer depressing the accelerator
pedal.
Gliding mode is deactivated under the following conditions:
Ryou depress the accelerator pedal.
Ryou depress the brake pedal.
Automatic transmission157
Driving an d parking
Z
Page 160 of 450
Ryou use theDIRECT SELECT lever to switch
th etransmission position (Ypage 154).
Ruse theDYNAMIC SELECT controller to
chang eth edrive progra m (Ypage 152).
Ryou activatemanual gearshiftin g
(Ypage 159).
Ryou leav eth esuitable speed range.
Mercedes-AMG vehicles
Glidin gmod eis characterized by th efollowing:
Rth ecombustion engin eis disconnected from
th edrive train .
Rtheengin espeed corresponds to th eidlin g
speed.
Rin th emultifunction display, th eglidin gsym -
bol appears in th edrive progra mdisplay.
Glidin gmod ecan be activated under th efollow-
in g conditions:
Rth eComfor tdrive progra mis activated or you
select th e"Comfort" setting for th edrive sys-
te m within th eIndividua ldrive program. You
can fin dinformation about this in th eDigital
Operator' sManual.
Rth eECO start/sto pfunction is activated.
Ryou are drivin gcarefully wit hlow acceleration
of th evehicle.
Rth eengin eis at normal operating tempera-
ture.
Rth espeed is within asuitable range.
Rth ecours eof th eroa dis suitable, e.g. there
are no steep up or downhill gradients .
Ryou are no longer depressingth eaccelerato r
pedal .
Glidin gmod eis d
eactivated under th
efollowin g
conditions:
Ryou hav edeactivated th eECO start/sto p
function .
Ryou depress th eaccelerato rpedal .
Ryou depress th ebrak epedal .
Ryou use th eDIRECT SELECT lever to switch
th etransmission position (Ypage 154).
Ruse theDYNAMIC SELECT controller to
chang eth edrive progra m (Ypage 152).
Ryou activatemanual gearshiftin g
(Ypage 159).
Ryou leav eth esuitable speed range.
Towing a trailer
XDrive in th emiddle of th eengin espeed range
on uphil lgradients .
XDependin gon th euphil lor downhill gradient,
use left-han dsteerin gwhee lpaddl eshifter
(
Ypage 159) to select alower gear ,eve nif
cruise control or DISTRONI CPLU Sare acti-
vated.
Drive programs
Slippery drive program
The Slipper ydrive progra mhas th efollowin g
characteristics :
Rreducedengin eand transmission setting sfor
optimum propulsion on slipper yor snow-cov-
ere droads.
Roptimized ES P®stabilitycontrol on slipper yor
snow-covered roads.
Rth evehicl ehas improved drivin gstabilit yon
slipper yor snow-covered roads, for example.
Comfort drive program
The Comfor tdrive progra mhas th efollowin g
characteristics :
Rcomfort-oriented engin eand transmission
settings.
Roptimal fuel consumption resultin gfrom th e
automati ctransmission shiftin gup sooner.
Rth evehicl epullin gaway mor egentl yin
forward and revers egears, unless th eaccel-
erator pedal is depressed fully.
Rth eautomati ctransmission shiftin gup
sooner. This result sin th evehicl ebein gdriven
at lower engin espeeds and th ewheels bein g
less likely to spin .
Sport drive program
TheSport drive progra mhas th efollowin gchar-
acteristics :
Rsportyengin eand transmission settings.
Rth eautomati ctransmission shiftin gup later.
th efuel consumption possibl ybein ghigher as
a result of th elater automati ctransmission
shift points .
Rthesuspension exhibits sport ydampin g(vehi-
cle swit hAIRMATIC) .
158Automatic transmission
Driving an d parking
Page 180 of 450
Every person who has access to the informa-
tion stated can use the functions of the online
access to the vehicle.
iInformation when selling a vehicle or
buying a used vehicle:
RIf you sell your vehicle, you are obliged to
delete the vehicle from your personal area
on the online access to the vehicle.
RIf you have bought a used vehicle, it is pos-
sible that the previous owner still has
access to the online access to the vehicle.
Calling up functions
The online access to the vehicle allows you
access to your vehicle's information and func-
tions using remote query and remote configu-
ration.
The following functions can be accessed:
Rrequest the current condition of charge of the
high-voltage battery
Rprogram the departure time (Ypage 274)
Rset or activate the "Pre-entry climate control
at departure time" function (see the separate
COMAND operating instructions)
Information on additional functions and operat- ing instructions can be found within the online
access to the vehicle.
Connecting the vehicle to the Internet
iThis function is not available in all countries
and requires activated access to the mbrace
emergency call system.
You can use the online access to the vehicle if
the vehicle has a connection to the Internet via a mobile phone network. The necessary data is
transmitted by radio. The vehicle automatically
recognizes whether a connection to the Internet
is possible or not. No presets are necessary.
iRestrictions in reception are possible if the
vehicle is in an underground car park, for
example. Restrictions may also occur in areas with poor mobile network coverage.
Parking
Important safety notes
GWARNING
Flammable material such as leaves, grass or
twigs may ignite if they come into contact with
hot parts of the exhaust system or exhaust
gas flow. There is a risk of fire.
Park the vehicle so that no flammable mate-
rials come into contact with parts of the vehi-
cle which are hot. Take particular care not to
park on dry grassland or harvested grain
fields.
GWARNING
If you leave children unsupervised in the vehi-
cle, they could set it in motion by, for example:
Rrelease the parking brake.
Rshift the automatic transmission out of the
parking position P.
Rstart the engine.
In addition, they may operate vehicle equip-
ment and become trapped. There is a risk of
an accident and injury.
When leaving the vehicle, always take the
SmartKey with you and lock the vehicle. Never
leave children unsupervised in the vehicle.
!Always secure the vehicle correctly against
rolling away. Otherwise, the vehicle or its driv-
etrain could be damaged.
To ensure that the vehicle is secured against
rolling away unintentionally:
Rthe electric parking brake must be applied.
Rthe transmission must be in position Pand the
SmartKey must be removed from the ignition
lock.
Rthe front wheels must be turned towards the
curb on steep uphill or downhill gradients.
Rthe empty vehicle must be secured at the
front axle with a wheel chock or similar, for
example, on uphill or downhill gradients.
Ra laden vehicle must also be secured at the
rear axle with a wheel chock or similar, for
example, on uphill or downhill gradients.
178Parking
Driving an d parking
Page 185 of 450
The ECO display consists of three sections, with
an inner and outer area. The sections corre-
spond to the following three categories:
:Acceleration(evaluation of all accel-
eration processes):
Rthe outer area fills up and the inner area lights up green: moderate
acceleration, especially at higher
speeds
Rthe outer area empties and the
inner area is gray: sporty acceler-
ation
;Coasting (evaluation of all decelera-
tion processes):
Rthe outer area fills up and the inner area lights up green: anticipatory
driving, keeping your distance and
early release of the accelerator.
The vehicle can coast without use
of the brakes.
Rthe outer area empties and the
inner area is gray: frequent heavy
braking
=Constant (continuous evaluation
over the entire journey):
Rthe outer area fills up and the inner area lights up green: constant
speed and avoidance of unneces-
sary acceleration and deceleration
Rthe outer area empties and the
inner area is gray: fluctuations in
speed
The three inner areas display the current driving
style and light up green as a result of a particu-
larly economical driving style. Depending on thedriving situation, up to two areas may light up
simultaneously.
At the beginning of the journey, the three outer
areas are empty and fill up as a result of eco-
nomical driving. A higher level indicates a more
economical driving style. If the three outer areas
are completely filled at the same time, the driver
has adopted the most economical driving style
for the selected settings and prevailing condi-
tions. The ECO display border lights up.
The ECO display does not indicate the actual fuel consumption. The additionally achieved range
displayed under Bonus fr. Start
does not
indicate a fixed consumption reduction. In addition to driving style, the actual consump-
tion is affected by other factors, such as:
Rload
Rtire pressure
Rcold start
Rchoice of route
Relectrical consumers switched on
These factors are not included in the ECO dis-
play.
An economical driving style specially requires
driving at moderate engine speeds.
Achieving a higher value in the categories
"Acceleration" and "Constant":
Robserve the gearshift recommendations.
Rdrive the vehicle in the Comfortdrive pro-
gram.
On long journeys at a constant speed, e.g. on the
highway, only the outer area for "constant" will
change.
The ECO display summarizes the driving style
from the start of the journey to its completion.
Therefore, there are more marked changes in
the outer areas at the start of a journey. On lon- ger journeys, there are fewer changes. For more
marked changes, perform a manual rest
(
Ypage 267).
For further information on the ECO display, see
(
Ypage 267).
Brakes
Important safety notes
GWARNING
If you shift down on a slippery road surface in an attempt to increase the engine's braking
effect, the drive wheels could lose their grip.
There is an increased danger of skidding and
accidents.
Do not shift down for additional engine brak-
ing on a slippery road surface.
Downhill gradients
!On long and steep gradients, you must
reduce the load on the brakes by shifting early
to a lower gear. This allows you to take
advantage of the engine braking effect and
Driving tips183
Driving and parking
Z
Page 188 of 450
RShift to a lower gear using the left-hand steer-
ing wheel paddle shifter.
RAvoid high engine speeds.
REnter and exit the water at a flat place and at
a steady walking pace.
RDrive slowly and at an even speed through the
water.
REnsure that a bow wave does not form as you
drive.
RDo not stop and do not switch off the engine.
Water offers a high degree of resistance, and
the ground is slippery and in some cases
unstable. Therefore, it is difficult and danger-
ous to pull away in the water.
RClean any mud from the tire tread after ford-
ing.
RApply the brakes to dry them after fording.
Always observe the fording depth values
(
Ypage 442).
Winter driving
GWARNING
If you shift down on a slippery road surface in an attempt to increase the engine's braking
effect, the drive wheels could lose their grip.
There is an increased danger of skidding and
accidents.
Do not shift down for additional engine brak-
ing on a slippery road surface.
GDANGER
If the exhaust pipe is blocked or adequate
ventilation is not possible, poisonous gases
such as carbon monoxide (CO) may enter the vehicle. This is the case, e.g. if the vehicle
becomes trapped in snow. There is a risk of
fatal injury.
If you leave the engine or the auxiliary heating
running, make sure the exhaust pipe and area
around the vehicle are clear of snow. To
ensure an adequate supply of fresh air, open a
window on the side of the vehicle that is not
facing into the wind.
Have your vehicle winter-proofed at a qualified
specialist workshop at the onset of winter. Drive particularly carefully on slippery road sur-
faces. Avoid sudden acceleration, steering and
braking maneuvers. Do not use the cruise con-
trol or DISTRONIC PLUS.
If the vehicle threatens to skid or cannot be
stopped when moving at low speed:
XShift the transmission to position
N.
When driving in snow with or without snow
chains, select driving program Slippery
(
Ypage 152).
iVehicles with a diesel engine: do not
cover the radiator, e.g. with a protective
cover. The measuring function of the on-
board diagnosis system may otherwise pro-
vide inaccurate values. Some of these values
are required by law and must therefore always
be accurate.
The outside temperature indicator is no
t
designed to serve as an ice-warning device and
is therefore unsuitable for that purpose.
Changes in the outside temperature are dis-
played after a short delay.
Indicated temperatures just above the freezing
point do not guarantee that the road surface is
free of ice. The road may still be icy, especially in
wooded areas or on bridges. You should pay
special attention to road conditions when tem-
peratures are around the freezing point.
For more information on driving with snow
chains, see (
Ypage 390).
For more information on driving with summer
tires, see (
Ypage 389).
Observe the notes in the "Winter operation" sec- tion (
Ypage 389).
Off-road driving
Important safety notes
GWARNING
If you drive on a steep incline at an angle or
turn when driving on an incline, the vehicle
could slip sideways, tip and rollover. There is a risk of an accident.
Always drive on a steep incline in the line of
fall (straight up or down) and do not turn the
vehicle.
186Driving tips
Driving and parking
Page 189 of 450
GWARNING
Flammable material such as leaves, grass or
twigs may ignite if they come into contact with
hot parts of the exhaust system. There is a risk of fire.
When driving off road or on unpaved roads,
check the vehicle's underside regularly. In
particular, remove parts of plants or other
flammable materials which have become
trapped. In the case of damage, contact a
qualified specialist workshop.
GWARNING
If the vehicle level is high, the vehicle center of gravity is raised. This could cause the vehicle
to tip over more easily on uphill or downhill
gradients. There is a risk of an accident.
Select the lowest possible vehicle level.
!There is a risk of damage to the vehicle if:
Rthe vehicle becomes stuck, e.g. on a high
curb or an unpaved road
Ryou drive too fast over an obstacle, e.g. a
curb or a hole in the road
Ra heavy object strikes the undercarriage or
parts of the chassis
In situations like this, the body, the undercar-
riage, chassis parts, wheels or tires could be
damaged without the damage being visible.
Components damaged in this way can unex-
pectedly fail or, in the case of an accident, no
longer withstand the strain they are designed to.
If the underbody paneling is damaged, com-
bustible materials such as leaves, grass or
twigs can gather between the underbody and
the underbody paneling. If these materials
come in contact with hot parts of the exhaust
system, they can catch fire.
In such situations, have the vehicle checked
and repaired immediately at a qualified spe-
cialist workshop. If on continuing your jour-
ney you notice that driving safety is impaired,
pull over and stop the vehicle immediately,
paying attention to road and traffic condi-
tions. In such cases, consult a qualified spe-
cialist workshop.
When driving off-road, substances such as sand,
mud and water or water mixed with oil may get into the brakes. This could result in a reduced
braking effect or in total brake failure and also in
increased wear and tear. The braking charac-
teristics change depending on the material
ingressing the brakes. Clean the brakes after
driving off-road. If
you detect a reduced bra
king
effect or grinding noises, have the brake system checked in a qualified specialist workshop as
soon as possible. Adapt your driving style to the
different braking characteristics.
Driving off-road increases the likelihood of dam-
age to the vehicle, which, in turn, can lead to
failure of the mechanical assembly or systems.
Adapt your driving style to suit the terrain con-
ditions. Drive carefully. Have damage to the
vehicle rectified immediately at a qualified spe-
cialist workshop.
Do not switch to transmission position Nwhen
driving off-road. If you try to brake the vehicle
using the service brake, you could lose control
of the vehicle. If the gradient is too steep for your
vehicle, drive back down in reverse gear.
General notes
Read this section carefully before driving your
vehicle off-road. Practice by driving over more
gentle off-road terrain first.
Familiarize yourself with the characteristics of
your vehicle and the gear shift operation before driving through difficult terrain.
The following driving systems are specially
adapted to off-road driving:
Rthe Offroad drive program (vehicles without
Off-Road Engineering package)
(
Ypage 237)
ROffroad andOffroad Plus drive programs
(vehicles with Off-Road Engineering pack-
age) . (
Ypage 237)
RLOW RANGE off-road gear (vehicles with the
Offroad Engineering package) (Ypage 239)
RDifferential lock (vehicles with the Off-Road
Engineering package) (Ypage 238)
ROff-road ABS (Ypage 67)
ROff-road 4ETS (Ypage 72)
ROff-road ESP®(Ypage 73)
RAIRMATIC package (vehicle level)
(Ypage 205)
RDSR (Downhill Speed Regulation)
(Ypage 236)
Driving tips187
Driving and parking
Z
Page 190 of 450
Observe the following notes:
RStop the vehicle before starting to drive along
an off-road route. If necessary, select the off-
road program (
Ypage 237) or shift to the
LOW RANGE off-road gear (Ypage 239).
RSelect a vehicle level that is suitable for the
terrain. To avoid damaging the vehicle, make
sure there is always sufficient ground clear-
ance.
RCheck that items of luggage and loads are
stowed safely and are well secured
(
Ypage 333).
RAlways keep the engine running and in gear
when driving on a downhill gradient. Activate
DSR (
Ypage 236).
RAlways keep the engine running and in gear
when driving on a slope.
RAdapt your speed to the terrain. The rougher,
steeper or more ruts on the terrain, the slower
your speed should be.
RDo not jump with the vehicle as this will inter- rupt the vehicle's propulsion.
RDrive with extreme care on unfamiliar off-road
routes where visibility is poor. For safety rea-
sons, get out of the vehicle first and survey
the off-road route.
RLook out for obstacles, such as rocks, holes,
tree stumps and furrows.
RAlways keep the doors, the tailgate, the side
windows and the sliding sunroof closed whilethe vehicle is in motion.
RDo not shift the automatic transmission to
transmission position N.
RObserve the notes on off-road fording
(Ypage 185).
iDo not use the HOLD function when driving
off-road, on steep uphill or downhill gradients
or on slippery or loose surfaces. The HOLD
function cannot hold the vehicle on such sur-
faces.
Checklist before driving off-road
!If the engine oil warning lamp lights up while
the vehicle is in motion, stop the vehicle in a
safe place as soon as possible. Check the
engine oil level. The engine oil warning lamp
warning must not be ignored. Continuing the
journey while the symbol is displayed could
lead to engine damage.
XEngine oil level: check the engine oil level
and add oil if necessary.
When driving on steep gradients, the engine
oil level must be sufficiently high to ensure a
correct oil supply in the vehicle.
XDEF tank (BlueTEC vehicles): check the
level and add if necessary (Ypage 167).
XTire-changing tool kit: check that the jack is
working and make sure you have the lug
wrench, a robust tow cable and a folding
spade in the vehicle.
XWheels and tires: check the tire tread depth
and tire pressure.
XCheck for damage and remove any foreign
objects, e.g. small stones, from the wheels/
tires.
XReplace any missing valve caps.
XReplace dented or damaged wheels.
XRims: dented or bent rims can result in a loss
of tire pressure and damage the tire bead.
Before driving off-road, check the wheels and replace them if necessary.
Checklist after driving off-road
!If you detect damage to the vehicle after
driving off-road, have the vehicle checked
immediately at a qualified specialist work-
shop.
Driving over rough terrain places greater
demands on your vehicle than driving on normal
roads. After driving off-road, check the vehicle.
This allows you to detect damage promptly and
reduce the risk of an accident to yourself and
other road users.
XIf the Offroad orOffroad Plus drive program
is selected: select the Individual,Sport,
Comfort orSlippery drive program
(
Ypage 152).
XDeactivate the LOW RANGE off-road gear
(Ypage 239).
XDeactivate DSR (Ypage 236).
XLower the vehicle level again to a level suita-
ble to the road conditions, e.g. to the normal
level.
XClean the headlamps and rear lights and
check for damage.
XClean the front and rear license plates.
XClean the wheels and tires with a water jet
and remove any foreign objects.
188Driving tips
Driving and parking
Page 191 of 450
XClean the wheels, wheel housings and the
vehicle undersi de with a water jet; check for
any foreign objects and damage.
XCheck whether twigs or other parts of plants
have become tr apped.These increase the risk
of fire and can damage fuel pipes, brake
hoses or the rubber bellowsof the axle joints
and propeller shafts.
XAfter the trip,examine without fail the entire
undercarriage, wheels, tires, brakes, body-
work structure, steering, chassis and exhaust
system for damage.
XAfter driving for extended periods across
sand, mud, gravel, water or insimilarly dirt y
conditions, have the brake discs, wheels,
brake pads/lin ings and axlejoints checked
and cleane d.
XIfyou detect strong vibrations after off-road
travel, check for foreign objects inthe wheels
and drive train and remove them ifnecessary.
Foreign objects can disturb the balance and
cause vibrations.
Driving on sand
Observe the foll owing rules when driving on
sand:
RSelect the Offroa ddriv e program (veh icles
wit h Off-Road Engineering package)
(
Ypage 237).
RSelect the Offroa ddriv e program (veh icles
wit hout Off-Road Engineering package)
(
Ypage 237).
RSelect a higher veh iclelevel.
RAvoid high engine speeds.
RUse the left-hand steering wheel paddle
shifter to shift to a lower gear appropriate to
the terrain.
RDrive quickly to overcome the rolling resist-
ance. Otherwise the vehicle's wheels could
become stuck inloose ground.
RDrive inthe tracks of other veh iclesif possi-
ble. Make sure that:
-the tire ruts are not too deep.
-the sand issuff iciently firm.
-the ground clearance of the veh icle issuf-
ficient.
Tire ruts and gravel roads
!Check that the ruts are not too deep and
that your vehicle has sufficient clearance.
Otherwise, your vehicle could bedamaged or
bottom out and get stuck.
Observe the foll owing rules when driving along
ruts inoff-road terrain or on roads with loose
gravel:
RSelect the Offroa ddrive program (vehicles
wit h Off-Road Engineering package)
(
Ypage 237).
RSelect the Offroa ddrive program (vehicles
wit hout Off-Road Engineering package)
(
Ypage 237).
RSelect a higher vehicle leve l.
RAvoid high engine speeds.
RShift to a lower gear using the left-hand steer-
ing wheel paddle shifter.
RDrive slowly.
RWhere ruts are too deep, drive with the
wheels of one side on the center grassy area,
if possible.
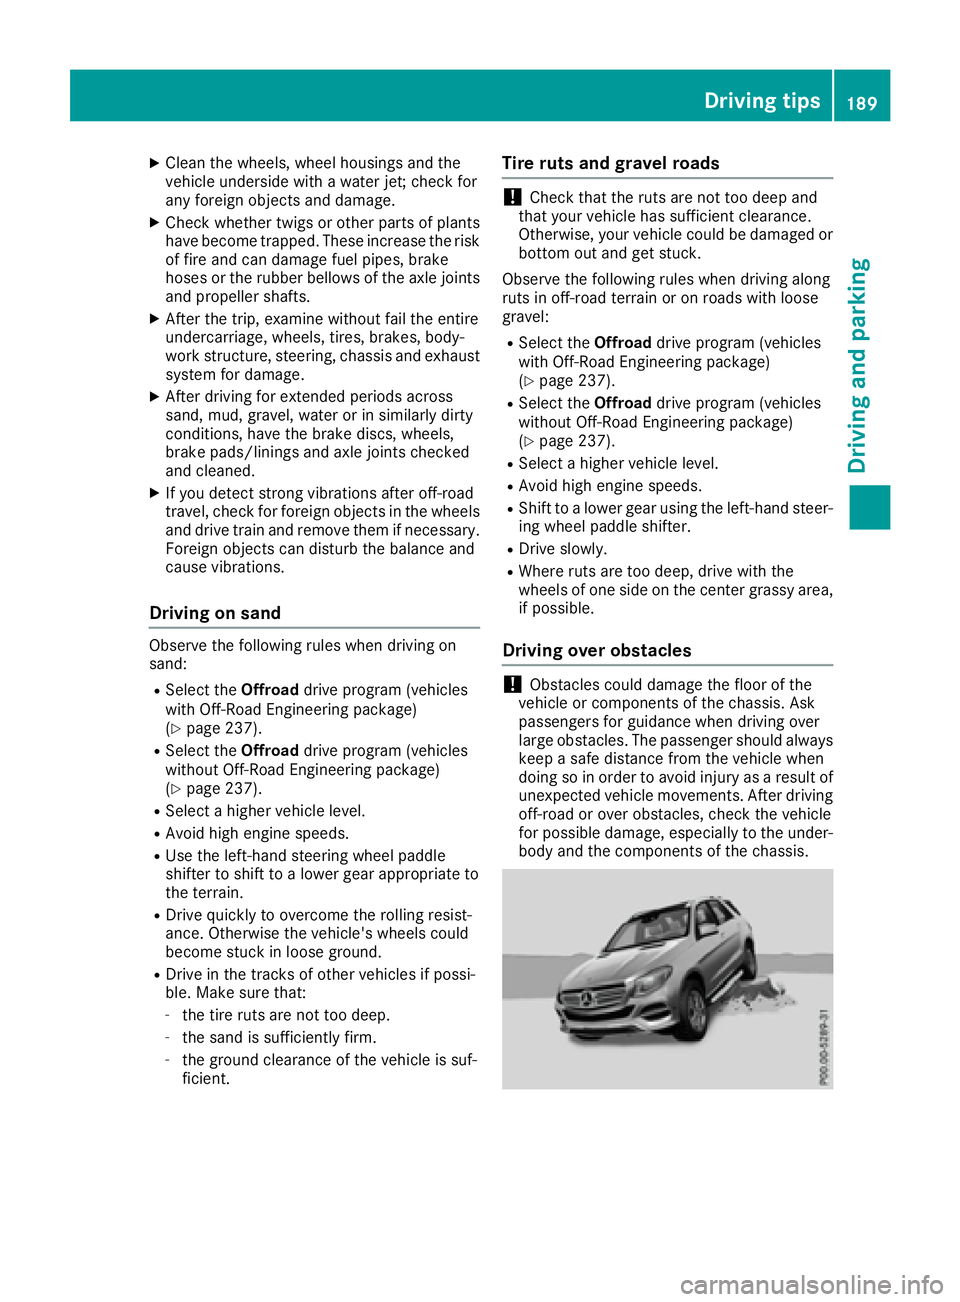
Driving over obstacles
!Obstacles could damage the floor of the
vehicle or components of the chassis. Ask
passengers for guidance when driving over
large obstacles. The passenger should always
keep a safe distance from the vehicle when
doing so inorder to avoid injury as a result of
unexpected vehicle movements. After driving
off-road or over obstacles, check the vehicle
for possible damage, especially to the under-
body and the components of the chassis.
Driving tips189
Driving and parking
Z
Page 192 of 450
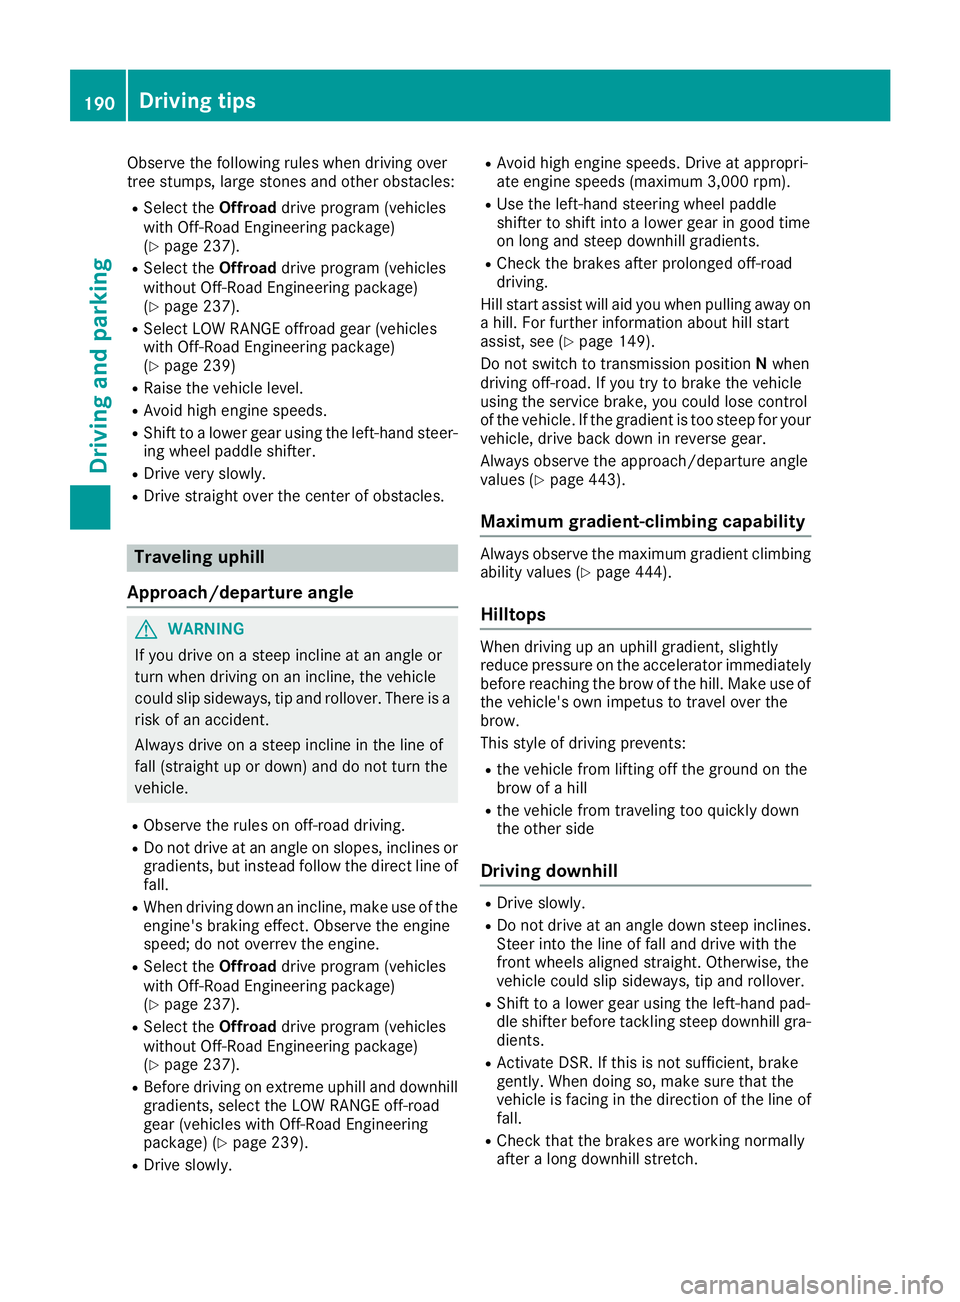
Observe the following rules when driving over
tree stumps, large stones and other obstacles:
RSelect theOffroaddrive program (vehicles
with Off-Road Engineering package)
(
Ypage 237).
RSelect the Offroaddrive program (vehicles
without Off-Road Engineering package)
(
Ypage 237).
RSelect LOW RANGE offroad gear (vehicles
with Off-Road Engineering package)
(
Ypage 239)
RRaise the vehicle level.
RAvoid high engine speeds.
RShift to a lower gear using the left-hand steer-
ing wheel paddle shifter.
RDrive very slowly.
RDrive straight over the center of obstacles.
Traveling uphill
Approach/departure angle
GWARNING
If you drive on a steep incline at an angle or
turn when driving on an incline, the vehicle
could slip sideways, tip and rollover. There is a risk of an accident.
Always drive on a steep incline in the line of
fall (straight up or down) and do not turn the
vehicle.
RObserve the rules on off-road driving.
RDo not drive at an angle on slopes, inclines orgradients, but instead follow the direct line of
fall.
RWhen driving down an incline, make use of the
engine's braking effect. Observe the engine
speed; do not overrev the engine.
RSelect the Offroaddrive program (vehicles
with Off-Road Engineering package)
(
Ypage 237).
RSelect the Offroaddrive program (vehicles
without Off-Road Engineering package)
(
Ypage 237).
RBefore driving on extreme uphill and downhill
gradients, select the LOW RANGE off-road
gear (vehicles with Off-Road Engineering
package) (
Ypage 239).
RDrive slowly.
RAvoid high engine speeds. Drive at appropri-
ate engine speeds (maximum 3,000 rpm).
RUse the left-hand steering wheel paddle
shifter to shift into a lower gear in good time
on long and steep downhill gradients.
RCheck the brakes after prolonged off-road
driving.
Hill start assist will aid you when pulling away on
a hill. For further information about hill start
assist, see (
Ypage 149).
Do not switch to transmission position Nwhen
driving off-road. If you try to brake the vehicle
using the service brake, you could lose control
of the vehicle. If the gradient is too steep for your vehicle, drive back down in reverse gear.
Always observe the approach/departure angle
values (
Ypage 443).
Maximum gradient-climbing capability
Always observe the maximum gradient climbing
ability values (Ypage 444).
Hilltops
When driving up an uphill gradient, slightly
reduce pressure on the accelerator immediately
before reaching the brow of the hill. Make use of
the vehicle's own impetus to travel over the
brow.
This style of driving prevents:
Rthe vehicle from lifting off the ground on the
brow of a hill
Rthe vehicle from traveling too quickly down
the other side
Driving downhill
RDrive slowly.
RDo not drive at an angle down steep inclines.
Steer into the line of fall and drive with the
front wheels aligned straight. Otherwise, the
vehicle could slip sideways, tip and rollover.
RShift to a lower gear using the left-hand pad-
dle shifter before tackling steep downhill gra-
dients.
RActivate DSR. If this is not sufficient, brake
gently. When doing so, make sure that the
vehicle is facing in the direction of the line of
fall.
RCheck that the brakes are working normally
after a long downhill stretch.
190Driving tips
Driving and parking